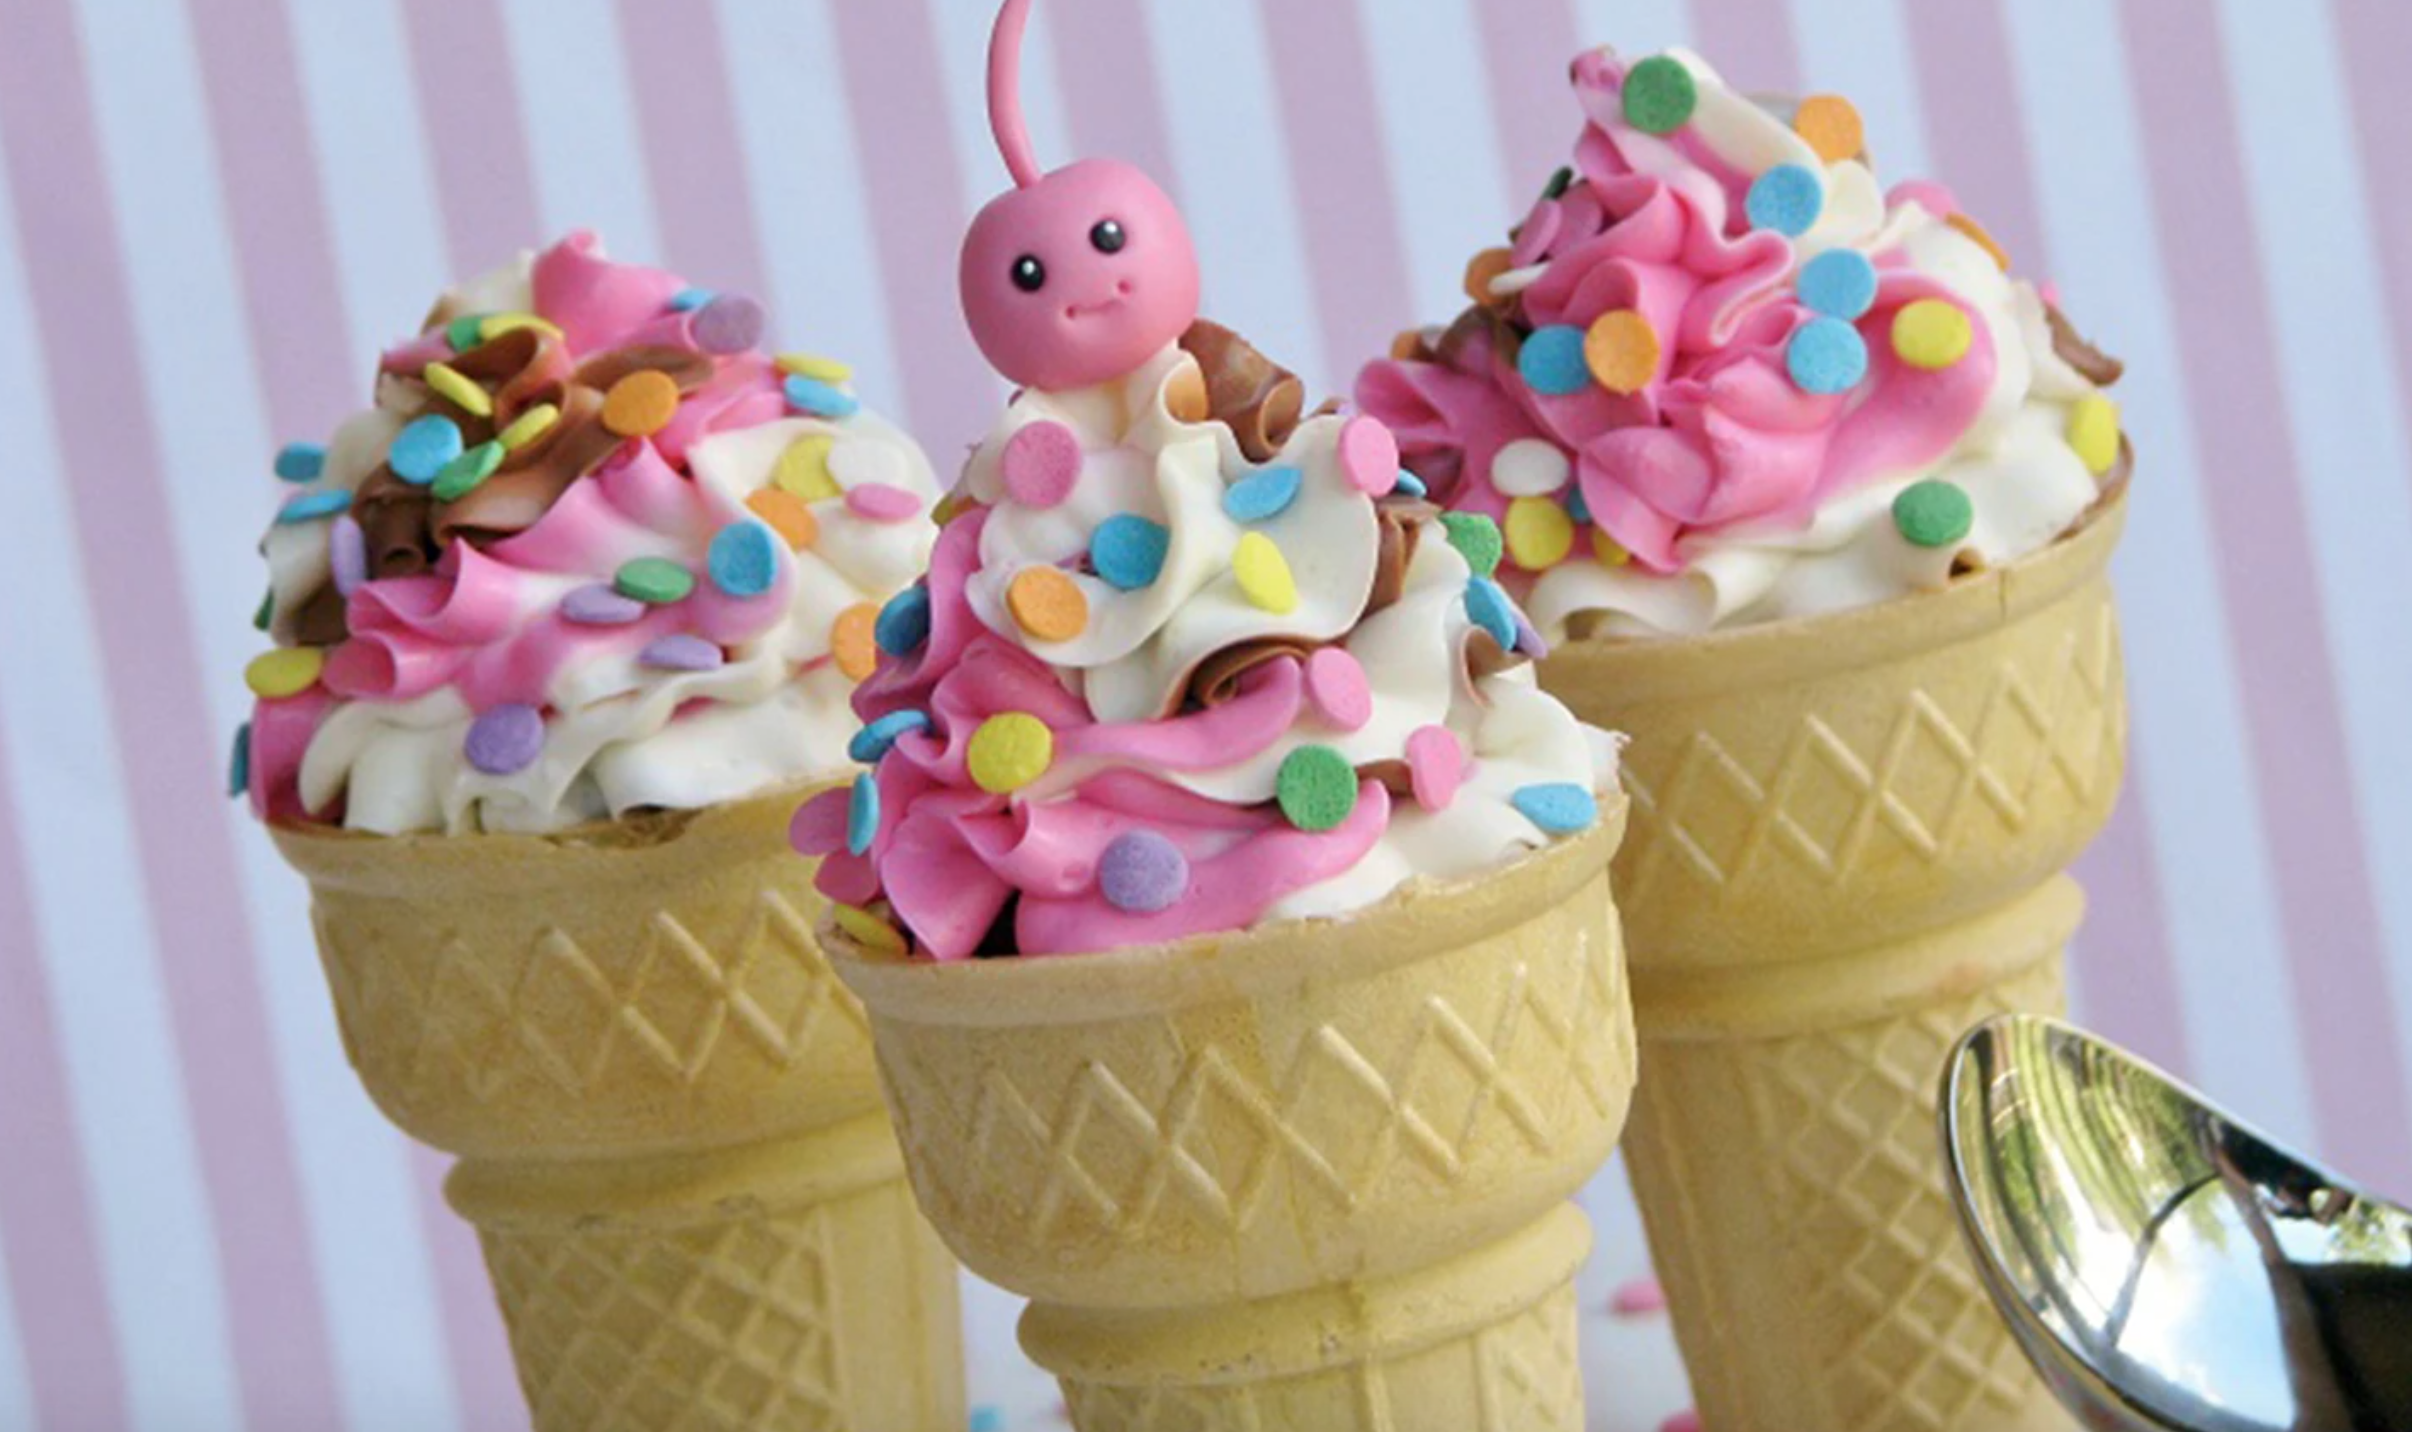
They look like ice cream, but taste like cake — could anything be better? These sweet desserts have buttercream piled high onto a cake base hidden inside that crunchy wafer cone. So yeah, this is a treat the whole fam will adore.
Ice Cream Cone Cupcakes
Level: Easy
What You Need
Ingredients
Tools
Instructions
1. Bake
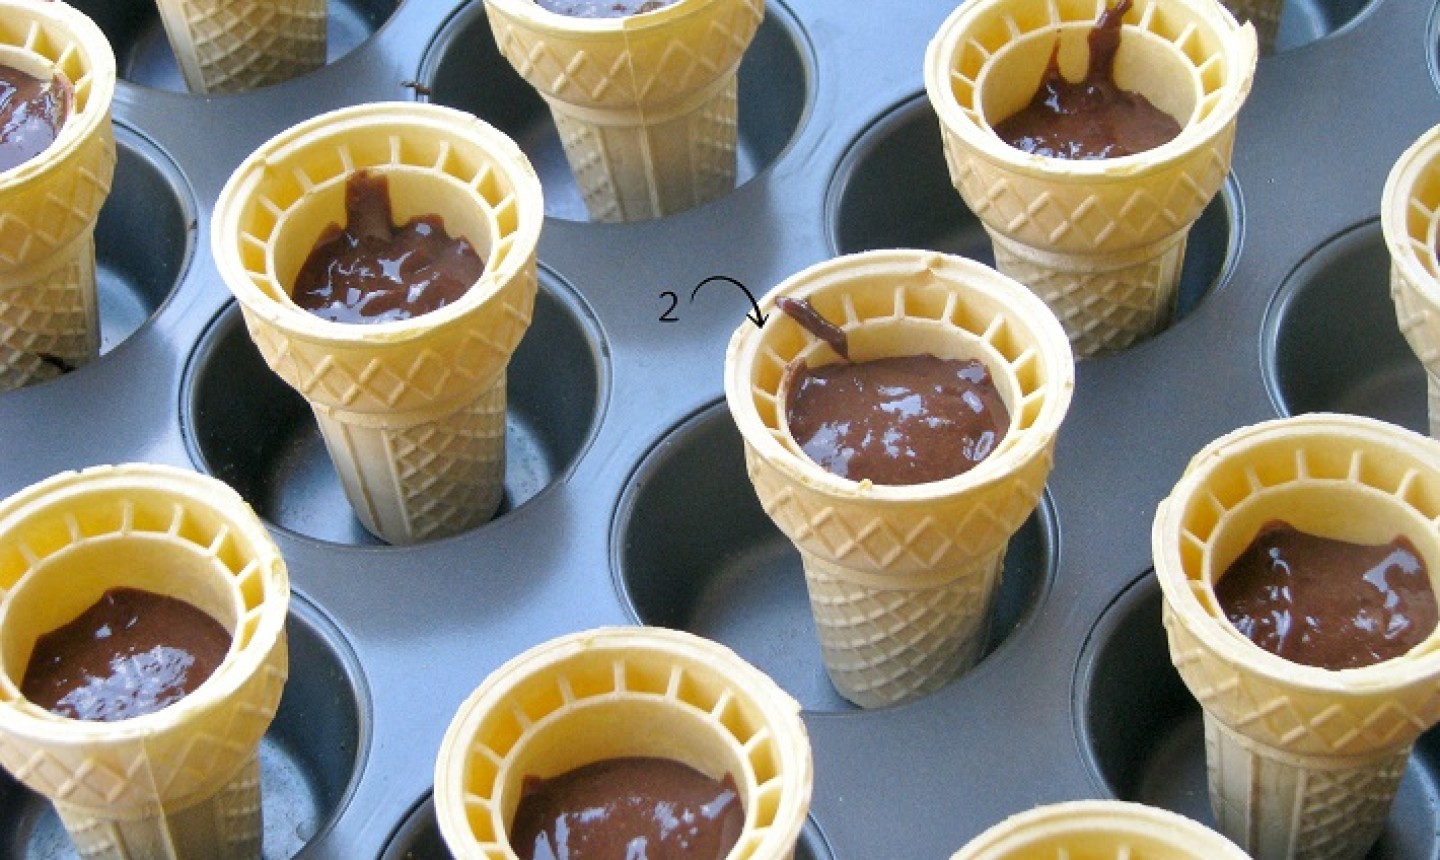
Before you decorate, you’ve gotta bake. Preheat the oven and prepare your batter as your recipe instructs. When it’s ready, place the ice cream cones into the muffin tin and fill with batter using an ice cream scoop. You want each cone to be about ½ or ¾ of the way full, so the cupcakes have room to rise.
Transfer the muffin tin to the oven and bake according to your recipe instructions. Let the cupcakes cool completely before decorating.
Pro Tip: It can be tricky to balance the cones in the tin as you’re moving them into the oven. If you need extra padding, stuff aluminum foil or parchment paper around the cones to help secure them.
2. Get to Piping
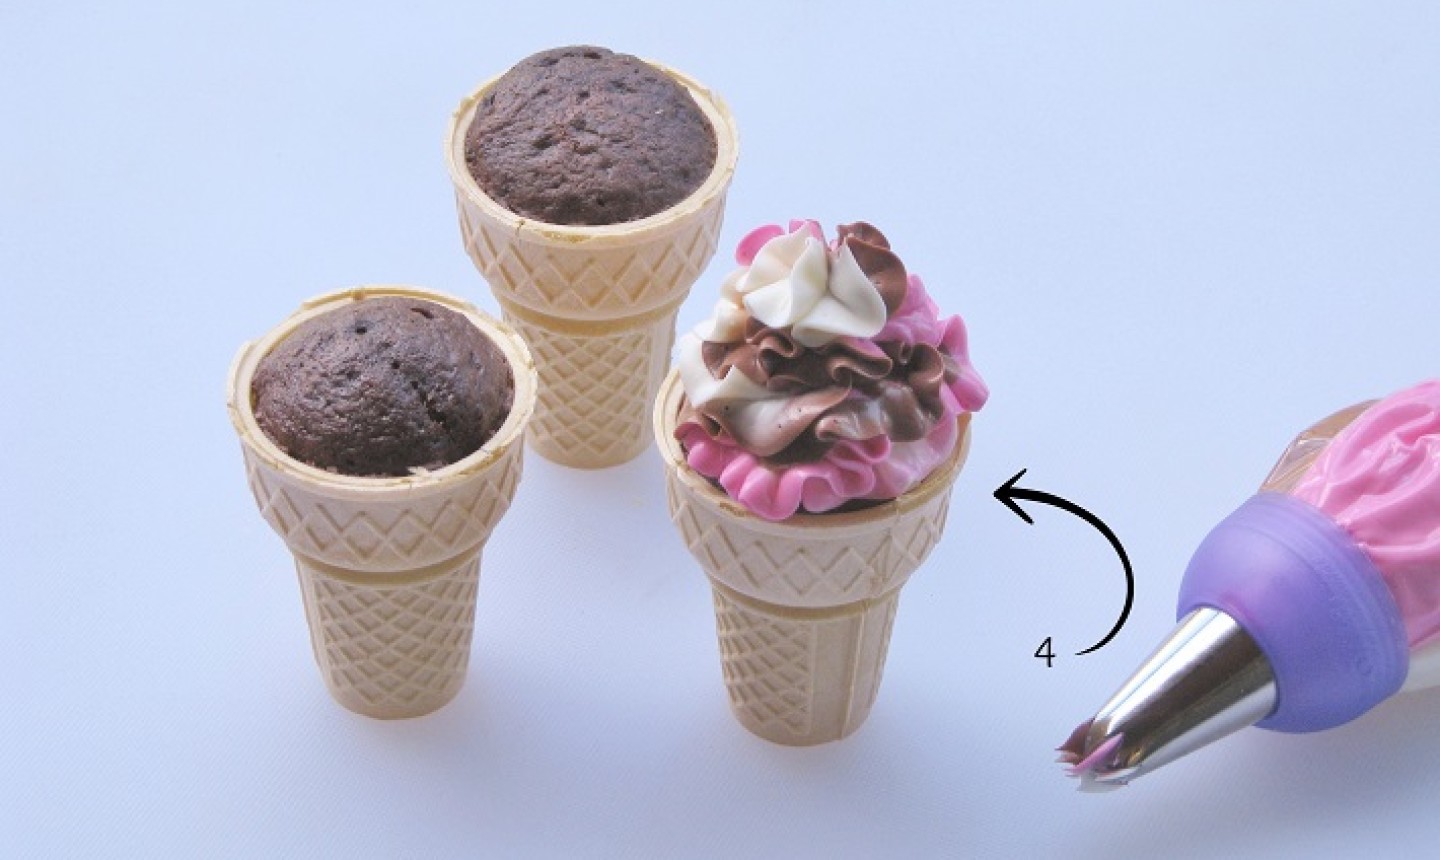
Fit a piping bag with a star tip, then fill it with three different colors of buttercream. You can make different buttercream flavors, or just color vanilla buttercream with food dye. Pipe a copious amount of buttercream, moving your piping bag up as you work — the buttercream should pile up from the cake base until it looks like ice cream.
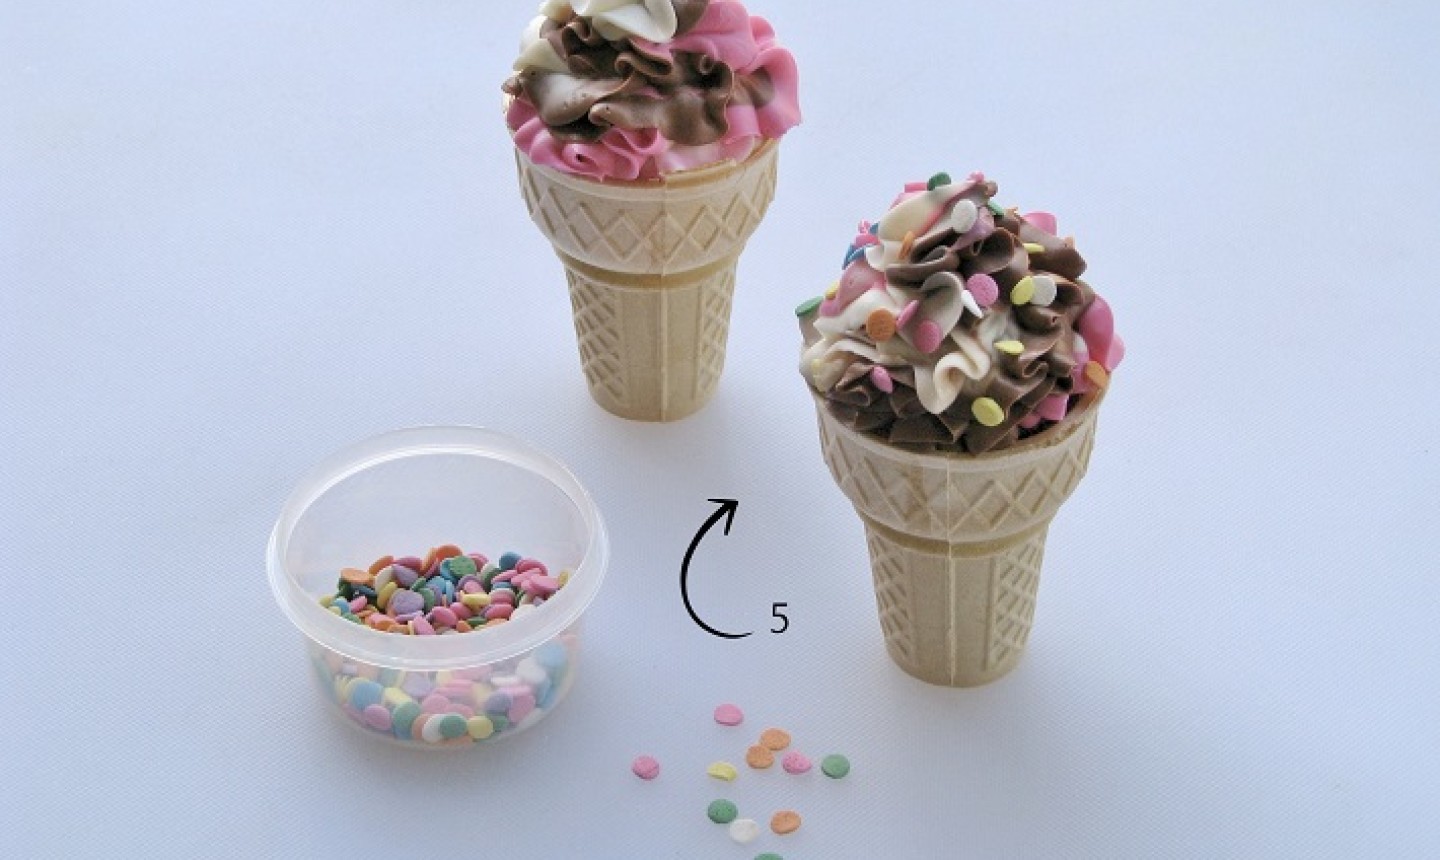
When you’re done piping, top with sprinkles and place the cones aside so the buttercream can set.
Good to Know: If you’re baking in a humid climate , your buttercream ice cream cones are at risk of melting. So make sure you let the cones set in a cool, dry room far away from open windows. It also helps if you use a recipe for a stiffer buttercream. And if you need to, investing in a dehumidifier is totally worth it.
3. Shape the Cherry on Top
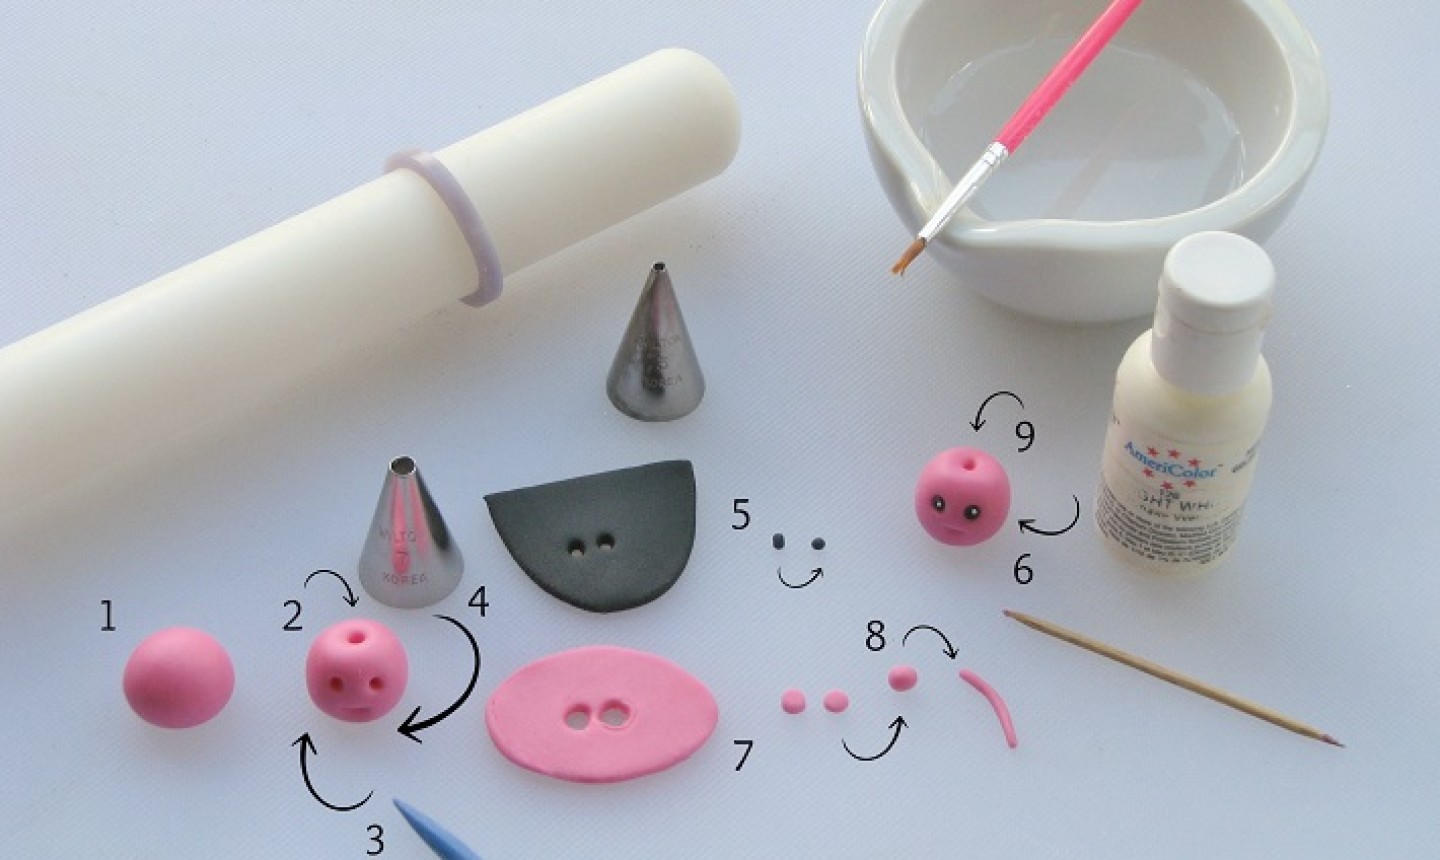
Roll a small ball of pink fondant, approximately ¾”. Using your finger, slightly indent the top of the cherry and use a modeling stick to make a hole in the middle of the indent. This is where you’ll insert the stem.
4. Give It a Face
Use the modeling stick again to make indents for the cherry’s face — two small dots for the eyes and a line for the mouth.
Roll out a small amount of black fondant, using ⅛” guide rings to control the size. Cut two tiny circles for the eyes.
Pro Tip: Did you know piping tips can double as fondant cutters? Small writing tips are the best for making these itty bitty circles!
Roll these two small circles into balls and use edible glue to place them inside the eye cavities. For a final touch, dip a toothpick into white soft gel paste and make small glimmer marks on the eyes to bring ’em to life.
5. Add the Final Touch

Roll out more pink fondant with a rolling pin and ⅛” guide rings. Cut out two more circles with a small writing tip. Combine the two pink circles together by rolling them in to a ball. Then roll this circle out onto your work surface to create a thin, spaghetti-like shape — the stem. Shape it as desired, then stick it into the hole you created earlier. If needed, add some edible glue to secure it.
Place that beautiful cherry on top of the cupcake’s buttercream summit.

And you’re done! Take a bite and enjoy. Or, if you’re saving them for a big bash, store them in the fridge so the buttercream keeps its shape. Just remove them a bit earlier than the serving time so the buttercream has time to soften.
Share tips, start a discussion or ask other students a question. If you have a question for an expert, please click here.
Already a member? Sign in
No Responses to “These Ice Cream Cone Cupcakes May Be the Cutest Treats We've Ever Seen”