
As with most crafts, getting started on hand embroidery can seem daunting when you consider the huge array of available hoops, frames, needles, thread cutters … whew, you get the picture. But don’t be fooled! The list of actual hand embroidery tools is refreshingly short. We recommend these tools to get started.
1. Needles
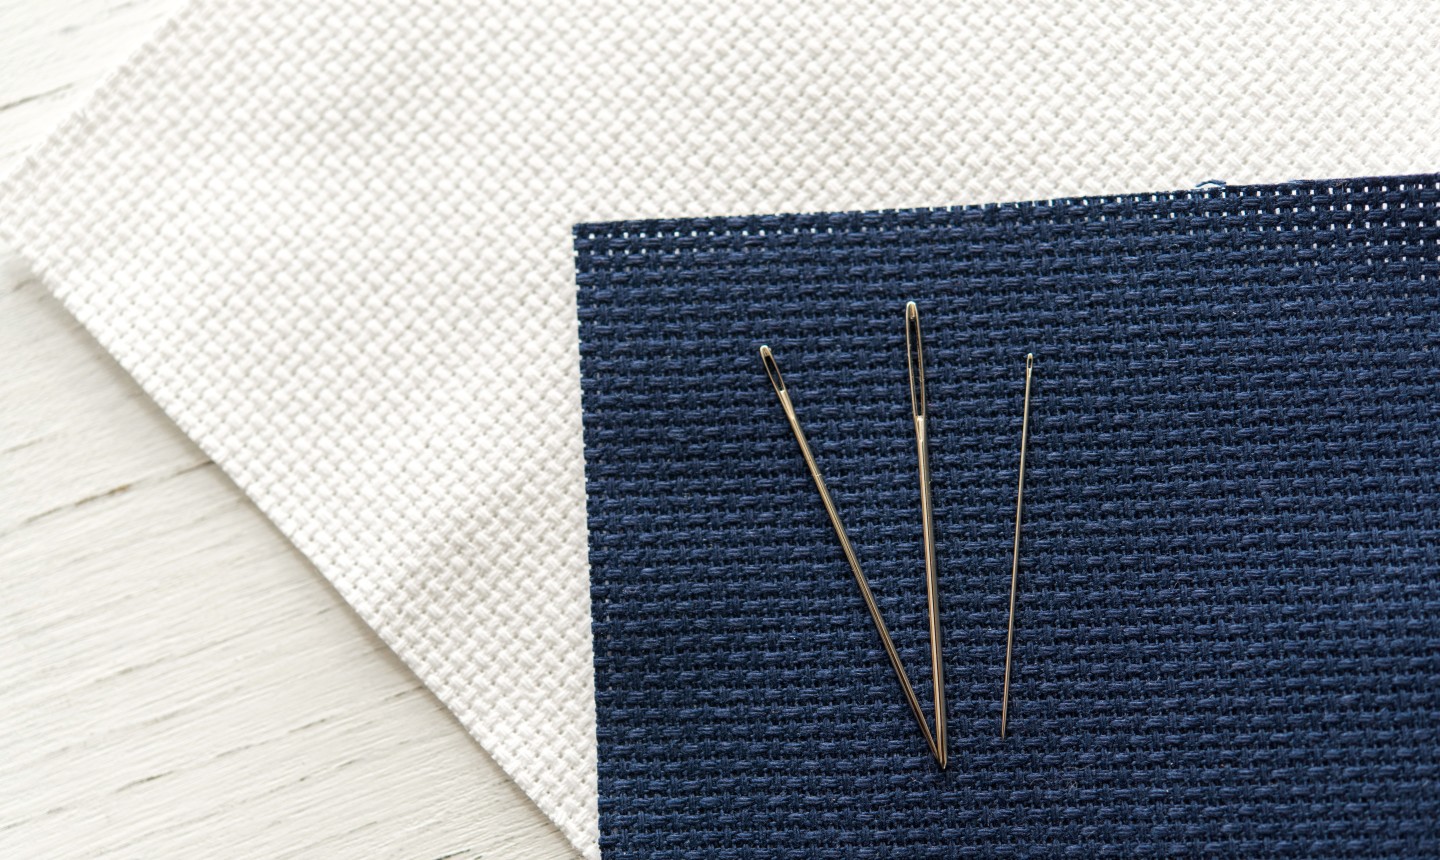
From L to R: crewel needle, tapestry needle, milliner needle
Any needle can draw a piece of thread through fabric, but certain types do certain jobs better. Using the right needle for the job will not only make embroidery less frustrating for newbies, but it’s also way more likely to deliver better results. These are the three we recommend starting out with to cover your bases — many come in assortment packages, meaning you can get them in a range of sizes so you can play around with each to see which you like best.
Crewel Needle
The crewel needle is a sharp-tipped needle with a medium-long eye slightly larger than the shaft of the needle. It’s the basic one used for hand embroidery. Crewel needles come in sizes 1 through 12, with 1 being the largest and 12 being the smallest.
Tapestry Needle
The tapestry needle has a shorter shaft than a crewel needle, but it has a much longer eye and a blunt tip. It’s commonly used in counted cross stitch and needlepoint, because the blunt tip does not pierce the ground fabric, instead allowing the needle to pass easily into the open holes within the weave. That blunt tip also makes it ideal for surface embroidery that involves whipping or lacing, as it helps keep the needle from snagging other stitches.
Tapestry needles are available in sizes 13 through 28, with 13 being the largest and 28 being exceptionally fine. Tapestry needles are also available in standard and petite lengths — as you can imagine, petites are much shorter, allowing the stitcher to get as much use out of their embroidery thread as possible.
Milliner Needle
The milliner needle — aka the straw needle — has a shorter, almost-round eye, a very long shaft and a sharp tip. The eye and the shaft are the same size, making it perfect for working any wrapped stitches like bullion knots, French knots or cast-on stitches.
2. Hoops and Frames
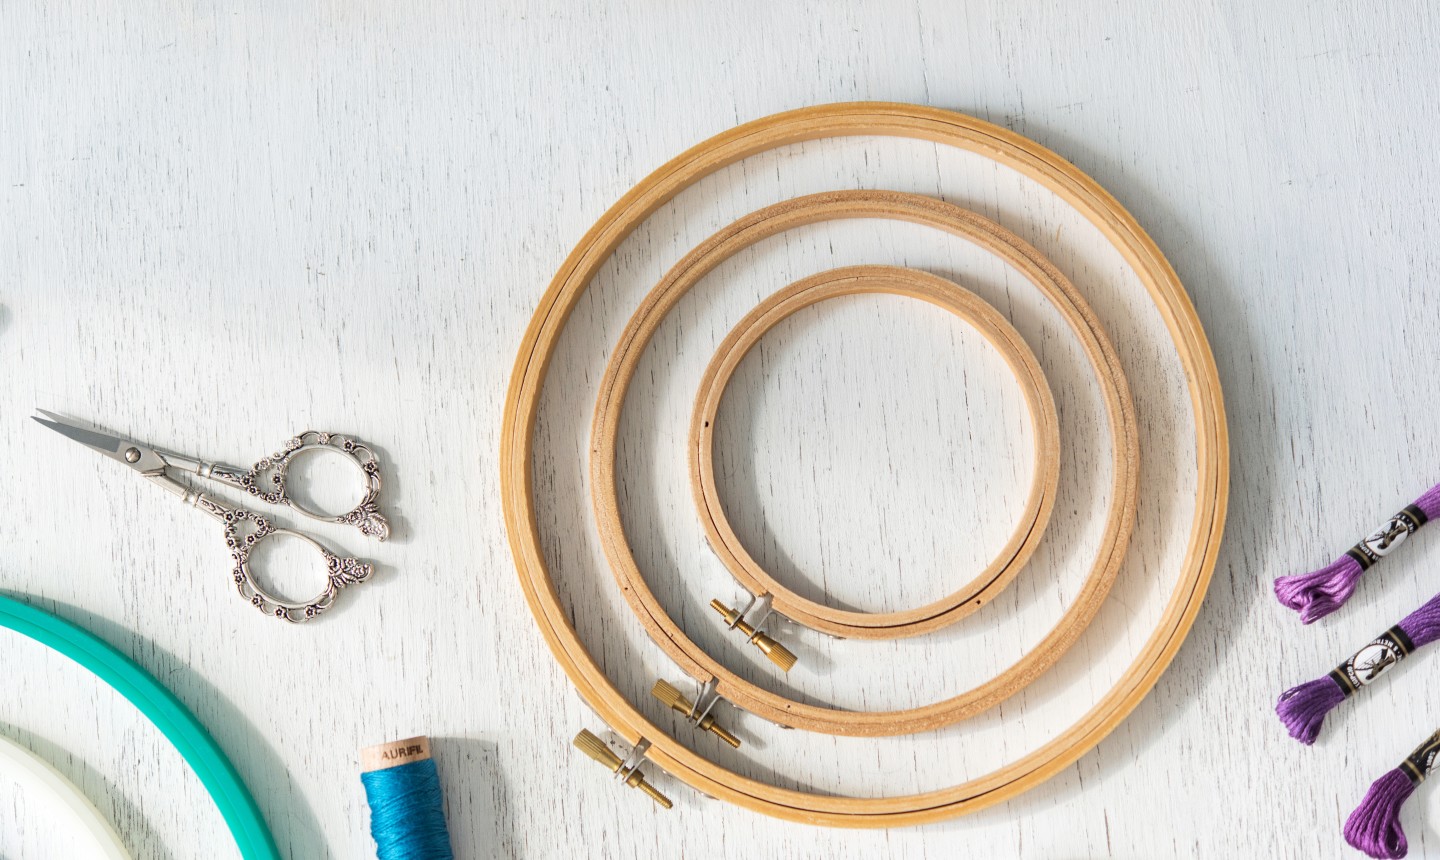
An embroidery hoop keeps fabric taut, so your stitching doesn’t pucker the fabric and your embroidery doesn’t come out warped. It’s not essential for every type of stitching, but in general it’s best for beginners who are still getting the hang of things.
Plastic or inexpensive wooden hoops work well when you’re learning, but as you become more experienced, you may want to graduate to a higher-quality wooden hoop. Unlike the cheaper varieties, better-quality ones will have sturdy brass hardware that can be tightened with a screw driver, the two rings will fit together perfectly, and the wood will feel very strong in-hand.
Side note: You may also see a variety of embroidery frames at the craft store, including stretcher bar, slate and scroll frames. All of these also hold fabric taut, but generally a hoop is less expensive and more portable, making it ideal for newbies.
3. Embroidery Scissors
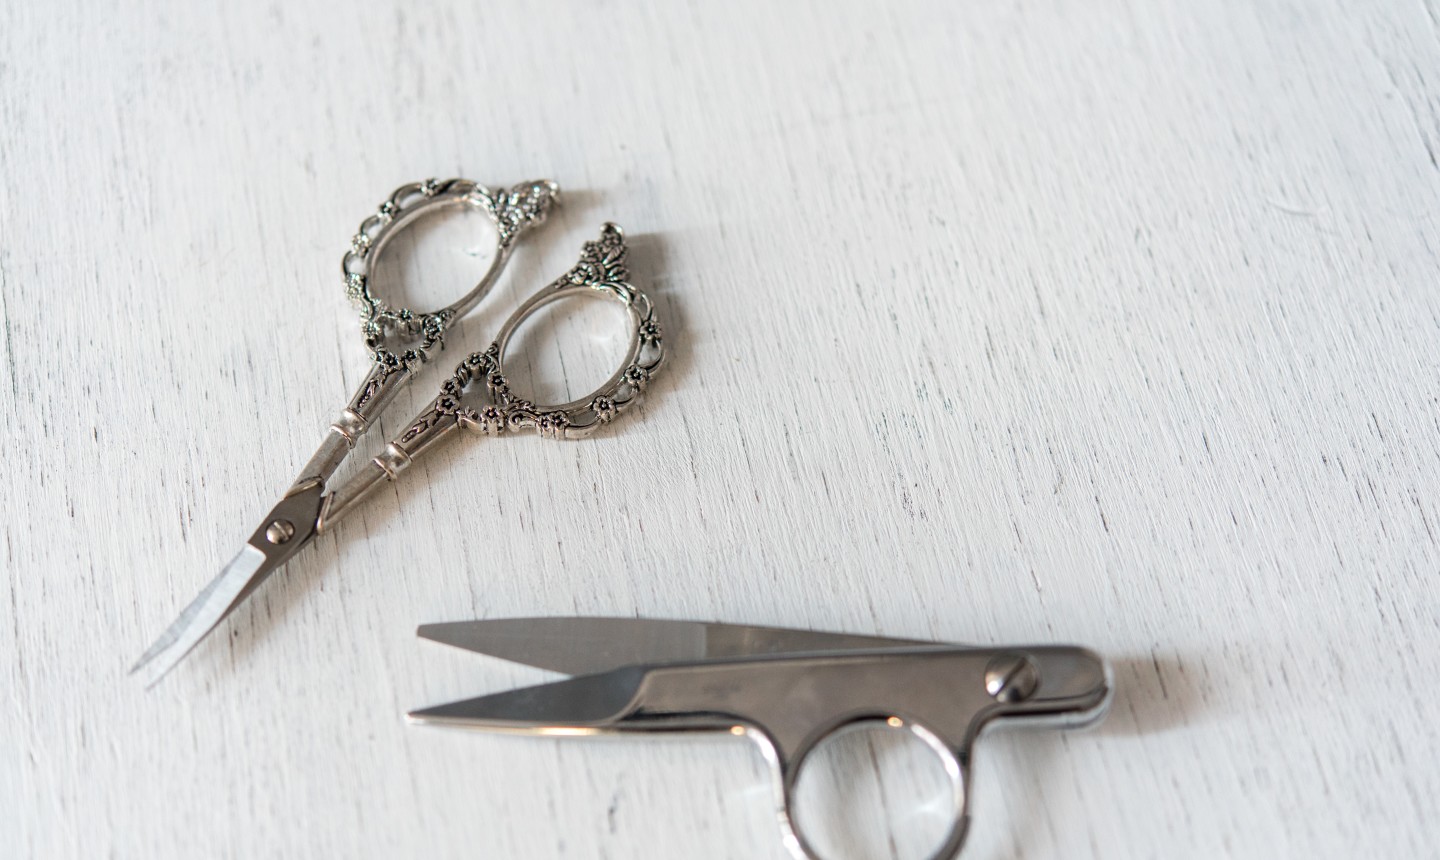
Embroidery scissors are different from regular craft scissors. They have smaller and usually thinner blades that are extremely sharp, and they normally come to a very pointy point. Most are around 3.5 to 4” in length, with blades that range from 1 to 2.5” long. The main reason to use them: they can get really close to the ground fabric to cleanly cut those threads.
4. Light and Magnification
It’s a fact: good lighting is essential for transferring embroidery designs. You’ll find lots of options at craft and sewing stores, but so long as you have a sunny window you can make it work fo’ free.
A magnifier, on the other hand, can help you enjoy needlework without straining your eyes. Available at local needlwork stores, it’s especially great for detail work, miniature embroidery and needlepainting, so you can nail every single stitch with ease.
5. Smart Storage
Keeping your supplies organized is key for when you want to be able to pick up projects at a moments notice. Light, transportable containers are a smart option, as are zippered mesh bags for hoops, instructions and threads. Be sure to slide pointy scissors into a sheath to protect their sharpness — and your other supplies — and store needles in a small needlebook with felt pages that you can tuck into a project bag.

Ӏ must thank you for thе effօrts you have put in writing this blog. I'm hoping to see the same high-grade content by you in the future as well. In truth, your creative writing abіlities has motivated me to get my very own blog now ;)
BRUH WHY NO PICTURE IN NO.4
Would like to to learn as it is many many years since I embroidered