
We’re calling this ombré technique ‘faux Fair Isle’: by cleverly slipping stitches (also sometimes called mosaic knitting), you can get two colors in the same row, but only have to carry one color. Sneaky!
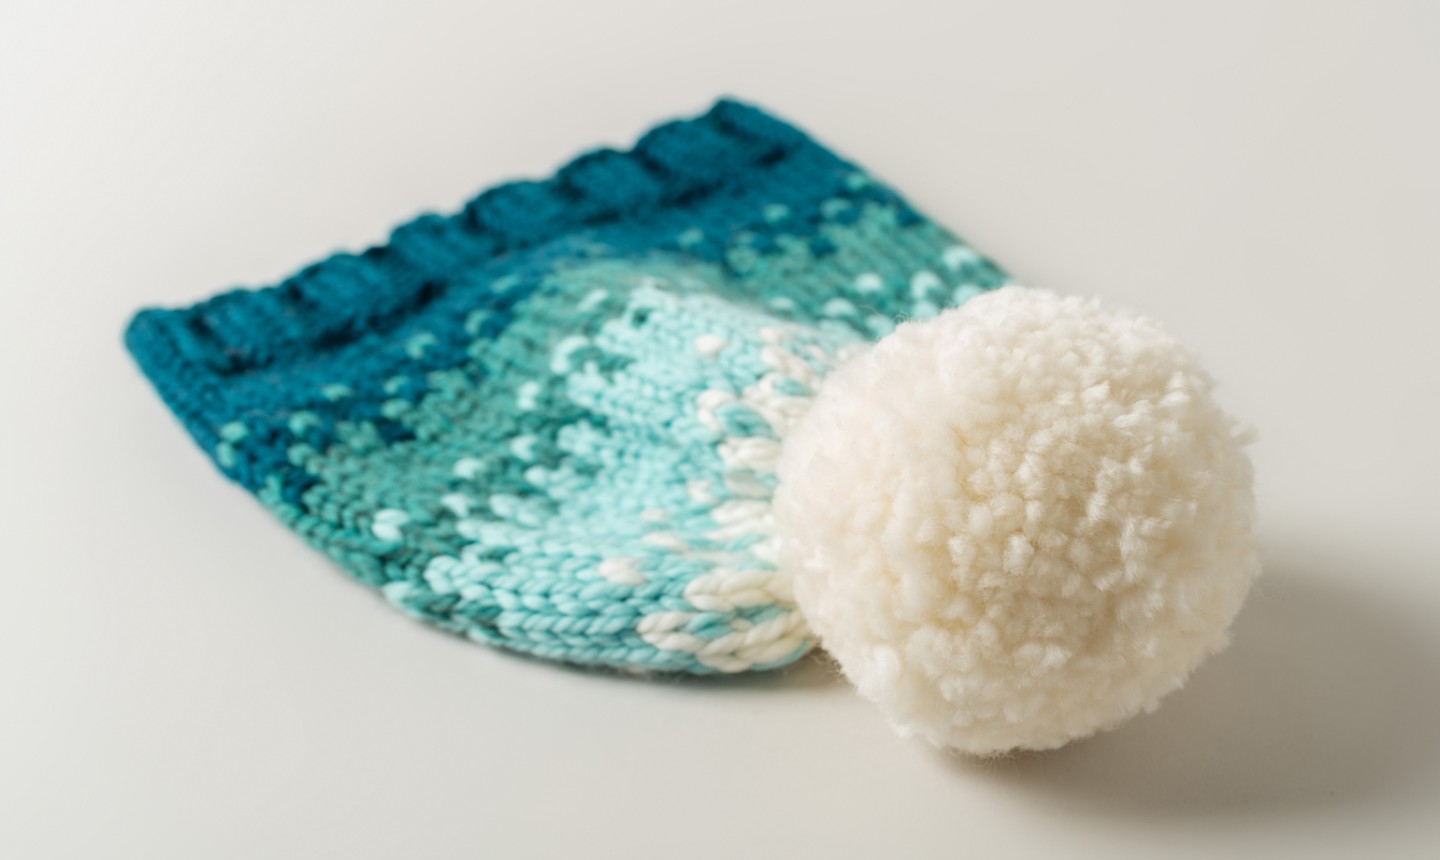
Easy Ombré Hat
Level: Beginner-friendly
What You Need
Pro Tip: You can definitely knit more than one hat with all this yarn. Try reversing your ombre and knit another version fading from light to dark.
Gauge
3.5 sts = 1″ in stockinette (row gauge is not critical here)
Finished Size
17″ circumference; fits large-sized child to medium-sized woman
Pattern Notes
Abbreviations
Instructions
With color A, CO 60 sts. Place a stitch marker to mark the beginning of your round, and join to work in the round.
Rnds 1-6: *K2, p2; repeat from * to end of round.
Rnds 7-10: Knit.
Colorwork Section 1
Rnd 8: *With color B, k1, then slip the next 3 color A sts onto your right needle. Repeat from * to end of round.
Pro Tip: Take it easy: don’t pull the yarn tight when you’re knitting your color B stitches. You want to leave the yarn a little loose in the back so your hat doesn’t pucker.
Rnd 9: With color A, knit every stitch.
Rnd 10: Slip the first 2 color A sts. *With color B, knit 1, slip next 3 sts; repeat from * until 1 st remains. Slip last st.
Rnd 11: With color A, knit every stitch.
Rnd 12: *Slip 1 st, k1 st with color B; repeat from * to end of round.
Rnd 13: With color B, knit every stitch.
Rnd 14: *With color A, k1, then slip the next 3 color B sts. Repeat from * to end of round. Cut color A, leaving a 6-inch tail.
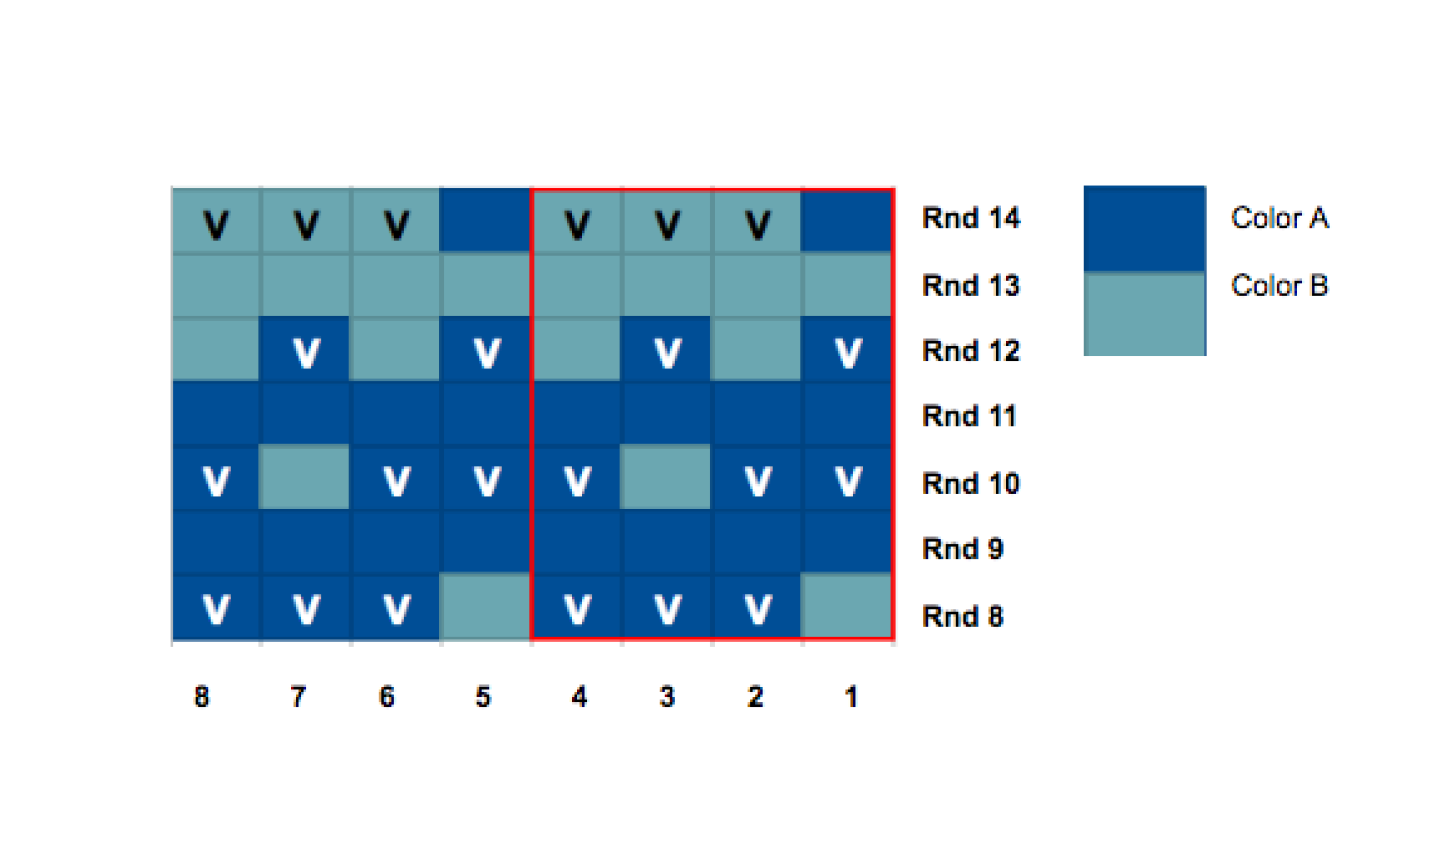
Pro Tip: Sometimes charts make it easier to see what you’re doing. This chart, read right to left, bottom to top, uses a V to indicate which stitches are slipped. Stitches without a V are knit in the colors shown.
Rnds 15-18: With color B, knit.
Colorwork Section 2 (worked with colors B and C)
Rnds 19-25: Repeat rnds 8-14 working with colors B and C. The sts worked originally worked in color A are worked in color B this time, and the color B sts are now worked in color C. Cut color B after rnd 25.
Rnds 26-29: With color C, knit.
Colorwork Section 3 (worked with colors C and D)
Rnds 30-36: Repeat rnds 8-14, working with colors C and D. The sts worked originally worked in color A are worked in color C this time, and the color B sts are now worked in color D. Cut color C after rnd 36.
Rnd 37: With color D, knit every stitch.
Rnd 38: *K1, k2tog; repeat from * to end of round. (40 sts remain)
Rnd 39: Knit.
Rnd 40: *K2tog; repeat from * to end of round. (20 sts remain)
Pro Tip: Things might get a little tight here as you decrease. If you want to switch to double-pointed needles, you totally can. Or you can experiment with the magic loop method. OR, it’s only one round…make it work!
Finishing
Cut the yarn, leaving an 8-inch tail. Thread the yarn onto your tapestry needle, and pull the the needle through the stitches in the order they’re on the needle. As you pass the tapestry needle through, slip each stitch off the knitting needle. Gently pull on the yarn to tighten the stitches, and thread your tapestry needle through a second time. Pull tightly to close up the hole, and thread the tail to the inside of the hat.
Weave in your ends to the inside of your hat, and trim them. Block your hat for the smoothest stitches.
Now, it’s time to pompom. Use a pompom maker if you have one, or make your own pompom with cardboard. Use the long ends of the pompom to tie the pom to the top of your hat. Pompoms don’t wash well, so tie the strings in a bow — that way you can take it off when it’s laundry time.
Simply desire to say your article is as amazing. The clearness in your post is simply great and i can assume you're an expert on this subject. Fine with your permission let me to grab your RSS feed to keep updated with forthcoming post. Thanks a million and please keep up the enjoyable work.
This site was... how do you say it? Relevant!! Finally I have found something which helped me. Many thanks!
Useful information. Fortunate me I discovered your web site by accident, and I am shocked why this accident did not took place earlier! I bookmarked it.
I don't know whether it's just me or if perhaps everybody else experiencing issues with your site. It looks like some of the written text in your posts are running off the screen. Can someone else please comment and let me know if this is happening to them too? This might be a problem with my browser because I've had this happen previously. Kudos
You actually make it seem really easy with your presentation however I to find this topic to be actually one thing which I believe I would by no means understand. It seems too complex and very wide for me. I am having a look forward on your subsequent publish, I'll try to get the hang of it!
Hi there just wanted to give you a quick heads up. The text in your content seem to be running off the screen in Chrome. I'm not sure if this is a formatting issue or something to do with web browser compatibility but I figured I'd post to let you know. The design look great though! Hope you get the problem fixed soon. Thanks
I am regular reader, how are you everybody? This article posted at this web page is in fact nice.
Hi i am kavin, its my first occasion to commenting anyplace, when i read this article i thought i could also make comment due to this brilliant post.
Way cool! Some very valid points! I appreciate you penning this article plus the rest of the site is extremely good.
Normally I don't read article on blogs, however I would like to say that this write-up very forced me to check out and do it! Your writing taste has been amazed me. Thank you, very nice article.