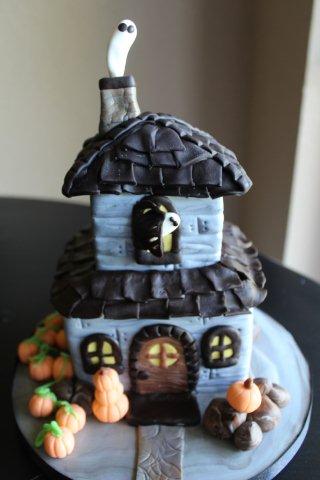
Haunted houses are typically full of ghosts, ghouls, vampires and zombies. But what about one that’s full of cake? This one is scarily perfect for your Halloween party, and it’s great for beginners who want to level up their skills with something a smidge more challenging. The best part: haunted houses tend to look like they’re falling apart, so perfection isn’t the goal — it’s all about creating some creepy character!
Haunted House Cake
Level: Intermediate
What You Need
Instructions
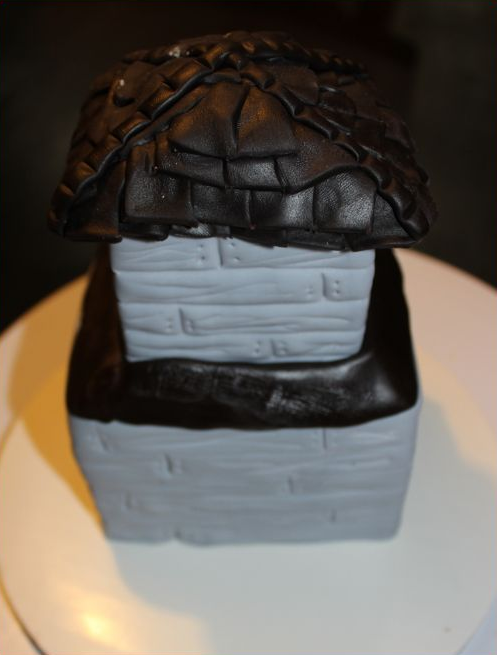
1. Create Your Tiers
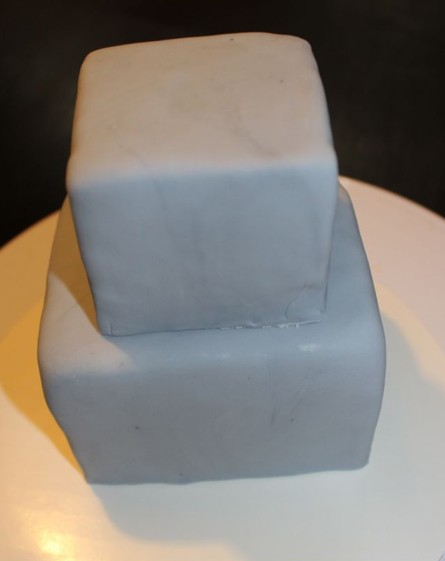
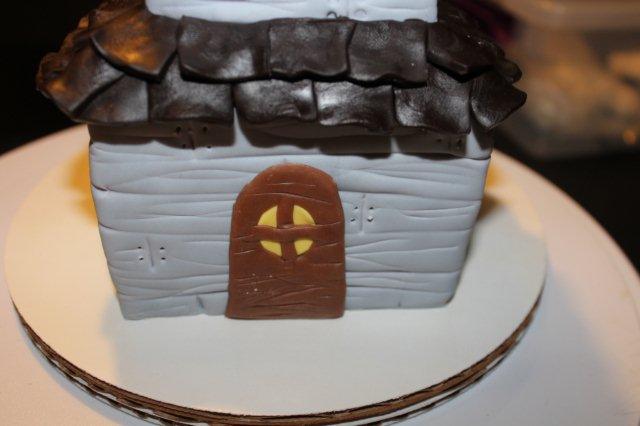
Once your cakes are cooled, crumb coat and cover them with grey fondant. Stack the smaller tier on top of the bigger one.
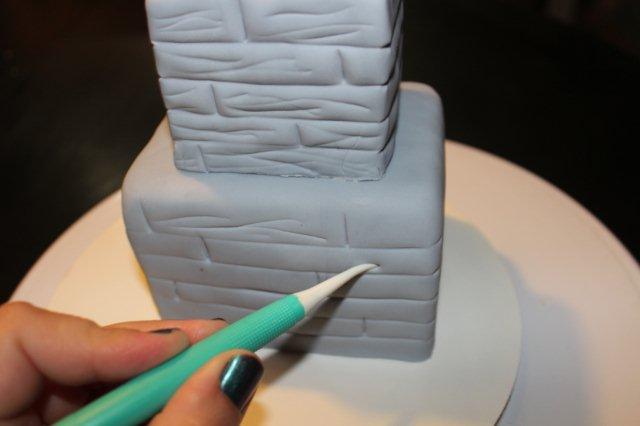
2. Add Texture
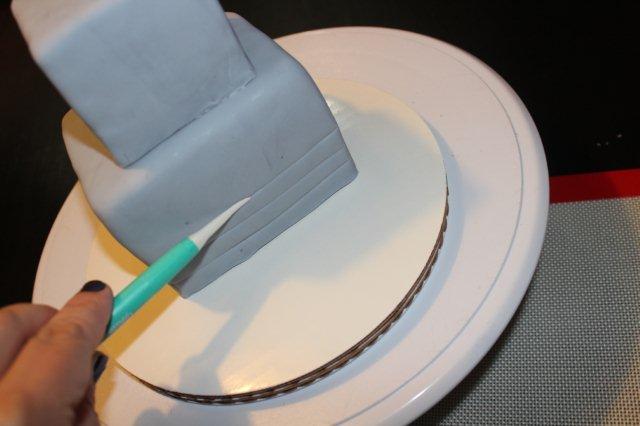
While the fondant is still soft, use your mini sculpting tool to mark straight, horizontal lines across the top and bottom tiers and on each side. (If you don’t have this tool, you can also use a toothpick.)
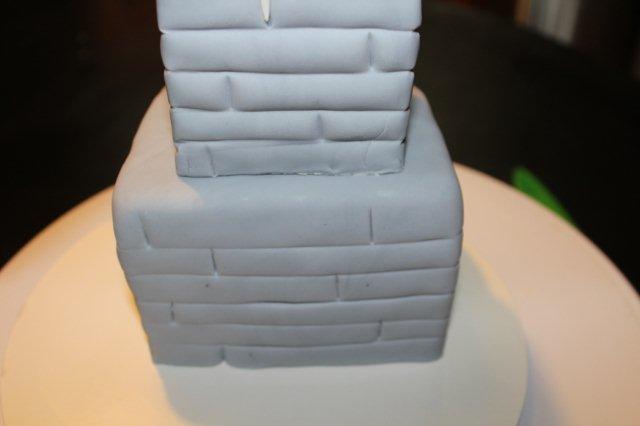
Make vertical indents to make it look like long planks of wood.
Then make woodgrain marks on each plank.
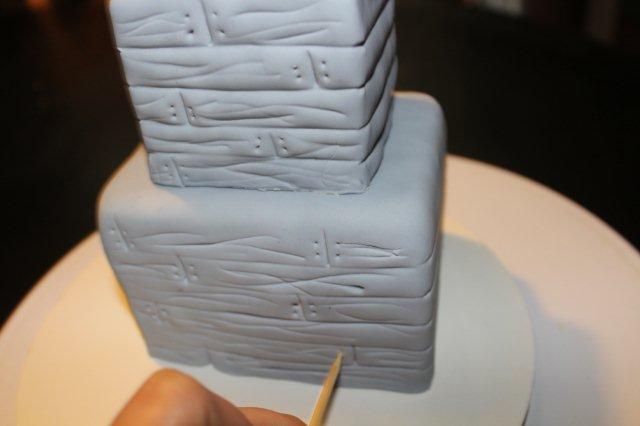
Using a toothpick, poke small holes on either side of the vertical lines.
3. Make the Upper Roof
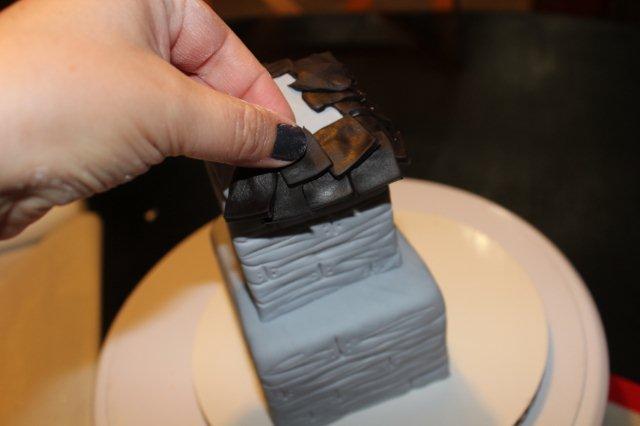
Roll out your black modeling chocolate or fondant. Cut into squares.
Pro Tip: You can use a square-shaped cutter if you’d like, but remember this is a haunted house — your squares don’t need to be perfect.
Starting at the bottom, use edible glue to adhere your square tiles onto the roof. Make one layer all the way around, then start the next layer up. Continue until you reach the top.
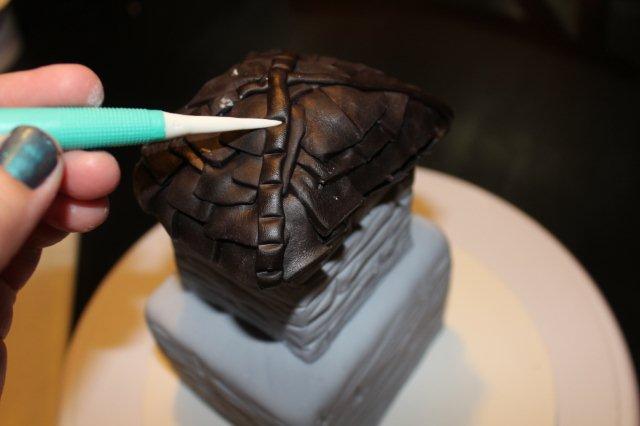
Roll out two thin, long pieces of black fondant. Lay them crisscross across the roof. Trim the excess.
Use your sculpting tool to press light indents equally spaced across the crisscross.
4. Make the Lower Roof
Roll out a larger piece of black fondant. Wrap it around the bottom of the top tier, pressing it gently into place to give it a slanted appearance.
Roll out more black fondant. Press flat and cut into squares. Repeat the process of attaching the tiles to this roof.
5. Make the Doors
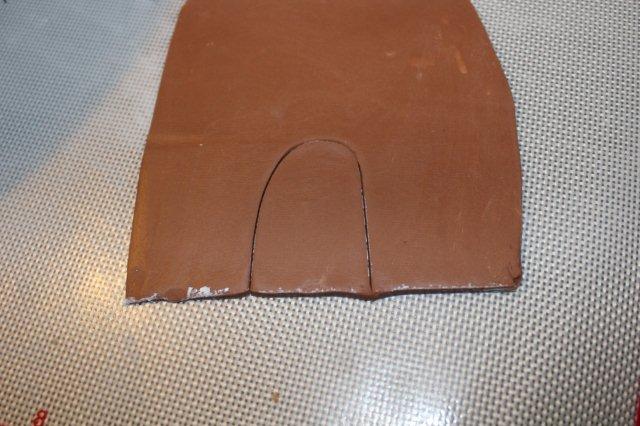
Roll out brown fondant and free-hand a rounded door.

Use the large end of a piping tip or a circle cutter to cut a hole for a window.
Roll out yellow fondant until it’s very thin. Cut a circle the same size as the hole you just made in the brown fondant. Place the yellow fondant inside the door to create the window light.
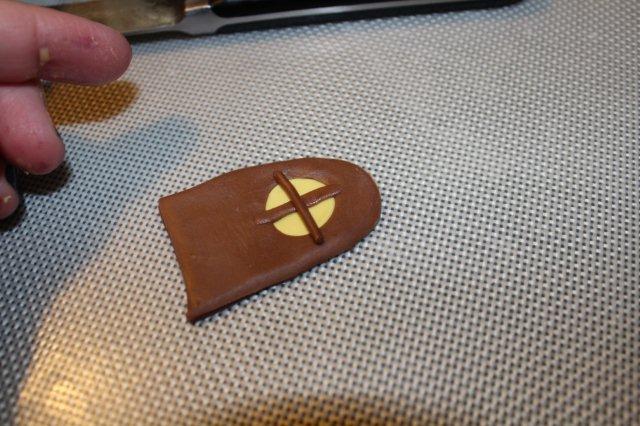
Cut two thin strips out of the leftover brown circle. Place them across the window and blend the ends with the door.
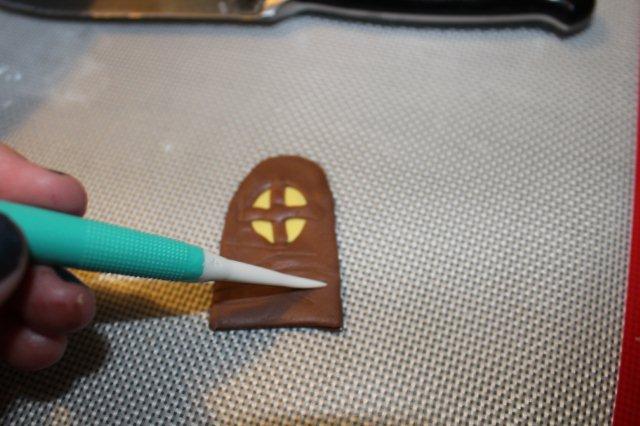
Make woodgrain marks into the door.
Use edible glue to attach the door to the house.
6. Decorate the Door
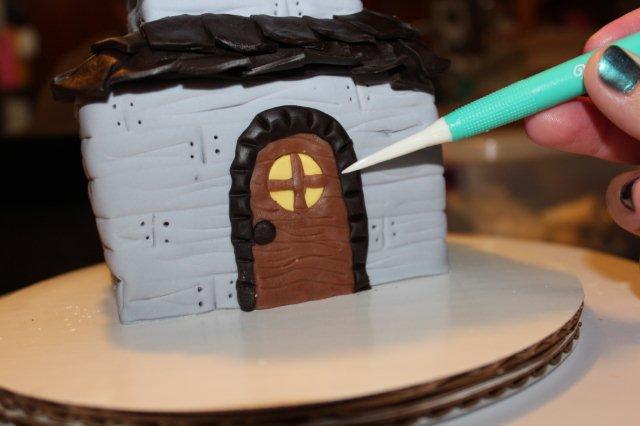
Roll out more black fondant. Press it flat, then use edible glue to place it around the door. Using the sculpting tool, create evenly-spaced indents all around the door.
Good to Know: The sculpting tool is your best friend for this project. We used it to make indents and lines, but it’s also great for straightening crooked lines or fixing mistakes.
7. Make the Windows
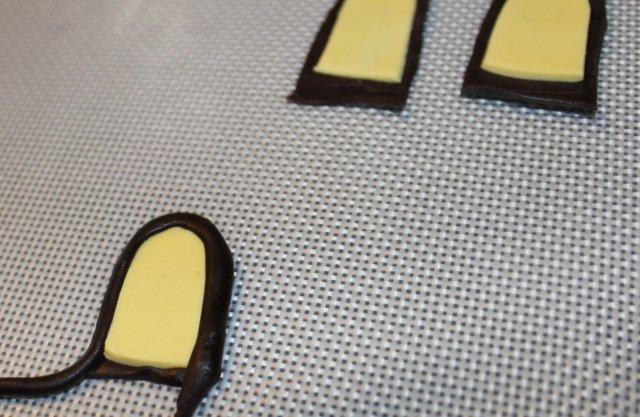
Roll more yellow and black fondant. Cut small windows out of both. (You can free-hand this.) Use edible glue to attach the yellow window on top of the black fondant.
Roll out thin ropes of black fondant and wrap around the windows (leaving the bottom open).
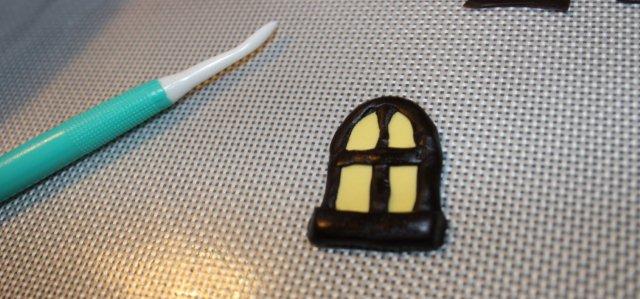
Press two thin pieces of black fondant crisscross over the window. Blend with the window.
Roll out a slightly thicker piece of black fondant. Press it across the bottom of the window to make a ledge. Trim any excess.
Use edible glue to attach the windows to the cake.
8. Add Details
Cover your station in 3-4 different colors of fondant. We used grey, black and brown fondant. (Purple could also be fun.)
Make rocks by marbling your fondant until they look mixed but not uniform in color. Pull apart the fondant to create the rocks in various shapes and sizes. Place the rocks randomly all around the haunted house.
To make pumpkins, cut small pieces of orange fondant and roll into balls of varying sizes.
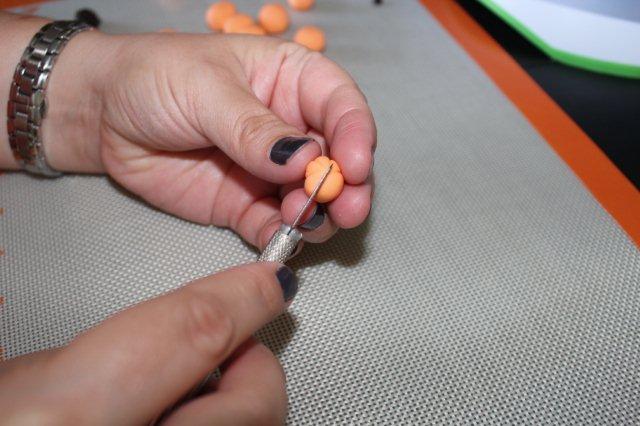
Starting from the central point, use an X-Acto knife or toothpick to press vertical lines onto the ball. Repeat all the way around the ball. Repeat for each pumpkin, then scatter them around the haunted house.
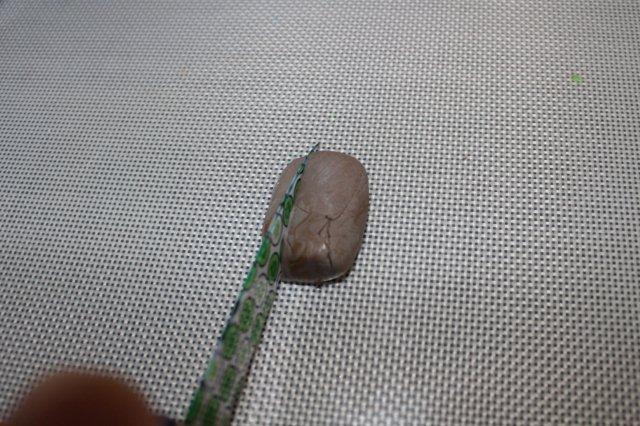
Roll out and flatten a piece of grey fondant to the height you want. Use a knife to cut flat edges on each side.
Cut horizontal indents across the fondant. Make off-set vertical indents as well to create a brick effect.
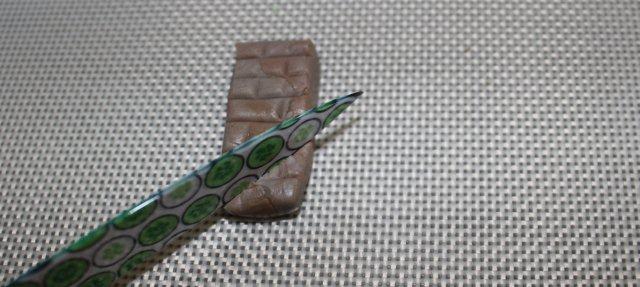
Cut off the bottom of the chimney at the angle of the roof.
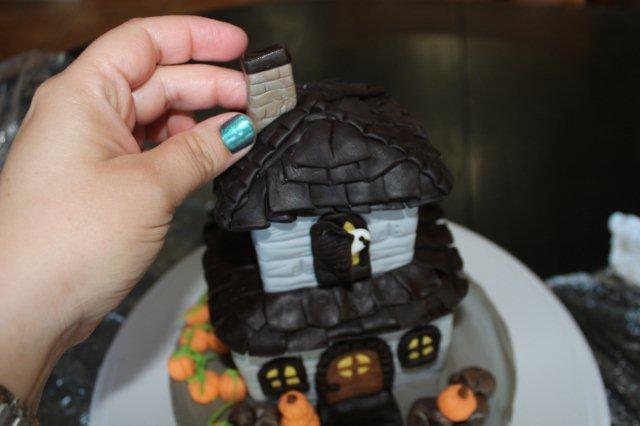
Use edible glue to attach the chimney to the roof.
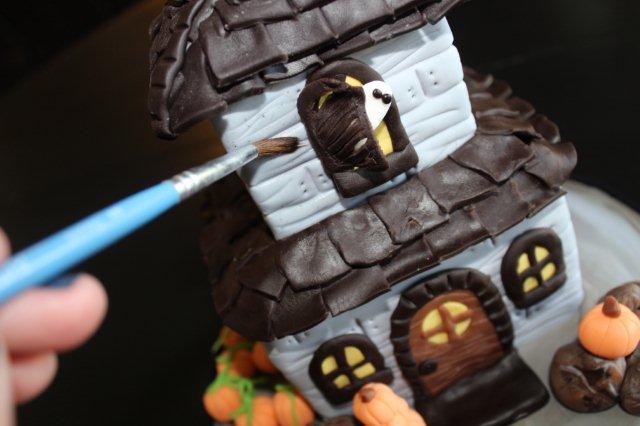
9. Give It a Rustic Look
Dilute a small amount of black food coloring in lemon extract or vodka until it’s really thin. Brush the diluted coloring on the indents all over the house, allowing the color to seep in and give depth to the crevices.
10. Add Scary Characters
It’s totally optional, but if you want your house to have some scary inhabitants, you can also add a few ghosts, a scarecrow or even a vampire. Happy Halloween!
Photos via Wendy Woo Cakes
I love this Halloween cake and all of the others!
Love the craftsy website ideas!