Even if you're a cake novice, don't fret: this cute holiday penguin cake is not as difficult as it looks. In fact, it's the perfect project to wow your fam and explore basic sculpting and piping skills. All it takes is a little bit of pract-ice. (Ice, because it's a penguin — get it?)
DIY Penguin Cake
Level: Easy
What You Need
Instructions
1. Stack Your Cakes
Grab three of your four cakes and stack them one on top of the other, spreading dark chocolate frosting between each layer.

Cut your fourth cake in half and use more frosting to sandwich the halves together. Place the flat end of the cakes on top of the three stacked ones, using frosting to secure the pieces together. Stick a straw down the center of each side to hold the top cakes in place. Freeze the cake for 30 minutes to secure.
2. Start Sculpting

Penguins are plump, but they're definitely not perfect cylinders. Start by cutting away two corners from the top vertical piece to form the head. Trim the stack around the top and bottom to round out the body.
Cover your entire cake with dark chocolate frosting. Chill in the refrigerator for one hour.
3. Paint It Black

In a small bowl, mix together a tablespoon of vodka and a few drops of black food coloring. Use a pastry brush to cover the cake in a smooth black color.
4. Place the Fondant

Roll out the white fondant until it’s about ⅛" thick. Cut out a piece with a heart-shaped cookie cutter and place it onto the head area to create the penguin's face.

Cut out a large fondant circle and trim off about a third of it. Stick this piece underneath the heart on the penguin’s body, trimmed side facing up. The rounded side should be touching the very bottom of the cake, leaving plenty of room for the ugly sweater.
5. Make Ice Cream Cone Arms

Take two cake ice cream cones. Start at the point where the cone gets wider and cut at an angle to the rim.

Cut the bases off the cones. Remove any pieces that remain inside the cone so they're hollow.

Press the angled edges of the cones into either side of the cake to make the penguin’s arms. Secure them to the cake by piping black frosting around the edges.
6. Pipe a Sweater

Spoon green buttercream into a piping bag fitted with a small round tip. Starting at the top edge of the white fondant tummy, pipe the hem of the sweater by moving your tip up and down in tight zig-zags. Go all the way around the cake until the green edges meet. Then, pipe a green hem around the ends of the ice cream cone sleeves.
Spoon white buttercream into the green for a slightly lighter hue. Fill a fresh piping bag and keep piping around and around your cake to make the sweater. As you pipe, move your tip in little loops to create the knit sweater look.

Cover the ice cream cones with little spirals and loops. Finish the top off with another darker green edging design, just as you did the hem.
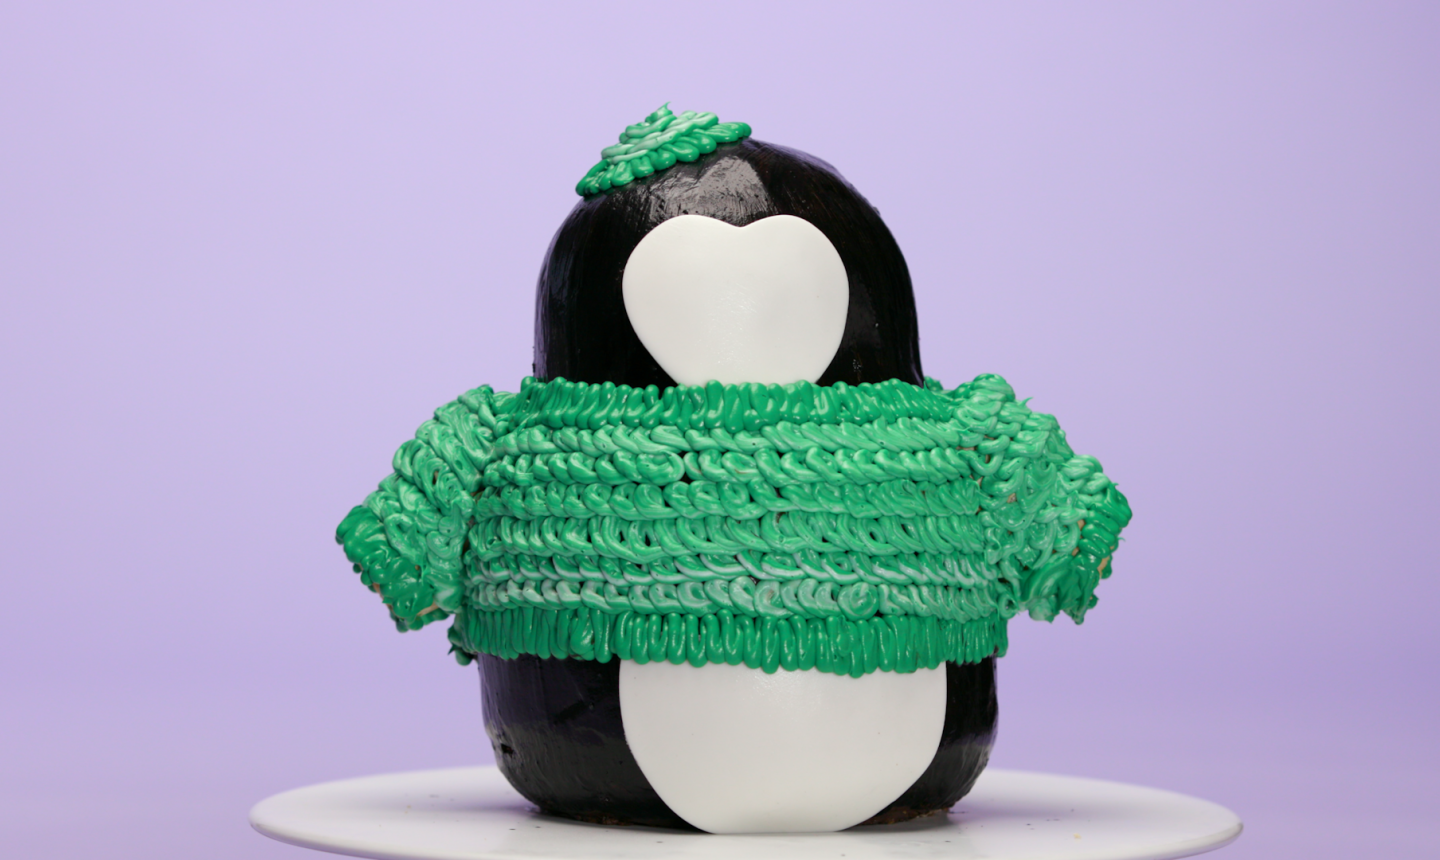
Once you’re done piping his sweater, give him a little hat to match.
7. Add His Happy Feet

Grab three pieces of circus peanut candy. Using scissors, cut out two pieces to make webbed feet, plus one piece to make a beak.

Secure these into place with small dabs of buttercream.
8. Add the Little Details

Pipe small amounts of buttercream above his beak and stick on two brown M&M eyes. Then place a candy pearl in the center of his hat as a pom-pom.

Break a circle chocolate wafer in half and place one half inside each cone, so now his flippers stick out of his sleeves. You can wedge these into the cones if they stay put, or secure with buttercream if needed.
9. Glam Him Up

It’s #UglySweaterSeason, so use a piping bag fitted with a small round tip to pipe a squiggly line of black buttercream along the front of his sweater.
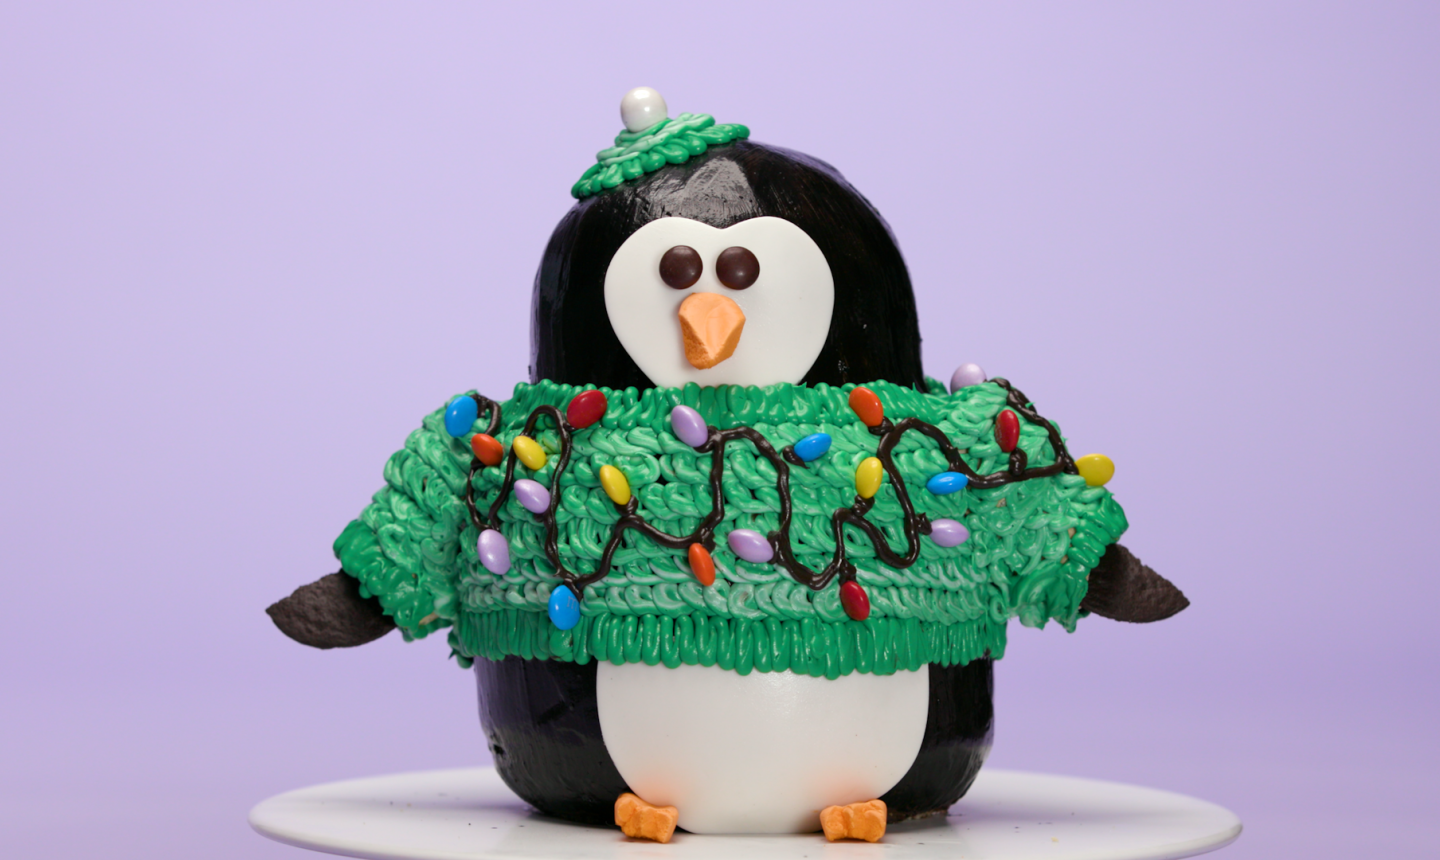
Place dabs of buttercream along the line and stick on some colorful M&M "lights."
That's it! Now comes the hard part: cutting into this cutie. Don't forget to snap a picture!

Share tips, start a discussion or ask other students a question. If you have a question for an expert, please click here.
Already a member?
No Responses to “This Penguin Cake Will Fit Right in at Your Ugly Sweater Party”