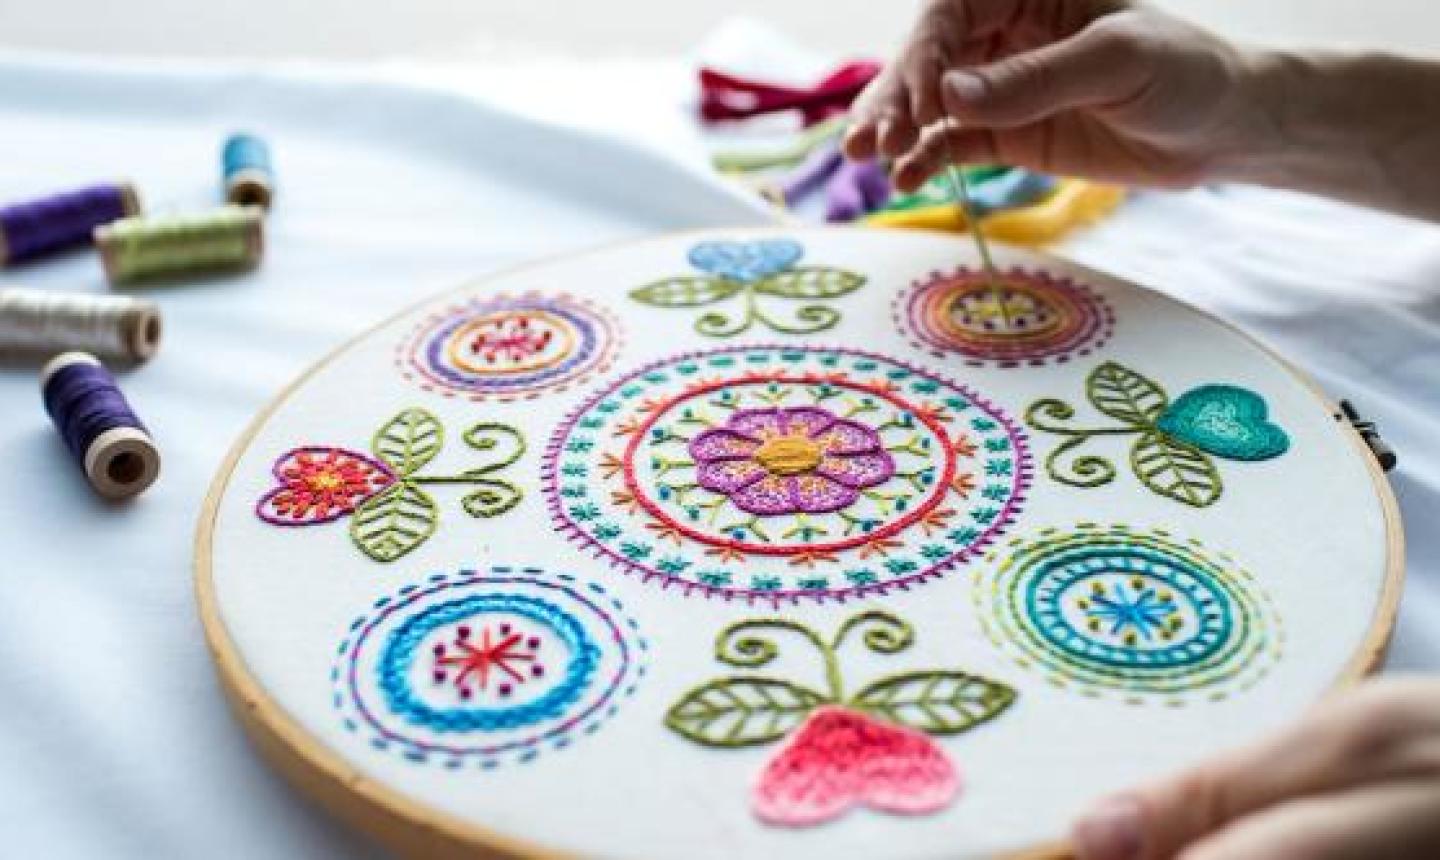
 Embroidery samplers are fun to make and retro in the coolest possible way. The oldest surviving European versions date all the way back to the 1500s, and they played one basic role: showing off stitches and demonstrating skills. While samplers still serve that purpose — like the mandala sampler from textile artist Kat McTee’s class Startup Library: Hand Embroidery — now they double as beautiful hoops all on their own, and are more likely to score a spot on the living room wall than get stashed away in a drawer.
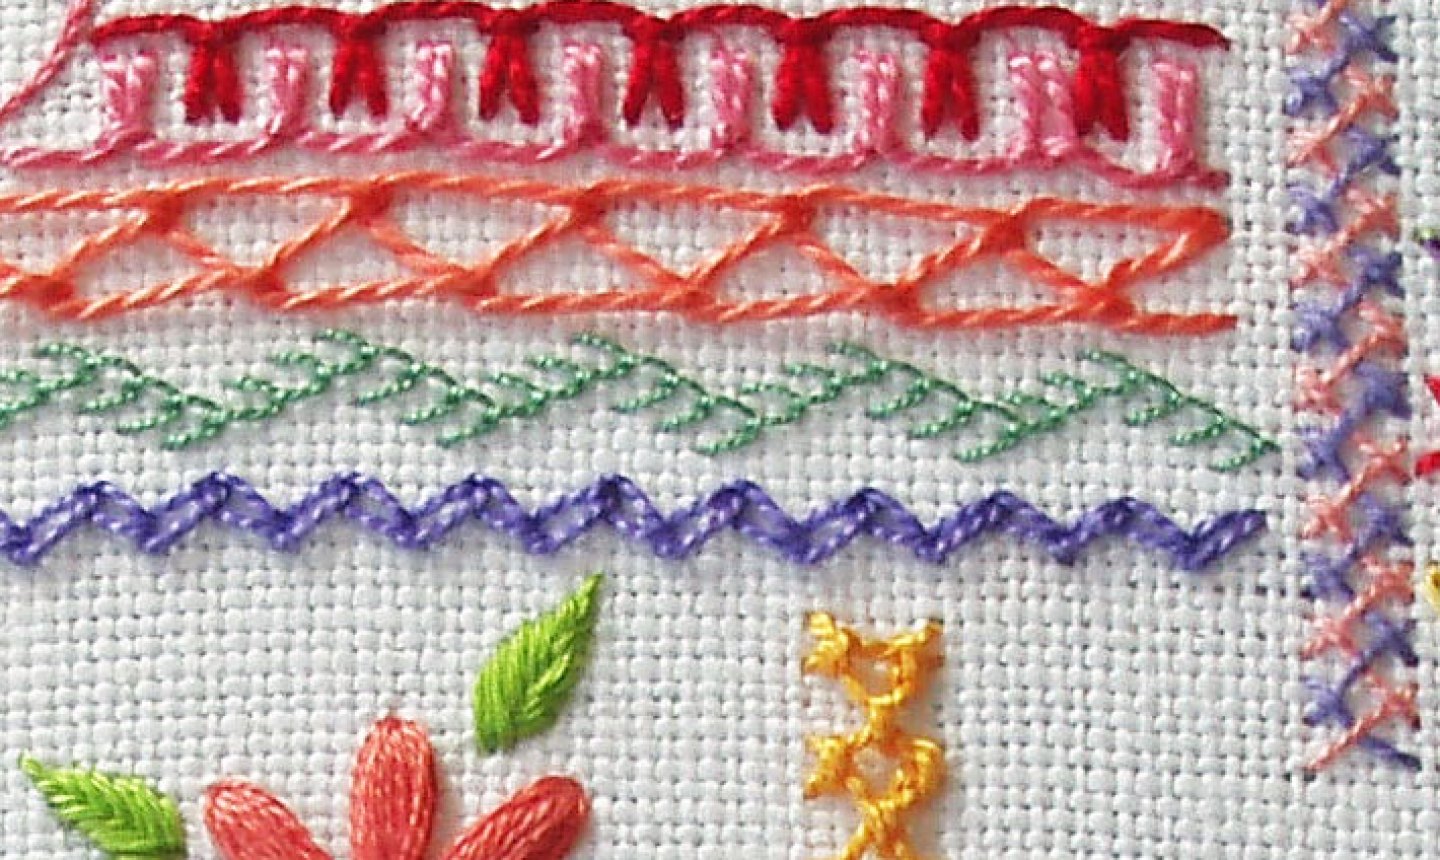
There are two main types of embroidery samplers: the more common band sampler, which has designs, motifs and designs worked in lines, and the spot sampler, which has small vignettes worked randomly in spots all over the fabric surface.
One of the best things about embroidery samplers is they aren’t confined to any set rules or patterns. Think of them as a playful learning tool, a record of your stitch mastery, a useful way to explore threads and fabrics, and an excellent method of honing techniques and discovering your own favorite (or less-than-favorite) stitches. The sampler is kind of like scratch paper, except the end result can be absolutely beautiful — and something you’ll definitely want to frame.
Embroidery samplers are fun to make and retro in the coolest possible way. The oldest surviving European versions date all the way back to the 1500s, and they played one basic role: showing off stitches and demonstrating skills. While samplers still serve that purpose — like the mandala sampler from textile artist Kat McTee’s class Startup Library: Hand Embroidery — now they double as beautiful hoops all on their own, and are more likely to score a spot on the living room wall than get stashed away in a drawer.
There are two main types of embroidery samplers: the more common band sampler, which has designs, motifs and designs worked in lines, and the spot sampler, which has small vignettes worked randomly in spots all over the fabric surface.
One of the best things about embroidery samplers is they aren’t confined to any set rules or patterns. Think of them as a playful learning tool, a record of your stitch mastery, a useful way to explore threads and fabrics, and an excellent method of honing techniques and discovering your own favorite (or less-than-favorite) stitches. The sampler is kind of like scratch paper, except the end result can be absolutely beautiful — and something you’ll definitely want to frame.
What You Need
Whether you have a specific plan for your sampler or you’re just randomly exploring, you’ll save time by thinking ahead about the embroidery supplies you’ll need. First up: your pattern. You can buy a sampler pattern or even design your own, like the freeform map sampler from artist Robert Mahar’s class. From there, you’ll want to keep these tips in mind when shopping.Pick Your Fabric
No matter what you’re embroidering, you need to choose a ground fabric that will support your stitches and show them off without being distracting. A medium weight, high thread-count linen is usually the best bet. Because linen is resilient, it’s less likely than cotton or cotton-poly blends to show wear and tear if you do any “reverse stitching,” a.k.a. tearing out a section of stitching. Linen also stands up better to heavy, dense stitches, like long and short stitch.Choose Your Thread
DMC, Anchor floss or perle cotton are a better (if slightly pricier) choice than generic craft threads. The well-respected brands tend to deliver a happier overall experience, and you’ll usually avoid the fraying, knotting, pilling and breaking that can happen with low-quality threads.Grab the Right Needles
For general surface embroidery, crewel needles (also called embroidery needles ) are a must. If you’ll be experimenting with various weights or thicknesses of thread or fabric — like when embroidering on denim — you’ll need to have a few different needle sizes on hand. Also take into account any specialty stitches that might need different needles — bullion knots, for example, call for milliner needles.Decide On a Hoop
Embroidery designs typically look better when you work in a hoop or a frame with the fabric pulled taut, as it helps prevent your material from puckering. If you’re just getting started in embroidery, a simple plastic hoop is all you really need. Another option is a wooden hoop with sturdy hardware, making it easier than ever to tighten that fabric.Top Tips for Samplers
 Whether you’re working your first sampler with basic embroidery stitches or making one that’s a bit more complex, keep these pointers in mind.
Don’t Let Stitches Scare You
Some stitches are more difficult than others. For instance, there’s a big difference between stitching a backstitch and learning how to pull off the perfect French Knot. But don’t let the more advanced stitches scare you — with patience and practice, you’ll be able to stitch anything.Keep Experimenting
Playing around with stitches is such a fun part of creating your own embroidery sampler. Give yourself tons of leeway to experiment with the sizes, spacing and orientation of stitches, and try out different types of threads to see how they look and behave with various stitches. Ask yourself questions and explore the answers as you go. How does a stitch look when you work it with a single ply of floss? What about with 6-ply? With wool or silk instead of cotton? What will happen if you combine two stitches? What will it look like if you mirror two rows of that particular stitch? How well does a stitch work on a curve? How can I make that stitch turn a corner? Be curious!Be Free
 As you explore stitches on your sampler, you’ll get more and more comfortable with taking risks and your embroidery will benefit from all that confidence. The more surefooted you get, the more freedom you’ll feel and the more fun you’ll have as you go. And that’s the whole point, right?
The sampler is the basis for everything
I desperately need to move on from satin stitch.
I did this as a child.
Look forward to learning new stitches
Have been embroidery for over 60 years. Look forward to new stitches
I would like to learn more.
Beautiful. Looks like fun!
I really like the Style of Old "English Samplers" & Author & Cross Stitch Enthusiast, Jane Greenoff has Published several Books on the Subject during the 1990s that are still very relevant today.
embroidery is relaxing and fun, like painting only using a needle and thread. I would like to join this group.
I’m excited