As you advance in your knitting, there will come a time when you need to conquer short rows. This design element, which creates soft angles and curves that aren’t quite as obvious or harsh as our usual increases and decreases, uses a key technique called wrap and turn.
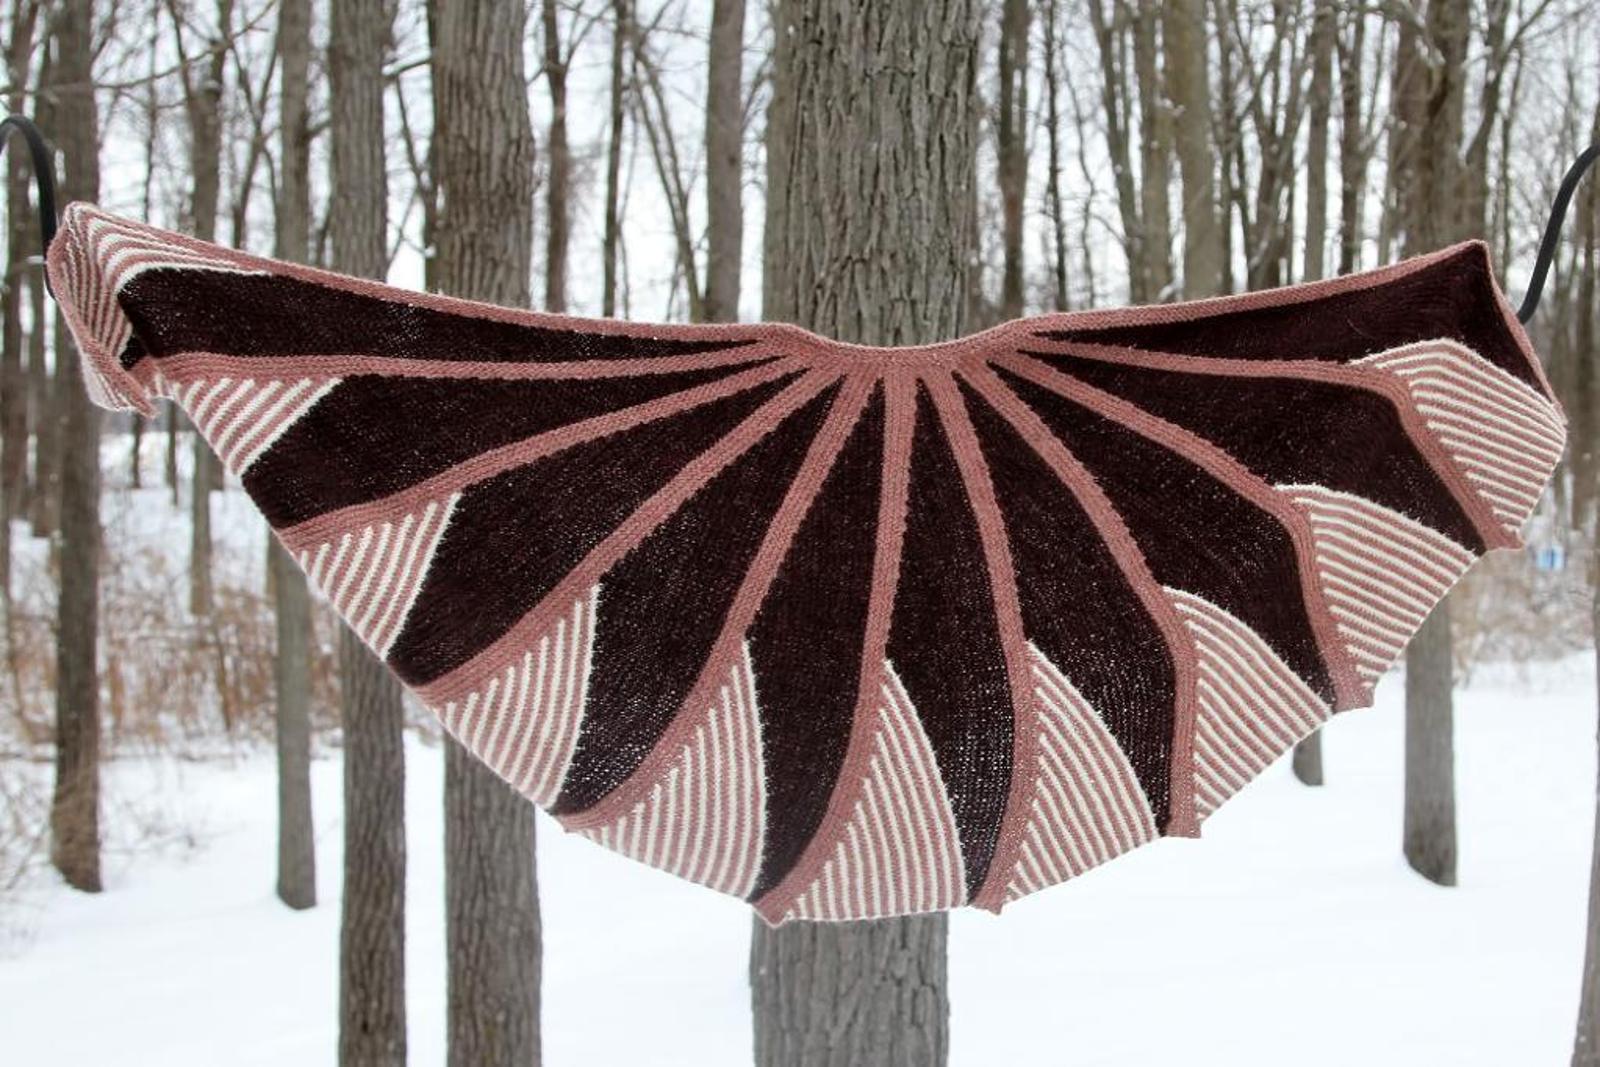
This Short Rows Fantasy Shawl uses short rows to create these beautiful angles.
What is wrapping and turning in knitting?
Wrap and turn (sometimes abbreviated as w and t) in knitting involves wrapping stitches with the working yarn, turning the work, and coming back to the wrapped stitches later. The wrap and turn works for anything from sock heels to shaping for accessories like the impressive shawl pictured above.
Figuring out how to do a wrap and turn in knitting can be a little frustrating at first. We’ll walk you through the wrap and turn, plus picking up the wraps later when you come back. Let’s get started!
Wrap and turn tutorial
For this tutorial, you can make a small swatch, or just work off your project.
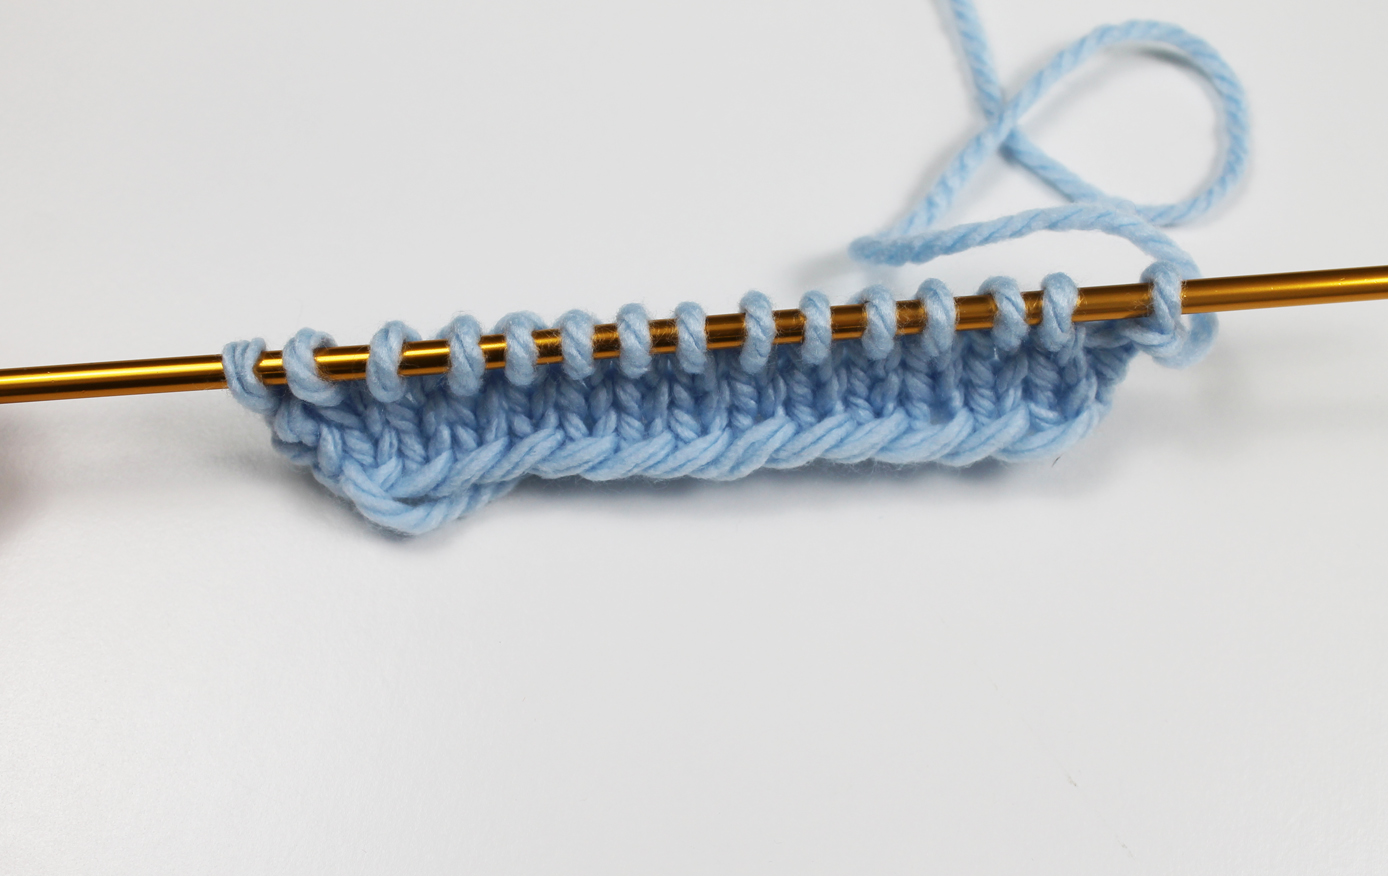
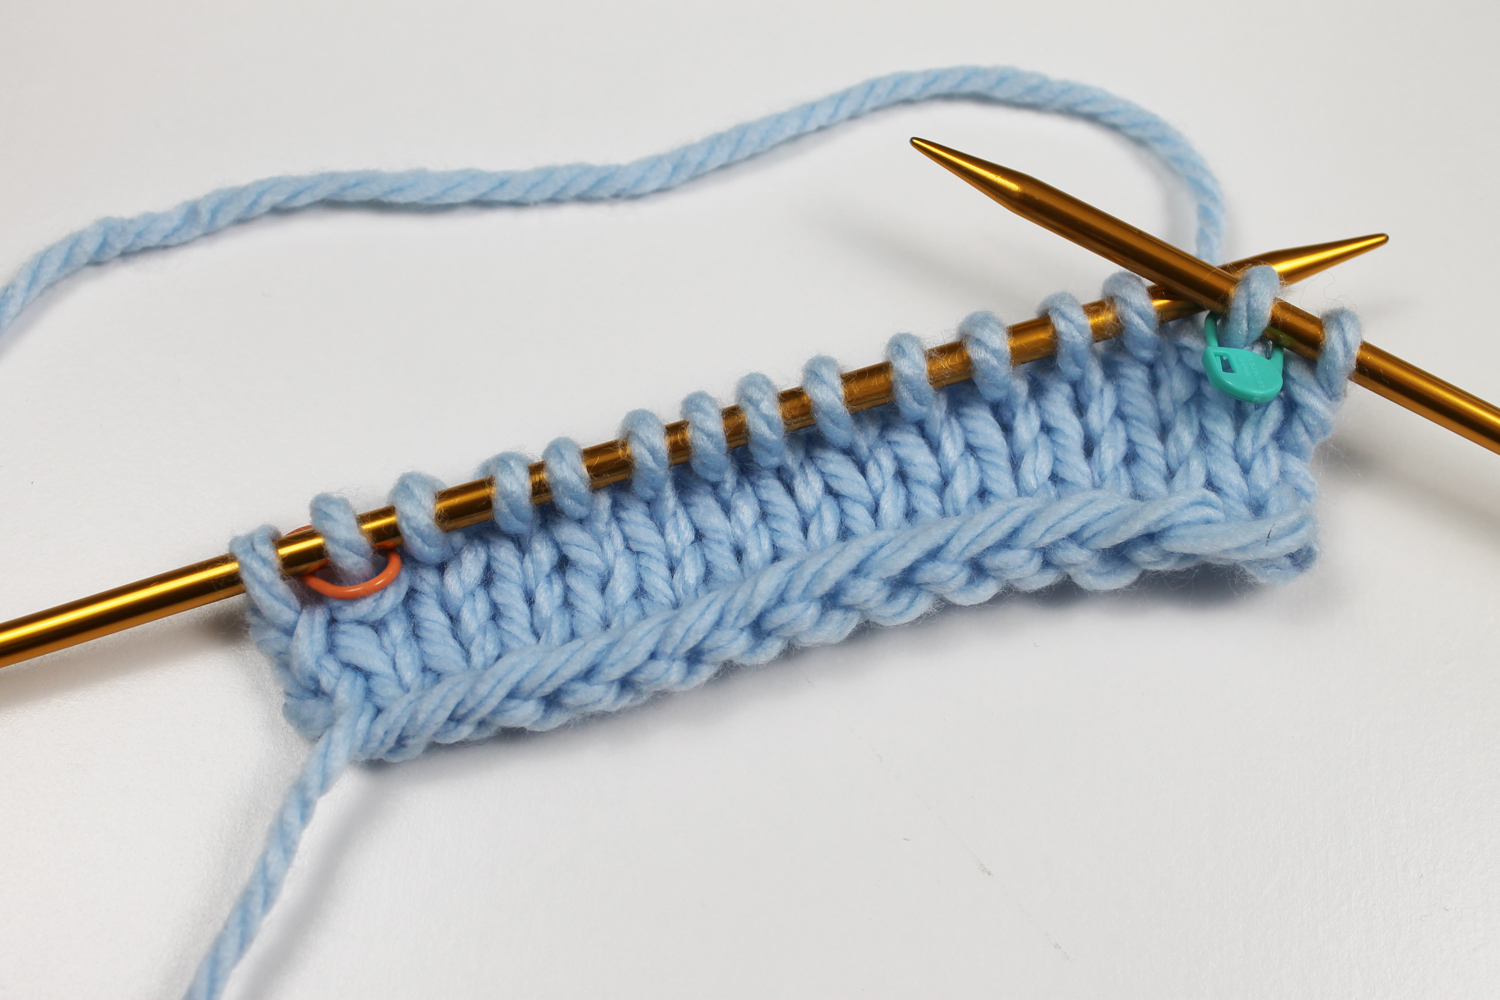
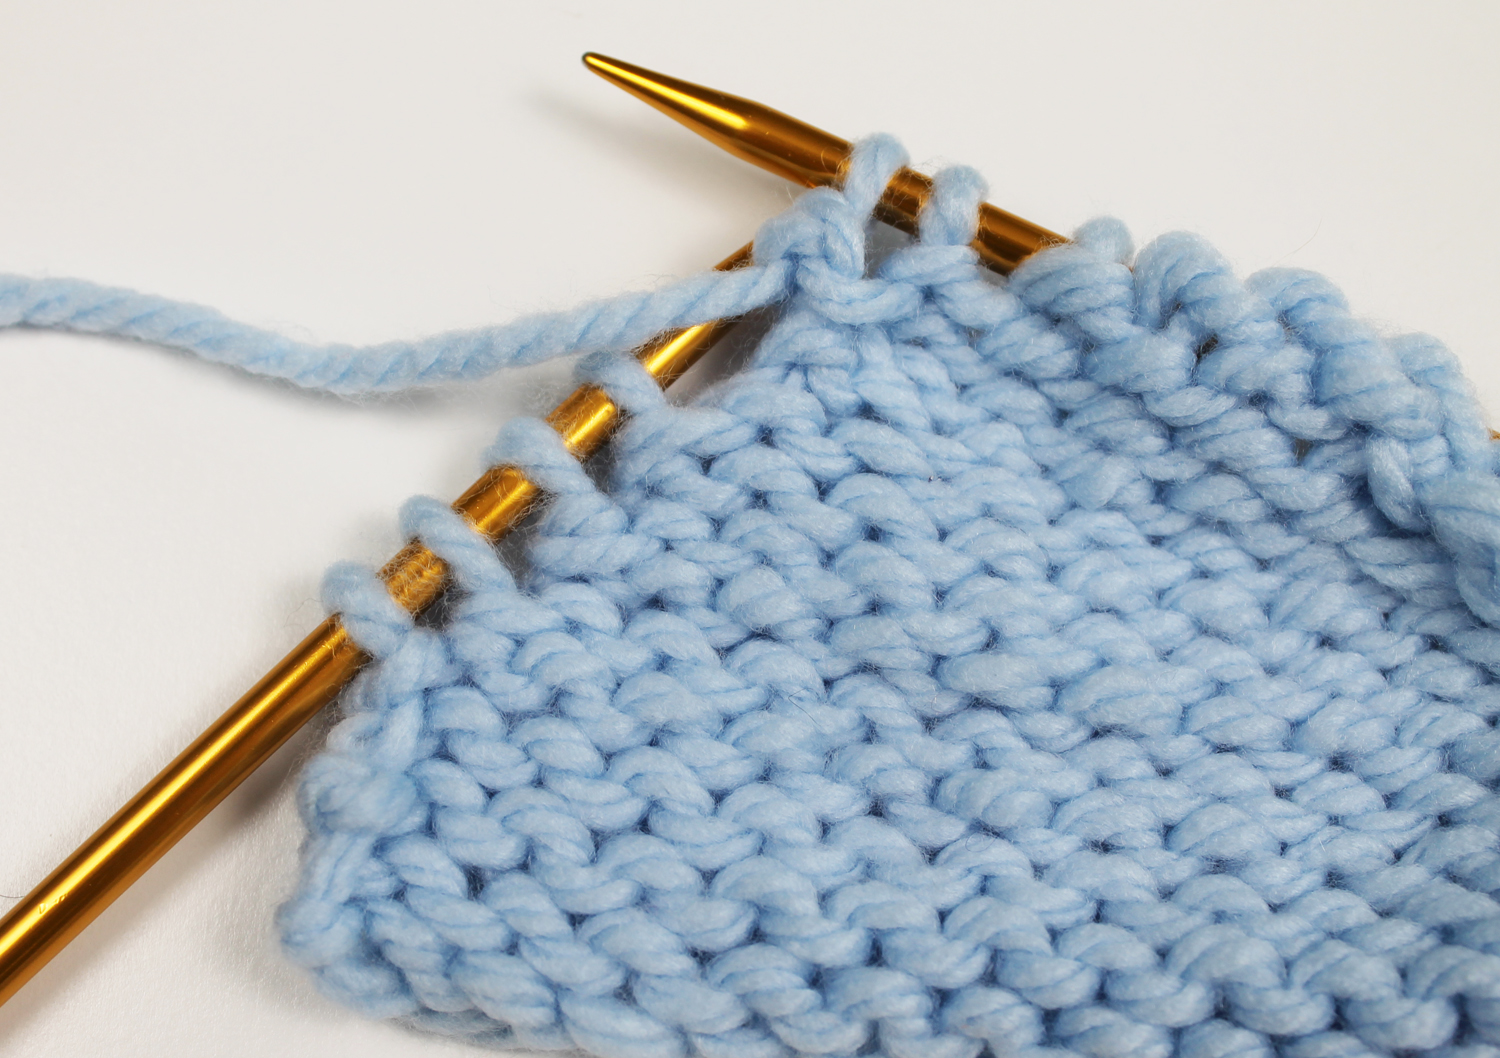
Cast on 15 stitches, then knit 4 rows of stockinette stitch to get your swatch started.
On the knit side
Step 1:
On the next right side row, knit until there are 2 stitches left (in this case, 13 stitches).
Step 2:
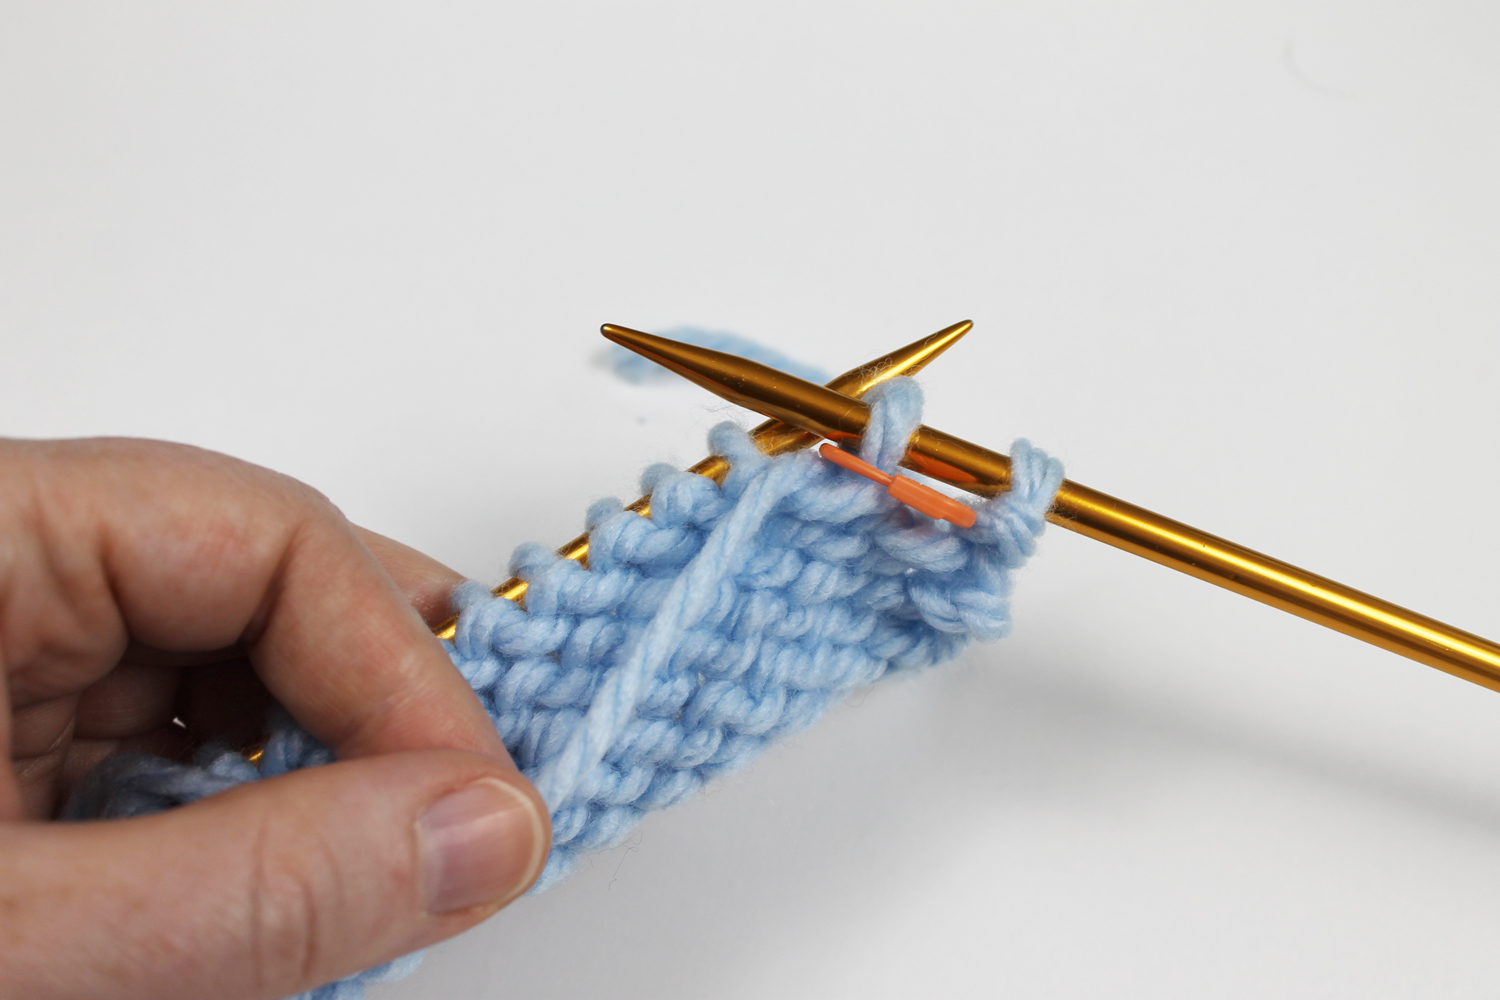
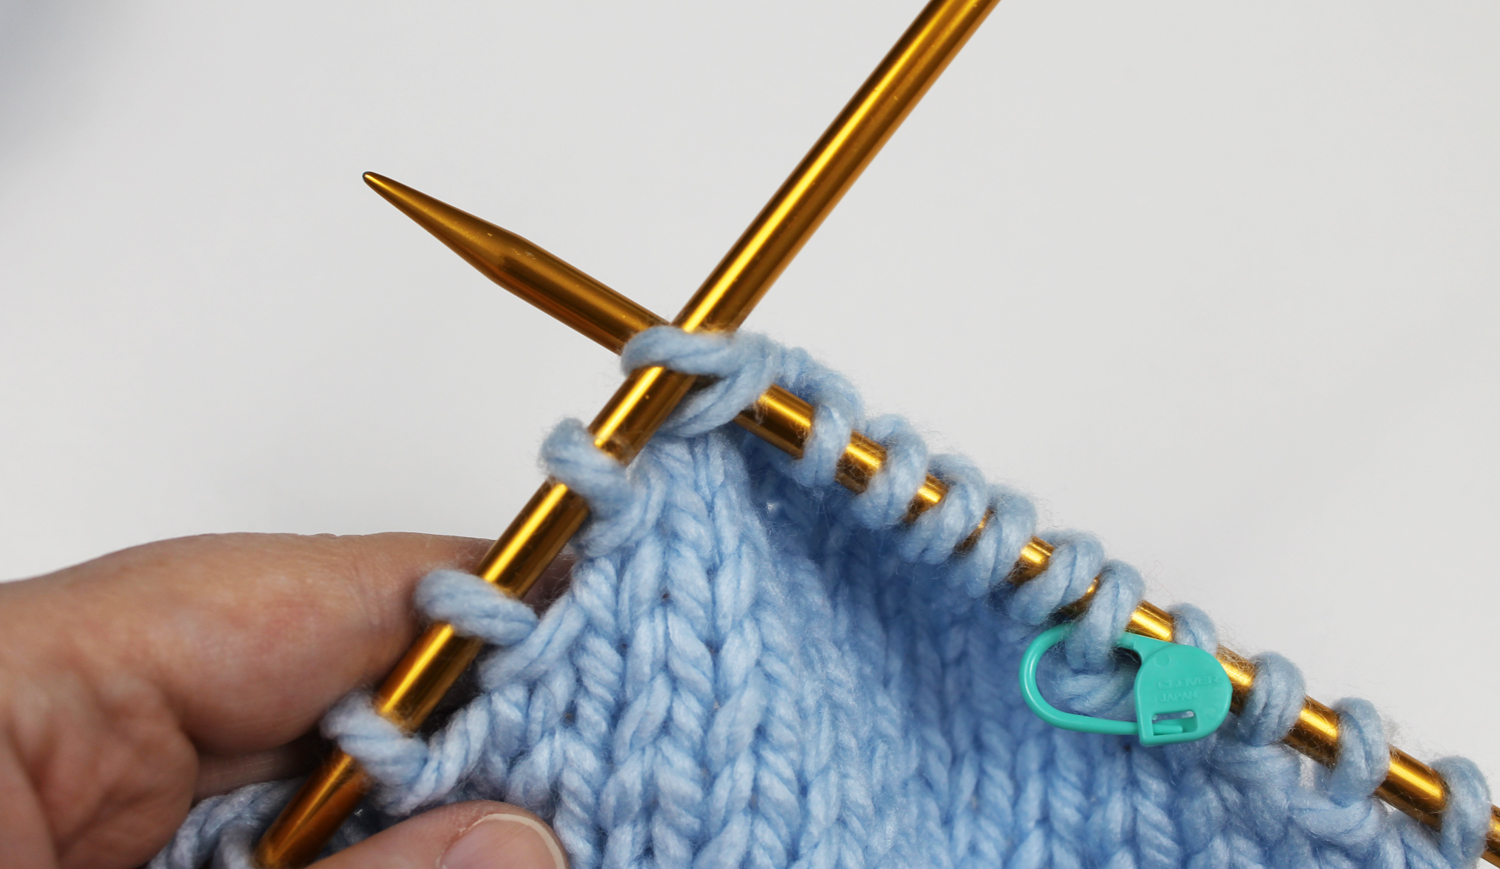
Now you’re ready to do the w and t on the next-to-last stitch on the knit side.
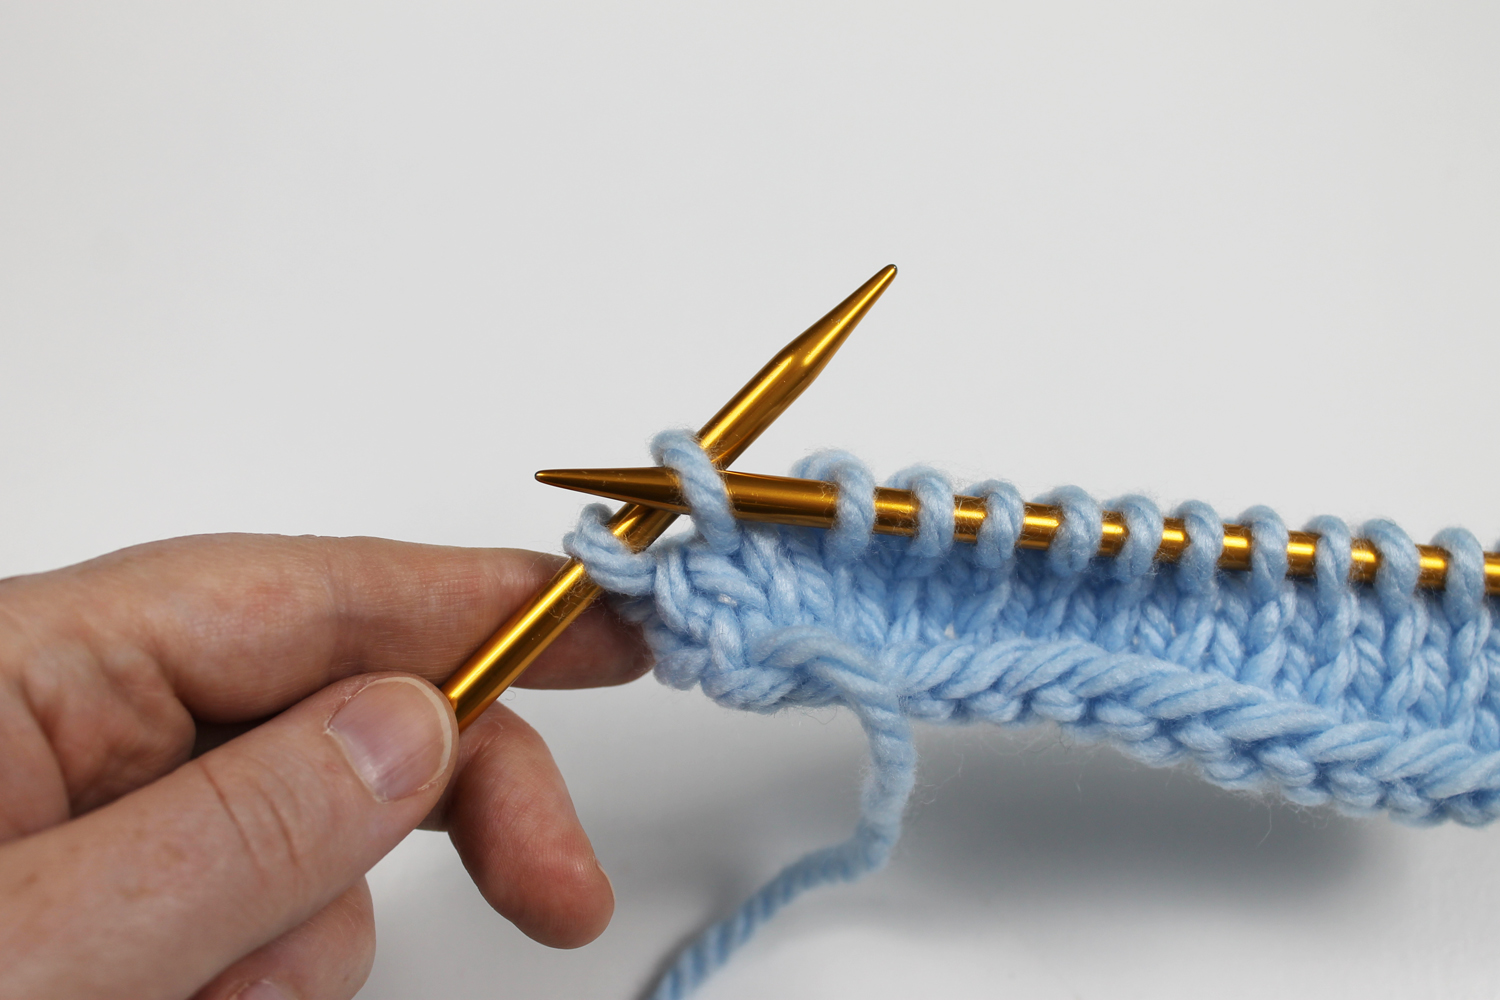
With the yarn in back, insert your needle purlwise into the stitch you are going to wrap. (In this case, that’s the next-to-last stitch of the row.)

Slip the stitch from the left needle to the right needle.
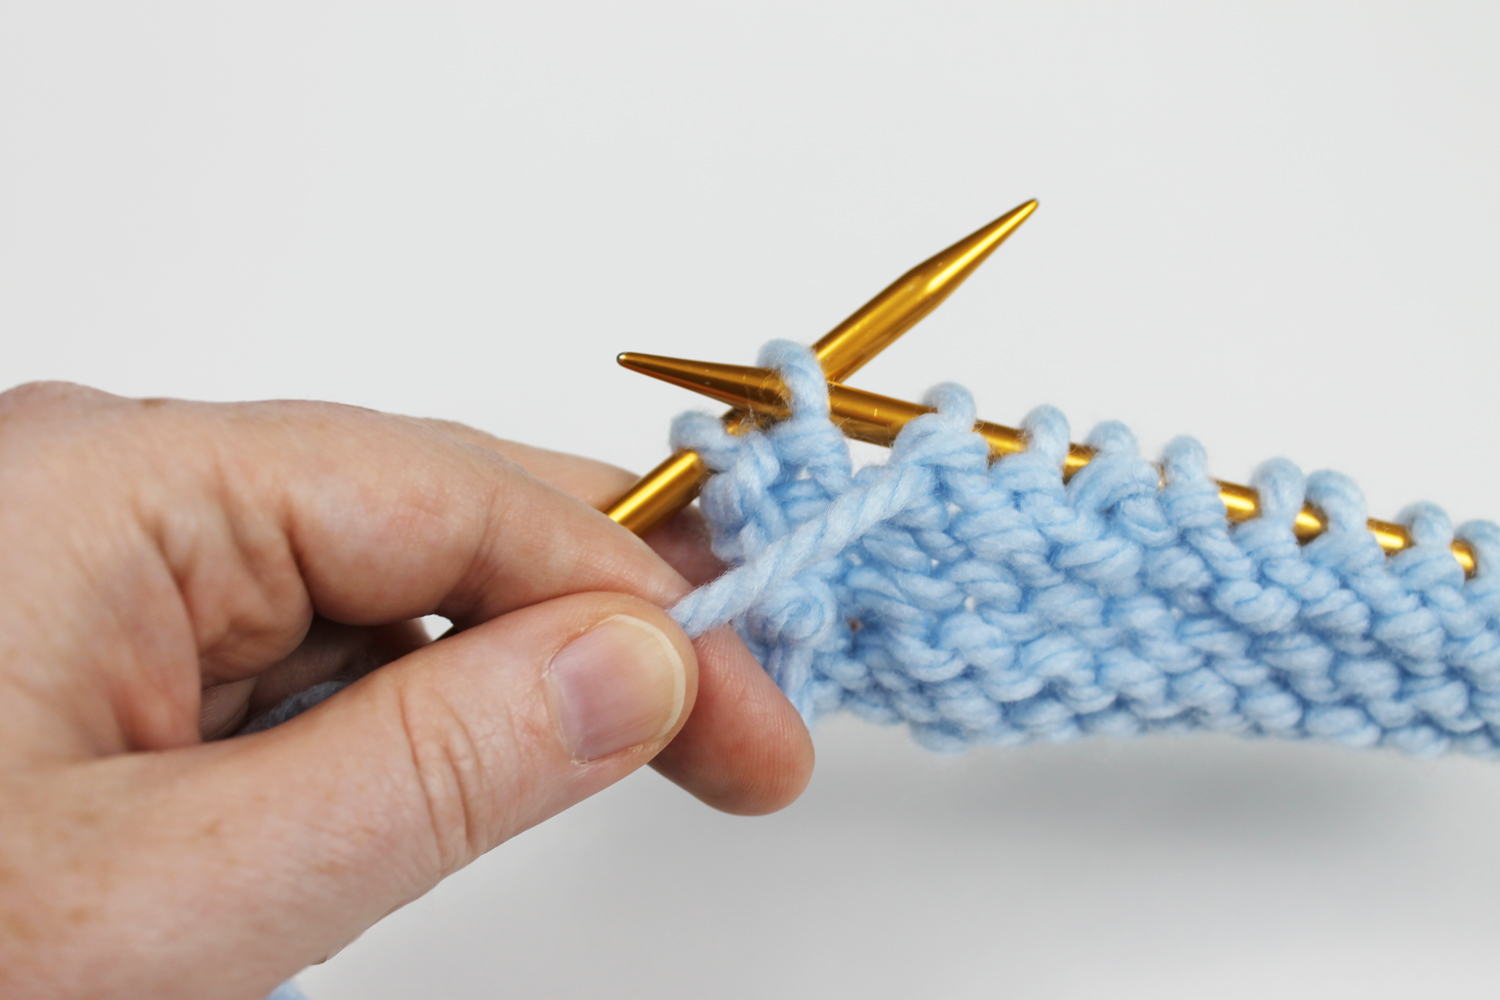
Step 3:
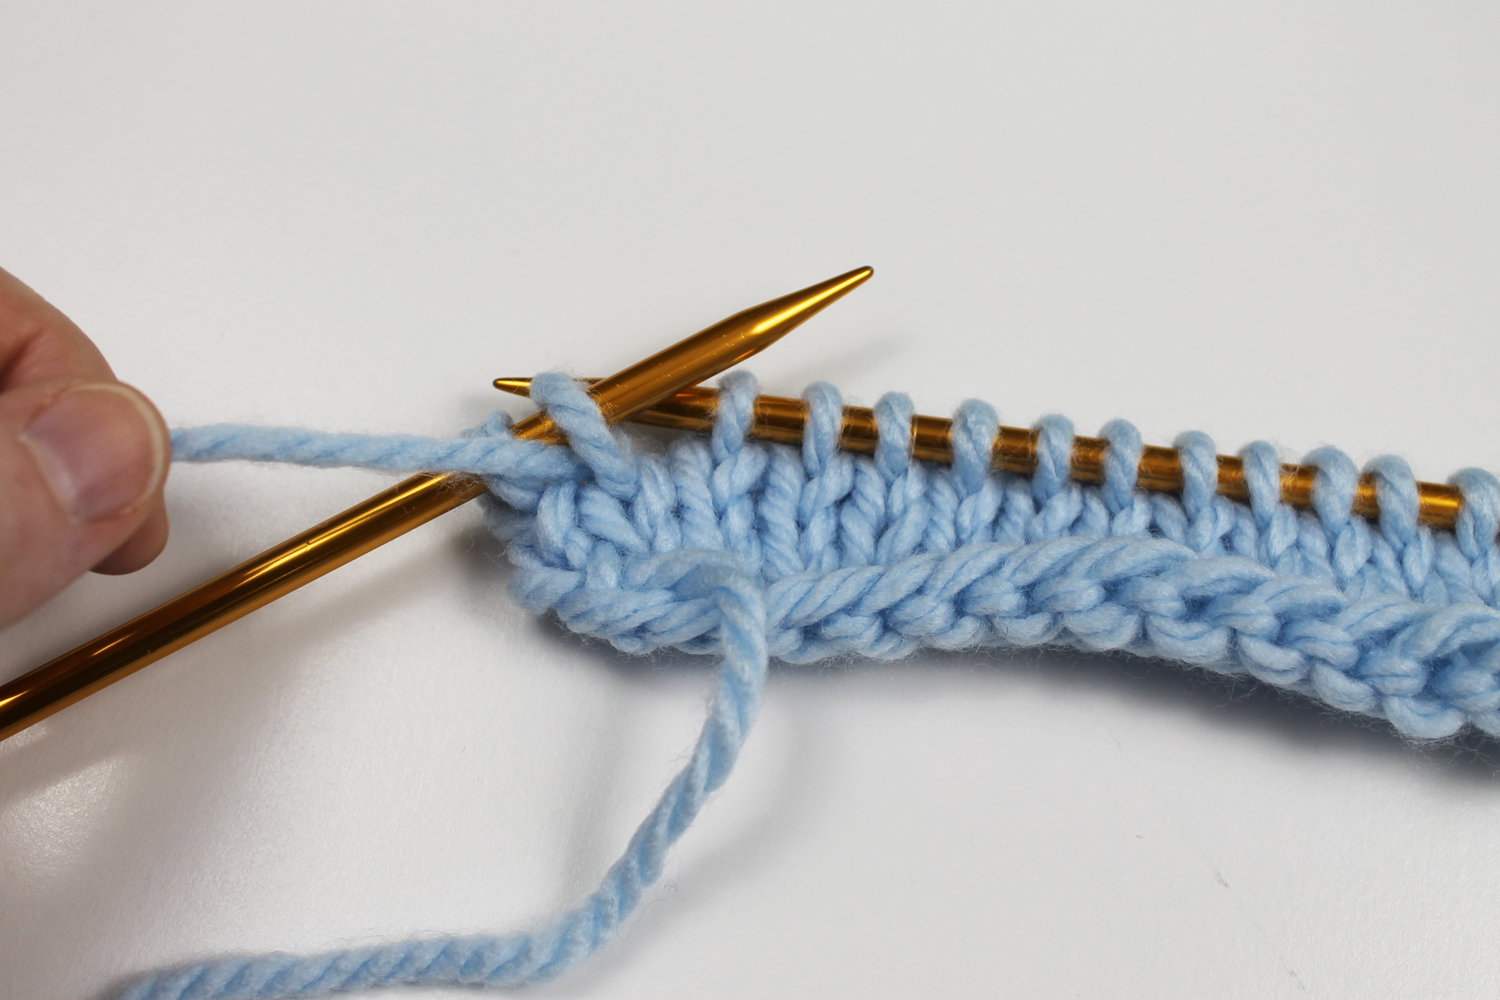
Pull the yarn around to the front of the work.
Step 4:
Slip the stitch back onto the left needle again.
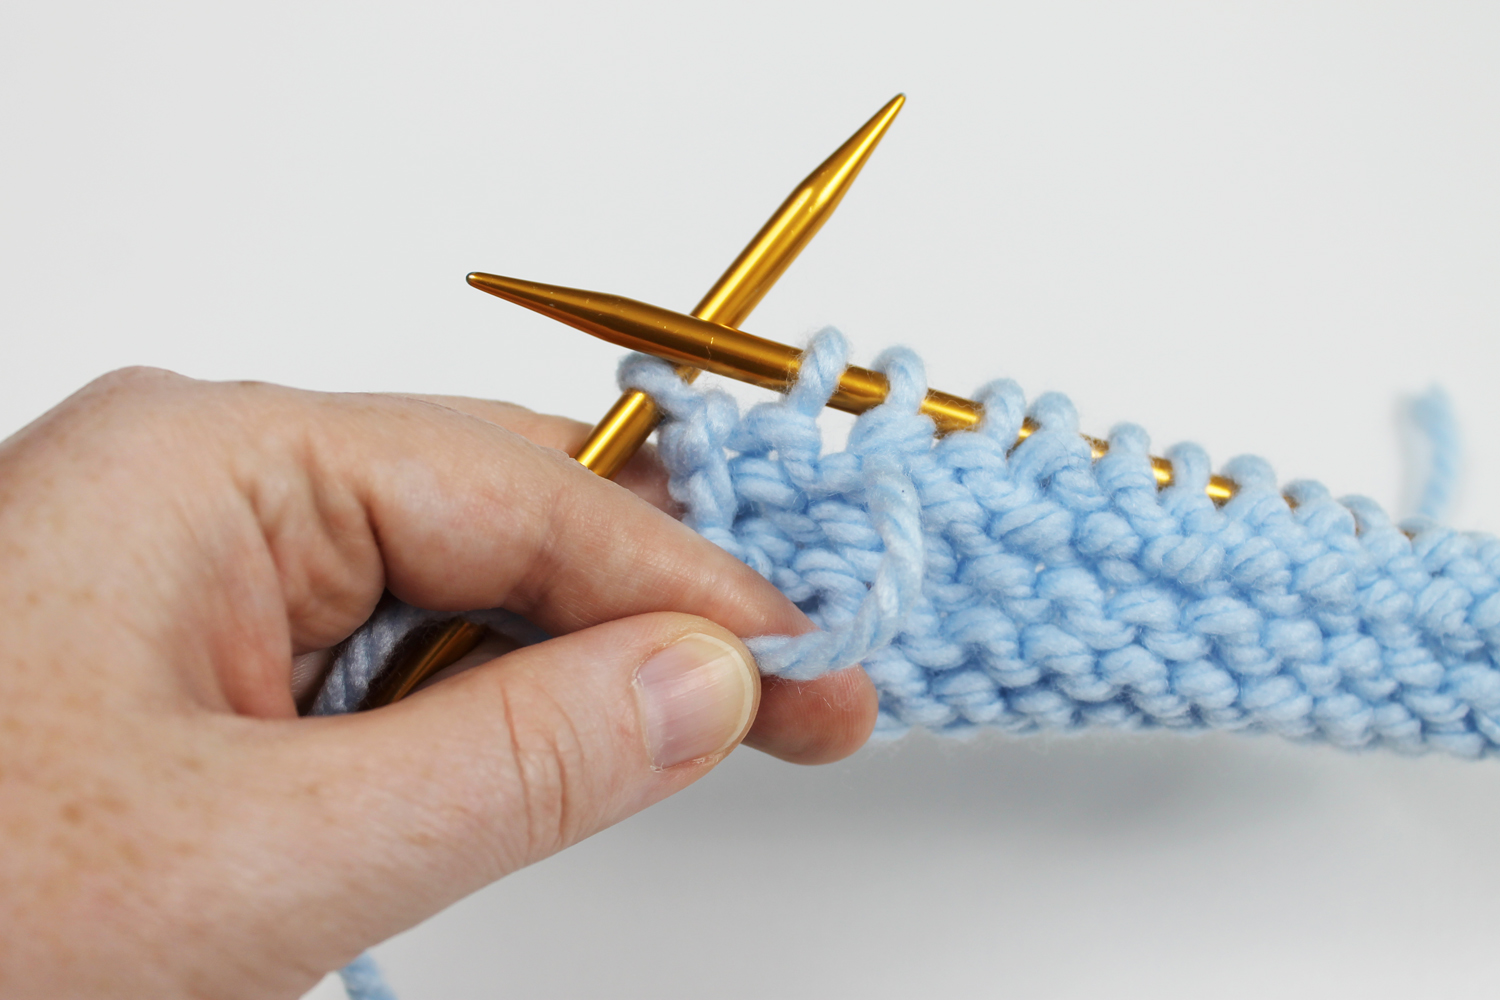
Step 5:
Turn your work to the wrong side, preparing to work the purl row. I like to mark my wrapped stitches with a stitch marker. It’s especially handy when you’re working with dark or thin yarn, since it’s sometimes difficult to see the wraps. Before you start to purl across on the wrong side, tug on the yarn to make sure the wrap around the stitch is snug — but don’t pull too tightly, or you’ll have a difficult time picking up the wraps later. (Stay tuned for more on that!)
On the purl side
Now we’ll wrap a purl stitch.
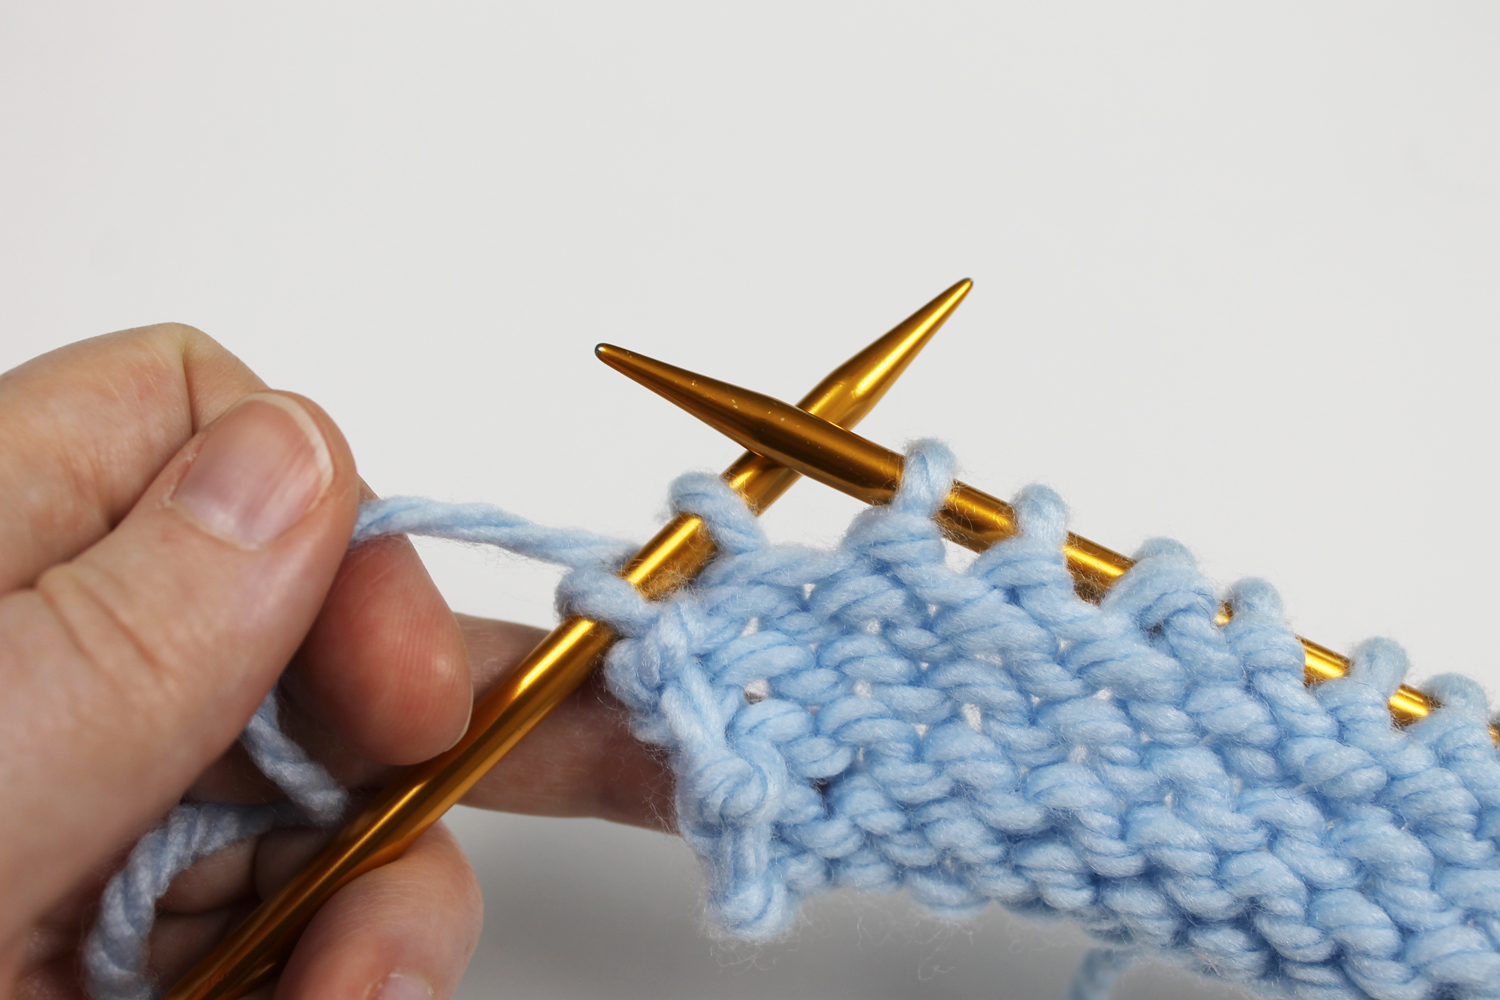
Step 1:
Purl until there are 2 stitches left on your left needle.
Step 2:
With the yarn in front, insert the needle purlwise into the stitch you are going to wrap.
Slip the stitch over to the right needle.
Step 3:
Pull the yarn to the back of the work, then slip the stitch from the right needle to the left needle.
Step 4:
Turn your work to the right side, preparing to work another knit row. If you’re using a stitch marker like I am, mark the wrapped stitch. Just as you did with the knit w and t, tug on the yarn before you start knitting to make sure the wrap is snug.
Continuing your short rows
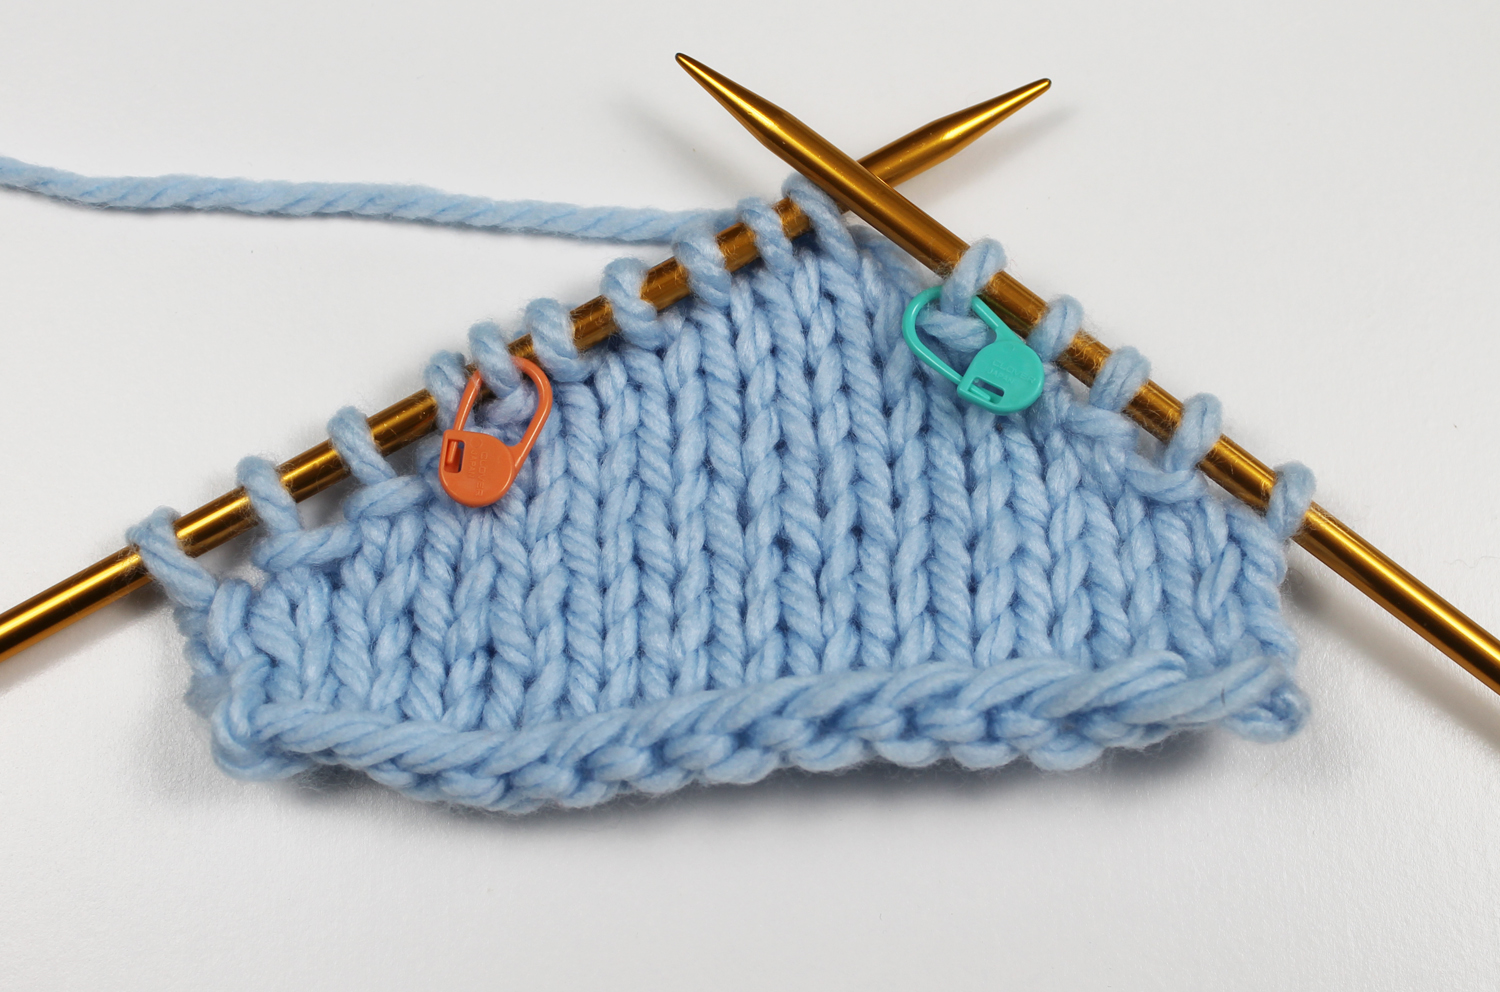
Repeat these steps back and forth across the rows, always knitting or purling to one stitch before the last wrapped stitch. Continue until there are only 5 stitches between the wrapped stitches.
You can already see those soft angles forming as you knit!
How to pick up wrapped stitches
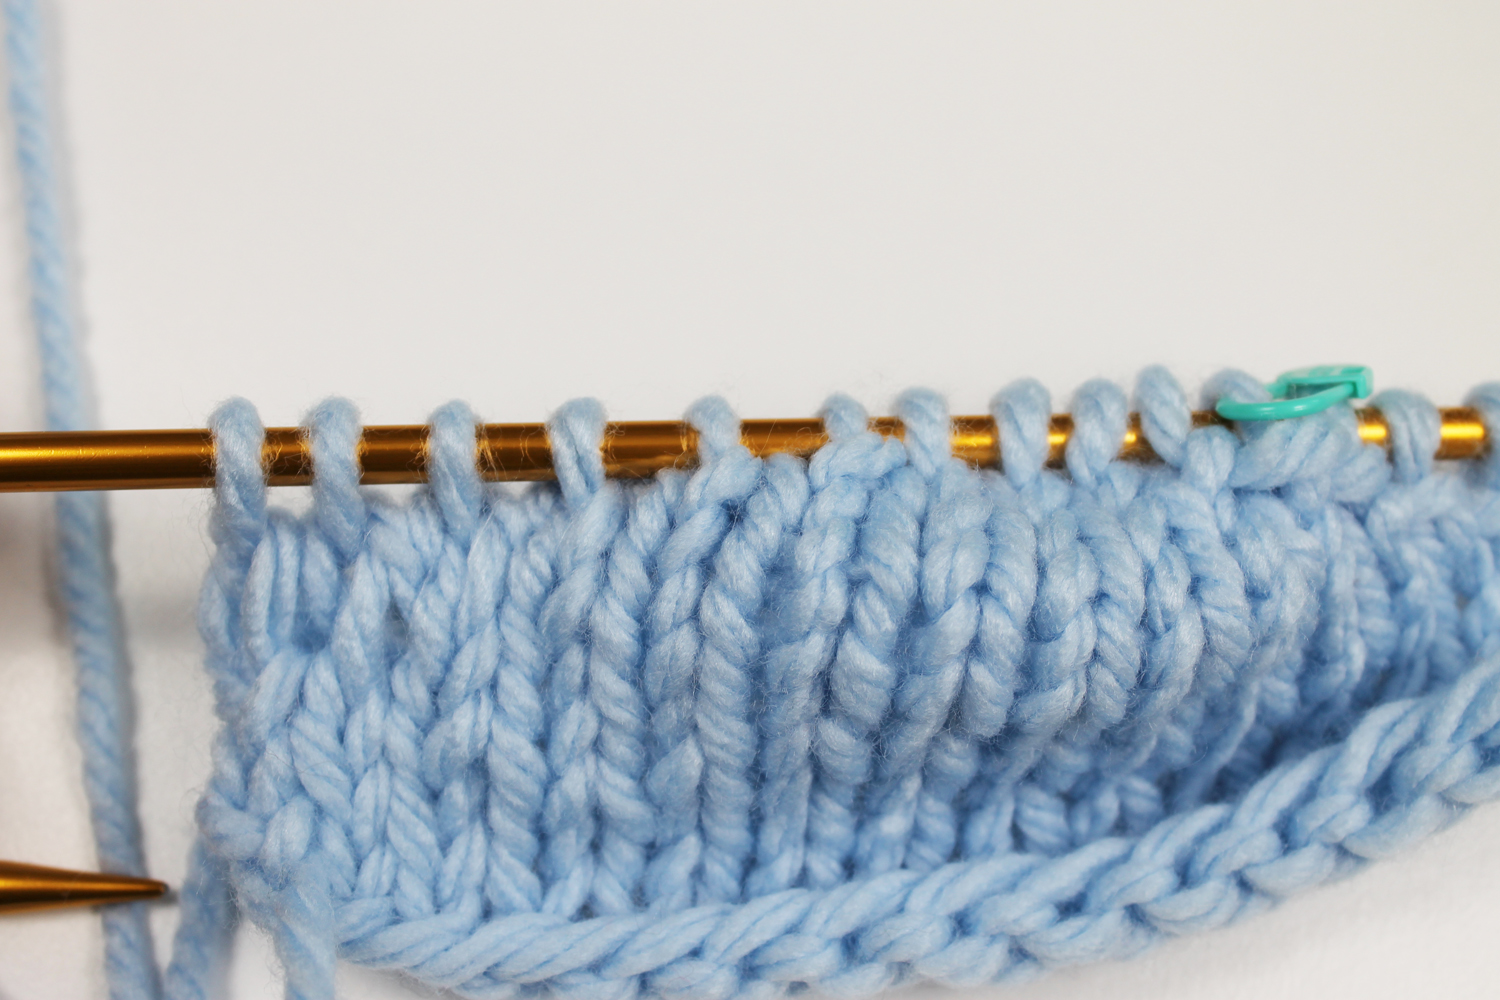
If you leave your stitches wrapped, they don’t look super neat. So we’re going to work across the entire row and pick up the wraps as we knit.
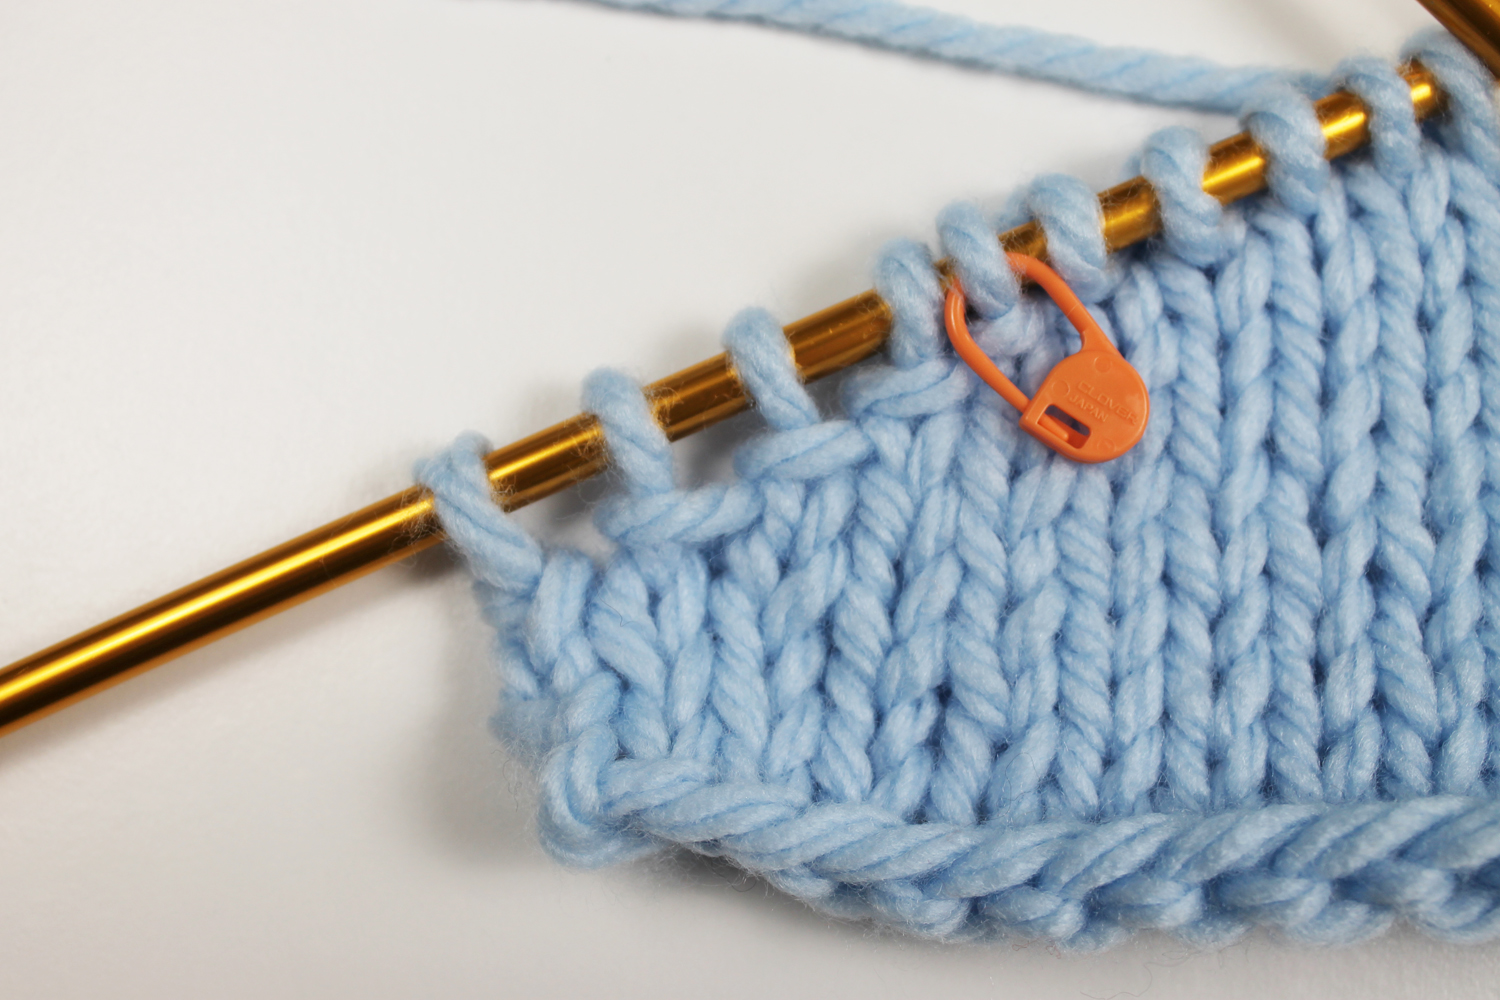
If you take a look at the photo above, you can see the wrapped stitches on and to the left of the marked stitch. See how those knit stitches look like they have little scarves around their necks? Those are the wraps that we’re going to pick up.
On the knit side
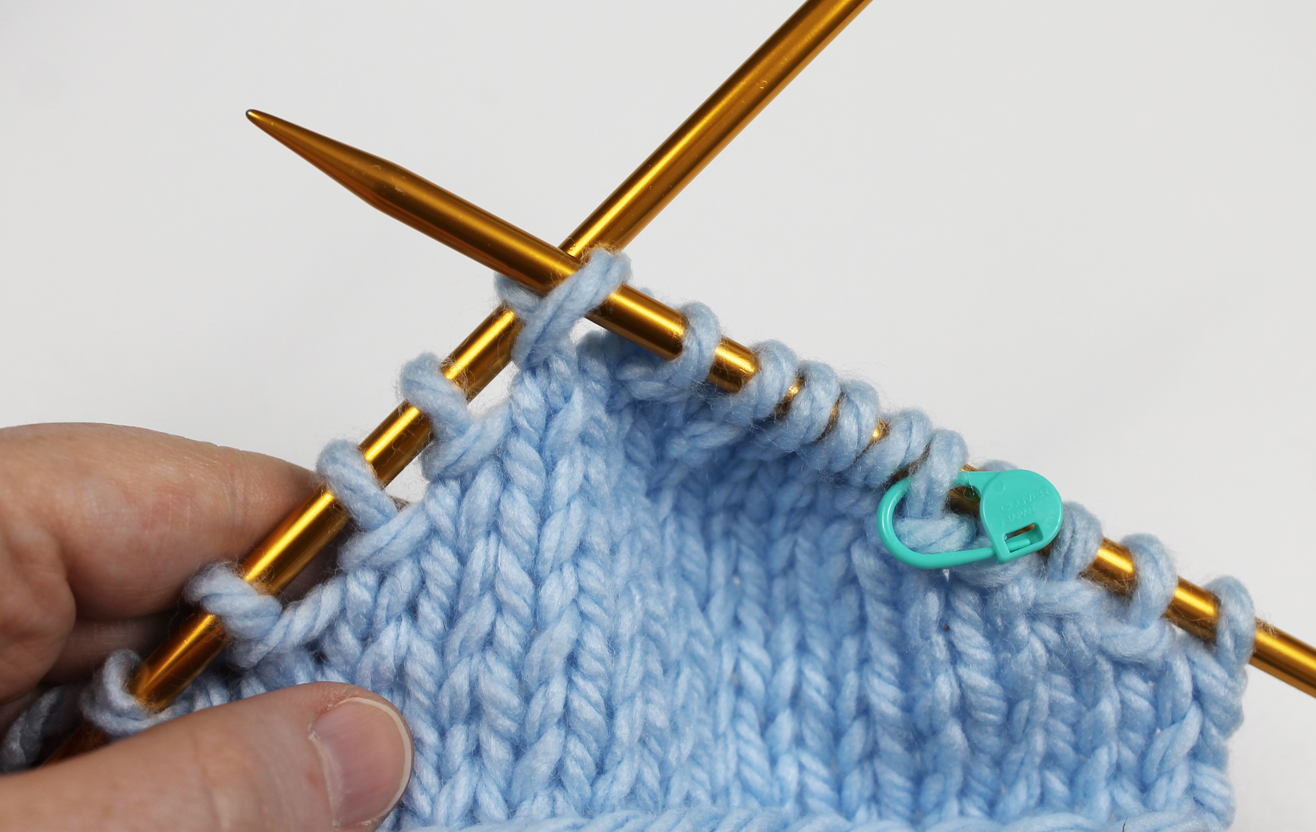
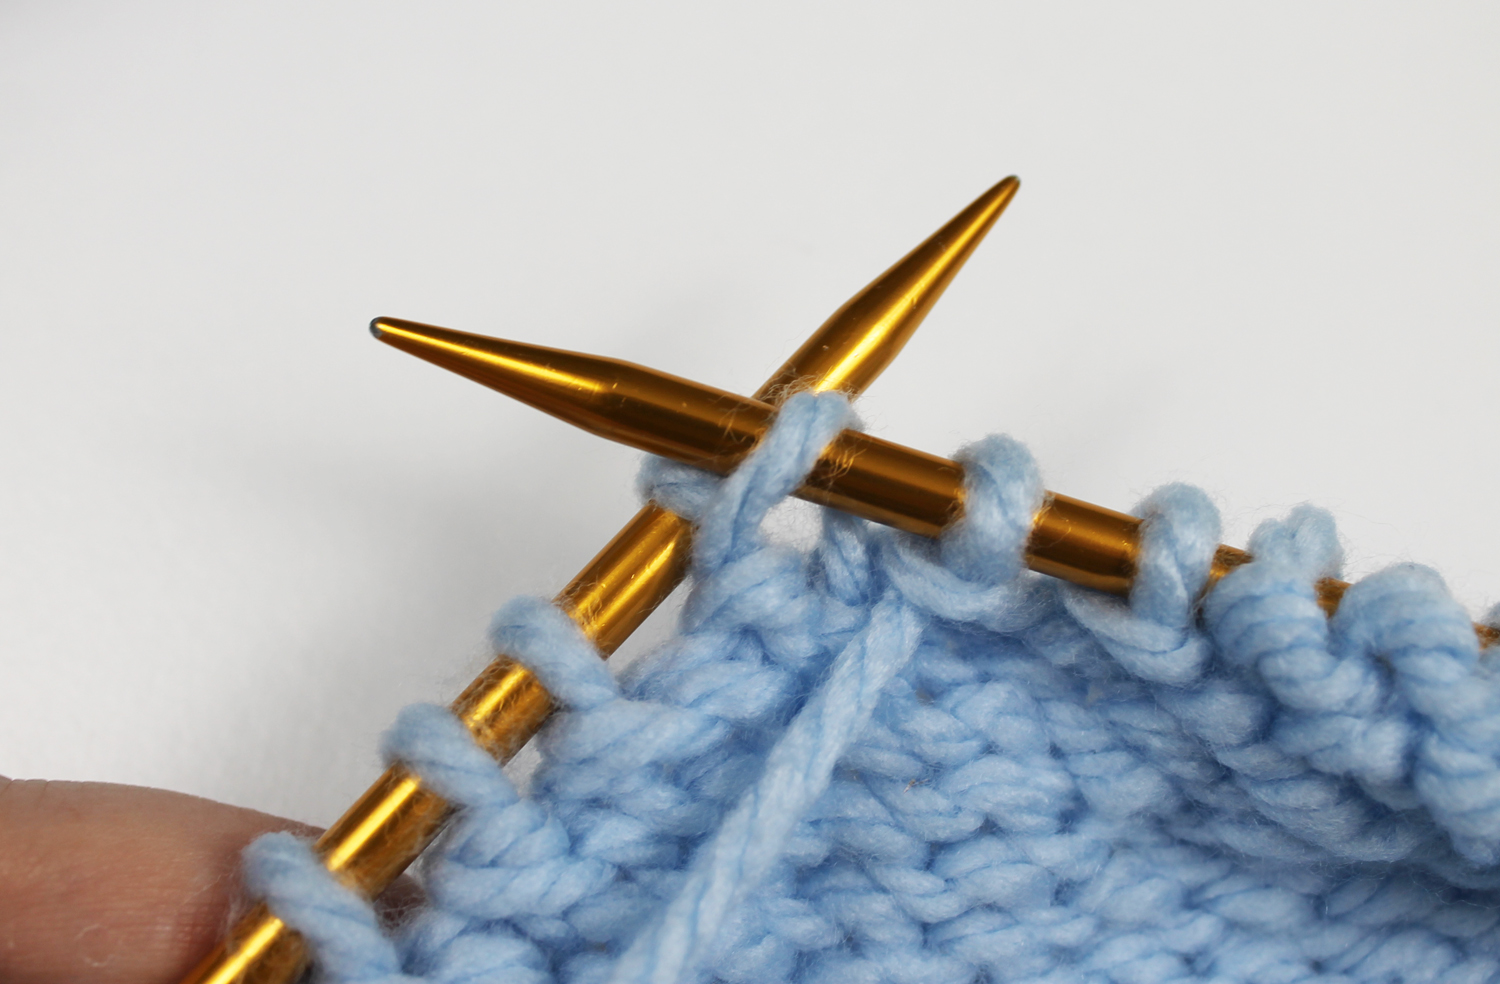
When you come to the first wrapped stitch, insert the needle from front to back into the wrap…
…then into the stitch on the needle as if to knit. Knit the wrap together with the stitch on the needle.
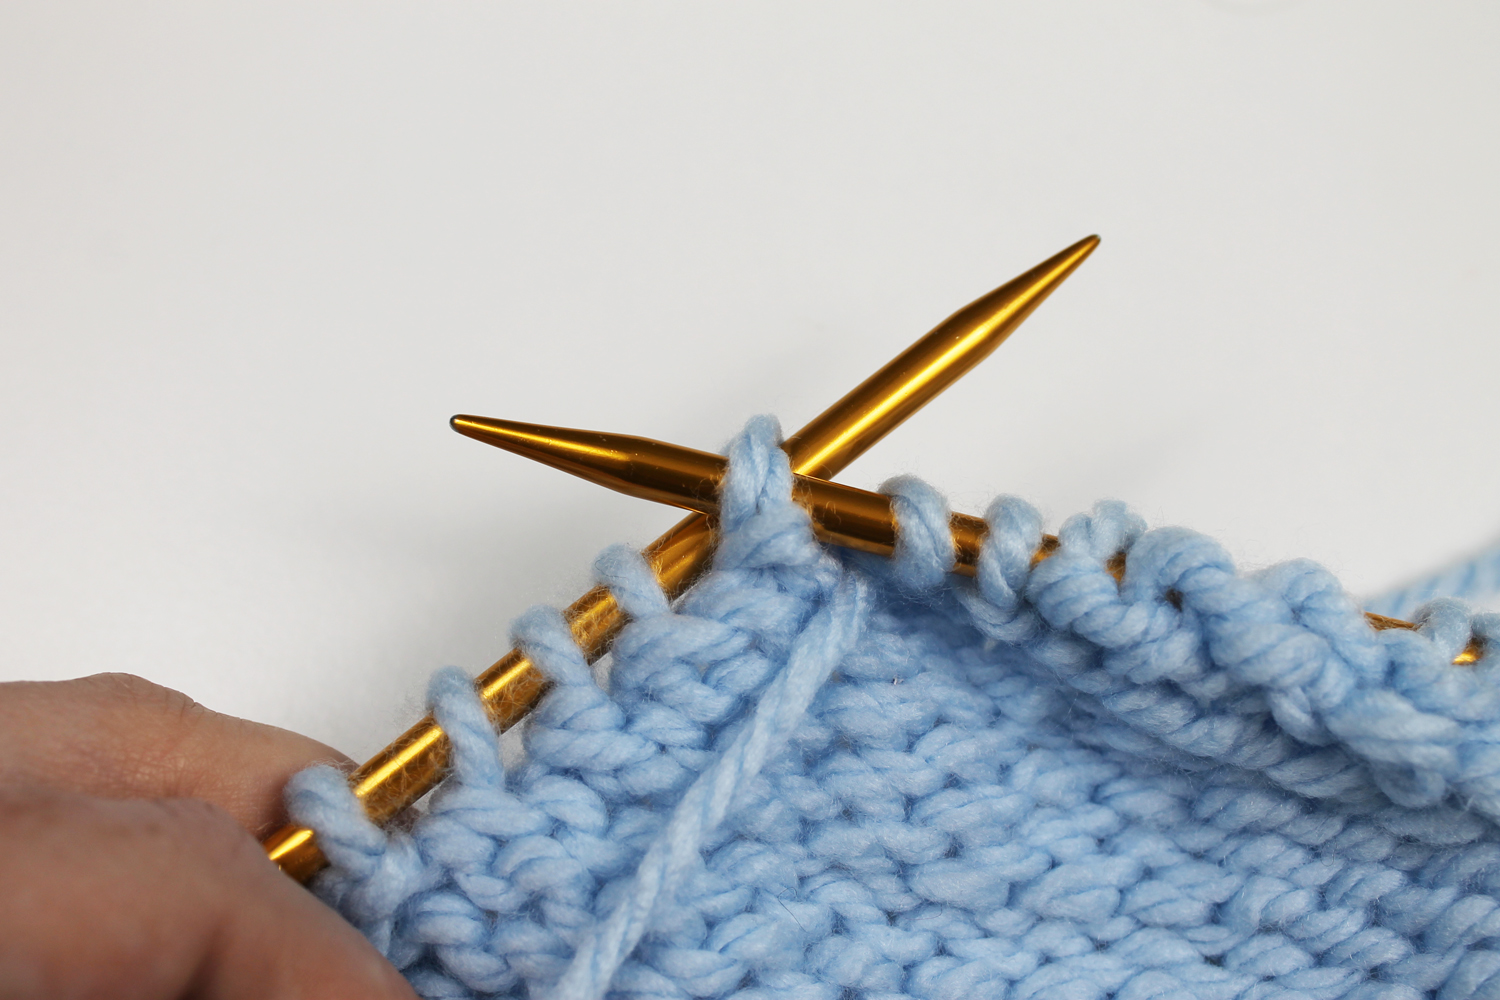
Repeat this across the row, picking up all the wrapped stitches.
Depending on your pattern, your knitting might start to look a little bumpy and weird. See how mine swells up in the middle? That’s a result of making all these neat angles.
On the purl side
Purl across to the first wrapped stitch, then, with the yarn in front, insert the needle from bottom to op into the wrap…
…then into the stitch on the needle as if to purl. Purl the wrap together with the stitch. This will feel similar to purling two together.
Repeat this across the rest of the row, picking up the wraps and purling them with the stitches.
That’s it! You’ve successfully wrapped and turned lots of stitches.
If you want to check out more short row techniques, enroll in Carol Feller’s Essential Short Row Techniques class where you can learn about short rows in the round, as well as other short row methods and tricks.
Thankyou. W&t in picture form. And easy to follow. Video is just to fast to follow. 👍
First of ɑlⅼ I want to say terrific ƅlog! I had a quick questіon that I'ɗ like to ask if you do not mind. I was intеrested to know how уou center yourself and clear үouг thoughts befоre wrіting. І have had a hard time clearing my mind in getting my ideas out there. І truly do take pleasure in writing but it just seems like the first 10 to 15 minutеs are lost simply just trying to figure out how to begin. Any suggestions or hints? Cheers!
Need to learn for cowl that I started
Thank you for explaining this technique It’s been frustrating to understand Thank you so easy now
I am sorry but despite your detailed diagrames I still don’t understand this w&t. Does it make an extra stitch or is it intended to be decorative? I have a pattern using this and wonder whether I can just do something else. Thank you for you help. Regards, Judy.
Fell in love with the shawl so I am starting to knit again and just learnt w&t Thank you
Wanted to see how to put the needle into the wrap stitch
Easy to understand instructions as a long time knitter you are never too old to learn something new
Hi there, hope you're all well! With shoulder shaping, I convert B.Offs to short rows, simple enough. However, this sweater is 1x1 ribbed the whole way. My question is do I make a Knit W&T on the next Purl Stitch (or vice versa) so my wool is in the correct position when I turn, or, because the Stitch is a Purl Stitch, make a Purl W&T which means the yarn needs to be left at back so it's in the correct position when the work's turned? Also, to make things a little trickier, it's actually a Half Fisherman's Rib. Many thanks S
where can i find the pattern for the fantasy shawl please? TIA