
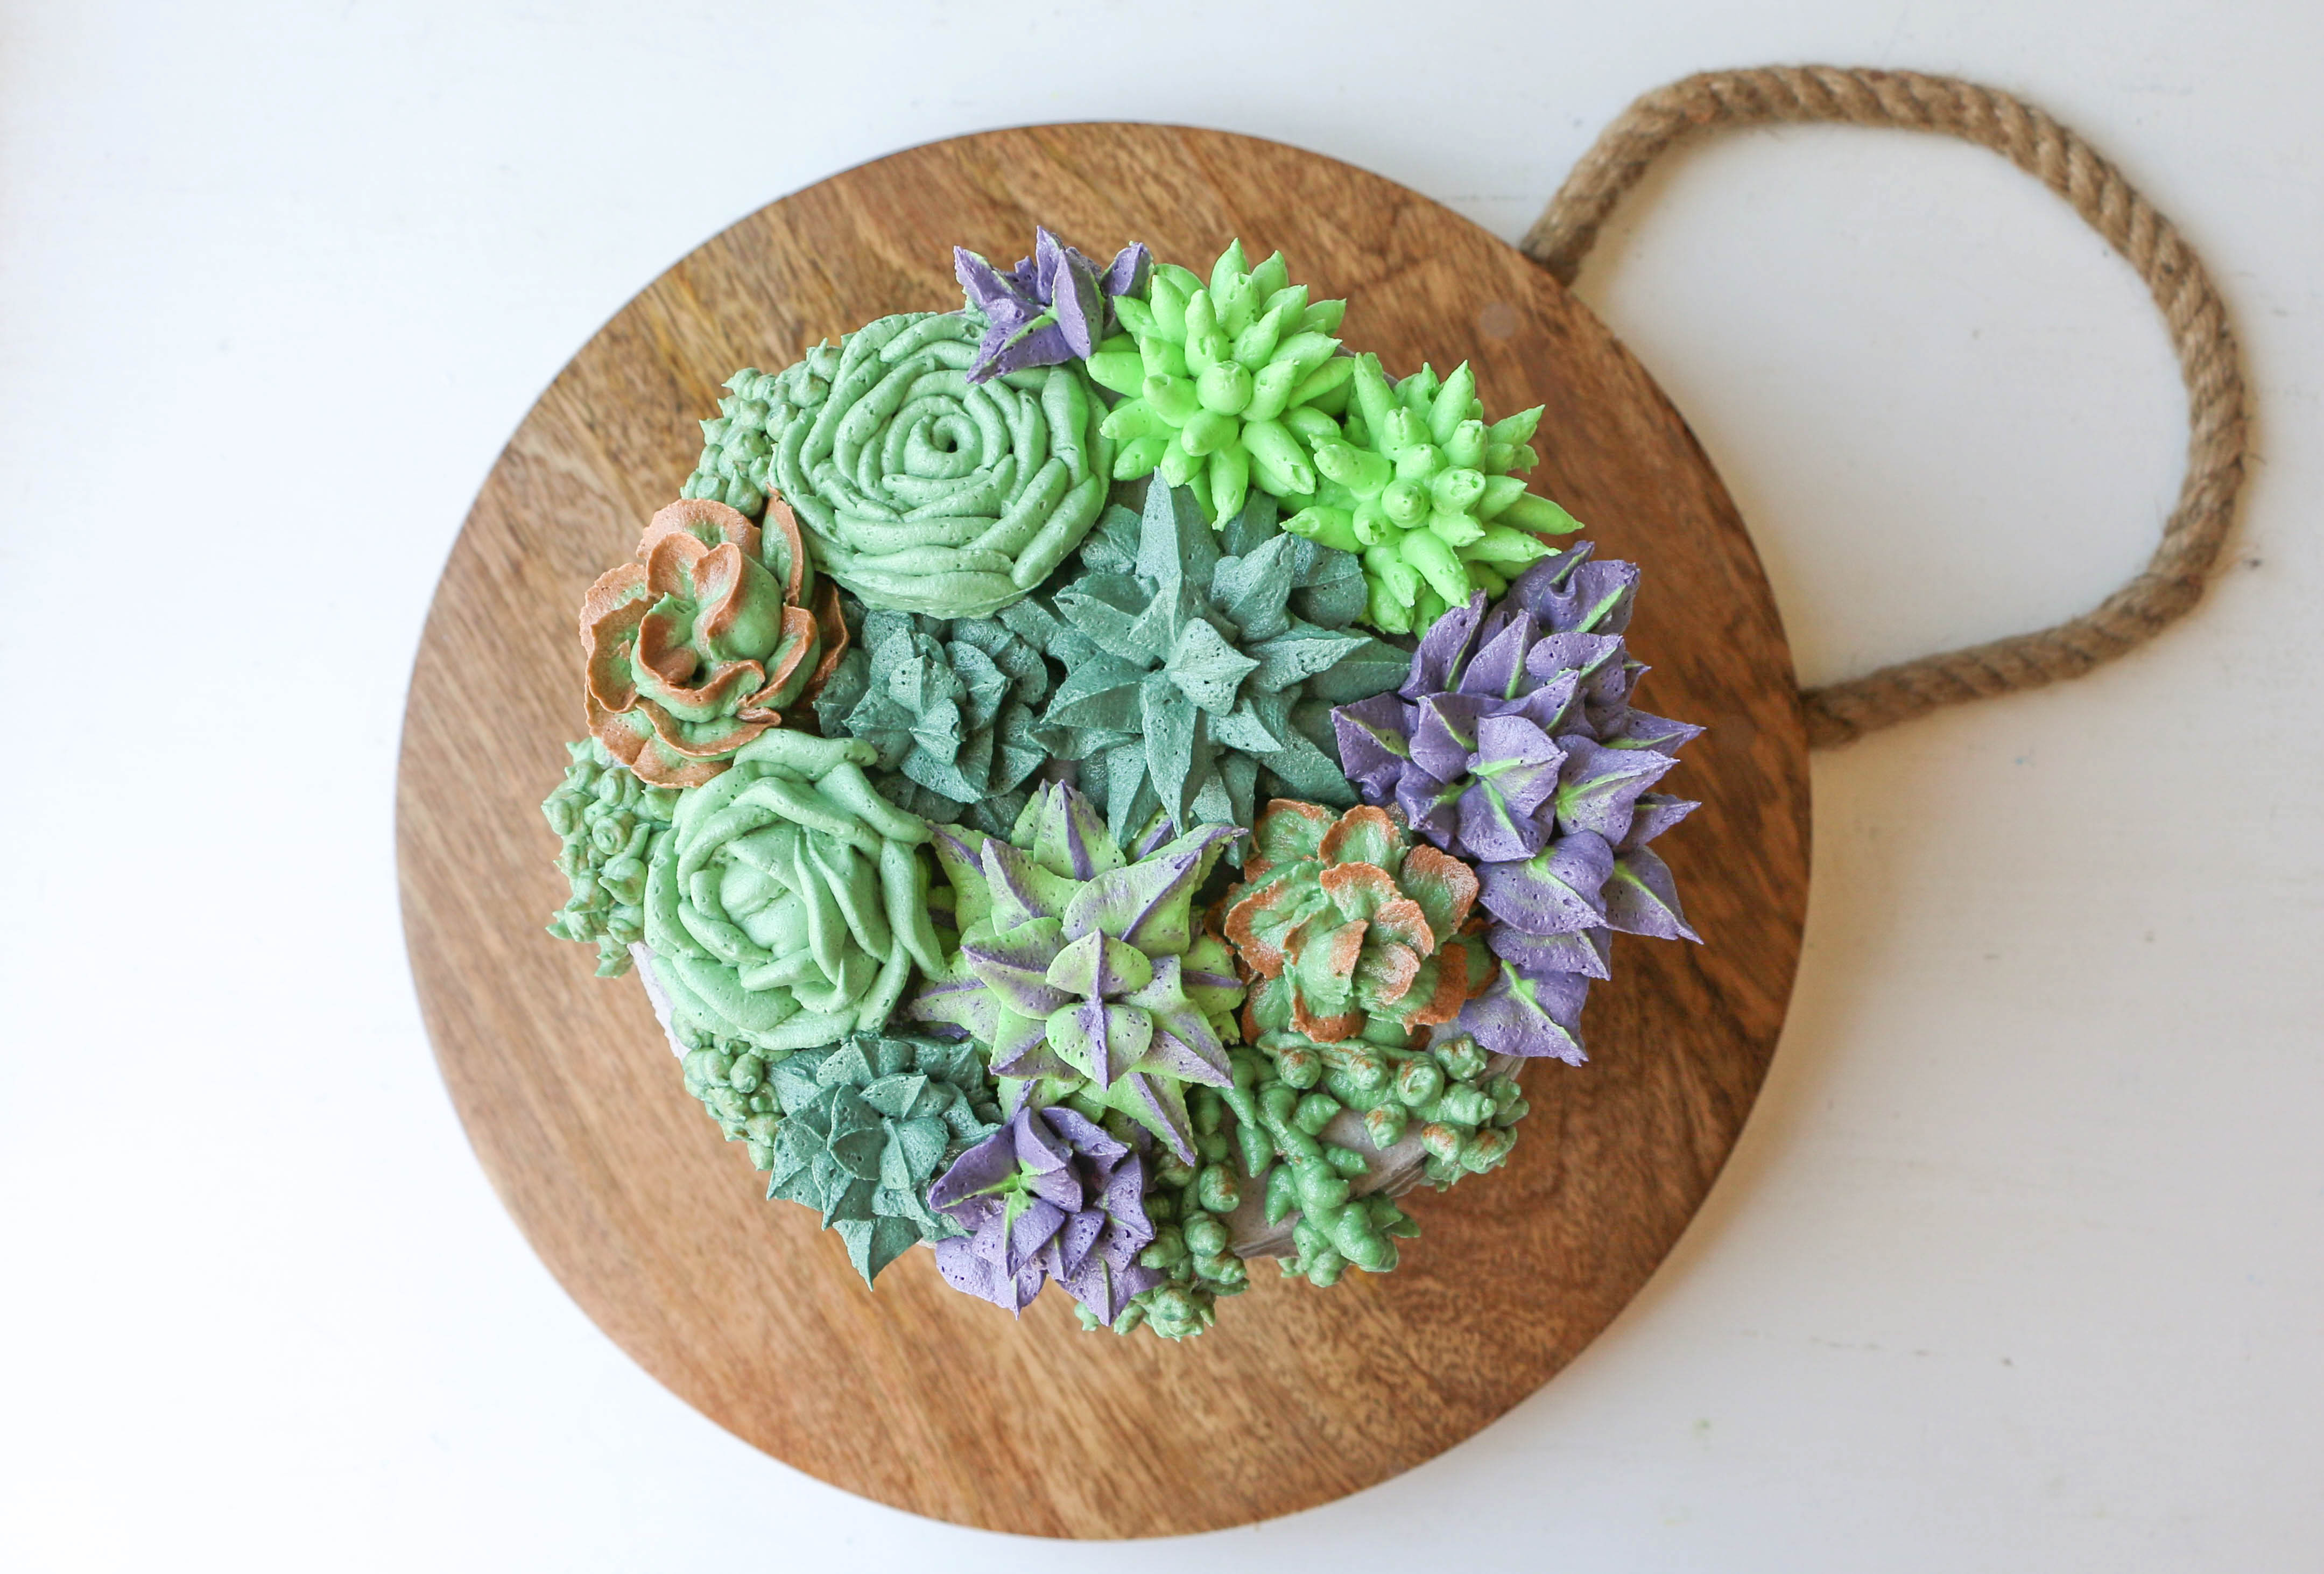
Succulent plants are fascinating to look at, in a desert or on a dessert. Seriously, just check out the piped-buttercream design above. The shapes! The colors!
There are so many reasons to pipe one of these edible terrariums. For one thing, buttercream succulents require far less precision than buttercream flowers, so they’re a good learner’s project. Plus these designs are more unisex than floral ones. Isn’t there a man in your life who deserves one of these wonderful cakes?
Buttercream Succulent Cake
Level: Intermediate
What You Need
Instructions
1. Frost the Cake
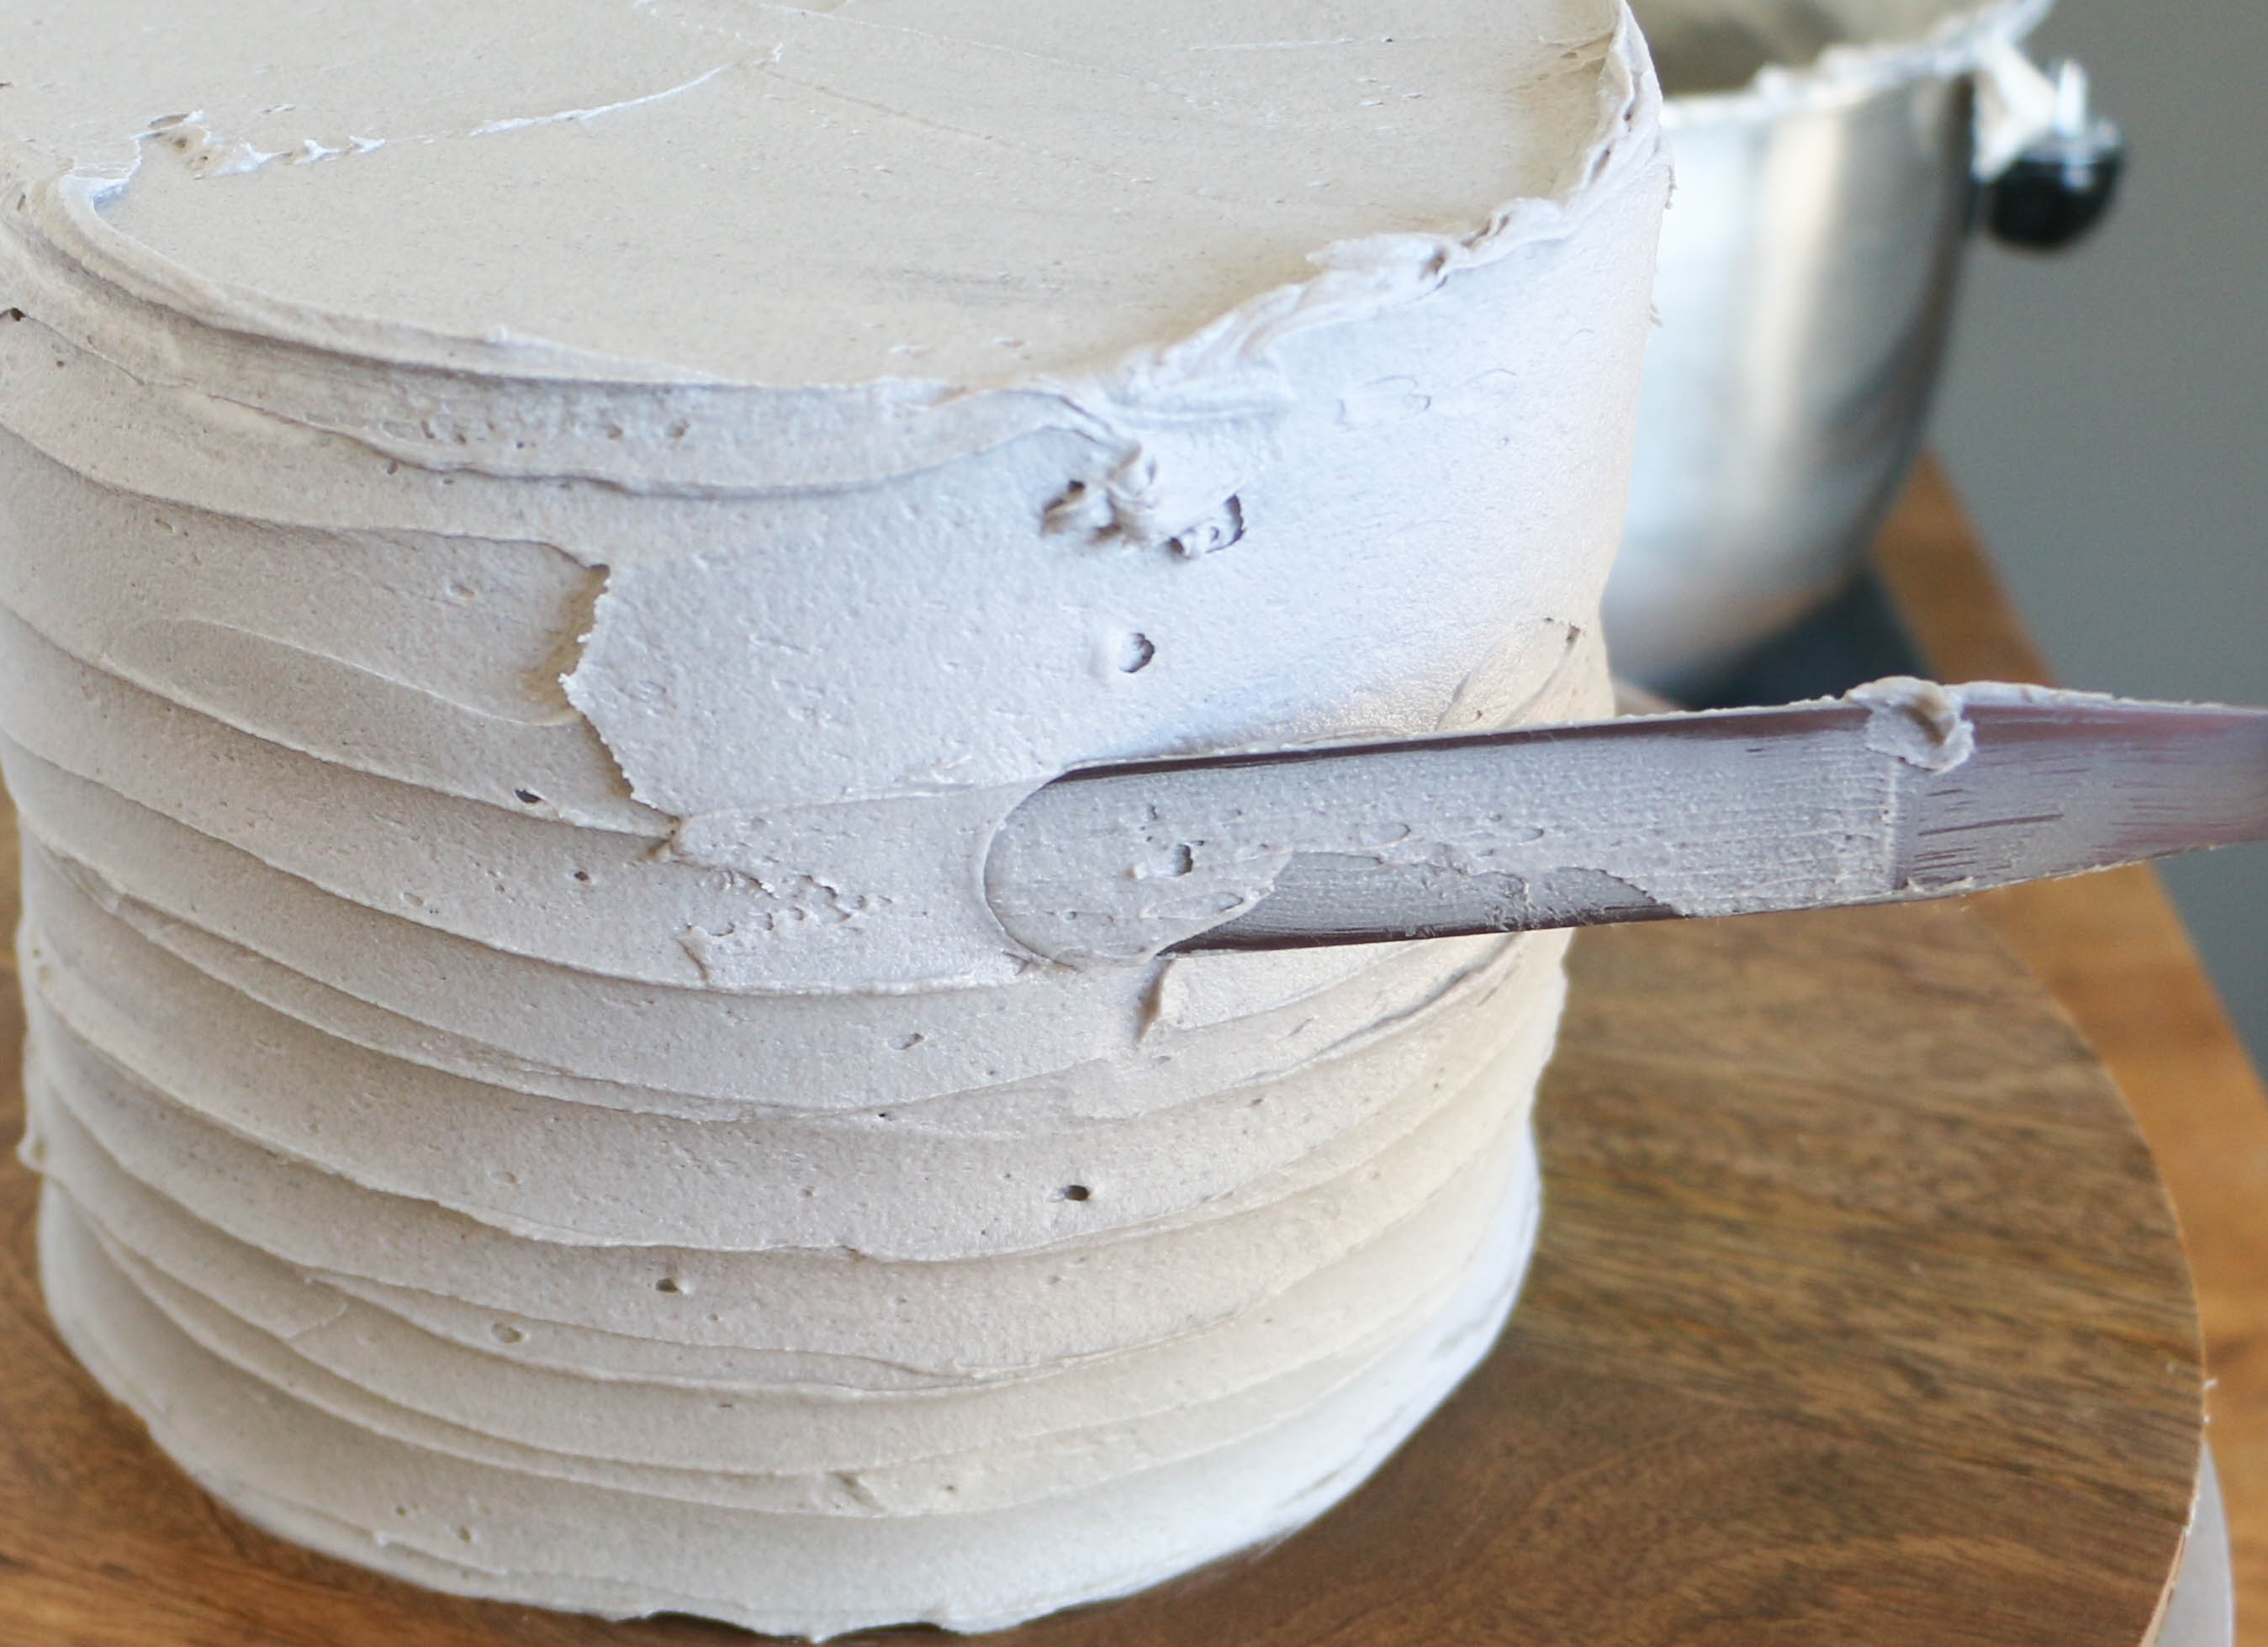
Tint enough gray buttercream to frost the whole cake. It’s OK if you end up with extra, because you can use it as a base for your succulent colors.
Frost your crumb-coated cake. Drag a small icing spatula around the sides to create the textured lines. Set the cake aside at room temperature.
2. Prep Your Succulent Colors
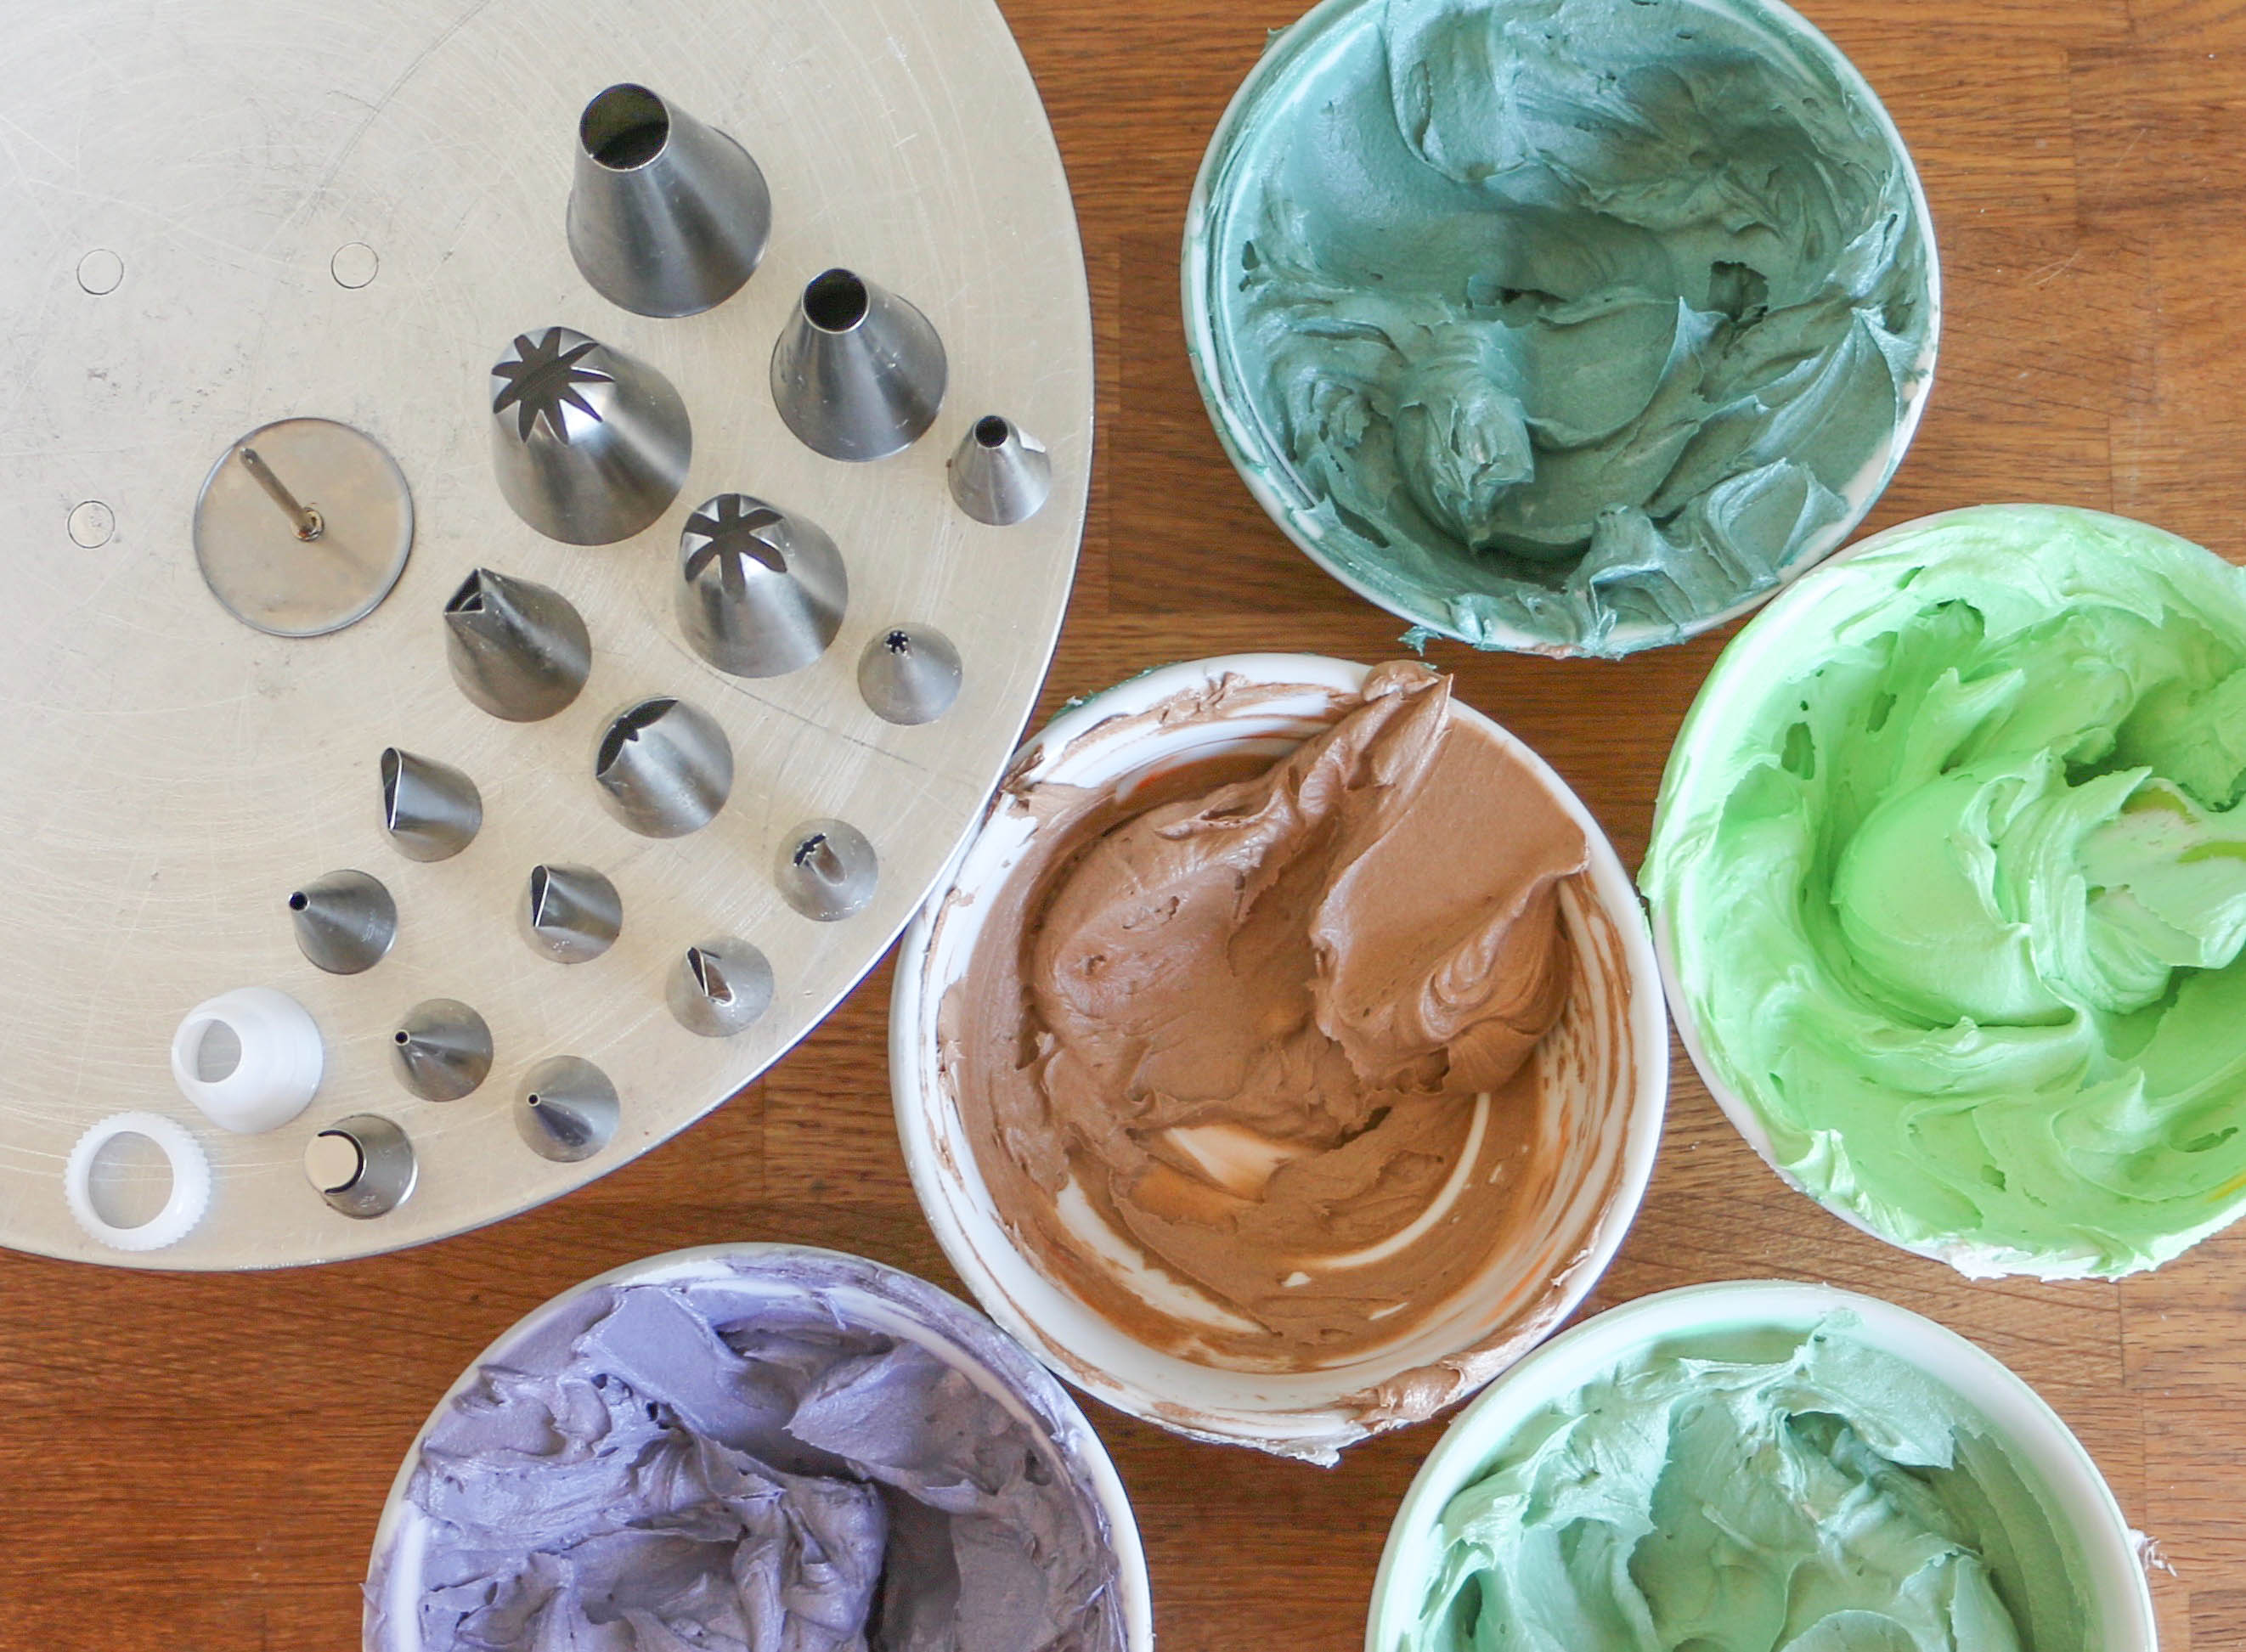
Tint small amounts of buttercream in various succulent shades — gray, blue, green, purple, rust. Succulents come in so many different varieties, you can pretty much use whatever color you like! Here is a general breakdown of the color combos we used:
Cut the tips off your piping bags (we used four bags) and fit them with couplers. Fill the bags with the different shades of buttercream as you go.
3. Get Your Other Piping Materials Ready
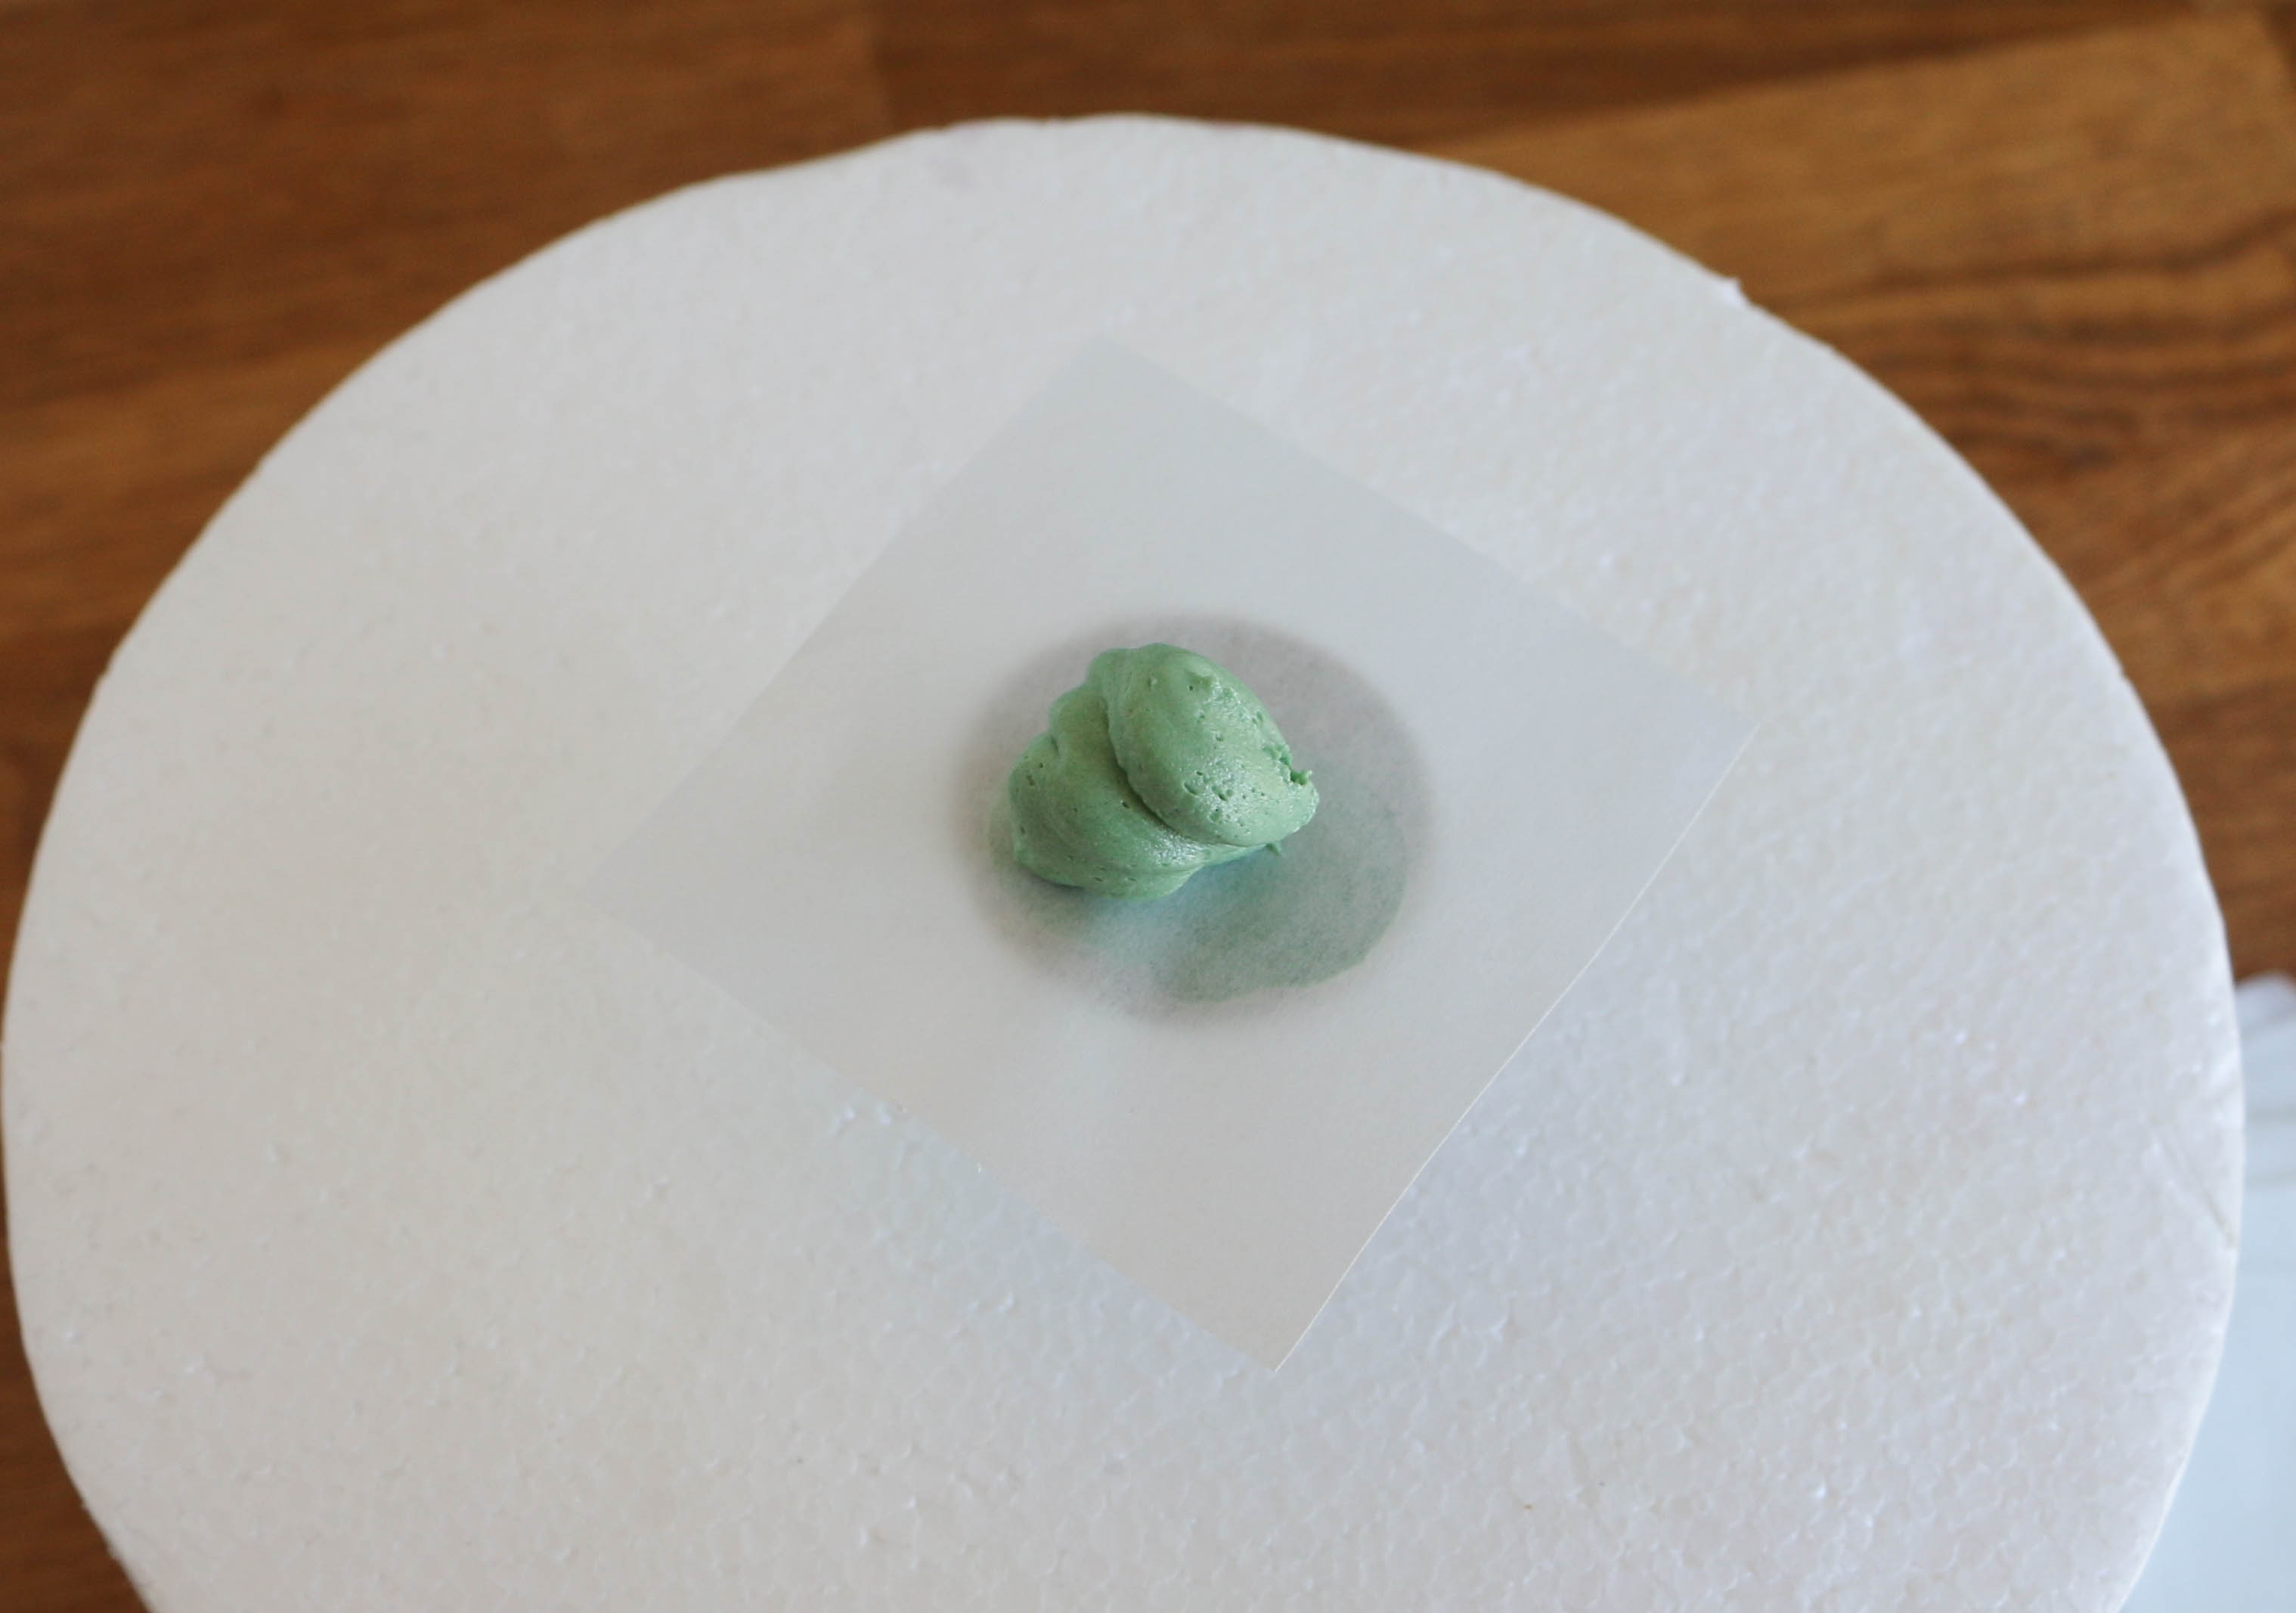
Prepare the flower nail before piping any of your succulents. Using a dab of buttercream, stick one of the parchment squares to the surface of the nail. Turn the nail upside down and press it against your tabletop to flatten the paper.
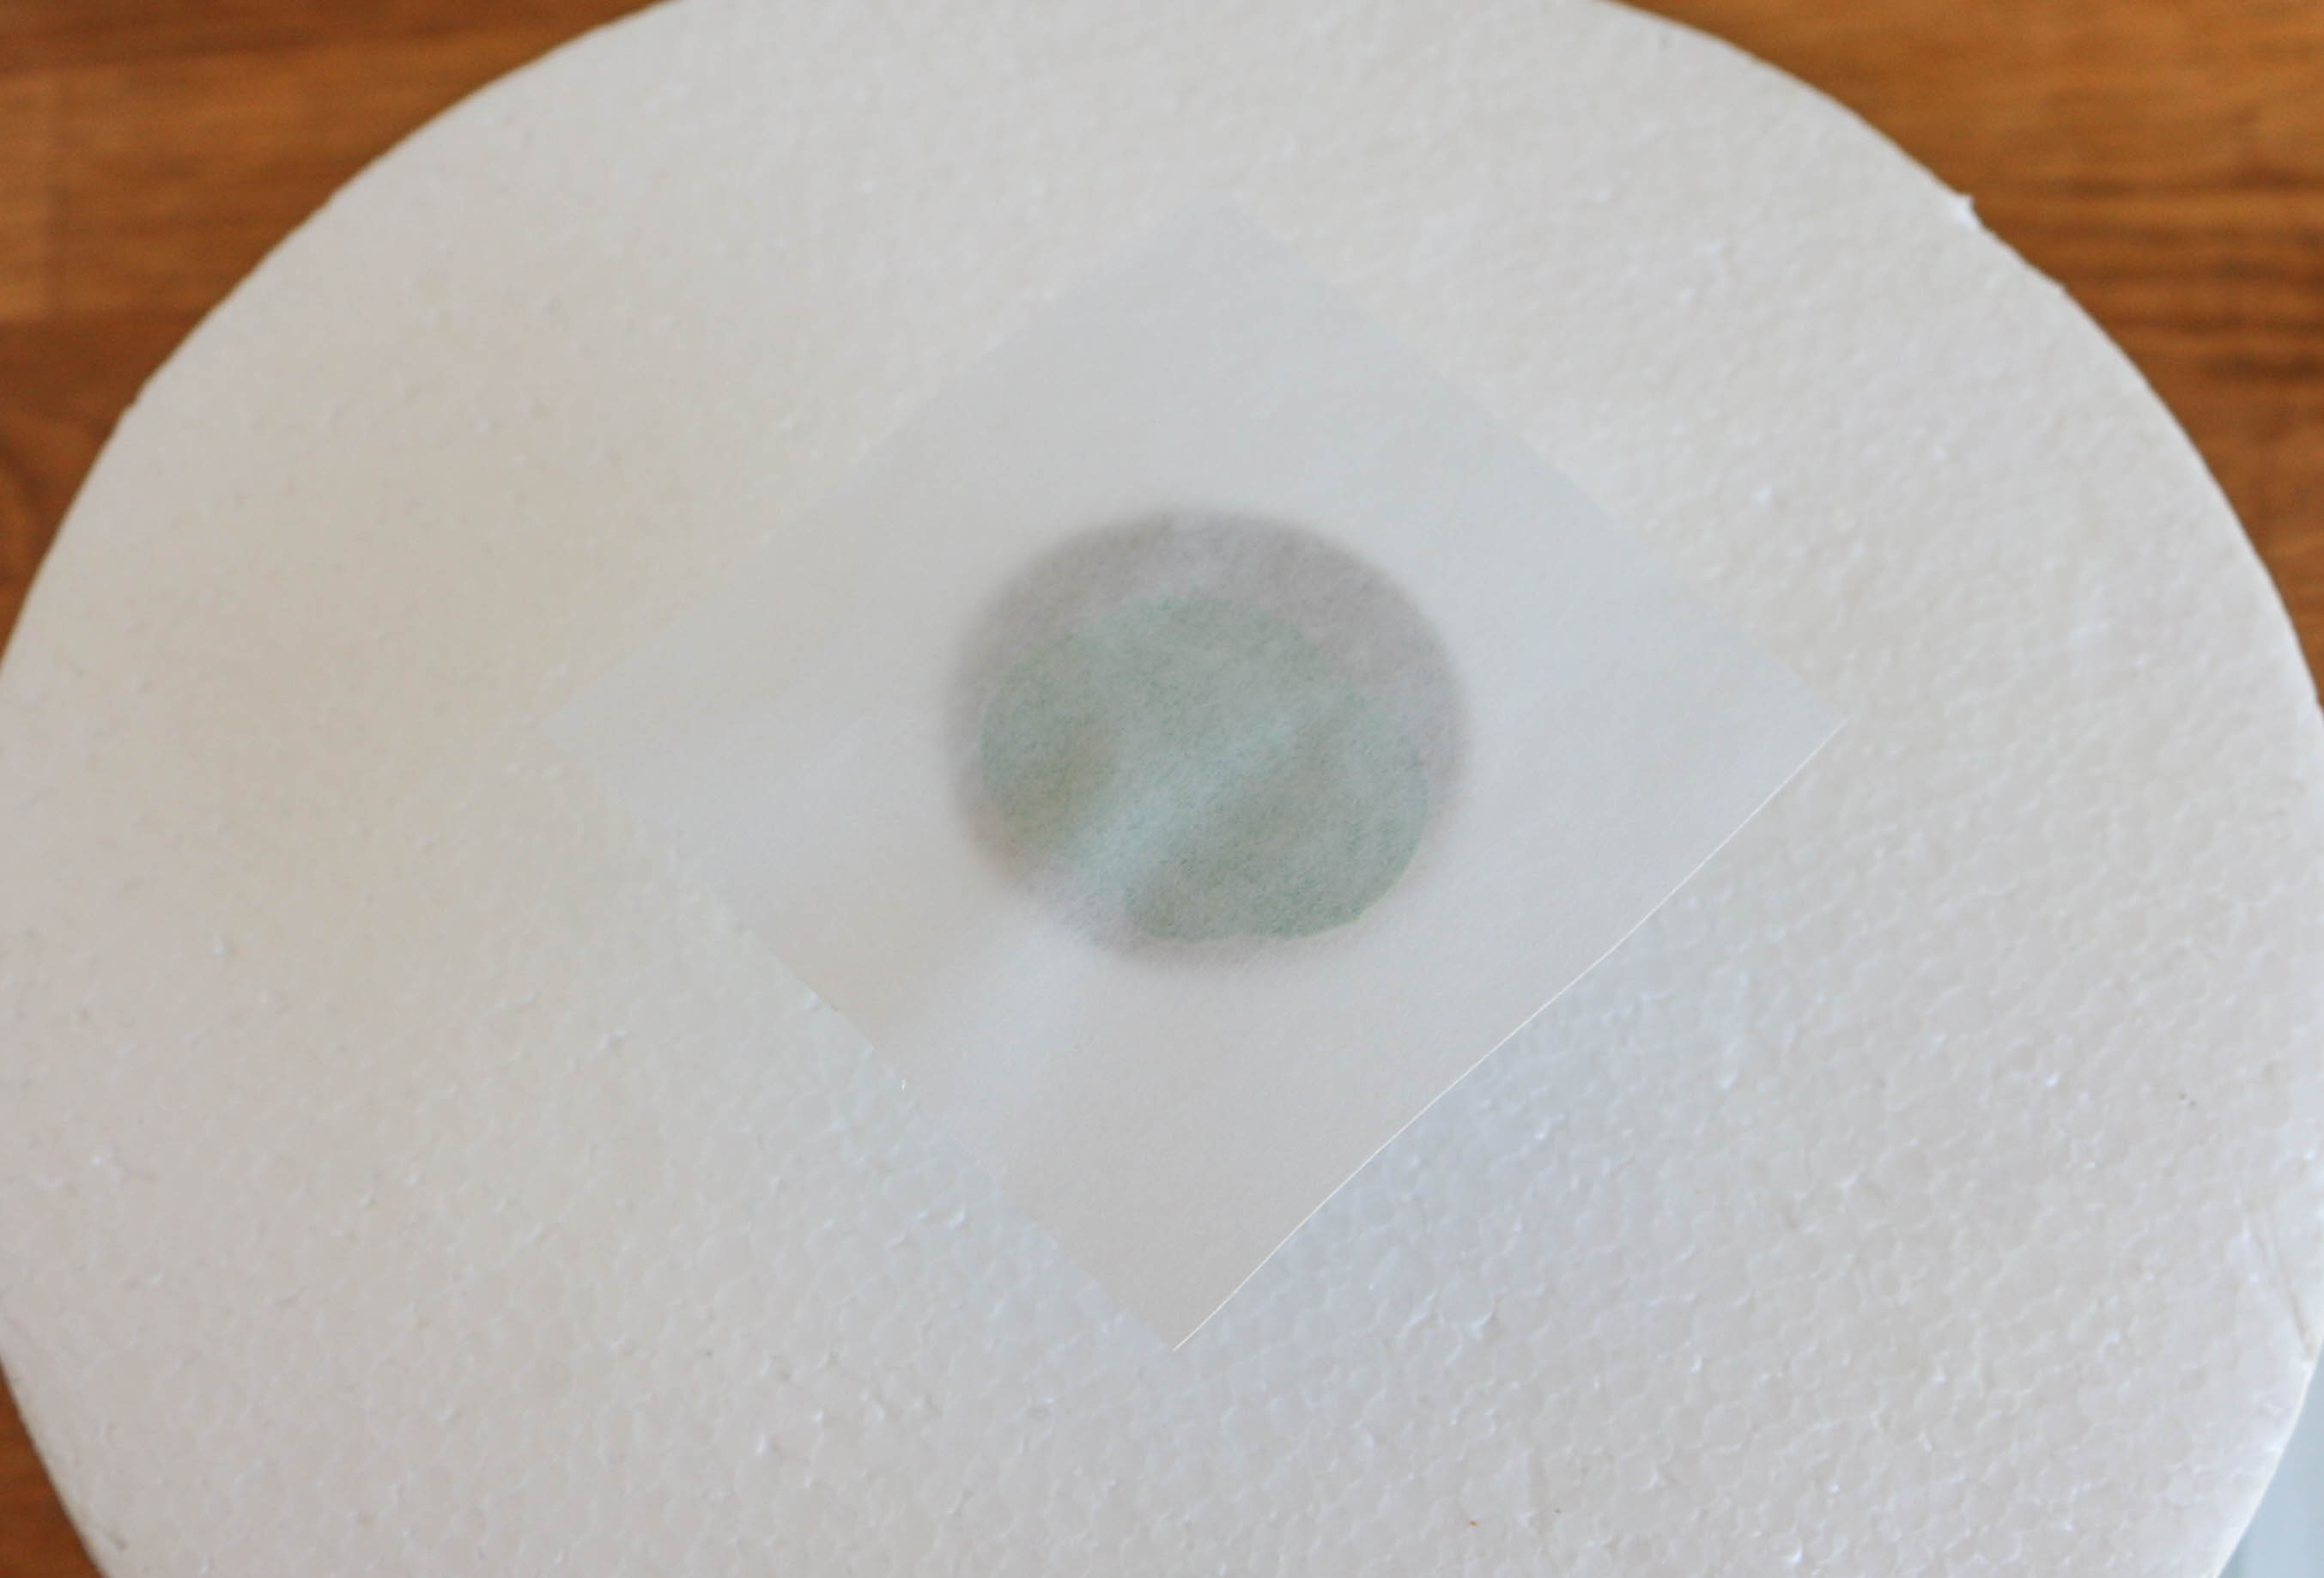
Repeat this process before you pipe each succulent. Adding a parchment square lets you safely move each finished succulent to a cookie sheet to firm up.
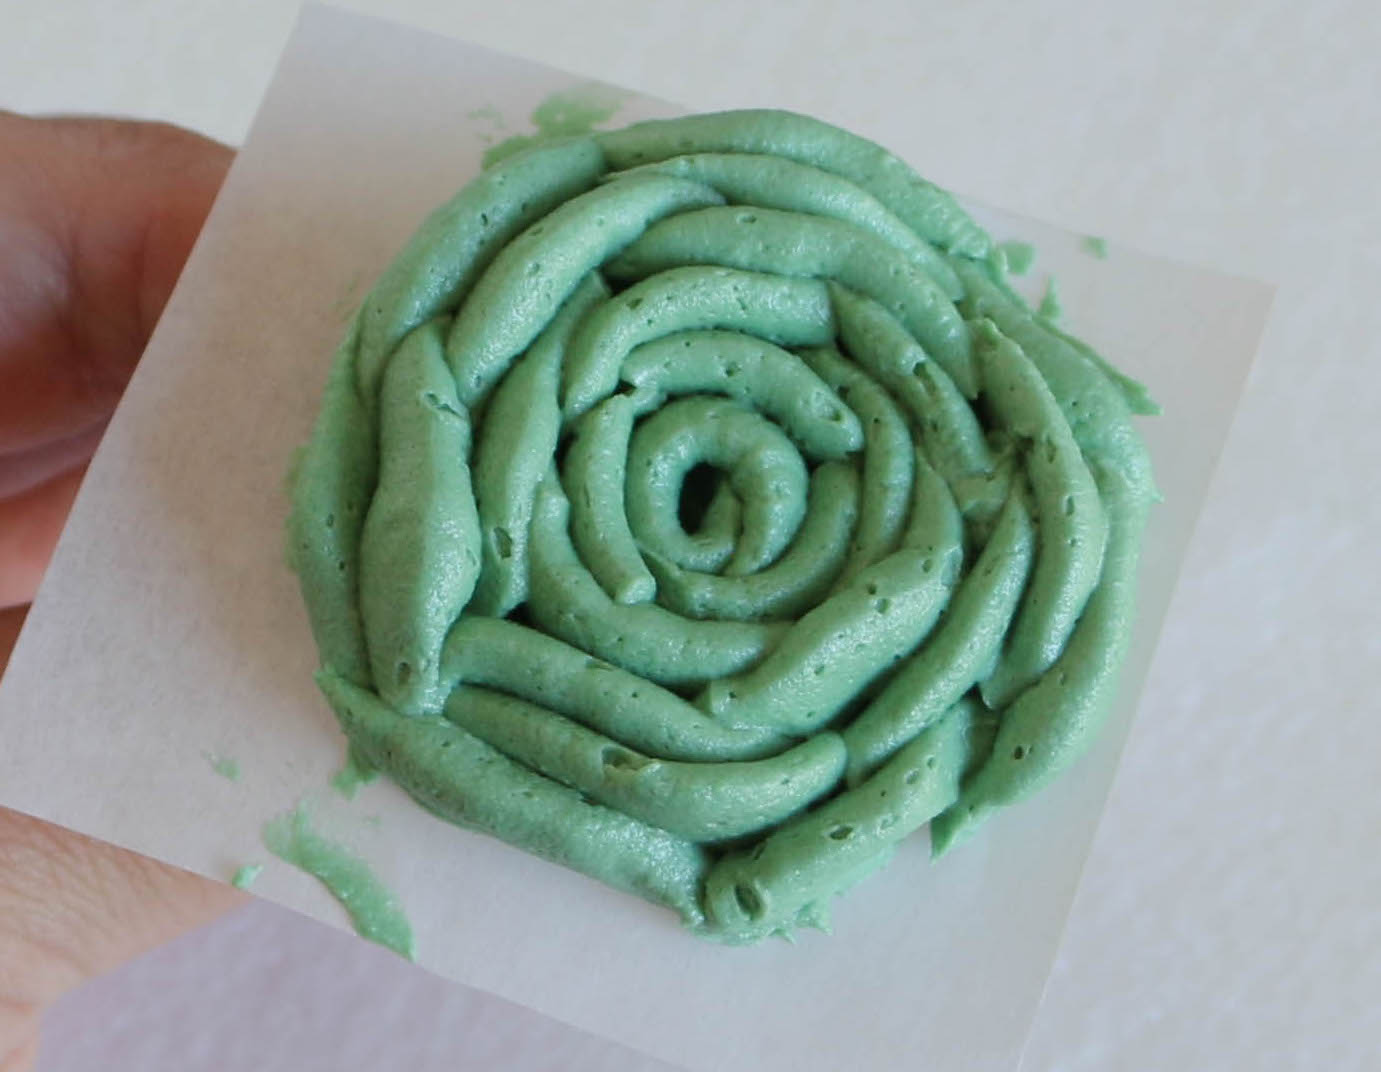
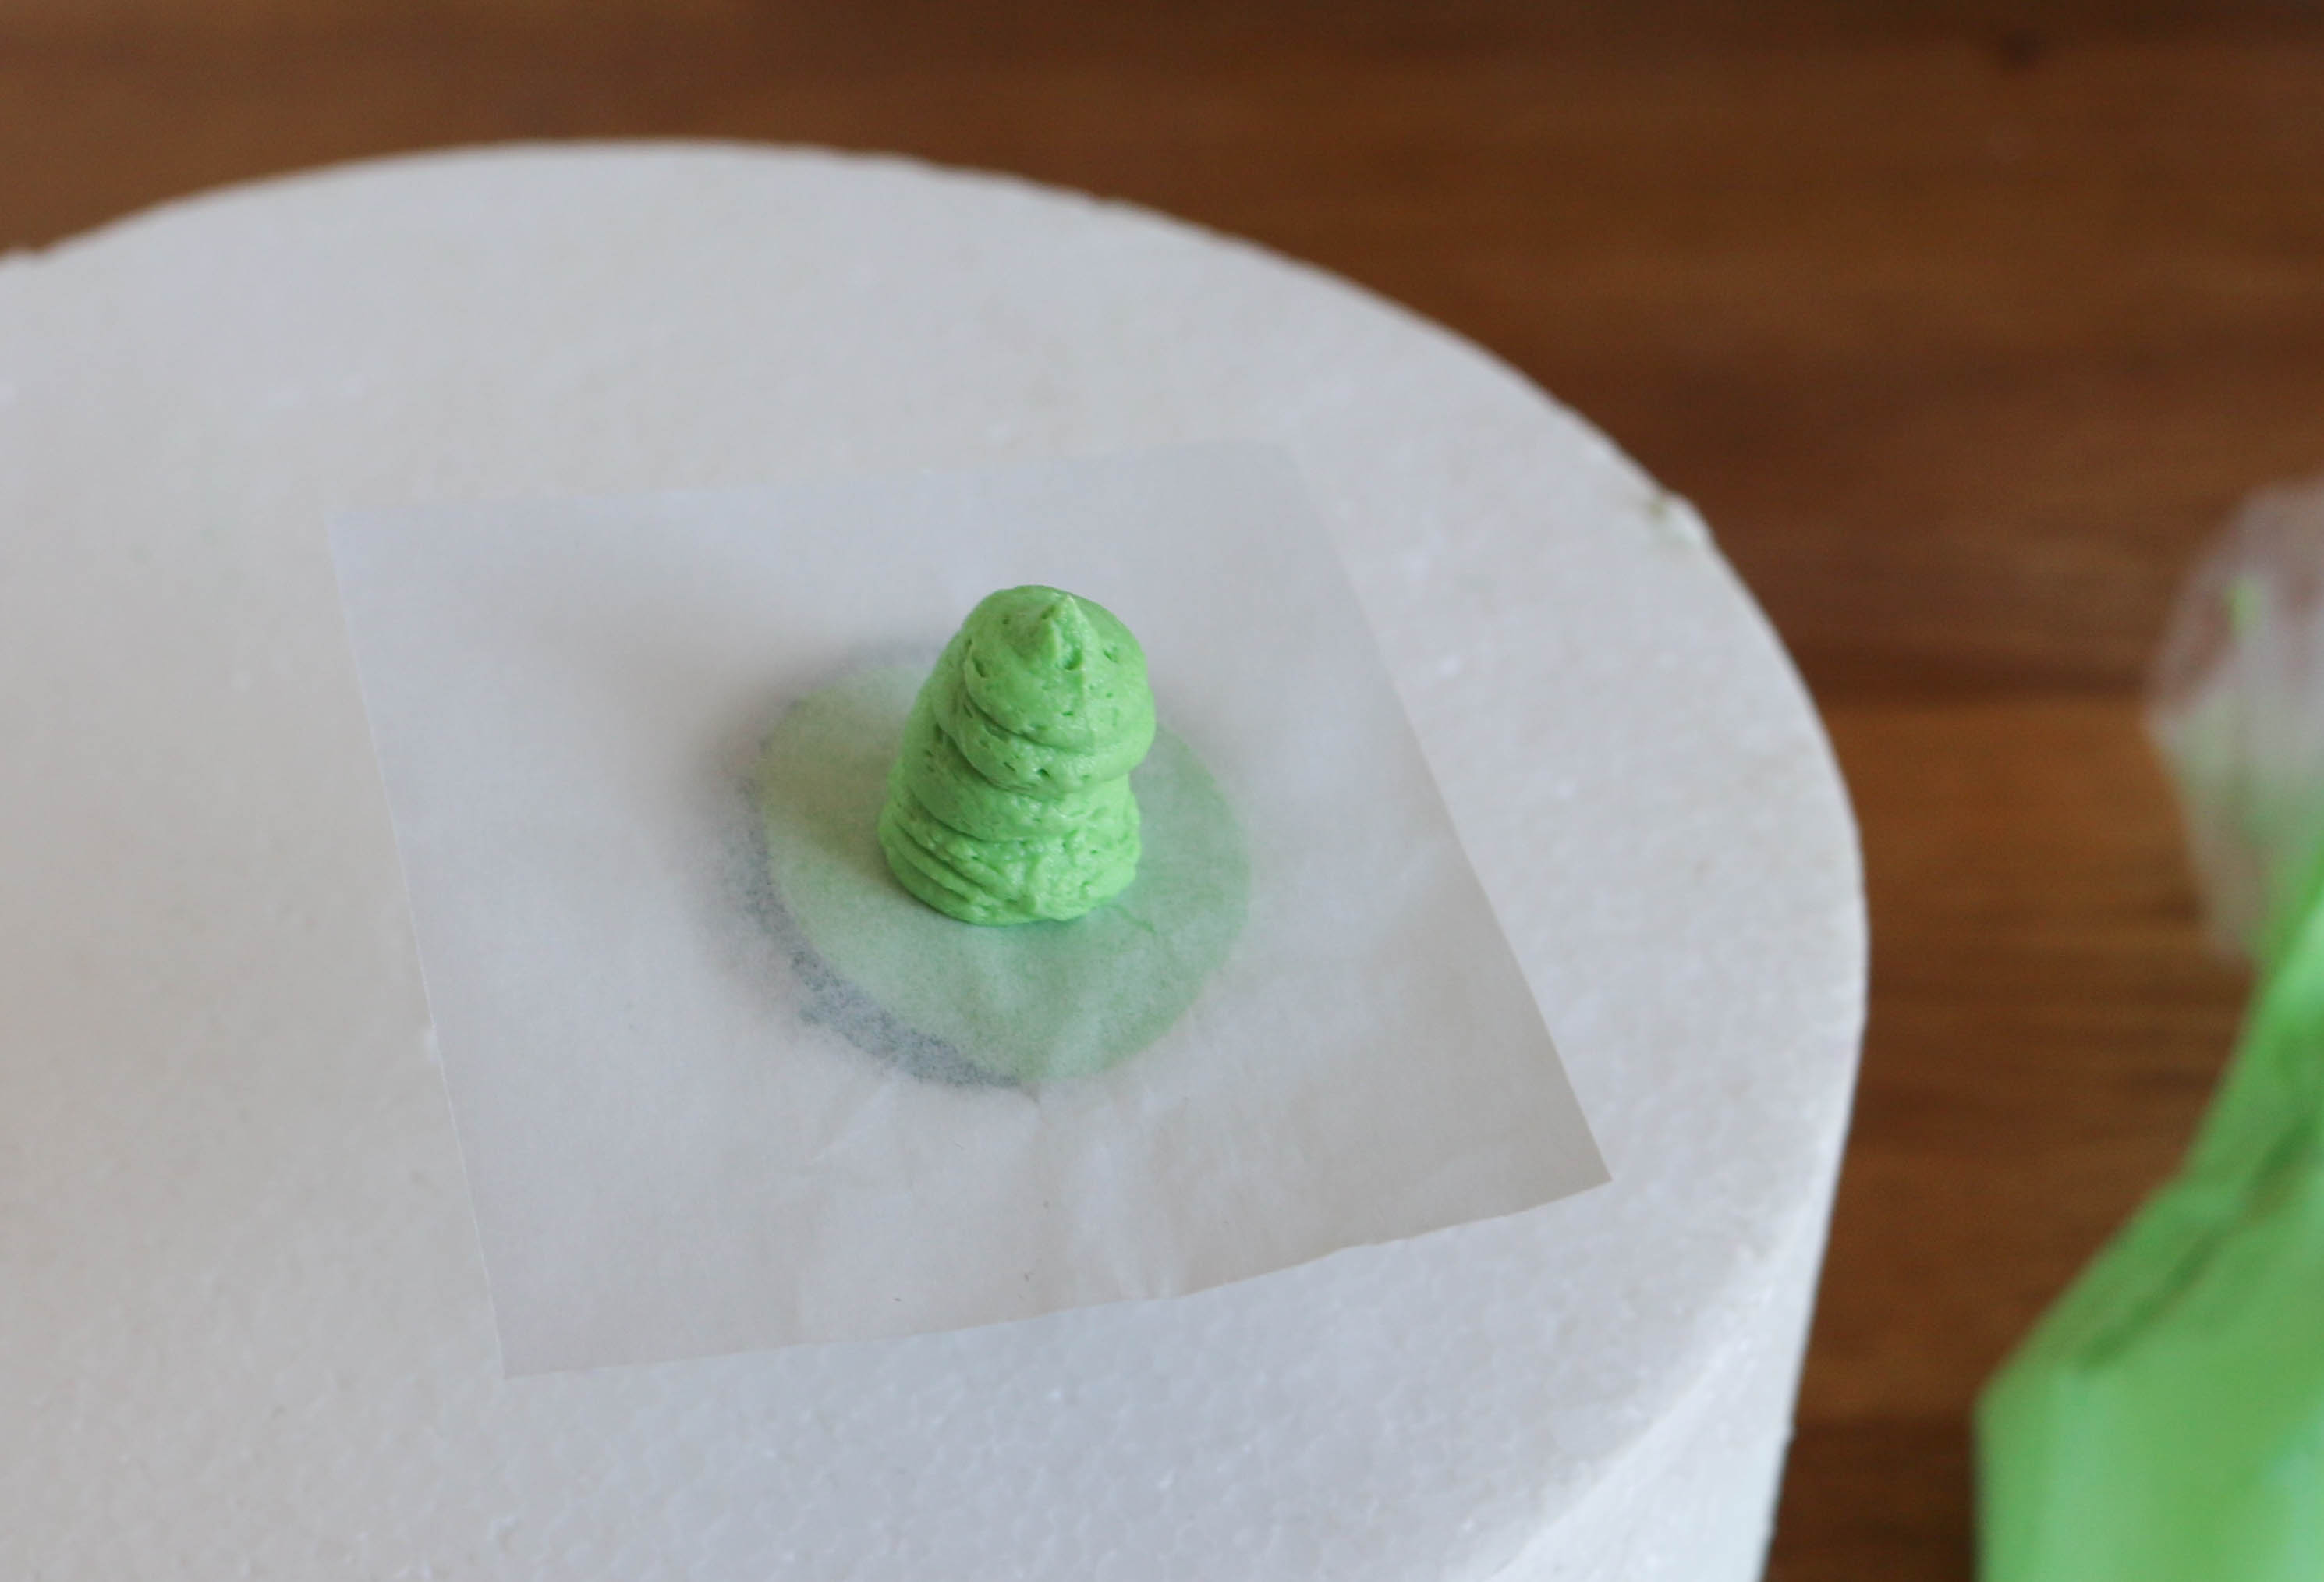
4. Pipe a Rose-Tip Succulent
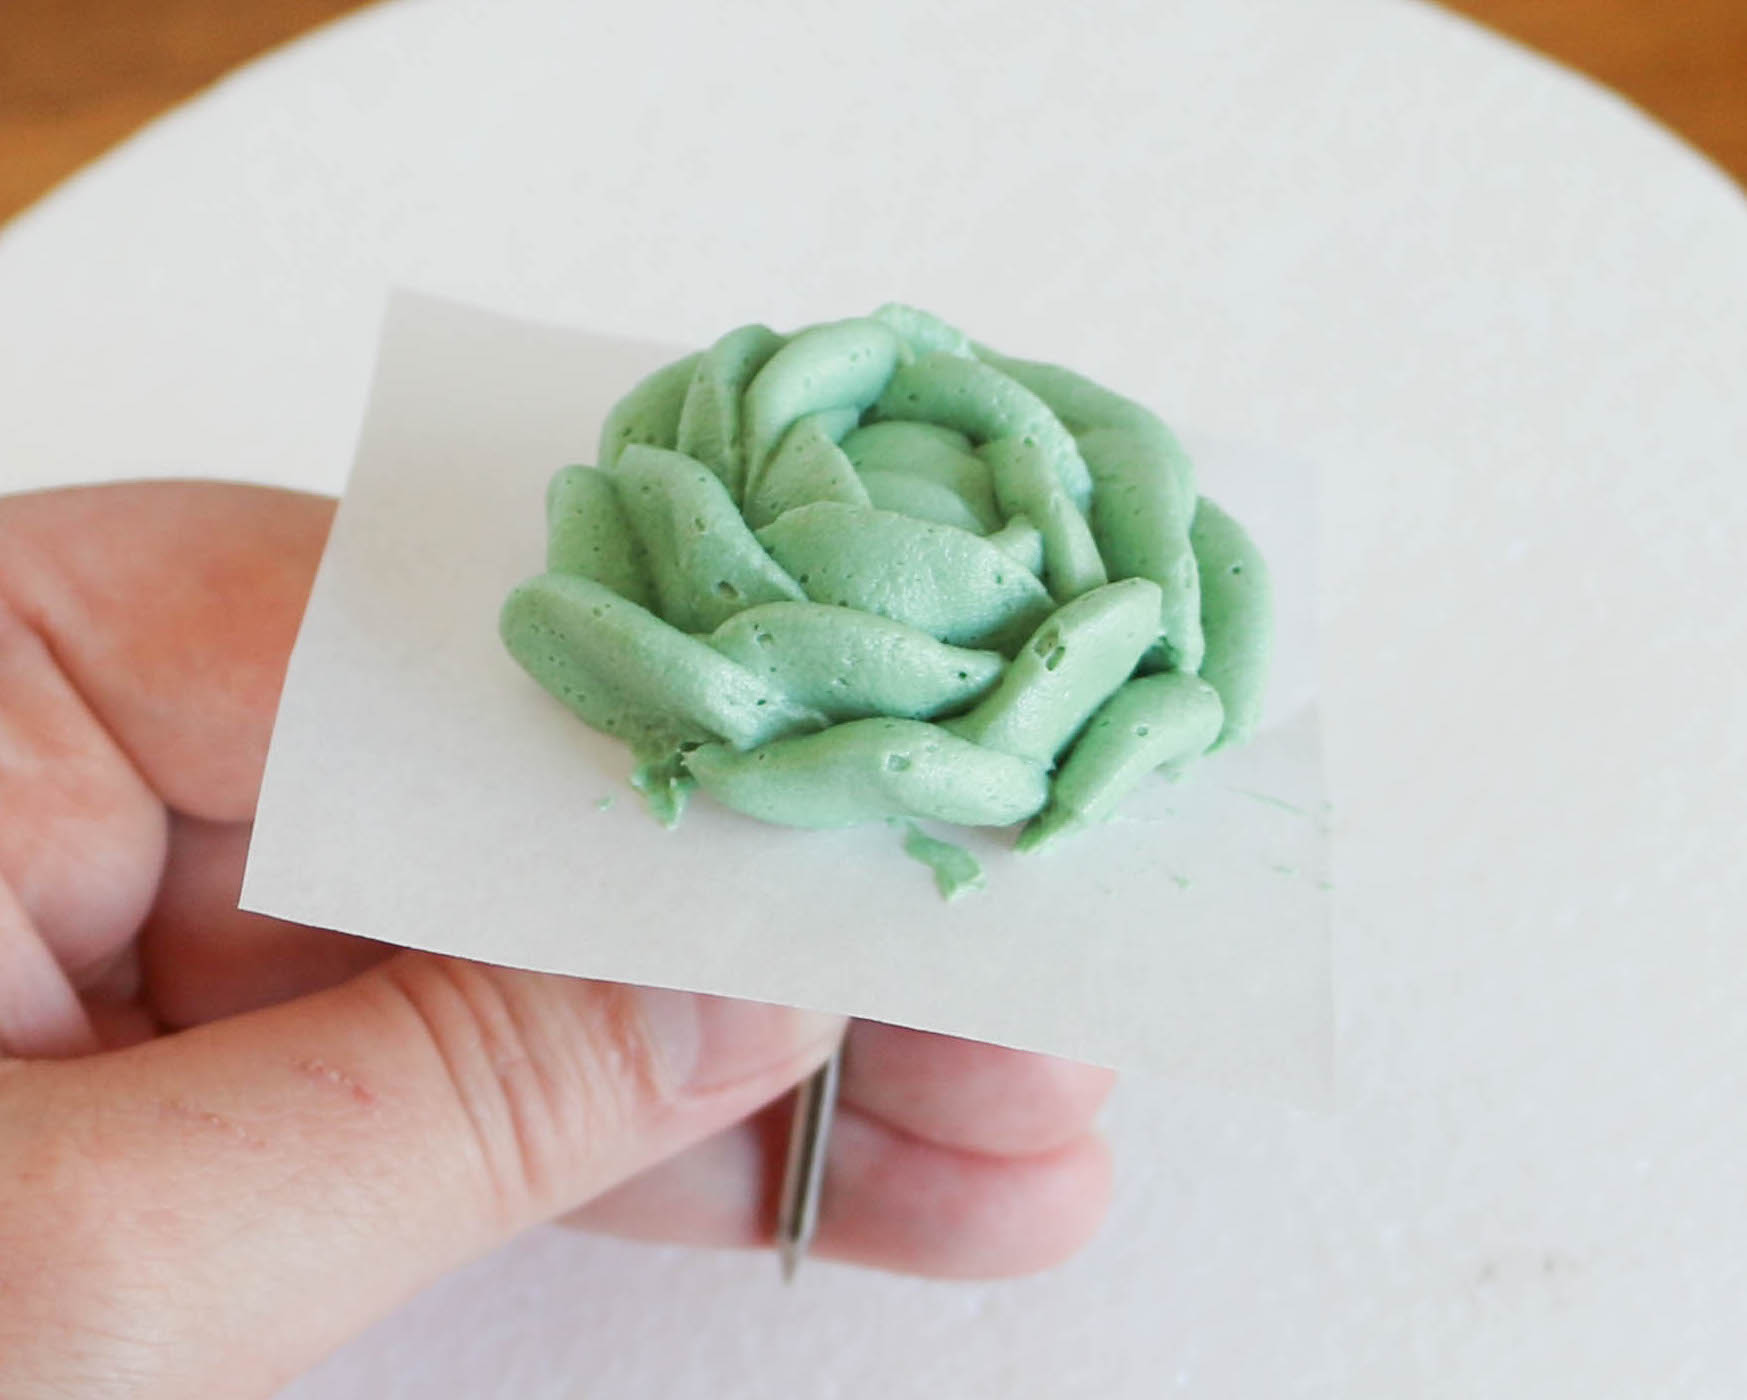
In the center of the floral nail, pipe a small mound of sage-green buttercream. Hold the piping bag so the skinny end of the rose tip is touching the parchment paper and the side of the tip is touching the piped mound.
Apply a small amount of pressure while lifting the tip up along the side of the mound of buttercream.
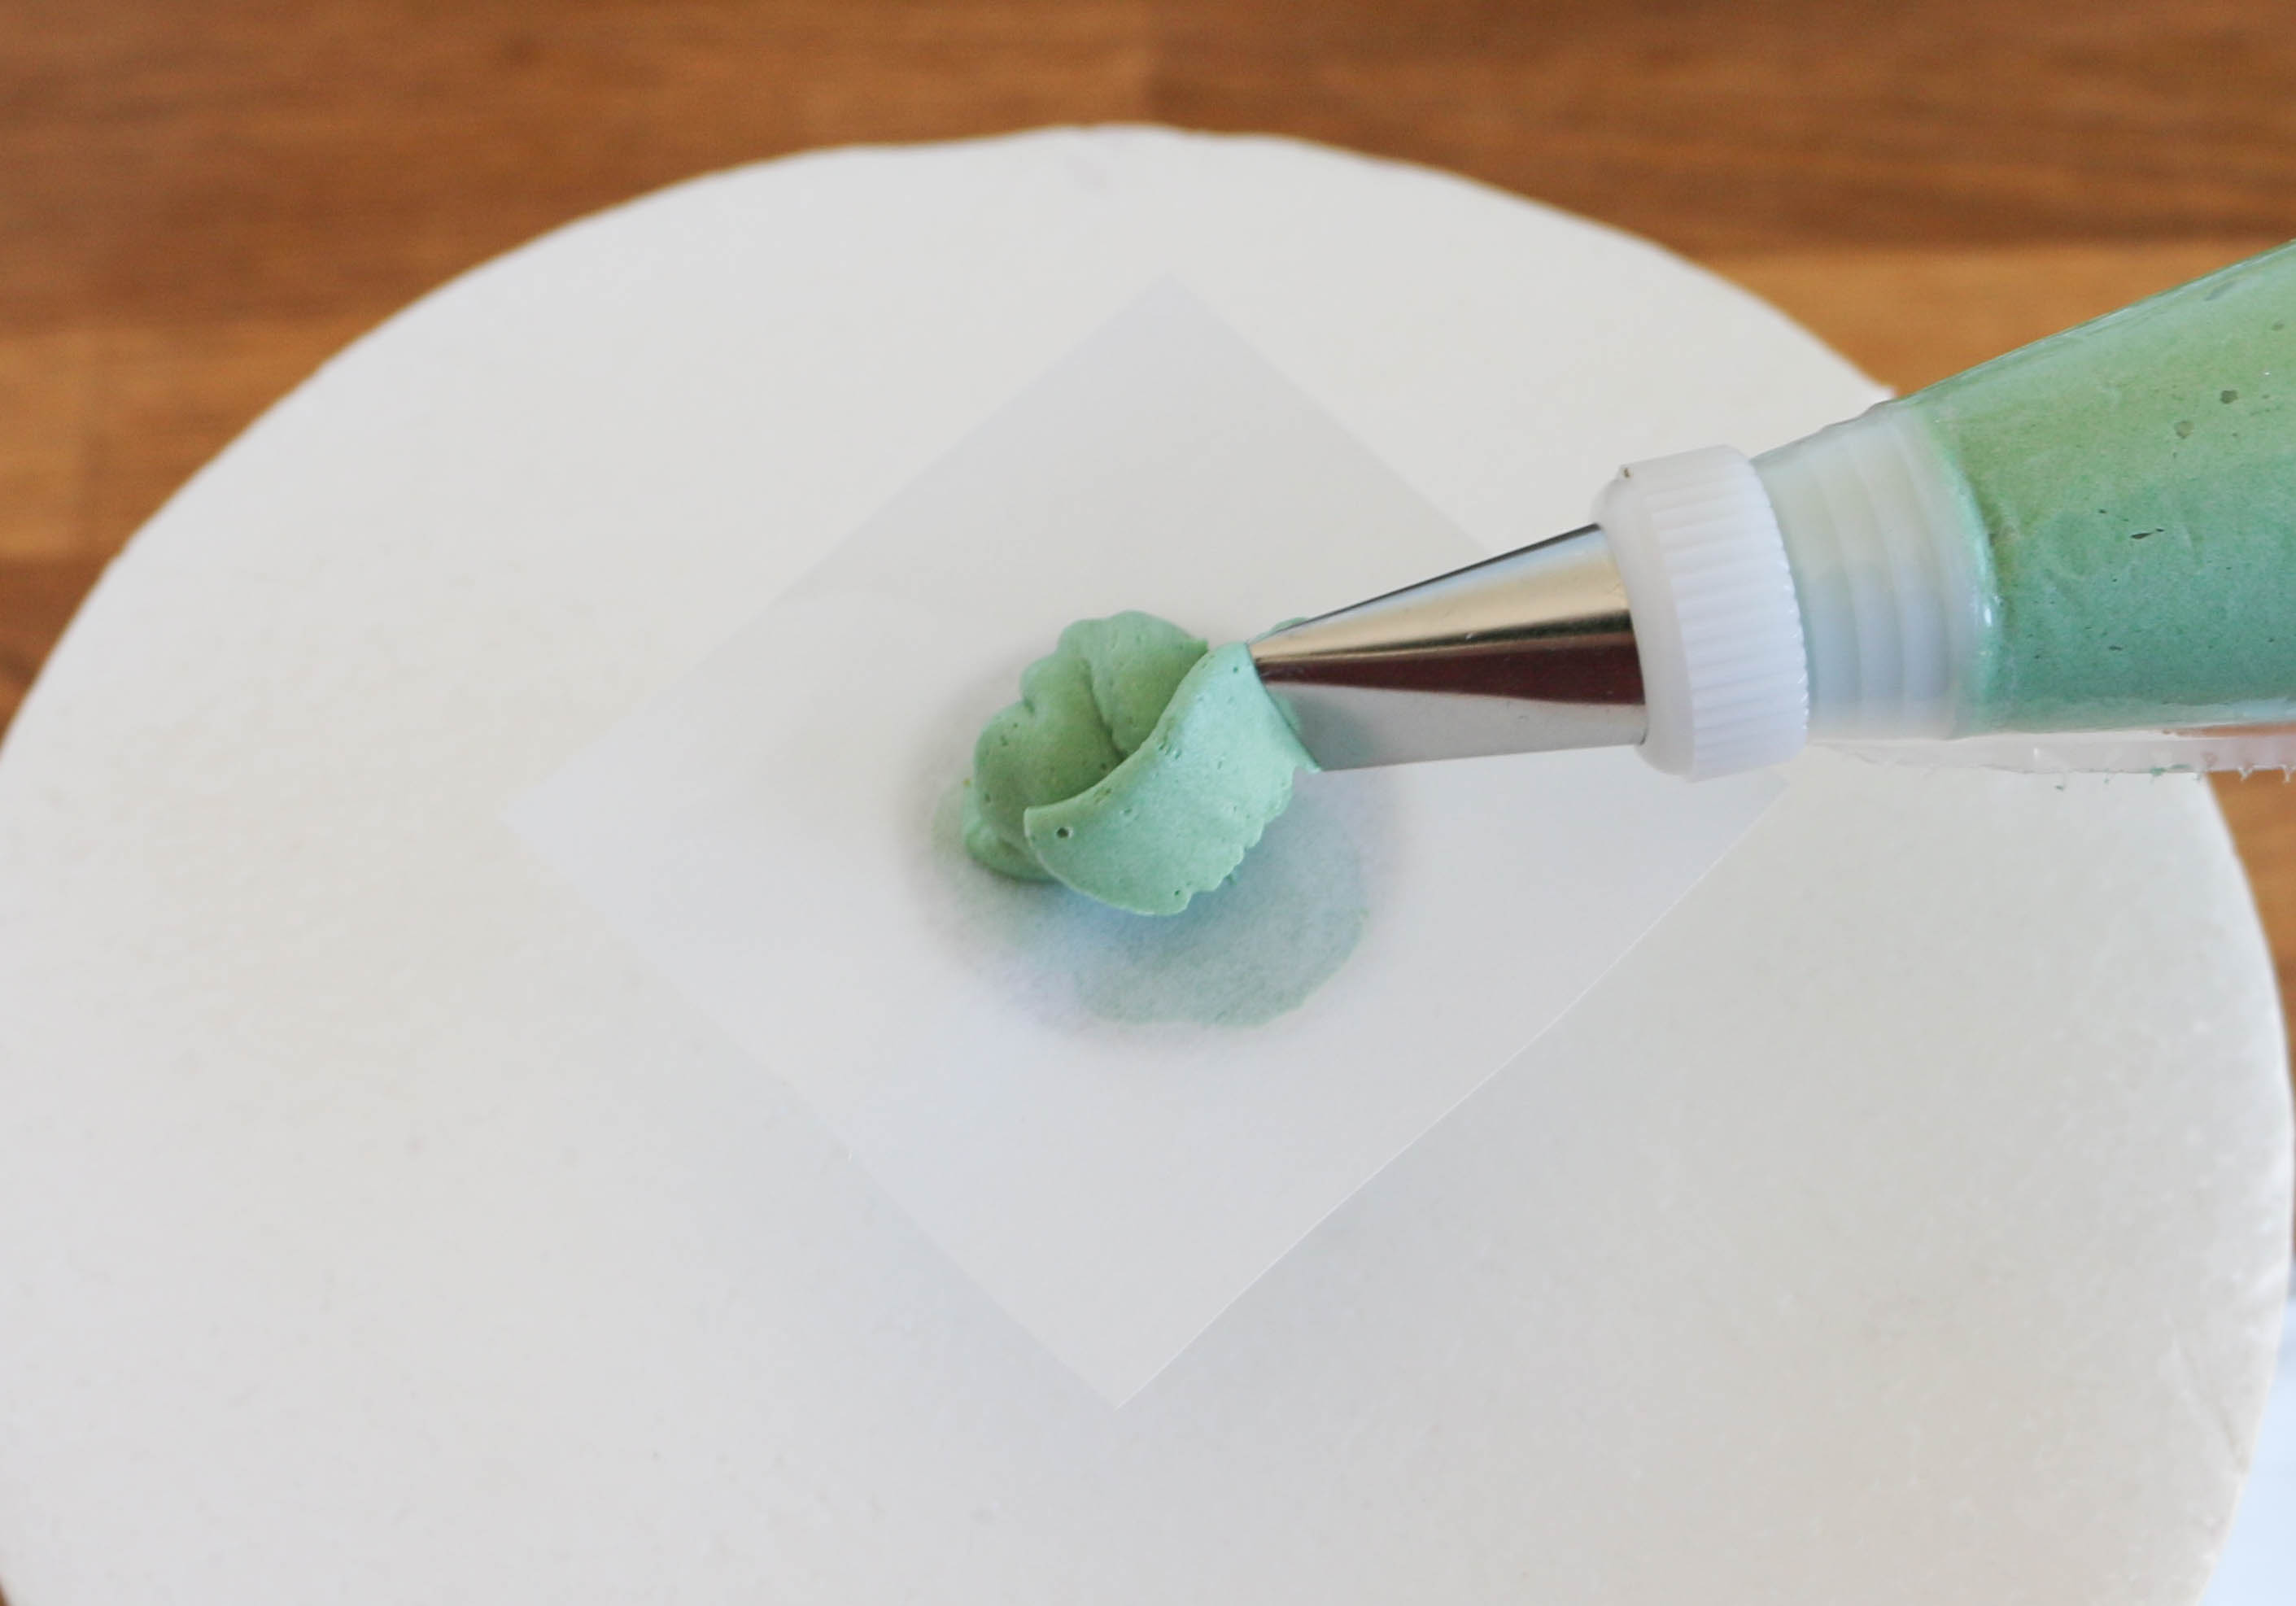
Quickly bring the tip back down again, releasing pressure as the tip returns to the surface of the flower nail. It should look like you’ve piped a tiny rainbow, or a lowercase n, up and over about a third of the mound of buttercream. Repeat until petals have been piped all around the mounded center.
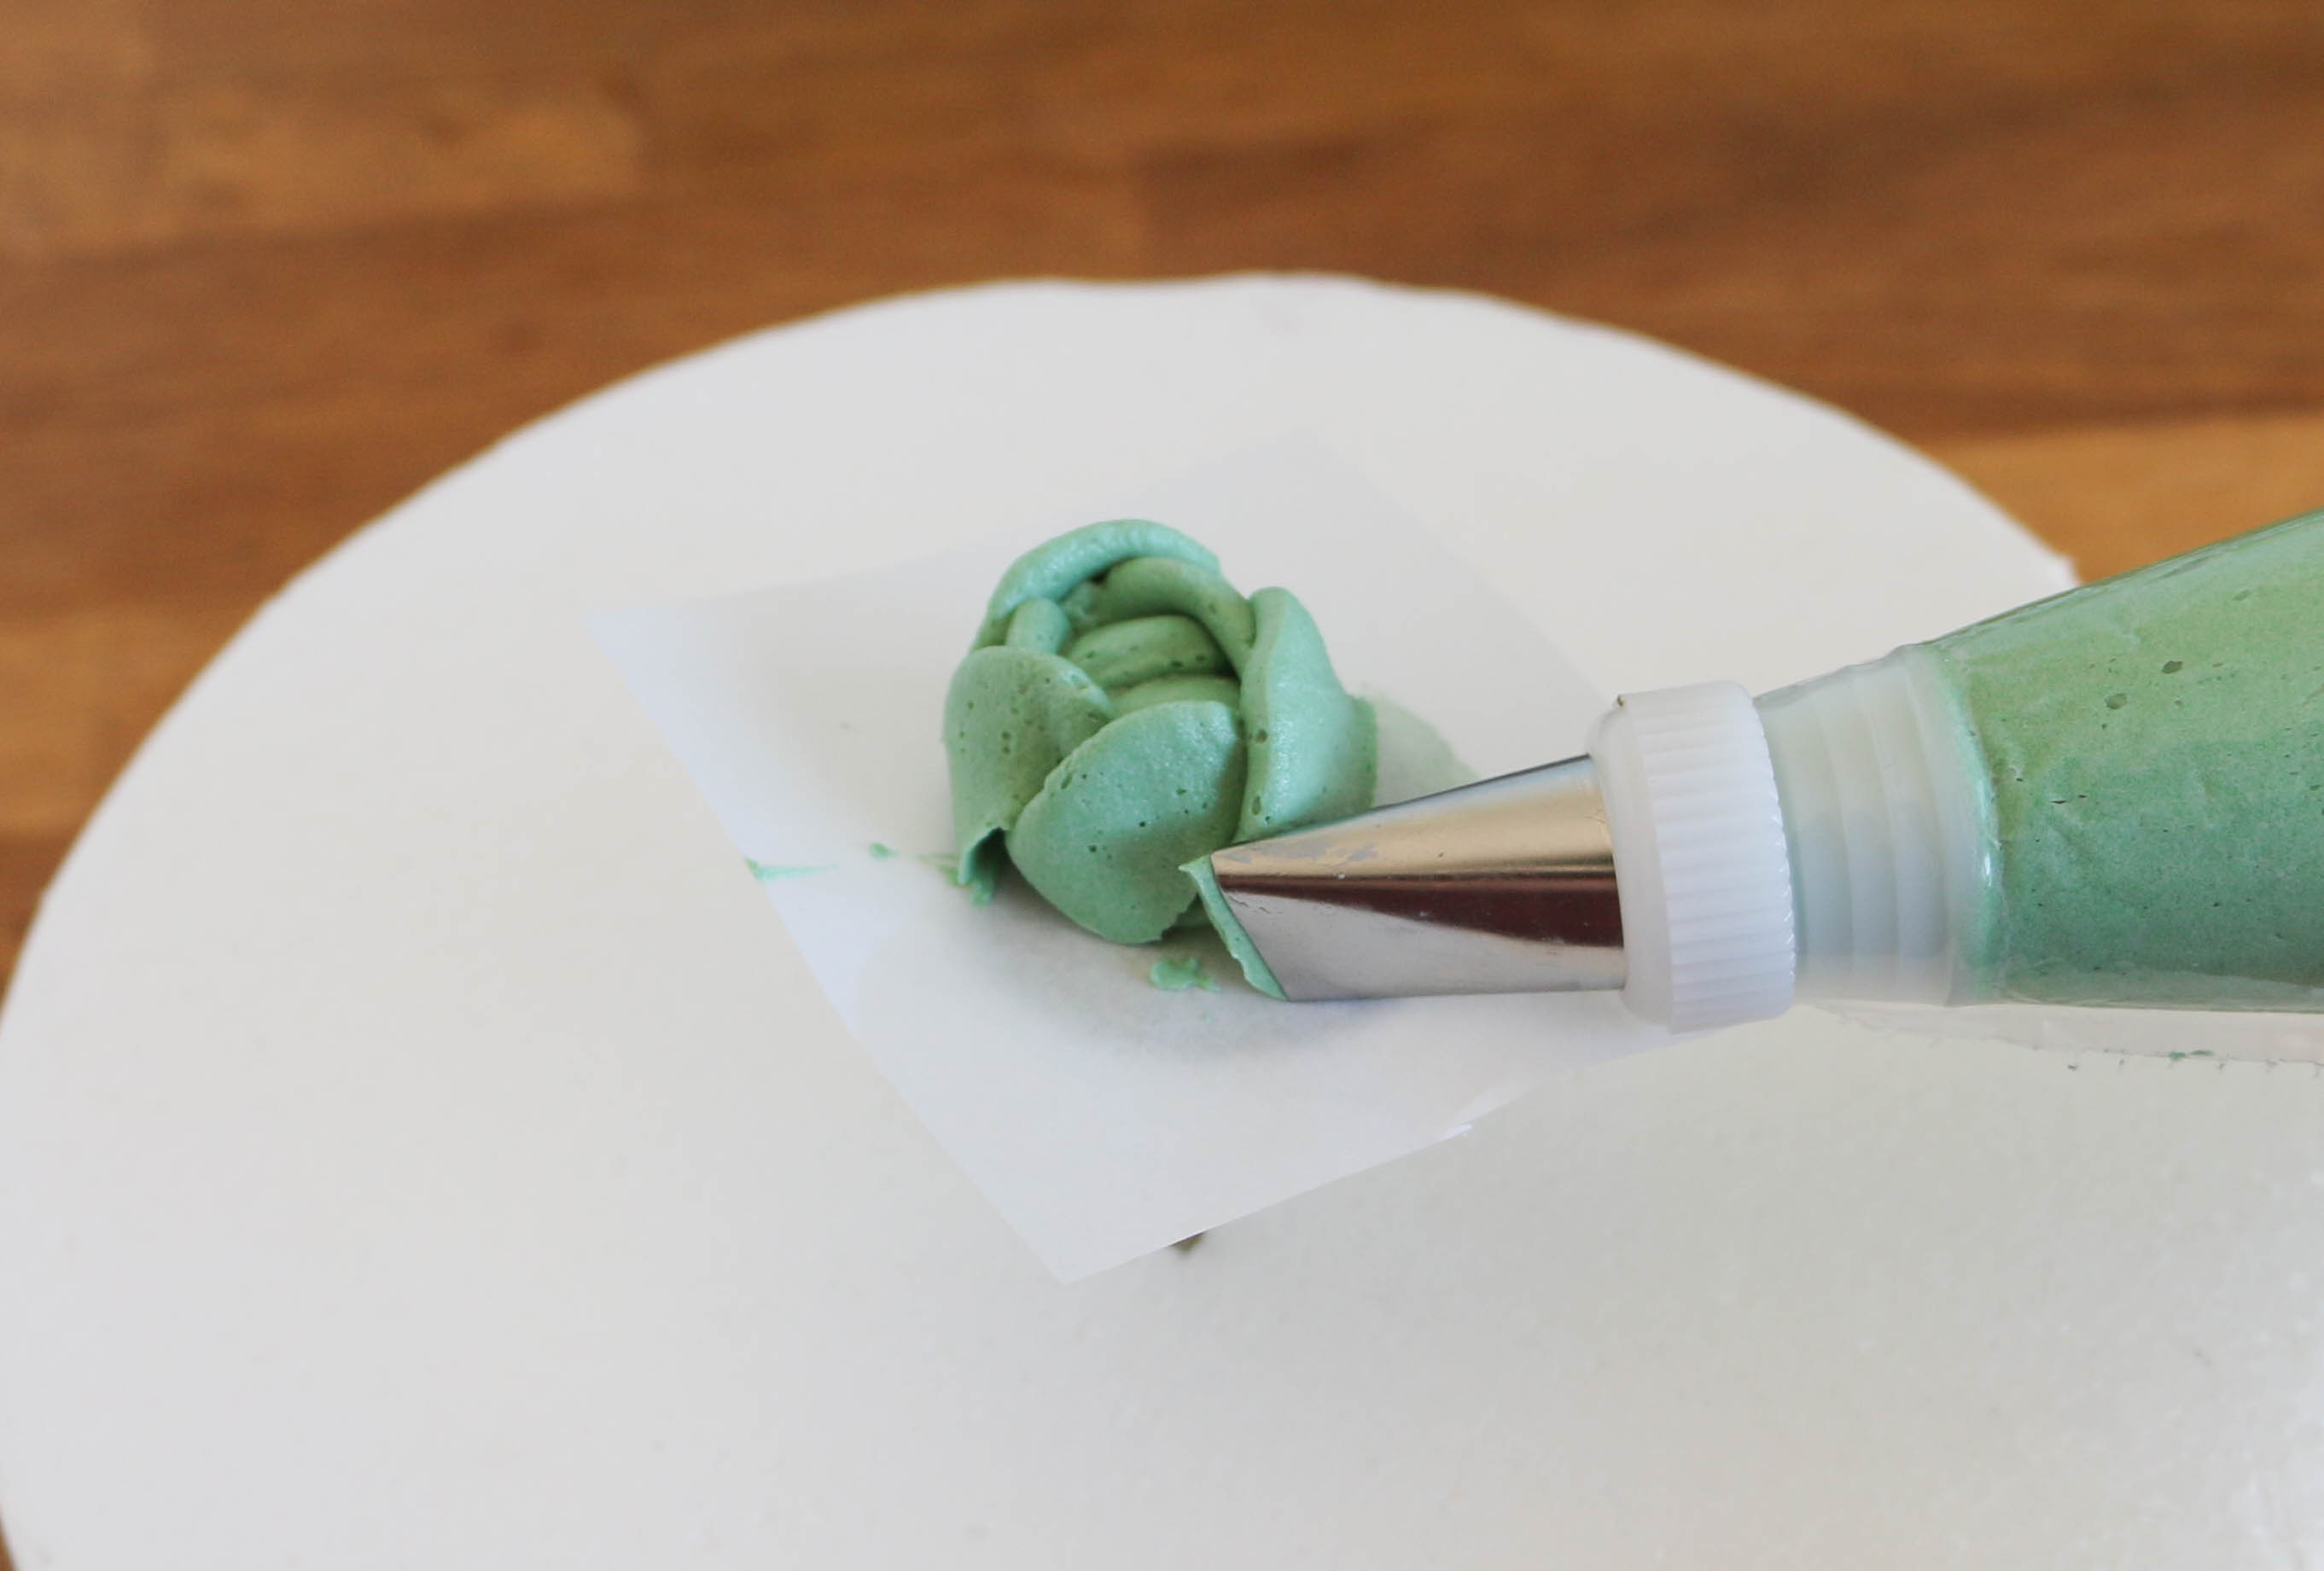
Continue piping layers of petals, making the petals a little longer with each layer. Offset petals when you begin a new layer, starting in the center of a petal from the row before. The peak of the rainbow or top of the n should intersect where two petals overlapped in the row before.
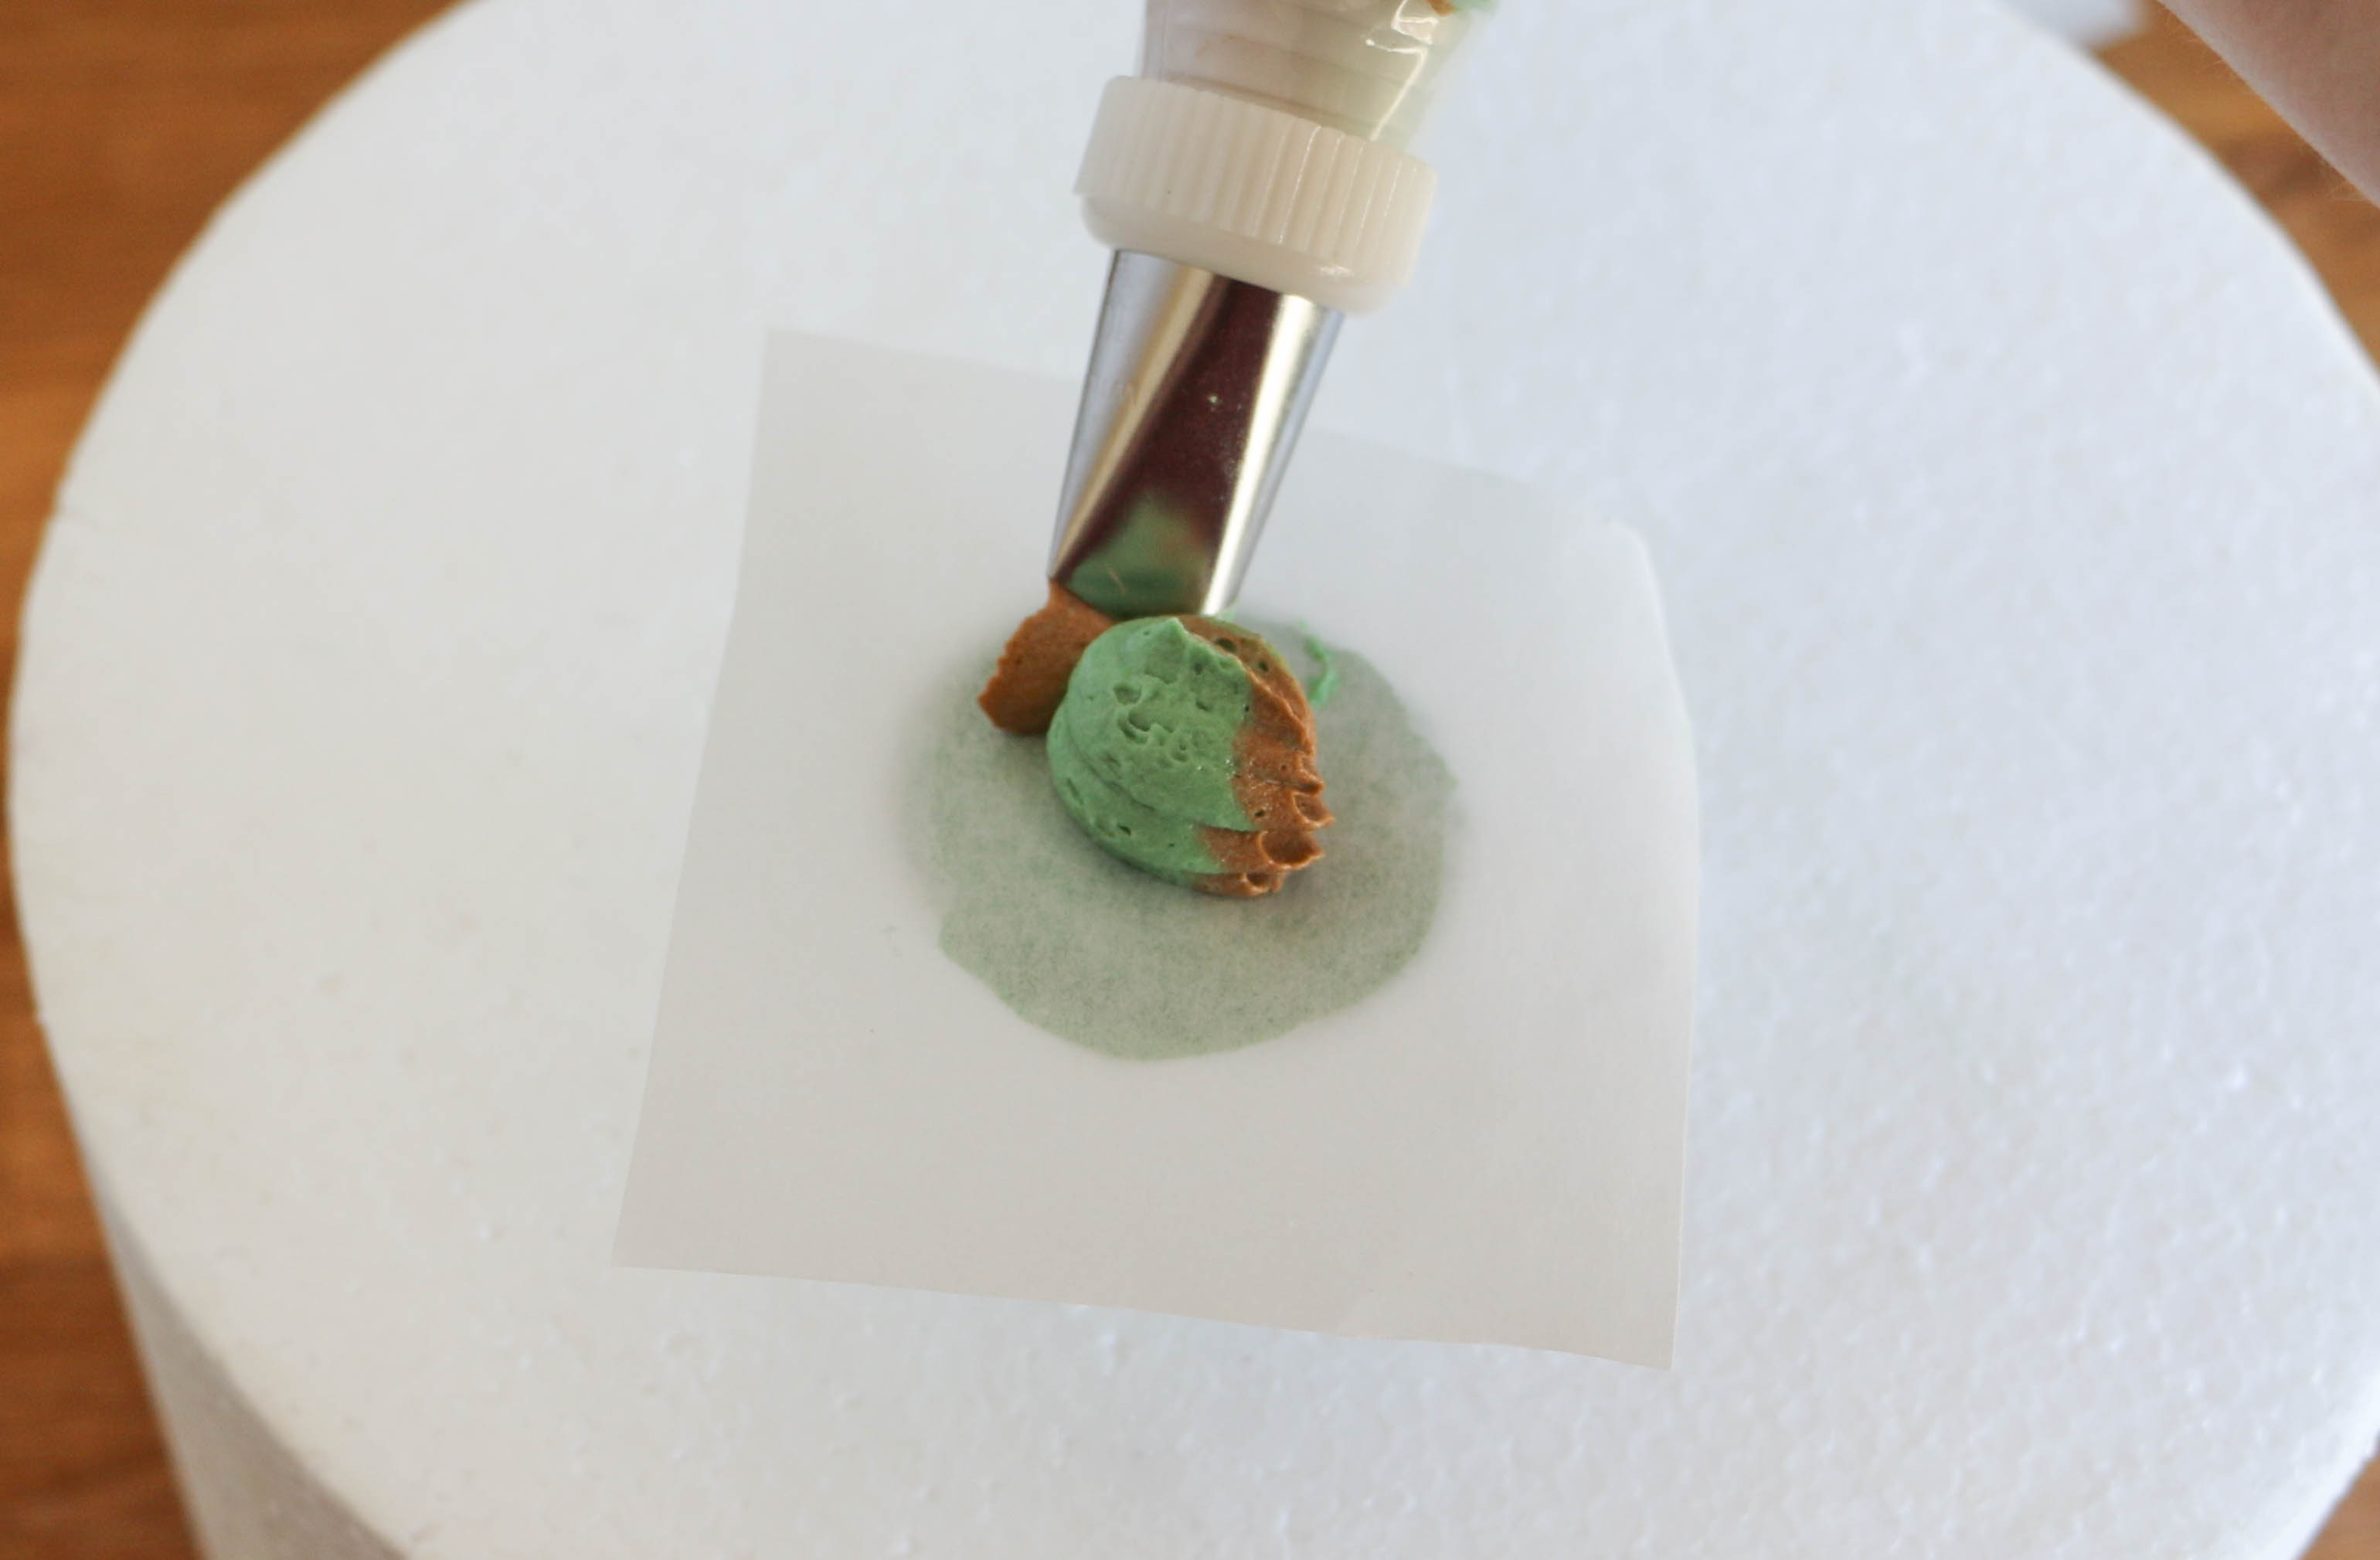
5. Try Another Kind of Rose-Tip Succulent
This design is very similar to the first, with a slight change to the center.
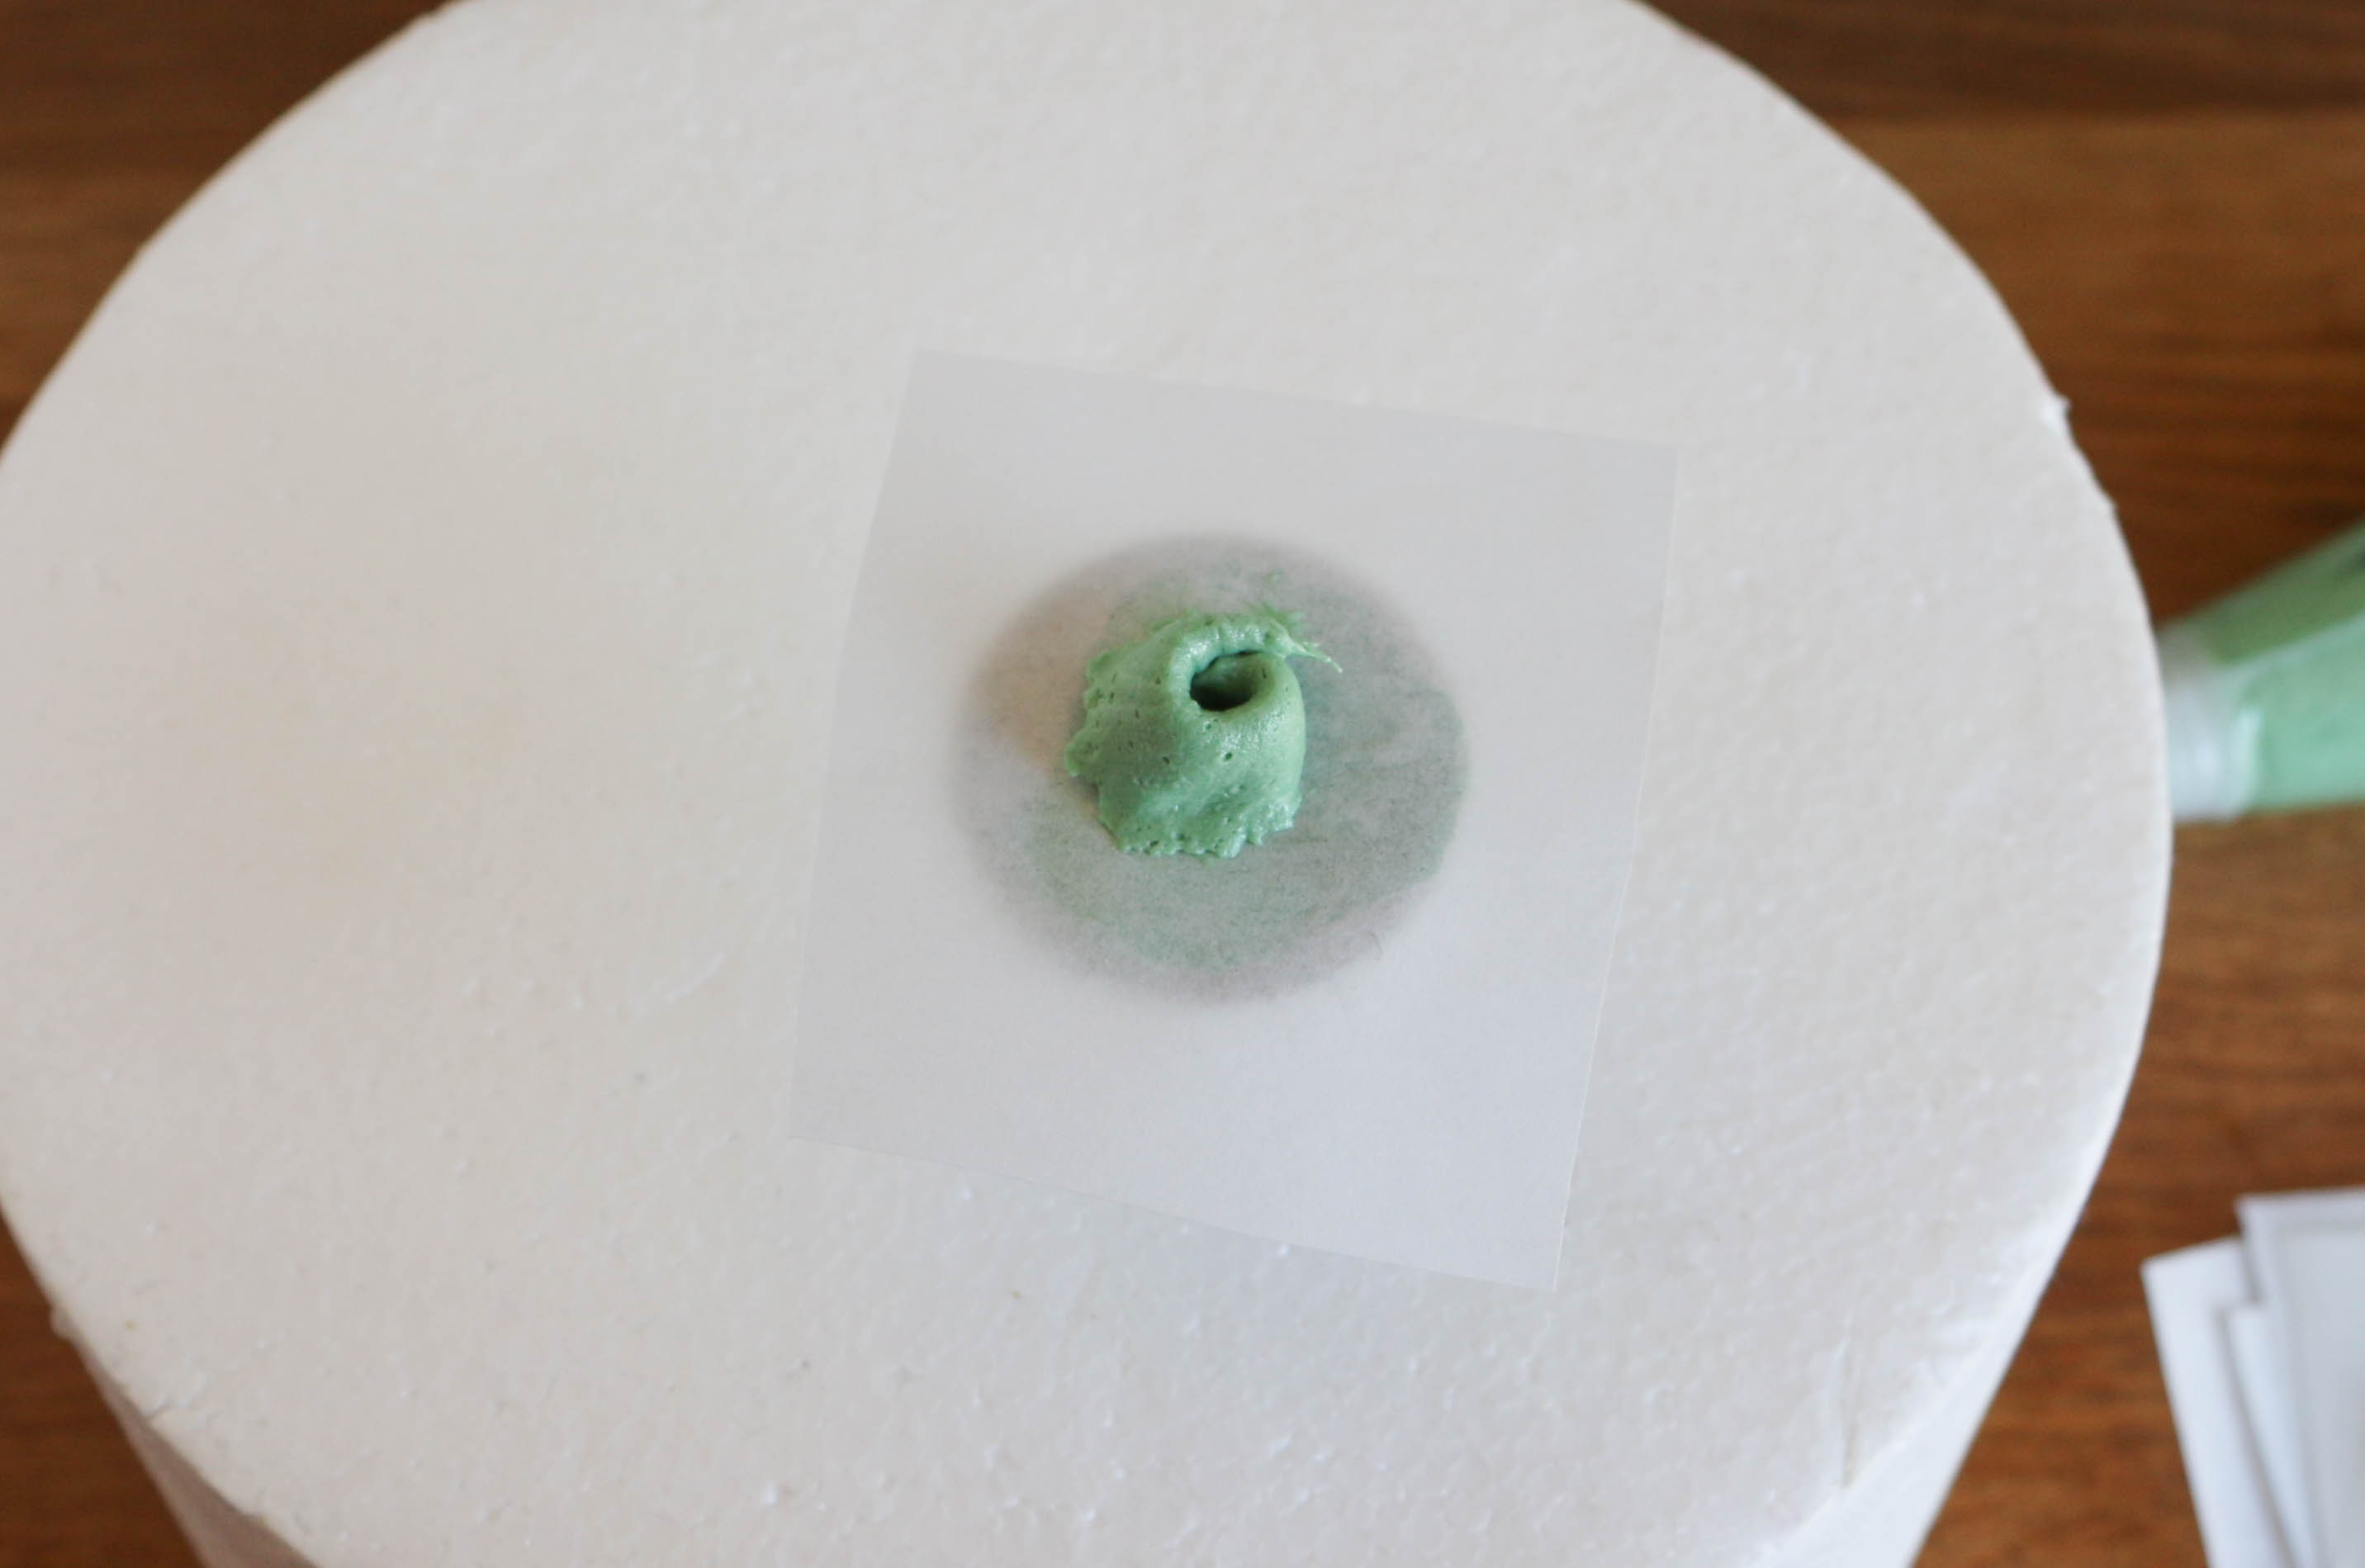
In your non-dominant hand, hold the flower nail between your thumb and pointer finger. With the same sage green, start with the fat end of your tip sitting vertically against the surface in the center of the flower nail.

Add layers of petals using the same method as for the first succulent. Keep the n’s short and squat to create a more compact effect.
6. Create a Two-Toned Rose-Tip Succulent

To created a variegated petal effect, add stripes of buttercream to your piping bag before filling. We smeared a thin line of the rust buttercream up the center of the bag before filling the rest with the sage green. We placed the rose tip onto the coupler so the thin end of the tip was lined up with the stripe.
Pipe a mound of buttercream in the center of the nail. Hold the bag so the tip is almost horizontal, with the fat end of the tip touching the mound of buttercream.
You will be piping a similar rainbow or n motion, but this time you’ll move horizontally around the center of the mound. Repeat upward with more layers until the mound is covered with petals.
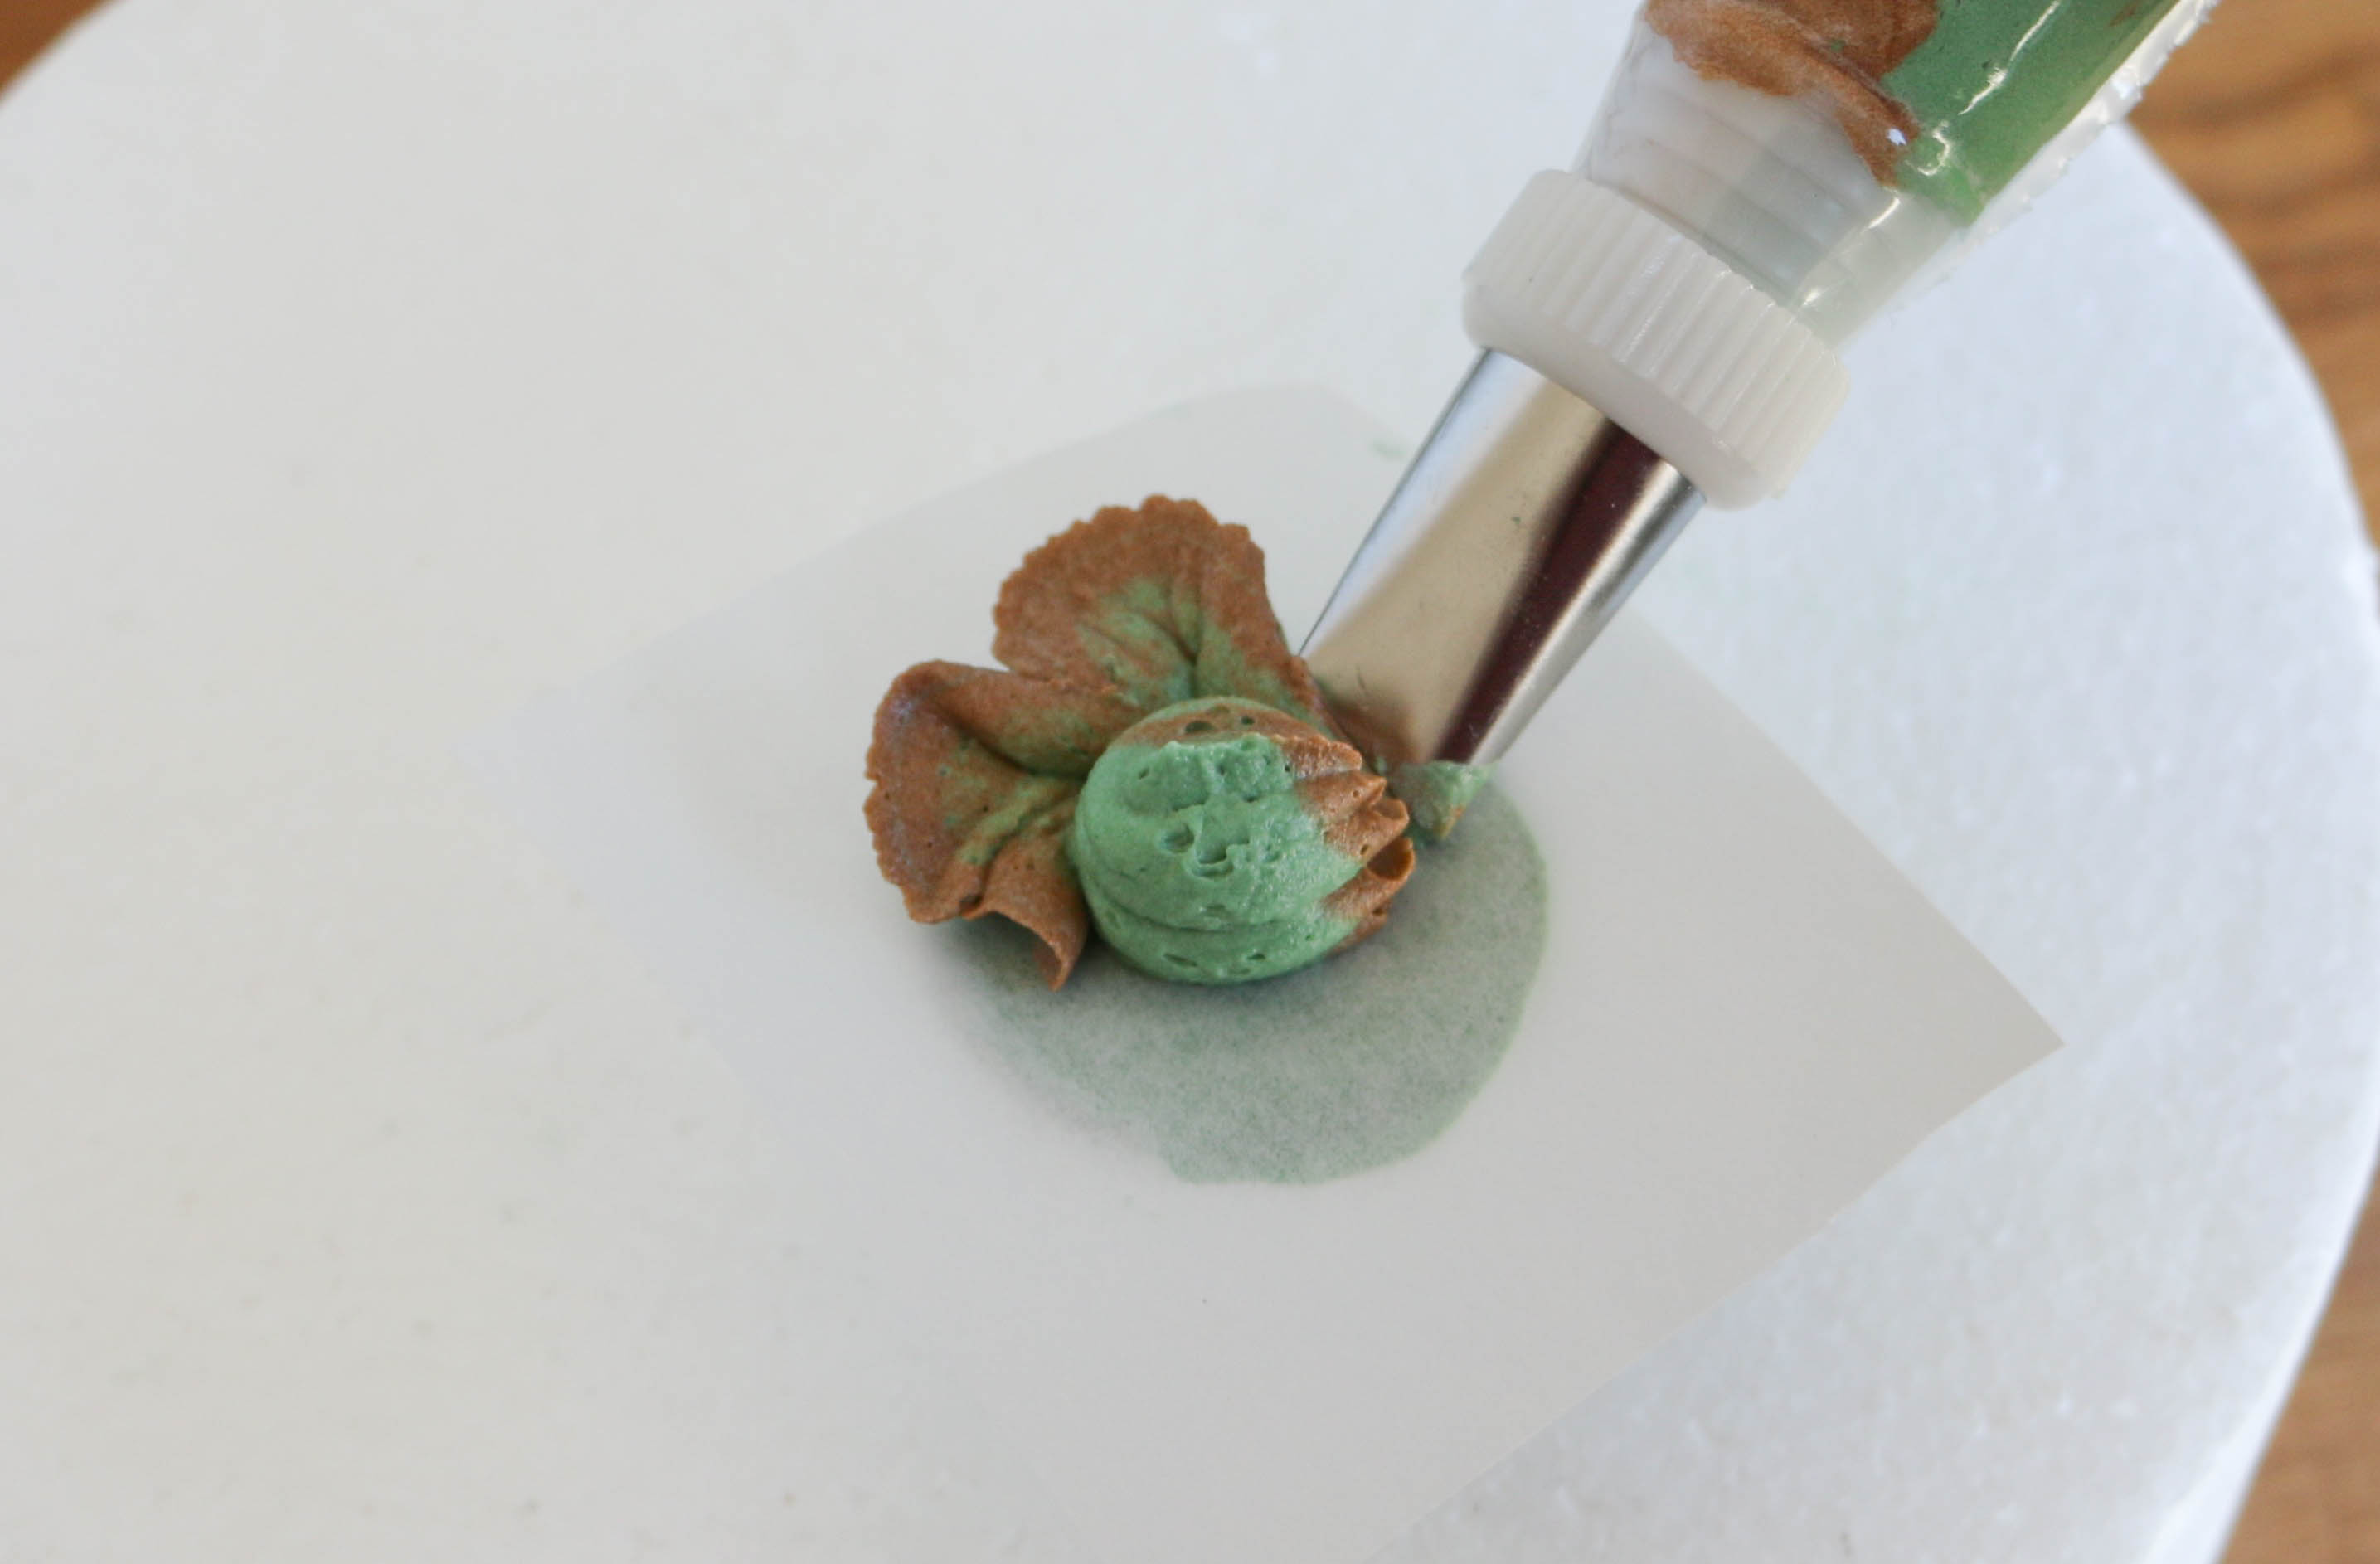
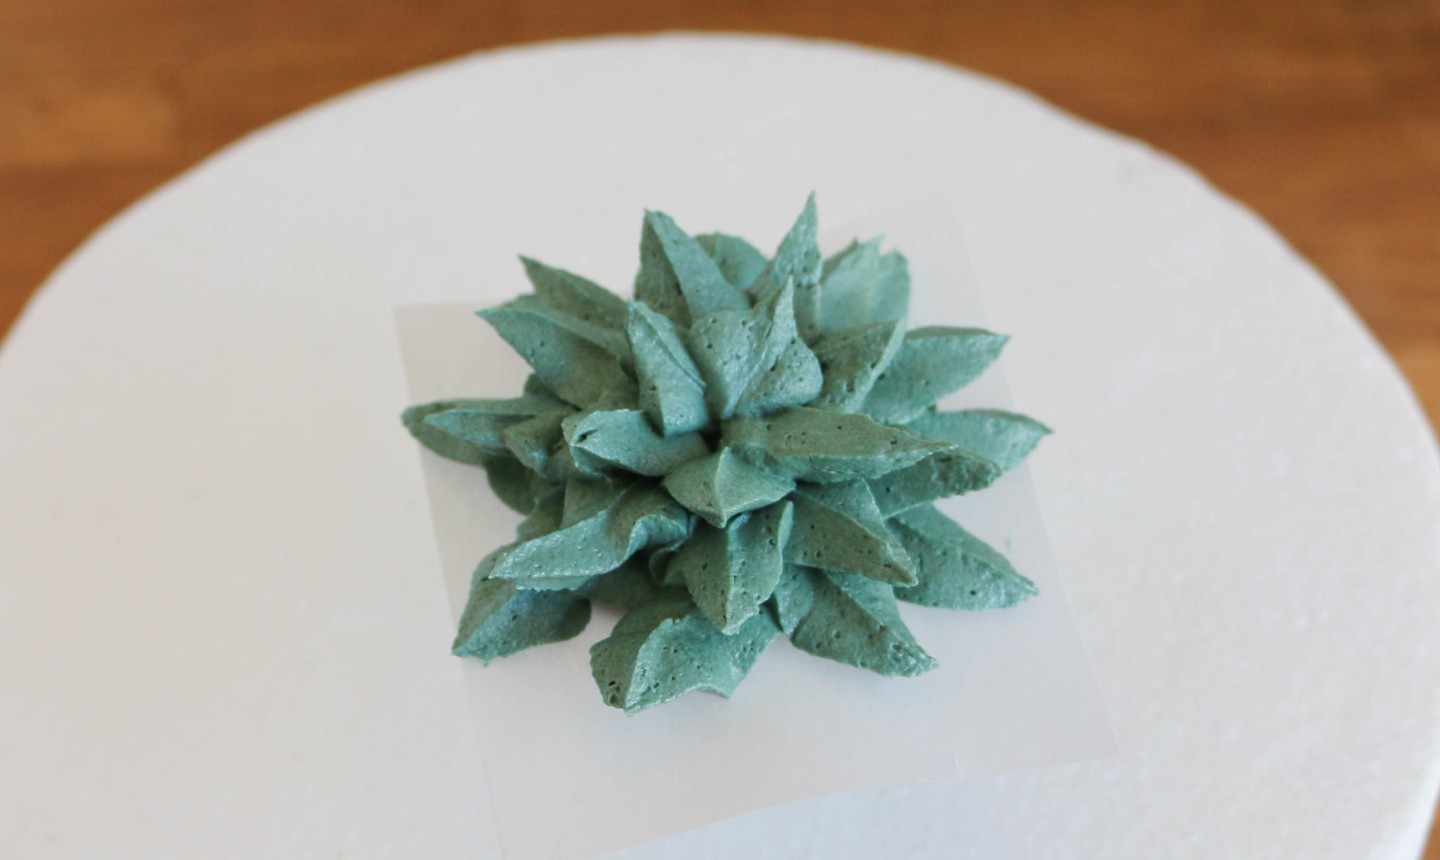
7. Make a Leaf-Tip Succulent
Fit a piping bag with a leaf tip, then fill with forest-green buttercream.
Pipe a mound in the center of a flower nail. Hold the tip vertically against the surface of the flower nail, so the opening almost looks like a little mouth about to gobble up the piped mound of buttercream in the center. The pointed ends of the leaf tip should just almost be touching the center mound.
Repeat with more petals all the way around the base of the center mound. Add more layers of petals until the entire mound is covered. Make the petals shorter as you reach the top.
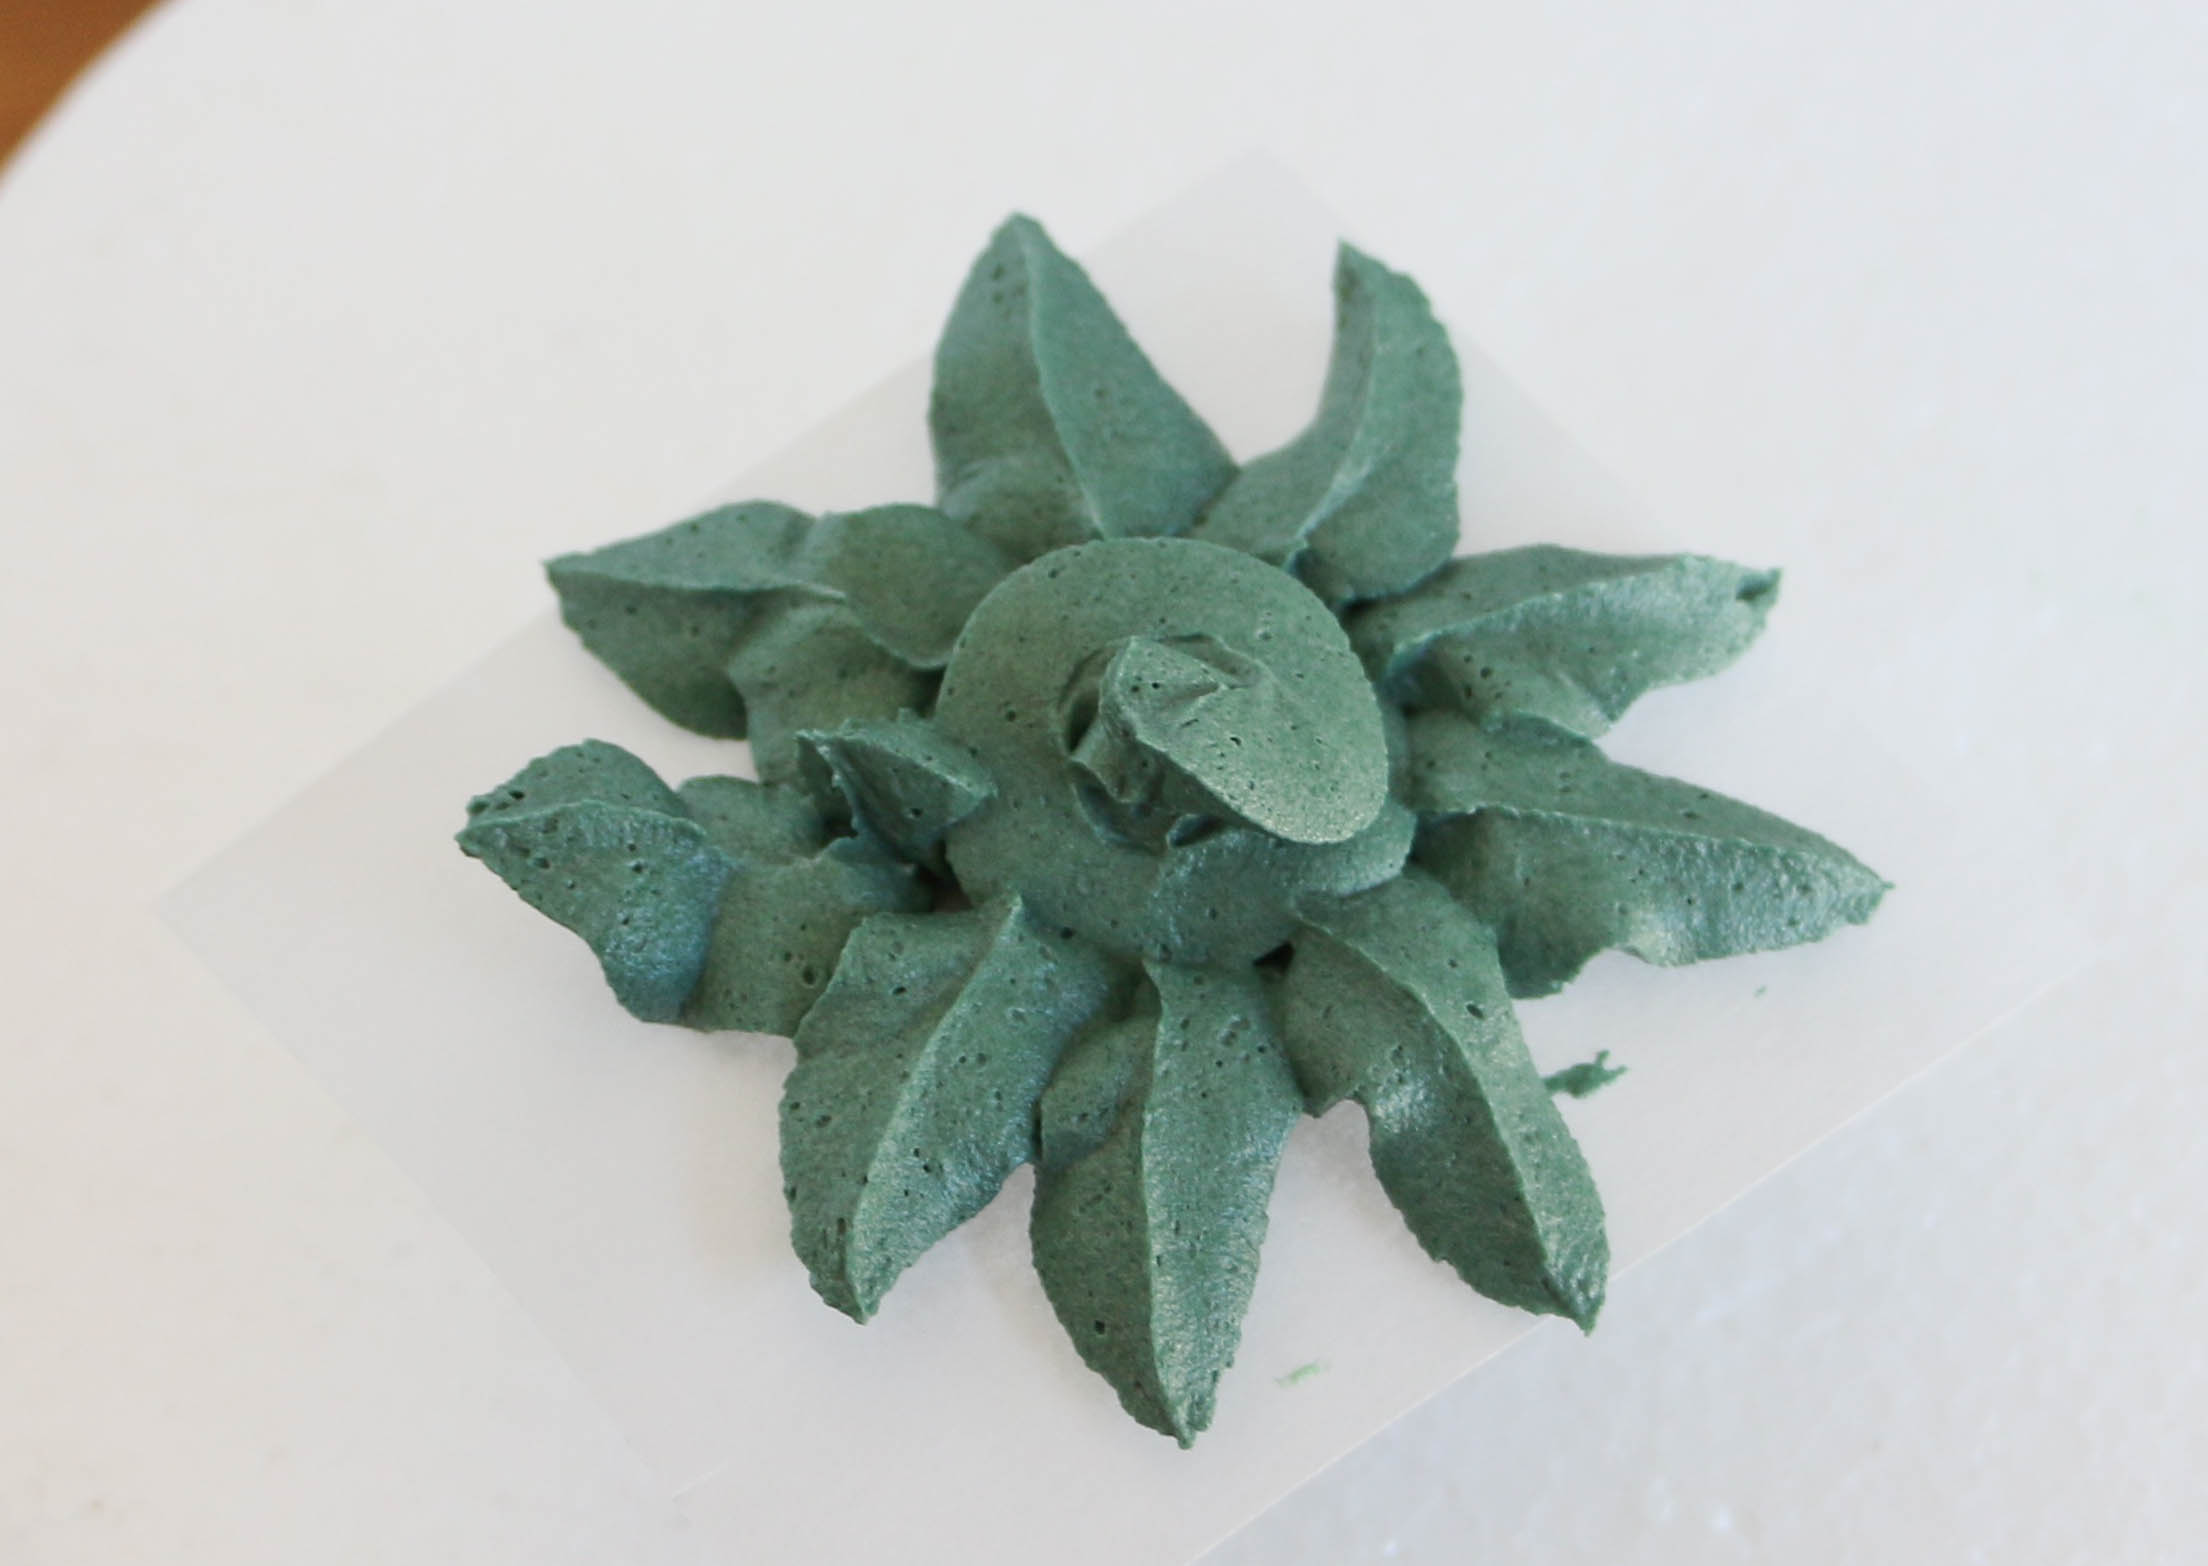
You can try adding two colors to the piping bag for some color variation here as well.
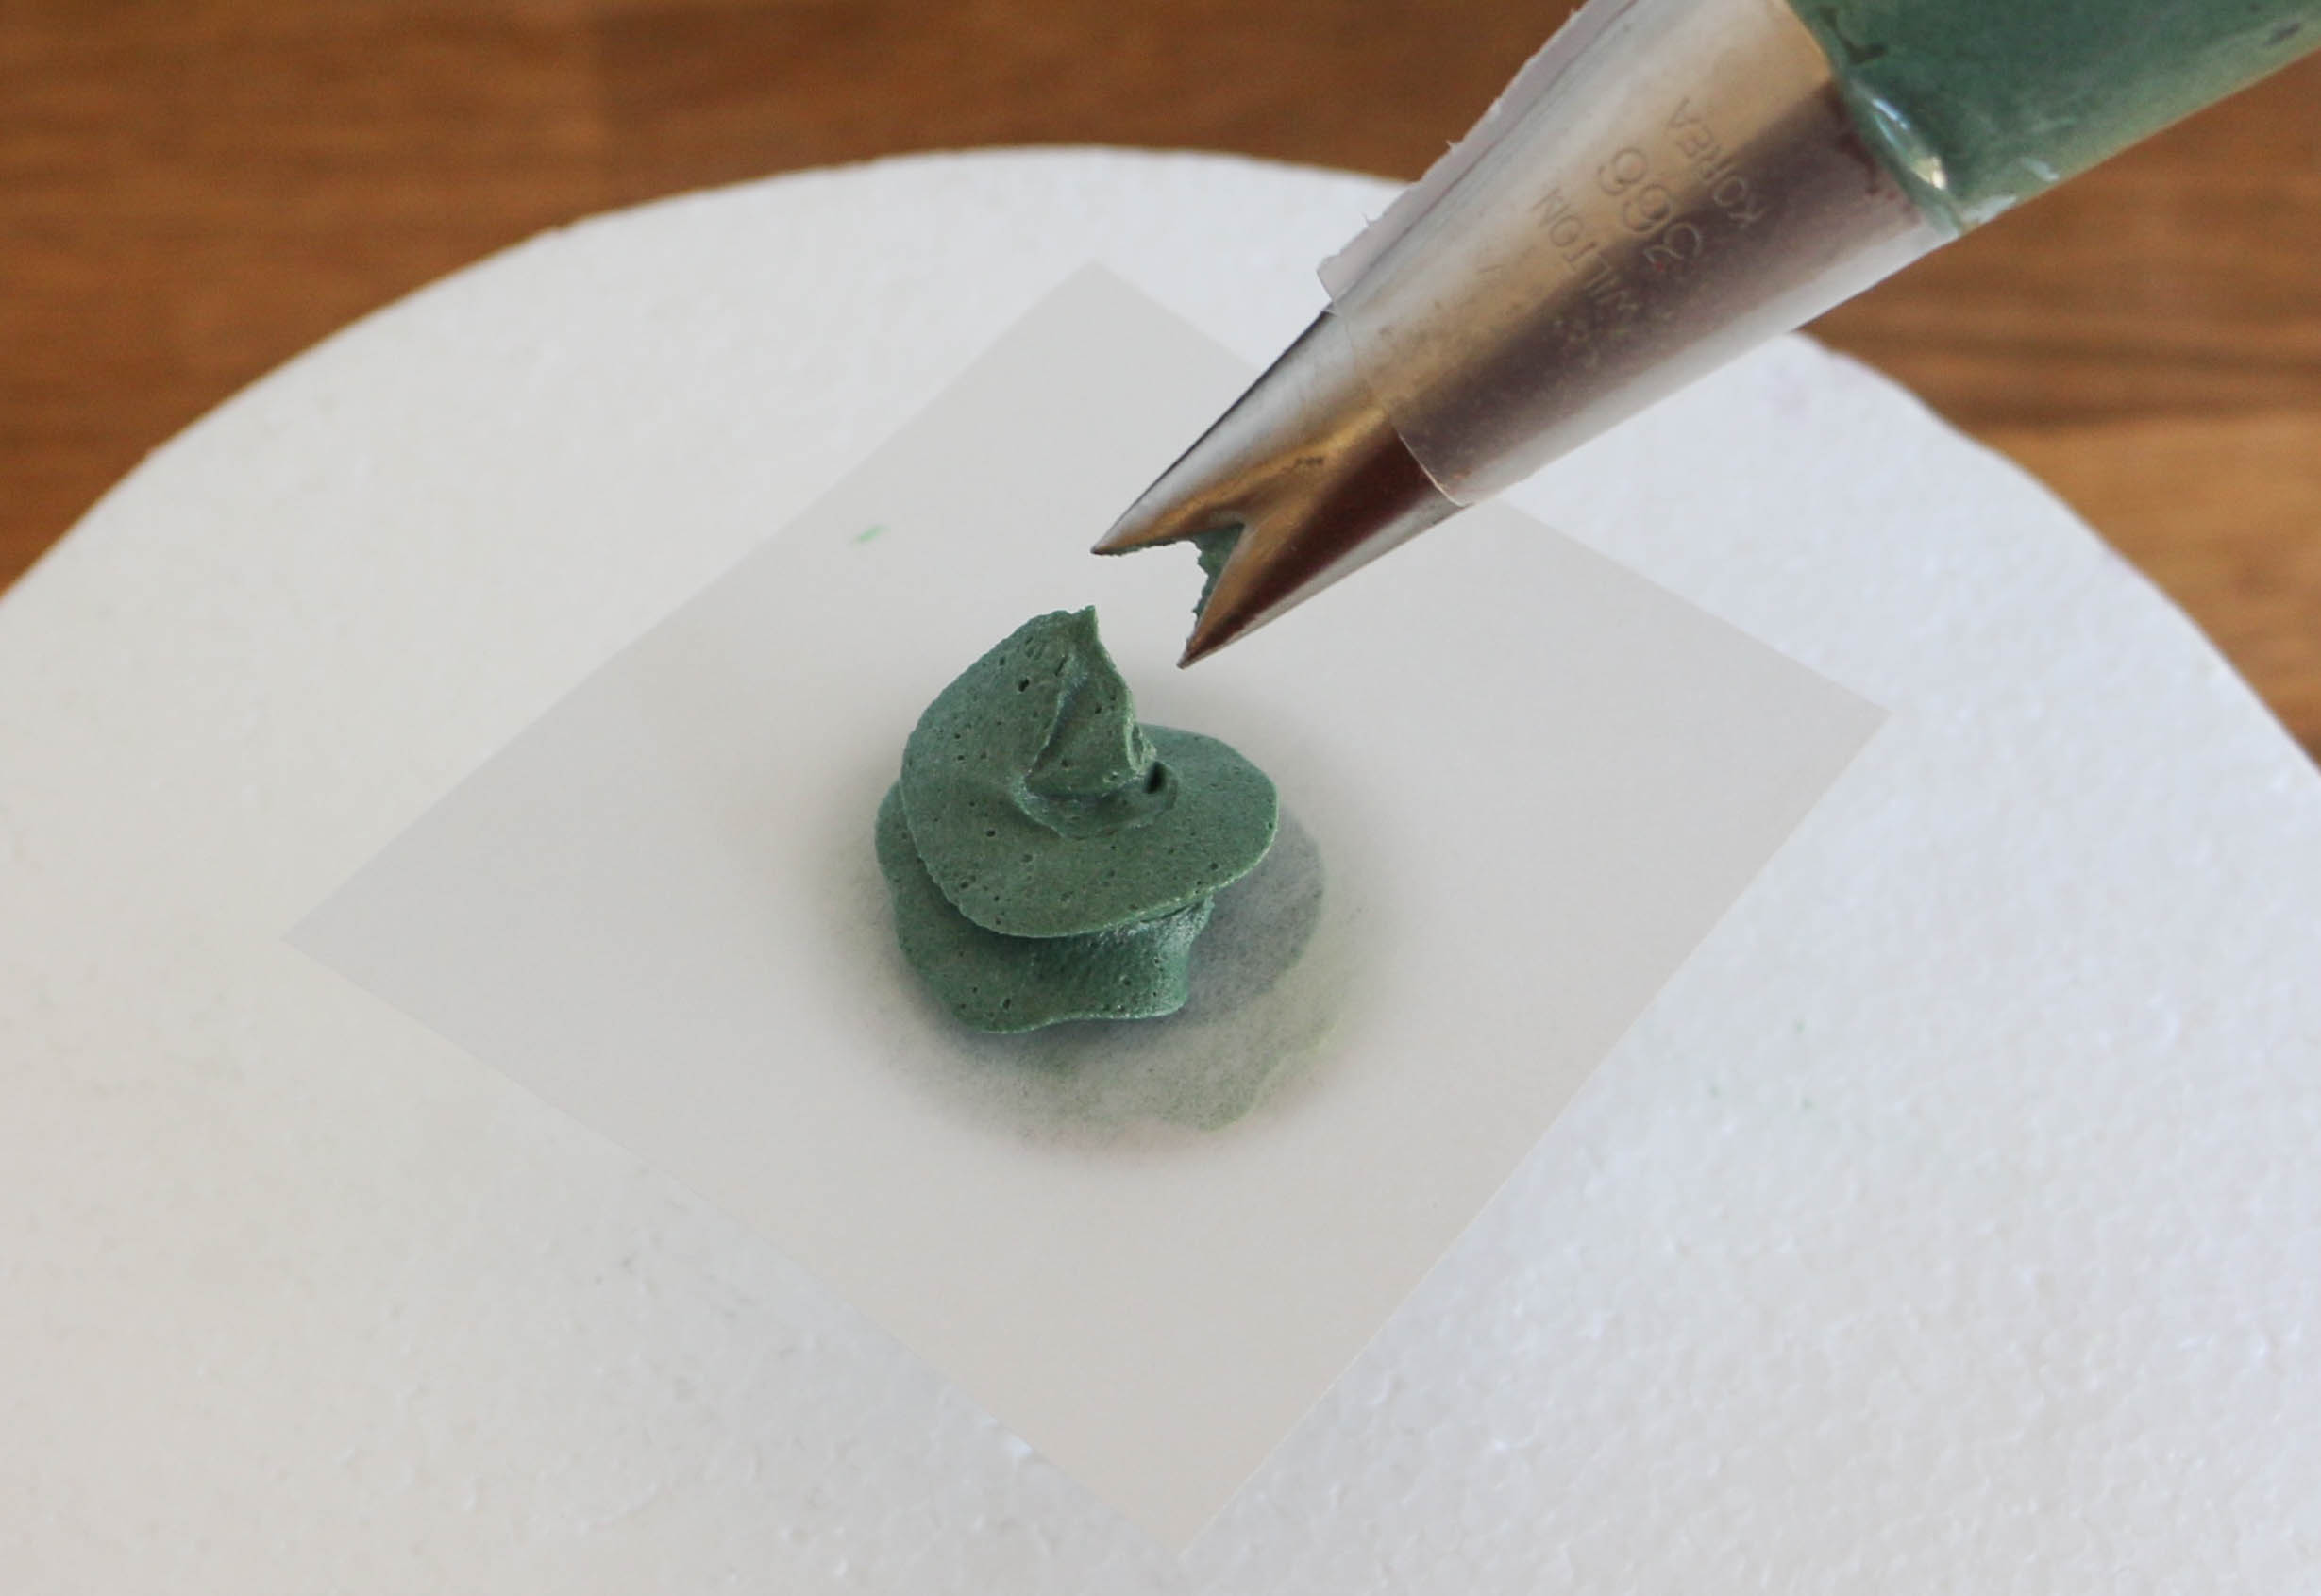
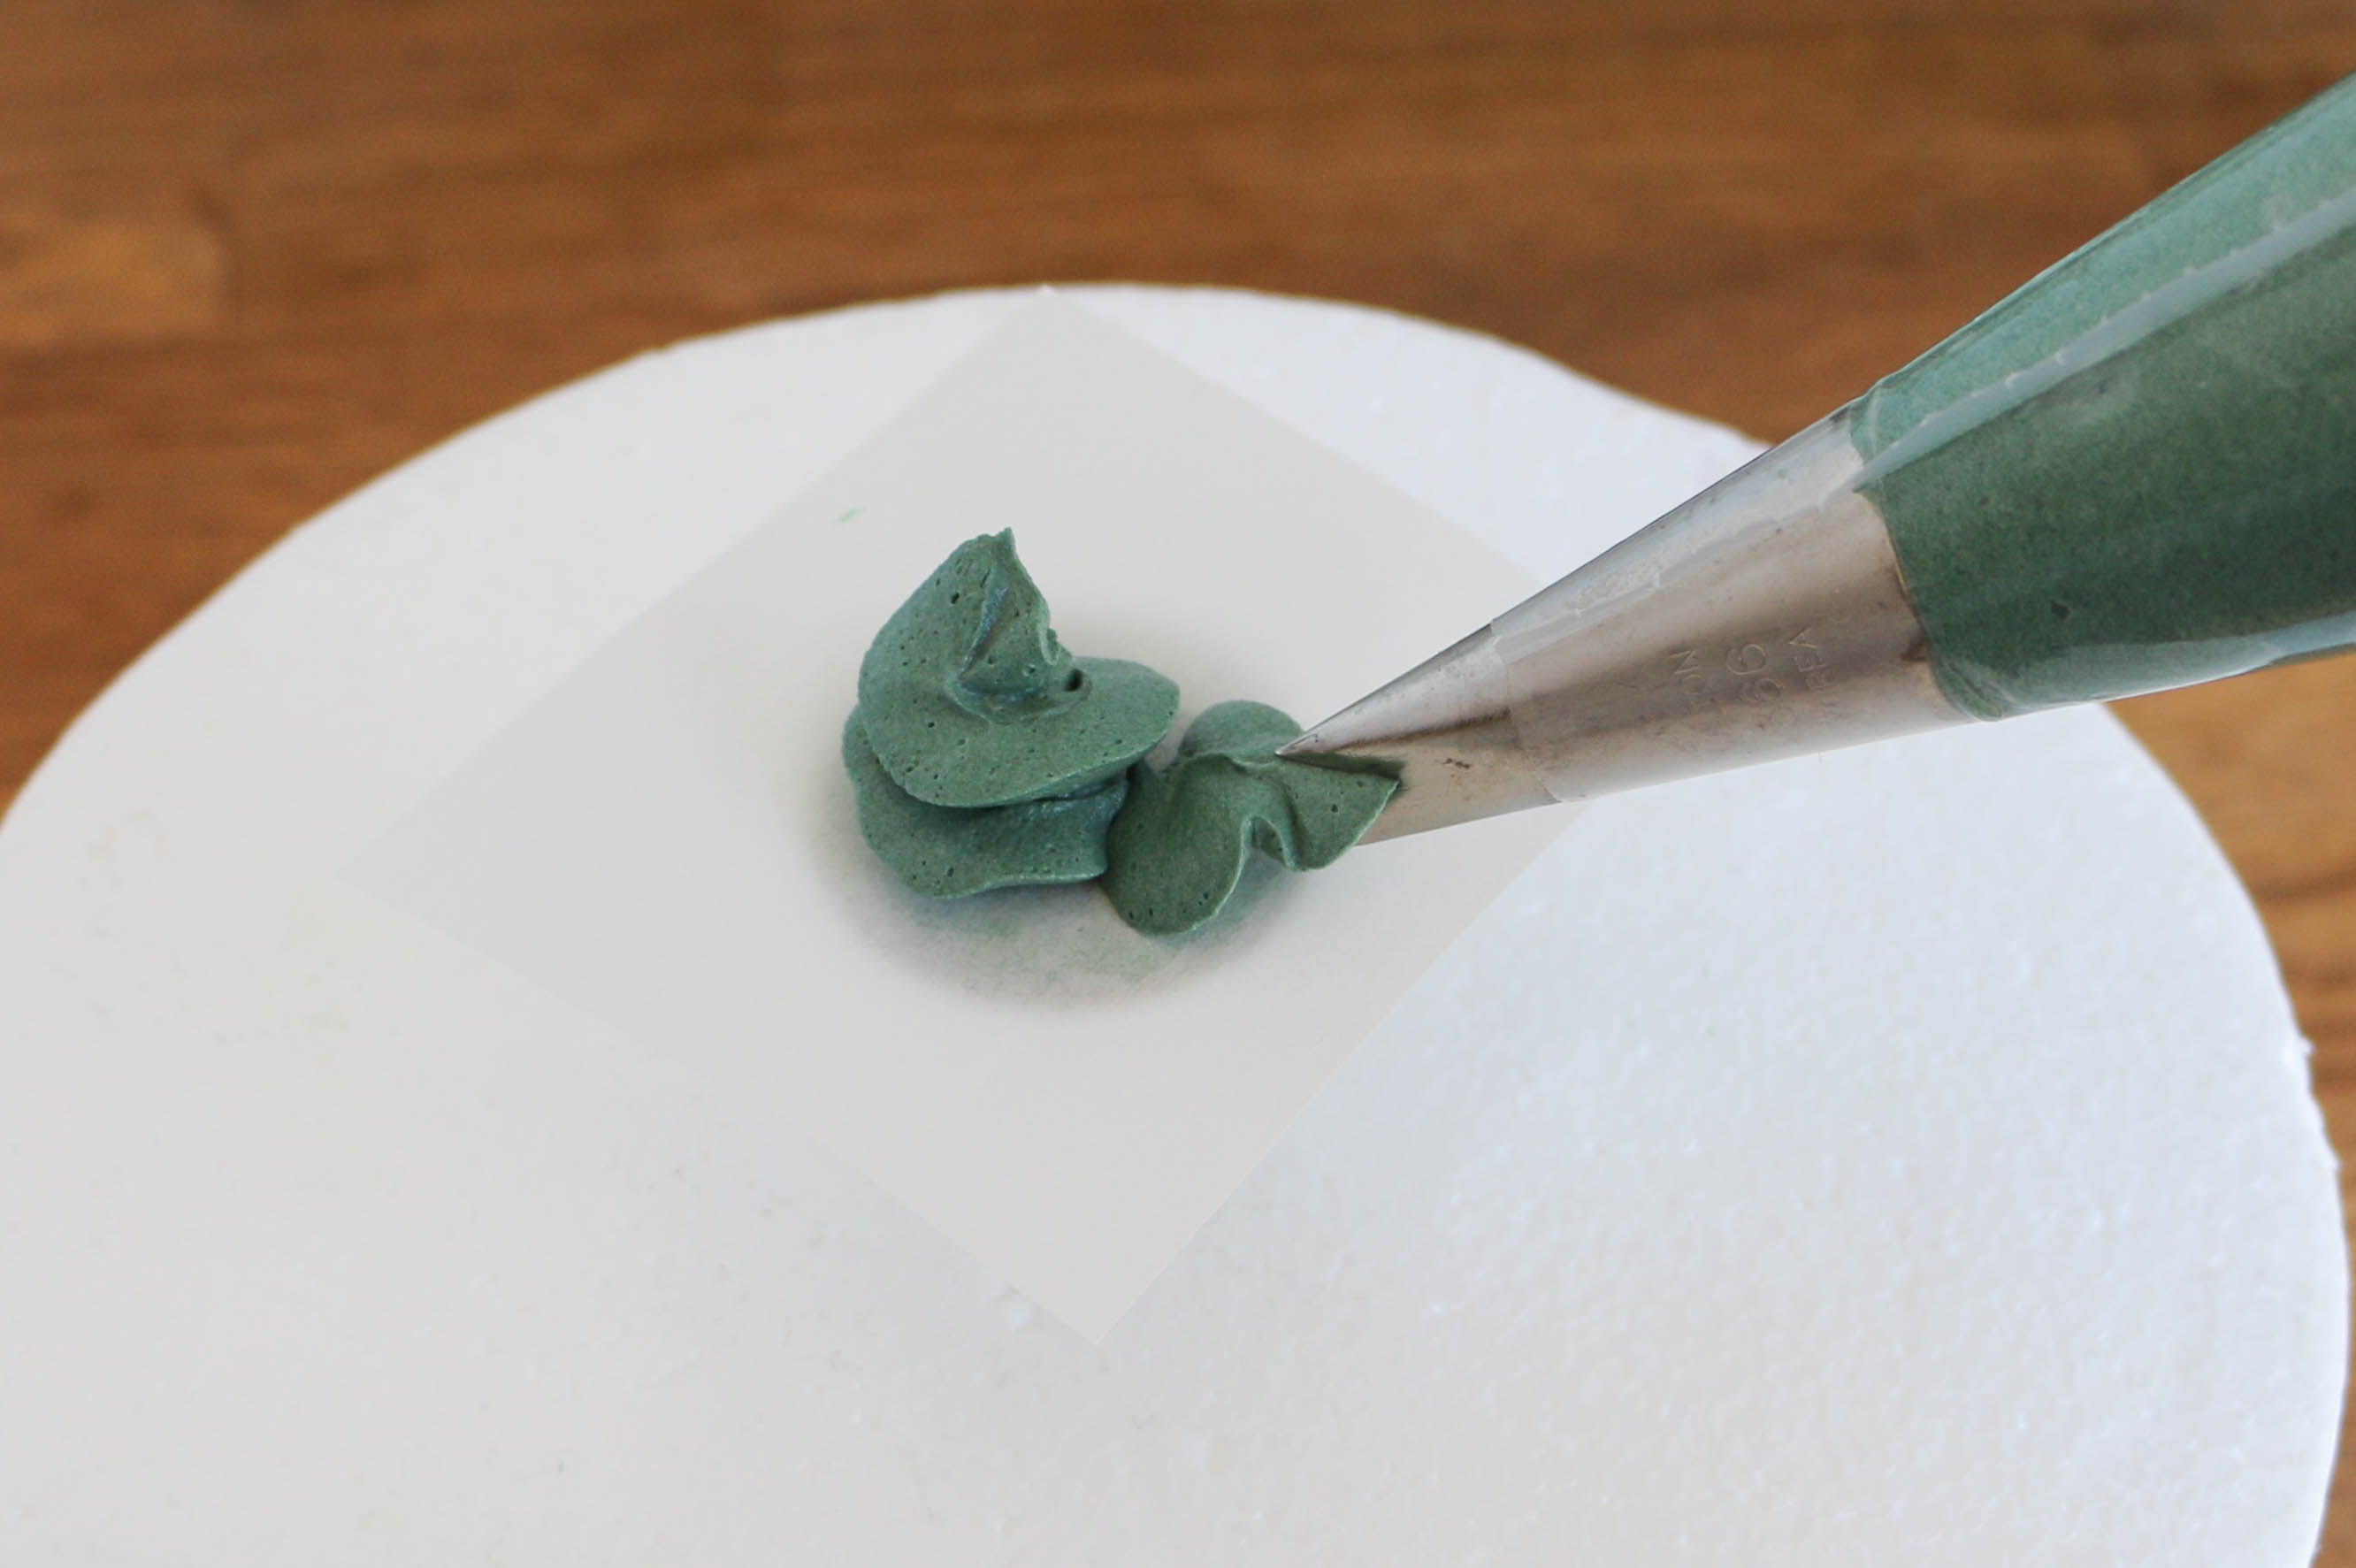
8. Whoa, Check Out this Round-Tip Plant
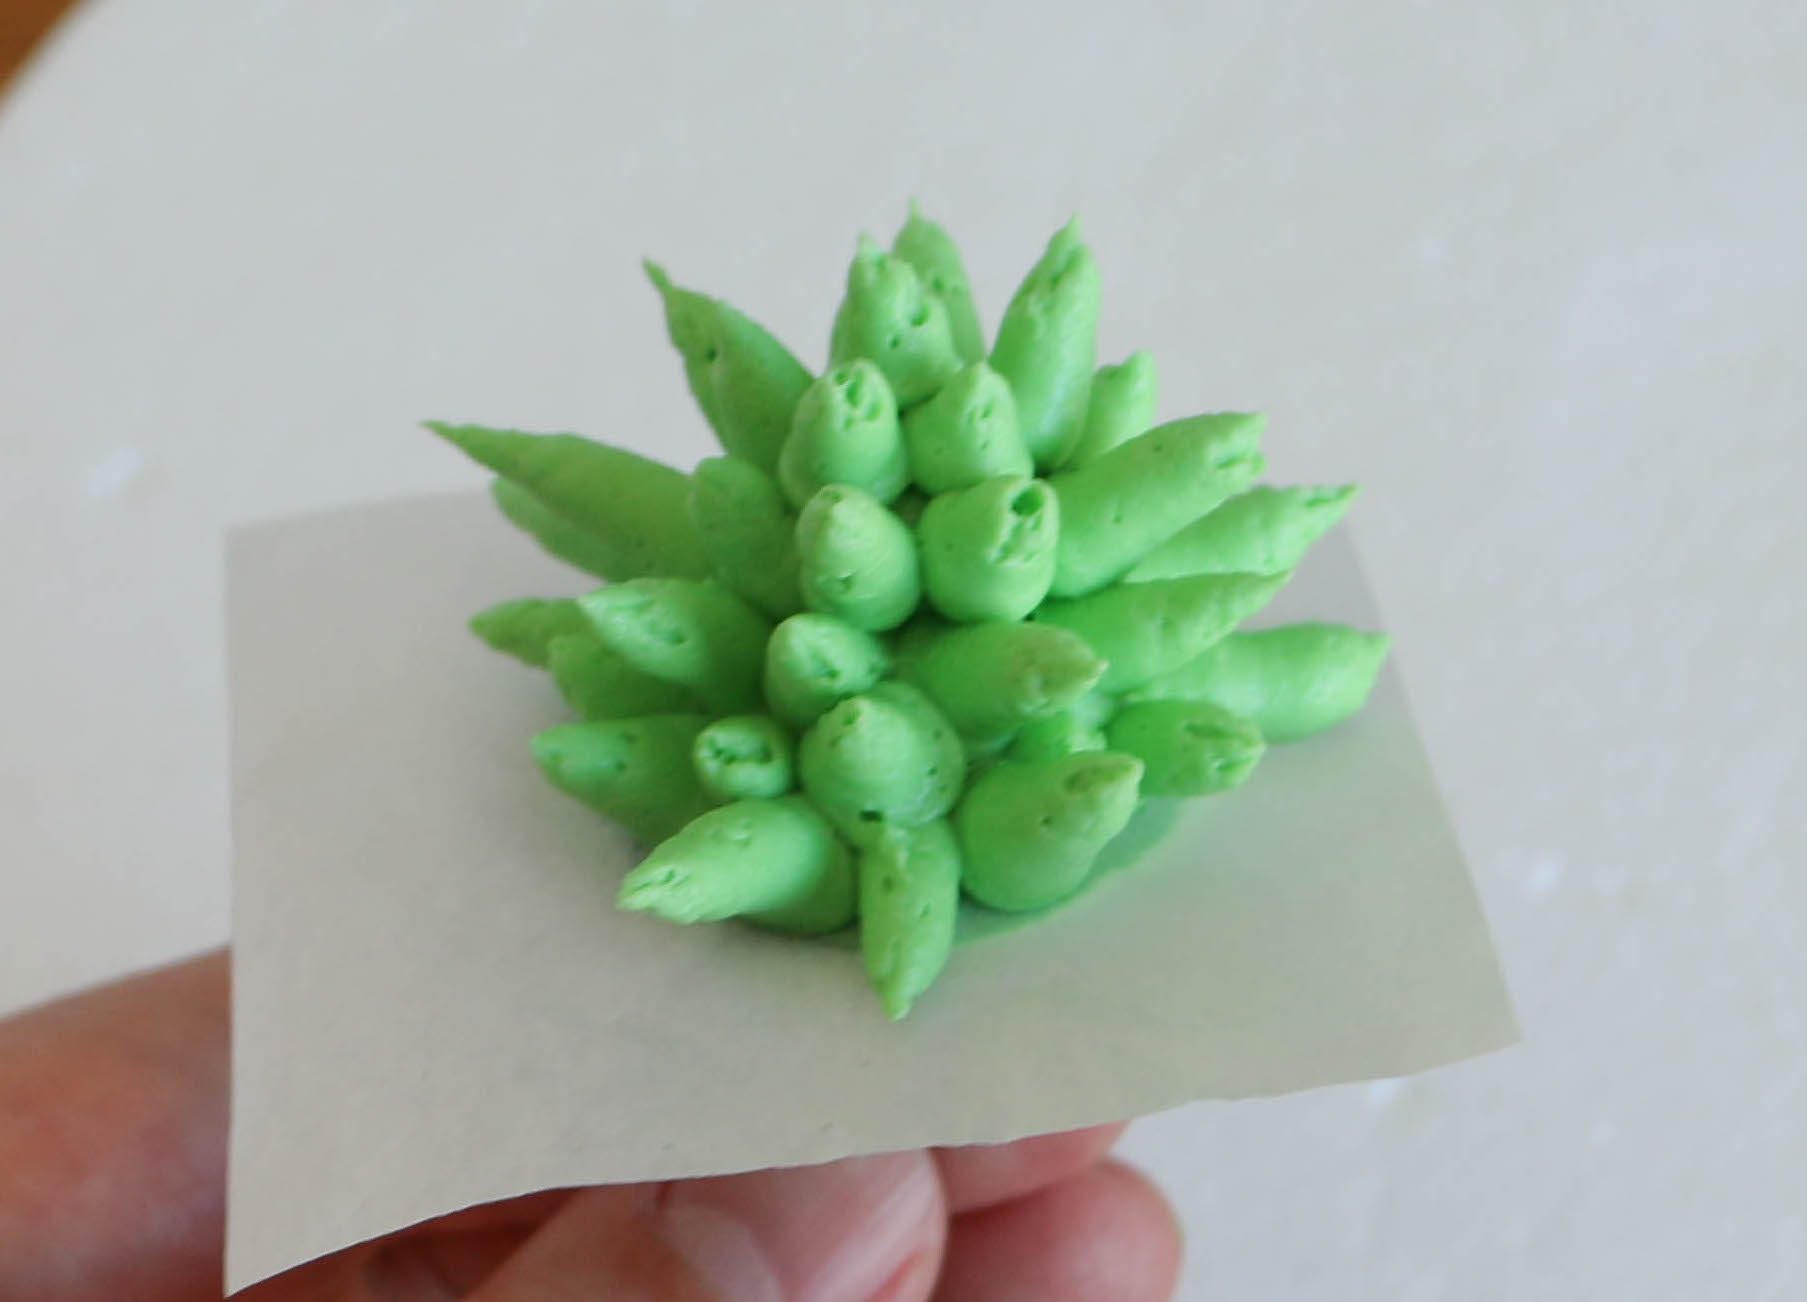
Fit a piping bag with a medium-sized round tip, then fill with lime-green buttercream.
Pipe a tall, skinny mound of buttercream onto the floral nail. Hold the opening of the tip at the base of the mound against the surface of the buttercream.

Pipe a line of green frosting, pulling the tip away from the mound and releasing pressure as you go. Repeat until the entire mound is covered. Make the lines shorter as you reach the top.
Place the tray with all your finished succulents in the fridge for at least 10 minutes or until they are chilled all the way through. This makes them easier to handle and arrange on top of the cake.
9. Arrange Your Desert Garden
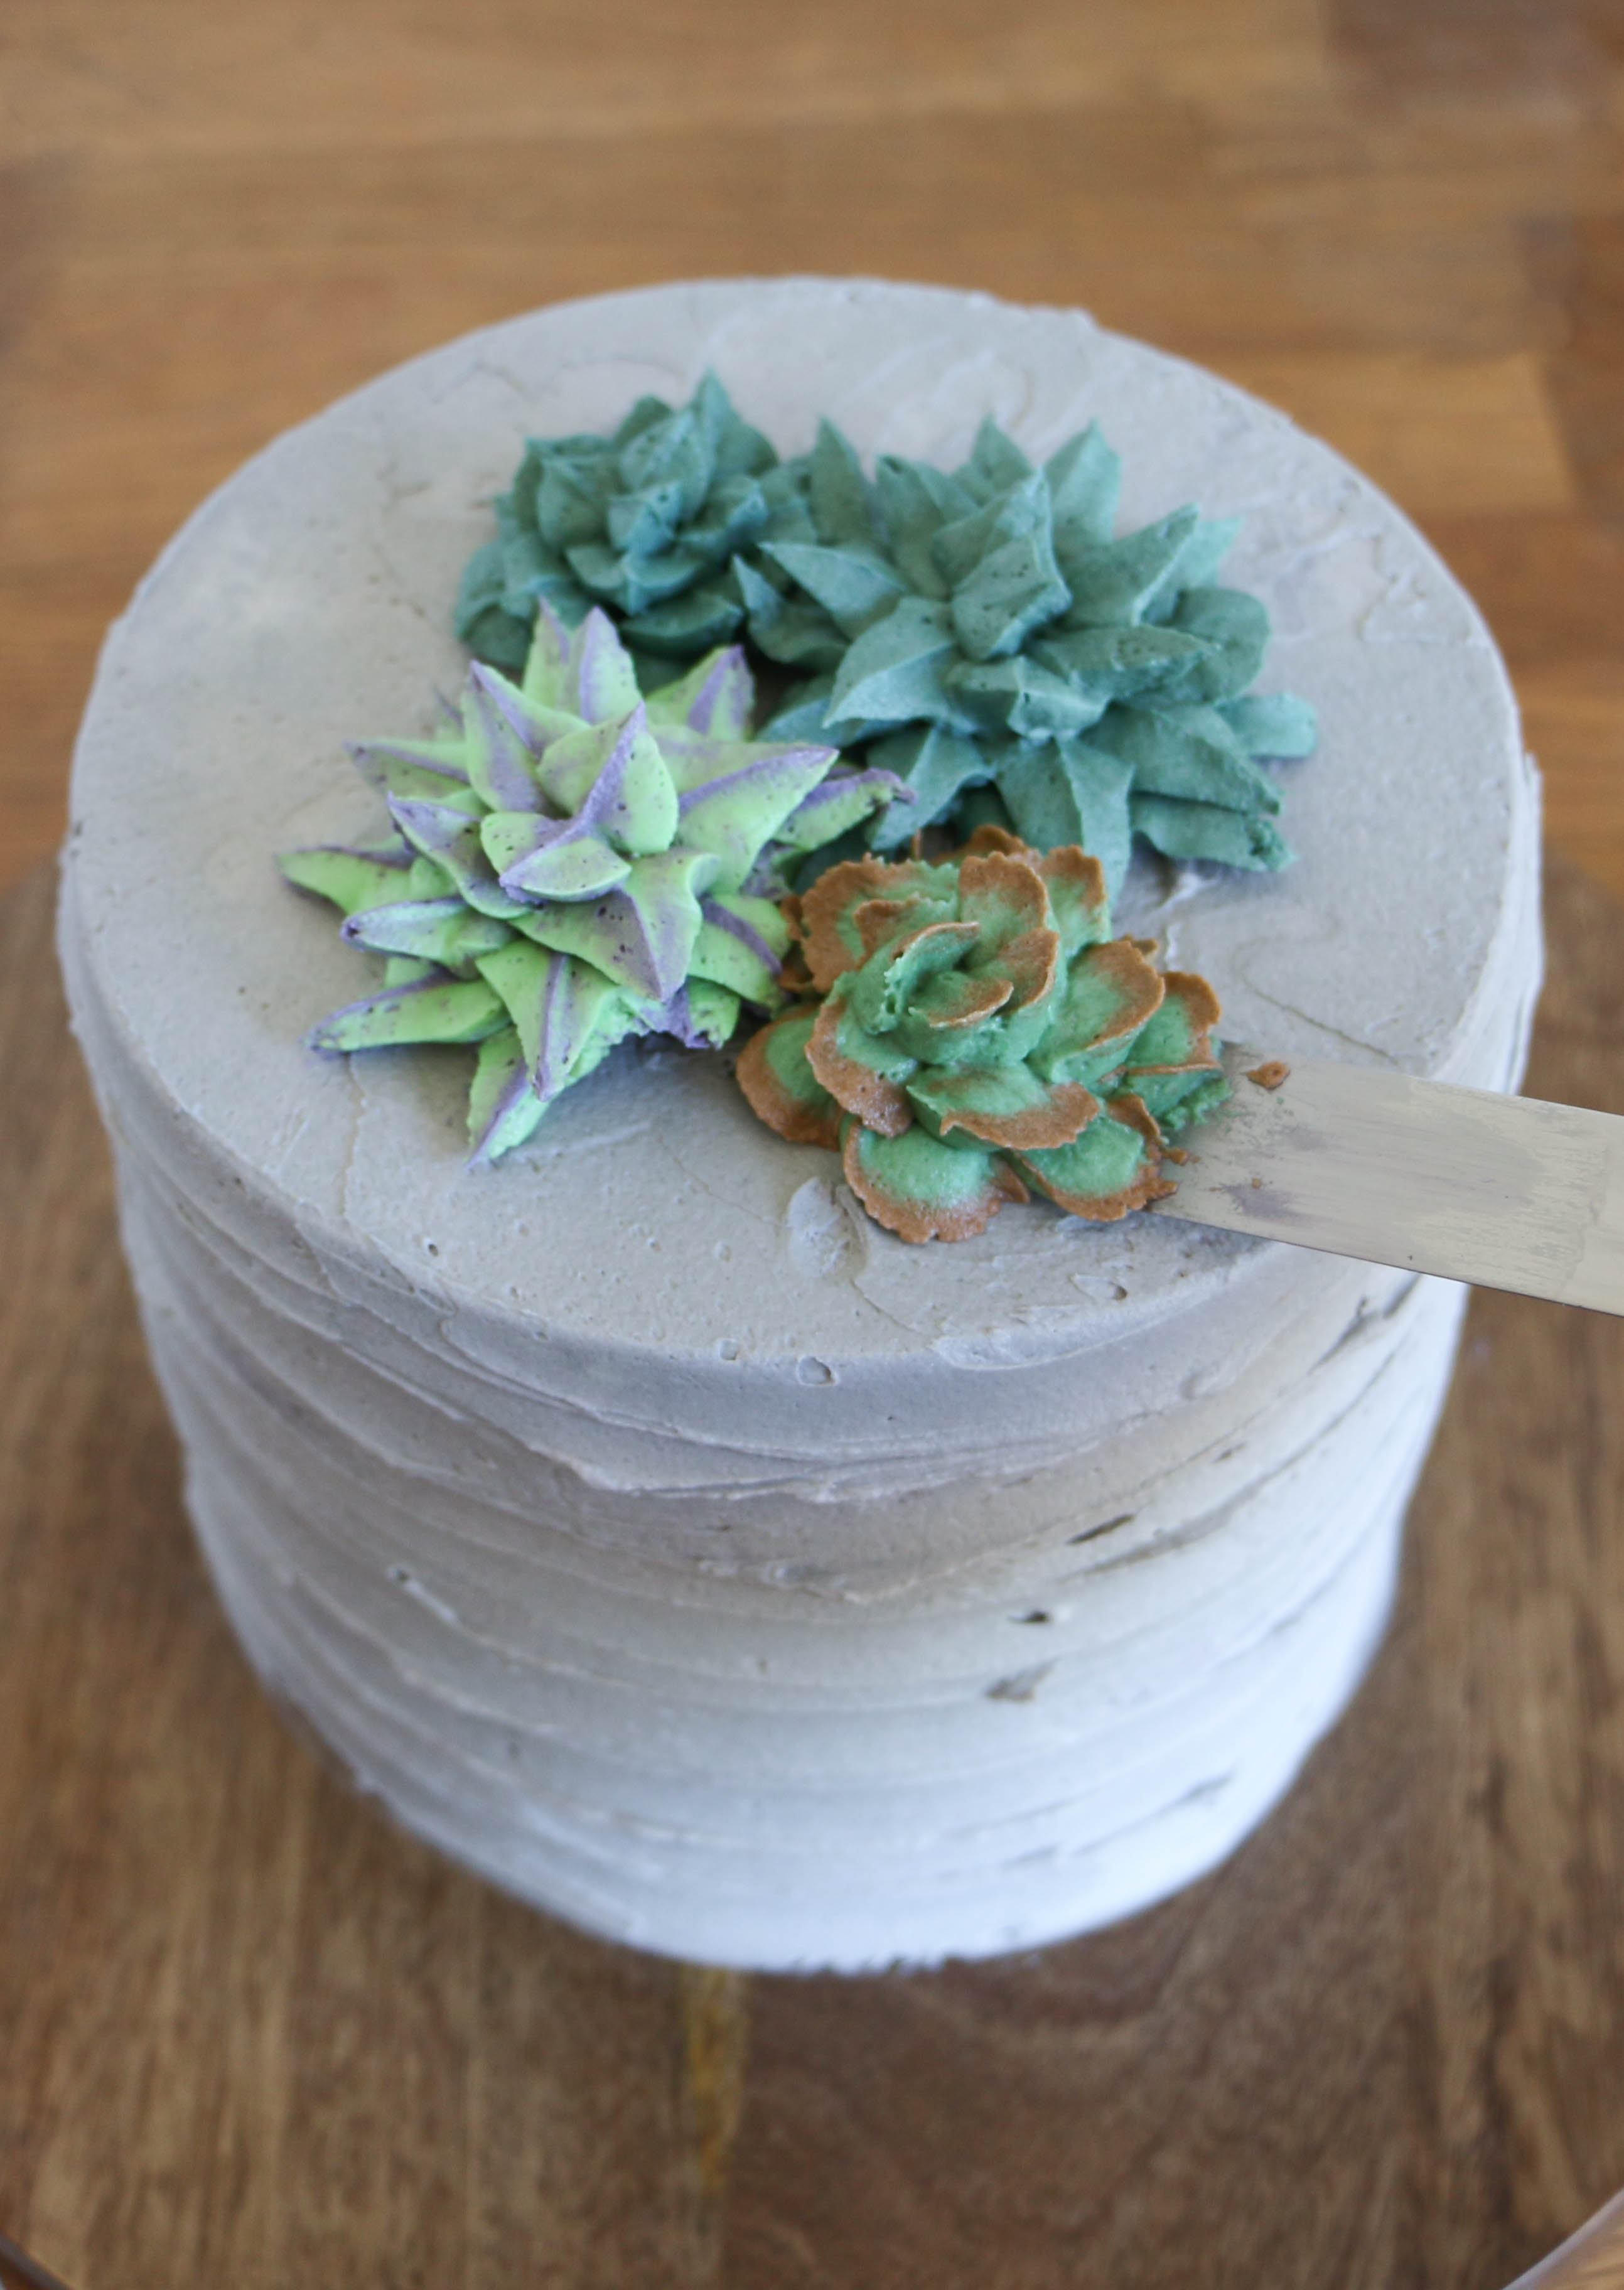
Gently peel the parchment paper off one of your chilled succulents. Place it on top of your frosted cake. Keep the succulent in place with a dab of buttercream if the frosting on the cake has crusted. Use a small icing spatula to slide succulents into place.
You can create a layered effect by piping a mound of buttercream before adding a succulent. Add even more realism by filling in the gaps and edges of your arrangement with smaller succulents piped directly onto the cake.
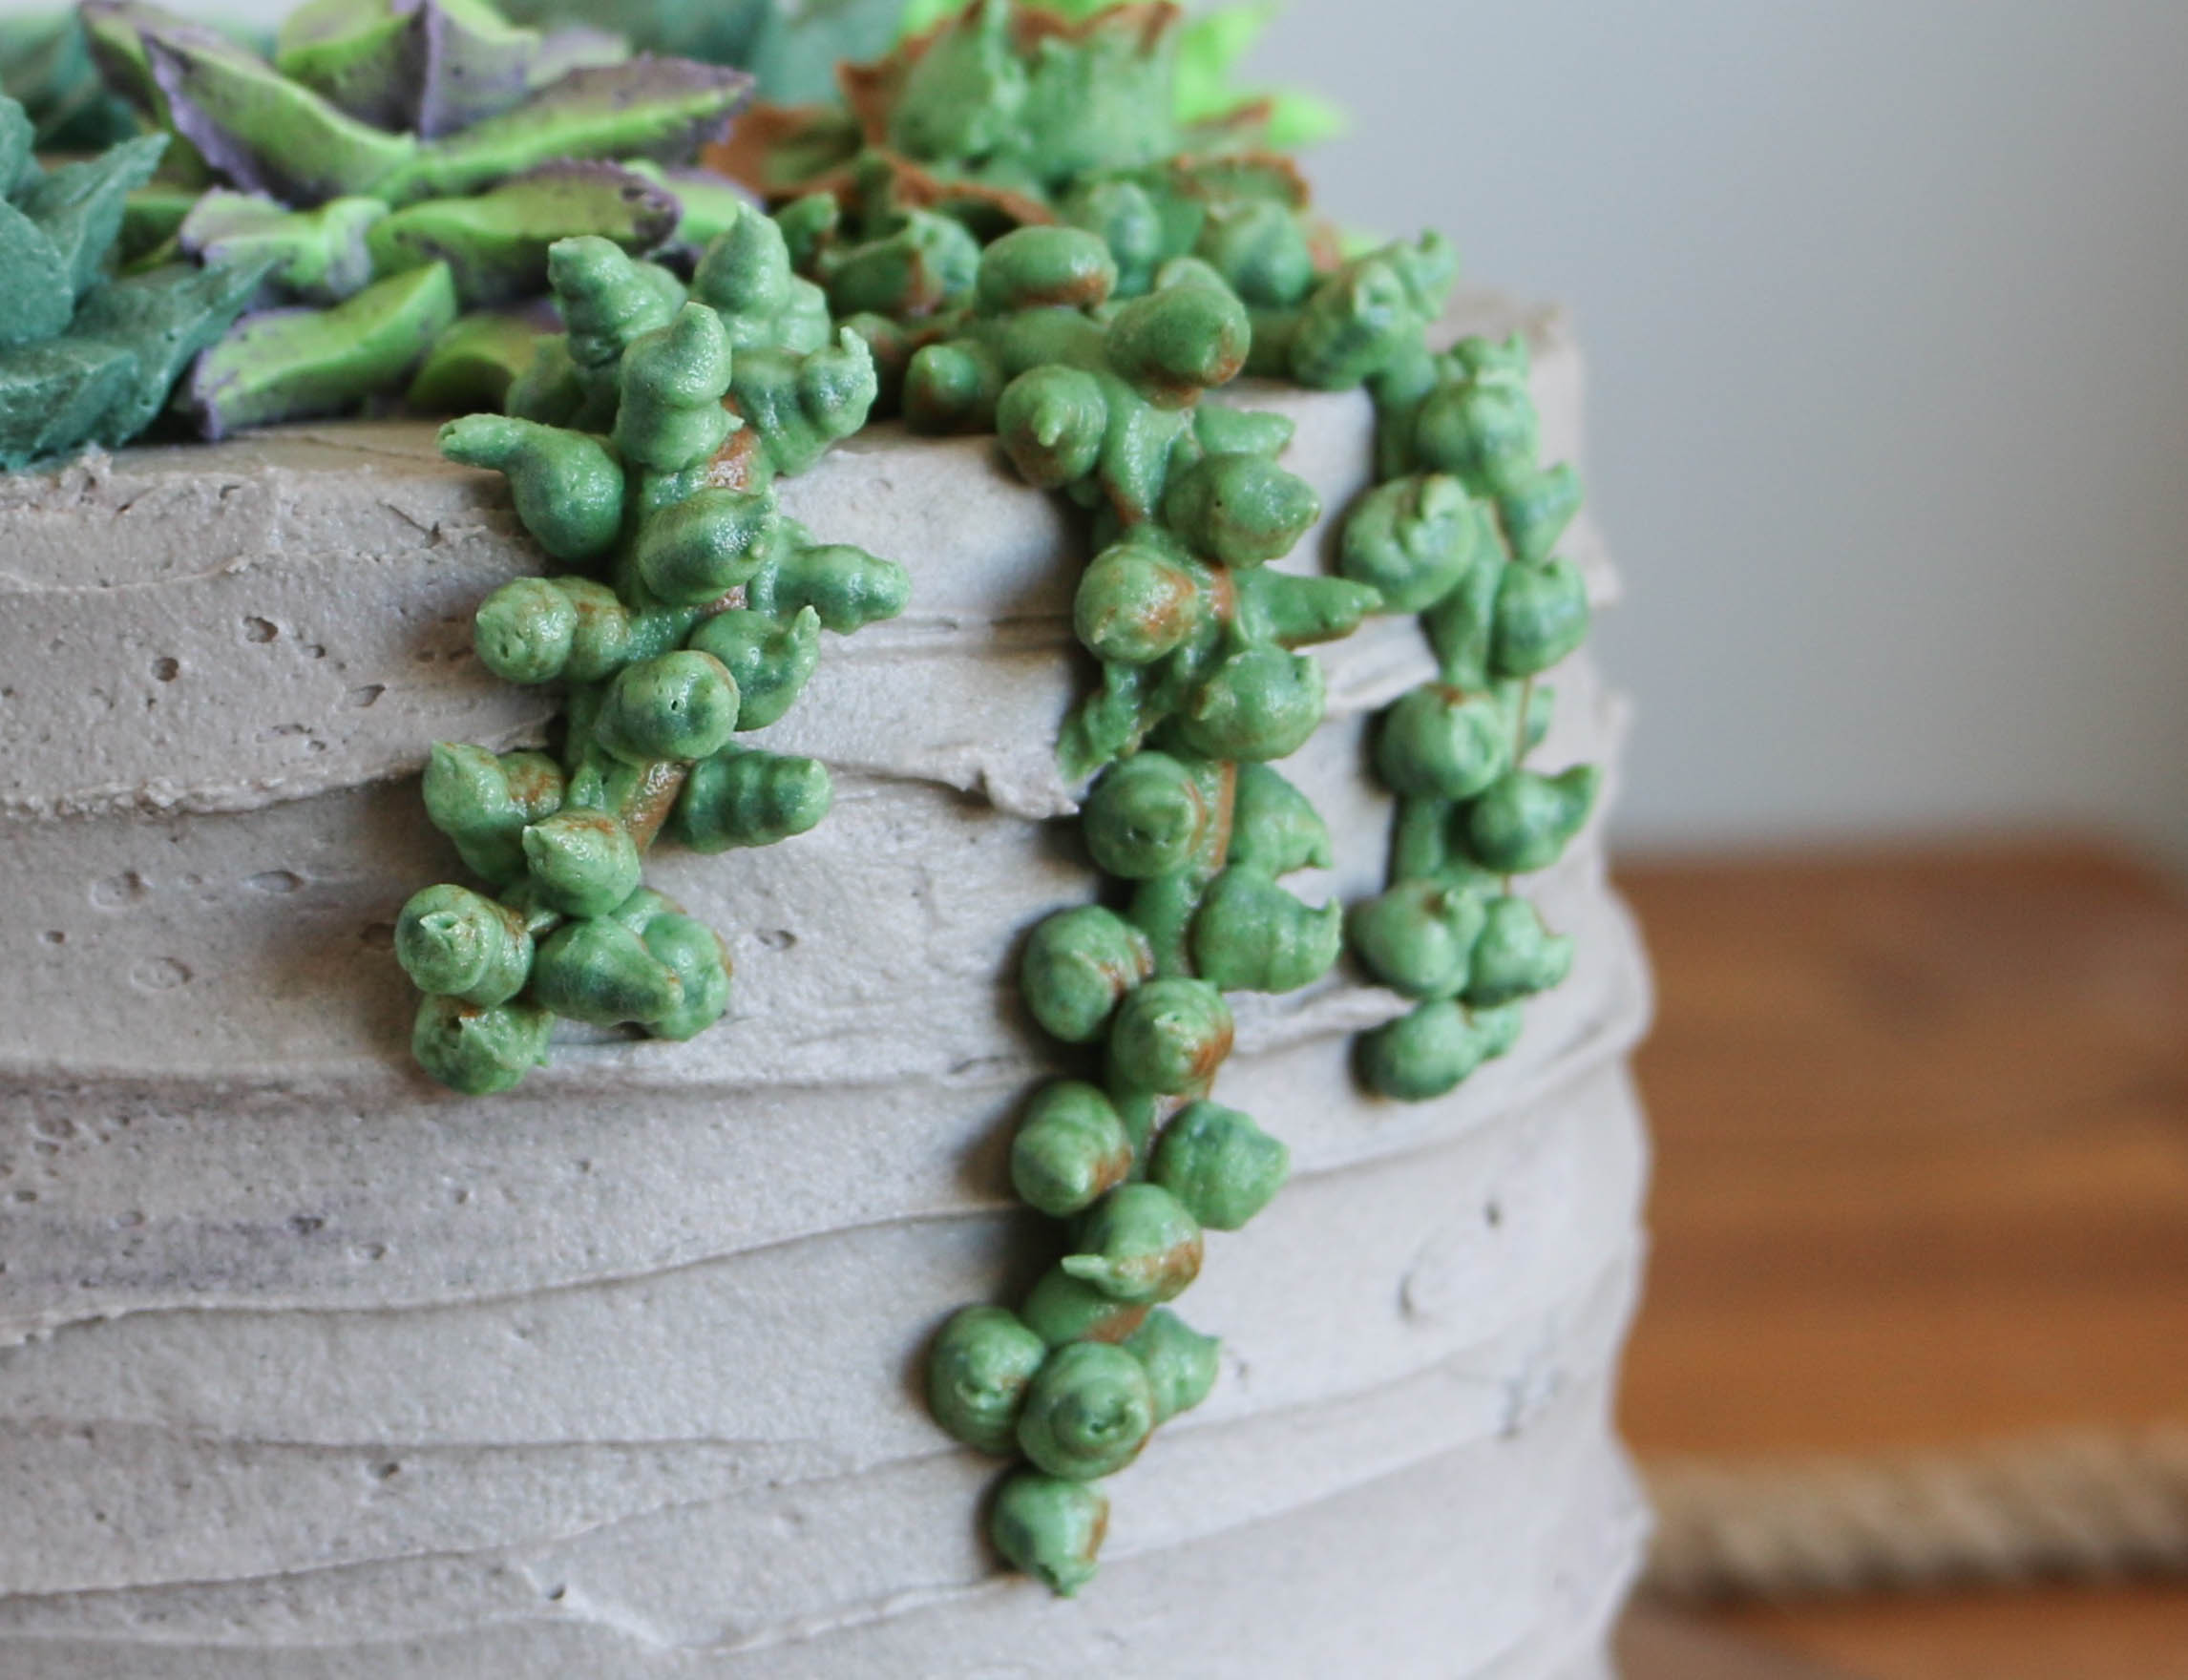
Fit a piping bag with a small round tip, then fill with the remaining dibs and dabs of green buttercream. Pipe a line over the edge of your cake, and go back over the line a few times to thicken it. Pipe small dots up and down the entire line, leaving spaces in between to create a vine effect. Repeat with more lines and dots.
You can also pipe clusters of tiny dots to fill in some of the gaps between larger succulents, completing your arrangement by adding extra petals where needed.
Stand back and admire your buttercream masterpiece!
Thanks for sharing . Amazing article
Amazing article you have here . Thanks for sharing
Thanks for finally writing about > Succulent Cake Buttercream Piping Tutorial | Craftsy | www.craftsy.com < Liked it!
Valuable information. Lucky me I found your web site accidentally, and I'm stunned why this coincidence didn't came about earlier! I bookmarked it.
I every time spent my half an hour to read this website's posts every day along with a mug of coffee.
great tutorial! Thanks!