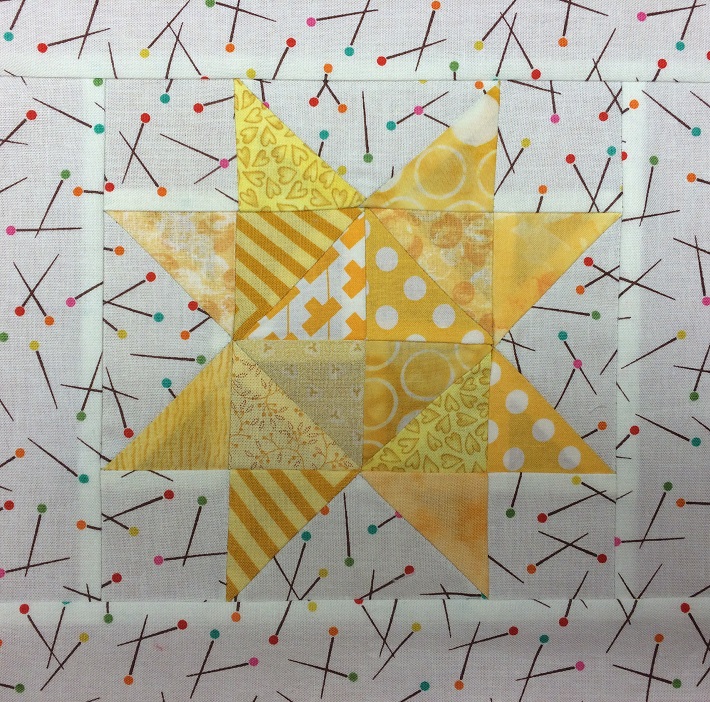
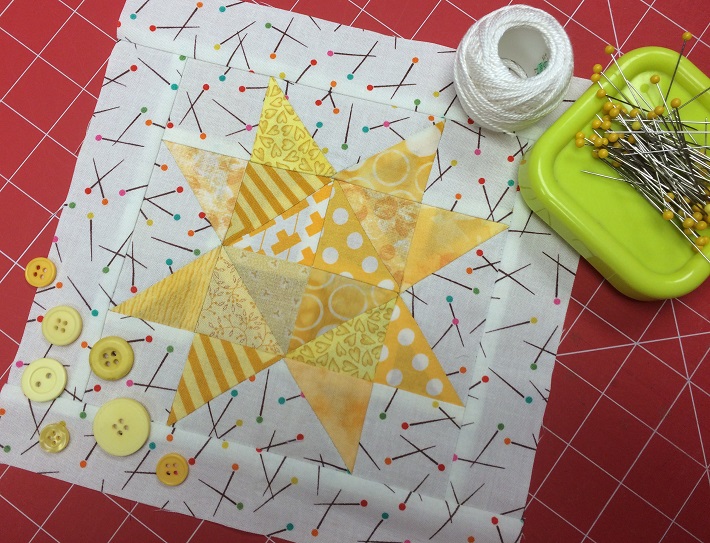
This shiny star block for January is made up entirely of 1½" and 2" strips and squares and will finish at 8" square. This block will add a little sparkle to our collection of scrappy blocks. Sew one or sew a dozen, these are so easy that you'll want to make many!
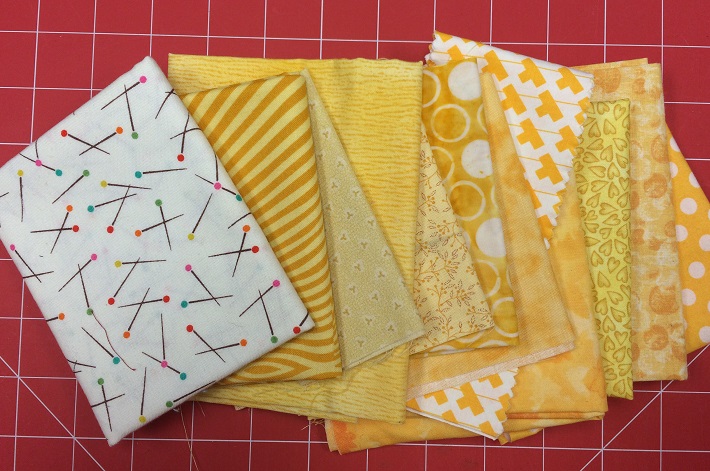
As always, all seams are sewn using a ¼" seam allowance unless otherwise noted. This block requires eight to sixteen yellow fabrics and one background.
Let’s get started!
Shiny Star Quilt Block Tutorial
Step 1:
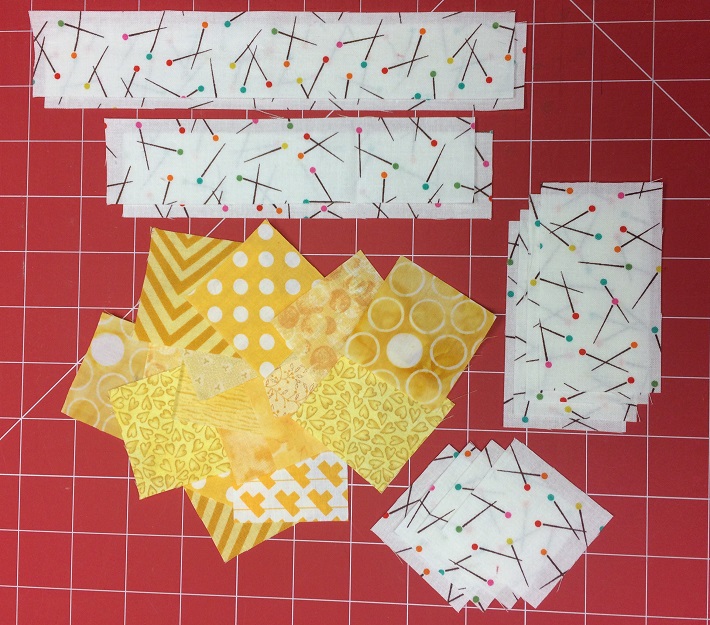
Cutting for this block is simple:
- Sixteen yellow squares will be cut 2" x 2"
- Two strips 1½" x 8½"
- Two strips 1½" x 6½"
- Four rectangles 2" x 3½"
- Four squares 2" x 2"
Step 2:
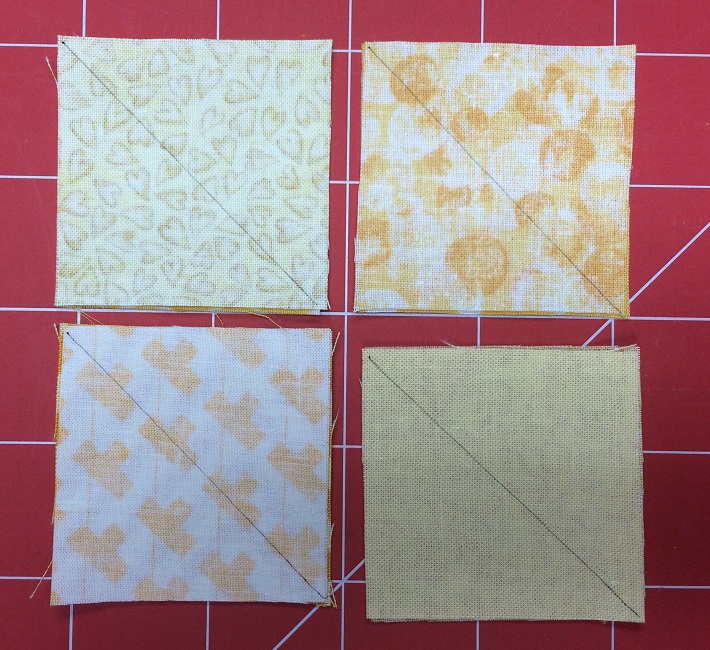
Layer four yellow squares on top of four yellow squares, right sides together. Draw a straight line diagonally from one corner to the opposite corner. This will be the sewing line.
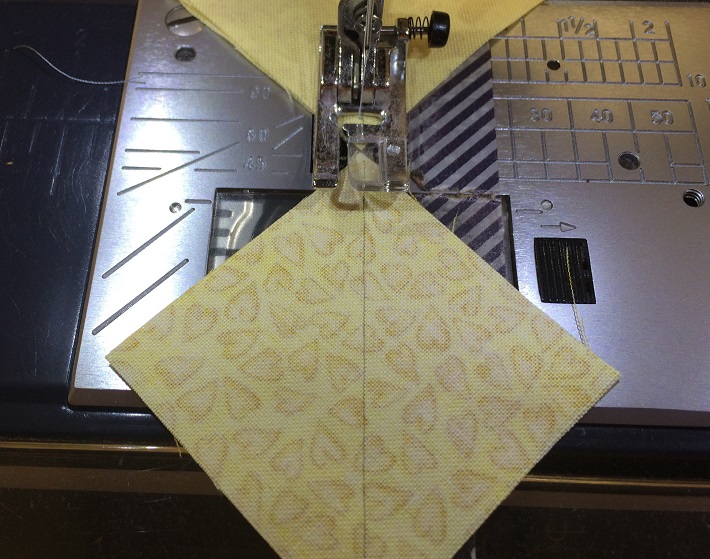
Step 3:
Sew along the drawn line on all four yellow square sets.
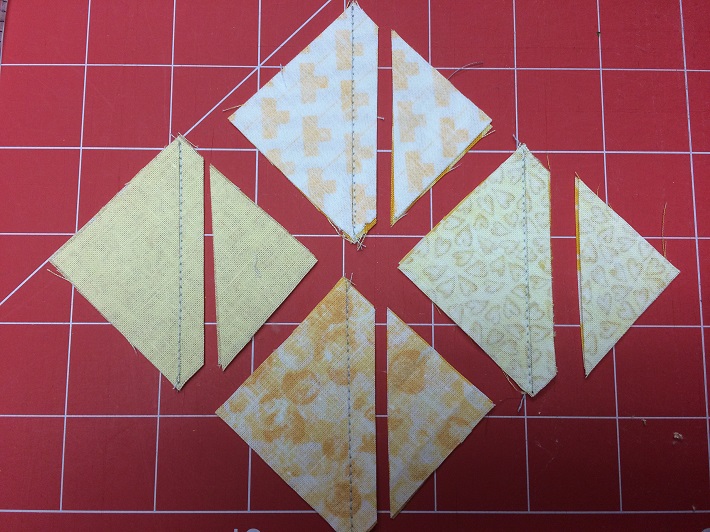
Step 4:
Using a ruler and a rotary cutter or scissors, cut ¼" away from the sewn line as shown. Press the blocks with the seams open.
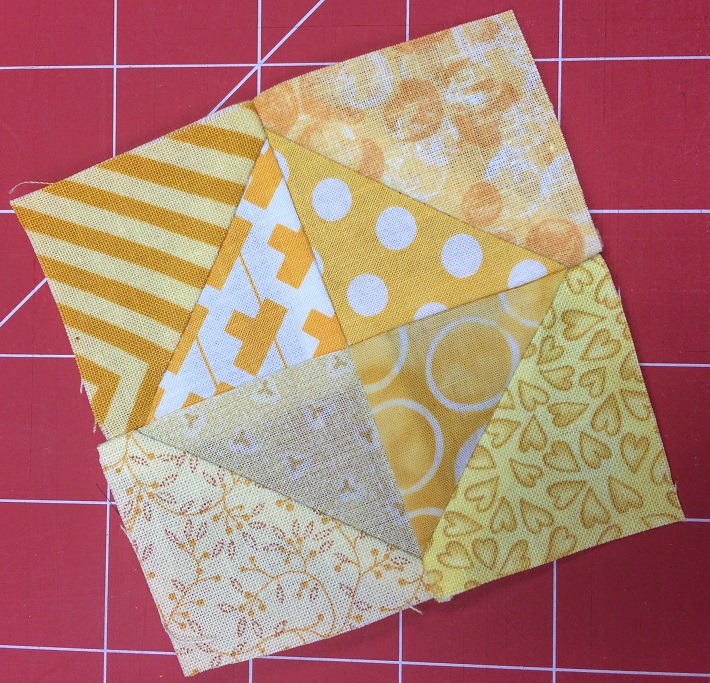
Step 5:
Sew these four squares together into a four patch. Arrange the diagonal seams as shown to create this diamond-in-a-square pattern. Pinwheel press the seams on the back to lay flat.

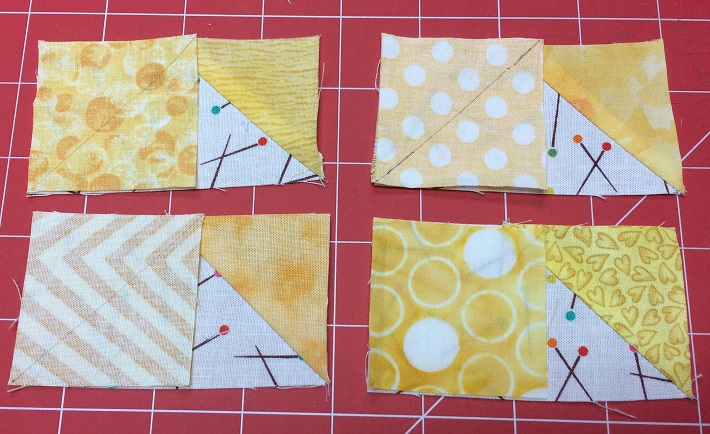
Step 6:
Mark the remaining eight yellow squares on the wrong side of the fabric with a diagonal line. Layer one square and one background rectangle right sides together as shown. Sew on the drawn line, trim ¼" away from the sewn line as shown. Press the yellow fabric away from the background rectangle.
Step 7:
Repeat Step 6 with the four remaining yellow squares. Be careful to arrange the drawn lines as shown to create a "flying geese unit" for the star points.
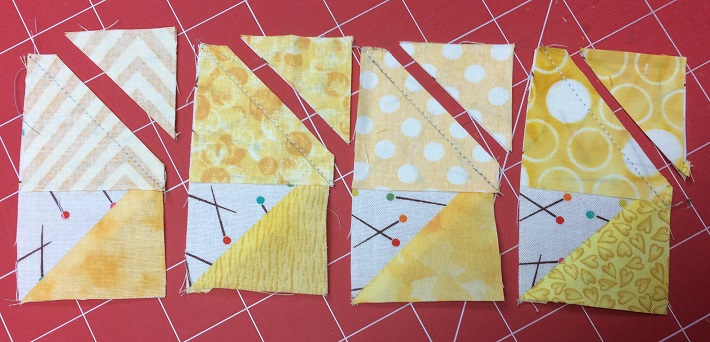
Step 8:
Sew on the drawn line, trim and press the seams away from the background fabric.
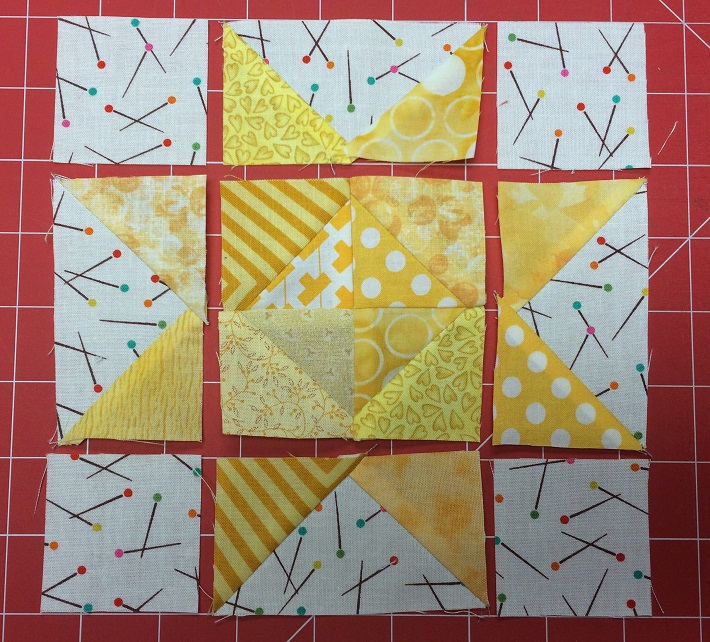
Step 9:
Arrange the sewn units as shown.
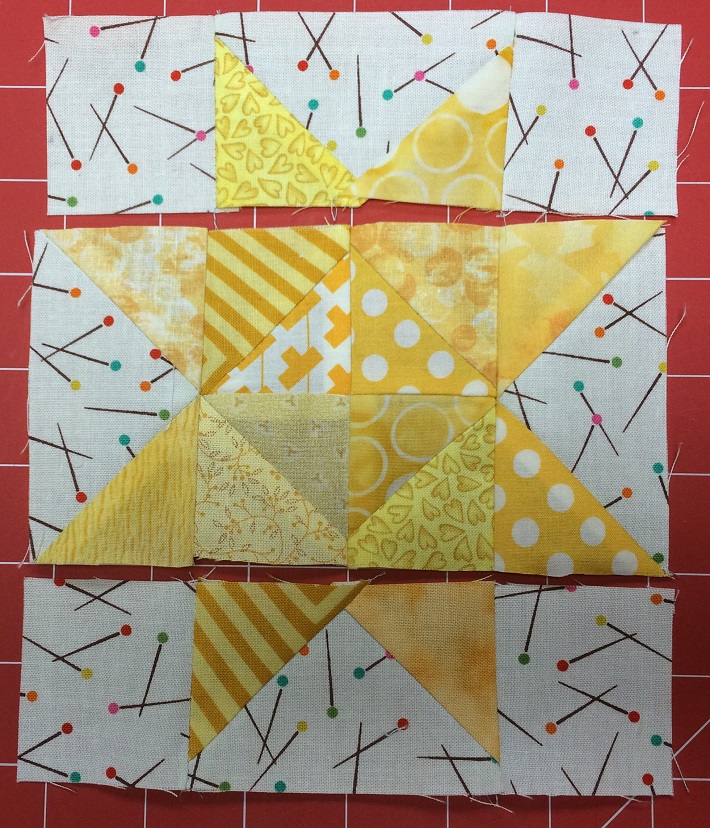
Step 10:
Sew the units into rows. Press the seams toward the star points on the top and bottom rows. Press the seams away from the center unit on the middle row. This will allow the seams to nest when sewing the rows together.
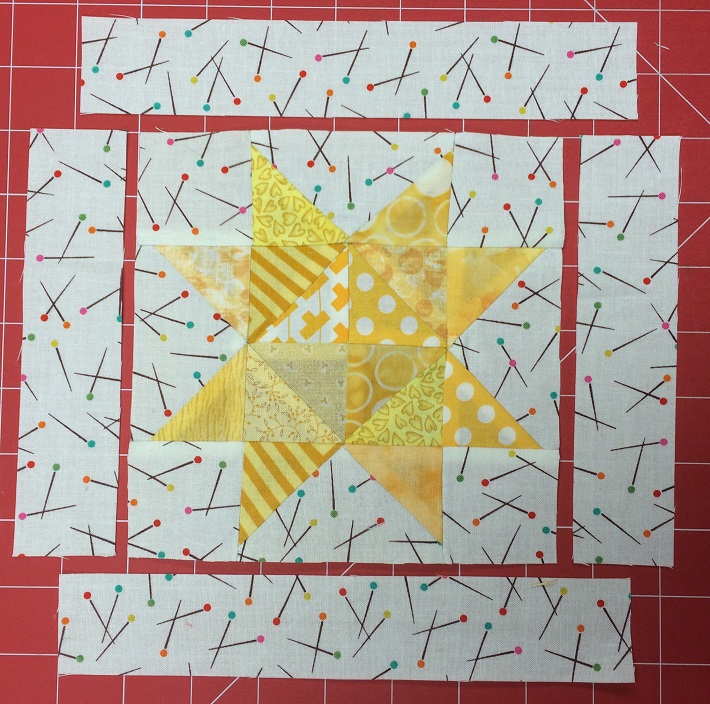
Step 11:
Sew the side borders onto the star unit. Press the seams toward the border strips. Sew the top and bottom borders onto the block. Press the seams toward the border strips.
Step 12:
Admire your beautiful star block! This is the last block of 12 blocks in this series. We will share a setting design and other fun options for these blocks next month.

Such cute patterns
I ADORE CRAFTSY PATTERNS