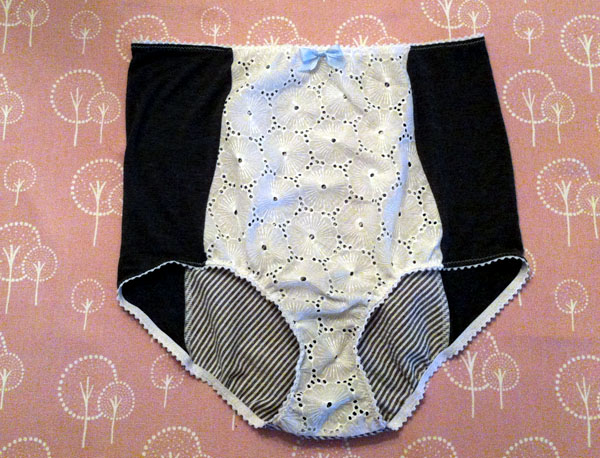
Go retro and stitch high-waisted underwear that’s totally comfortable and classic, not to mention customizable thanks to the ability to mix and match woven and knit fabrics. And if you have leftover fabric post-project, there’s great news: you can use it to make a matching vintage-inspired bralette, meaning you’ll never have to scour the lingerie section for perfect-fitting undergarments ever again.
High-Waisted Panties
Level: Intermediate
What You Need
Instructions
1. Prep the Pattern
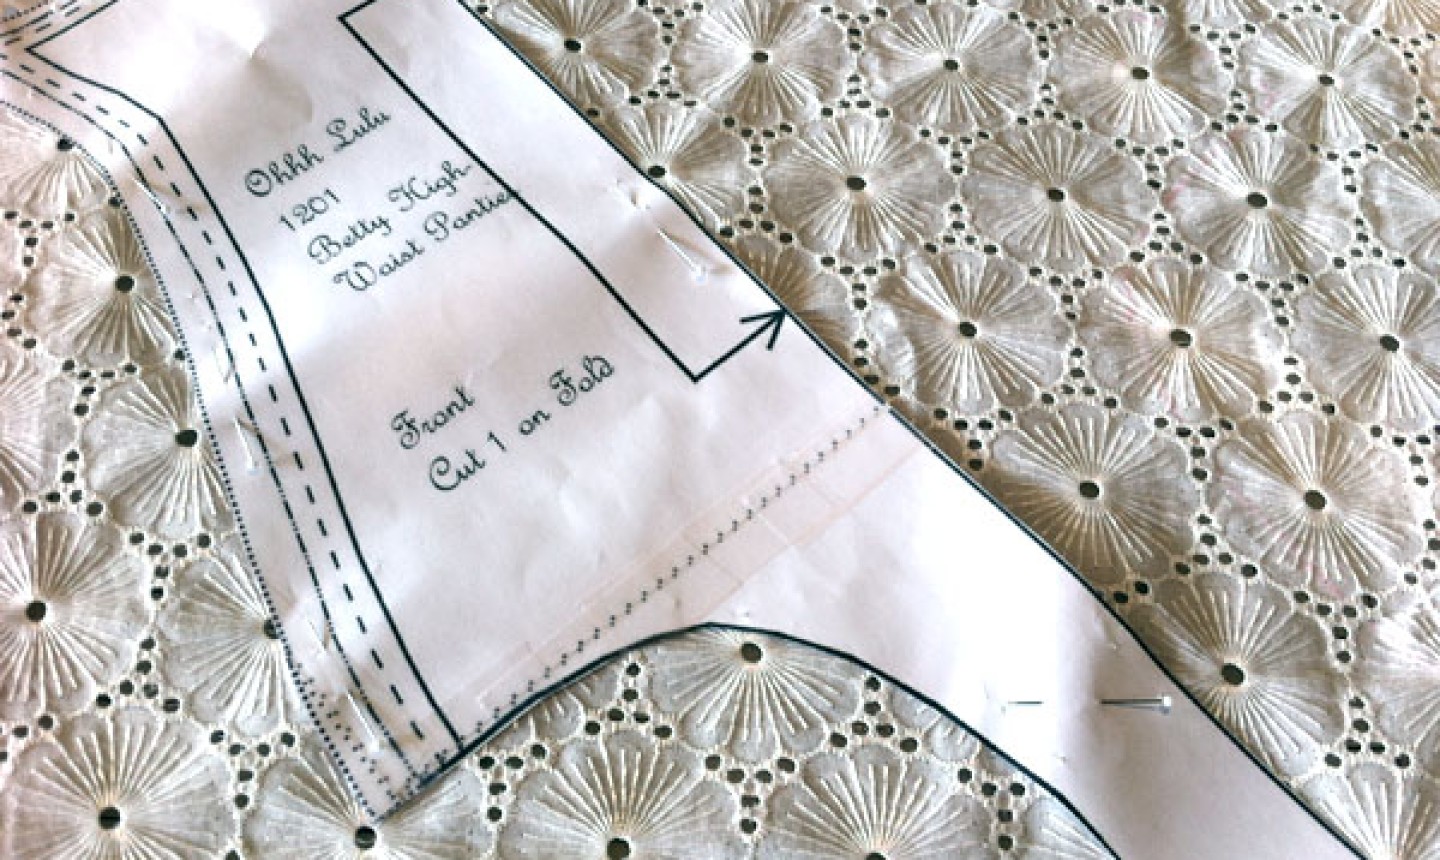
Download the panties pattern and tape the pieces together. Cut the size you need as indicated on the pattern.
To cut the front panel, line up the straight “place on fold” edge on the 45-degree true bias. (Don’t try to cut this on the bias and on the fold.) If you choose to make the front panel from stretch fabric, place this piece on the fold on the length of grain and cut out.
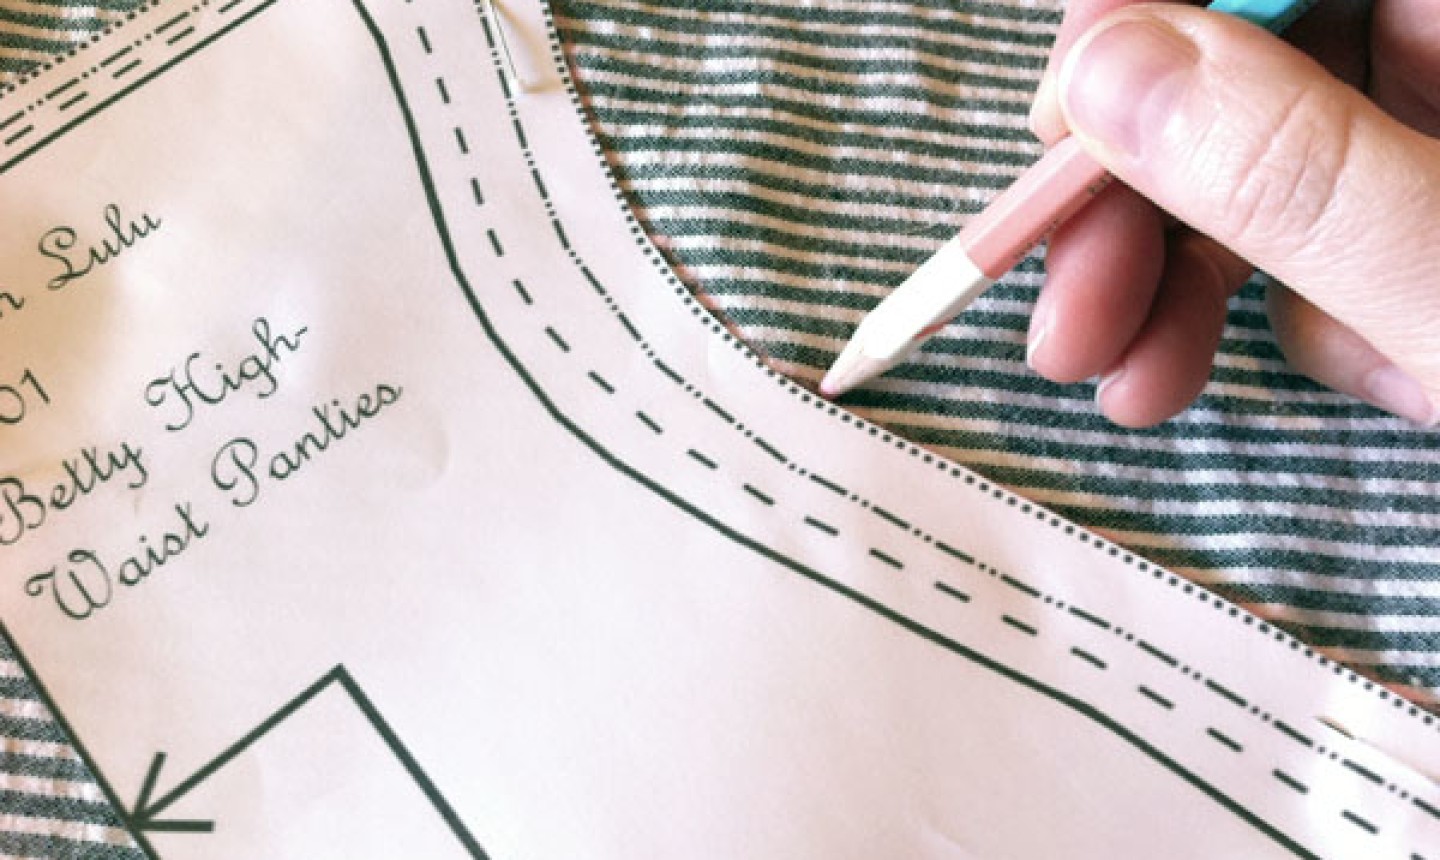
2. Trace
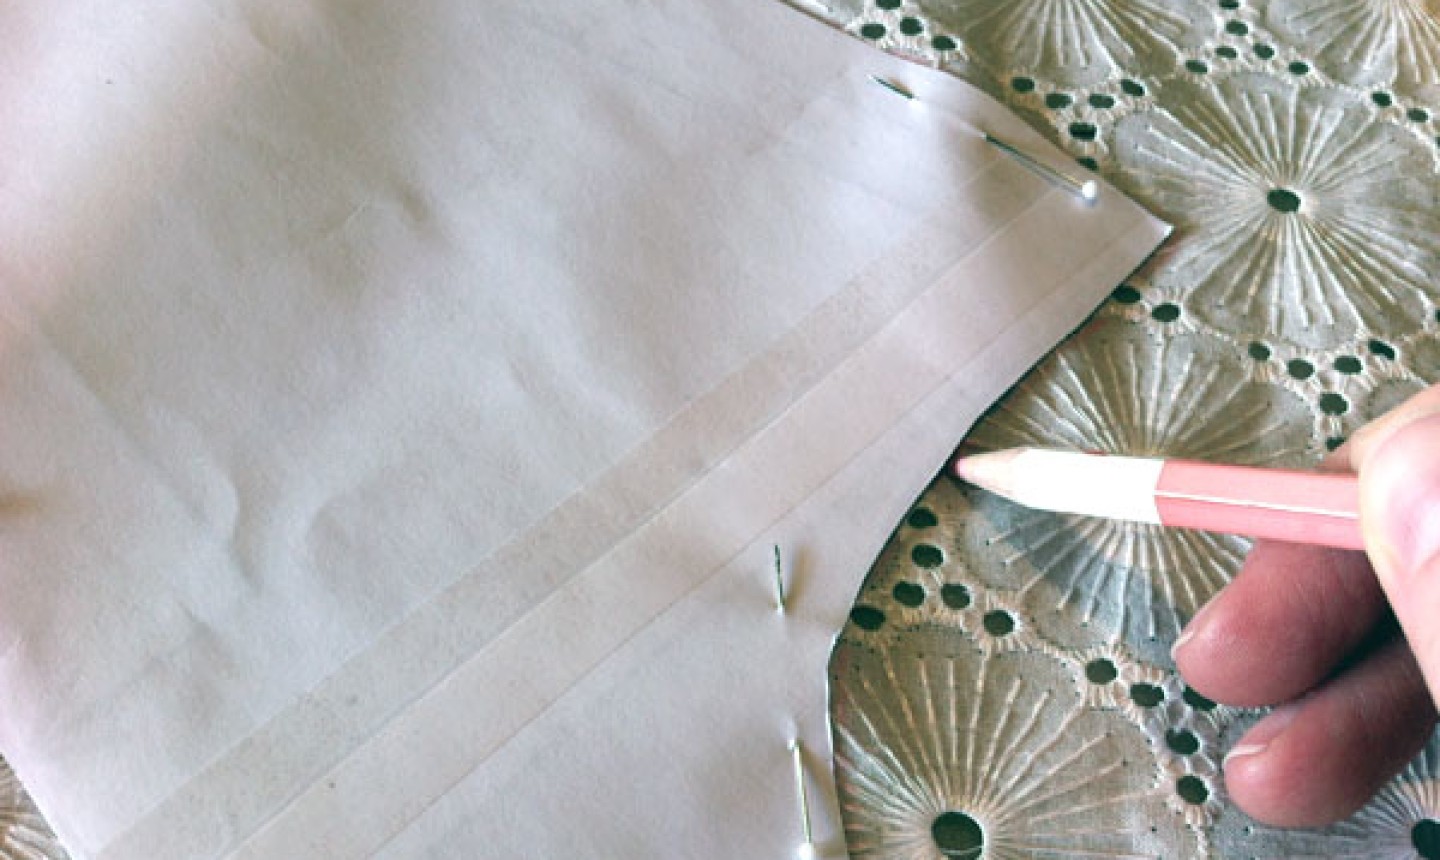
Cut out one whole piece on the bias by pinning and tracing the outline with a chalk pen or fabric marker. Unpin the pattern piece, flip and pin down, keeping the pattern in line with the chalk outline of the other half.
3. Cut the Front Panel
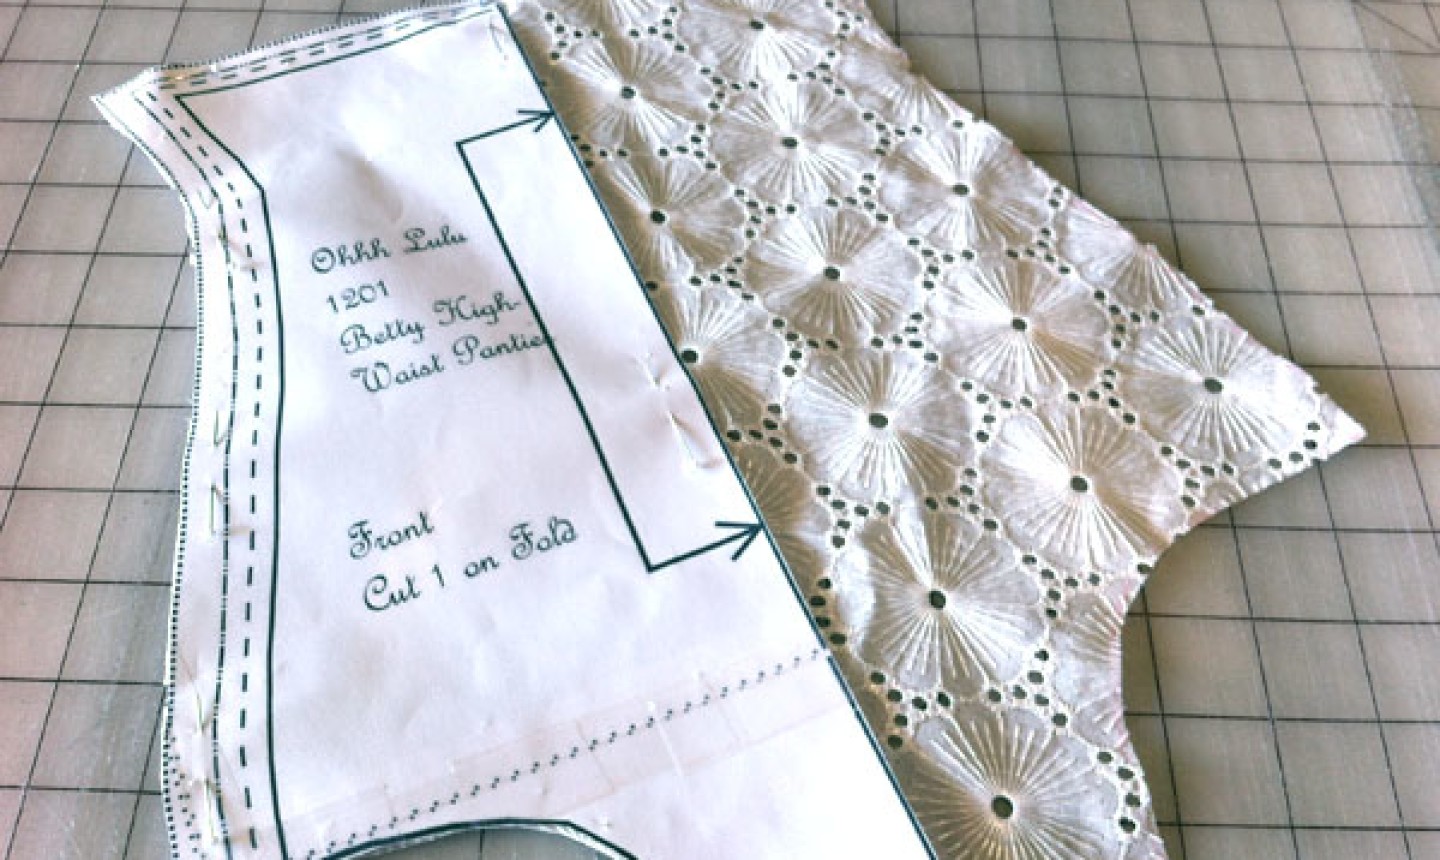
Cut around the entire piece, following the marked line on the half without the pattern piece.
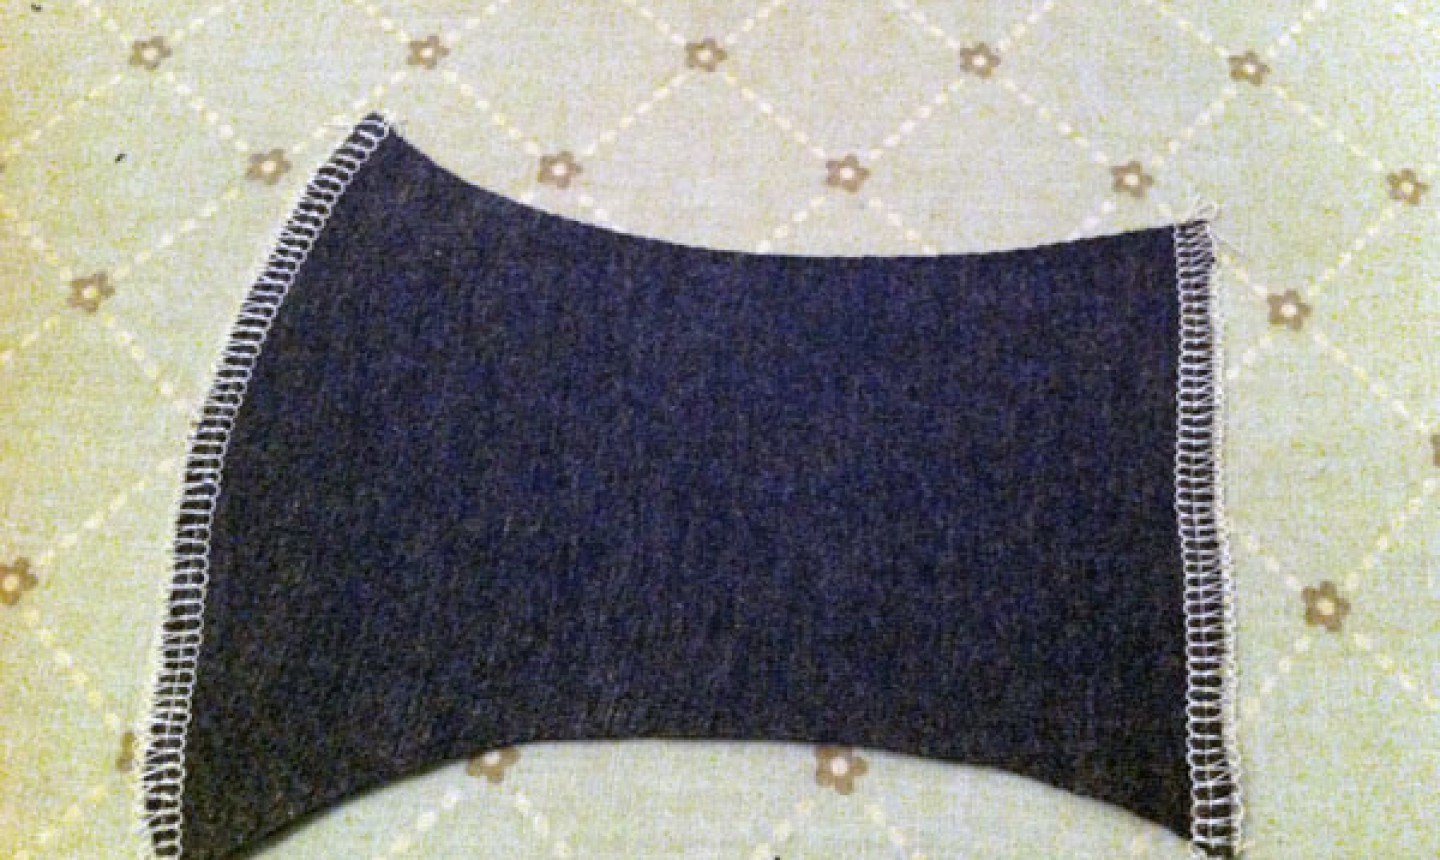
4. Cut the Back Panel
Pin and trace the back piece onto your back fabric just as you did in step 2. This piece should also be on the bias if made from woven fabric. Again, if you’re using a stretch knit, place this piece on the fold and on grain.
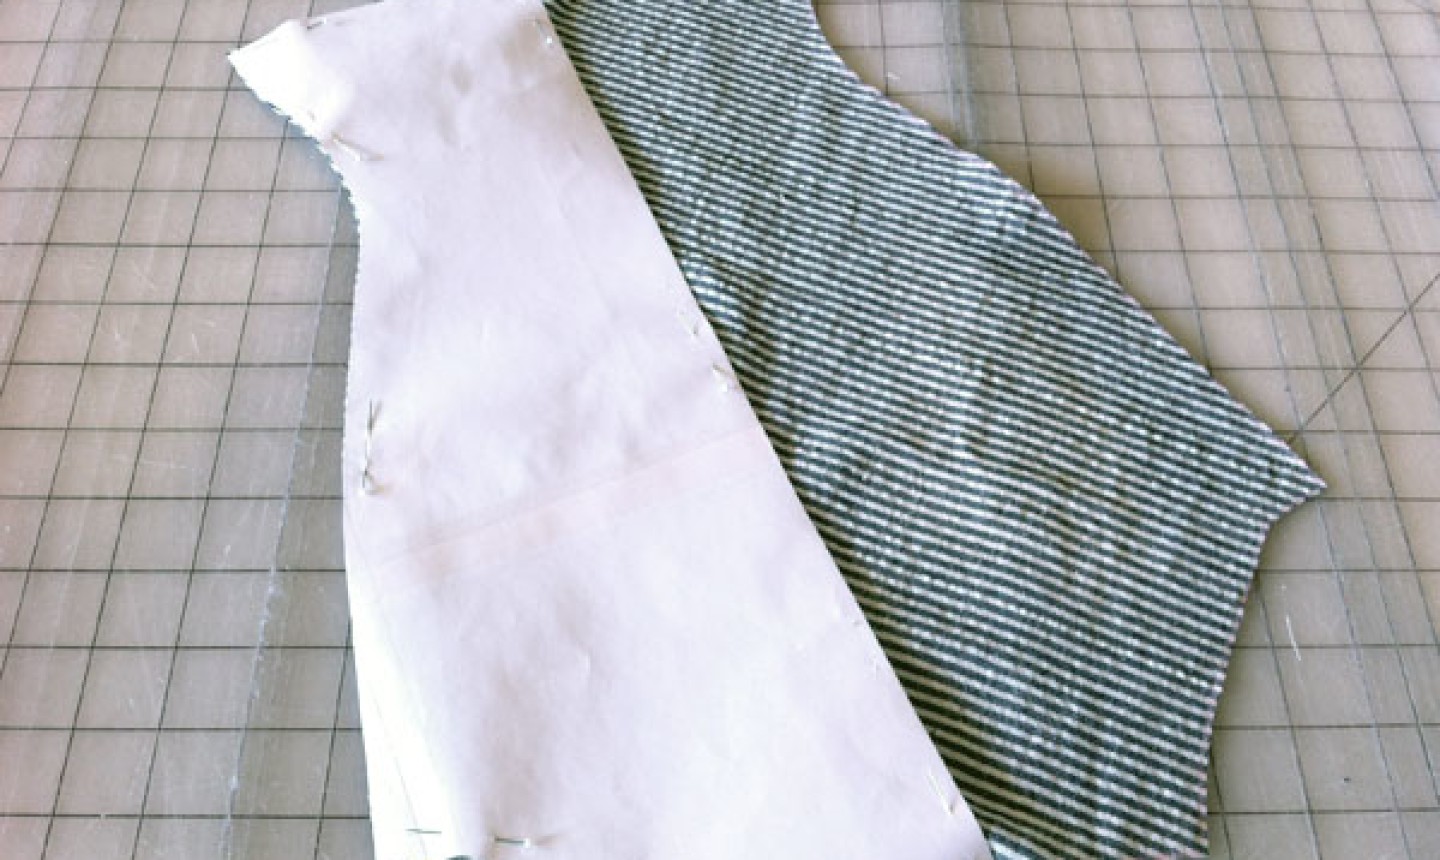
Cut this piece as you did in step 3.
Cut your side panels and crotch lining pieces from stretch knit.
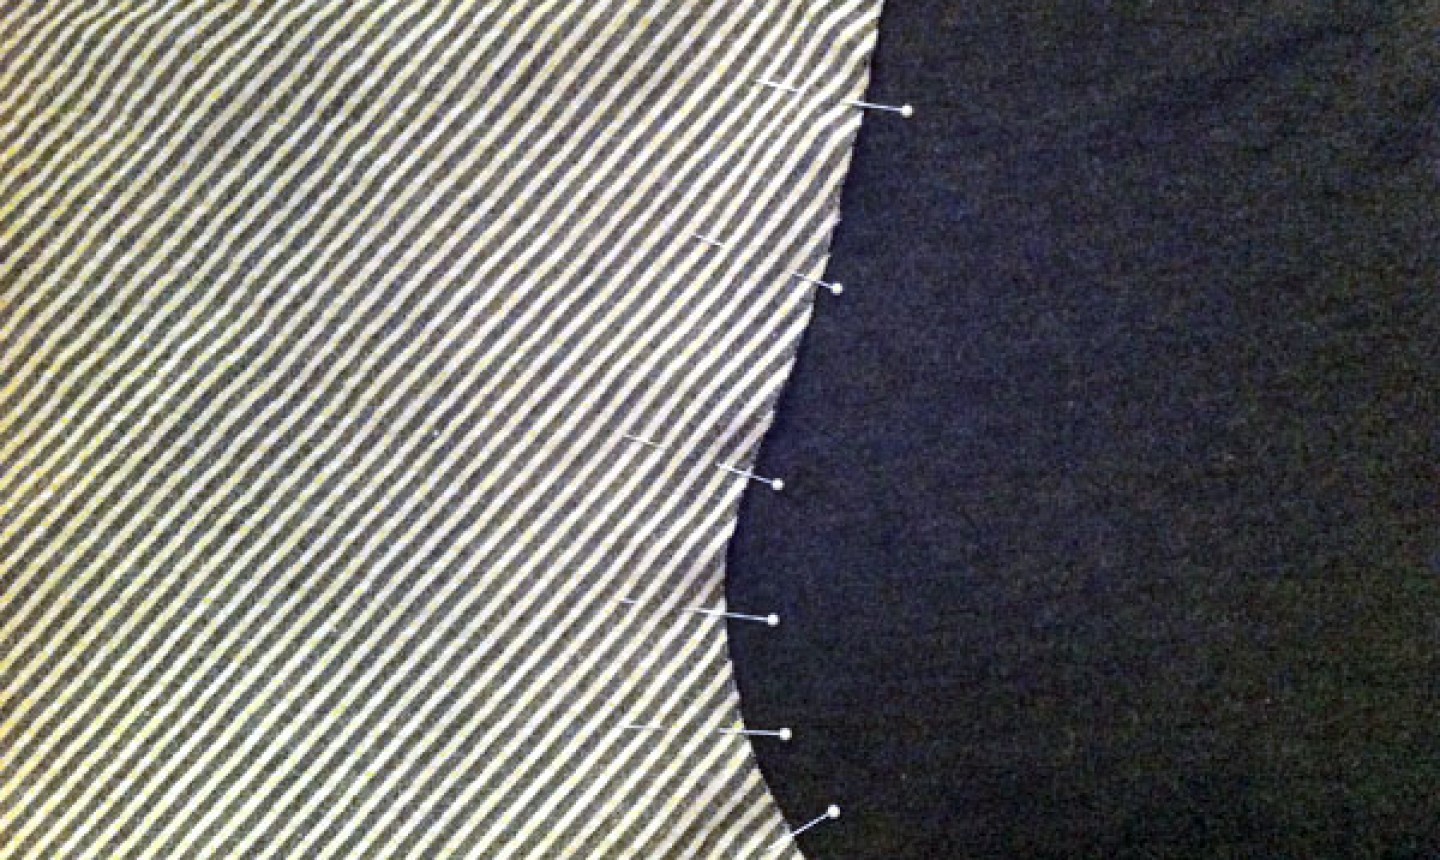
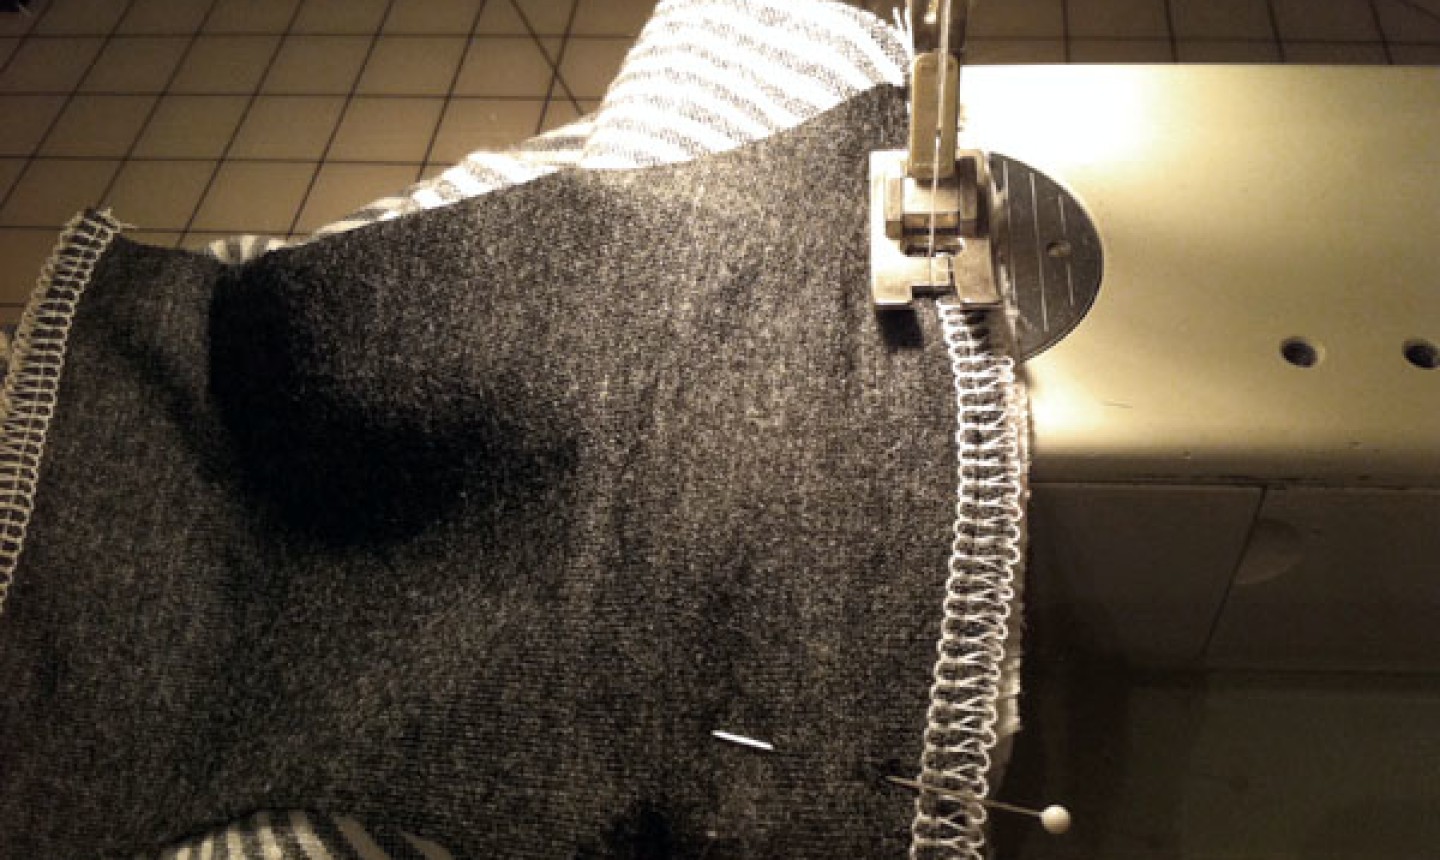
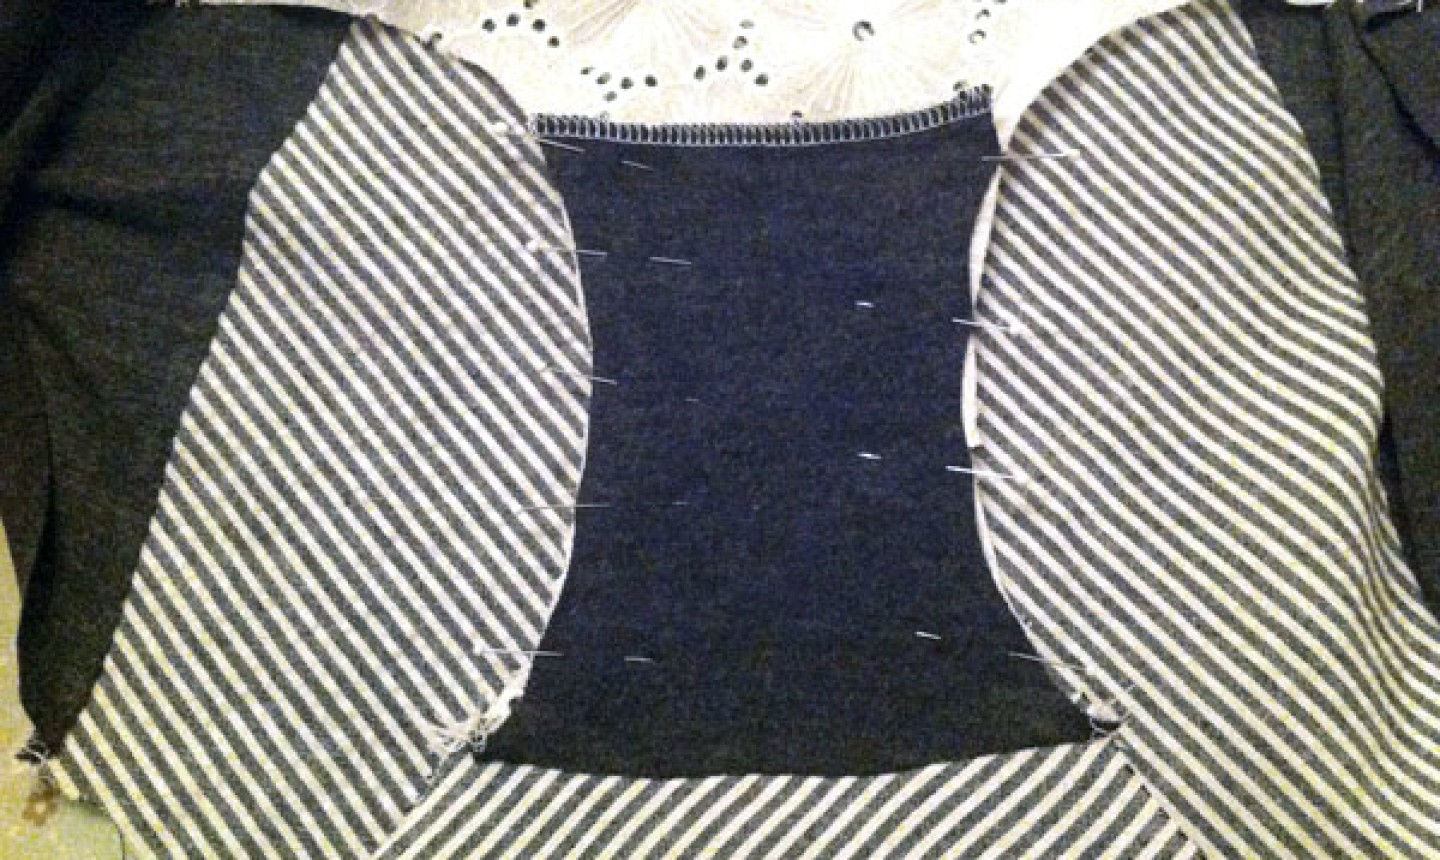
5. Stitch the Side Panels
You can use a serger overlock machine for the seams or a stretch stitch. Sew the front panel to the two side panels.
Pro Tip: We recommend a serger overlock because the panties will stretch around your body, but if you don’t have access to one you can use the stretch stitches on your machine or a long and narrow zigzag stitch . This will keep the seams from popping when you wear them.
Press the seam allowance toward the side panels. If you used a straight stitch machine, finish the edges so they don’t fray.
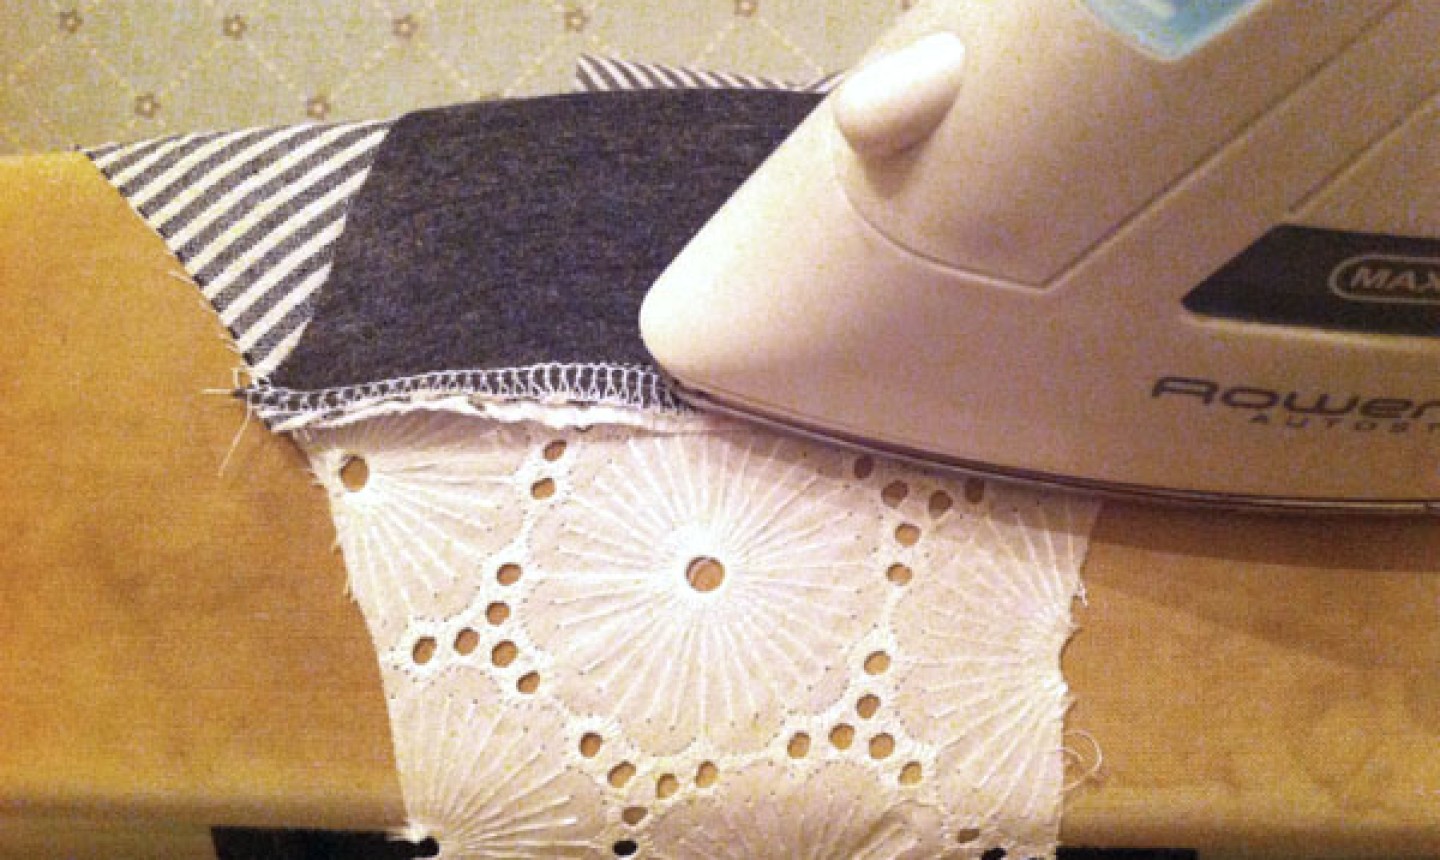
6. Stitch the Back Panel
Pin the back panel to the two side panels and stitch together in the same way you sewed the front panel in step 5. Finish the seams and press toward the side panels.
Pro Tip: Use a sleeve board in this step so you don’t accidentally press the underside while pressing the top layer of fabric.
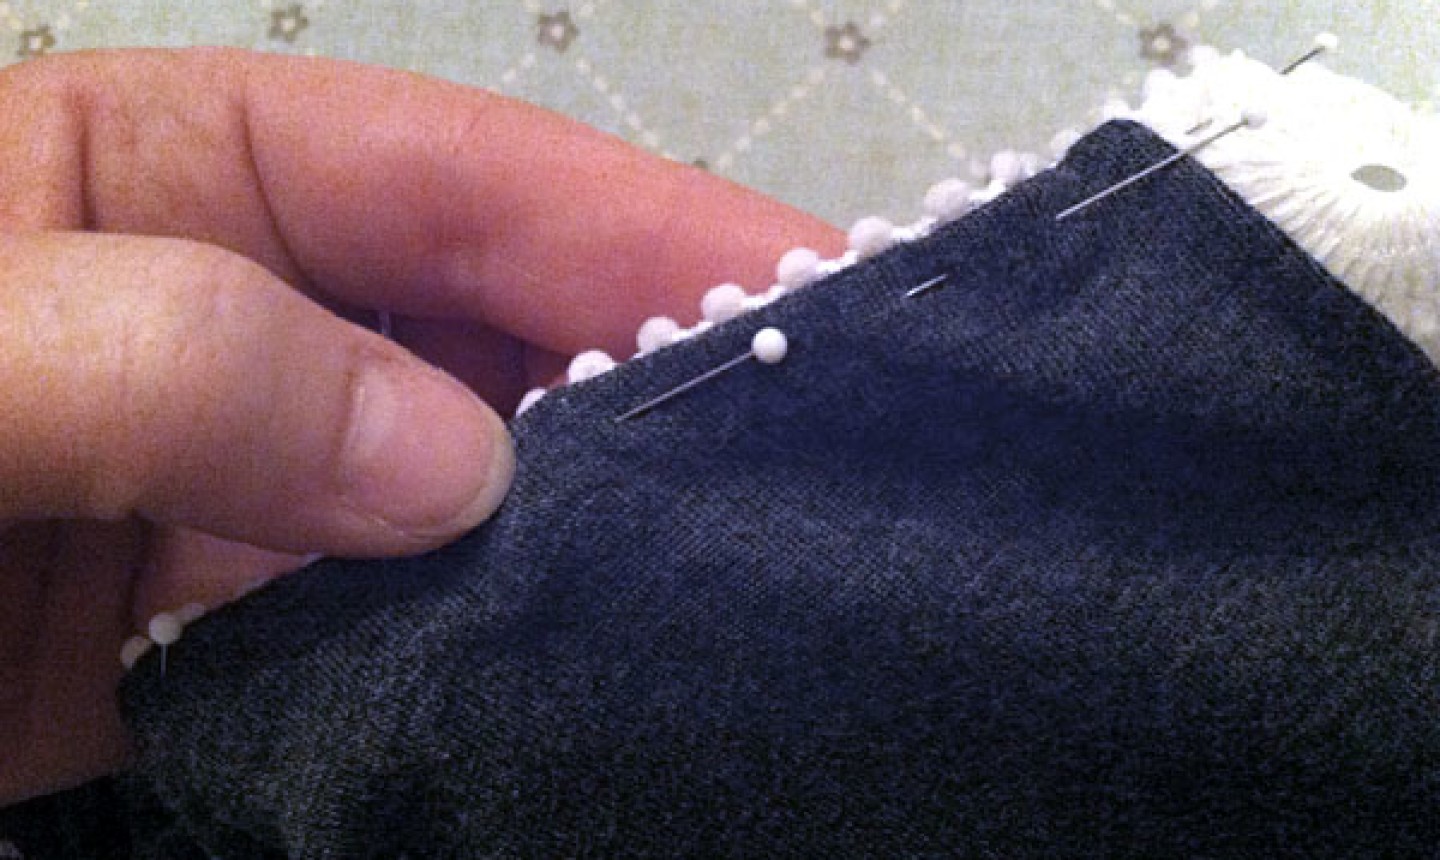
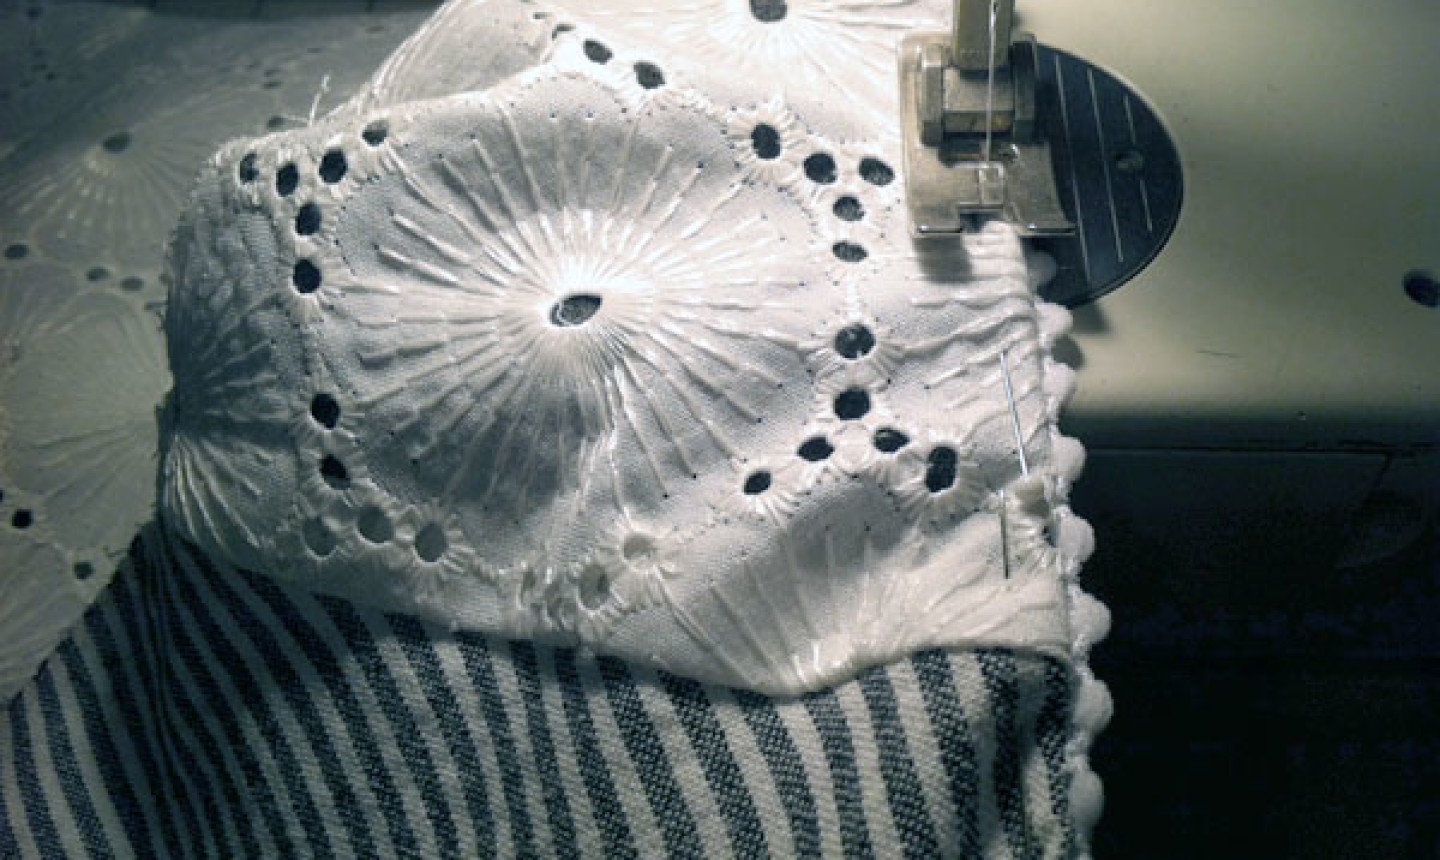
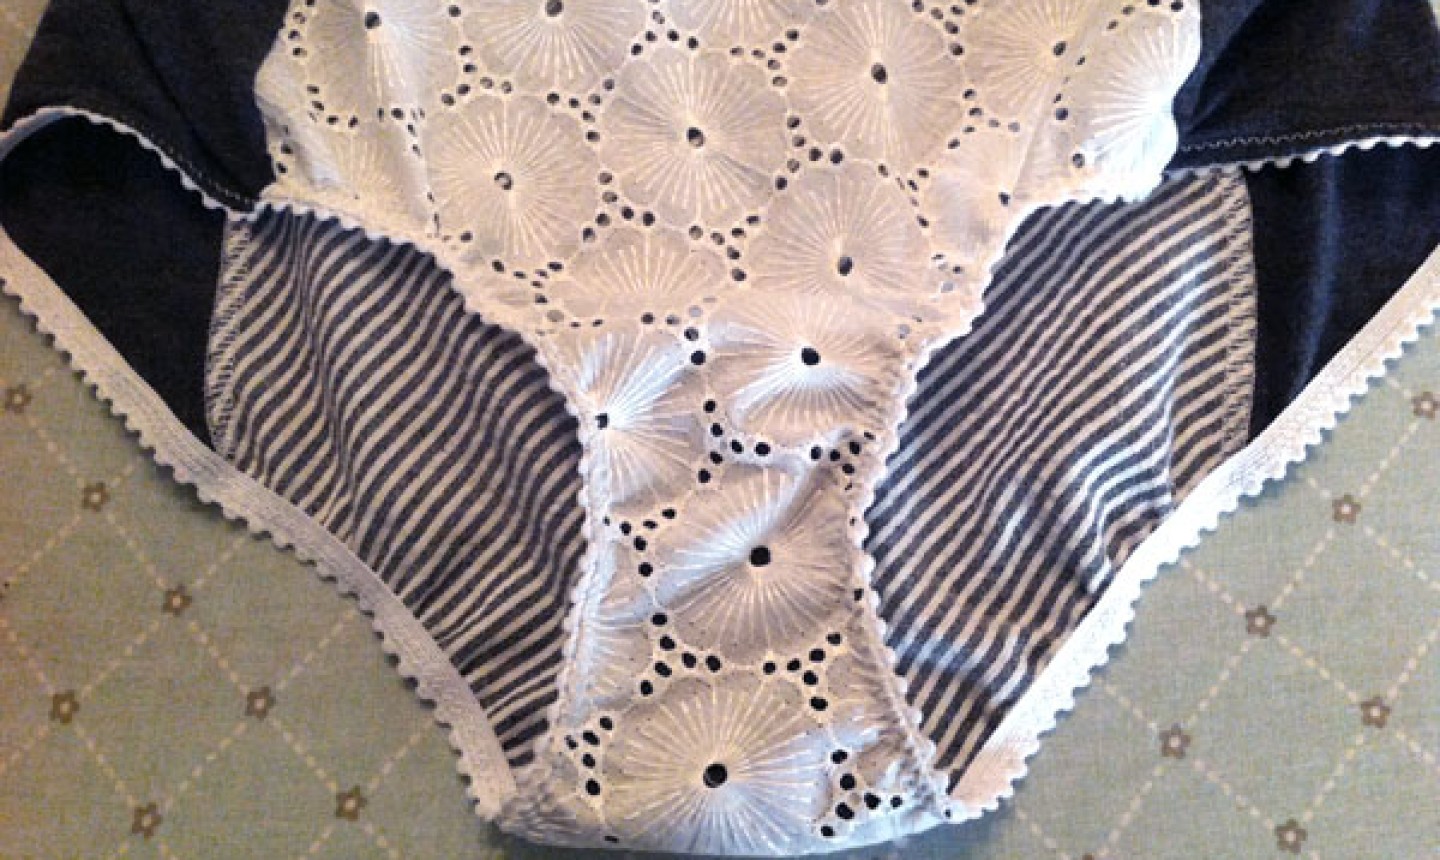
7. Sew the Crotch
Finish the two straight edges of the crotch lining using a serger overlock machine or a zigzag stitch.
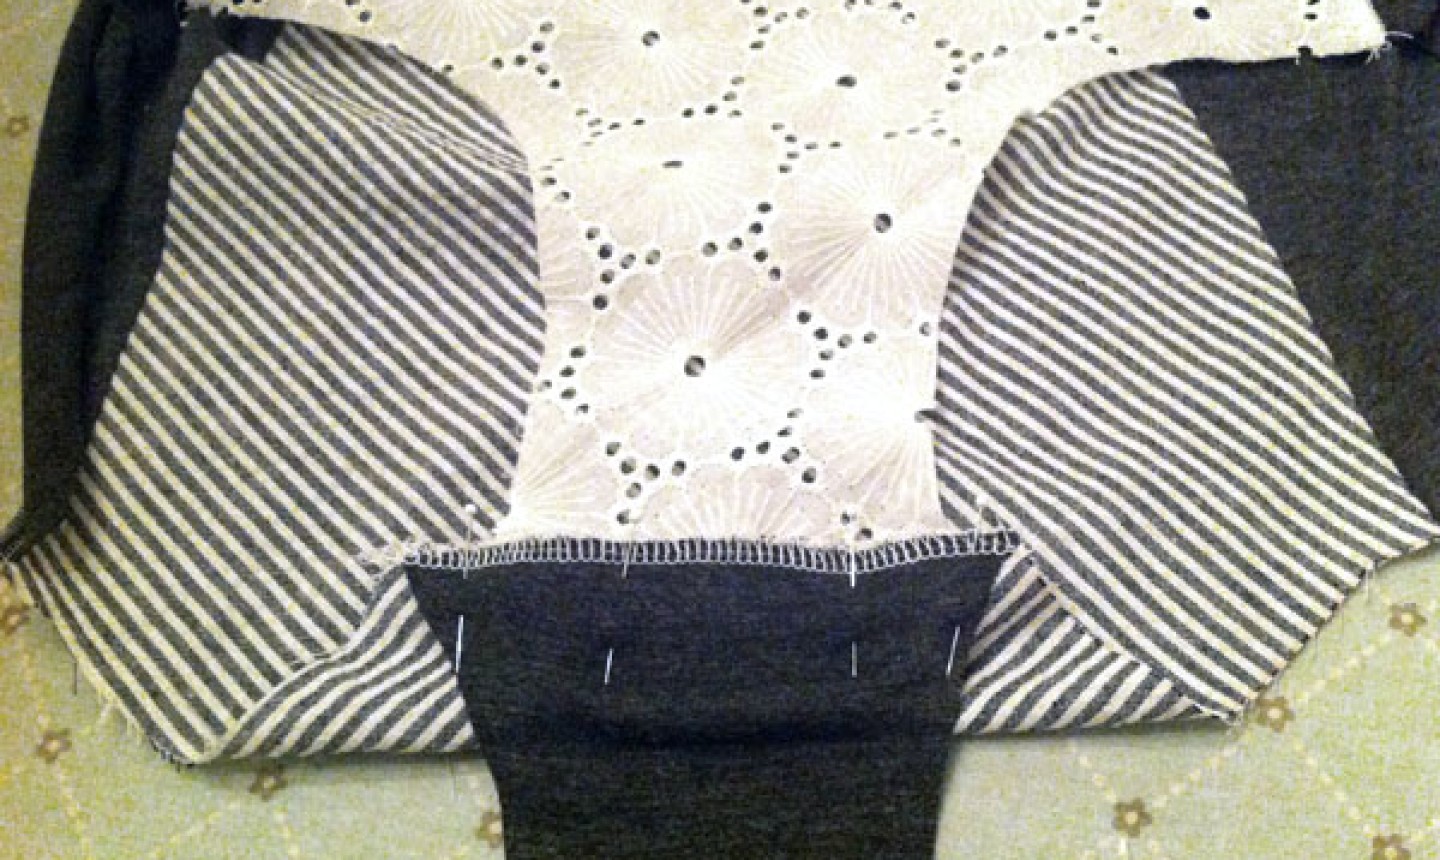
Along the back crotch seam, pin the right side of the crotch lining to the wrong side of the back crotch. Then pin the right side of the front crotch seam to the right side of the back crotch seam, so all three are pinned together and the back panel is sandwiched in the middle.
Sew along the pinned edge at ¼” seam allowance. We used straight stitch as this area isn’t pulled and stretched like the side seams.
Press the seam allowance toward the front panel, keeping the crotch lining and back panel to the opposite side. Then flip the crotch lining toward the front panel and press the seam again.
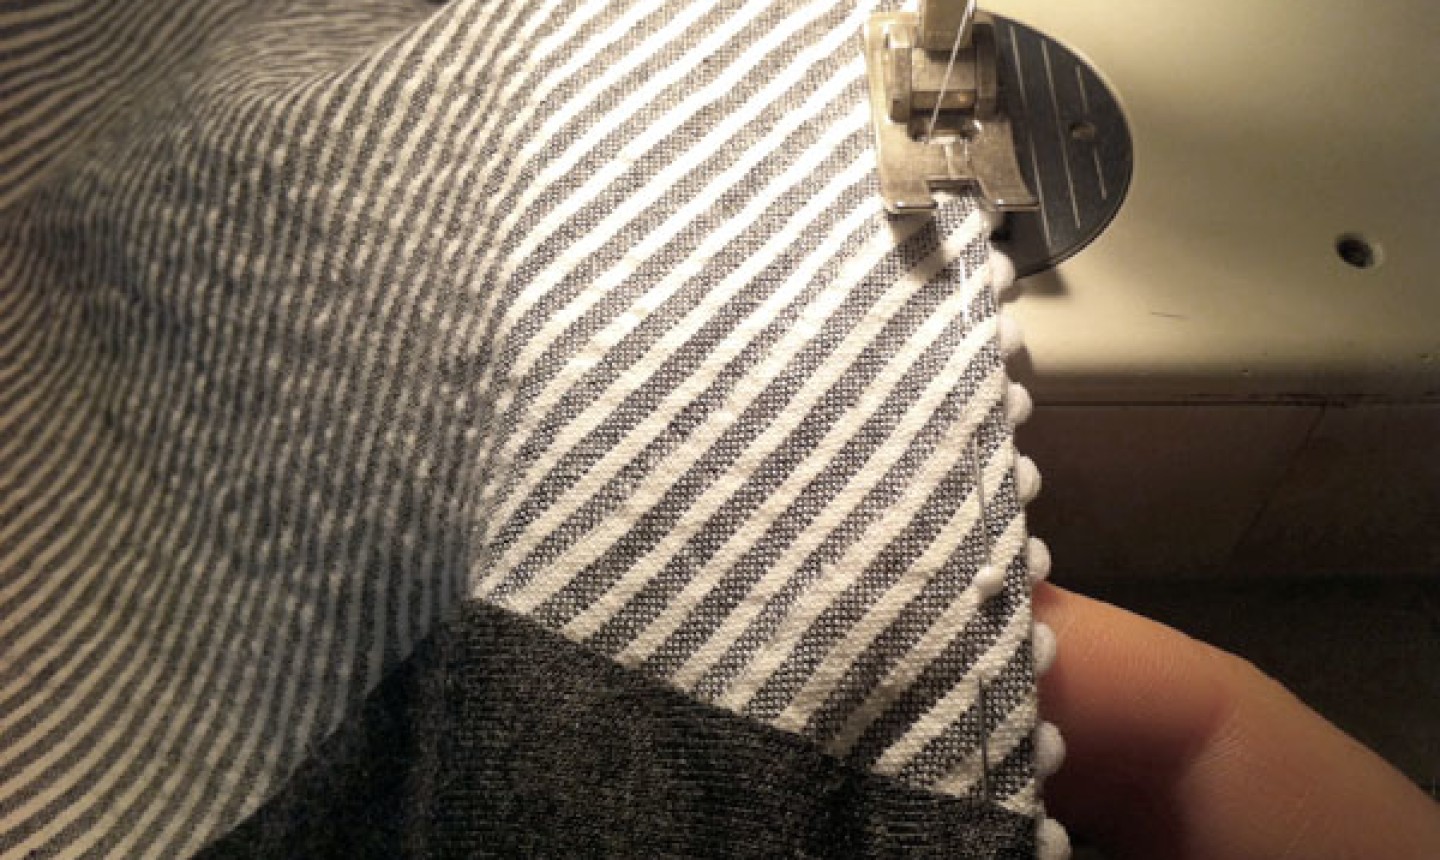
8. Add the Elastic
Pin the crotch lining along the leg openings, baste stitch and press flat.
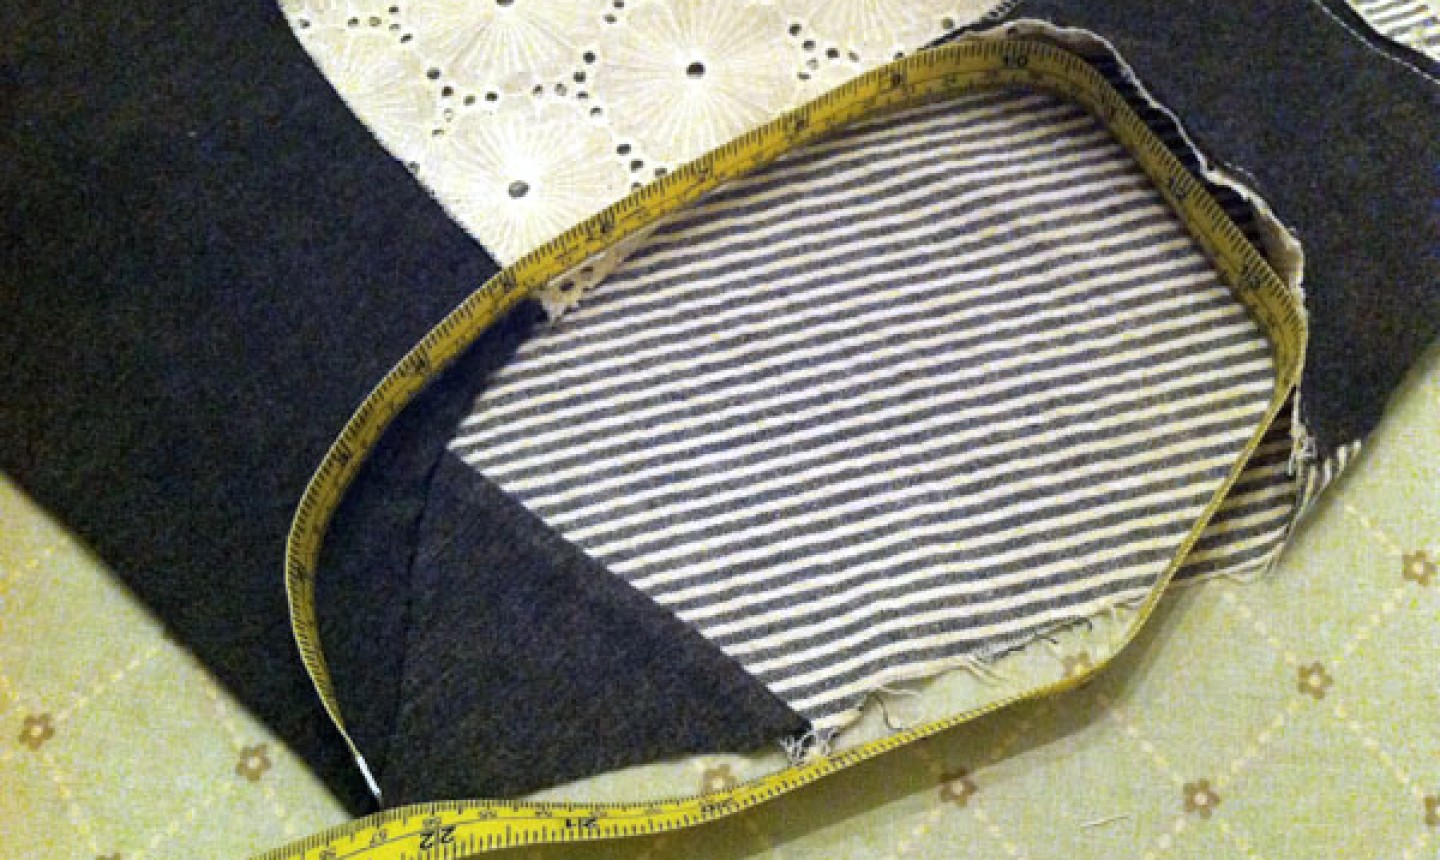
Use measuring tape to find the circumference of the leg openings. Cut the lingerie elastic to be about 2″ smaller than this measurement.
Pin the lingerie elastic to the leg opening. Place the elastic on the fabric, right sides together, with the flat edge of the elastic flush with the edge of the fabric on the opening. Overlap the beginning and end of the elastic by about ½” and pin in place. Find the halfway point from this first pin and pin that in place, too.
Pro Tip: The elastic will be stretched to fit the opening during the sewing, so don’t pin the remainder of the elastic down.
Starting at the overlap, use a long and narrow zigzag stitch and sew along the inner edge of the elastic. Stretch the fabric as you sew.
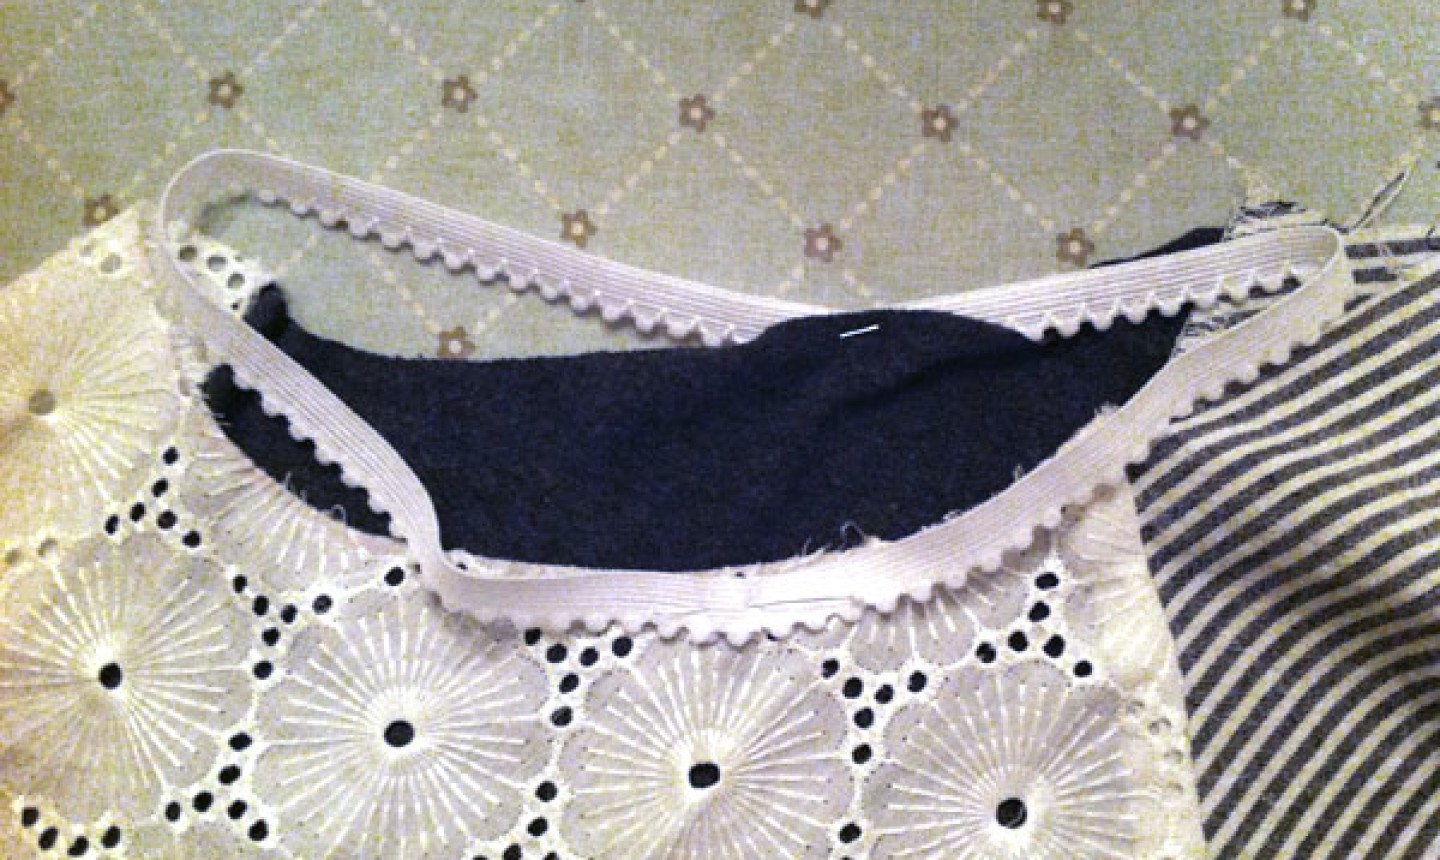
9. Finish the Leg Opening
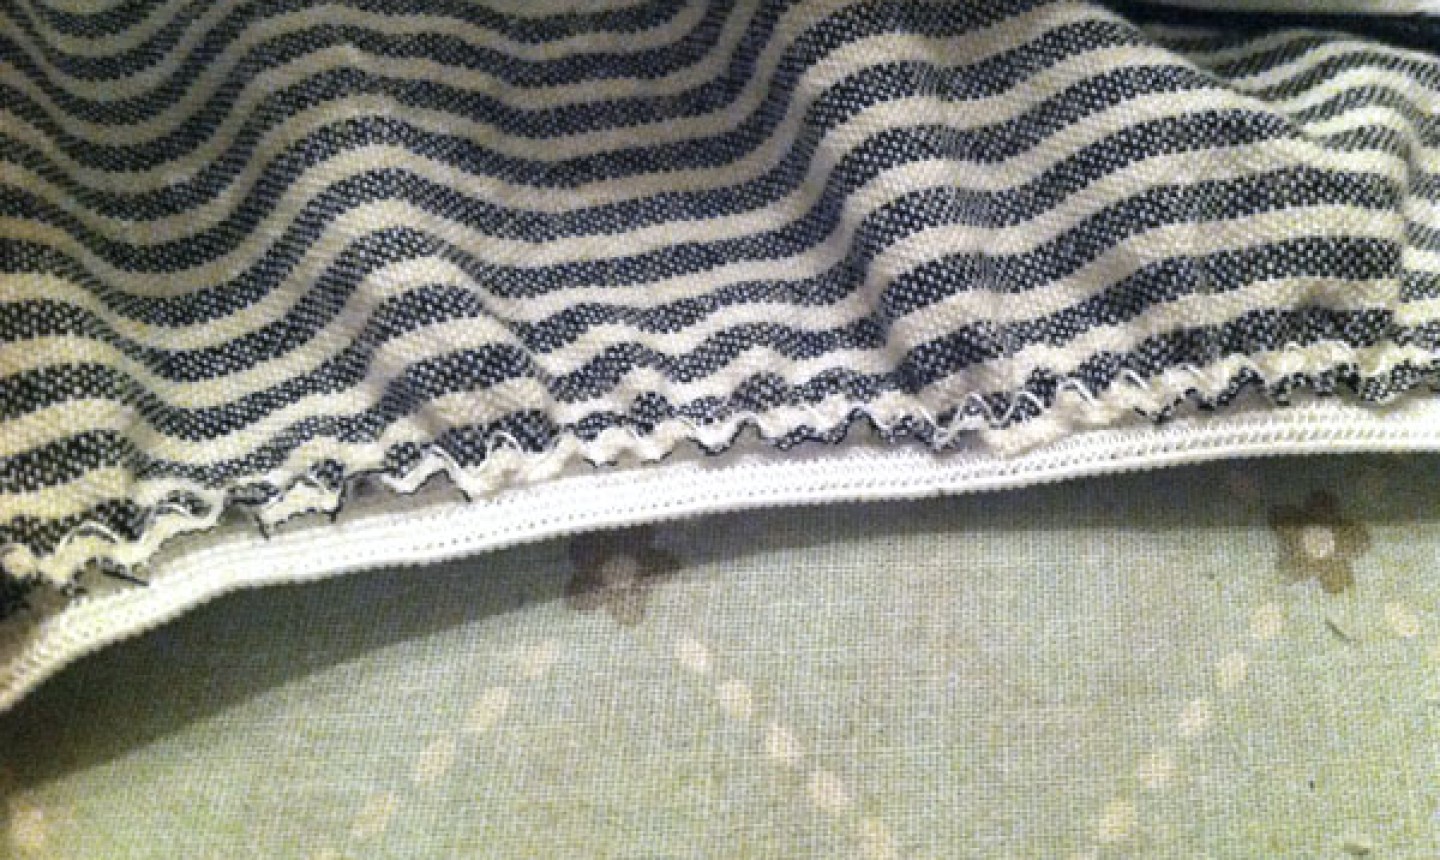
Trim the extra fabric down on the inside of the elastic so it’s hidden when you flip it in the next step.
Fold the elastic to the inside of the leg opening and pin in place. If your elastic has trim detail, this should show on the outside of the seam.
Using a zigzag stitch no wider than the width of the elastic on the inside of the seam, sew the elastic in place. Stitch on the right side of the garment and stretch the elastic as needed.
Repeat steps 8 and 9 for the other leg opening.
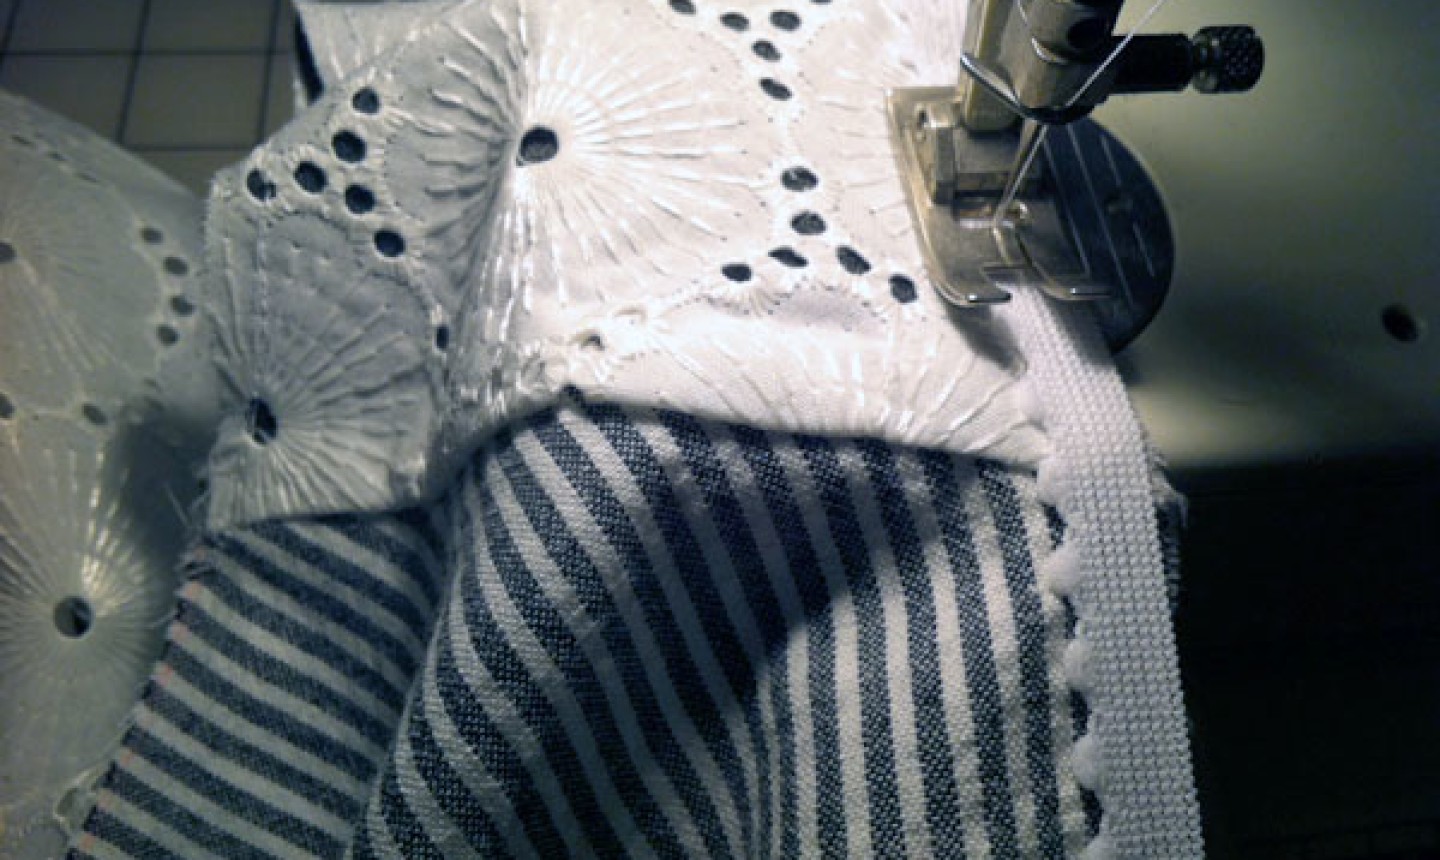
10. Sew the Waistband
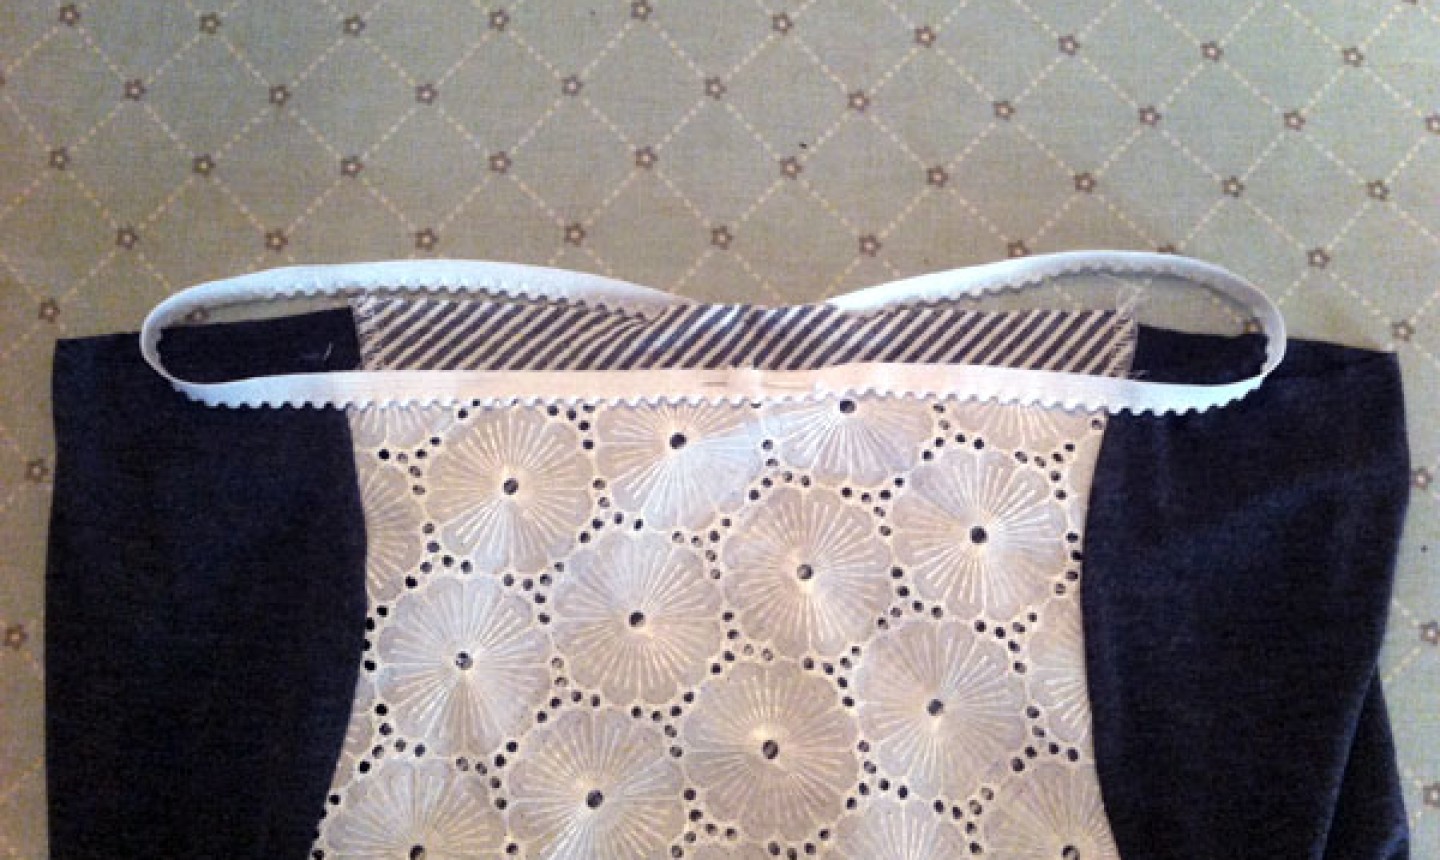
Measure and cut more lingerie elastic to fit the waist opening just as you did in step 8. Pin in place at the overlap spot and again at the halfway point.
Pro Tip: You want the overlap spot to be in a place that’s relatively hidden. We put it in the center back of the garment.
Sew the elastic to the waist and trim. Then fold, pin in place and topstitch as you did in step 9.
11. Add a Bow
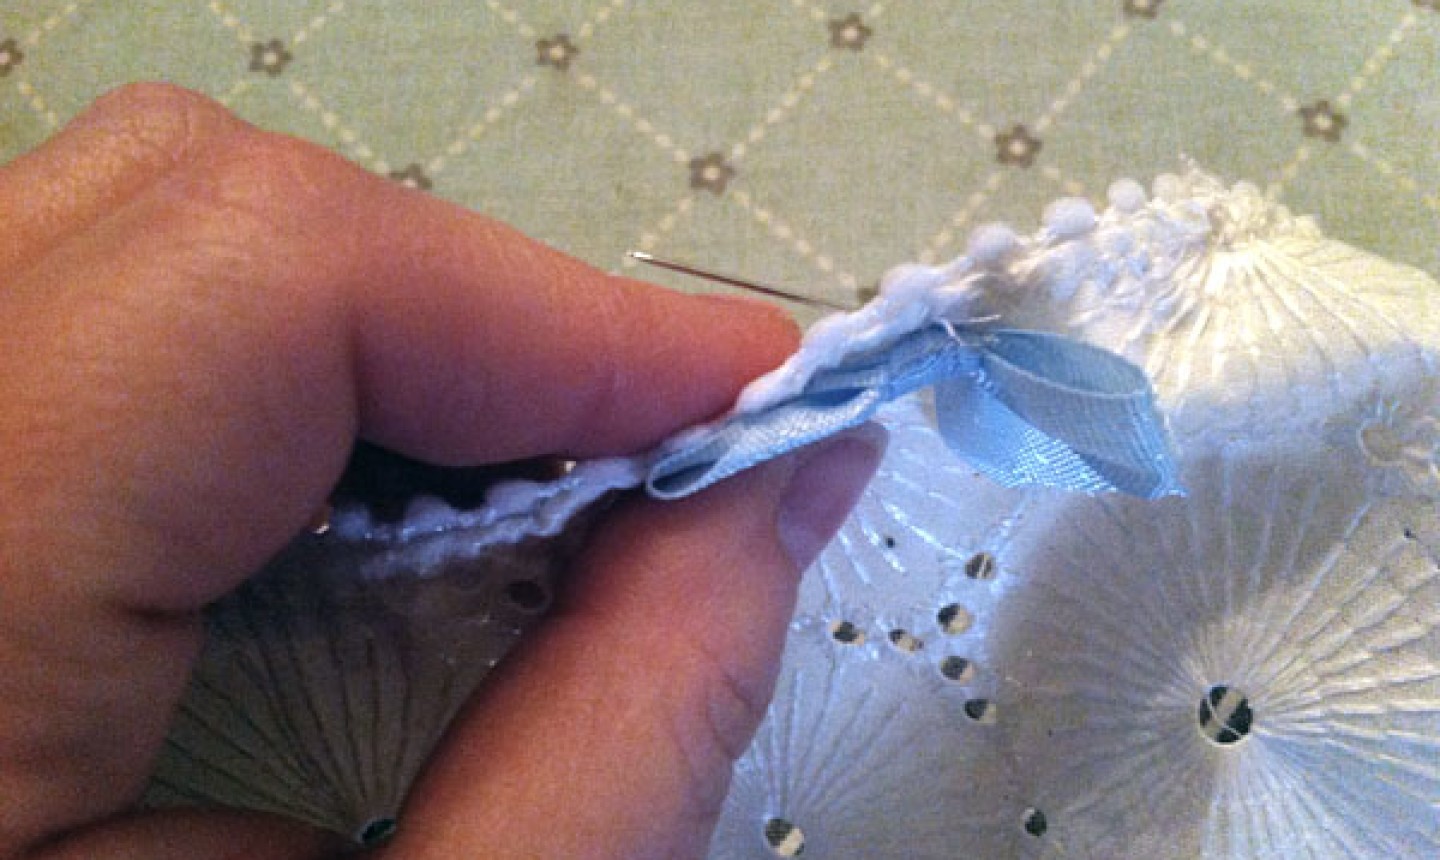
If you’d like to add a decorative bow, hand stitch it in place with a needle and thread.
Ta-da, you’re done!
These look just what I'm looking for
Thank you for a simply pattern even a beginner can follow! I've been searching for a pattern for a brief similar to a name brand in this style that I've worn until they're threadbare. This is perfect replacement.
thanks!