Face the facts: there's more than one way to make a stunning portrait. For your next work of art, ditch the acrylic and paint in buttercream. (Bonus: you get to eat it when you're done!)
Portrait Cake
Level: Easy
What You Need
Instructions
1. Bake and Frost
To make a portrait cake, you need to have... cake. Choose your favorite recipe or try something new (a fun rainbow cake, anyone?) and bake in a round pan as instructed. Once it's cooled, use an offset spatula to frost the cake in white buttercream — either Swiss meringue or simple American buttercream works great.
2. Trace Your Portrait
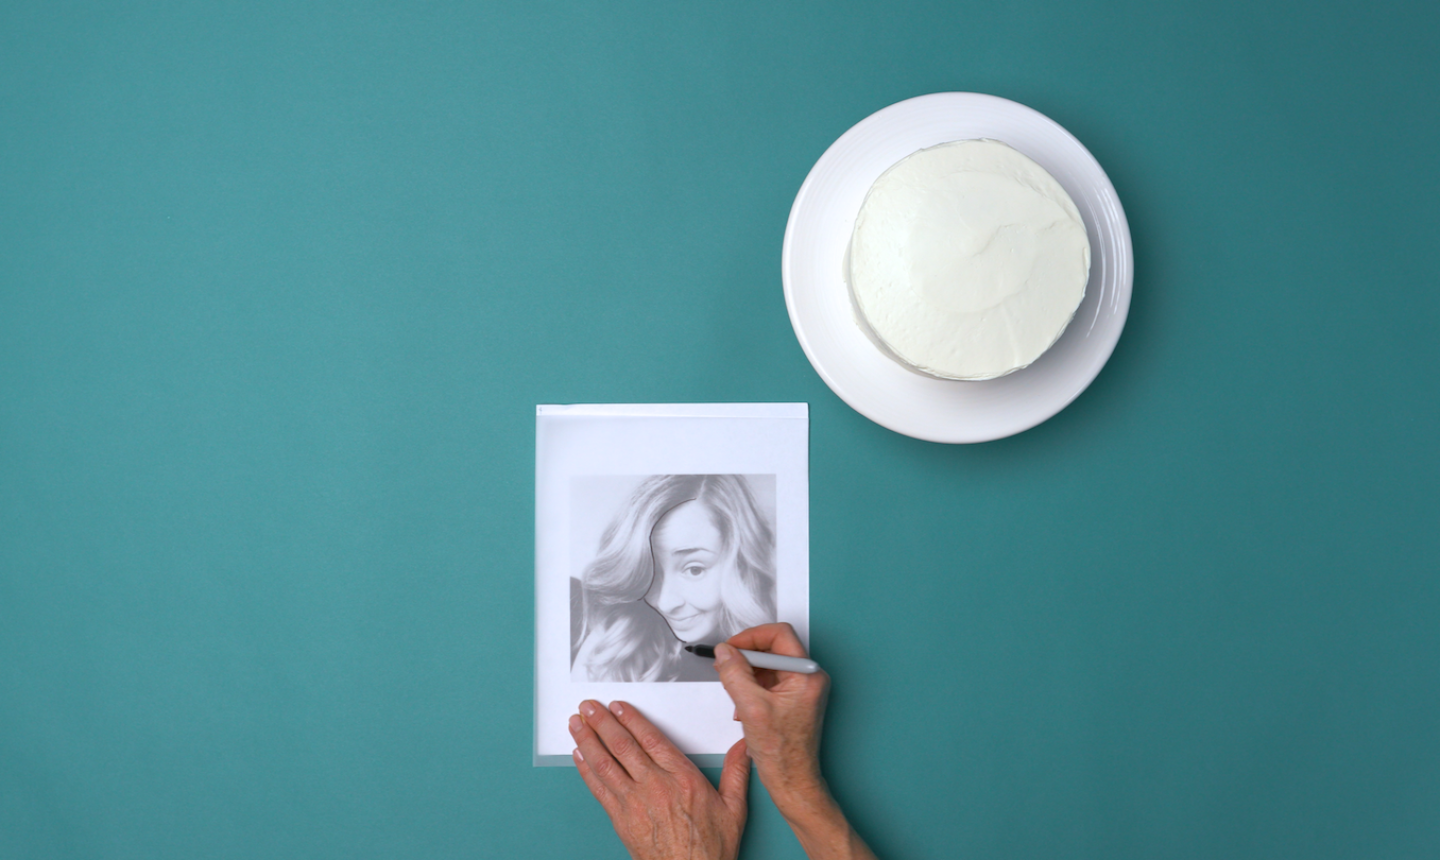
Now you’ve gotta pick your glam shot. Choose an up-close photo where you can easily recreate the facial features on a cake. It helps to enlarge an image on your computer and print it out. Then cover the picture with tracing paper, outline the face and trace the features.
3. Poke Out the Details
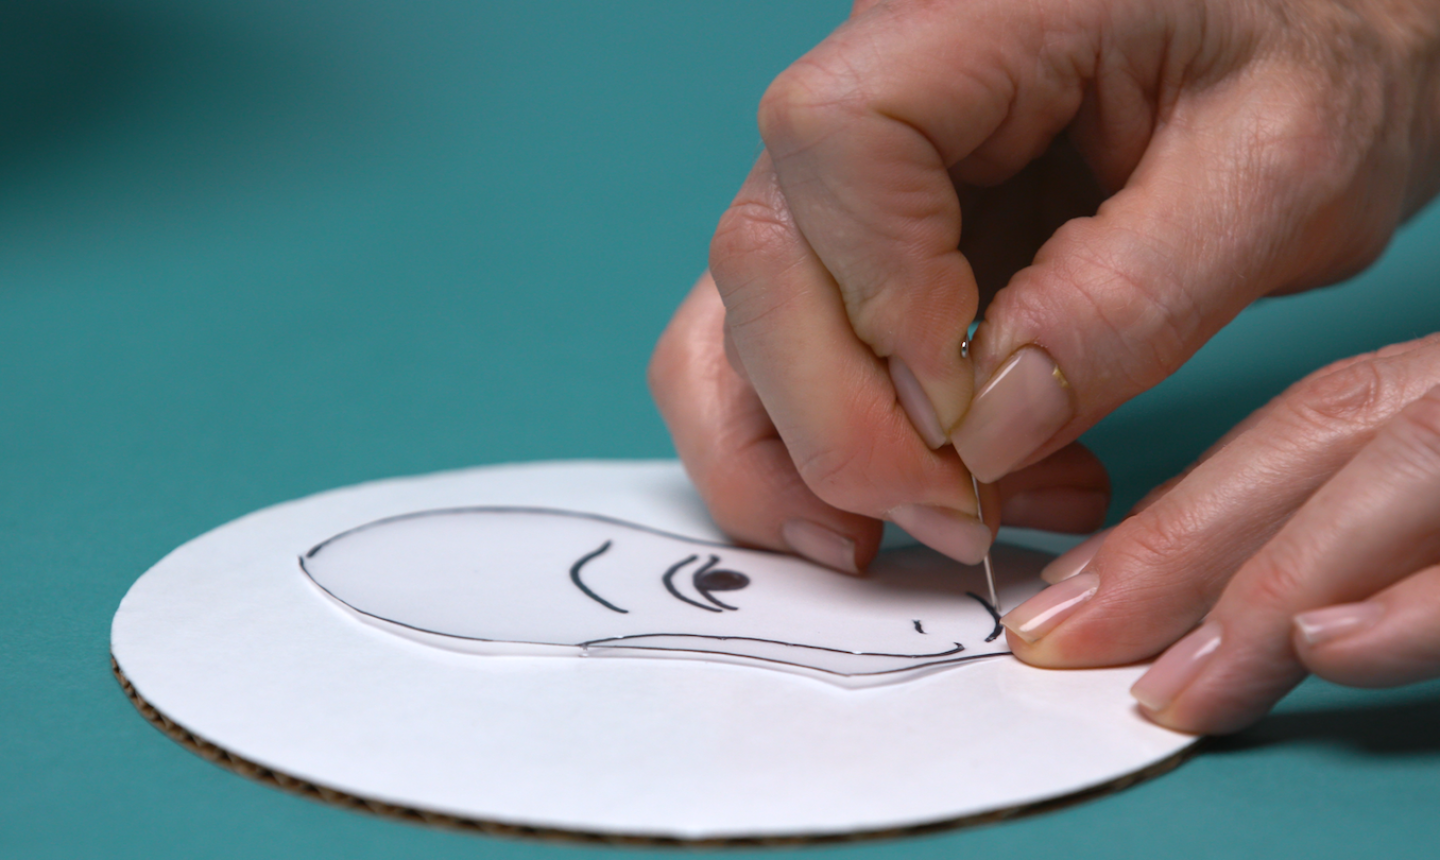
Cut the tracing paper along the outline and place it onto a piece of cardboard. Use a needle to poke holes along the facial features.
4. Transfer to the Cake
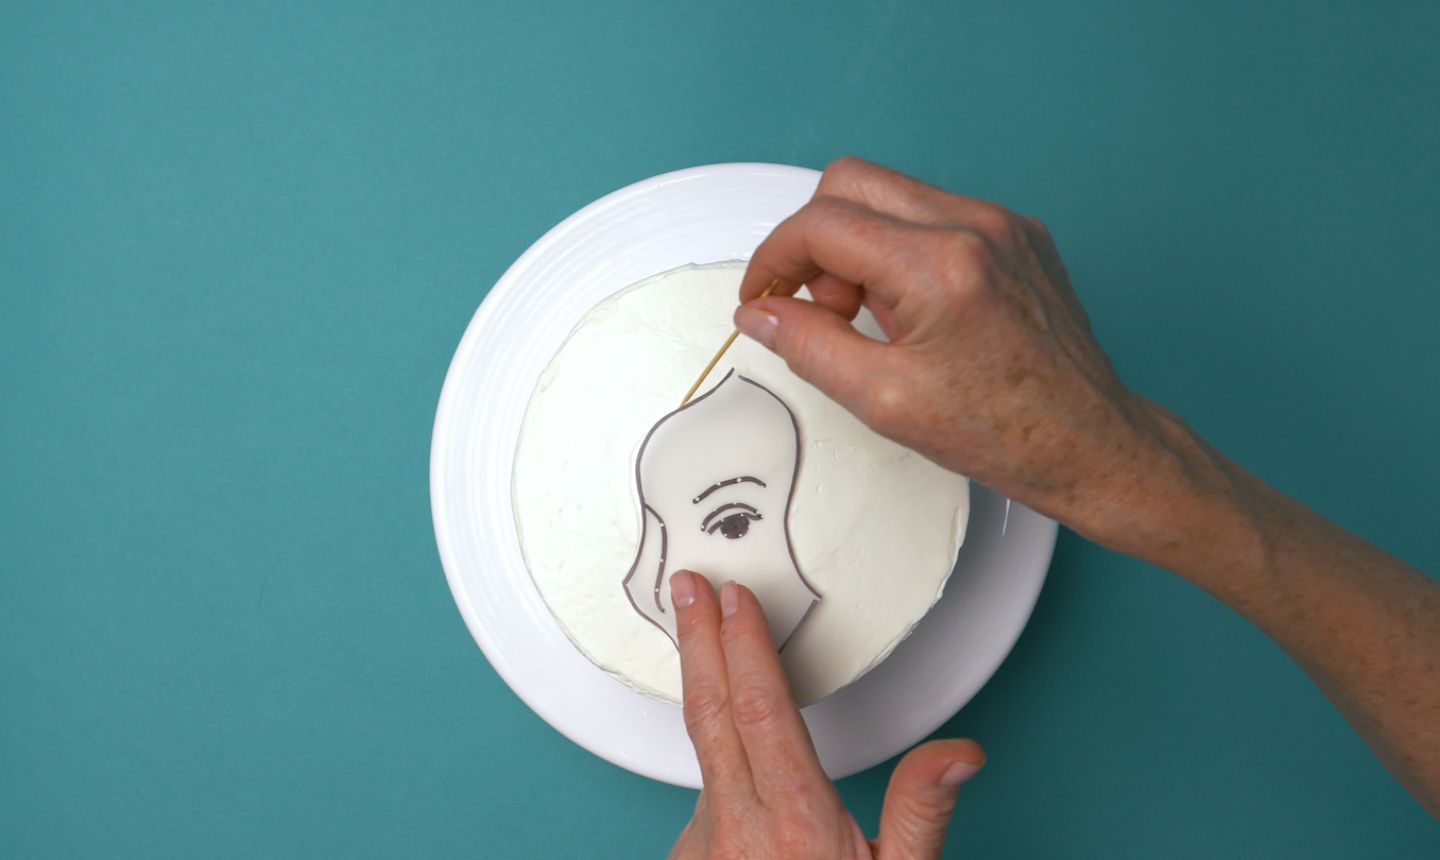
Lay the tracing paper on top of the cake. Once you find the position you want, trace around the cut-out with a toothpick.
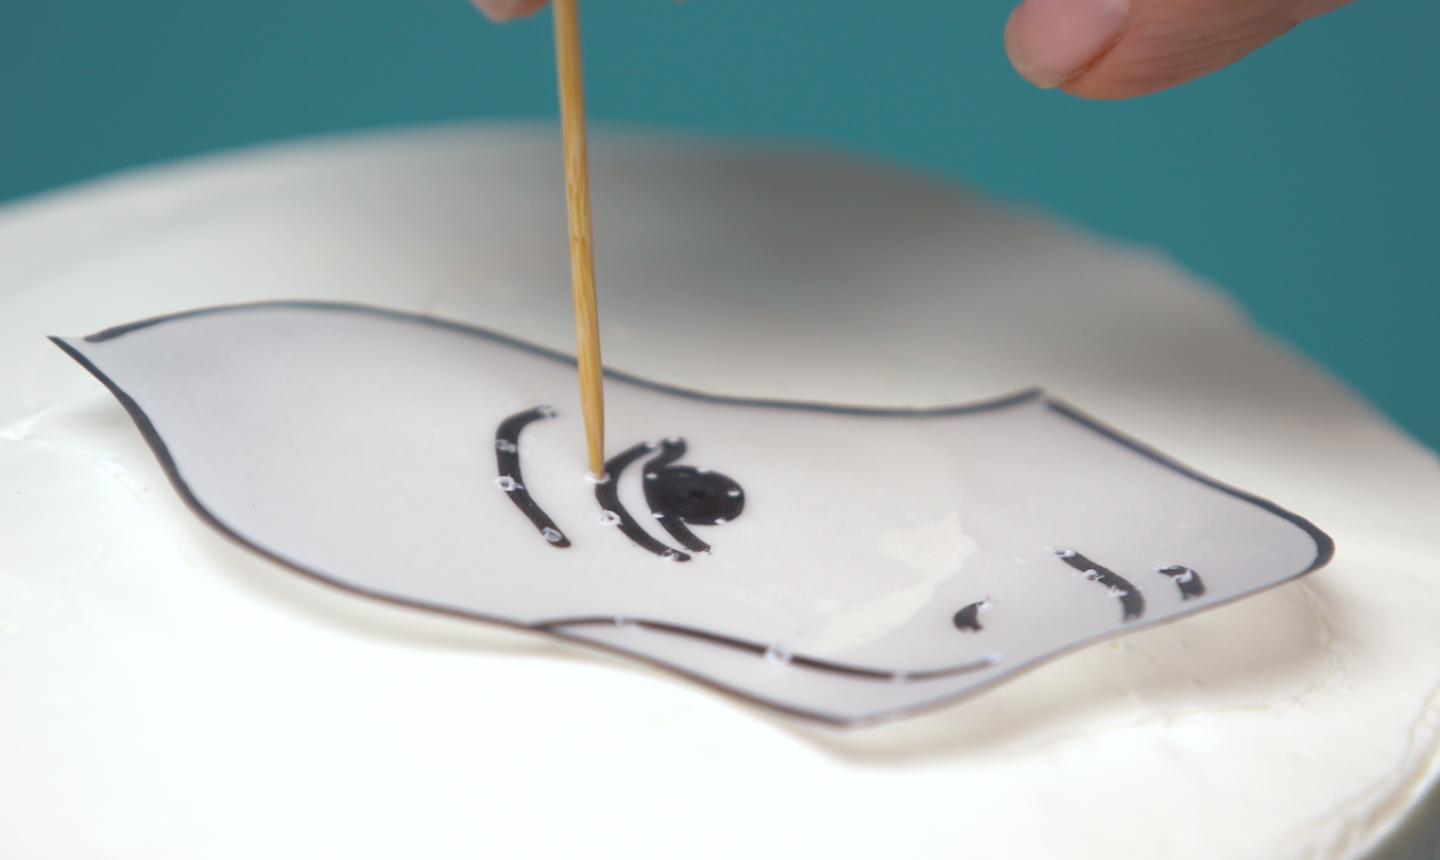
Then stick the toothpick through the holes you made in the previous step. Don’t press too deeply — you’re just making guidelines in the frosting, and you shouldn’t penetrate the cake itself.
Pro Tip: Work slowly during this step. The tracing paper can easily shift and slide as you work, which can distort your portrait.
5. Pipe
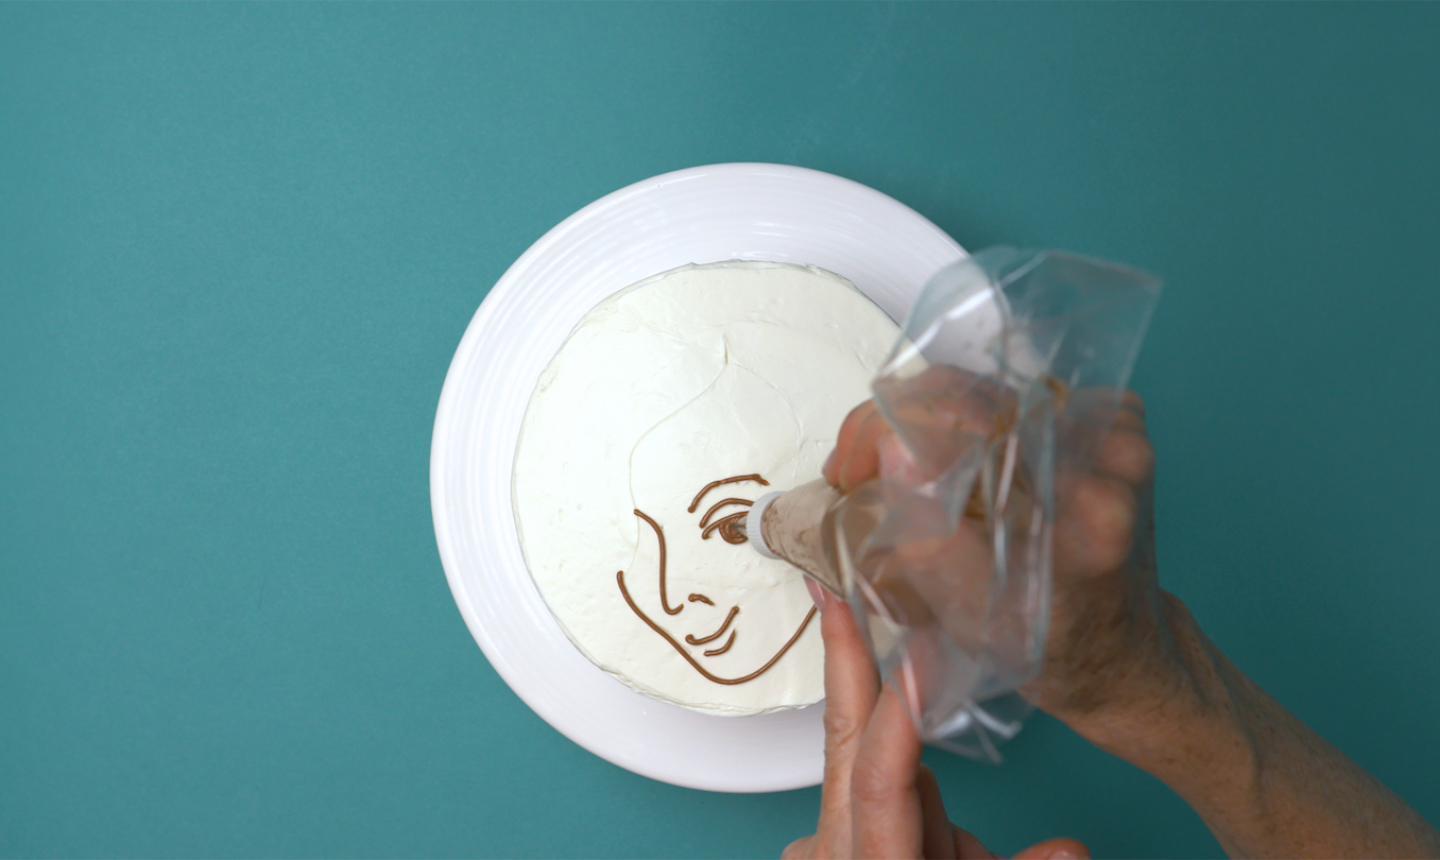
Color your buttercream to create a color for your portrait's features. Once you have the perfect hue, spoon the buttercream into a piping bag fitted with a small round tip. Pipe along the lines and dots you made in the buttercream to draw the portrait.
Pro Tip: Don’t pipe along the hairline — we’ll cover that area in the next step. Only use this color for the facial features and jawline.
6. Add the Hair
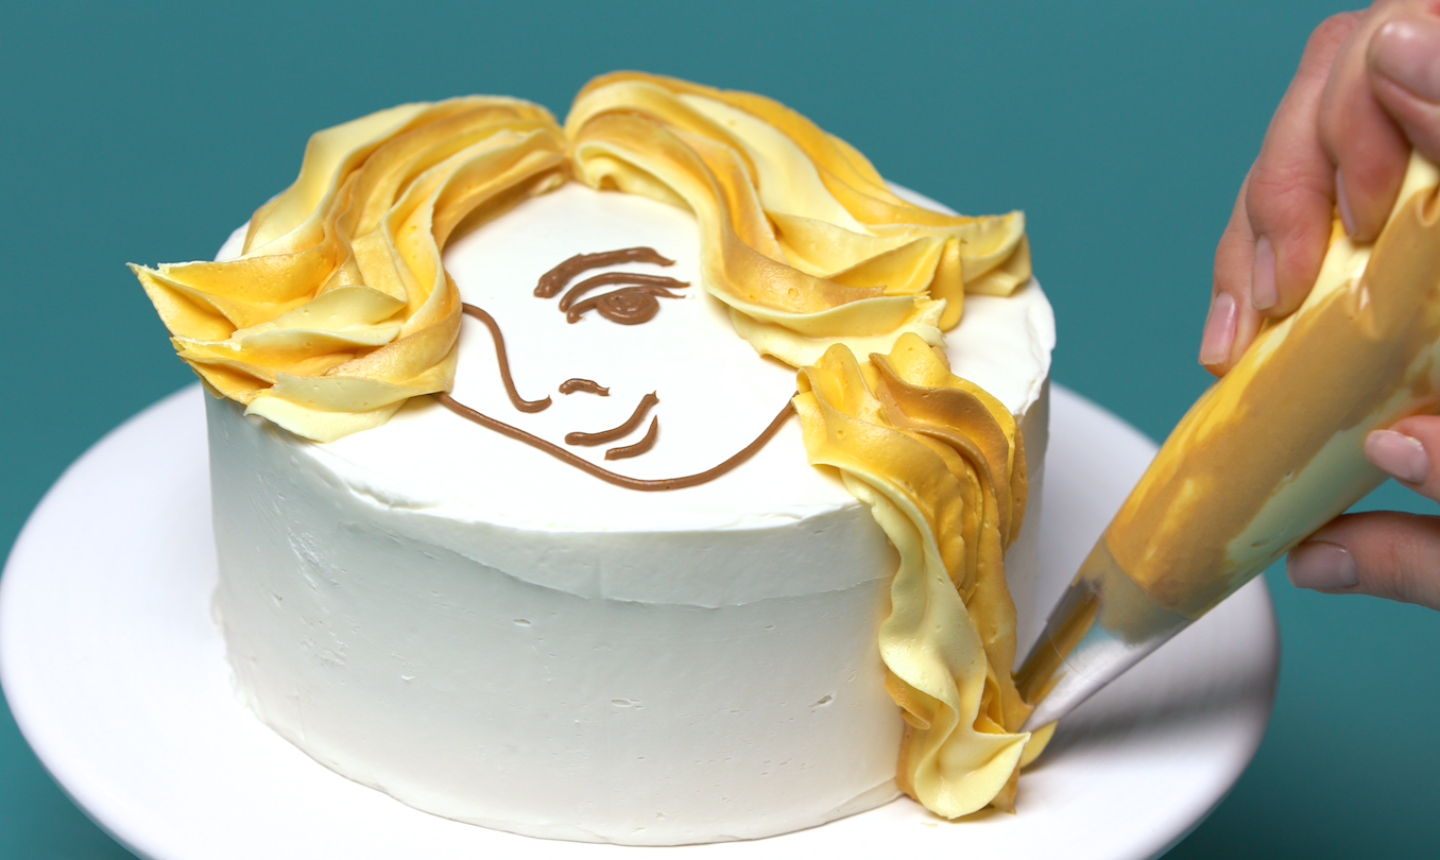
Now mix more buttercream to make your hair color. You can keep it simple, or add two different colors to a piping bag to give your portrait some fab highlights. Using an open star piping tip, create the hair. If your subject has long locks, continue piping over the edge of the cake and make it cascade down the sides.
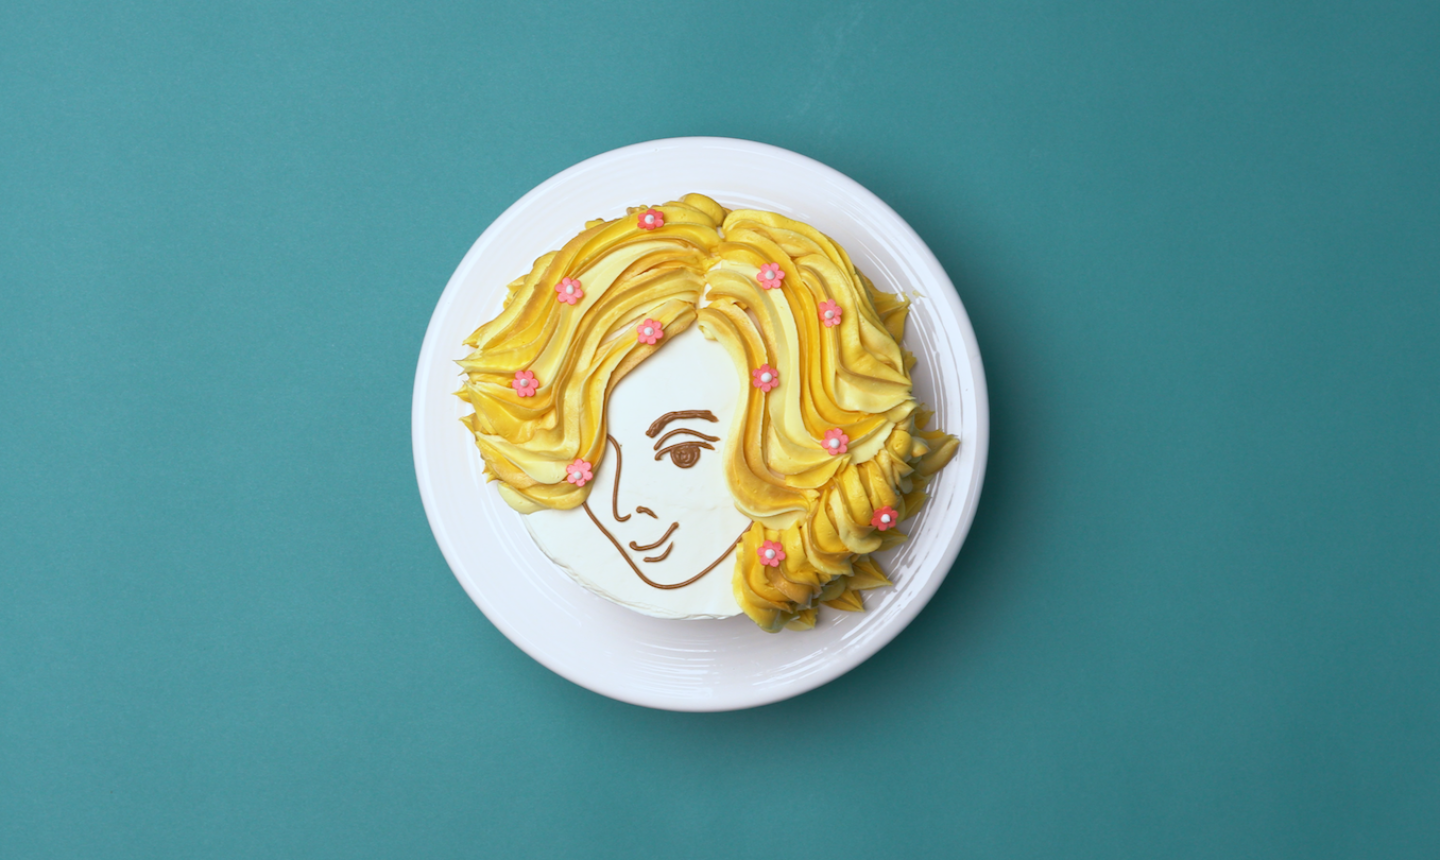
If you're feeling it, add some sprinkles for accents. You can't go wrong with flowers!

Share tips, start a discussion or ask other students a question. If you have a question for an expert, please click here.
Already a member?
No Responses to “You Can Make a Portrait Cake That's Almost Too Cool to Eat”