
If you’ve been perusing crochet boards on Pinterest and had a jonesing to start the craft, you’ve come to the right place. We’re going to crush your first crochet lesson. Even if you’ve never held a hook before or don’t know a slip knot from a single crochet, this guide will help you pick up basic techniques and tips. Soon enough you’ll be ready to crochet in rows, which is all you need to make a scarf or even a simple blanket.
Let’s get started!
First, Nab the Right Tools
There’s a whole world of yarns and hooks out there, but some are better for beginners. The main goal is to get materials that you find easy to work with. When starting out, keep these things top of mind.
Choose a Mid-Weight Yarn
Worsted weight yarn (#4) is the best option when you’re a newbie.
Go for Good Stitch Definition
It’ll make it easier to see your stitches when you work. A simple acrylic , wool or cotton yarn is a good choice. (For now, steer clear of fuzzy or fancy yarn.)
Pick Light Colors
Dark or multicolored yarn can make it harder to know where to insert the hook as you crochet, so your first few projects are likely to feel easier in a lighter hue. Once you’re crushing it, you can opt for any shade you want.
Match Your Crochet Hook to Your Yarn Weight
Yarn labels often suggest a hook size, so keep an eye out when shopping. In general, size G/4.25 mm and size J/6 mm are good starter hooks.
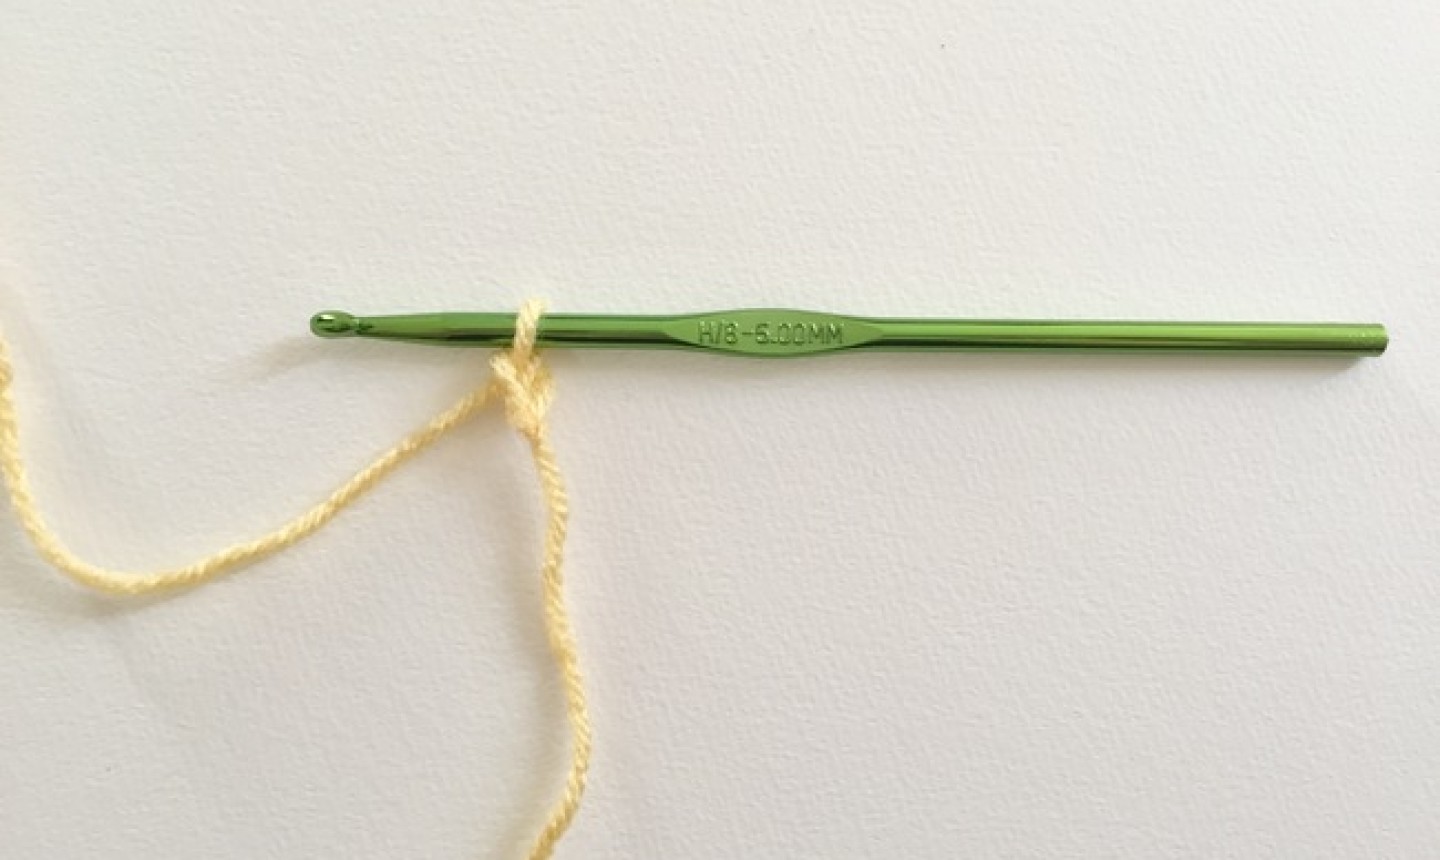
Start With a Slip Knot
Everything you crochet begins with a slip knot on the hook, so learning this simple knot is step one on your road to success.
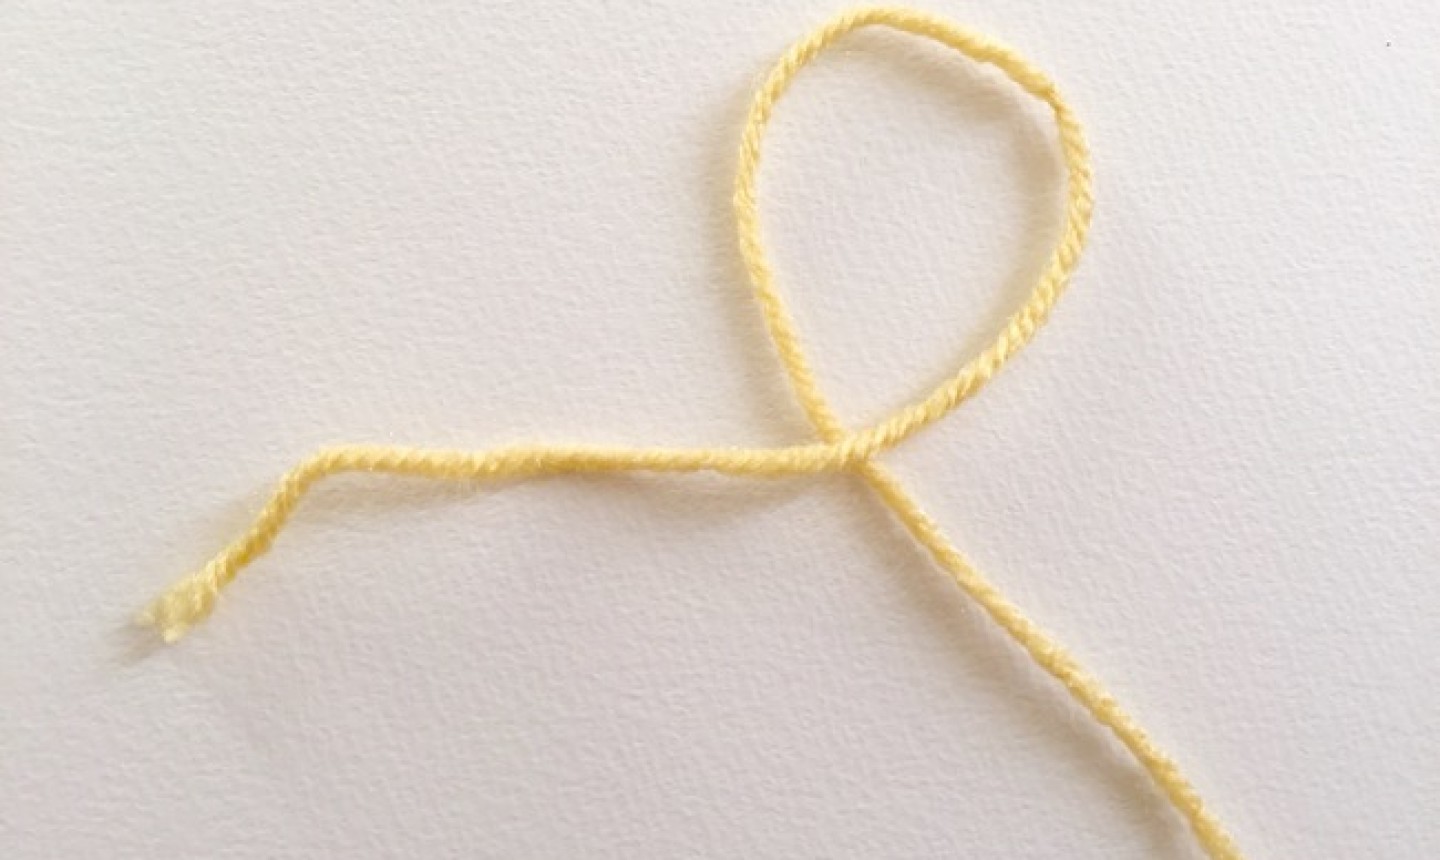
1. Make a loop with your yarn, then bring the tail of the yarn over the working yarn. The tail should be 4″ to 6″ long after it crosses the body of the yarn.

2. Create a pretzel shape (see above) with the loop. Press your left finger where the yarn tail crosses the working yarn. Then use your right hand to bring the loop down over the working yarn. (In reality, you’re just flipping the loop upside down.)
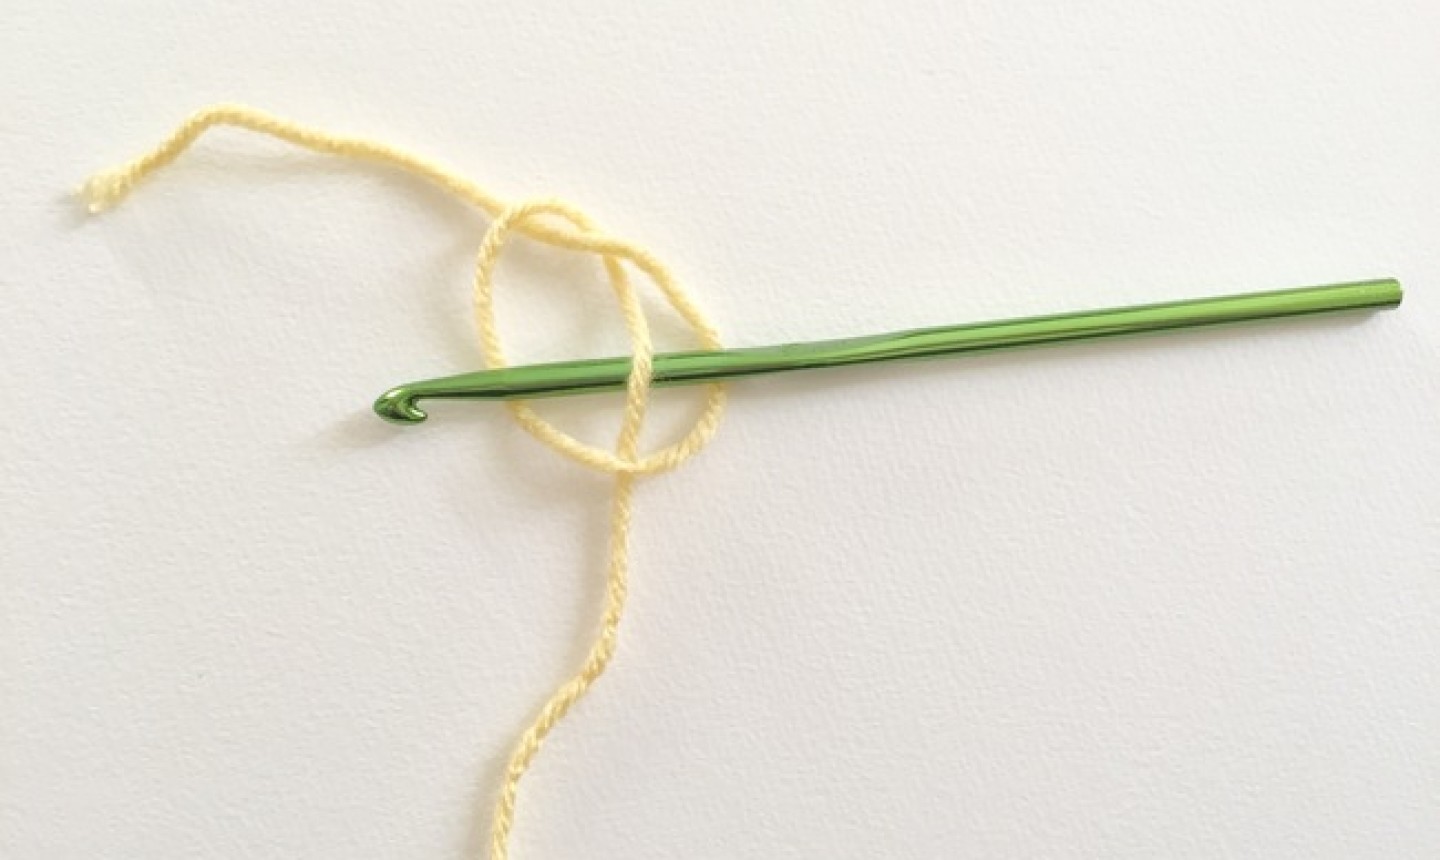
3. Insert the crochet hook from the right to the left over the working yarn, going through the loop. It should go over the right side of the “pretzel,” under the working yarn, then over the left side of the “pretzel.”
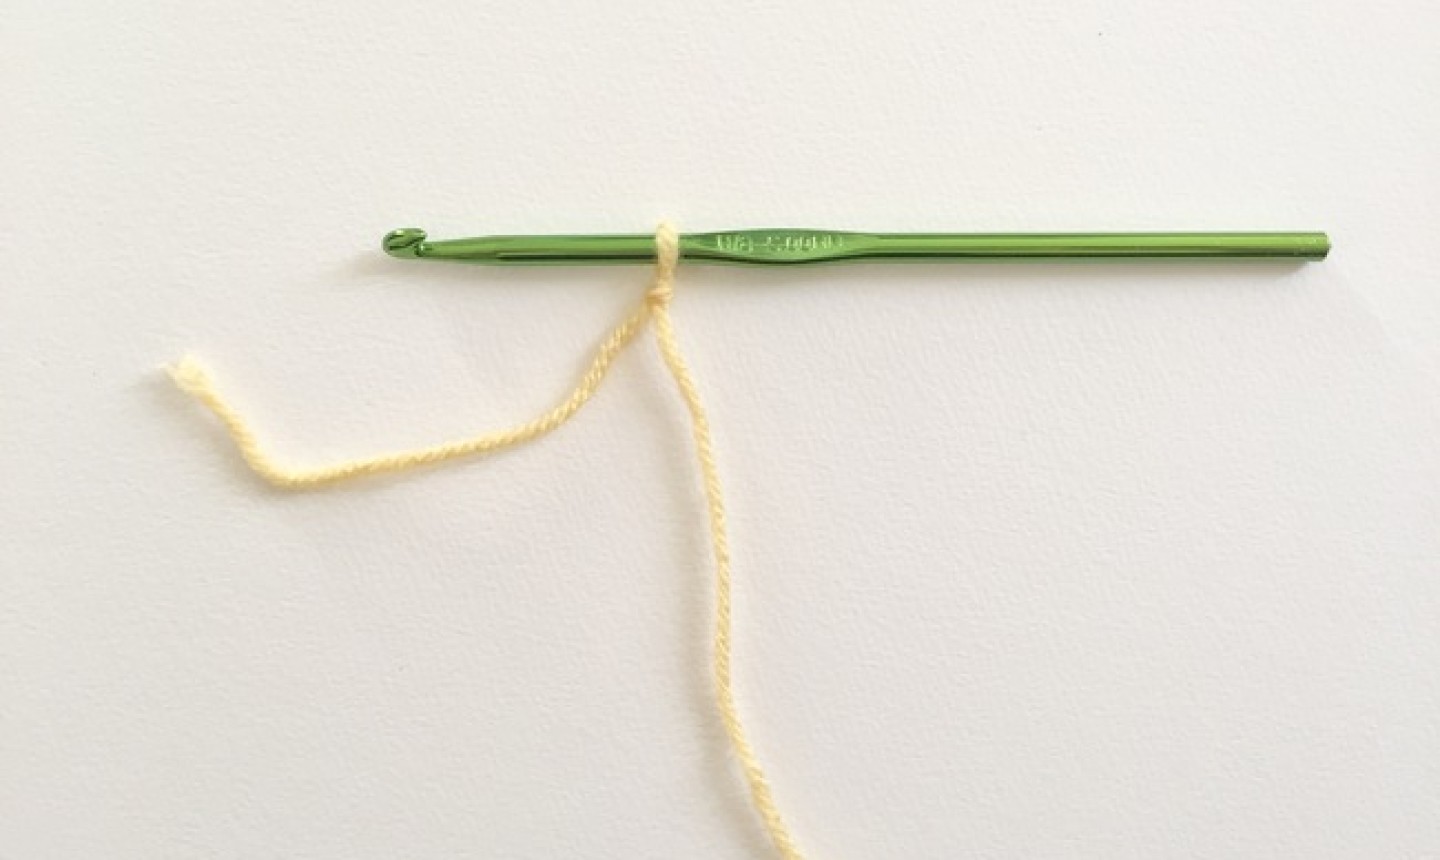
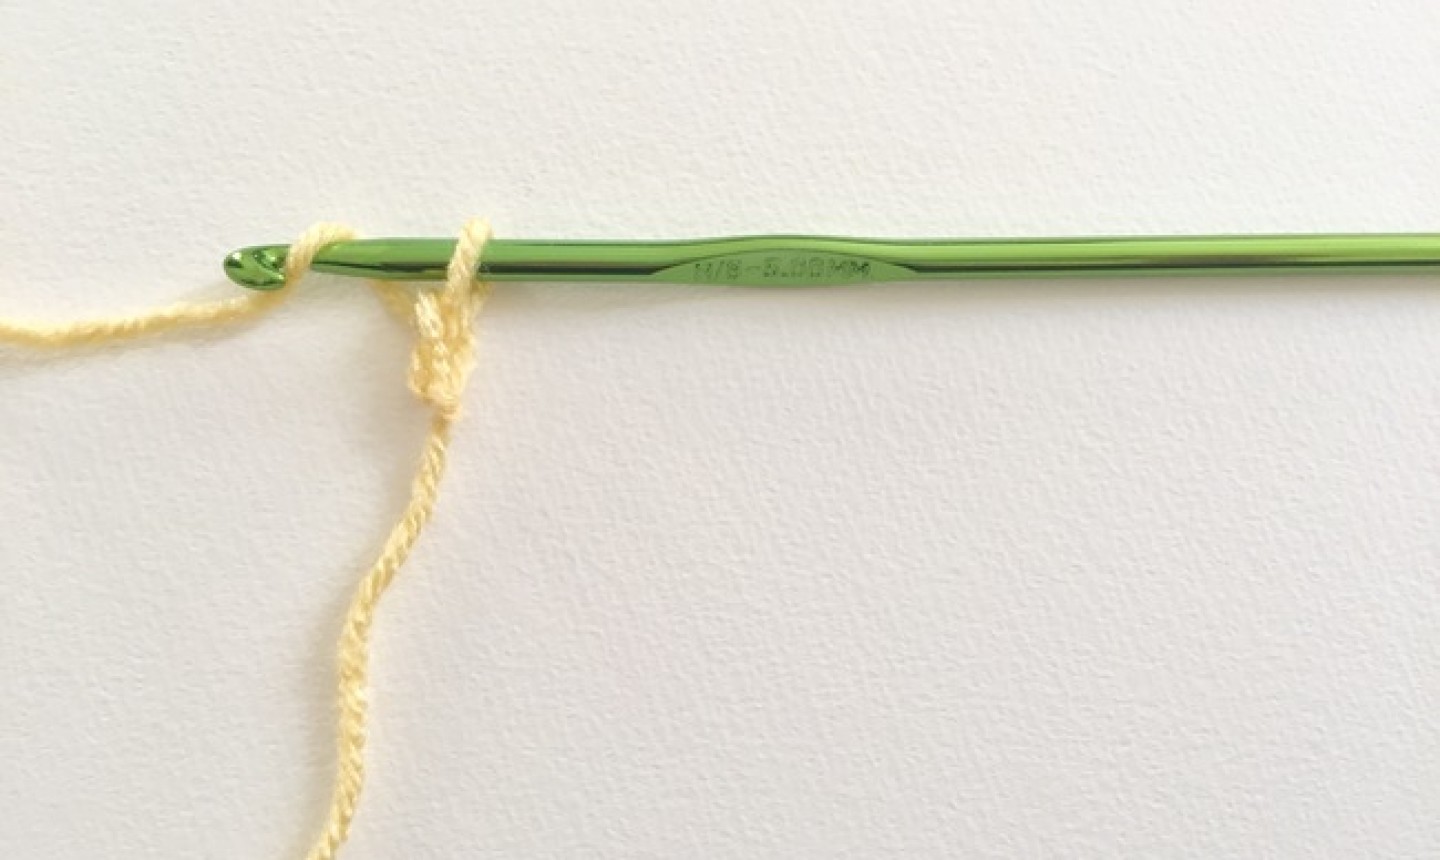
4. Pull down to tighten the yarn around the hook. Lift the hook up and tug lightly on the tail end and working yarn to tighten it. You just made your first slip knot. (Way to go!)

Crochet a Foundation Chain
Once you have a slip knot on the hook, you’ll need to crochet a chain. This is often called the starting or foundation chain because you work other stitches into it.
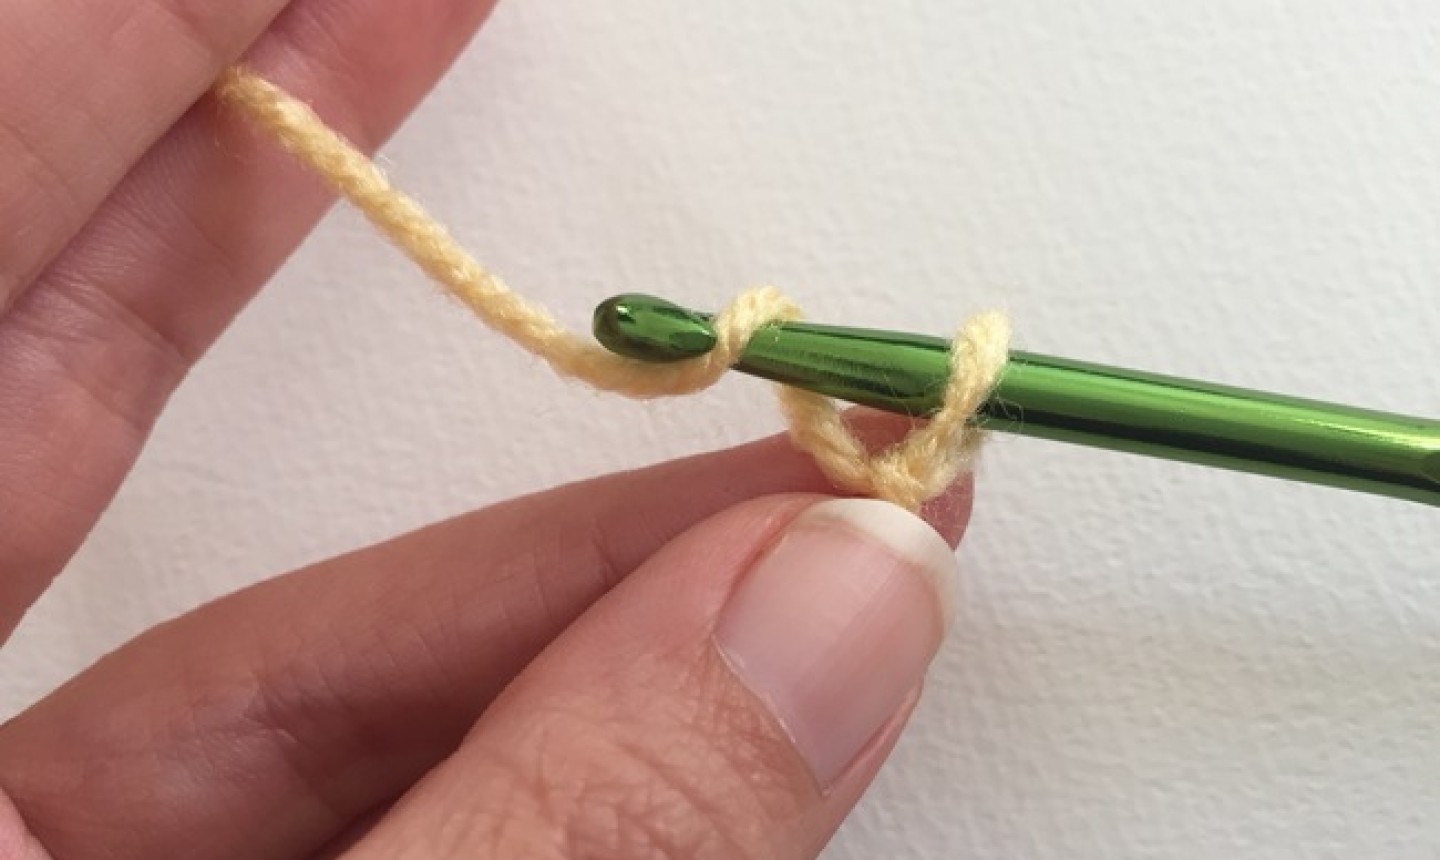
1. Hold the crochet hook so the tail hangs down, and pinch the tail between your thumb and ring finger.
Bring the ball of yarn to the left of the crochet hook. Yarn over so the working yarn comes behind the hook and then over it, to the left of the slip knot. Bring the working yarn underneath your hook.
Pro Tip In crochet, you’ll run into lots of yarn over instructions. This common crochet term (abbreviated yo) means you bring the working yarn over the hook.
2. Pull the working yarn through the slip knot. Move your hook to the right, pulling the yarn over all the way through the slip knot. There will still be a loop on your hook, plus one loop beneath it. These loops are called chains, and you’ve just crocheted your first one!
3. Keep repeating steps 1 and 2: Yarn over, then bring the yarn through the loop that’s on the hook. Each yarn over creates one chain, so if the instructions say “chain 20” then you will repeat these steps 20 times.
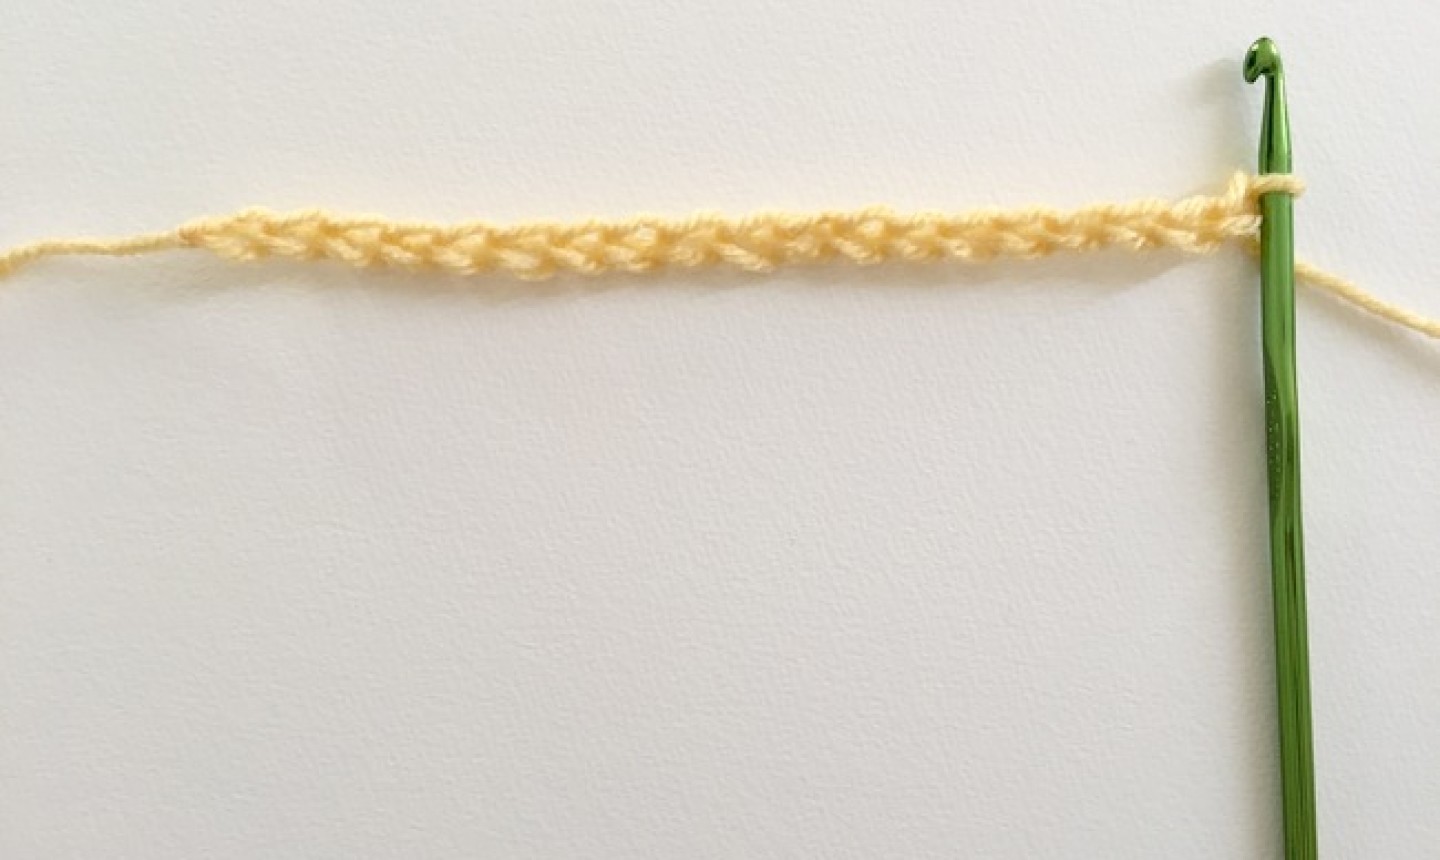
You can also see each loop as you work, so if needed you can count them again. But it can get cumbersome the longer the chain, so counting as you go is a good habit to get into.
Single Crochet
Now that you know how to create a chain, you’re ready to learn how to single crochet (abbreviated sc). Many crochet stitches begin the same way as the single crochet, so once you learn this stitch you’ll have the foundation to pick up more complex crochet stitches.
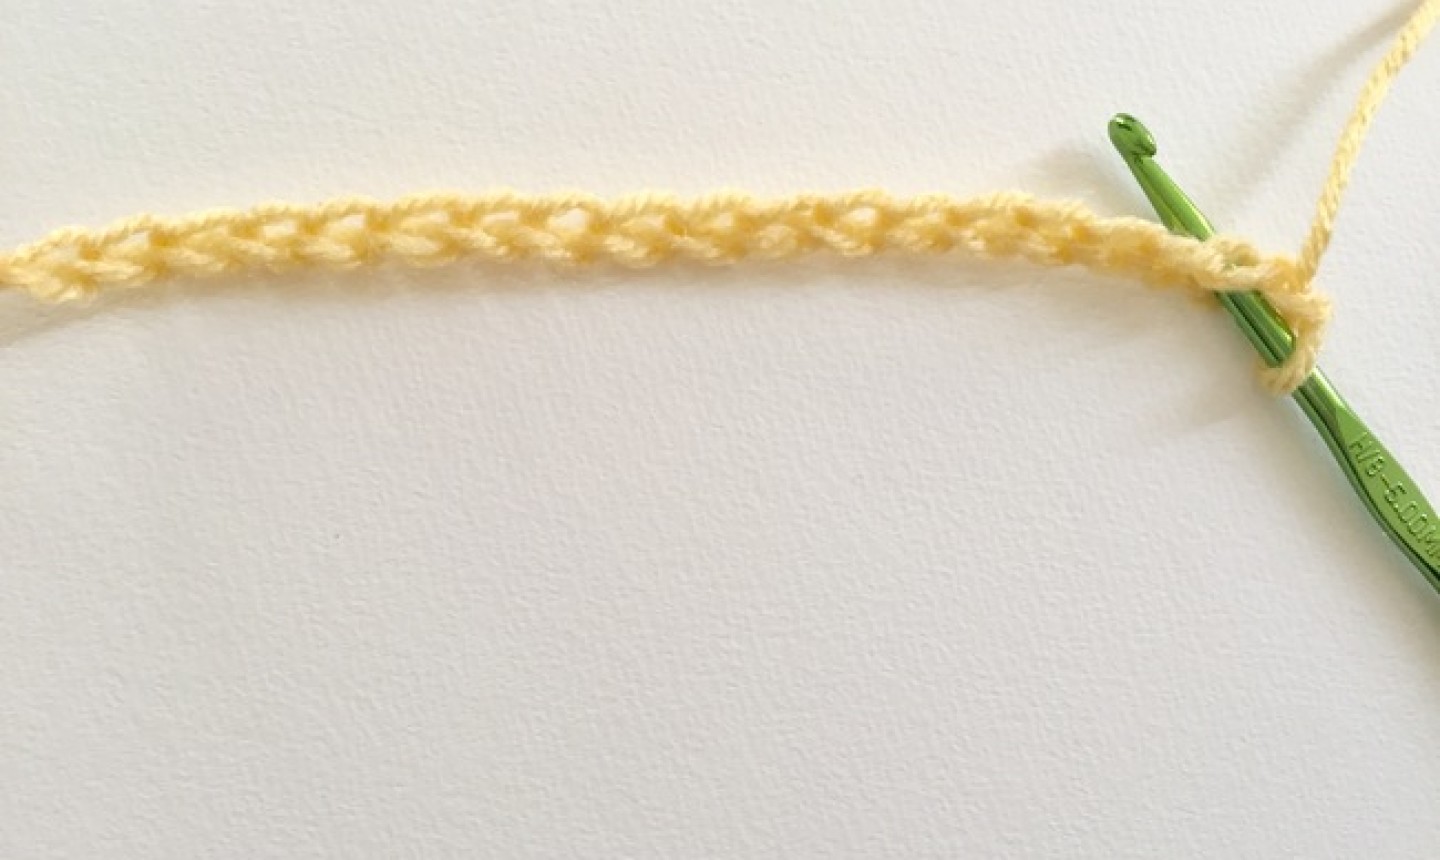
1. The first row of stitches is worked into the foundation chain you just made. Each chain looks a little bit like a V, with the mouth of the V open toward the right. Insert your hook into the second V from front to back through the V. Look carefully: When you insert the hook, there should be two loops of yarn above the hook and one strand of yarn below the hook.
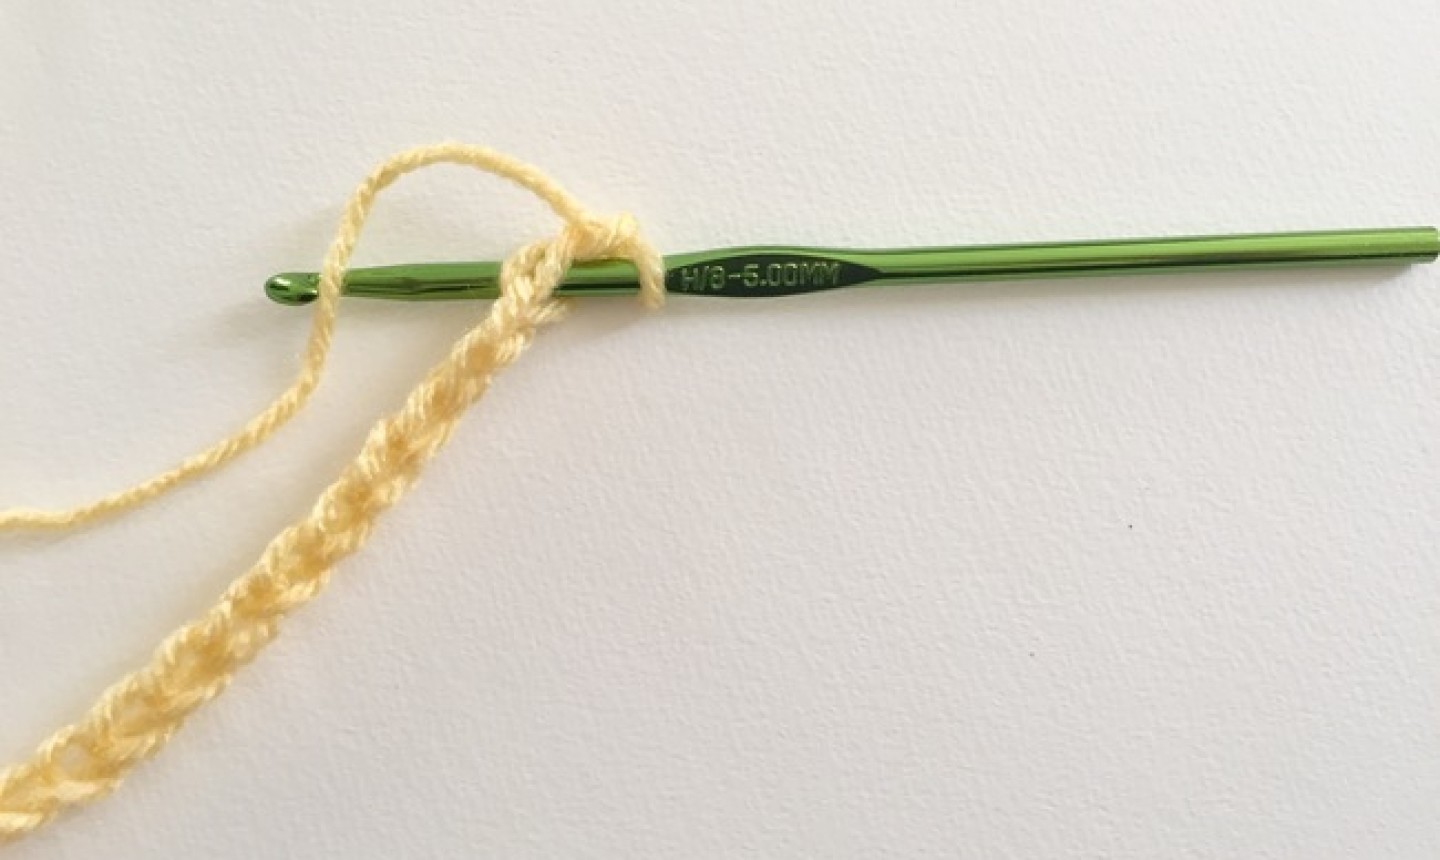
2. With your hook through the V, yarn over with your working yarn.
3. Pull the working yarn through the V: Move your crochet hook to the right, bringing the working yarn all the way through the chain where you inserted the hook. When you finish, there will be two loops on your crochet hook.
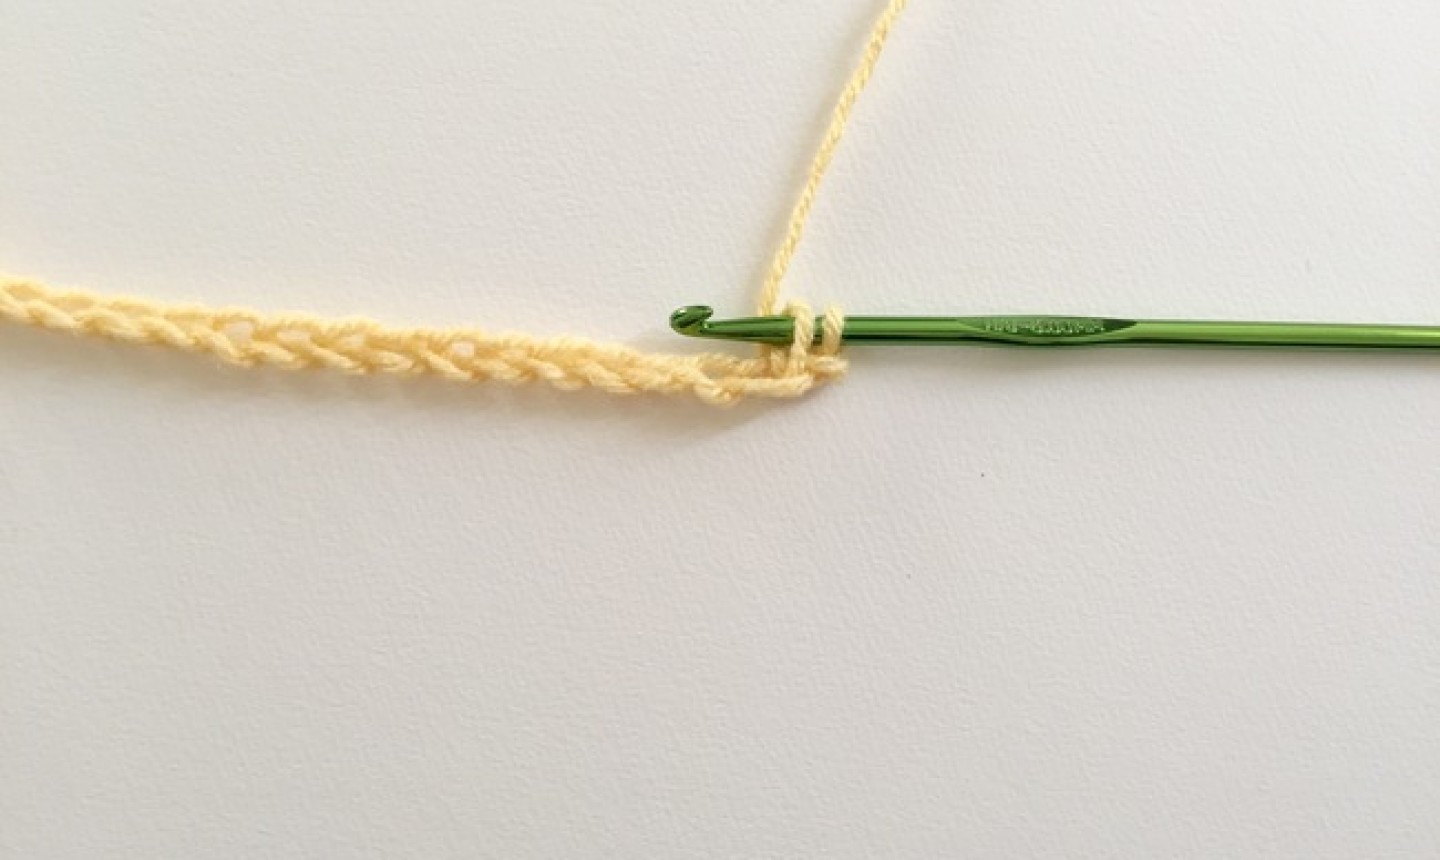
4. Yarn over again.
5. Pull the working yarn through both of the loops on the hook. Now you should have one loop on the hook. You have completed your first single crochet stitch!
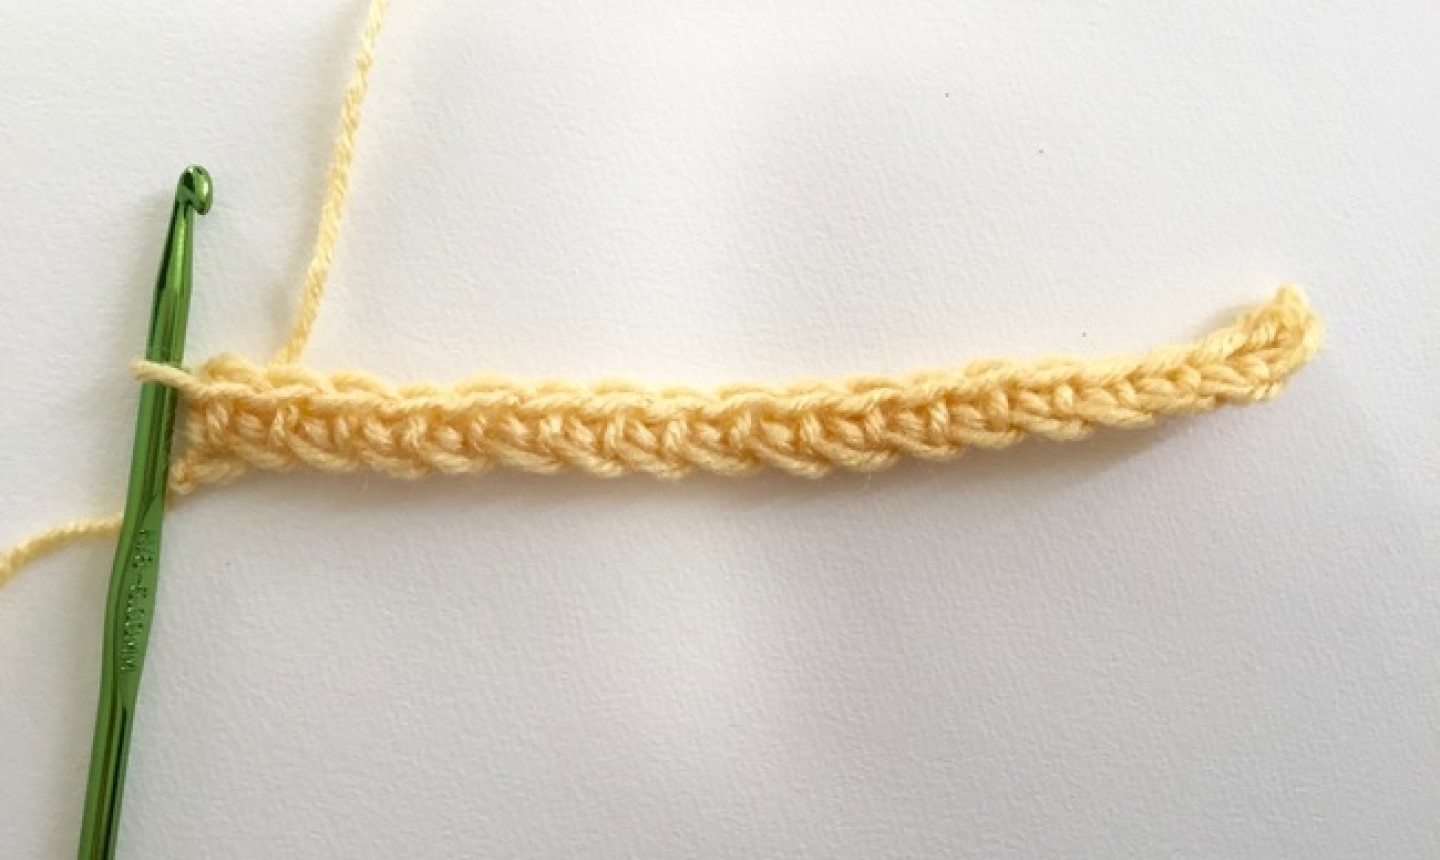
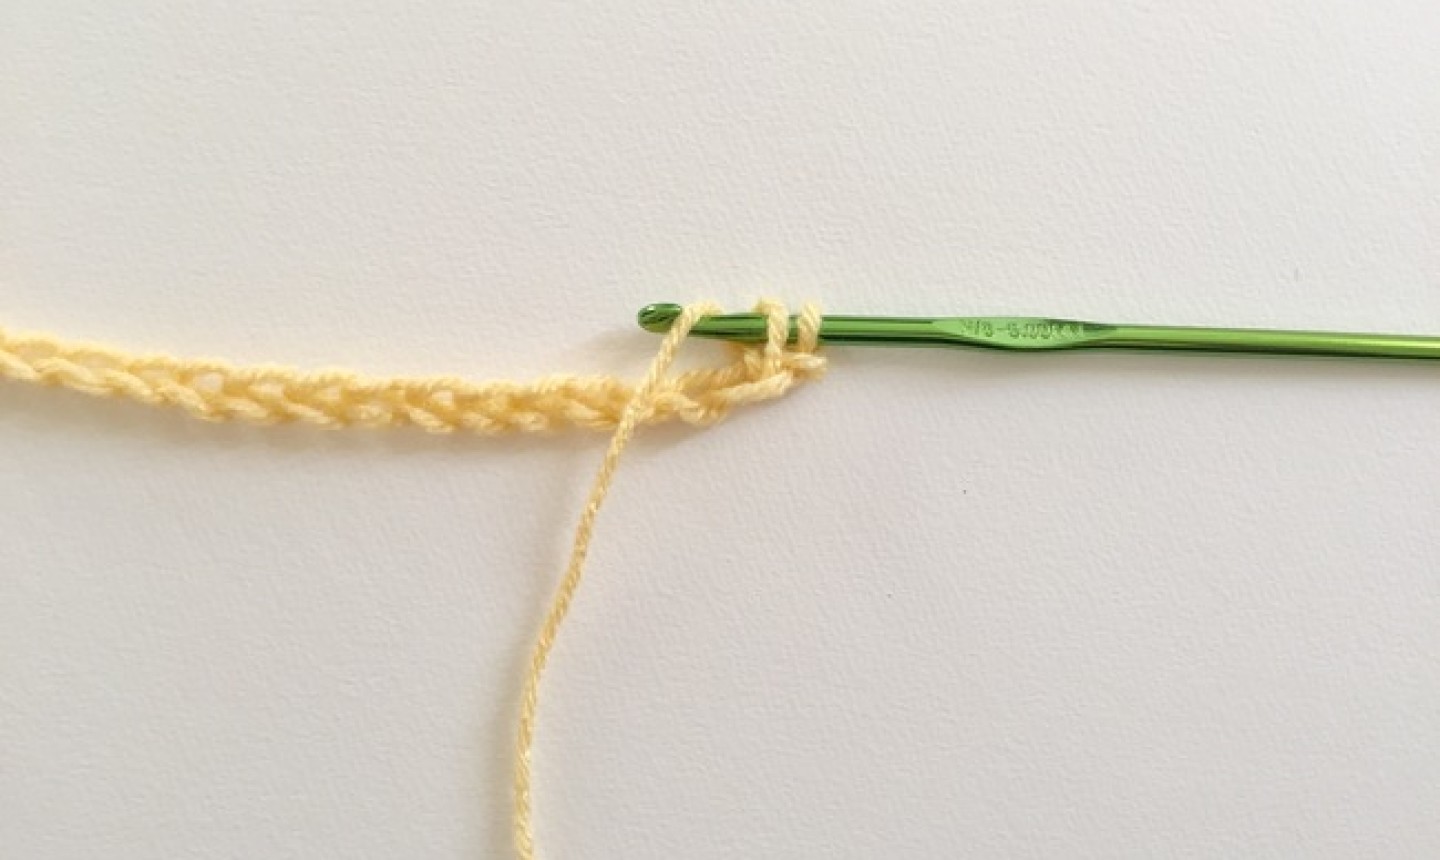
Continue all the way across the row. Each time, insert your hook into the very next chain.
Here’s a quick single crochet recap to have on hand:
- Insert hook, front to back, where the stitch is going to go
- Yarn over
- Pull up loop, creating two loops on the hook.
- Yarn over
- Pull the working yarn through both loops on the hook
Make More Single Crochet Rows
Now that you’ve learned to do one row of single crochet stitches, you can create as many rows as your project calls for. There’s just one more thing to learn for crocheting additional rows — the turning chain.
In crochet, you always work right to left. To make another row, you need to turn your work so you can continue to crochet right to left.
That’s where a turning chain comes in. It gives your row a little height, so when you start working your stitches they can stand tall. Turning chains sometimes replace your first stitch, and can be worked in addition to your first stitch. (Your pattern will say what to do.) In this demo, we’ll show you the step-by-step for when the turning chain takes the place of the first stitch.
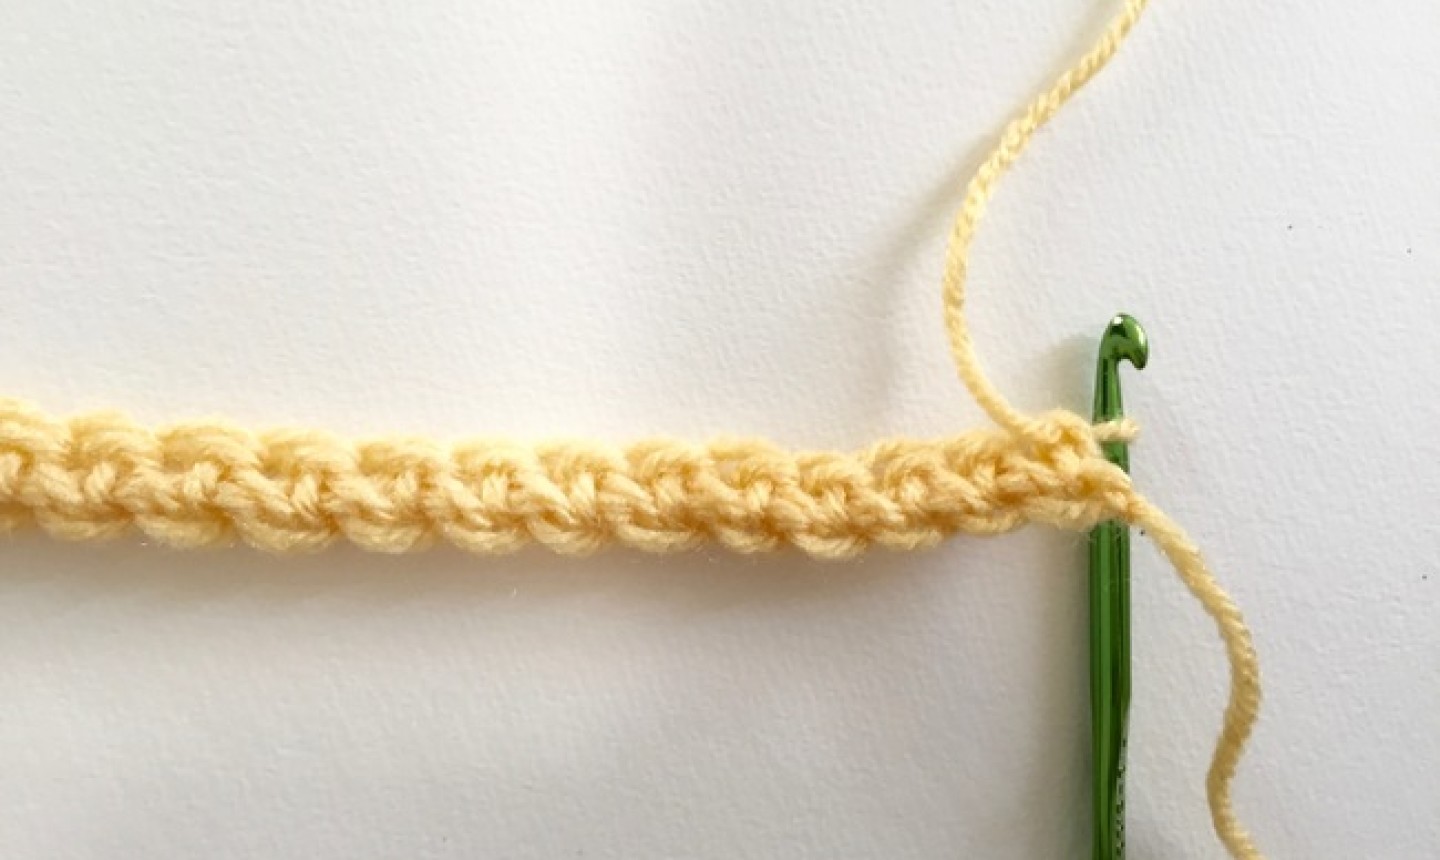
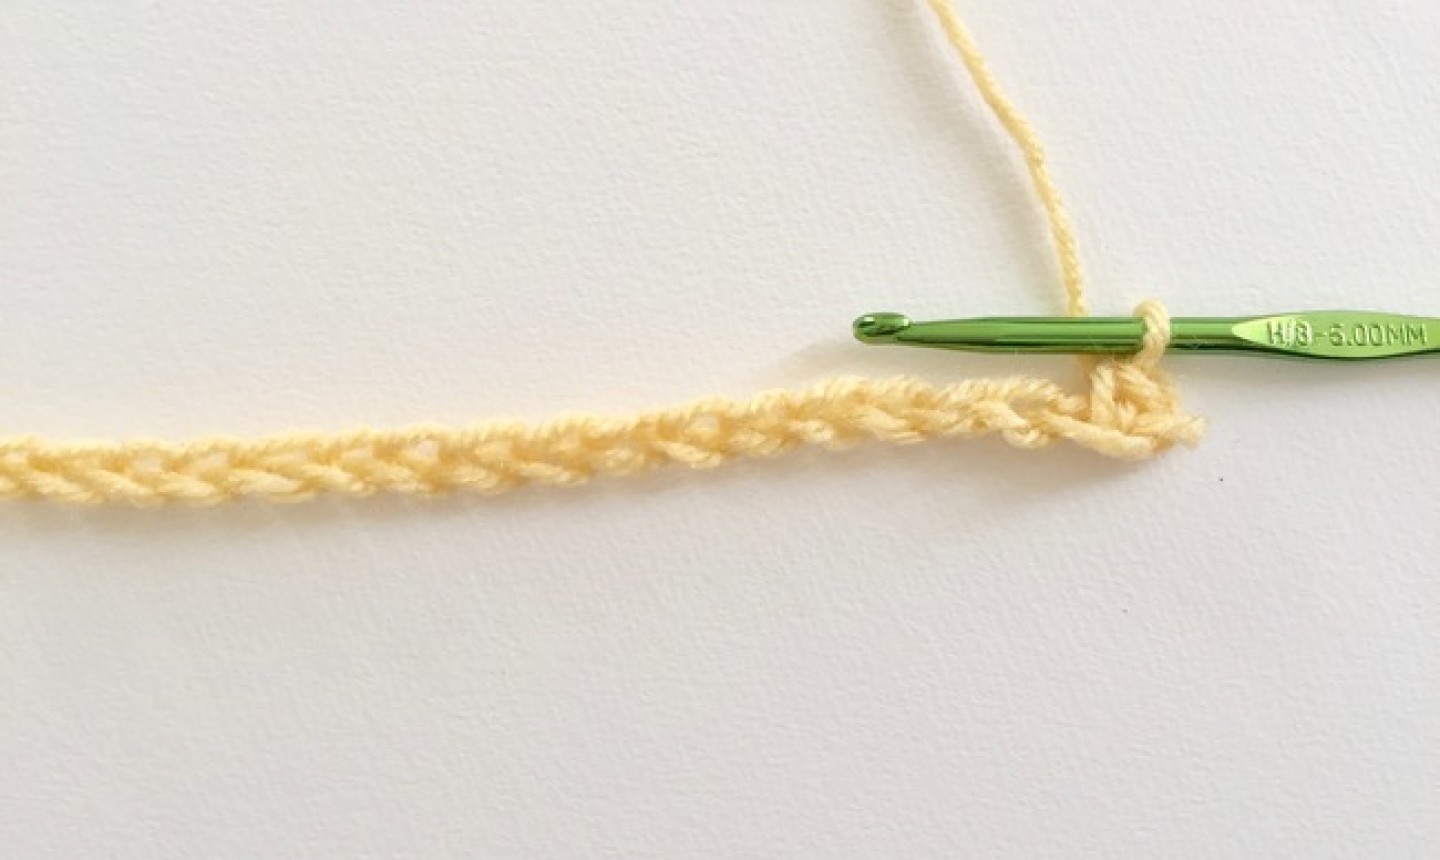
1. Flip your work over, clockwise from right to left, so everything that was to the right of the hook is now to the left.
2. Chain one. (You know how!) This serves as the first stitch in your row.
3. Now that you’ve made the first stitch, it’s time to figure out where you’re placing your second. Since your turning chain is standing in for your first stitch, jump ahead to the second stitch in your row. (In the photo above, the finger is pointing out where to place your hook for the second stitch.)
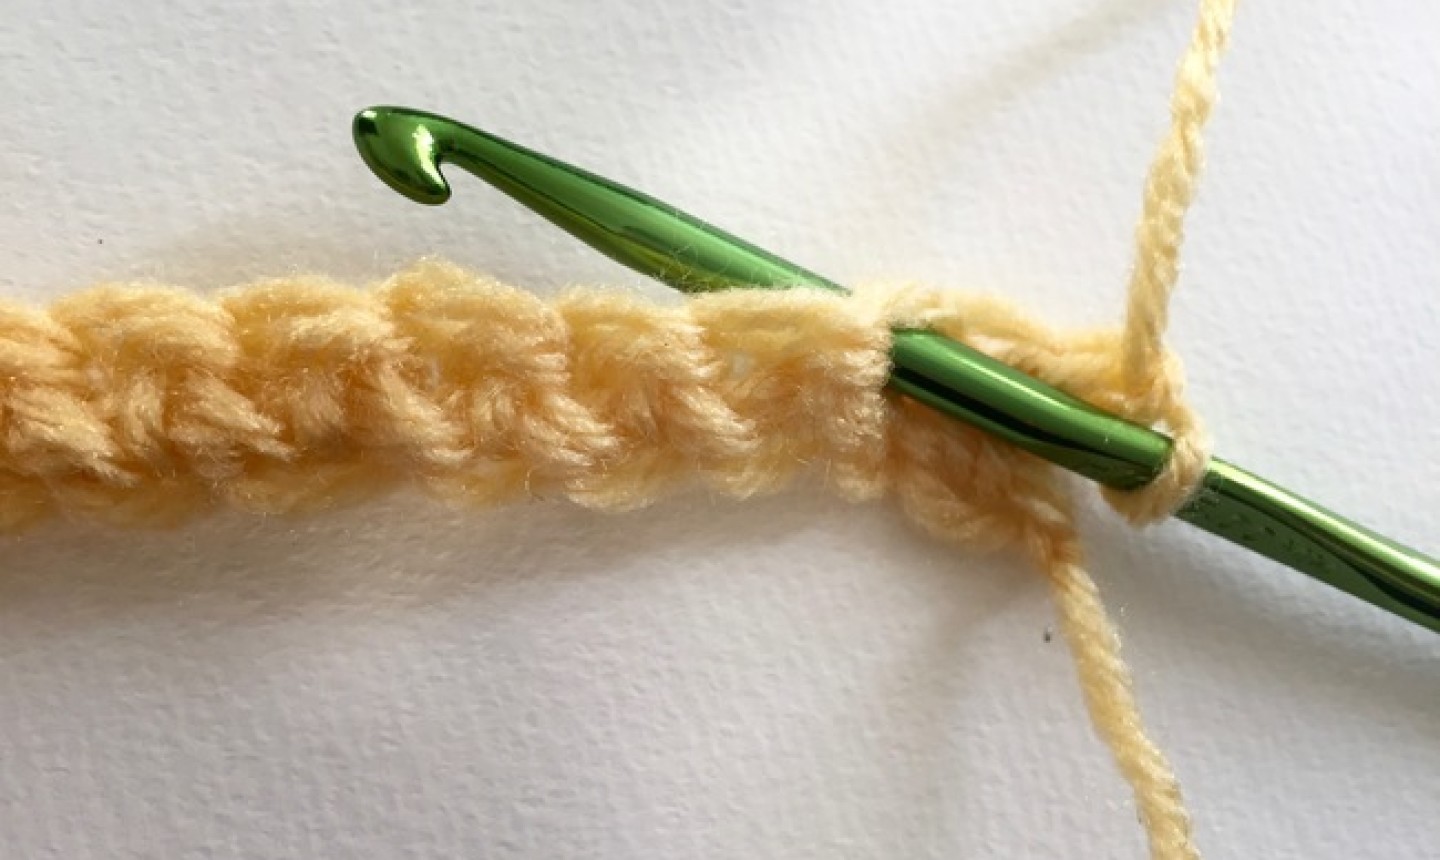
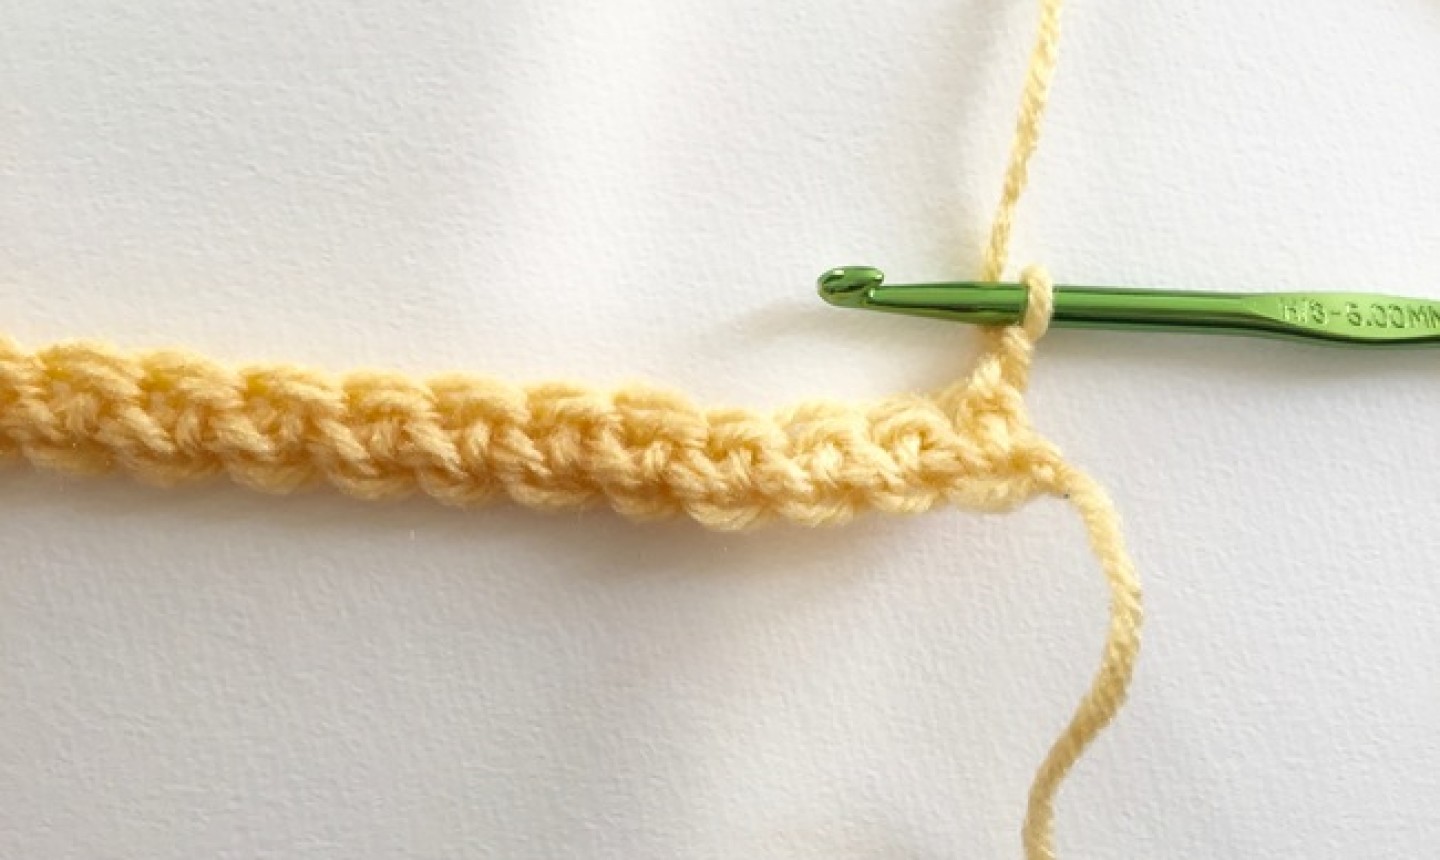
4. Insert your hook into the second stitch from front to back, and make a single crochet.
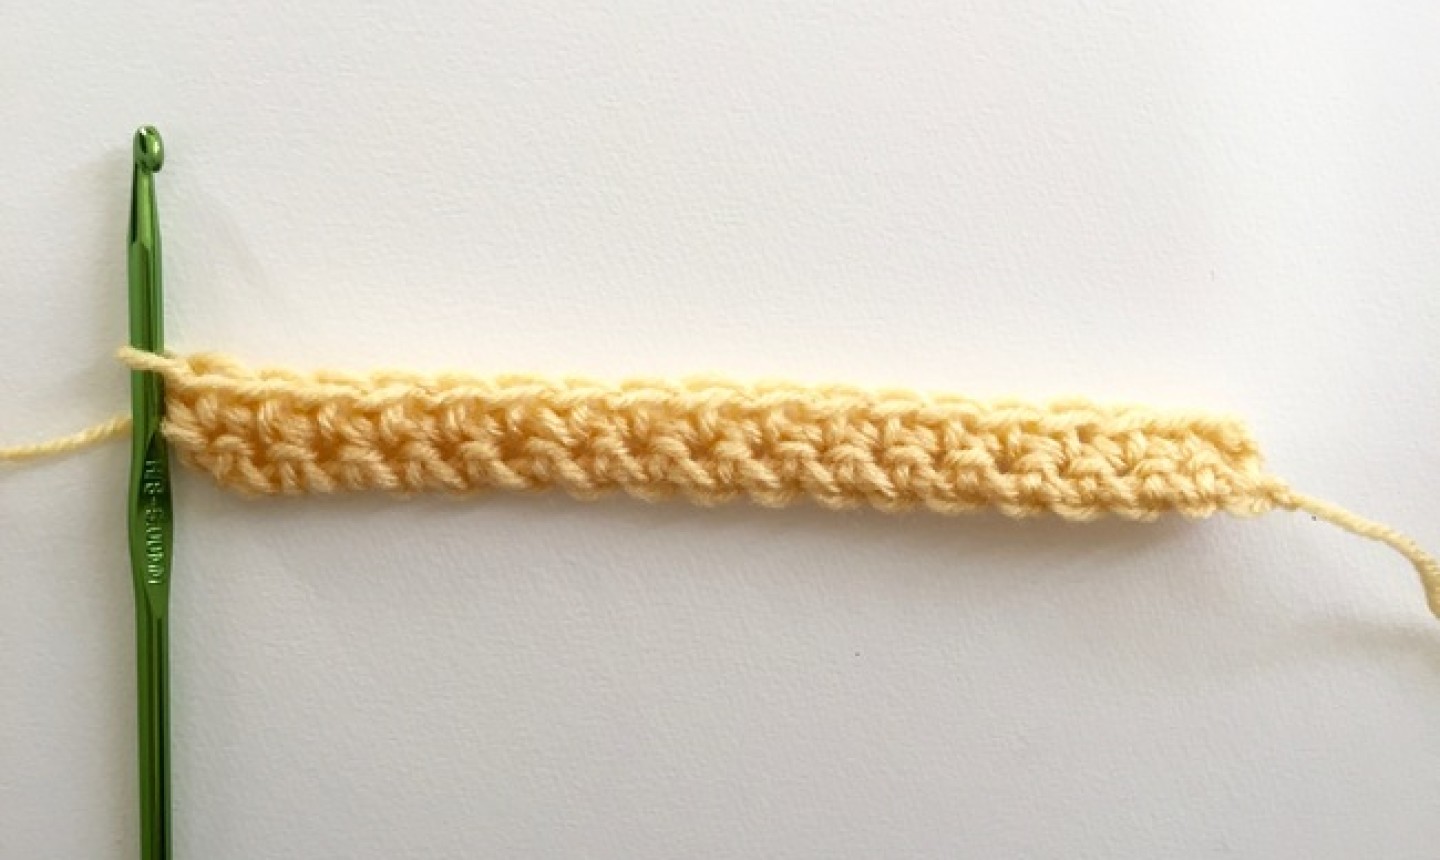
5. Continue this all the way across the row. At the end, you’ll have two rows of single crochet stitch, like in the above photo.
Now you can create as many rows of single crochet as you like. Just remember your final single crochet of a row will be worked into the turning chain at the start of the previous row. This is something that becomes important when you do taller crochet stitches.
A Few More Helpful Tips
Keep these in mind as your work in progress (WIP) develops and you’ll have a beautiful crochet project in no time.
Insert Your Hook Correctly
It should always go into the next stitch, immediately next to the one where you just worked. Insert the hook so it’s always going under the two legs of the V on the top of the stitch.
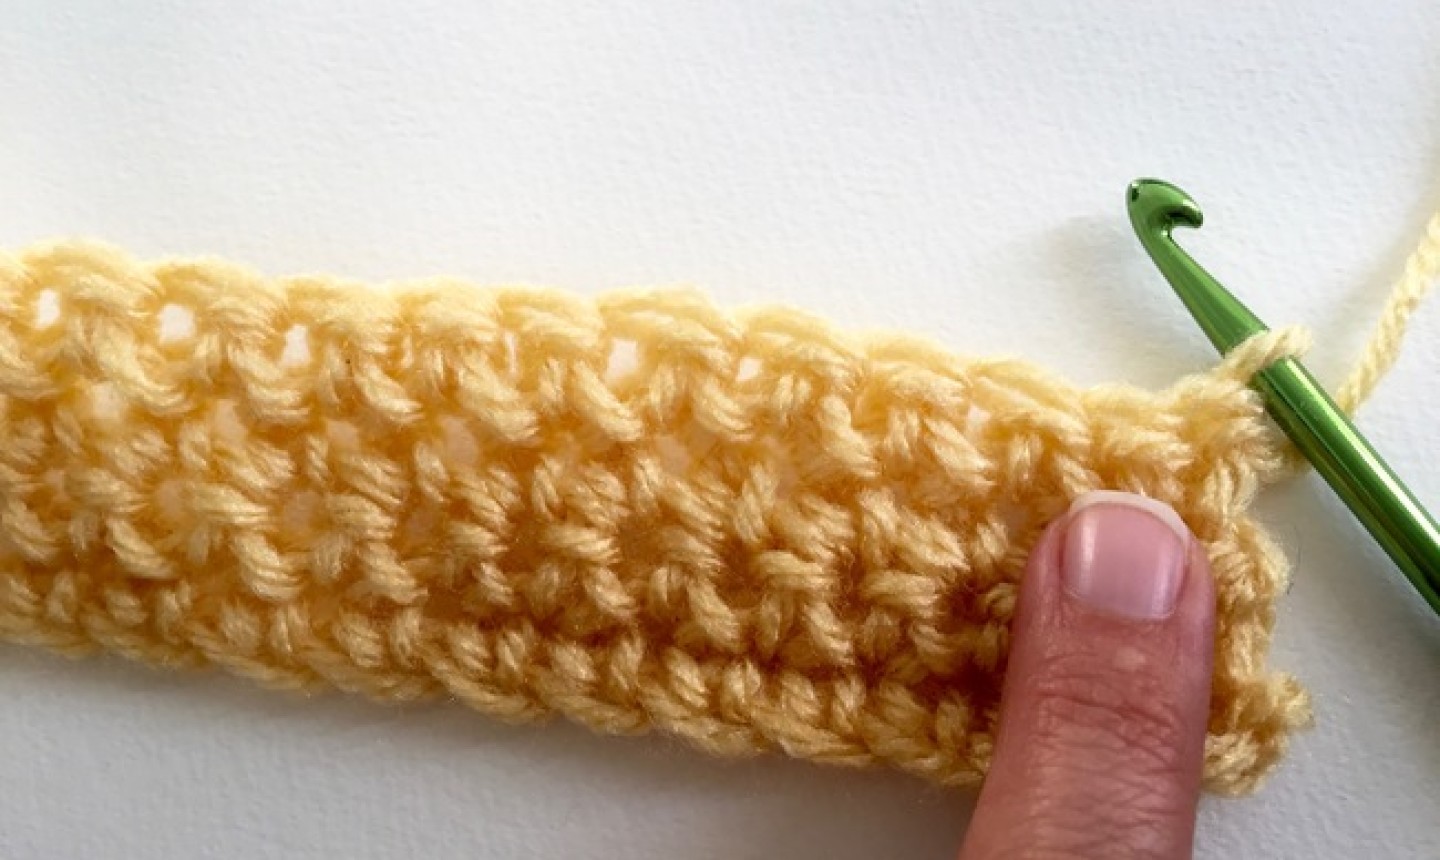
Keep Track of Your Stitch Count
When working straight rows (no fancy increases or decreases), your stitch count should stay the same from row to row. If you have 20 stitches in the first row, there should be 20 in rows two and three (and so on). Count as you go, beginning with that turning chain. If you get to the end of the row and you don’t have the right number, you know you have to go back and work again.
Now that you’ve crushed your first crochet lesson, you’ll want to pick up more techniques in our Startup Library Crochet class so you can learn to change the length of the foundation chain, crocheting more rows (or fewer ones!) to create squares and rectangles of all sizes. Soon you’ll be a pro at increasing and decreasing, working different loops and making taller basic stitches, like double and treble crochet. Get ready to make afghans, place mats and a slew of other gorgeously crocheted items. Let the fun begin!

A video link would be better. Having to read what to do and what hole to insert is not helpful. I will need to use youtube instead
Is there a way to save these on our lesson profile?
Very good first lesson. Thank You
Yours is the first site or video (including those with millions of views) which clearly explained there should be two strands above the hook and one below! Thank you!
I first learned to crochet when I was about 8 and I would spend the summer's with my French Cajun Grand- mother. She made all my clothes and put crocheted lace on everything. what a thrill, however i forgot how to crochet.
Love❤️🤓🤬
I know basic crochet, but I would like to improve myself and follow patterns.
Really just want to get started.Can do single and double crochet
I do crochet often. It is always good to see if there are newer,easier ways to do a stitch.
I knit and always wanted to learn how to crochet, so here goes. Great first lesson!