
Depending of the latitude at which you live, you are either in the midst of fall leaf glory or have just watched the last of the leaves fall from the trees. No matter where you live, you can sew a lovely rainbow of leaves for your next project.
Add a couple of these to your pumpkin quilt block from last month for a fun table runner, or sew up dozens for a cozy throw quilt. Or simply sew one block and add it to our growing collection for the year.
What could be a more perfect way to celebrate the season and use up some scraps at the same time?
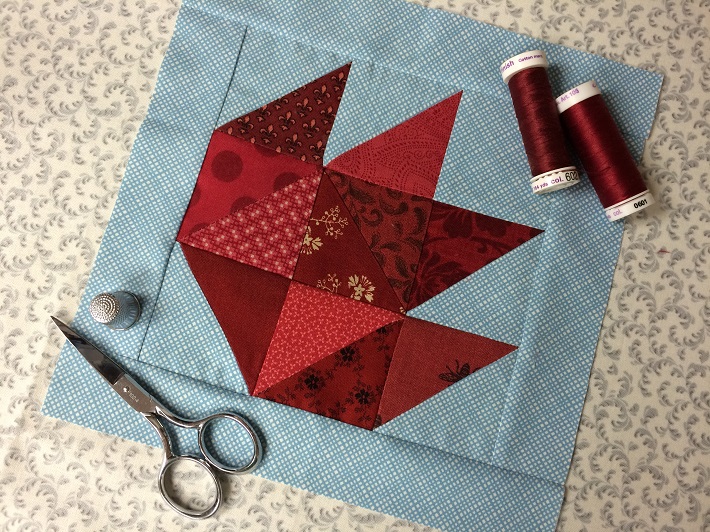
Maple leaf quilt block tutorial

Supplies:
For this month’s block you will need to gather some red fabric scraps (unless you would like your leaf to be another color such as gold, green or brown) and a single background fabric.

Step 1: Cutting
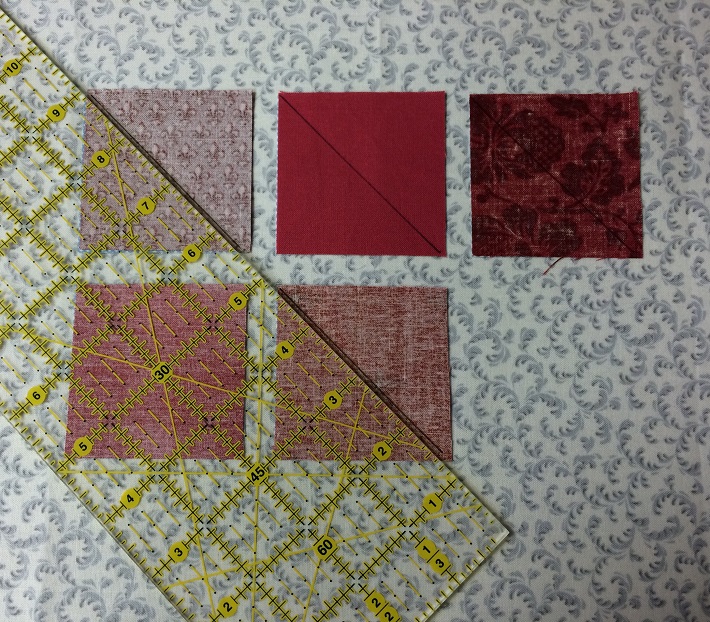
From the red scraps, cut a total of eleven squares 2 1/2” x 2 1/2”.
From the background fabric, cut a total of six squares 2 1/2” x 2 1/2”. Also cut two strips 1 1/2” x 8 1/2” and two strips 1 1/2” x 6 1/2”.
Step 2: Marking
Draw a diagonal line on the wrong side of five of the red squares. Use a pencil or marking pen and a straight edge to get an exact line from corner to corner. This will be our sewing line.
Step 3: Layering
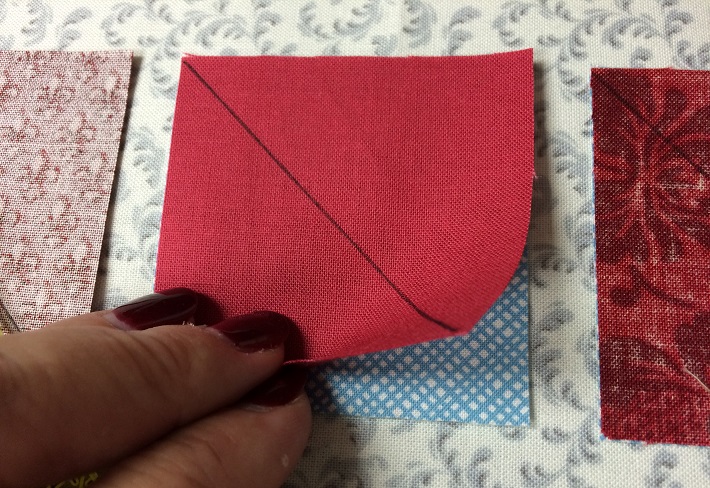
Layer a marked red square, right sides together on top of background square, repeat five times.
Layer a marked red square, right sides together, on the remaining three red squares.
There will be one background square leftover at this point.
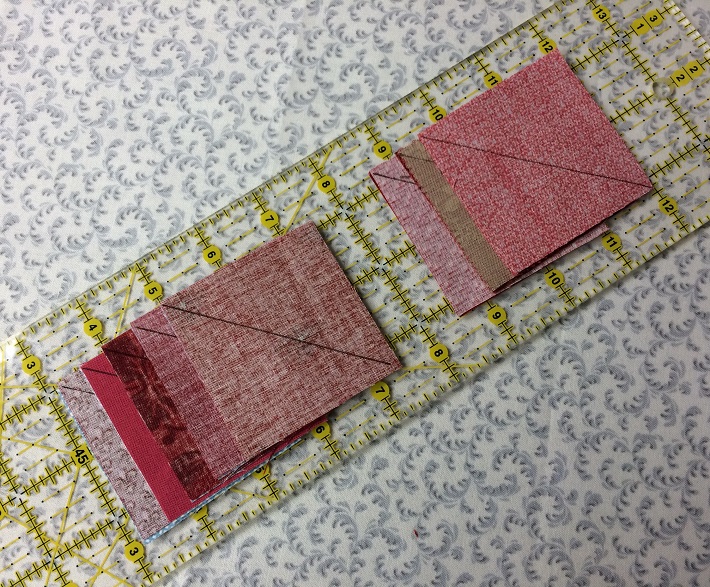
Tip: Place the layered squares on a ruler for easy transport to the sewing machine. This will prevent having to adjust the squares and keep them perfectly paired.
Step 4: Piecing the squares
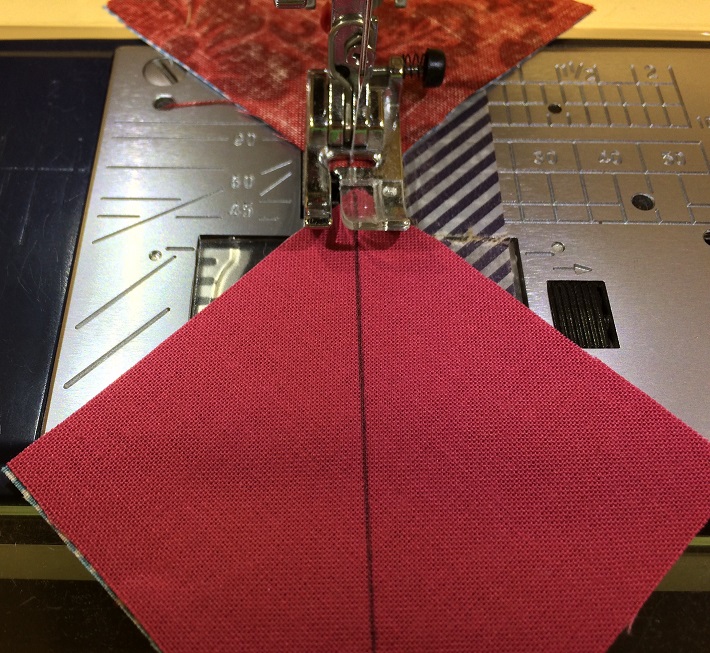
Chain piece the squares one after the next, sewing on the drawn line. Do not clip the threads in between the squares until after they are all sewn. This will save thread and time.
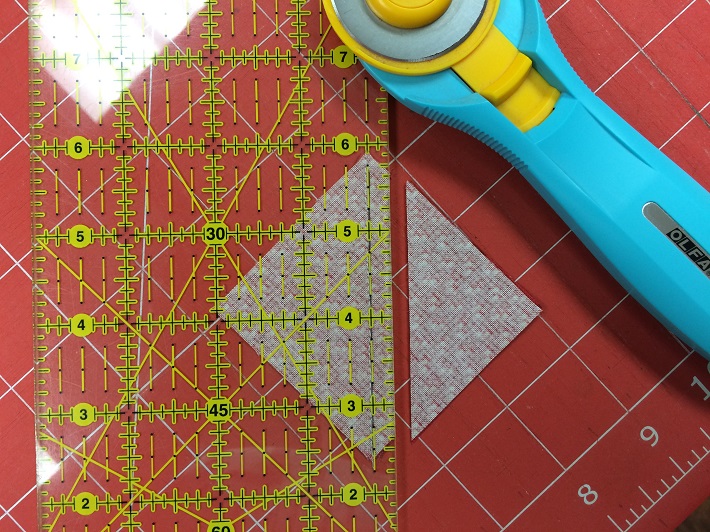
Step 5: Trimming the triangles
Using a ruler and rotary cutter, trim 1/4” away from the sewn line. The smaller pieces can be thrown back in your scrap bin or tossed.
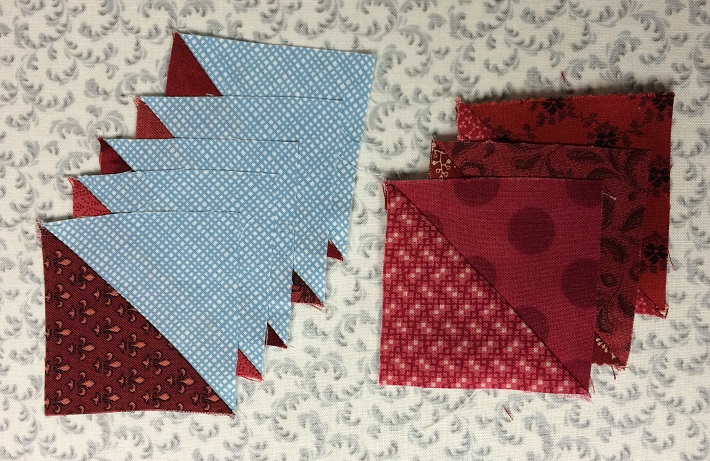
Step 6: Pressing the triangles
Press the triangles into a square, pressing the seam allowance away from the background fabric where needed.
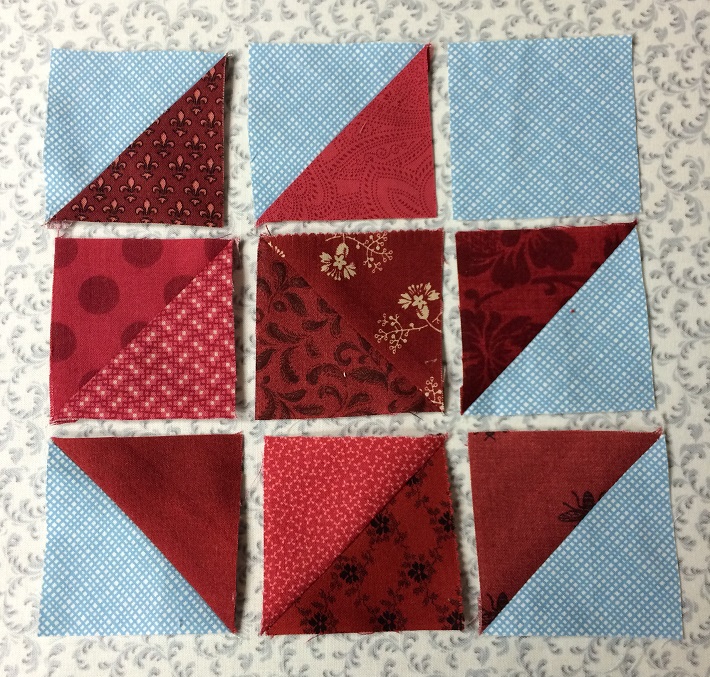
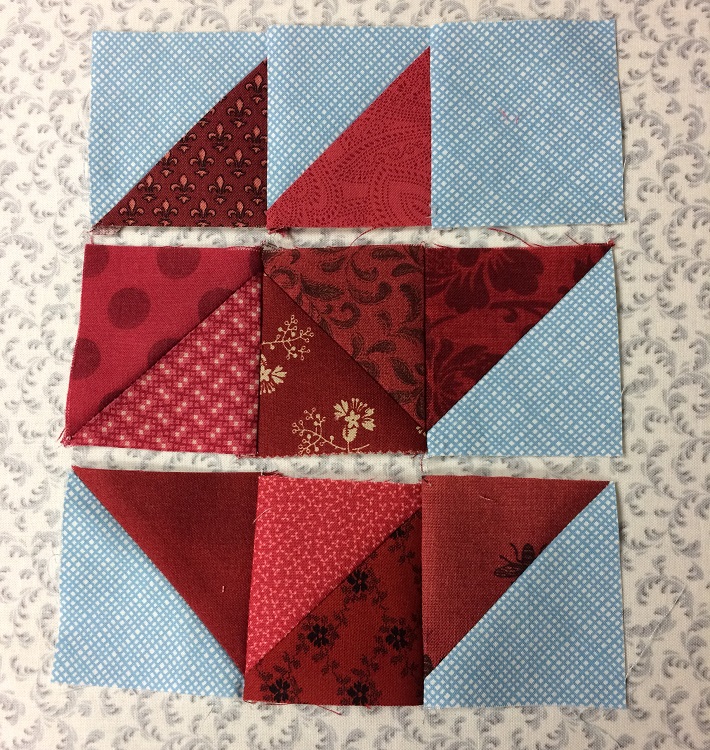
Step 7: Arrange the leaf squares
Arrange the squares into a nine patch as shown above. Take time to select the direction and fabric placement of each square. Take time to adjust the seams as show, or in any direction you prefer.
Step 8: Sew into rows
Using a 1/4″ seam allowance, sew the squares into three rows of three. Press the seams in the top and bottom row to the right, and press the seams in the middle row to the left. This will allow them to ‘nest’ for the next step.
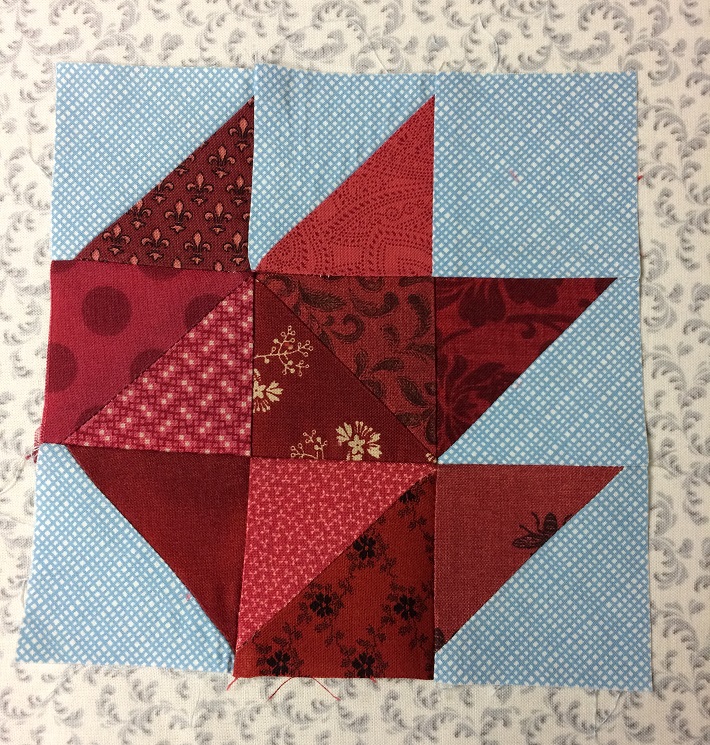
Step 9: Assembling the leaf
Sew the rows together and press the block. The leaf unit will measure 6 1/2” x 6 1/2”.
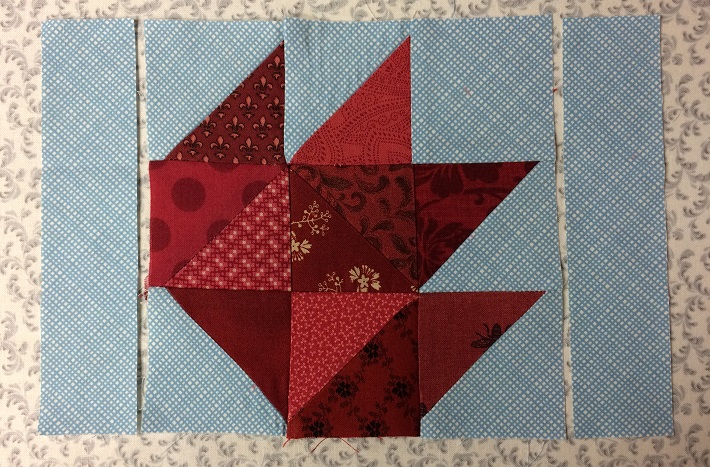
Step 10: Add the side borders
Sew a 6 1/2” strip of background fabric to each side of the block. Press toward the border strips
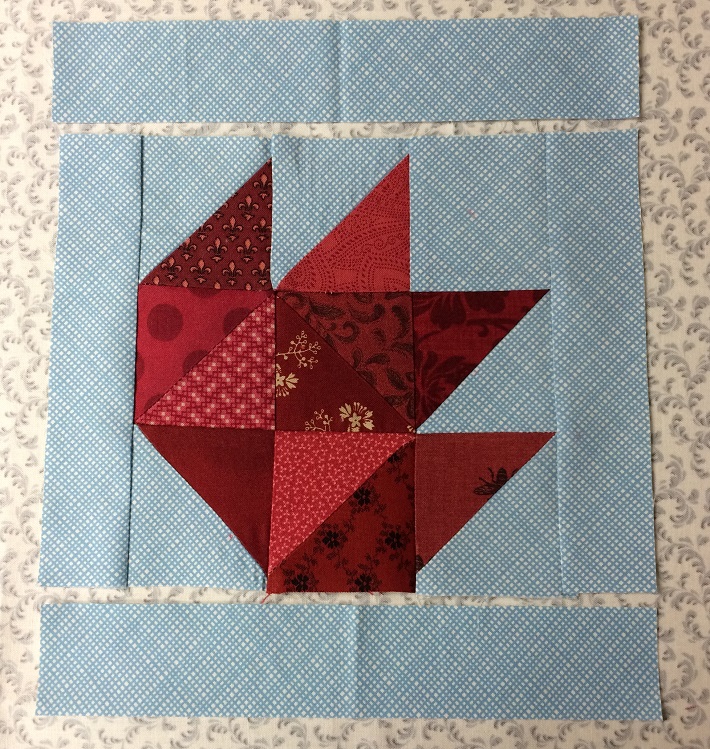
Step 11: Add the last borders
Sew the 8 1/2” strips to the top and bottom of the block. Press the seams toward the border strips.
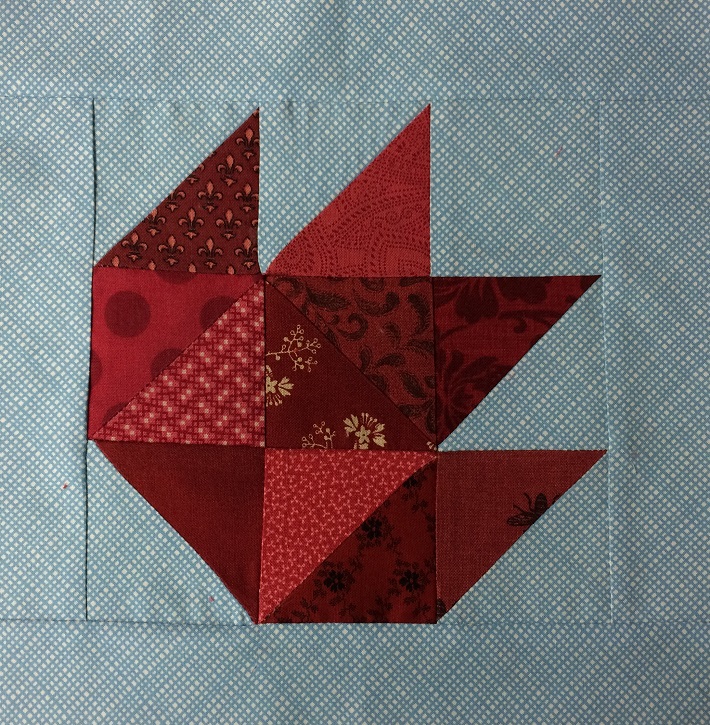
Now step back and enjoy your scrappy fall leaf quilt block! This block will measure 8 1/2” x 8 1/2” square just like all of the other monthly scrappy blocks that we have shared.
If you missed any of the free scrappy block patterns, they can be found here:
Share tips, start a discussion or ask one of our experts or other students a question.
No Responses to “A FREE Maple Leaf Quilt Block Tutorial to Make With Scraps”