Sewing a dress might seem like a big task, but even those just starting their sewing journey can accomplish it! Dresses are actually great beginner projects, as long as you choose a simple style and an easy-to-use fabric. These tips for beginners will help you sew a dress.
The key to sewing a dress is to treat it as a series of components. Each component might have several steps, which are set in a specific order and build upon each other. Once you have completed one component, you move on to the next — soon enough your dress will be done.
Step 1: Select your pattern and fabric
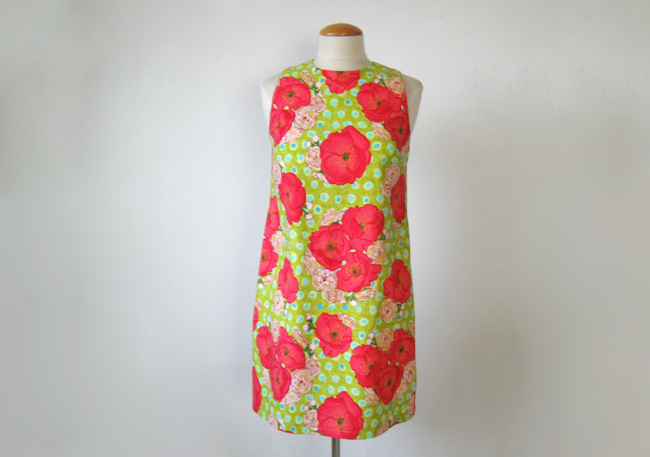
For this tutorial, I’m making a simple shift dress — a great choice for beginners. You can get a pattern with this online class to find one you like.
Selecting fabric is a big task too — one too huge to cover in this post! Luckily, we have another very helpful post on choosing fabric for clothes.
Step 2: Prepare your pattern
Once you’ve chosen your dress pattern, you can prep your pattern for success. Open your pattern and find all the pattern pieces required. For a simple shift dress, that might include the dress front, dress back, front and back neck facings and armhole facings or sleeves. Most patterns provide a listing of the pattern pieces, which indicate exactly which pieces you need.
I like to give my tissue paper pattern pieces a quick press with a dry iron to remove all the wrinkles and make sure they lay flat on my fabric. Set you pattern pieces aside and move on to the fabric.
Step 3: Prepare and cut out your fabric
Preparing the fabric
Press your fabric to remove all wrinkles. Then, lay out your fabric on your work space, following the pattern instructions — you may need to fold the fabric in half.
Placing the pattern pieces
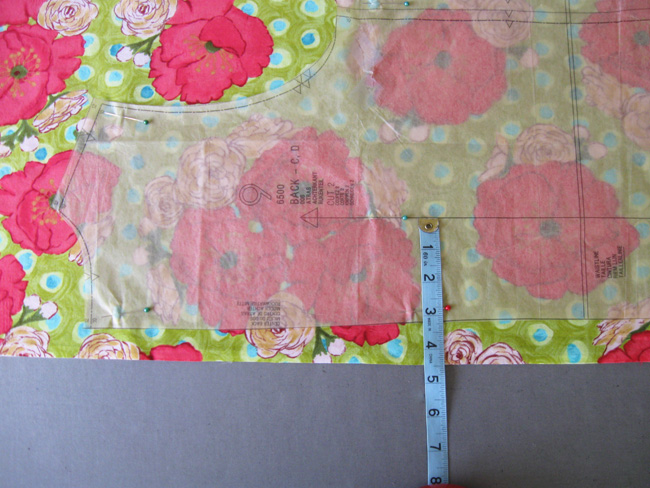
Place the pattern pieces on the fabric, following the pattern instructions. Make note of the grain line and any pieces that need to be placed on the fold.
Don’t forget about directionality: If your fabric has a directional print like flowers with stems, you want all the flowers to face the same direction. Make sure to lay out the pieces so that they all have the same orientation.
Pin the pieces to your fabric, then cut!
Facings
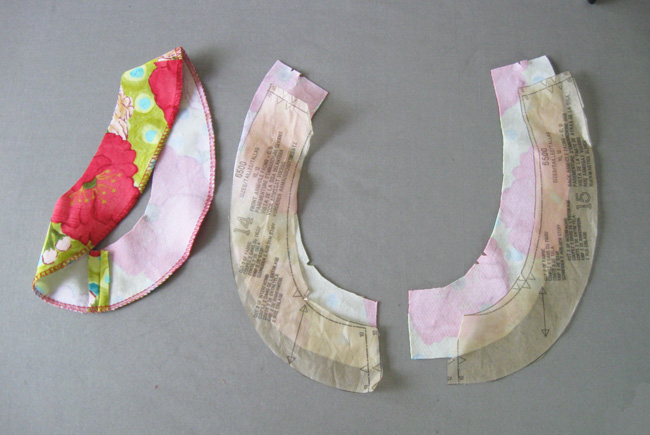
Your pattern may also include facings. For example, a sleeveless dress likely includes facings for the neck and armholes, either in one piece or separate pieces for the front and back.
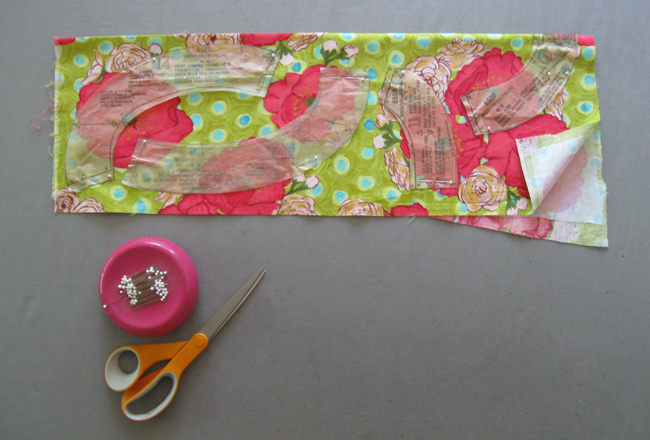
Facings typically have interfacing; the pattern instructions will indicate which pieces need to be interfaced. You can cut out the interfacing separately and then fuse or sew it onto the facing pieces, or you can block fuse the fabric. (Block fusing is a convenient method for applying interfacing prior to cutting out the pieces. Block fusing is a real timesaver although it does use up more of the fusible interfacing.)
In the photo above, I used a small piece of the dress fabric and cut a similar sized piece of interfacing, which is fused to the wrong side of the fashion fabric. Then, I folded the now-interfaced dress fabric in half and cut the facing pieces.
Always remember to line up the pieces along the grain line, watching for pieces cut on the fold as indicated on the pattern pieces.

Step 4: Mark and sew darts
Your pattern will likely have a few darts. My pattern only has bust darts to provide some shaping. Transfer the pattern markings to your cut-out fabric. Darts are indicated by dots in a long triangular configuration, which you fold and stitch from fabric edge to the point. Sew your darts and press downward.
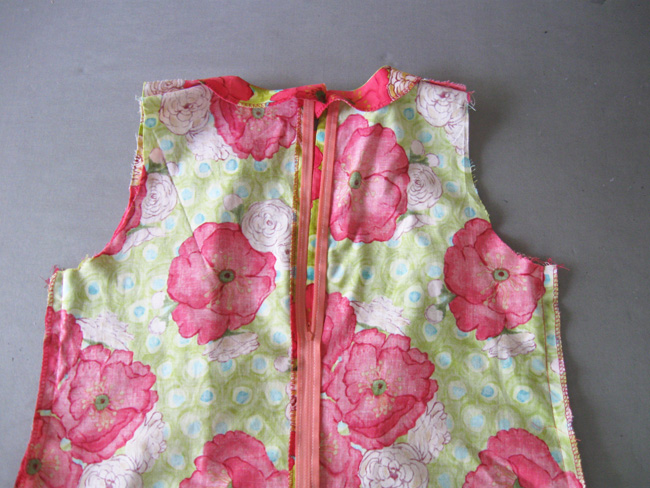
Step 5: Sew the back zipper
If your dress includes a back zipper, as many do, it’s more convenient to put in the zipper now, before the front and back of your dress are sewn together.
You can put in the zipper in a variety of ways:
- The simplest option is a standard centered zipper, sometimes called a railroad zipper.
- Another choice is to use an invisible zipper.
- In the example above, I use a lapped zipper application, which you can do by hand or by machine.
Step 6: Sew the shoulder seams
Now that your dress front and dress back are both ready, you can sew them together at the shoulder. Like most commercial patterns, my pattern has 5/8″ seam allowances, but always check your pattern instructions to verify the indicated seam allowance. Then press the seams open.
If your pattern has a V-neckline, or if you are working with a loosely woven fabric (such as linen or double gauze) then it’s a good idea to staystitch the front and back neckline edges before sewing the shoulder seams so that the fabric keeps it shape and doesn’t stretch out.
Step 7: Prepare the neckline facing
Time to start on the facings. If you have not previously done so, apply the interfacing to the front and back neckline facings.
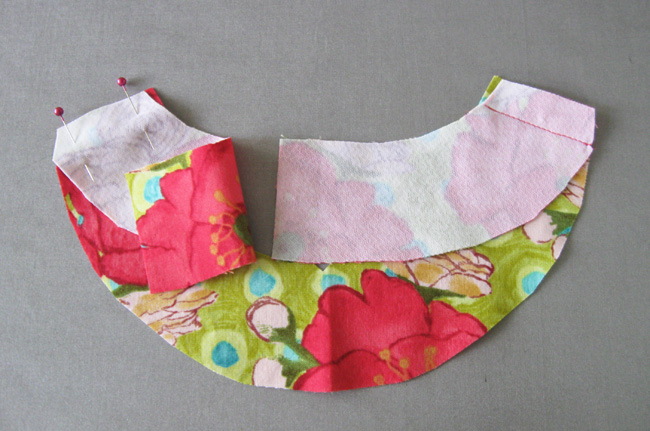
Stitch the back neck facings to the front neck facing at the shoulder seams. Most likely, you’ll have one continuous piece for the front facing and two pieces on the back to accommodate the zipper.
Press the shoulder seams open, as you did on the dress shoulder seams. You can finish the outside edge of the facing by turning under and stitching or use a serger to finish the edges.
Step 8: Attach neck facings
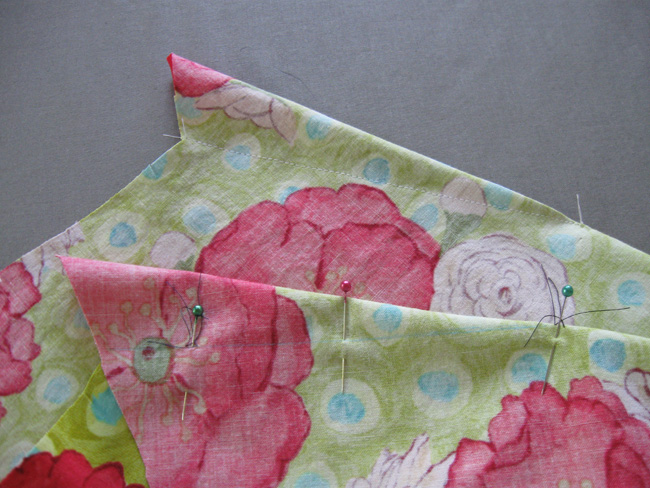
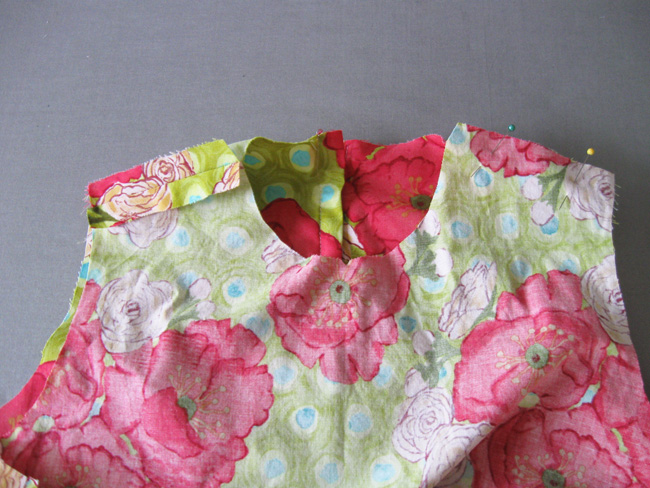
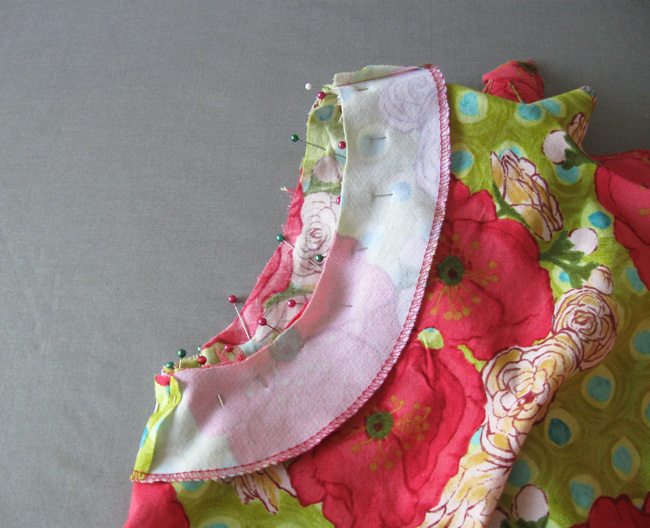
Pin the neckline facing to the dress neckline, right sides together. Match the shoulder seams of the dress with the shoulder seams on the facing pieces.
Note that at the center back the facing will stick out past the dress edge. That’s because the zipper already used up the 5/8″ seam allowance, but the facing still has it. Don’t trim it off or try to get the center back edges to match! The 5/8″ seam allowance on the facing will be folded under later to create a clean finish at the top of the zipper.
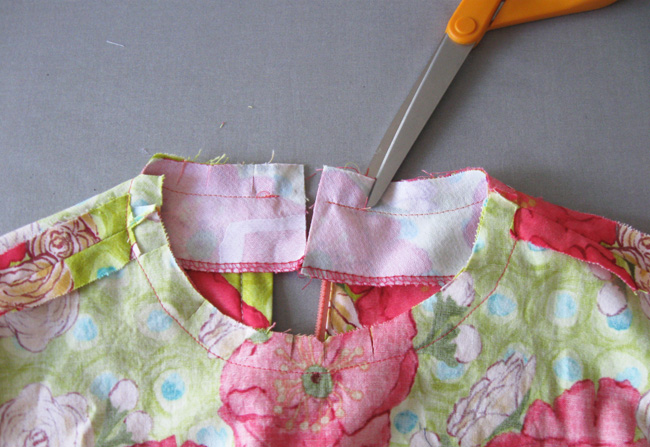
Stitch the dress neckline facing in place.
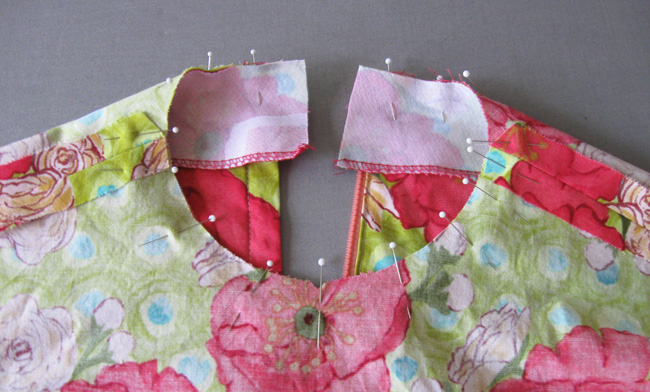
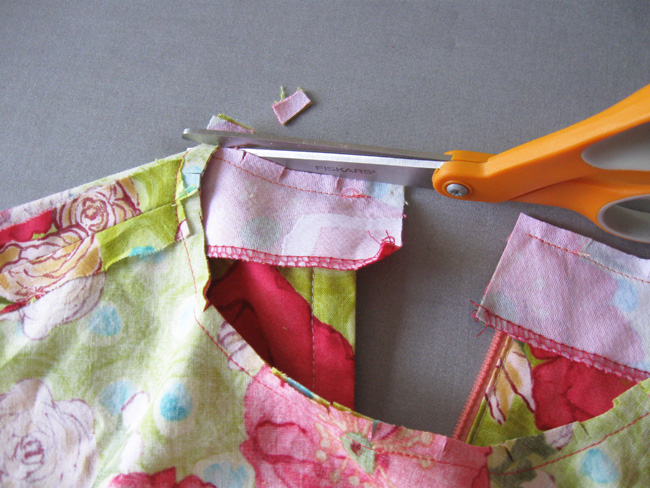
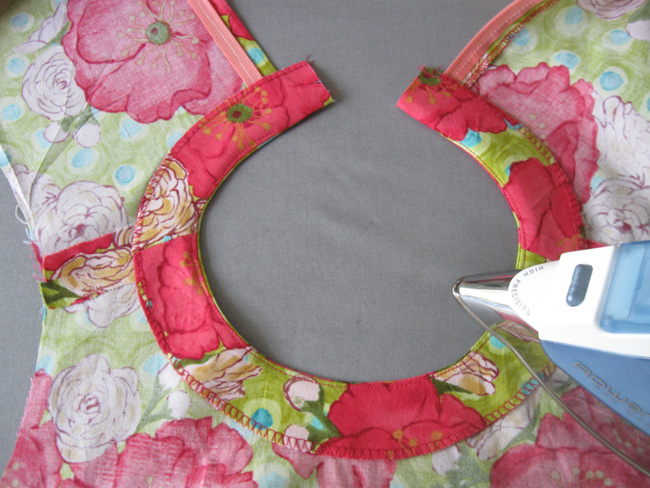
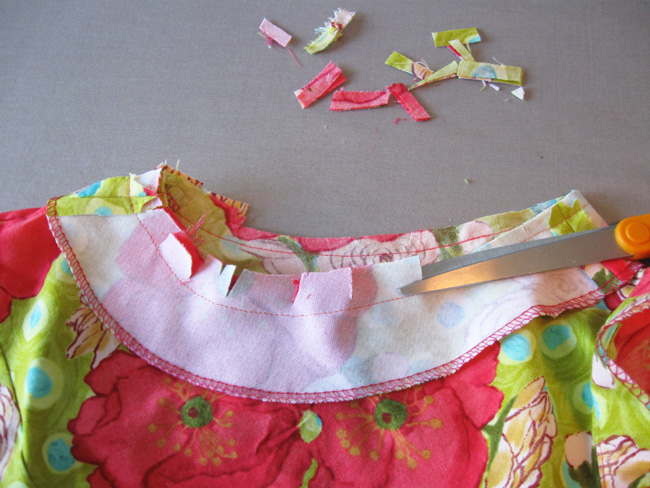
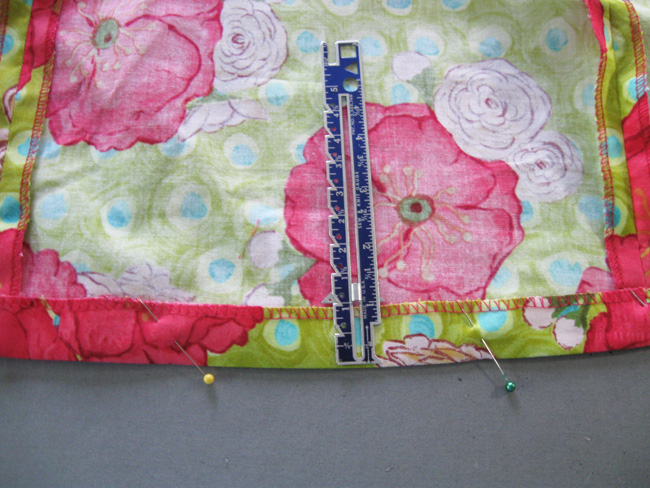
Because this is a curved seam, you’ll need to make small snips around the seam allowance so it can easily turn inside the garment. Make small cuts perpendicular to the stitching, ending close to the stitch line, but not through it.
My neckline shown above is a fairly small and curved neckline, so it needs snips every 1″ – 2″. Yours may need more or less.
Fold the facing toward the inside of the dress. If there are any areas that don’t want to turn or don’t sit well, add another clip to release the fabric in that area.
Then, trim the seam down to about ¼”. This reduces bulk in the neckline.
If you prefer, you can first trim to ¼” and then do the perpendicular clipping. However, I find it difficult to clip that small seam allowance, so I do the clipping first and trim second.
Step 9: Press and under stitch neck facing
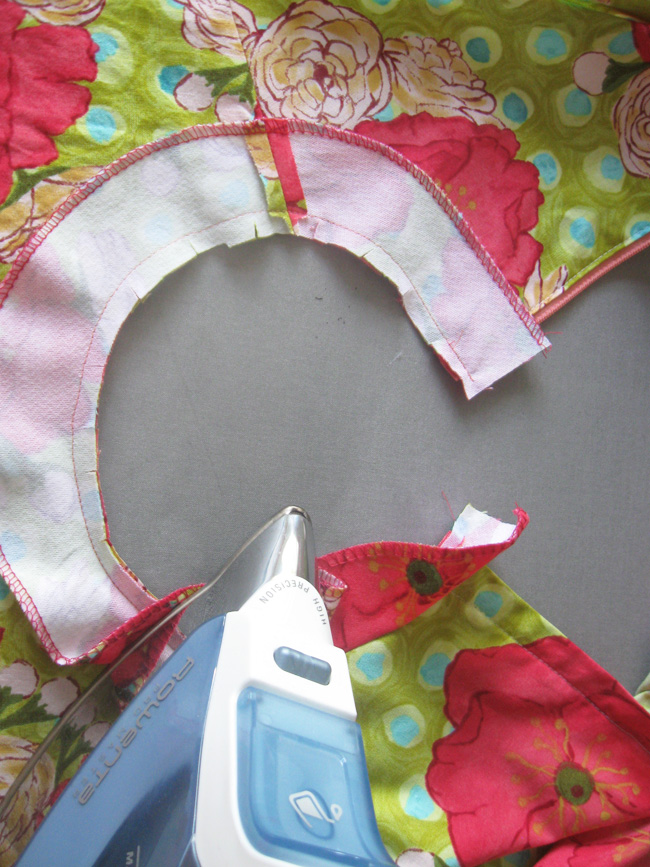
Press the neckline facing up and away from the body of the dress. Make sure that the seam allowance also stays up and doesn’t get flipped down toward the body of the dress.
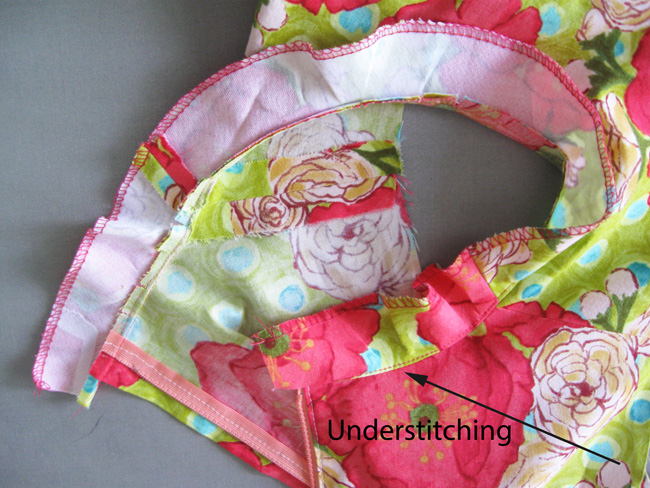
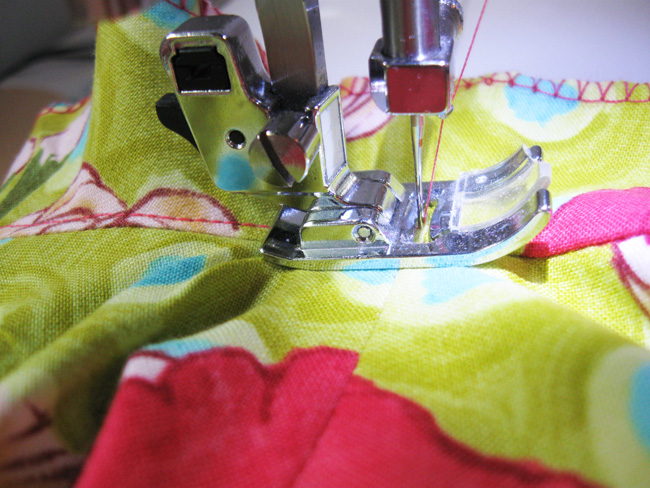
Once the facing is pressed upward, understitch around the neck edge. Understitching is a row of stitching near the seam on the facing that helps the facing roll inside of the garment.
Now that the the neck facing is under-stitched, flip it to the inside of the dress and press around the neckline edge to create a smooth finish.
Step 10: Sew side seams
Sew the side seams of the dress, matching notches along the seam. Remember to follow the seam allowance your pattern indicates.

Press the side seams open.
Step 11: Prepare the armhole facings
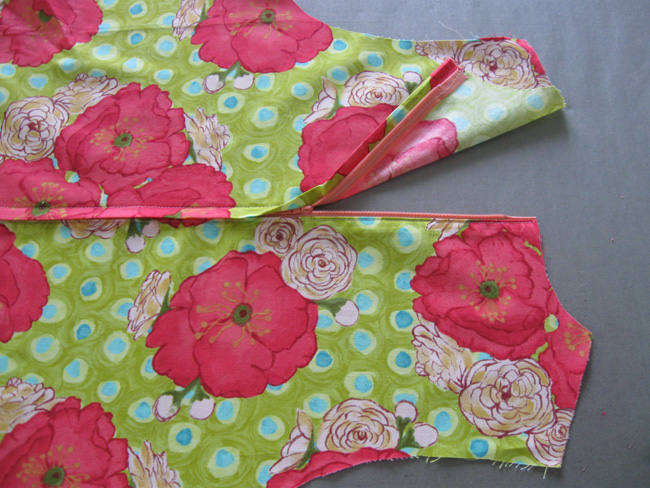
The armhole facings are prepared in a similar fashion to the neck facings. My pattern happens to have a tw0-piece armhole facing, so the front and back pieces must be sewn together.
Note that the back armhole facing has a double notch and the front has a single notch. These pattern markings are common in most patterns, especially on sleeves and armhole facings. They help you distinguish between the front and back pieces.
Stitch the two facing pieces together as shown above, aligning it at the shoulder and underarm seams. Press the seams open and then edge finish the facing by sewing on the serger or turn under and stitch.
Step 12: Attach the armhole facings
Pin the armhole facings to the armhole, matching front and back notches as well as the shoulder and underarm seams. Stitch the facing to the armhole. Repeat for the second armhole.
As you did with the neck facing, clip and trim both armhole seams to reduce bulk and allow the facings to turn to the inside of the garment.
Under stitch both armhole facings. Unlike the neck facing, which intersects with the zipper, for the armhole facing you can under stitch completely around the armhole. Press the facing toward the inside of the dress.
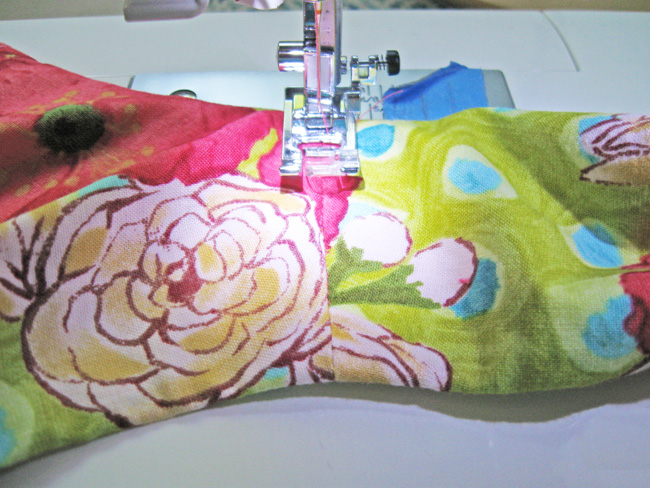
Step 13: Finish back neckline
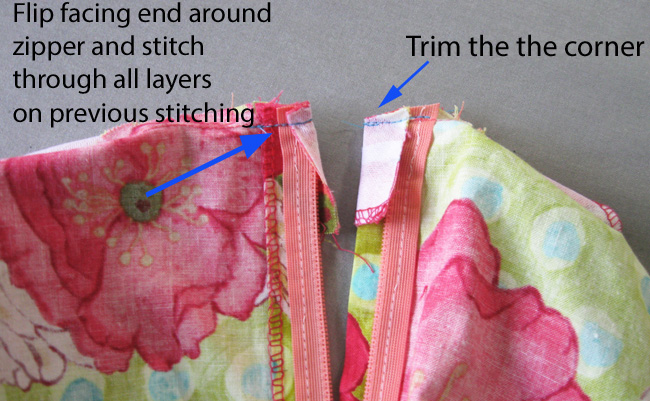
To create a clean finish at the top of the zipper, flip the facing end around the top of the zipper and stitch through all layers, following the line of previous stitching. Trim the corner diagonally on both sides. Here I’ve used a contrasting blue thread to make the stitching more visible in this image.
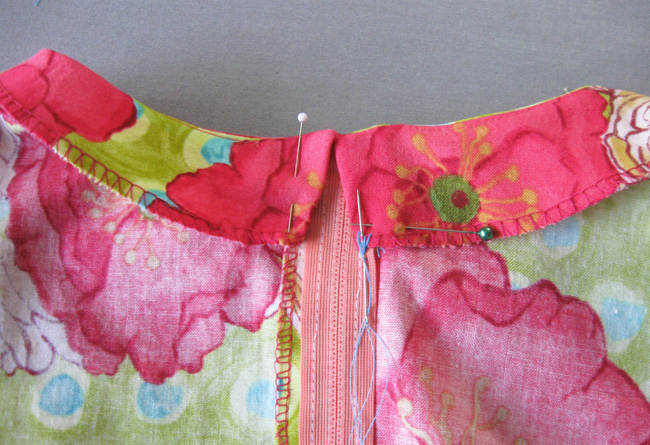
Flip the facings back to the inside and push the corner out to make a crisp edge. Press the facing down.
Finally, stitch a few hand stitches along the edge of the facing where it meets the zipper tape. Since I used a lapped zipper, I tacked the facing edges on either side of the tape.
Step 14: Secure the facing edges
For those who don’t like facings because they tend to flip outside the garment, I have a tip for you.
Tack those facings down by stitching in the existing seams. This is called “stitching in the ditch,” when you stitch through the outside of the garment on a seam line to secure layers that are underneath. This stitching is hidden in the seam and invisible on the outside.
For my dress, I stitched across each shoulder seam and at the side seams to secure both the neck and armhole facings.
Step 15: Hem the dress
Time to hem the dress. There are many ways to hem:
- You can choose to sew the hem by hand, which creates a nice hidden hem
- Or, you can sew the hem with your machine
For my cotton dress, I chose to sew the hem by machine. On boldly printed fabrics like this, a machine-stitched hem is hard to see, and is a quick option.
And that’s it! A new shift dress ready for a warm summer day.
Just starting on your sewing journey? Check out this handy glossary from our friends at National Sewing Circle: Glossary of Sewing Terms
Thank You for this detailed information, useful for me as a beginner
am a beginner
When and how did you finish the seams? In photos some seams are finished and some are not--can you clarify about this? Thanks.
This site doesn't render properly on my iphone 3gs - you may want to try and fix that
I'MA BEGINNER, REALLY WANNA LEARN HOW TO SEW
I want to learn tailoring
This is mind-blowing to me that dress making is not hard, please I like to learn more and be alert of new stlye from my email thanks
Amazing
Good job!
Nice one