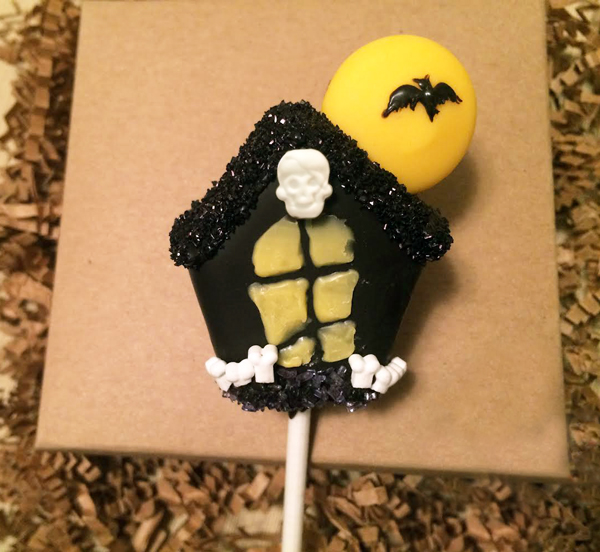
Here’s a spooky fact: these cake pops have been known to mysteriously vanish into thin air — or into your guests’ mouths! Play it safe and make a big batch for this year’s Halloween festivities.
Haunted House Cake Pops
Level: Easy
What You Need
Instructions
1. Shape the Dough
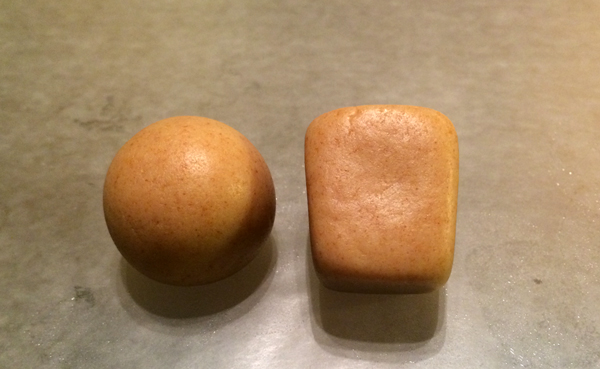
Cover your work surface in wax paper. With cake pop batter that’s ready for shaping, use a cookie scoop to make uniform portions of dough.
Roll each dough portion into a ball and place on your flat work surface. Gently press down on the ball, creating six flat sides so it becomes a rectangular trapezoid. Repeat with each ball.
2. Form the Roofs
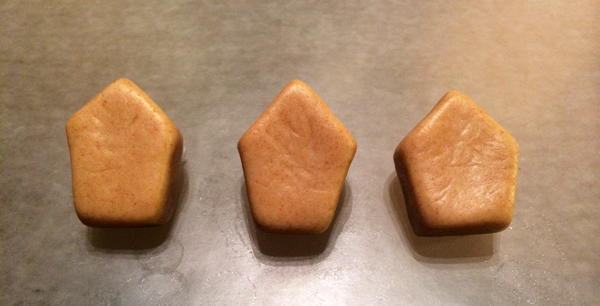
Using your flat work surface again, gently press at an angle on the two widest points of your trapezoid, forming a gabled roof. (Don’t worry about making them perfectly symmetrical — they’re spookier when they’re not!) Repeat on each house.
Once all of your houses are shaped, refrigerate for at least 10 minutes.
3. Melt the Candy Coating
While the houses chill, melt the black candy coating.
Pro Tip: If black candy coating isn’t available in your area, a 50/50 combination of dark brown and navy blue will yield a deep slate color that will look black after refrigerating the completed cake pops.
4. Make Your Full Moons
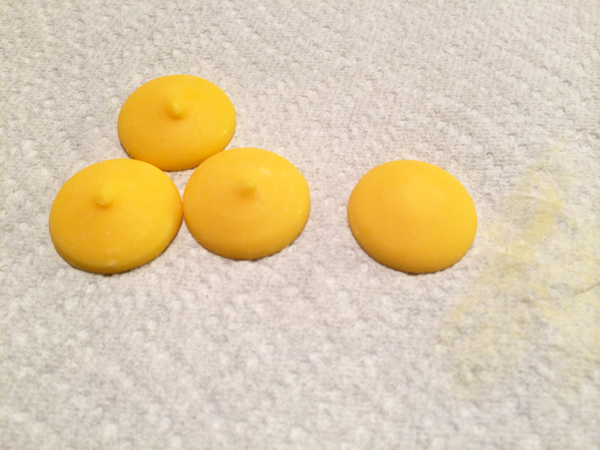
Using a paper towel, rub on the pointed center of each yellow candy melt so it “sands” down to a smooth circle. These will be your big, ominous full moons.
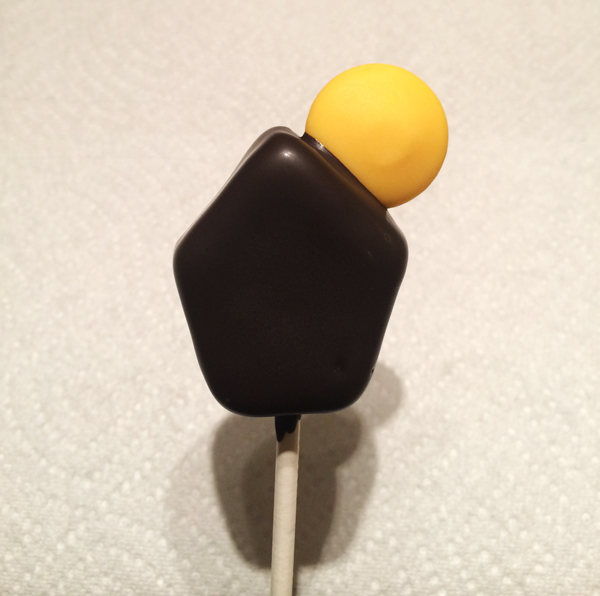
5. Put the Houses on a Stick
Remove the houses from the fridge. Dip a lollipop stick about ⅓” into the melted coating, then push it into the bottom of one house until it’s about halfway through. Repeat with all of your houses.
6. Dip the Houses
After you insert all the sticks, gently dip your first house into the melted coating. Let the excess drip off, then use a toothpick to carefully pop any air bubbles.
Gently push a yellow candy melt into the roof, then place the cake pop on the stand or styrofoam block until completely dry. Repeat with each house.
7. Pipe the Windows
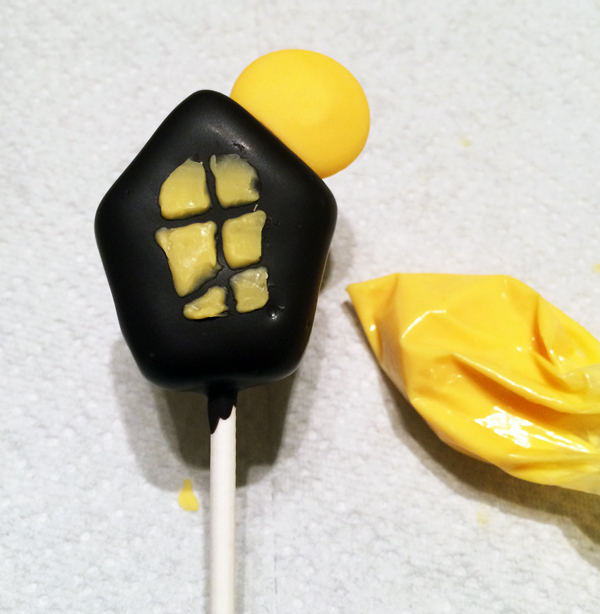
Once the coating is dry, melt about a dozen yellow candy melts and transfer them into a piping bag fitted with a writing tip. Pipe the windows on the front and back of the houses.
8. Add Sanding Sugar
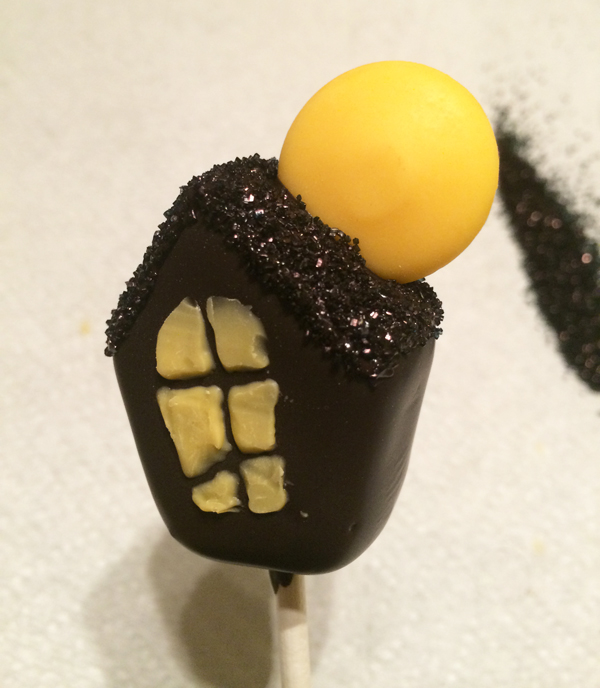
Add your leftover melted black candy coating to another piping bag fitted with a writing tip. Pipe the roofs, then sprinkle with black sanding sugar.
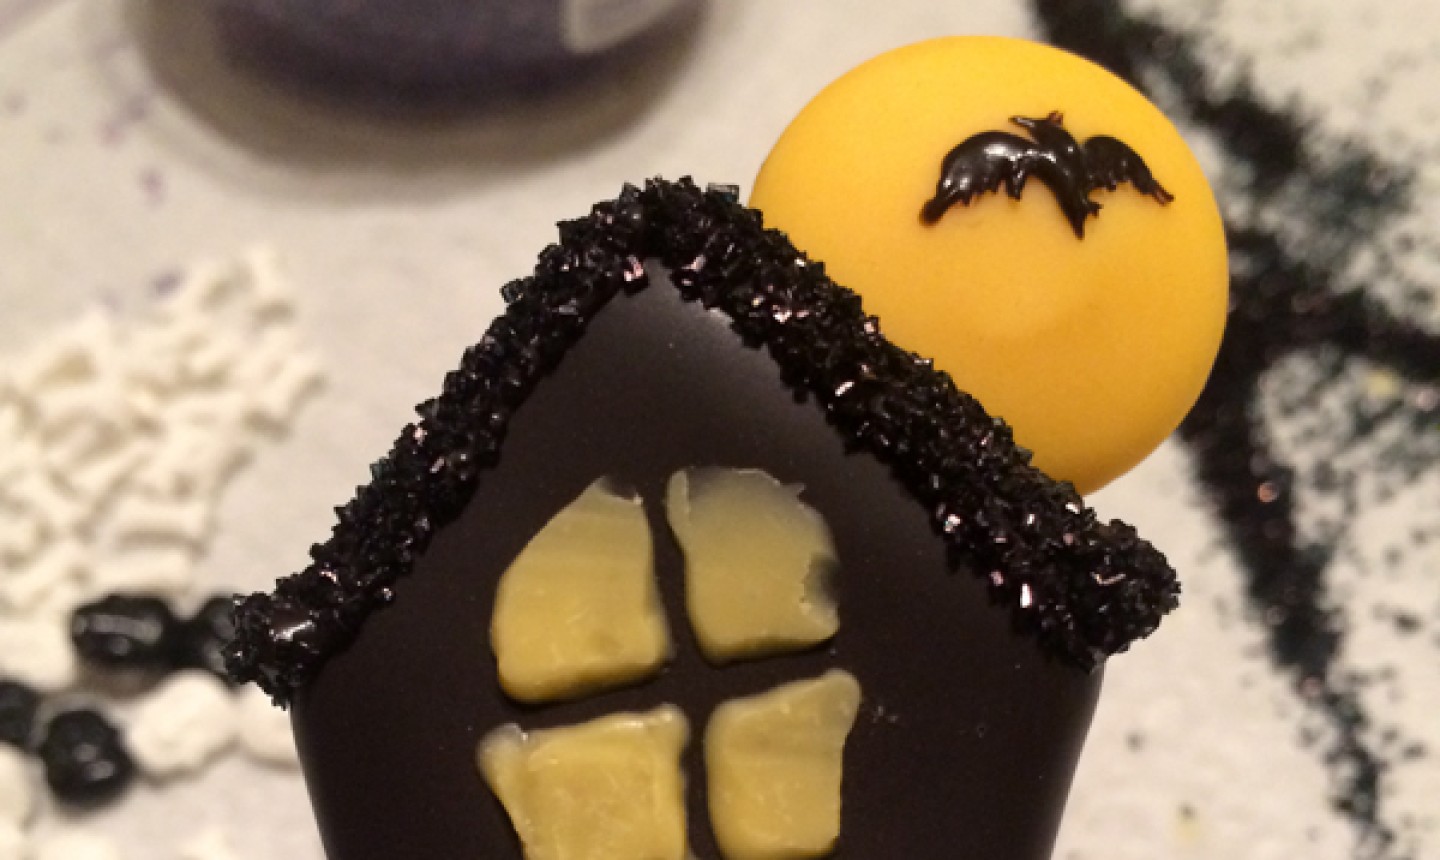
While you’re at it, pipe a little bat on the moons. Use a toothpick to create more detail if needed.
Pipe more black coating around the bottom of the cake pops, then add purple sanding sugar.
9. Decorate With Bones
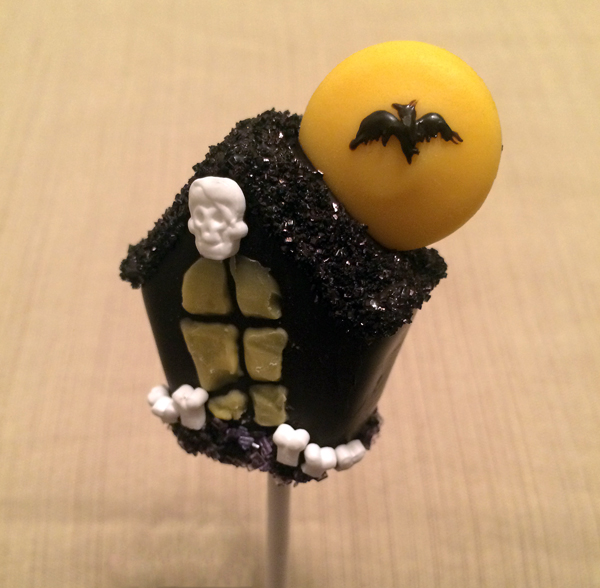
Add some extra spooky flair with skull and bone sprinkles wherever you like best.
Let your pops dry, then hand out to guests for a hauntingly good time!

Share tips, start a discussion or ask other students a question. If you have a question for an expert, please click here.
Already a member? Sign in
No Responses to “Haunted House Cake Pops Are Here for a Scary Good Time”