
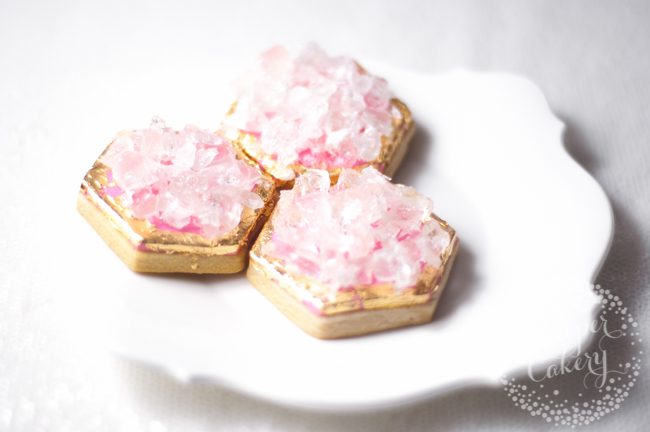
Geodes are such a great trend — and they’re not going away! Why not try re-creating the eye-catching style in cookie form?
One of the best things about making geode cookies is that they are surprisingly easy. Check out our geode cookie tutorial below to make your next sweet project super stylish.
Geode cookie tutorial
Materials needed:
- Baked sugar cookies (any shape)
- Cookie cutter (the same one you used to cut the cookies)
- Fondant (any color you like)
- Edible gold leaf
- Edible glue or light corn syrup
- Food-safe paintbrushes
- Clear / transparent hard candies
- Small rolling pin
Baking your cookies
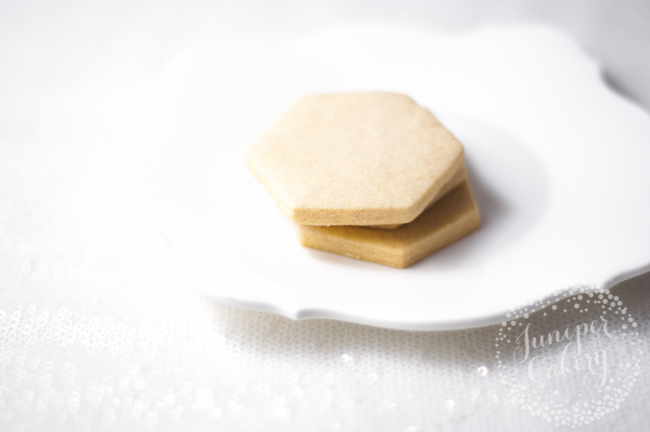
The best cookie surface to work on is obviously a flat one. Sometimes bumps can appear in baked cookies, usually caused by an air bubble in the dough. We’ve found that sifting your flour or over-mixing the cookie dough can cause bubbles, so be careful as you make the dough.
To help smooth out any bumps or bubbles once baked, gently press down and flatten them while the cookies are still warm.
Decorating your cookies
Step 1:
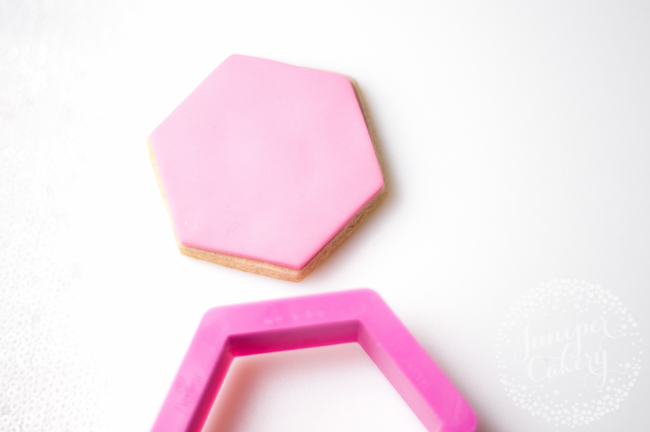
Rolling out some of your fondant and cut out shapes using the same cutter you used to cut out the cookies. Stick the fondant pieces on tops of your cookies with a little bit of light corn syrup, edible glue or even apricot preserve!
Step 2:
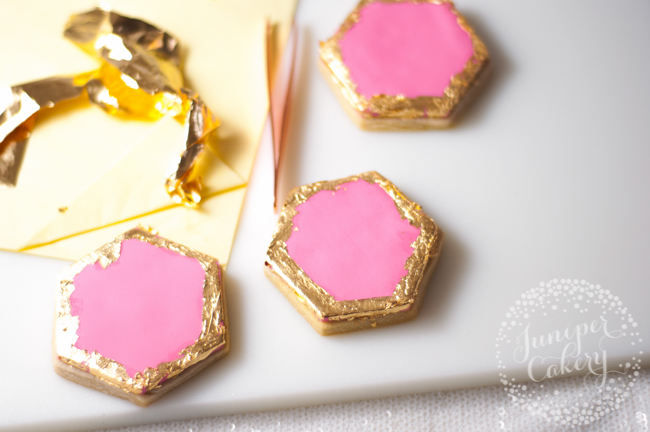
Brush edible glue around the edges of your cookies. Using a food-safe paintbrush, gently lift and attach edible gold leaf where you’ve painted on your glue.
Edible gold leaf can be tricky to work with because it’s so light and delicate. Make sure you don’t have any windows open or fans switched on — the smallest gust of wind or breeze can ruin your edible gold leaf!
Step 3:
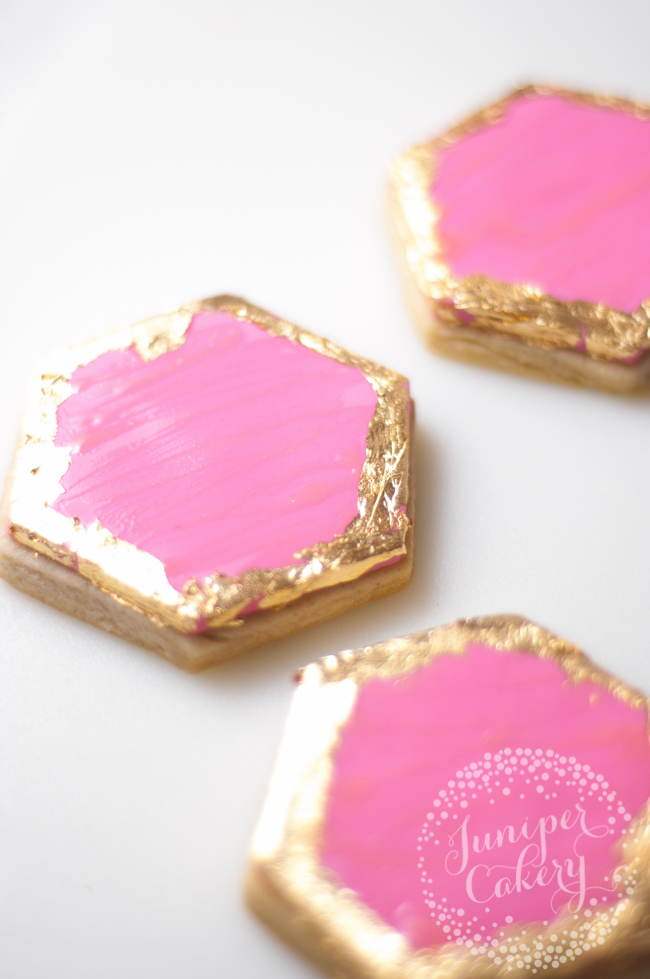
Liberally apply edible glue all over the surface of your fondant-covered cookie to make it really shine!
Step 4:
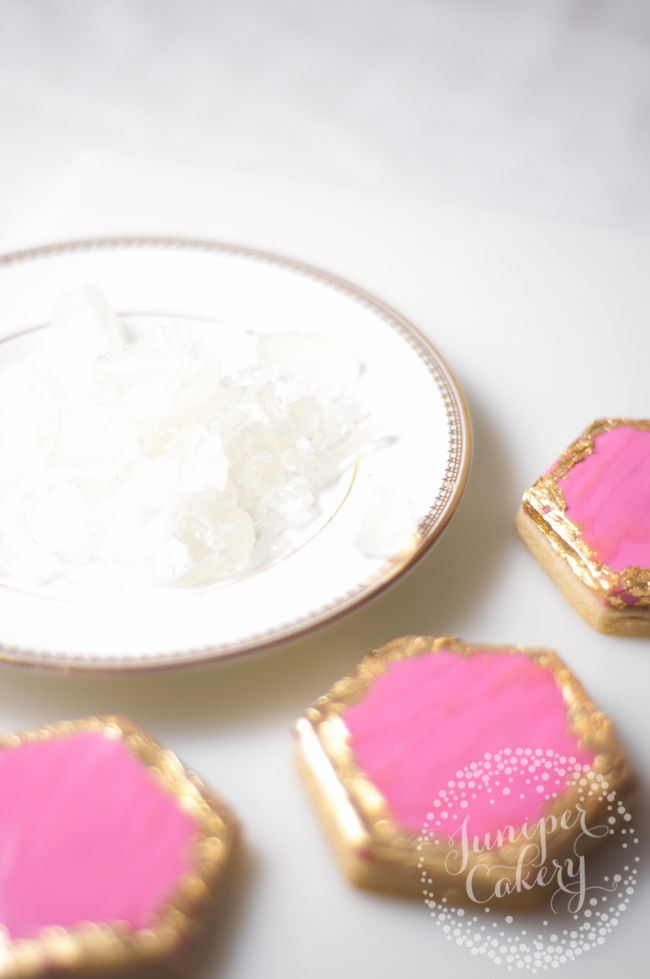
Break up the hard rock candies into small pieces. We found the easiest way to do this was putting them in a tough zip-top bag and smashing them up with a rolling pin. Your candy should start to look like random pieces of crystal now.
Step 5:
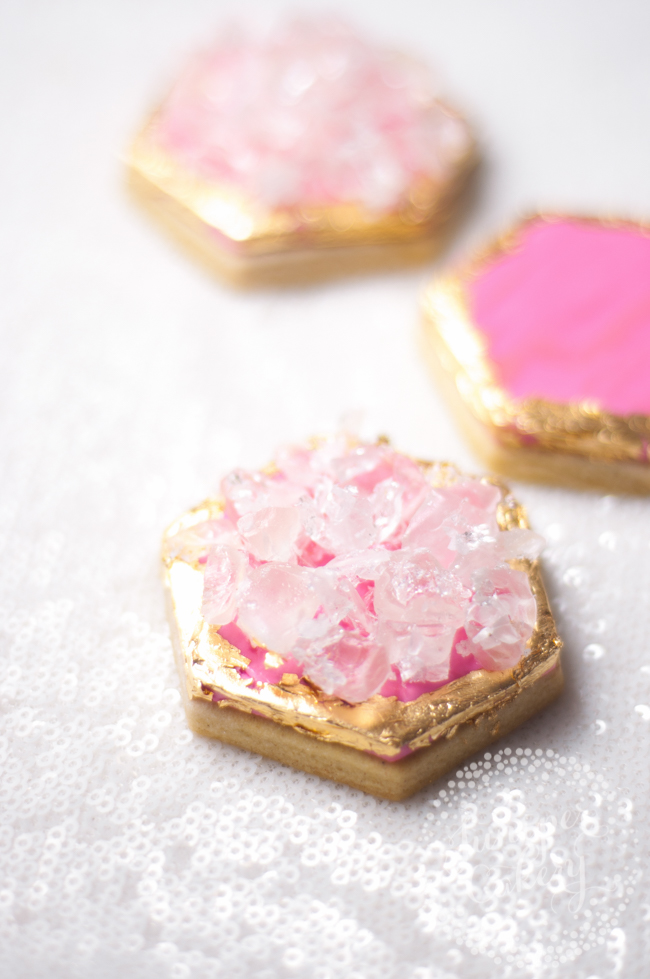
Arrange the your pieces of smashed-up hard candy on the surface of your sugar cookie. Attach each piece with edible glue and leave them to set for 15 to 30 minutes.
Crushed or smashed up hard candy can still be sticky (especially in humid environments). Because of this we recommend not stacking up your cookies when packaging them, as the candy pieces can stick to other cookies. Instead, try individually bagging or boxing them up.
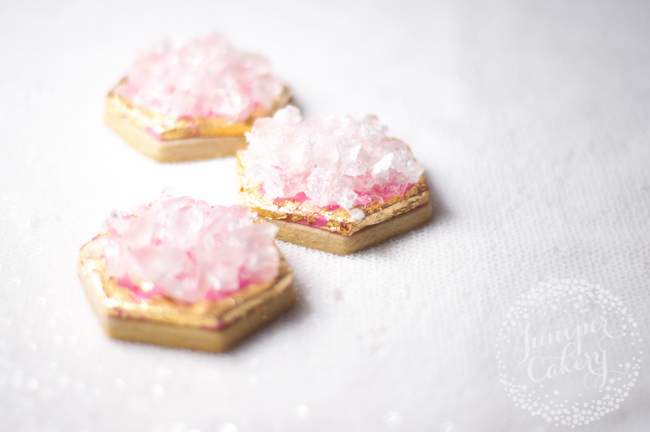
Wow — look how cool these little cookies can be! They’re so stylish that they’re bound to be the star of the party, right?
Have fun and try different colors of fondant together for amazing effects. We love the idea of rainbow geode cookies!

Share tips, start a discussion or ask one of our experts or other students a question.
No Responses to “These Geode Cookies Totally Rock!”