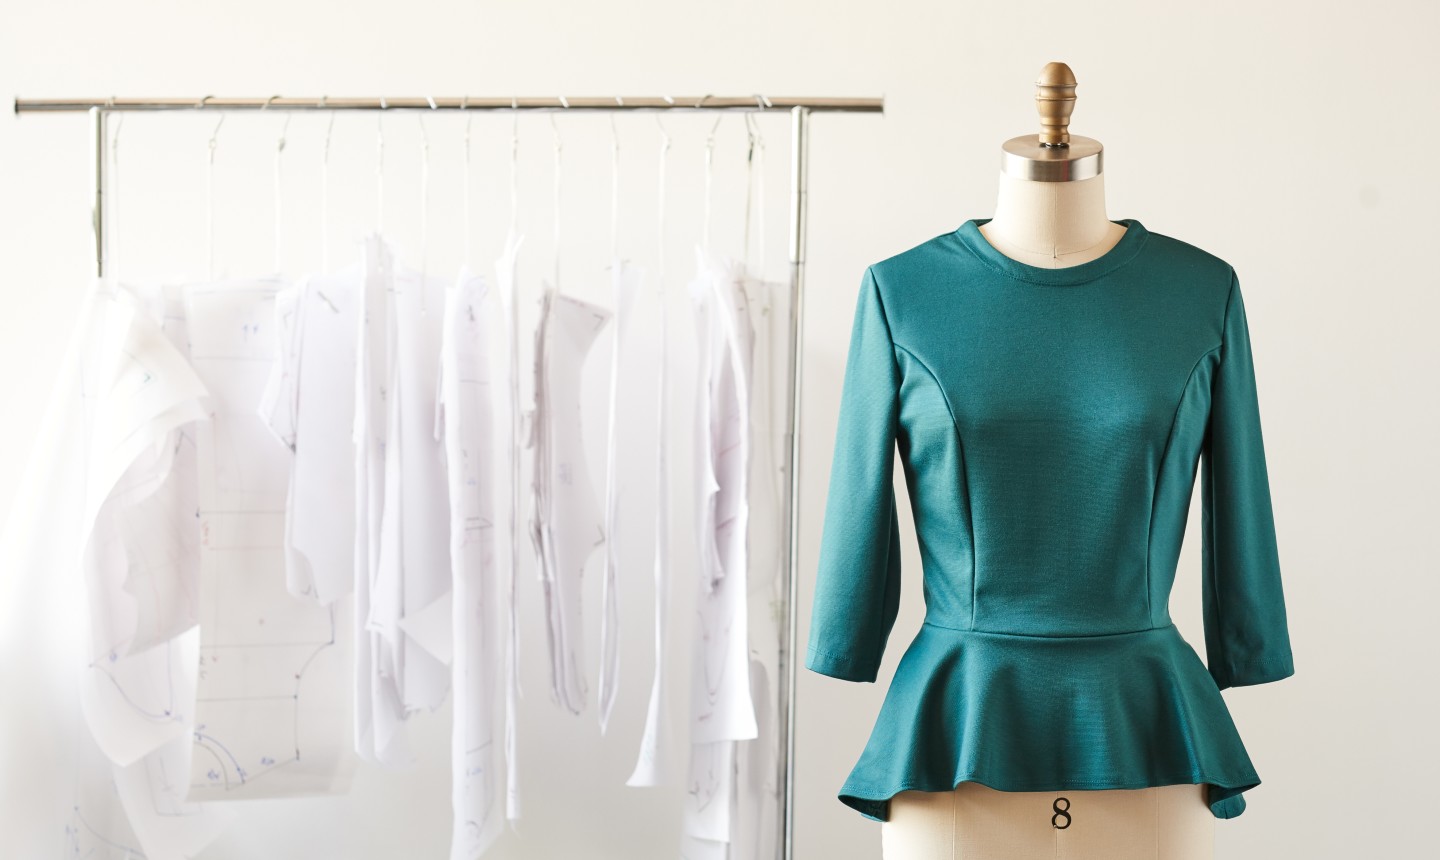
If you love sewing your own clothes, you've probably come across a princess seam. The seams are common design lines on many tops, dresses and jackets. Their slimming effect is flattering on almost any figure, but for them to look just right they need to fit your body properly — which means they need to follow the natural curves of the bust line.
When fitting princess seams, as with so many types of alterations, adjustments must be made before any patterns are laid out and cut . Two of the most typical princess seam adjustments are a full or small bust adjustment , and raising and lowering the seam curve apex.
Pro Tip: No matter where the princess seams emanate (which can be from the shoulder seam, armhole or necklines), these adjustments are made in the same manner.
How Do You Know If the Princess Seams Need Adjusting?
Most commercial patterns are based on a B-cup bustline, but if you're smaller or larger than that, adjustments will likely have to be made right off the bat.
The best way to know what type of adjustment is needed is to conduct a careful pattern tissue fitting or to prepare a muslin sample. Pin together the front and side front, then the side back and back pattern pieces. Join the shoulder and side seams and you are ready to test the fit.
Before trying on the half tissue garment, mark the apex of your breasts with either a fabric pen or some tape, so they are visible through the tissue. Line up the side seams of the pattern to your body and secure in place with a pin to a bra or undergarment. Then, pin the center front to the center portion of your body at the neckline, bust line and waist. Do the same for the center back (you might need to phone a friend for this).
Any serious fitting issues should be apparent. The usual culprits: the pattern is too tight, too loose, the seam apex is in the wrong spot or the lines themselves are falling too far to the right or left of the apex.
Check if the princess seam curve's apex is in line with the body’s actual breast apex. If apexes don't line up, the fit is off and the garment as-is won't look good on the body. If they don't line up horizontally, the pattern curve will need to be raised or lowered.
For older women and women with very large busts, the apex on most patterns is much too high and often times have to be lowered.
How to Raise the Princess Seam Apex on the Pattern Pieces
In the example below, we used a small-sized dress form with a high bust. The pattern used has the apex well-labeled, so it's clear the marked apex on the dress form is well above the pattern apex by ⅞”. Therefore, the curve on both the center front and side front pattern pieces will have to be raised by that same amount.
This is a relatively easy adjustment to make with the right tools and workspace. The adjustment won't change the armhole, side seams or bodice length — it only impacts the curve placement.
What You Need
Instructions
1. Lay Out the Pattern
Dry-iron the center front and side front pattern pieces. Lay a large piece of craft, drafting or tissue paper on your cutting mat and place the pattern pieces side-to-side onto the craft paper. Line up the bottom notches and any other horizontal lines on the two patterns to ensure they're squarely positioned.
Pro Tip: If using a gridded cutting mat, use the lines to help square the pieces. To keep them from shifting about hold them in place with either pattern weights, cans or pin them to the paper.
2. Draw a Rectangle

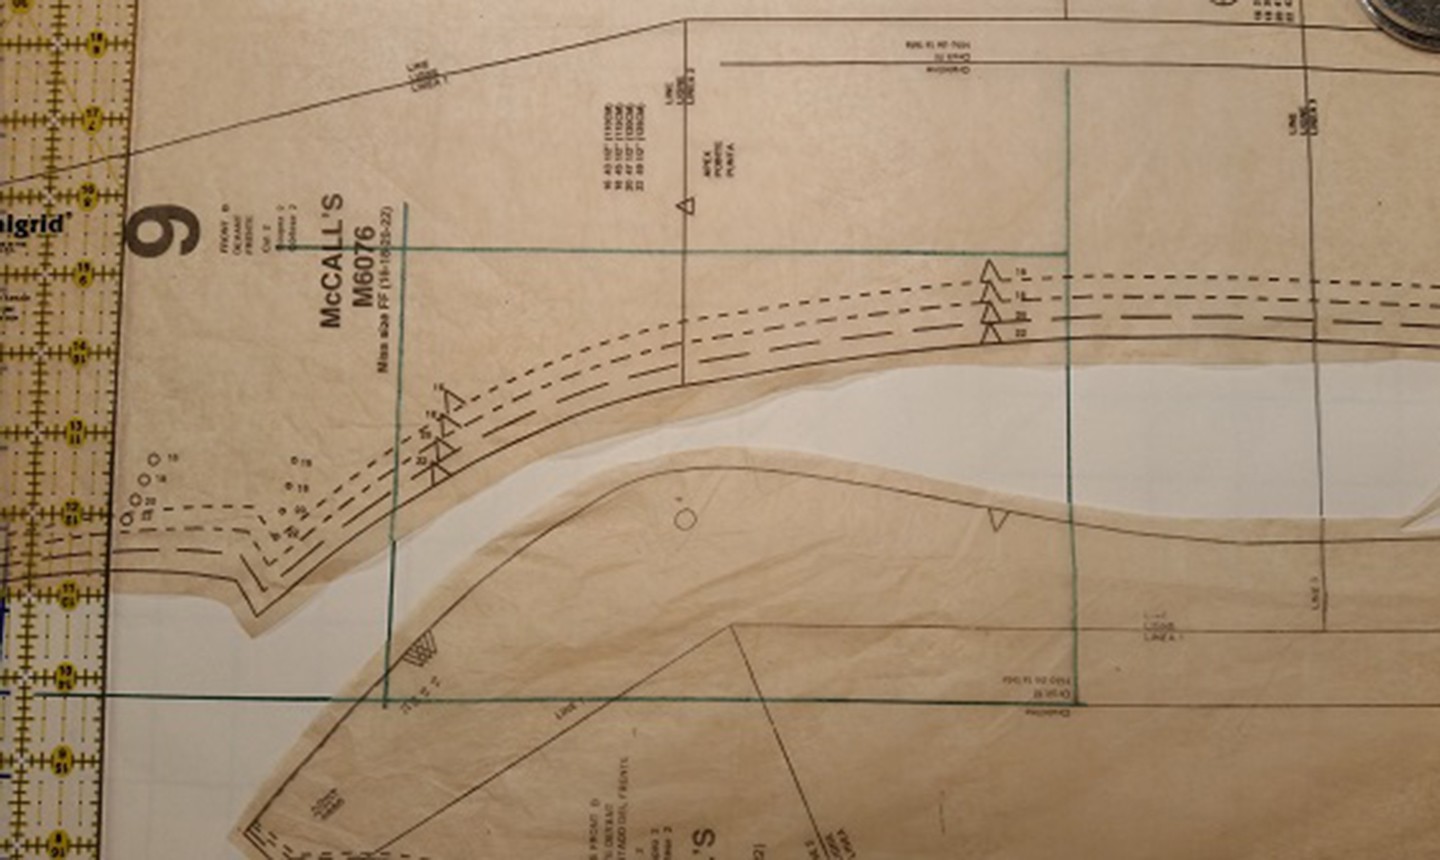
Draw a perfect rectangle over the curve portions of the two patterns. Start just above the top notch and draw the rectangle to just below the bottom notch, as shown in the photo above. Secure the pattern to the craft paper with pins both inside and outside the newly drawn rectangle.
3. Cut
Cut out the rectangle along the drawn lines. This will separate the prominent curve portions of the side front and center front pattern pieces from the rest of the patterns.
4. Measure and Place
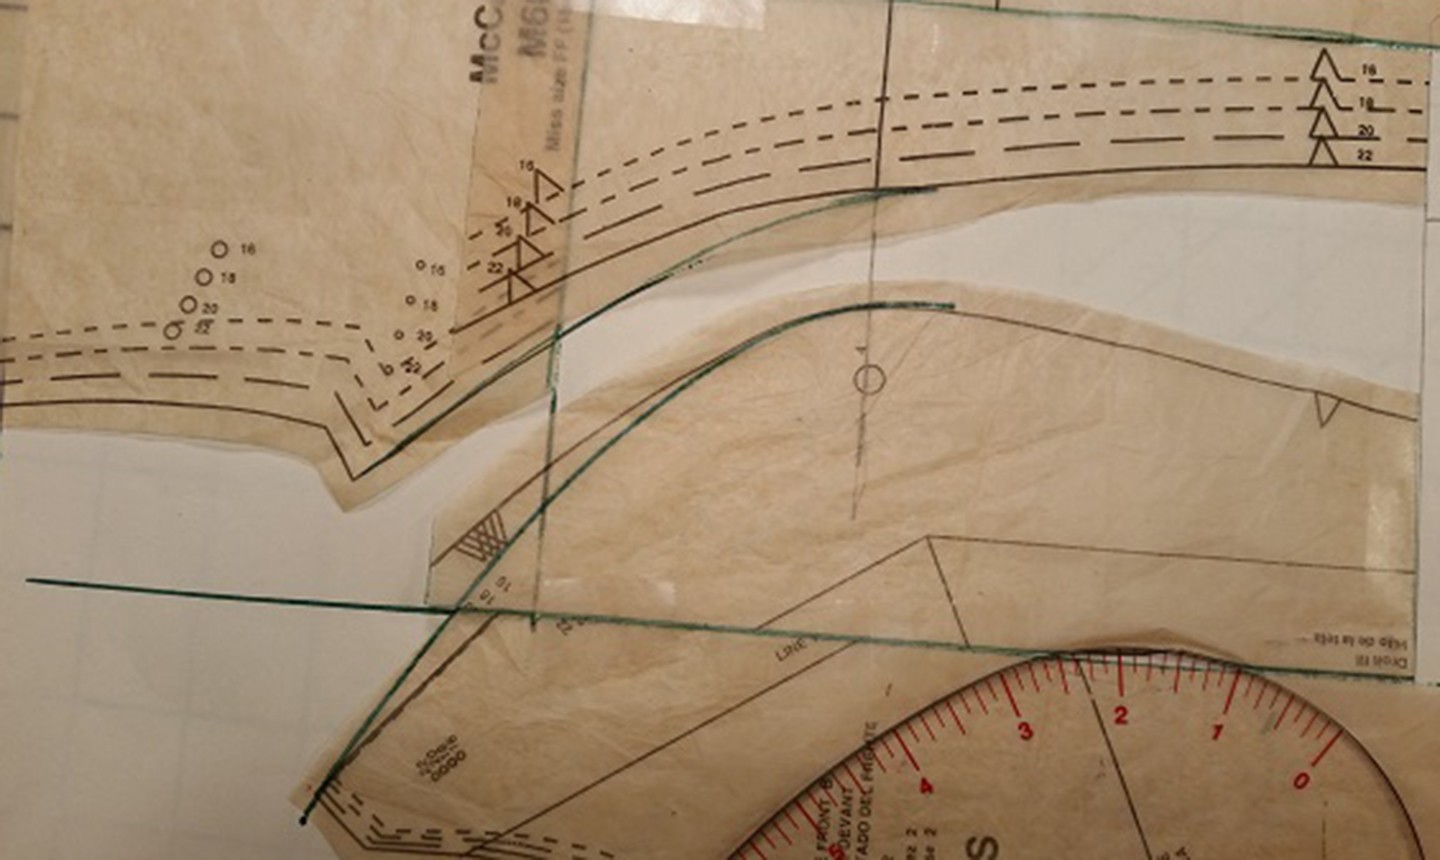
Measure ⅞” up from the bottom line of the rectangle and mark that measurement with a horizontal line. Place the cut-away pattern piece and position it to the new line. Tape the pieces in place. The new pattern apex is now ⅞” higher than the apex label.
5. Finish

The final step is to true the cutting lines of both pattern pieces. Using a French curve or design ruler, position it so it lines up with the armhole edges and the pattern apex points, then draw in the new cutting lines.
Good to Know: In cases where the curve needs to lower, follow the same procedure, but move the cutout rectangle down rather than up.
Now you're ready to sew your garment!

Share tips, start a discussion or ask other students a question. If you have a question for an expert, please click here.
Already a member?
No Responses to “How to Raise or Lower the Curve on Princess Seams”