
Scrappy BOM: Bonus Block!
If you’ve been following along with our Scrappy Block of the Month series, you know that we’ve made all 12 blocks — one for every month of the year. Now we have a surprise for you: a bonus block! Make one for fun or make 13 to use in the quilt we’ll share next month to celebrate the end of the series.
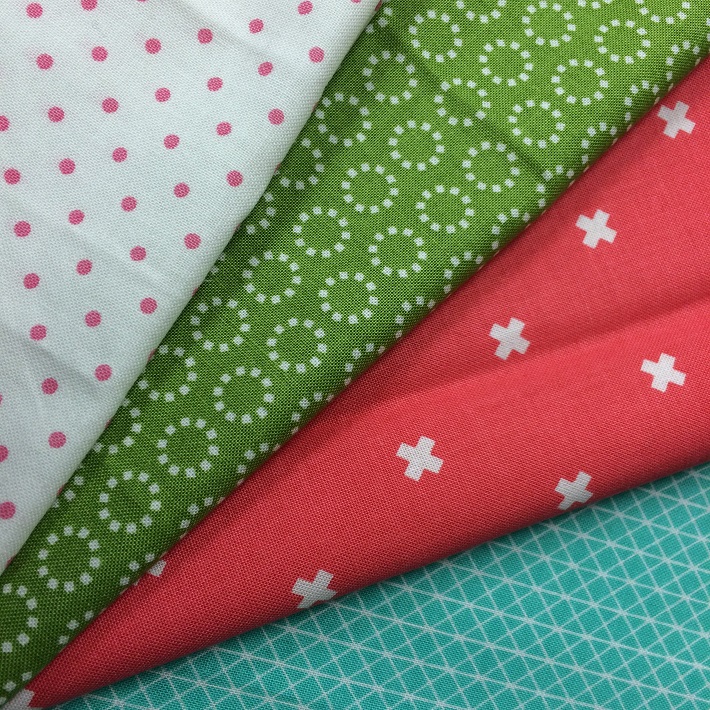
As always, all seams are sewn using a ¼” seam allowance unless otherwise noted. This block requires four different fabrics: three colors and one background fabric. It will measure 8½” x 8½” when sewn.
Let’s get started!
Bonus quilt block tutorial
Step 1:
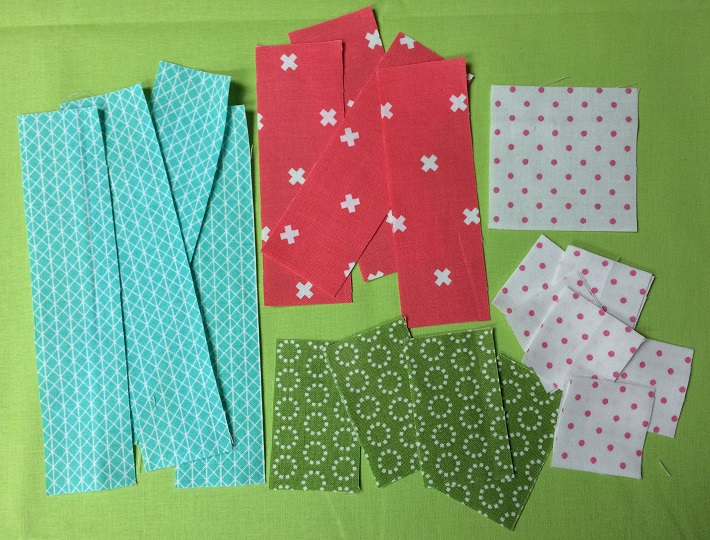
Cutting for this block is simple:
- Twelve background squares will be cut 1½” x 1½”
- One background square will be cut 2½” x 2½”
- Four strips of the first color will be cut 1½” x 2½”
- Four strips of the second color will be cut 1½” x 4½”
- Four strips of the third color will be cut 1½” x 6½”
Please note: If you are making multiples of this block, they will all be different including the backgrounds. Remember, with scrap quilts, the more fabrics the better!
Step 2:
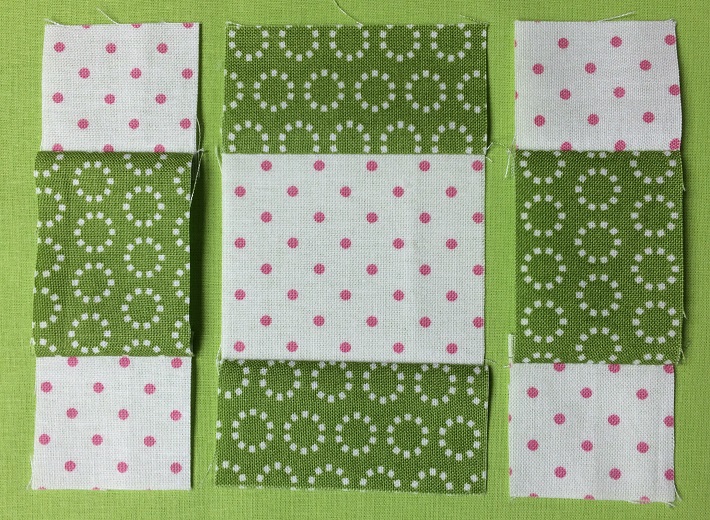
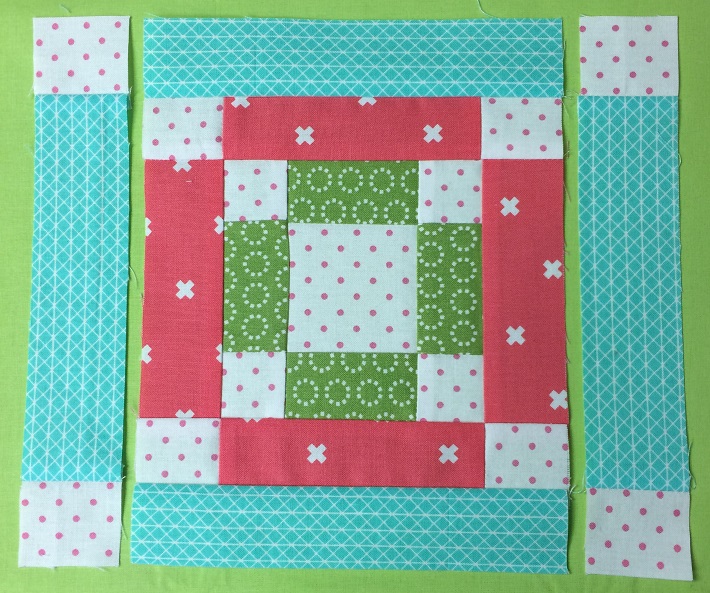
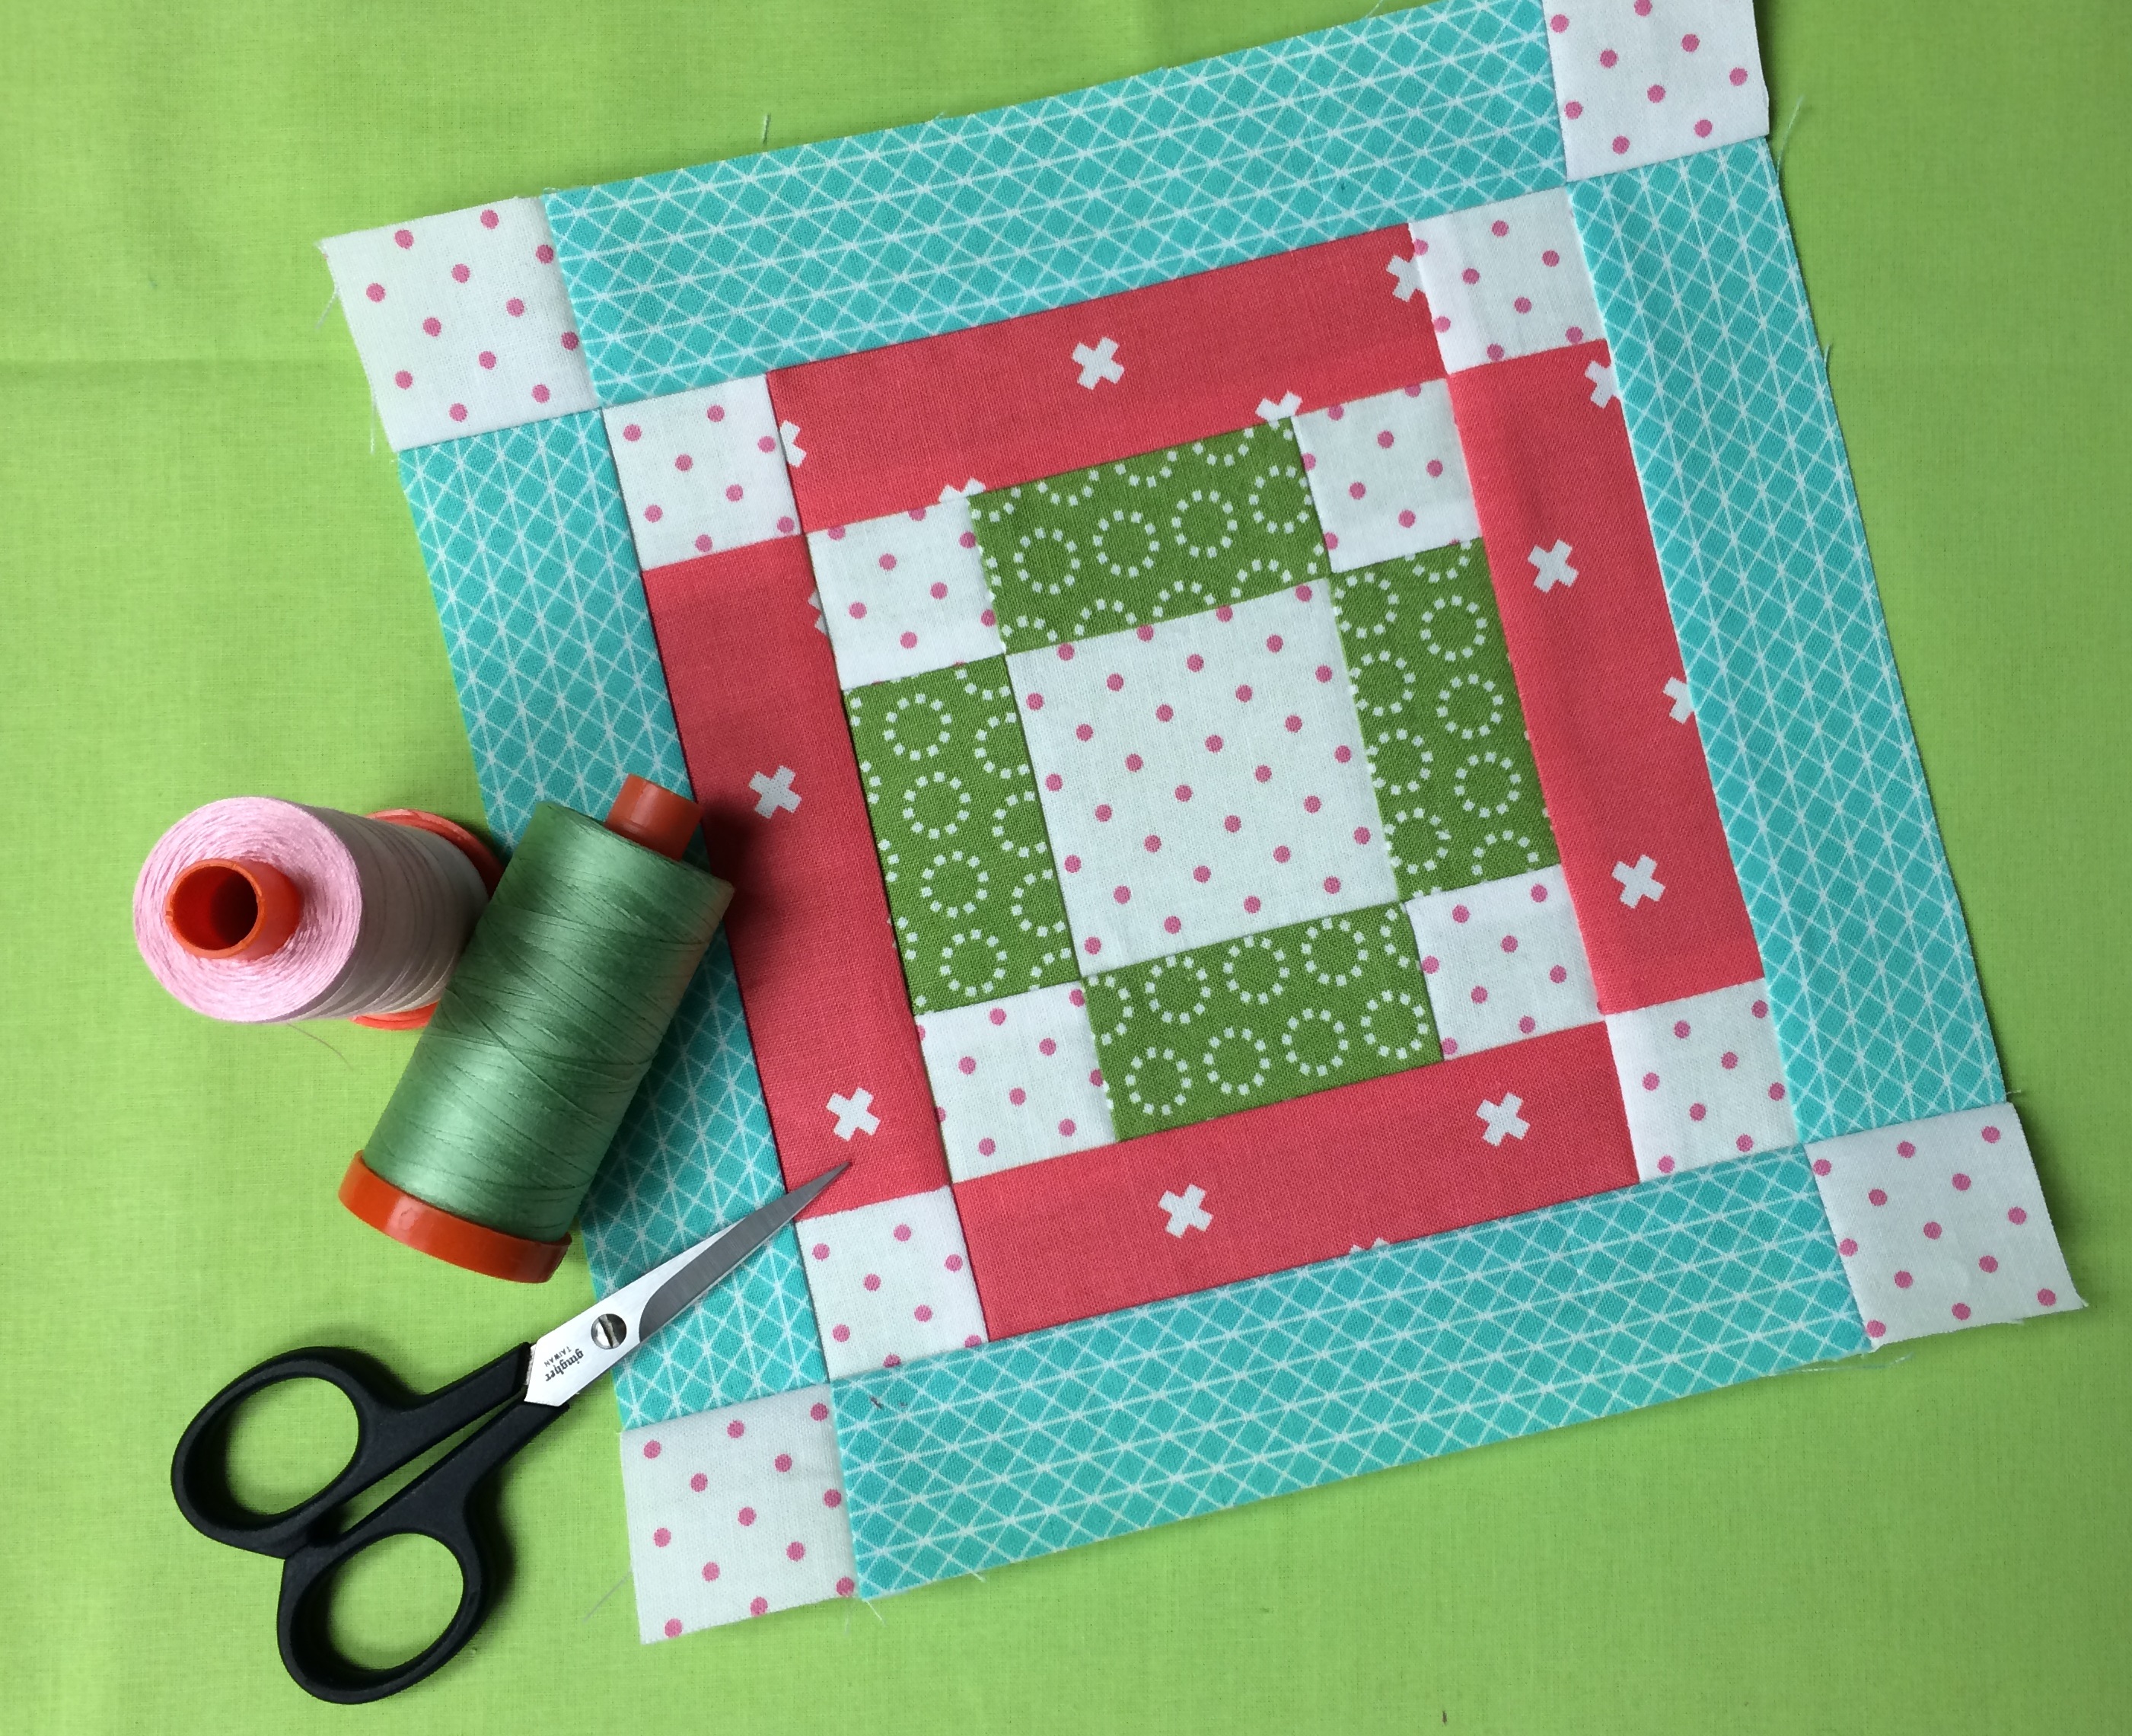
Arrange the 2½” x 2½” square in the center with a 1½”‘ x 1½” square on each corner. Place a 1½” x 2½” strip on all four sides. Sew the pieces into strips and press the seams away from the background fabric. Then sew the rows together and press the seams away from the center strip.

Step 3:
Repeat the previous step: Arrange a small background square at each corner and add a 1½” x 4½” strip to each side of the unit sewn in Step 2. Sew one strip to the top and bottom sides of the center unit. Press the seams away from the strips. Sew a 1½” x 1½” background square to both ends of the remaining two strips. Press all seams away from the background squares. Sew the units to each side of the center unit and press the seams toward the center strip.
Step 4:
Repeat in the same order as the previous step: Arrange a small background square at each corner and add a 1½” x 6½” strip to each side of the unit sewn in Step 3. Sew one strip to the top and bottom sides of the center unit. Press the seams away from the strips. Sew a 1½” x 1½” background square to both ends of the remaining two strips. Press all seams away from the background squares. Sew the units to each side of the center unit and press the seams toward the center strip.
Step 5:
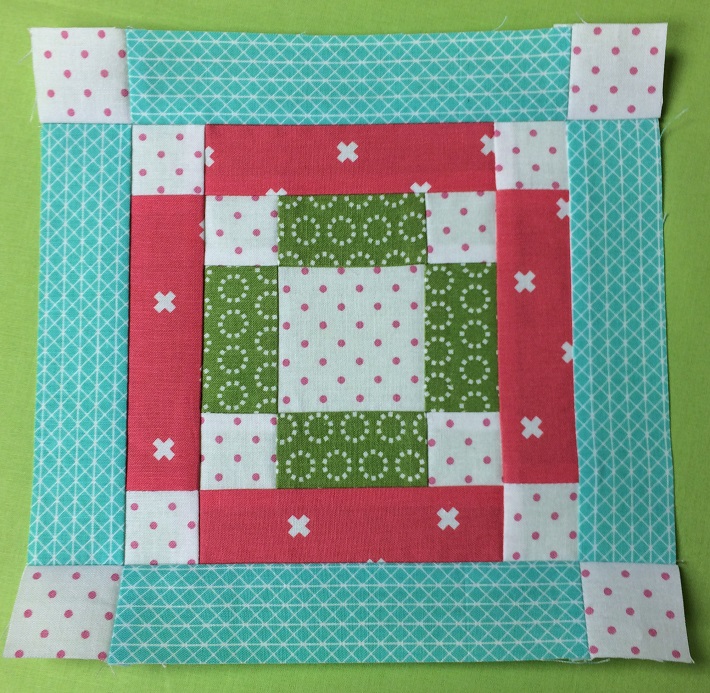
Admire your beautiful bonus block! This is the last block to be offered as part of this series. It will be the alternate block in the setting with the 12 blocks in this series. We will share a setting design along with the directions for the sashing and borders if you want to finish this quilt as a sampler. If you want to wait and see what the quilt looks like, just print out this block now and save it for later.
Share tips, start a discussion or ask one of our experts or other students a question.
No Responses to “Bonus Block! Wrap Up the Scrappy BOM With This Easy Tutorial”