
Fitted sheets can be pricier than flat ones and, depending on the material you want and the place you’re shopping, they can even cost more than double. What’s worse: sometimes fitted sheets aren’t even included in bedding sets, and they can be hard to find in luxury natural fibers like durable cotton wovens or linen and hemp blends.
The solution? Make your own fitted sheets from the flat ones you already have on hand. Here’s how.
DIY Fitted Sheets
Level: Intermediate
What You Need
- One flat bed sheet for your mattress size (or bigger)
- 50″ in length of flat 3/16″ or ¼” elastic
- Matching thread
- Scissors
- Pins
- Tape measure
- Serger (optional)
- Rotary cutter
- Cutting mat
Pro Tip: If you’re using brand new flat sheets, pre-wash them before you cut. Otherwise, you could end up with fitted sheets that are too small, as a woven cotton can shrink significantly for a variety of reasons.
Instructions
1. Measure Your Bed
Make sure there’s nothing on top of your bed except a mattress protector (if you use one). Measure exactly from one corded edge to the other, laying the measuring tape flat and straight on top of the mattress. Take the measurements for width, length and thickness. For a consistent look — and to make sure your fitted sheets will be on grain — snip and rip off two contiguous existing hems and measure from those raw edges.2. Cut Your Flat Sheet
Now it’s time to figure out your fabric measurements so you can cut your sheet. If you want a quick shortcut, you can use this free Fitted Sheets Calculator. Simply pop the three measurements (width, length and thickness) into the calculator and you’ll instantly get your fabric measurements.
You can also calculate on your own, using the guidelines below:
Measurement A: Width of your mattress
Measurement B: Length of your mattress
Measurement C: Height of your mattress
Width: Start with the width of your mattress (Measurement A) and add the height twice (Measurement C x 2). Add another 5″ for two seam allowances and extra fabric to slide under the mattress. This total will result in Measurement D.
Length: Add the length of your mattress (Measurement B), the height twice (Measurement C x 2) and an additional 5″. This total will result in Measurement E.
Measurement D is the width of your fitted sheet, while Measurement E is the length. Cut your sheet to size.
Pro Tip: If your fabric has a pattern printed on it, make sure to cut so it goes in the right direction!
3. Cut the Sheet’s Corners
Now you’ll cut off each corner. The cut should be a square with a measurement of C + 3″. This is measurement F. Here’s an example of how your fabric measurements should look.
To make it easier to see, we demonstrated the cuts you’ll make to your fitted sheet on a piece of scrap paper.
First, fold the fabric in half by length, then again in half by width. This will pile the four corners together in one spot.
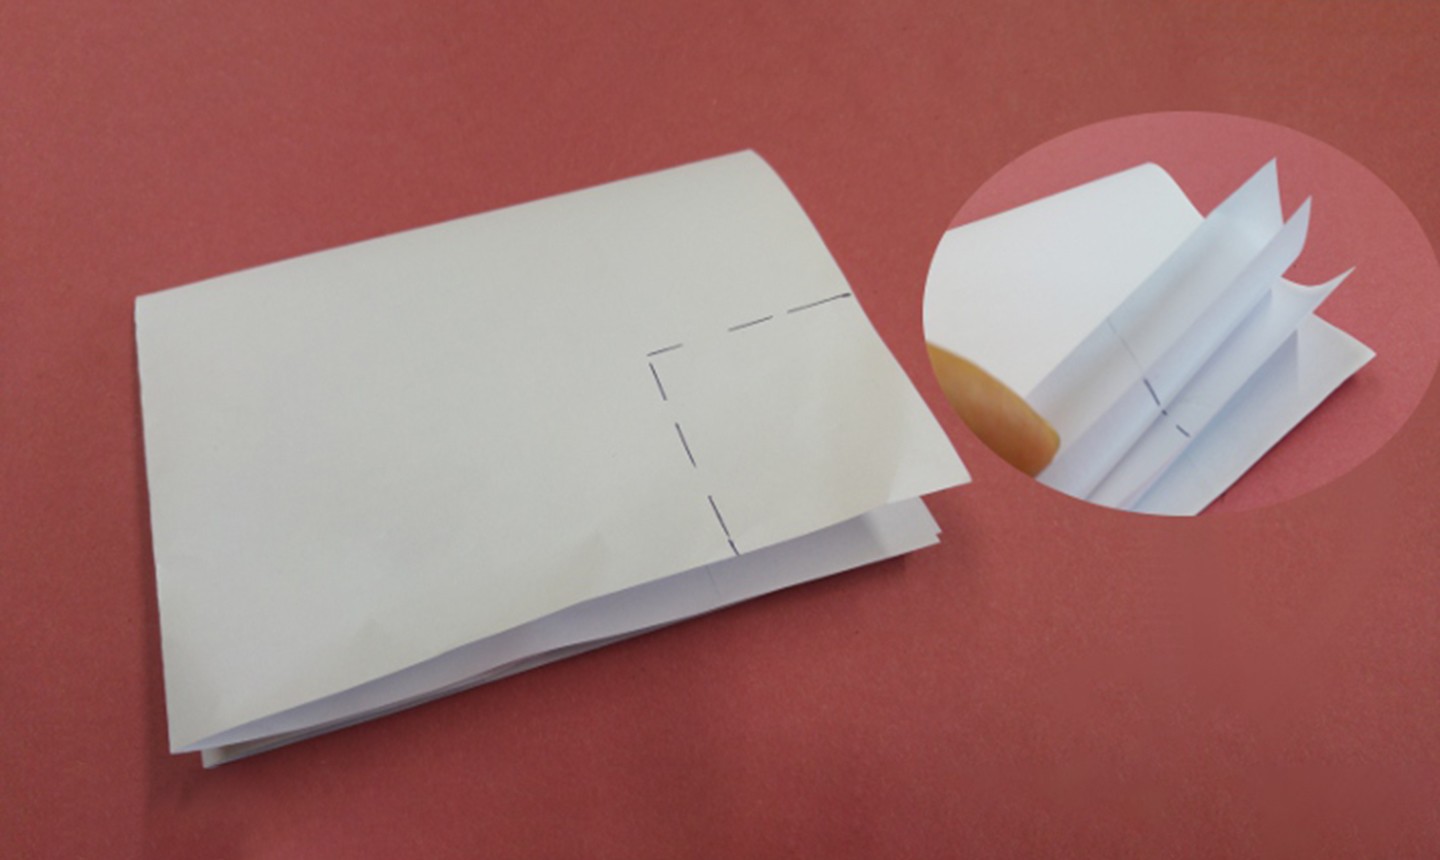
Mark measurement F on both sides, starting from the corner.
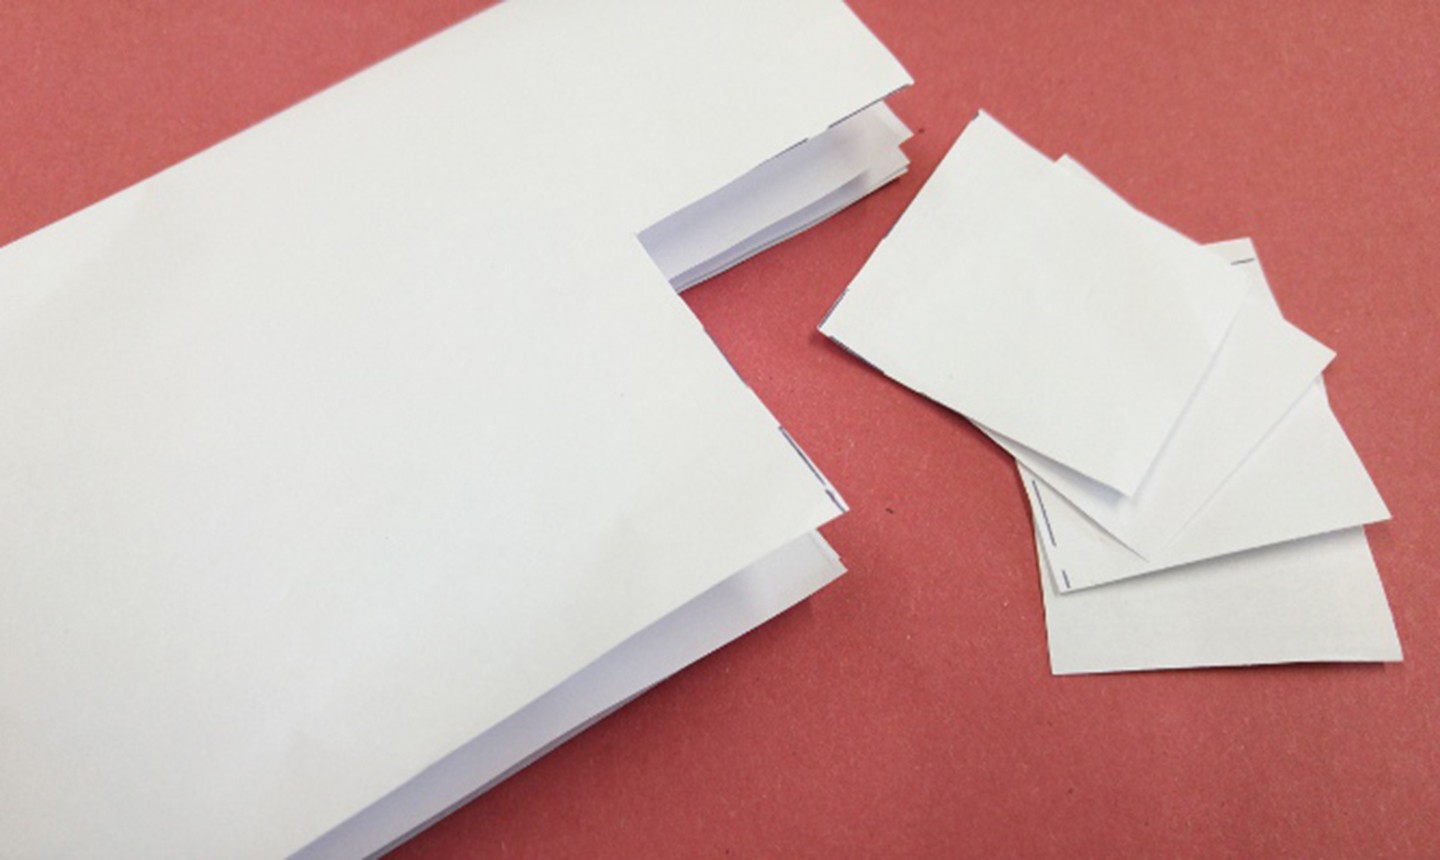
Cut out the square using a rotary cutter and cutting mat.

Your fabric will look like the above image after it’s cut.
4. Sew the Sheet Corners
With the right sides together, fold over the edges of one of the corners, matching the X and O shown in the image above.
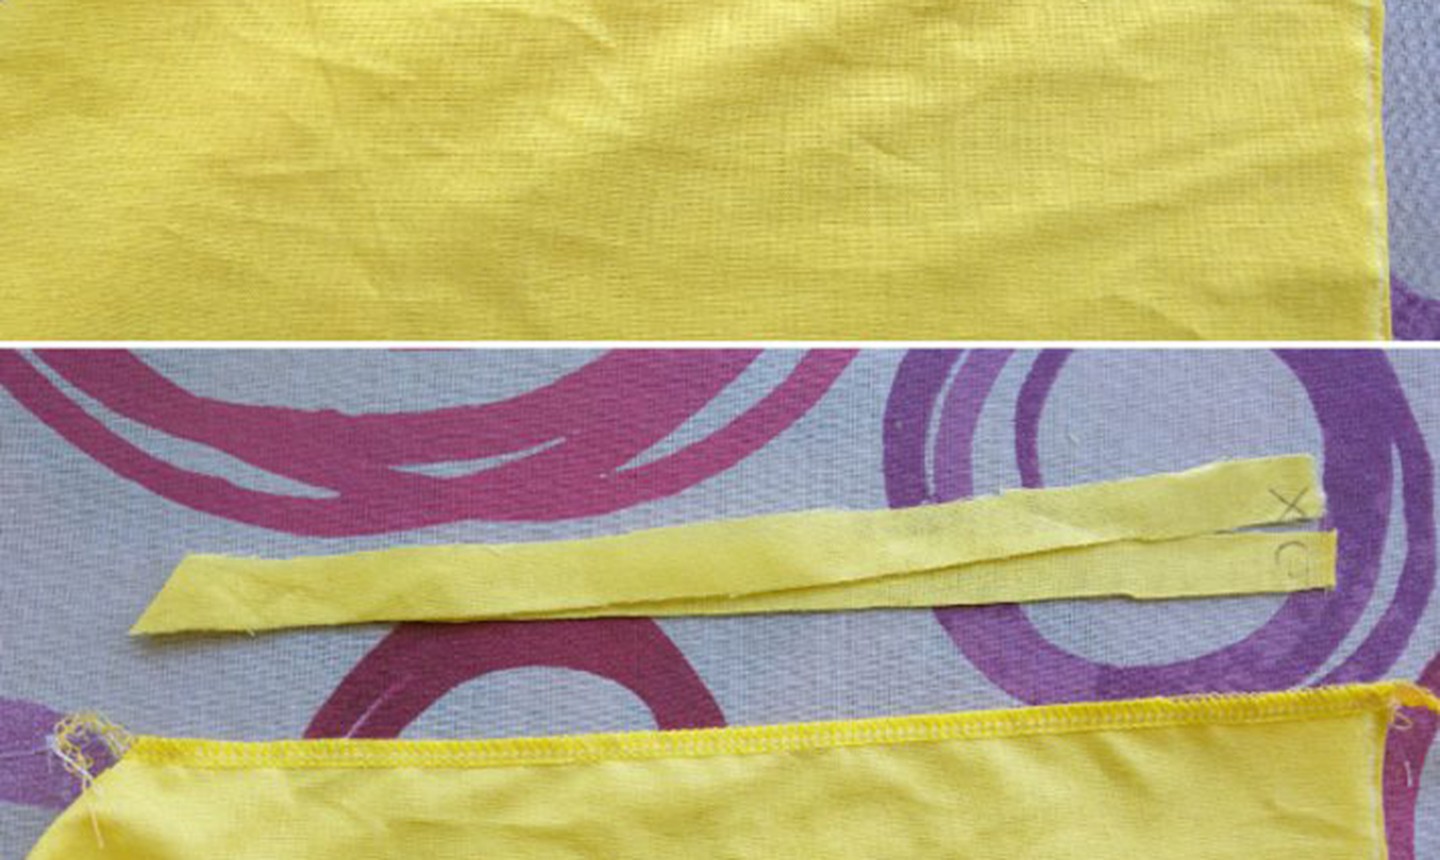
Sew from the X and O mark to the point of the missing square, using a ½” seam allowance. Then trim and zigzag-stitch the edge, or serge the edge with a four-thread overlock.
Pro Tip: To make your fitted sheets even more durable, you can sew the corners with a French seam.
Repeat for the other three corners. Then try your WIP fitted sheet on the mattress to make sure you’re on the right track.
5. Attach the Elastic
If you have a serger, run a three-thread overlock all around the raw edge. (As a shortcut, you can use a four-thread overlock so you don’t have to pull one of the needles and one spool off!)
If you don’t have a serger, press the entire raw edge ¼” toward the wrong side. Then, press a ½” hem toward the wrong side of the fabric.
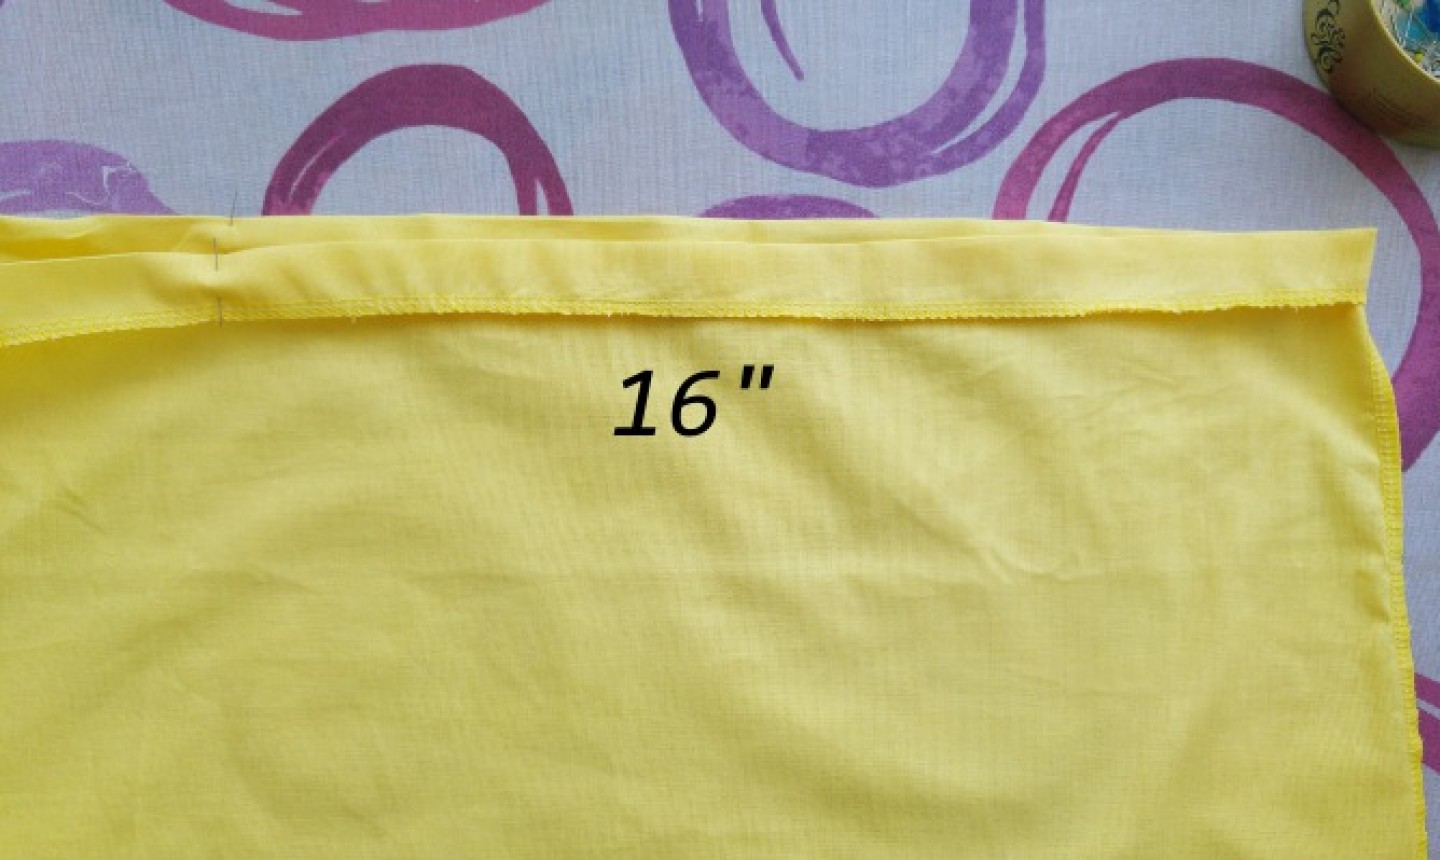
Measure 16″ in both directions from each corner seam. Mark those eight spots with your fabric marker or a pin.
Secure one end of the flat elastic to the wrong side of the fabric, ¼” or more in from the overlocked hem (or the first pressed hem). Sew a few zigzag stitches, one on top of the other, using a stitch length of 0.
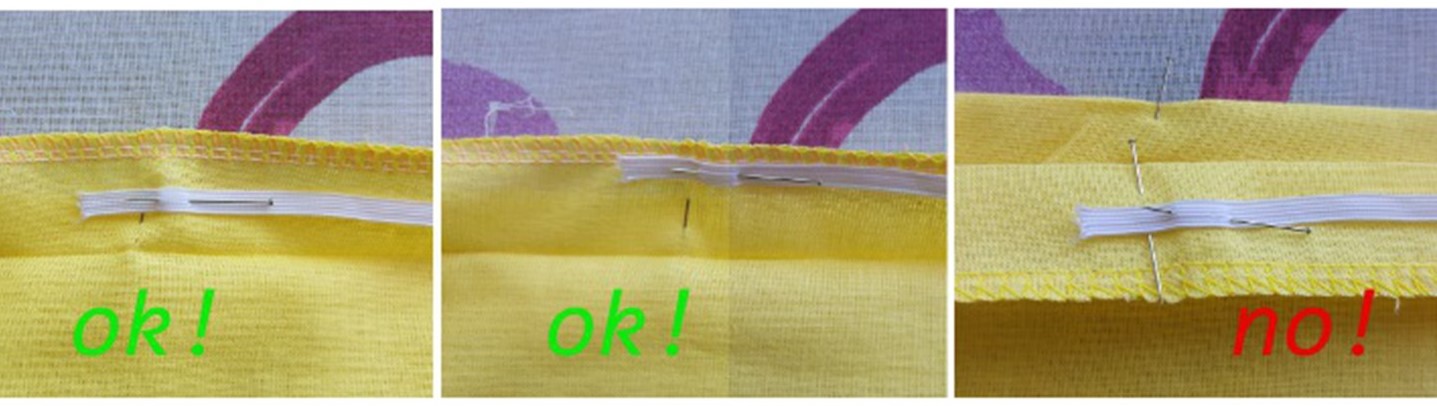
Sew the elastic into a single layer of fabric on its wrong side. Don’t sew it into a double layer, and don’t sew on the right side of the fabric. This way it’ll stay hidden in the casing.
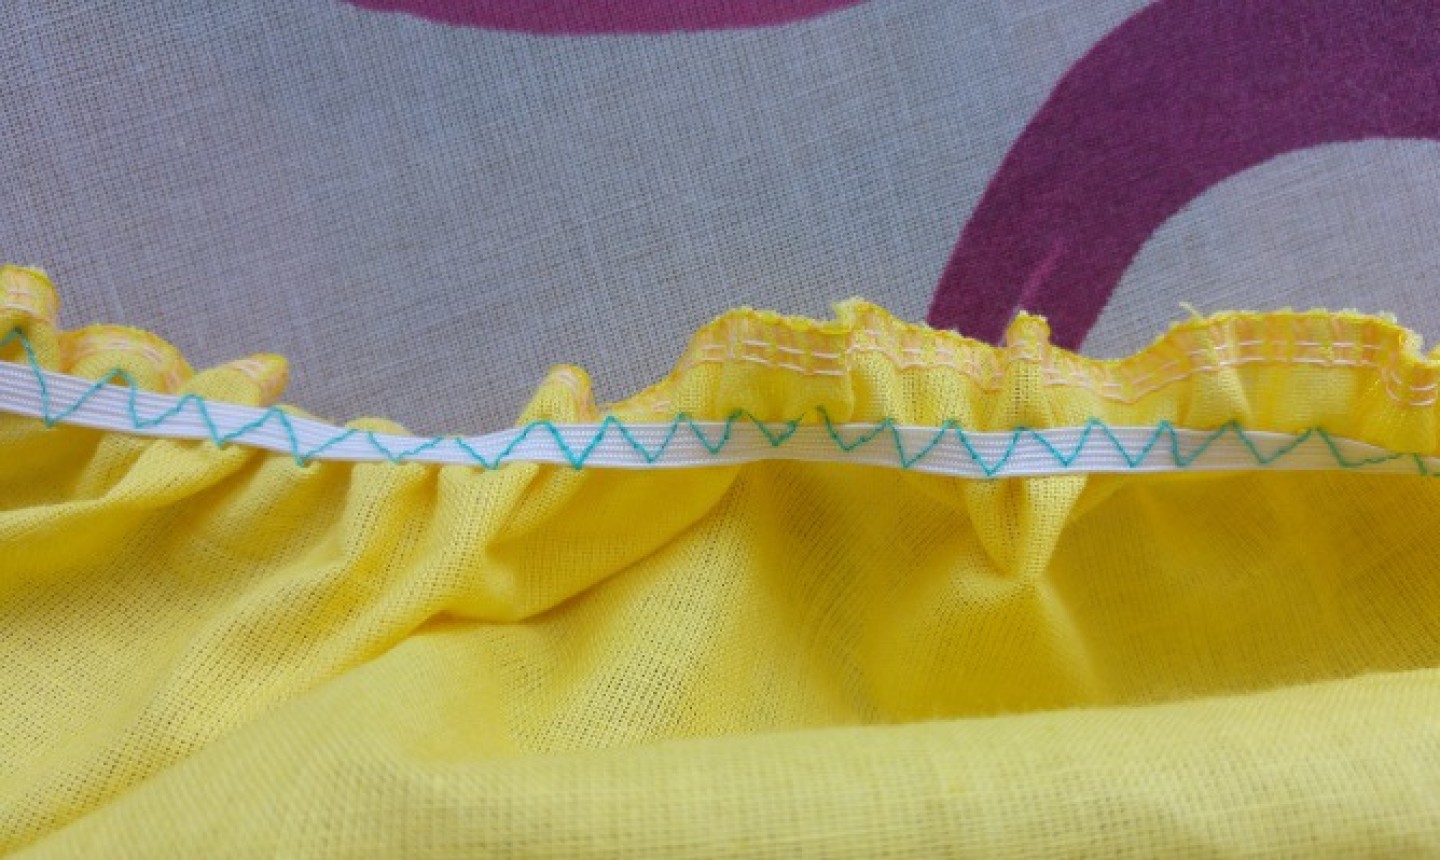
Select a three-step zigzag stitch on your sewing machine, using your max stitch length. Choose a width that allows you to sew onto your stretched elastic, and just barely off onto the fabric on each side. Testing on your fabric scraps is key here: for the 3/16″ elastic and the machine we’re using in this tutorial, a medium width of 3 works well. Here’s how it should look when it’s done:
The easiest way to attach the elastic is to pull it as much as you can, then finger-pin it to the fabric in front of your sewing machine, using your right hand and pinning every 2″-3″.
Once you reach the presser foot with your right hand, stop with the needle down, pull another portion of the elastic until it’s 2″-3″ long, and finger-pin it again to the fabric.
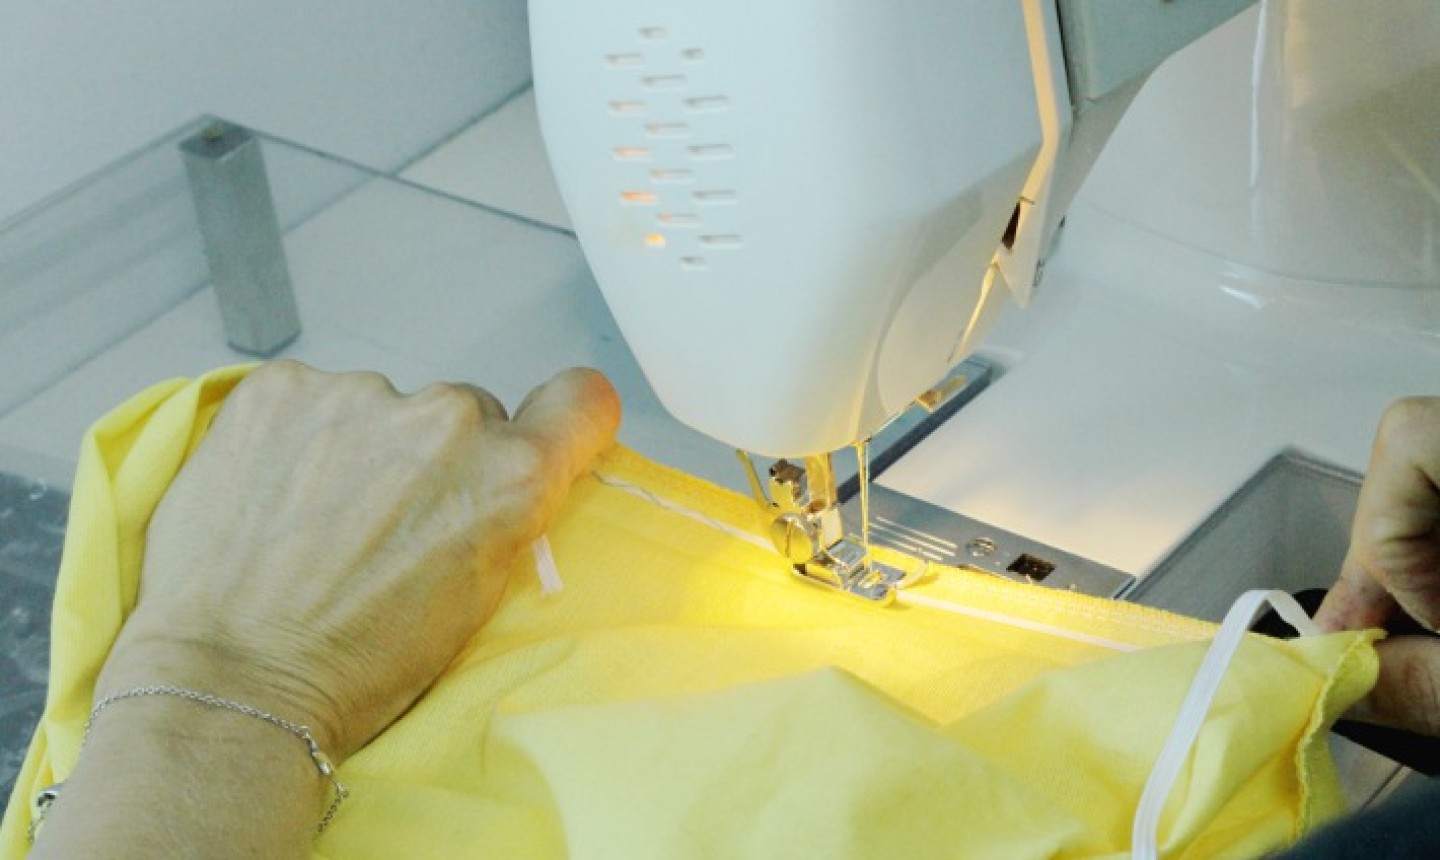
Each time you stop sewing, double check that your needle is down into the elastic and the fabric to keep everything in place. Don’t pull the fabric, though: just keep it taut to help it feed consistently, using your left hand to guide the fabric coming out behind your presser foot.
Once you reach the next 16″ mark, turn your stitch length to 0 and sew a couple of stitches on top of one another to secure the elastic. Then cut the elastic.
Pull the elastic and see the magic of a three-step zigzag:
Repeat for the remaining three corners.
6. Add the Hem
Set the stitch to a regular straight stitch (length = 4, width = 0). Starting in the middle of one long side, far from the corners, topstitch the hem all around from the wrong side. (Use the ½” pressed hem from the last step as a guide.) Remember to backstitch at the start and end of the seam.
Good to Know: You can use a foot with a stitch guide if you want to. It’ll get the job done super fast and keep your topstitch consistent.
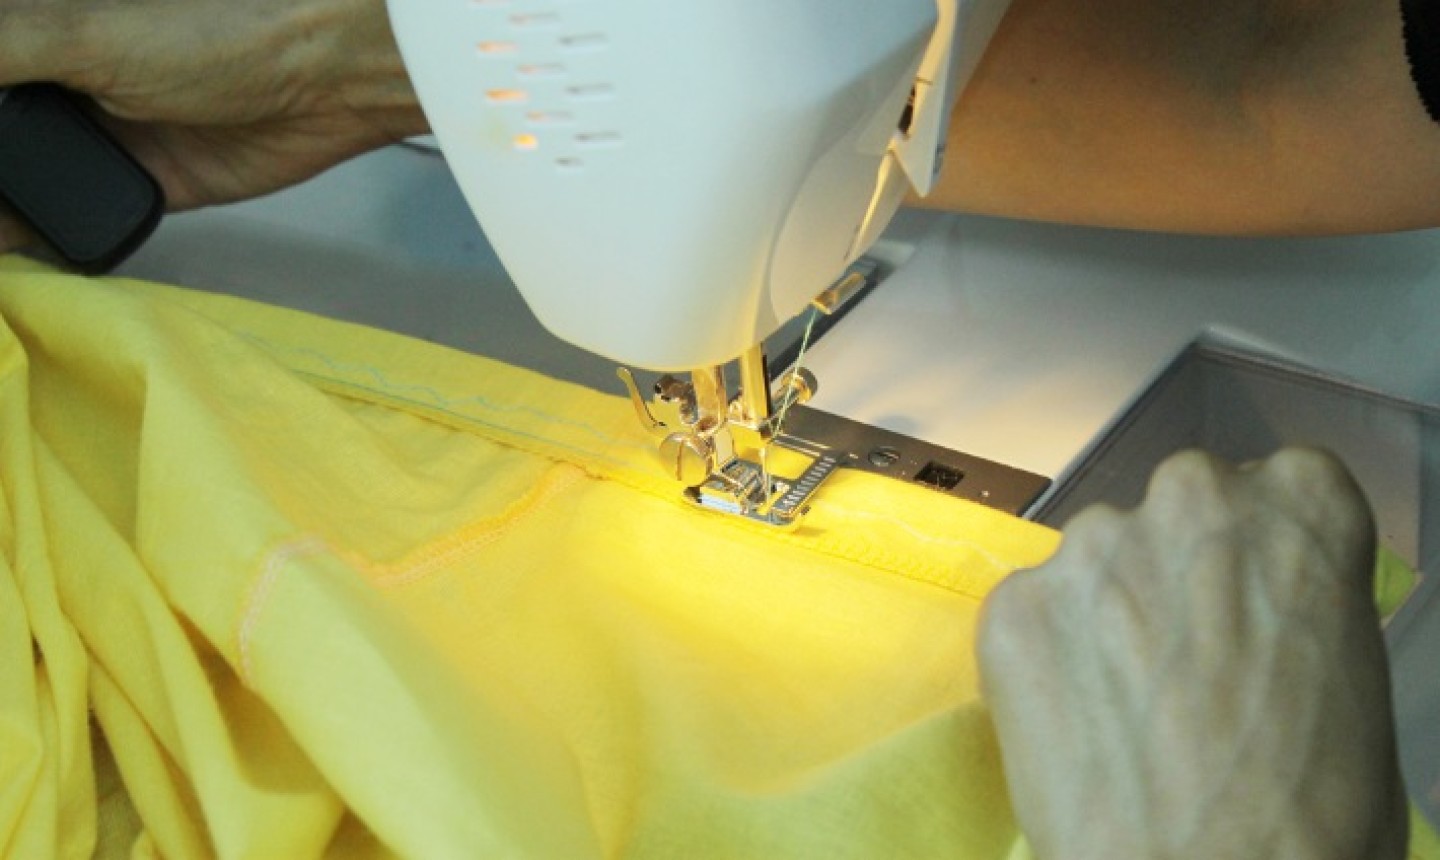
When you approach a portion with elastic, stop with the needle down, pull the fabric taut and continue topstitching. (The ½” pressed hem will be your BFF.)
Pro Tip: If you have a square-ish bed with sides of similar but not identical measurements, sew on a marking tab. Then you won’t have to guess which sides are shorter or longer when you’re putting on your sheet.
Ta-da! You have a new fitted sheet ready to go on the bed.
If the corner cutouts are as stated, i.e. mattress depth + 3", that results in the length of the side panels being less than the mattress measurement and there being no seam allowances for the corner seams. I think the cut outs should be 1" less in both directions. That would give a decent seam allowance - particularly if you wanted to do french seams. Also, Would this work if the 50" piece of elastic was cut into 4 equal lengths (12.5") and then stretched to fit the16" between the markers?
The Fitted Sheet Calculator link has expired. Can anybody send me the details or a link where this can be found?
Pleased I found this , very clear explanation that backed up my theory and promoted some plan changes . Thanks
Your calculator is no longer available - broken link. Thanks for the directions tho!
super
Nice idea, but my flat sheets are not long enough to make a fitted sheet for the same bed. I was stupid enough to not measure my sheet before I ripped off the two edges, so now I have just ruined a flat sheet.
My husband doesn't like flat sheets and this would be a good way to double our investment on good fitted sheets. Are the flat sheets that come with a set really large enough to be turned into fitted sheets?
Thanks. Will try it out now. Was struggling and trying to figure it out by myself
Just what I need!
This is a very good write up on this technique. Thanks, kws