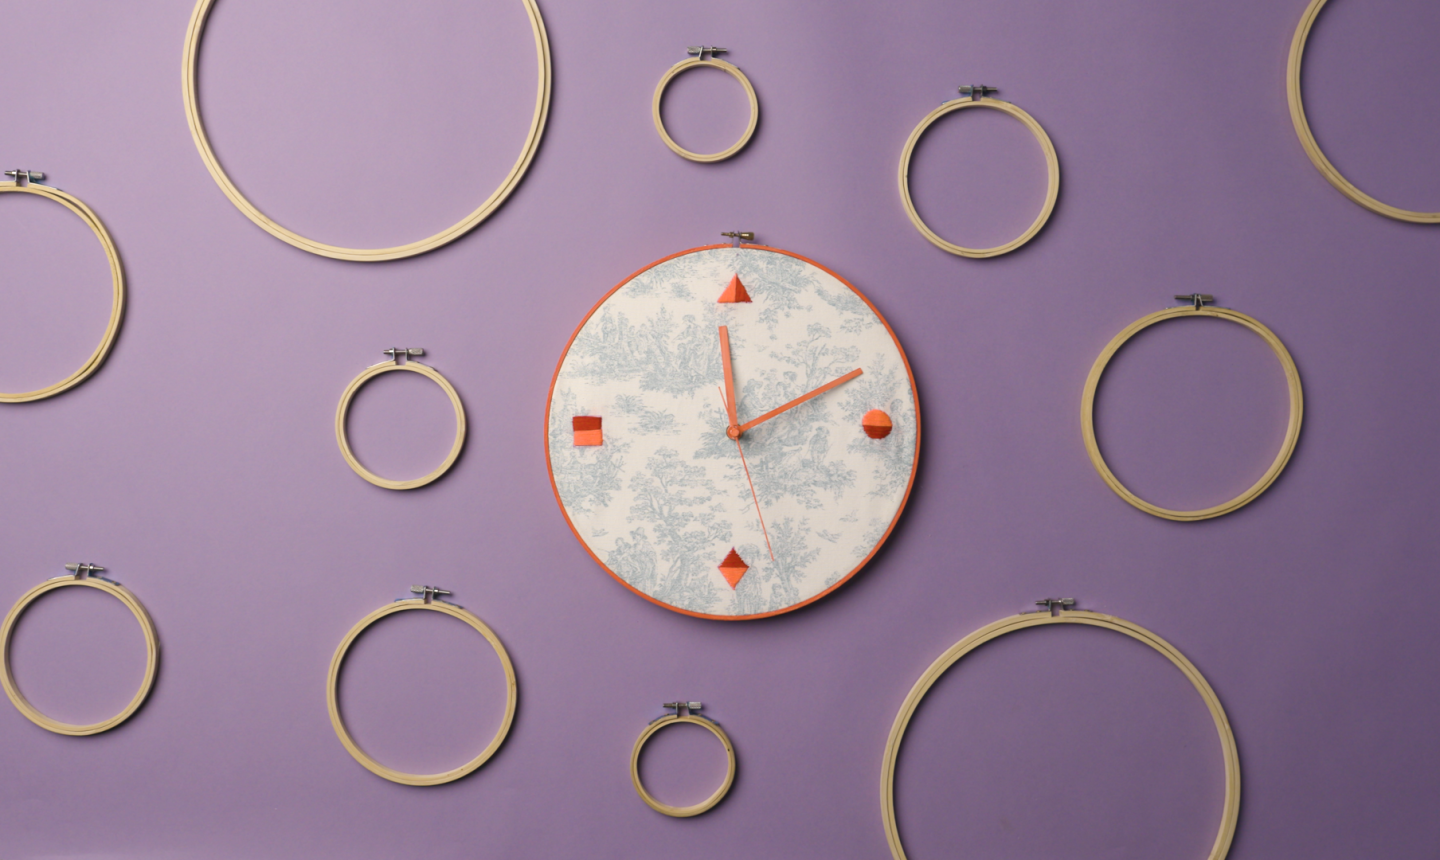
DIYing a clock that both matches your style and gives you an excuse to craft beats buying one any day. Whether you're painting one or stitching on fabric, it's easy to show off your fave hobby and use up some scraps with this fun tutorial.
Embroidery Hoop Clock
Level: Easy
What You Need
Instructions
1. Paint the Hoop
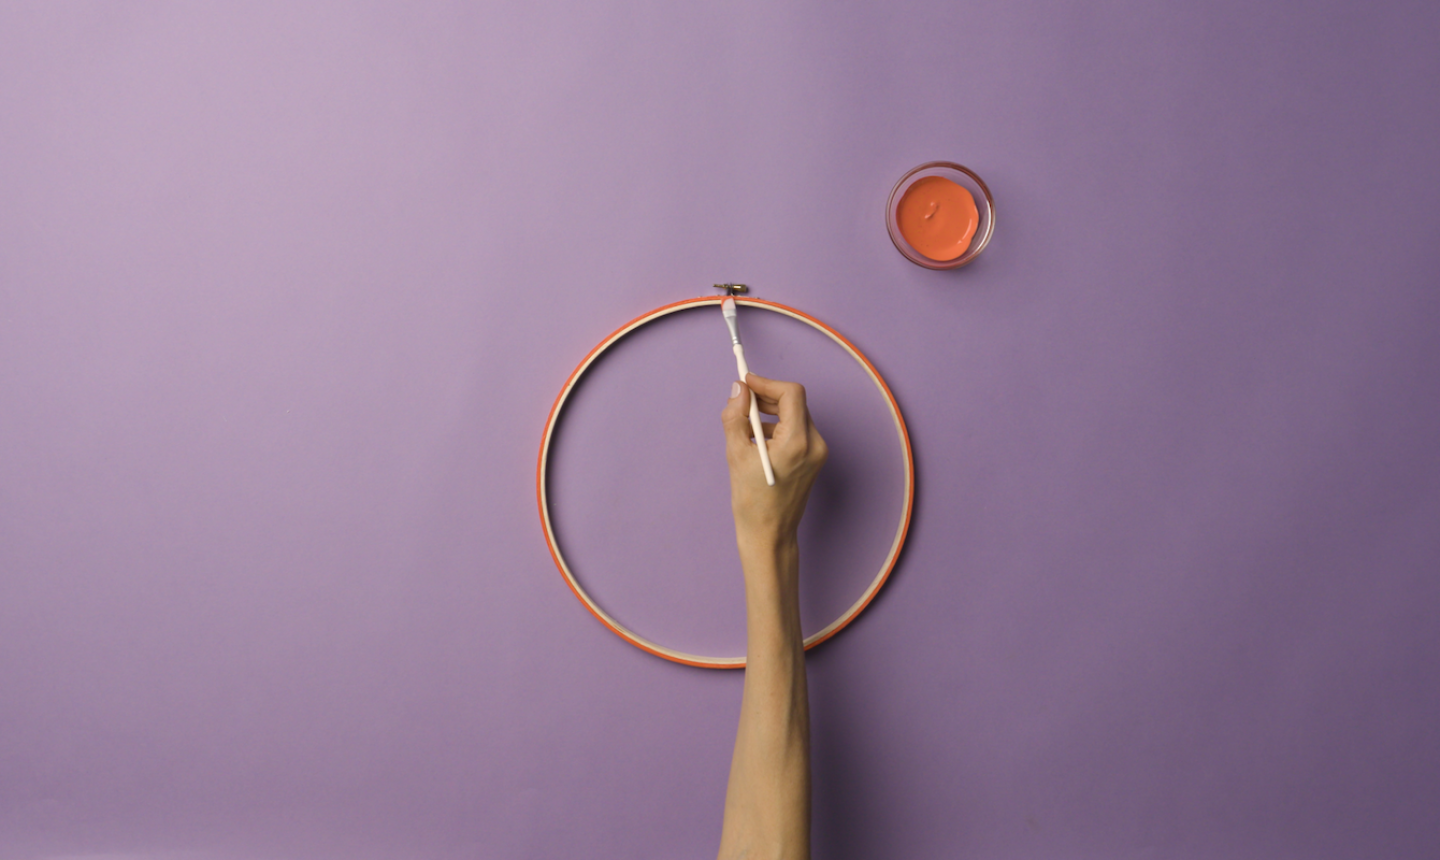
Unscrew your embroidery hoop and remove the two pieces. Paint the larger circle in the color of your choice (we used salmon). Set aside to dry completely.
Pro Tip: You only need to paint the larger hoop. The smaller piece goes behind the embroidery fabric and won't be visible. And if you're too impatient to wait for paint to dry, you can always look for a plastic embroidery hoop in a color you love.
2. Shape the Foam Core
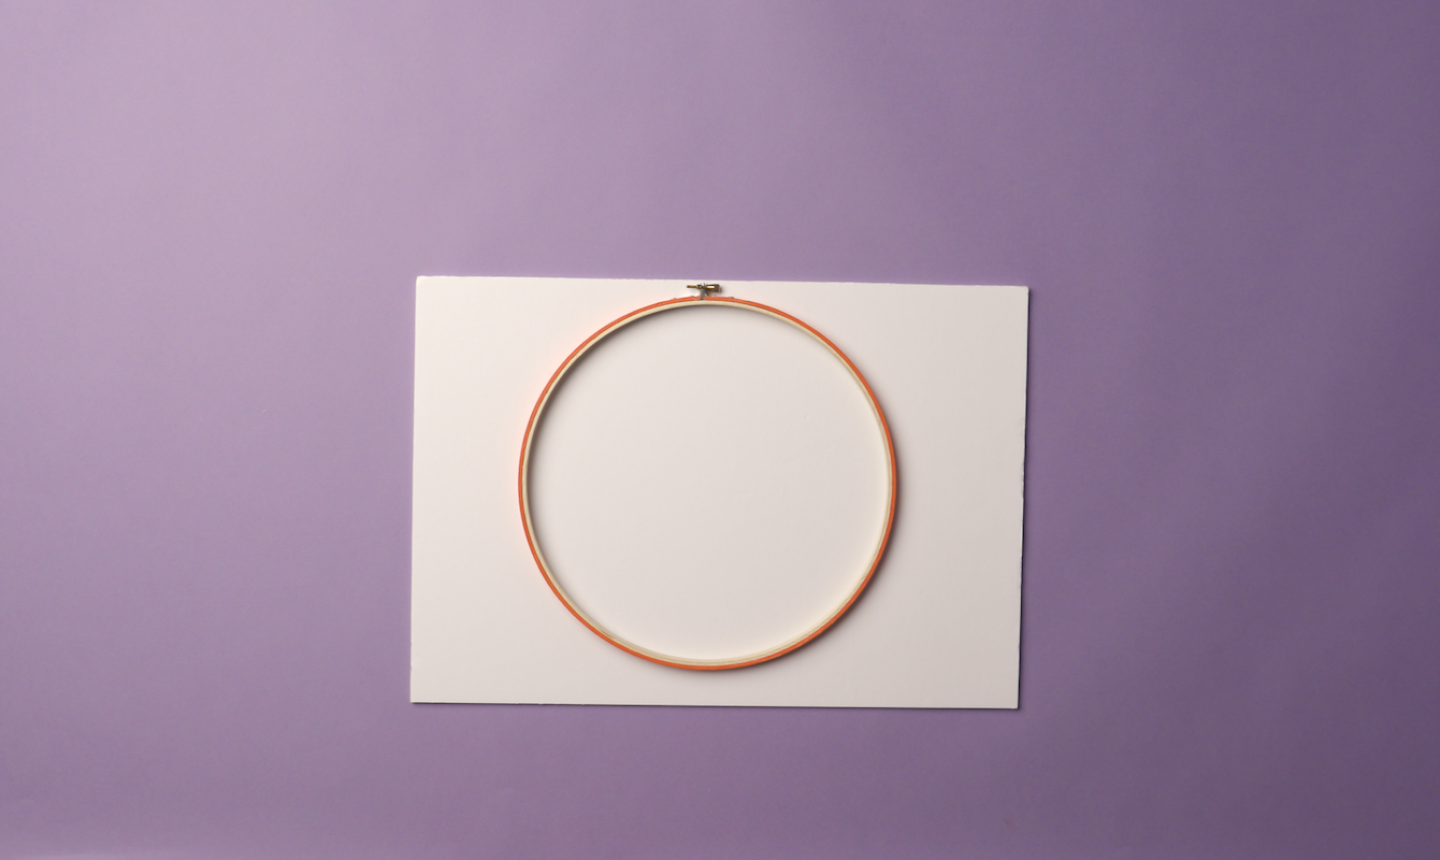
Put the two pieces of your hoop back together and tighten. Place the hoop over a piece of foam core and trace around the inside perimeter with a pencil.
Using scissors or an X-ACTO knife, cut along the traced line so your foam core fits snugly into the hoop. Use a ruler to measure the center of the circle and punch a hole through it with your awl.
3. Hoop Up
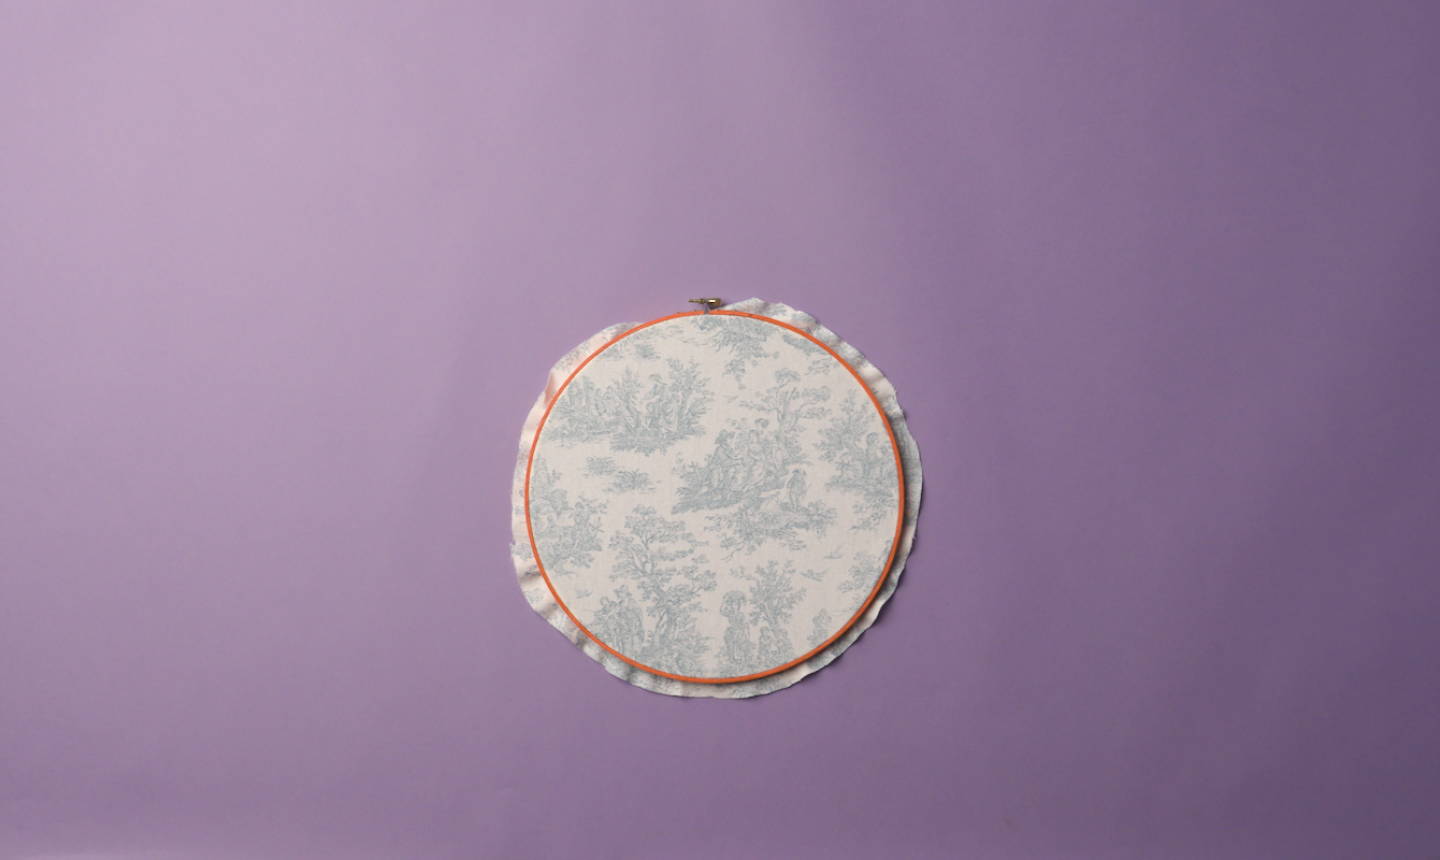
Remove the foam from the hoop and set it aside for later. Hoop up your fabric and pull it taut. Cut away the excess fabric, leaving about 1"-2" around the hoop.
Pro Tip: Take care to choose the right ground fabric. Linen and cotton generally work great. We used a print fabric, but you can stick to solids if you want. Whatever you choose, make sure it's not so busy that it'll distract from your stitching.
4. Trace the Designs
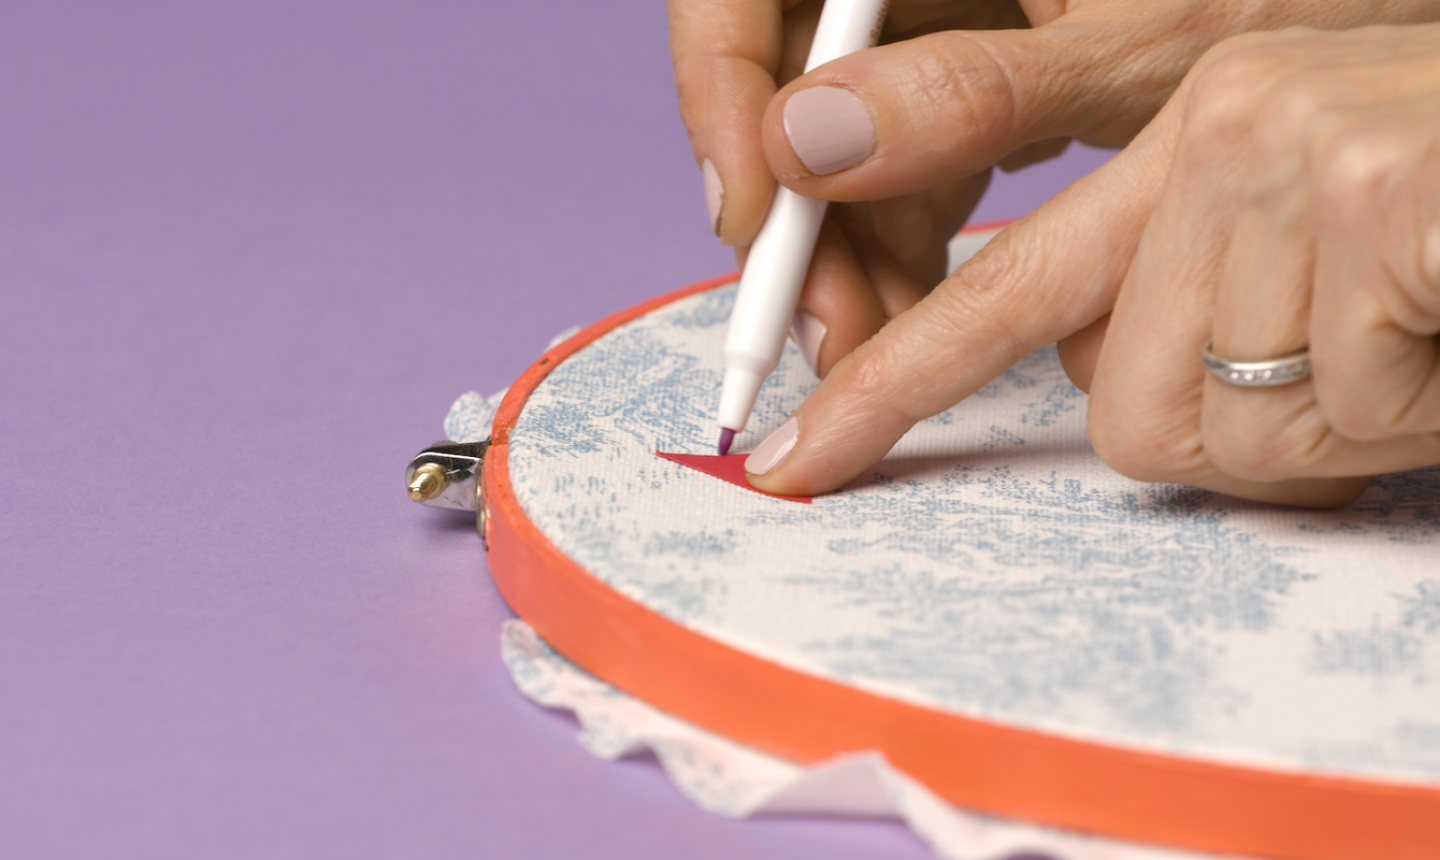
Punch four shapes out of your cardstock. Place one at the 12 o'clock spot (it might help to use your ruler) and trace it with a fabric pen. Trace the other three shapes at the 3, 6 and 9 o'clock points.
5. Stitch Your Shapes
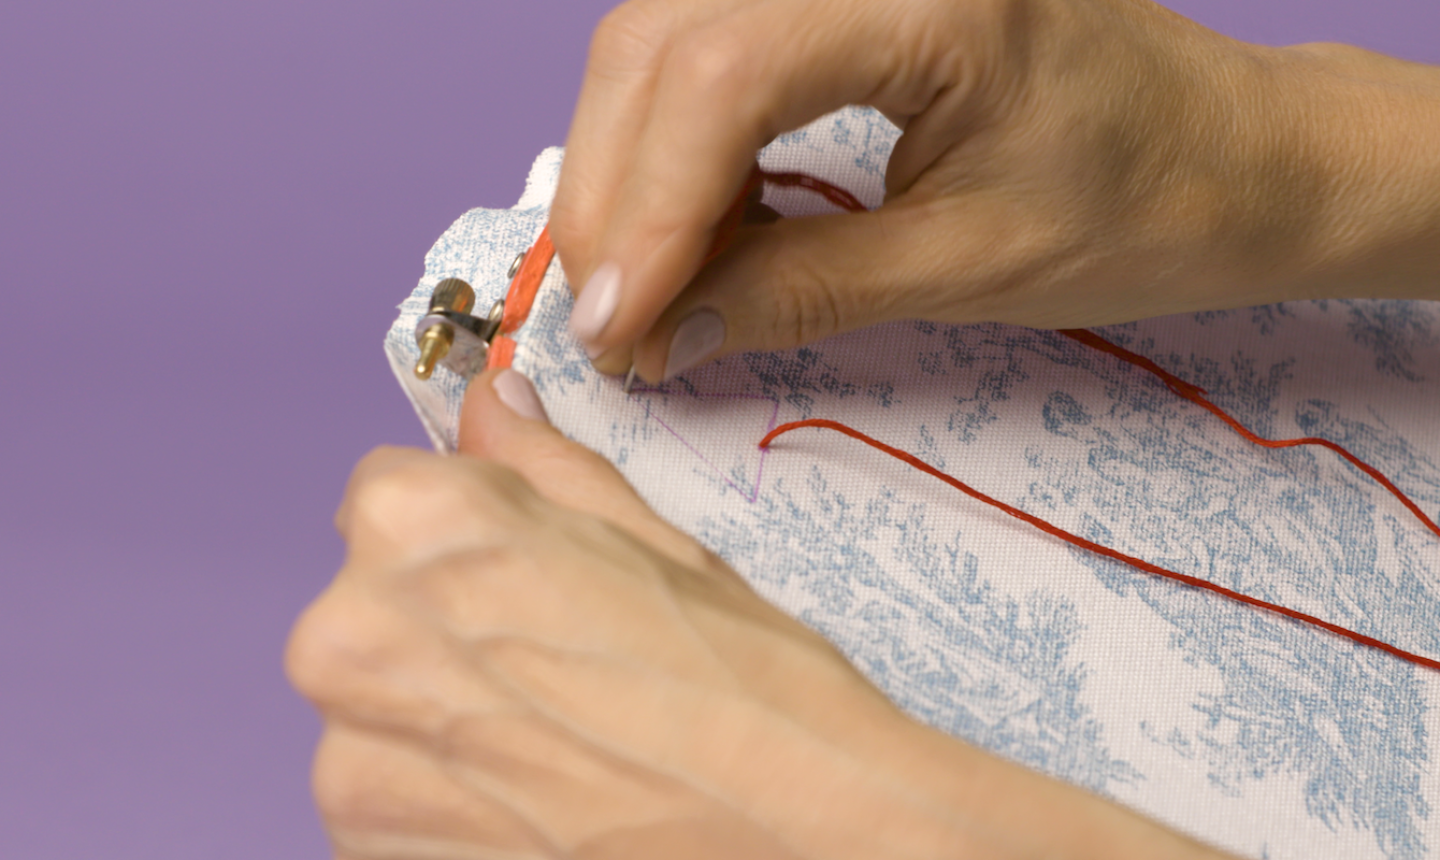
Thread your needle with 6-ply floss, tie a knot at the end and start stitching your shape. We used satin stitch, but you can use any fill stitch you like best.
When you want to change colors (or if you run out of floss), move the needle to the back of your hoop and tie it off in a knot. Rethread and begin stitching as before.
Continue working around the clock until all shapes are filled in.
Pro Tip: If any ink is showing on your fabric when you're done stitching, remove it according to your fabric pen's instructions. Some inks disappear with water, others with heat, etc.
6. Finish the Hoop
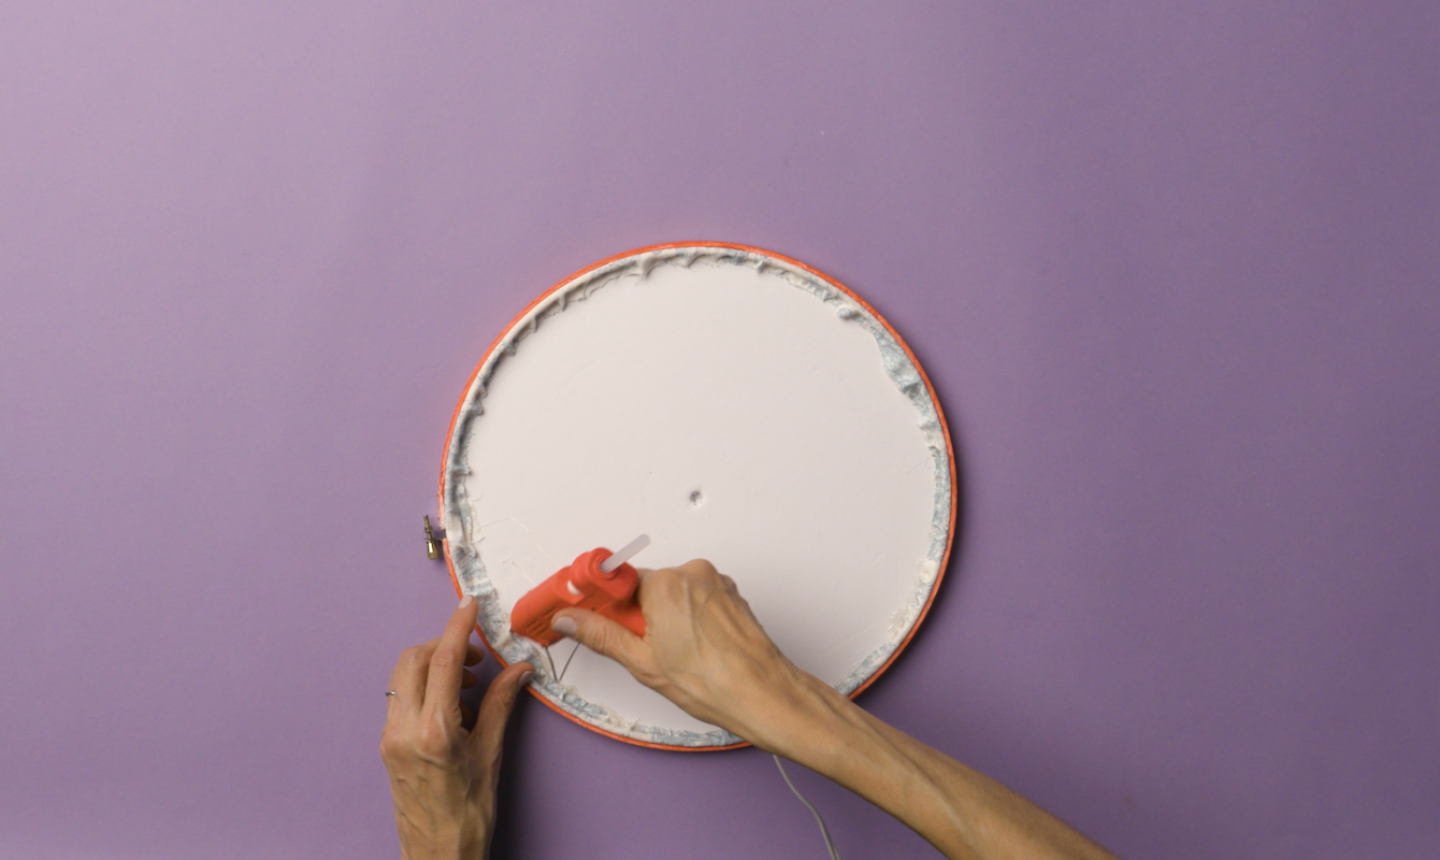
When you're done stitching, you need to frame the fabric in the hoop before adding the clock pieces. Flip it over so the back side is facing you, place the circle foam core inside and hot glue the raw 1"-2" fabric edges down.
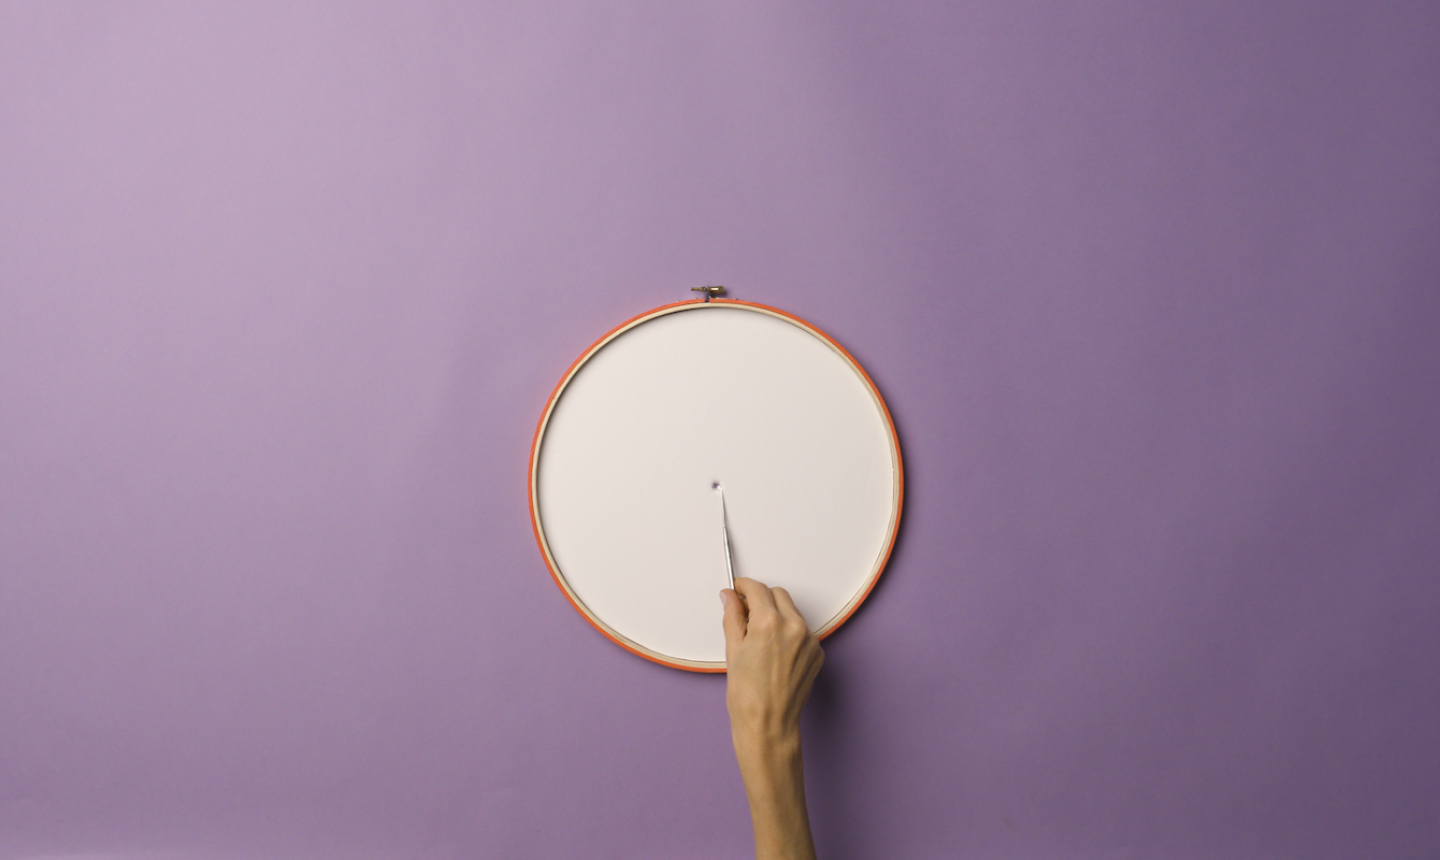
7. Add the Clock Device
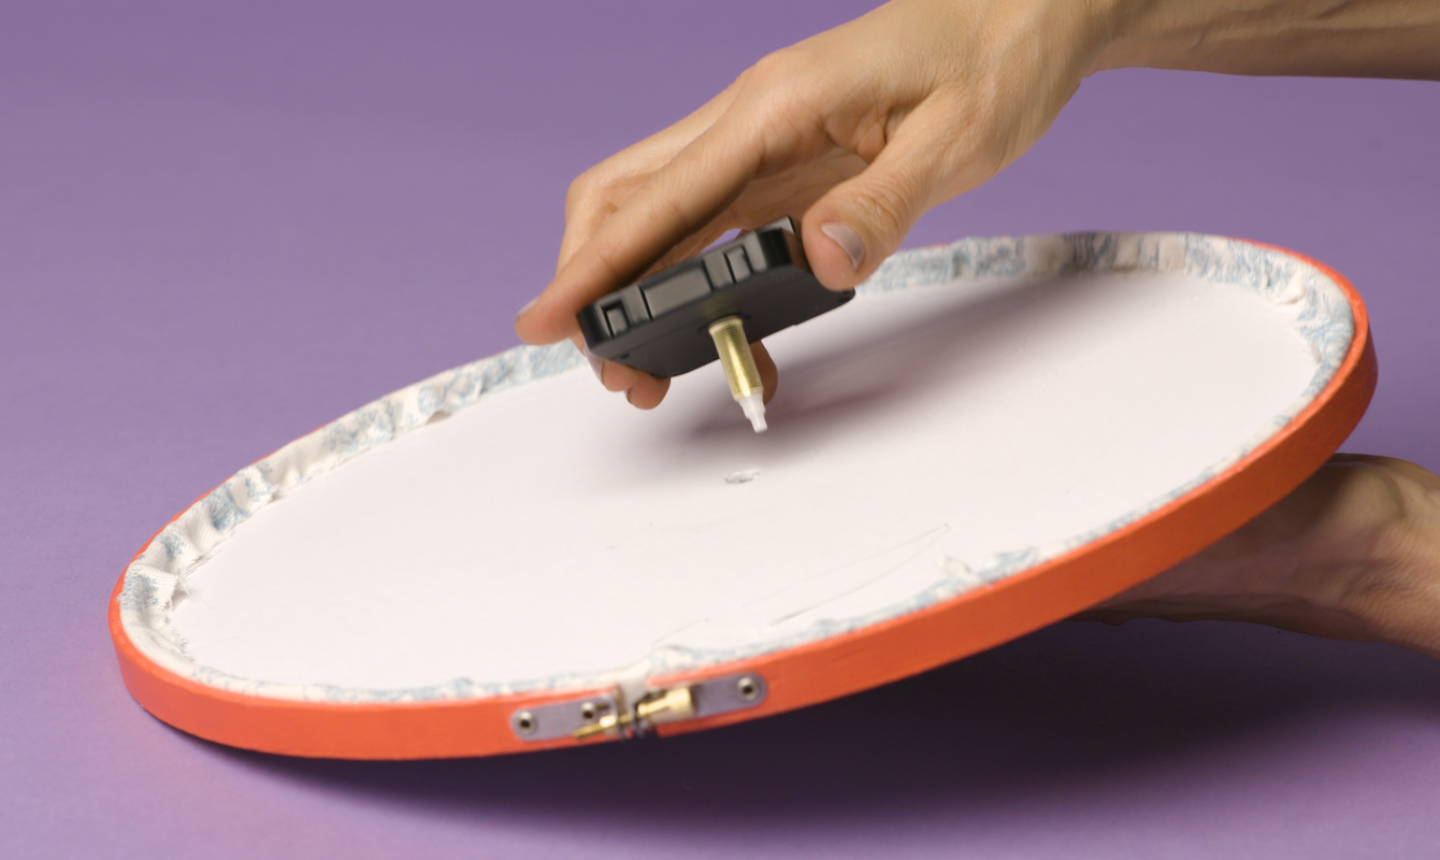
Use the awl to poke a hole through the fabric where the foam core hole lies and insert the back of the clock device. Hot glue it in place.
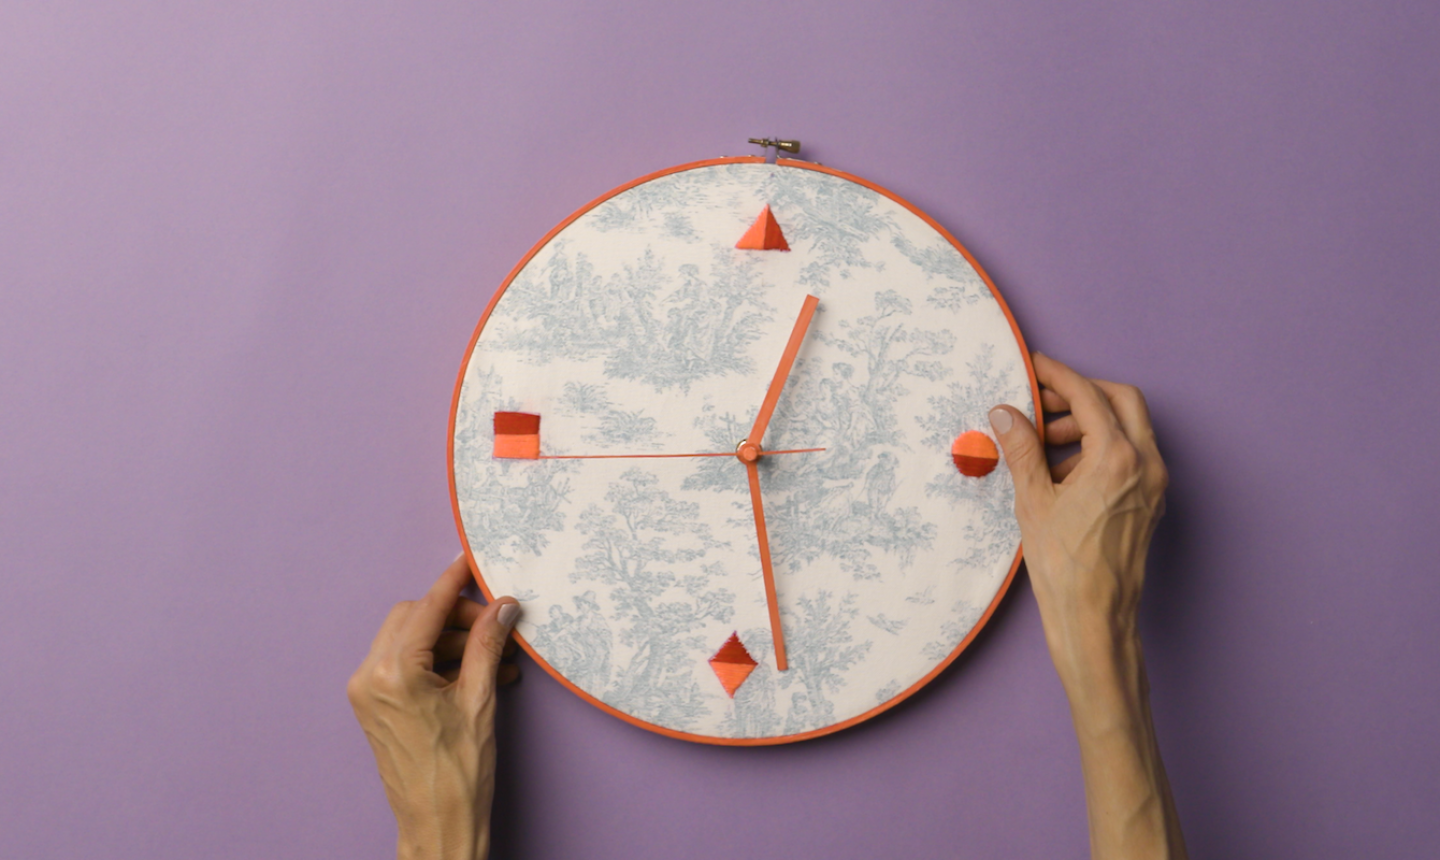
Continue assembling the clock kit according to the package instructions. When everything is secured, hang your new artsy clock on the wall!

How do you stop the fabric from stretching and stretching and stretchingsome more.it looks saggy. I tighten and one minute later it is saggy again!