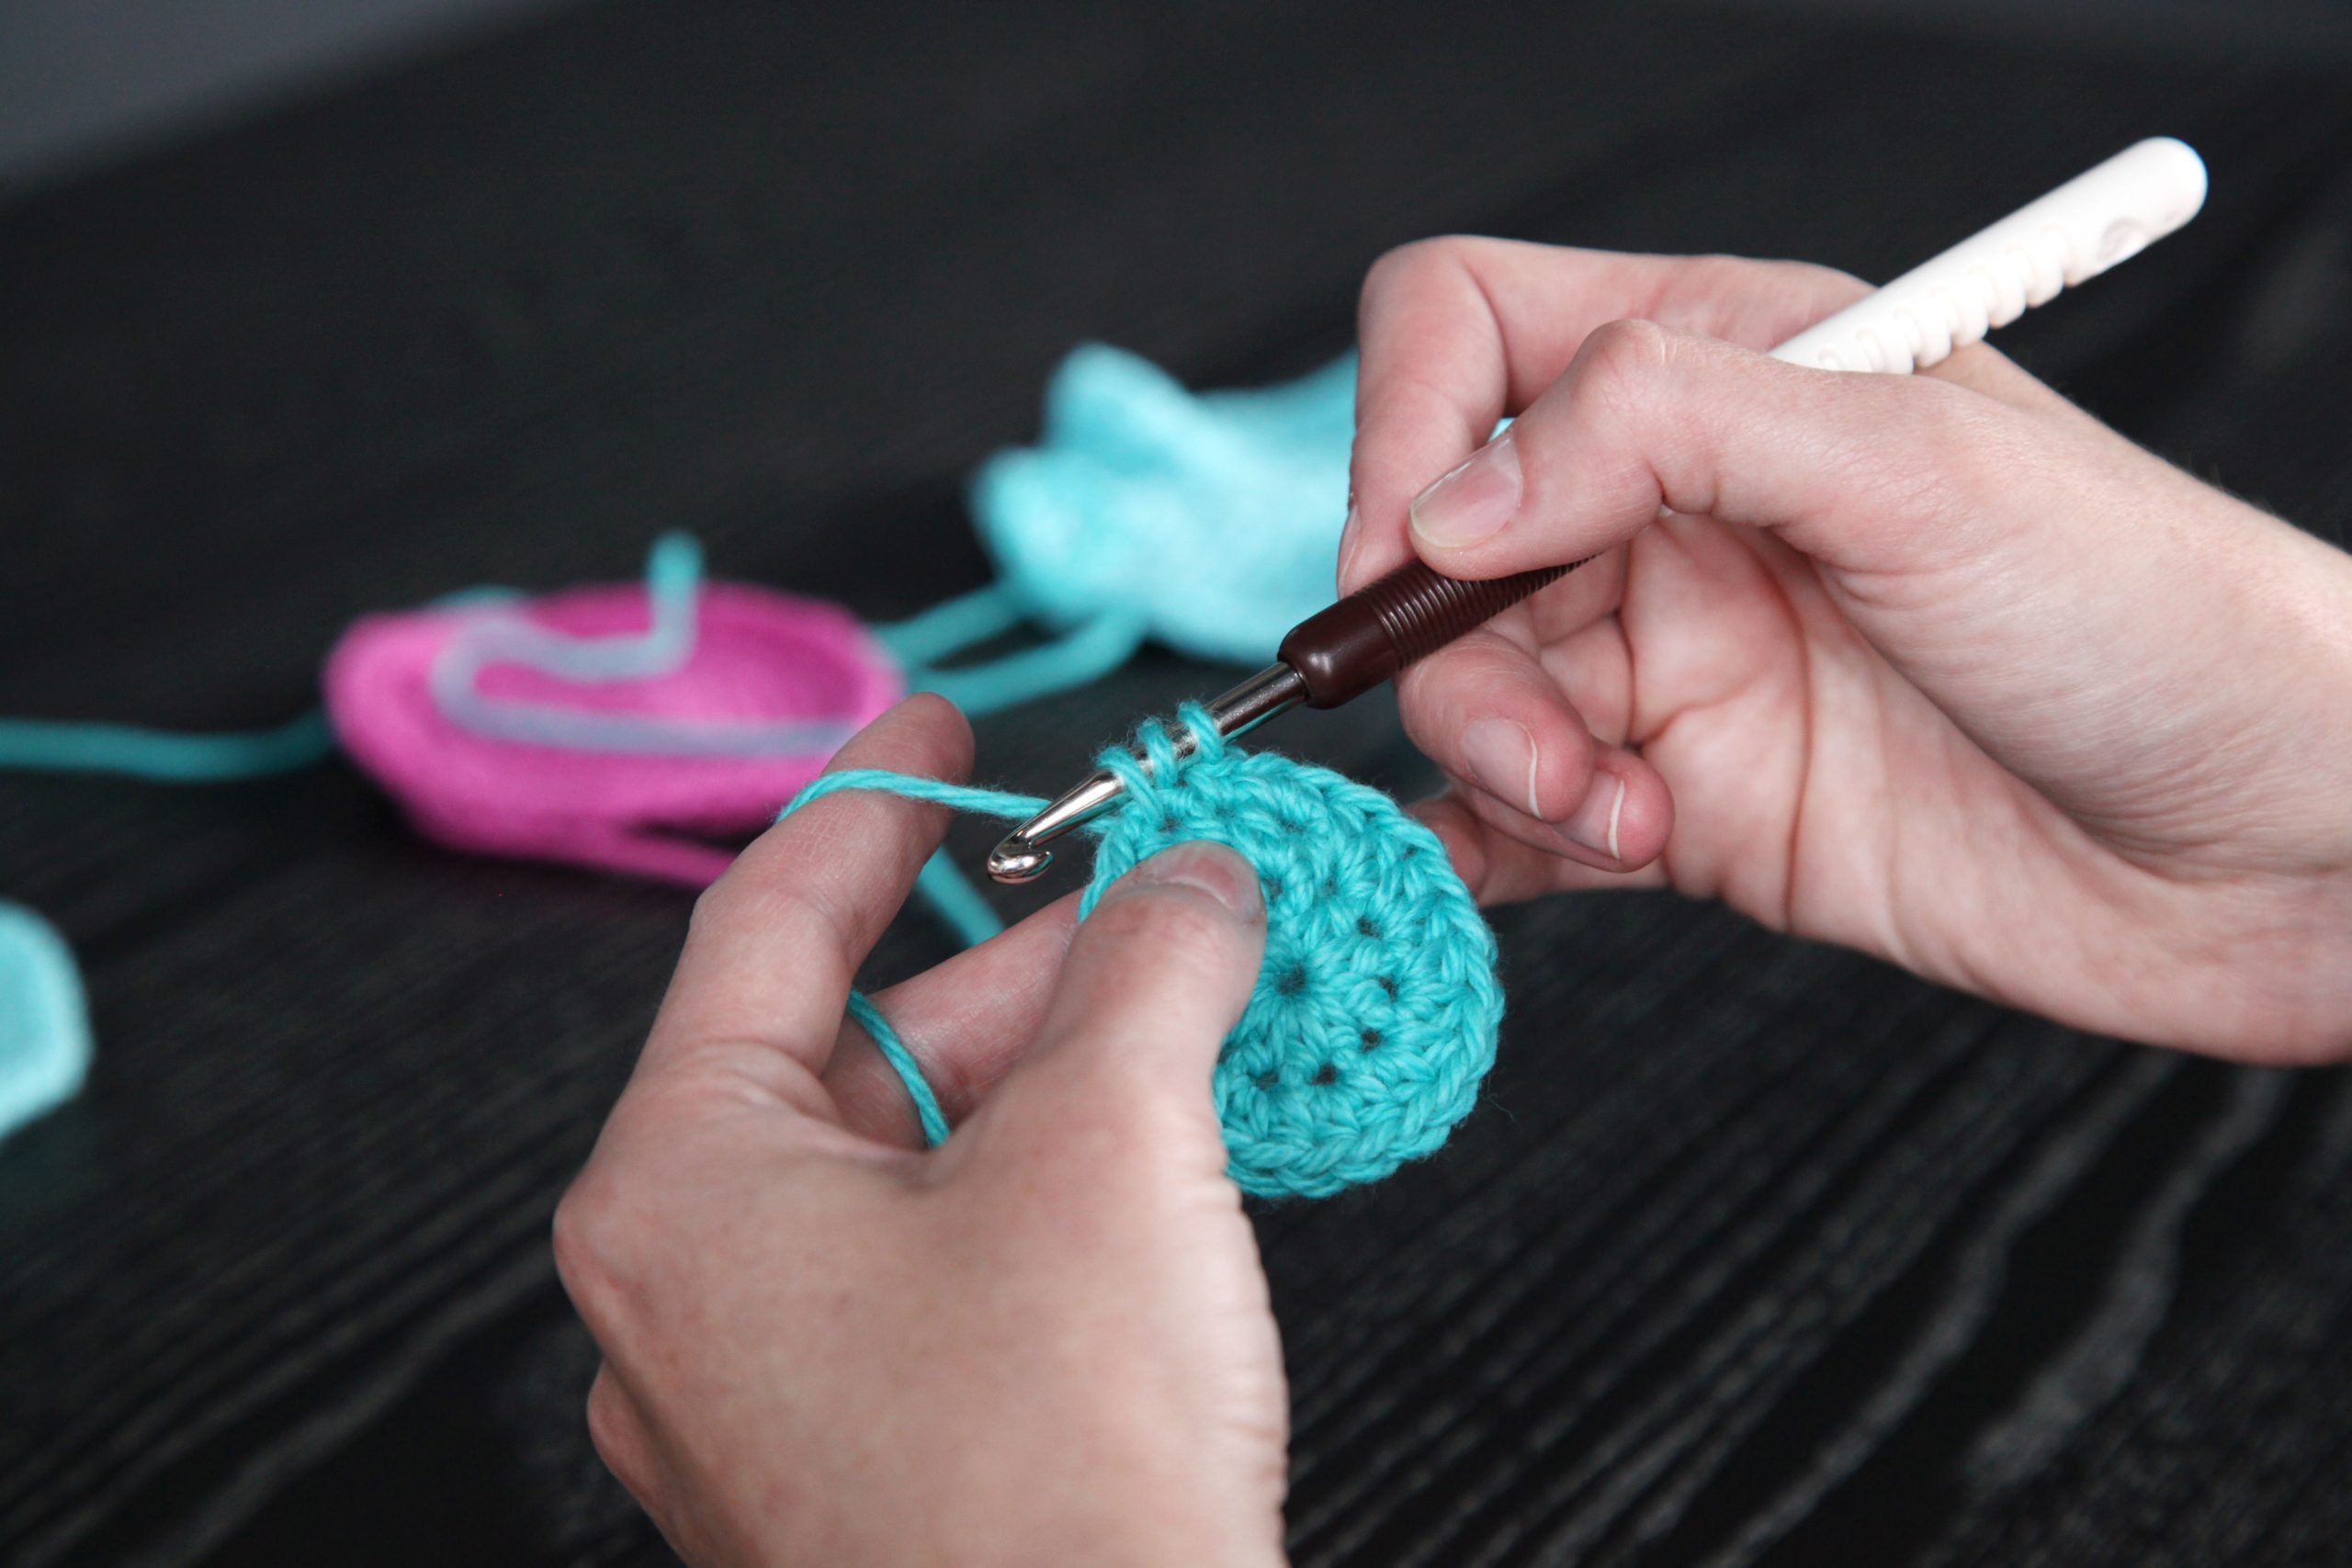
Crocheting a flat circle seems pretty straightforward: crochet in rounds, throw in some increases and — bam! — you’ve got a circle. Except, you might have something that’s a little misshapen and not actually a circle.
The good news is this problem is totally fixable. All you need are a few rules to help guarantee you get perfect circles every time.
1. Start With the Right Number
Your first round really sets the stage for success, so make sure you have the right number of stitches from the get-go. Too many stitches and you make waves; too few and you have a bowl.
Generally, the taller the stitch, the more stitches you need in your first round. A few guidelines to keep in mind:
- Single crochet: Use 6-8 stitches in round 1
- Half double crochet: Use 10 stitches in round 1
- Double crochet: Use 12-14 stitches in round 1
2. Nail the Magic Increase Formula
To make your circle grow just enough without getting too big around the edge, you need to know how many times to increase and where to increase each round. Luckily, this is the same whether you’re making a crochet circle using sc, hdc or dc stitches.
Pro Tip: You must start with the recommended number of stitches laid out above if you want this formula to work its magic.
- Round 1: Start with the recommended number of stitches listed above.
- Round 2: Make 2 stitches into each stitch of Round 1 (you’re increasing in every stitch).
- Round 3: Make 2 stitches into the first stitch of the previous round, 1 stitch into the next. Repeat this pattern around (you’re increasing every other stitch).
- Round 4: Make 2 stitches into the first stitch of the previous round, then 1 stitch into each of the next 2 stitches. Repeat this pattern around (you’re increasing every third stitch).
- Round 5: Make 2 stitches into the first stitch, then 1 stitch into each of the next 3 stitches. Repeat this pattern around (you’re increasing every fourth stitch).
With every round, you work one more regular stitch between your increase stitches. By Round 10, for example, you’d make 8 single stitches between each increase.
Now, what does this actually look like? See below how to work a flat circle in double crochet.
Rounds 1 and 2
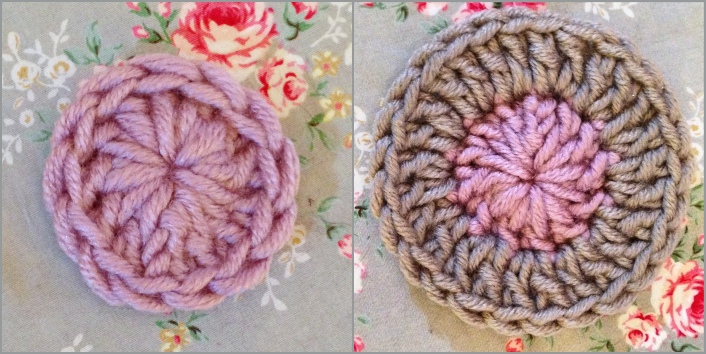
Start with a magic ring. Make 3 chains and 12 dc into the ring, which will give you 13 stitches in Round 1, shown on the left in the photo above.
For Round 2, make a dc into one of the dc stitches in Round 1. Work a second dc into the same stitch and complete the round making 2 dc into every stitch.
By working 2 stitches into every stitch, you’ve doubled your stitches in Round 2. You now have 26 stitches.
Rounds 3 and 4
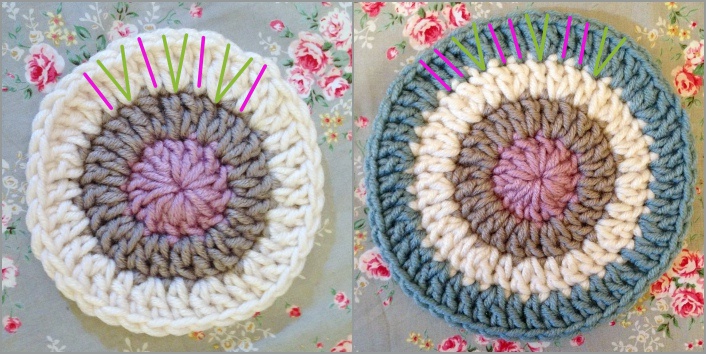
In the photos above, the increase stitches are highlighted with green Vs and the single stitches are shown in bright pink lines. In Round 3, shown on the left, there is an increase every other stitch. In Round 4, shown on the right, there are two single stitches between each increase.
Keep Counting
An easy way to make sure you’re on track in each round is to count your stitches. Remember, you’re increasing by the same number of stitches you started with in Round 1. So, because our example started with 13 dc, each subsequent round increases by 13 stitches.
- Round 2: 26 (13 sts from previous round + 13 sts increased)
- Round 3: 39 (26 + 13)
- Round 4: 52 (39 + 13)
- Round 5: 65 (52 + 13)
- Round 6: 78 (65 + 13)
Give Spirals a Go
There’s another method for crocheting flat circles, used primarily in amigurumi: instead of joining each round and making a complete ring, you work in an ever-growing spiral pattern. The same formula for increasing applies.
How to Fix Mistakes

Although the above tips will give you perfect, flat circles 95 percent of the time, there’s still a chance things can go wrong. After all, your tension could be off, or you could accidentally repeat a row or forget a few increases. When that happens, you may find yourself with a wonky-looking circle. Here’s what to do in each situation.
The Potato Chip
Compared to the flat circle in the center, the one at the top right looks super ruffled — that’s the potato chip effect. This is what happens if there are too many stitches around the outside of your growing circle. In this example, rounds 1 and 2 are correct, but the others have too many increases.
If your circle shows signs of ruffling, try pulling back a couple of rounds and skip a round. For instance, you could pull back to round 4, then crochet round 6 instead of round 5 before carrying on. Because you’re skipping a set of increases, you’ll have fewer stitches and hopefully a flatter edge.
The Bowl
The example on the top left shows what happens if you complete rounds 1 and 2 correctly, but then continue without increasing at all. The sides curl up, beginning the formation of a bowl or basket. When this happens, try repeating the round you’ve just finished. So if you’re on round 5, work another round 5 before going on to round 6. Problem solved!
My Mum taught me how to crochet many years ago, and her method for crocheting a flat circle was the same as you have explained above. She also recommended that we use markers for start of new row until you can do it blindfolded. Thank you and your tip brought back beautiful memories of a beautiful mother.
Thank you. I took a long break from crocheting but have taken it up again pretty seriously this past year. I had noticed this formula for most of the projects I’ve completed. Now that I know, I’m looking forward to creating some designs of my own. Thank you again for clarifying.
I have often noticed on some pattern it only states to increase a few stitches and my circle never turns out very well. I’m so glad to see this tip.
I would like to learn how to crochet small animals but I have trouble getting started.
Telly’s creation
My mother crocheted beautifully. She made doilies, table cloths, and even bedspreads. She tried to teach me but I didn't have the patience to past a chain stitch. (I can make very long chains!) Mom is gone now but I really want to learn. I bought a teach yourself crochet book and basic supplies. I know I will really enjoy this site.
Great demonstration!
Looks easy enough.
Great instructions!
I love to crochet, been crocheting for over 40 years, love it and I love this tip, sometimes I make a perfect circle and sometimes no, thank you would live to have a copy of this formula. I also am into cardmaking and wreath making. Love to work with wood.