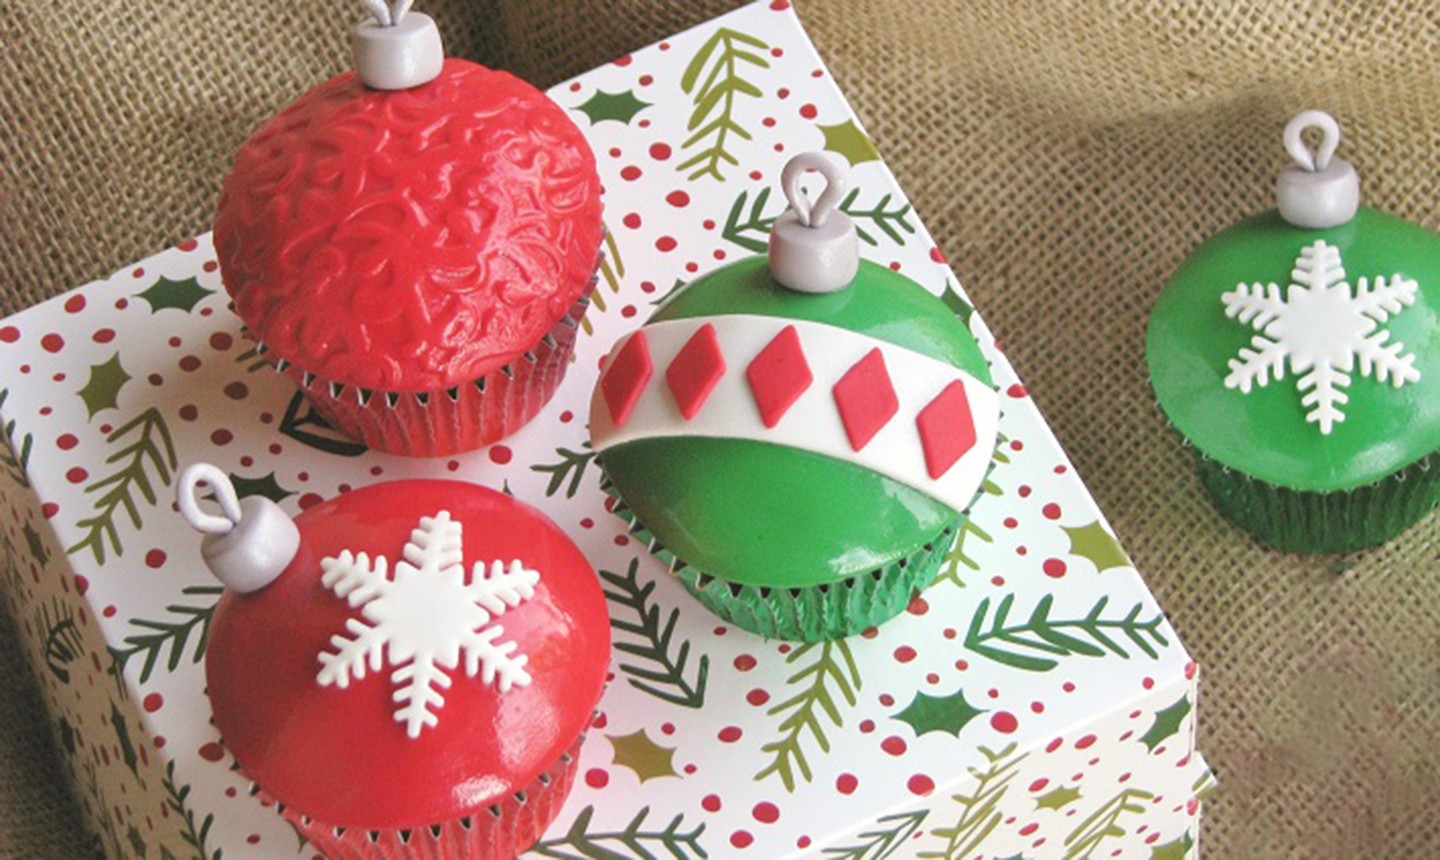
While we wouldn't suggest putting edible cupcakes on your tree, these ornaments are cute enough to do just that. They're sweet, festive and will definitely bring the holiday cheer!
Christmas Ornament Cupcakes
Level: Easy
What You Need
Instructions
1. Color Your Fondant
Separate your fondant into fourths. Leave one white, then color the others red, green and light gray.
2. Make the Ornament Cap
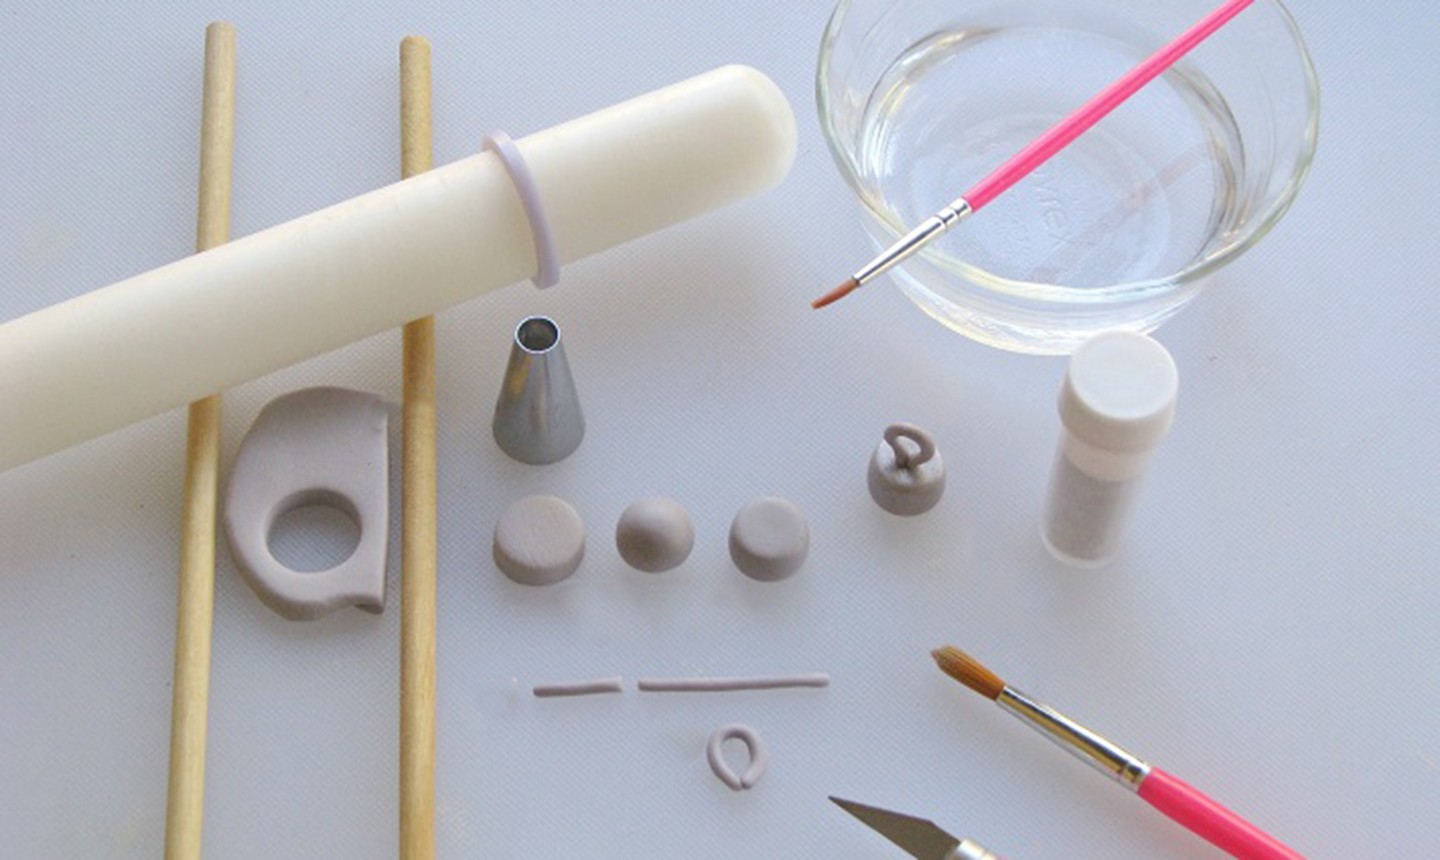
Roll a piece of light gray fondant until it's about ¼" thick. (We used a rolling pin and ¼" wooden dowels as guide rings.) With the bottom of a piping tip, cut out a small circle.
Roll the circle into a ball with your fingers, then press the top and bottom into a flat cylinder.
Roll some additional light gray fondant to create a thin, spaghetti-like shape. Trim it to approximately ¾" long, then bend both ends down so that the tips touch, creating a loop.
Brush silver luster dust over the cylinder and the loop. Glue the two pieces together and set it aside to dry. Repeat this step for each cupcake.
3. Add the Fondant Base
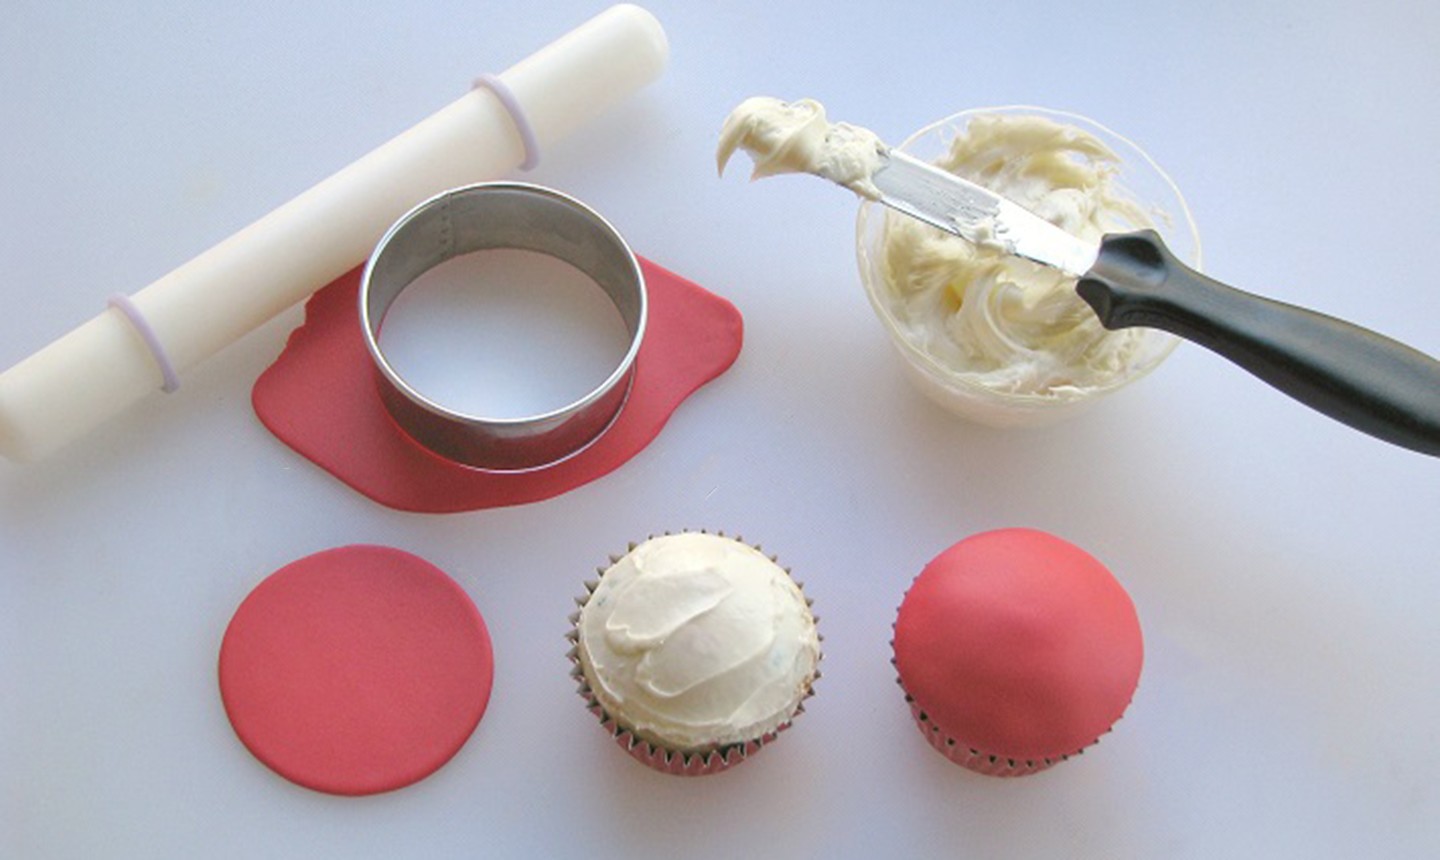
Roll out red and green fondant until each is about ⅛" thick. Cut out a circle (in either color) with the round cutter.
Use the small spatula to lightly ice a cupcake.
Pro Tip: Be careful not to apply too much icing, or it will seep out when you add the fondant. You just need a light layer.
Gently press the fondant onto your cupcake, patting down the sides to secure it in place. Repeat these steps until each cupcake has a red or green fondant top.
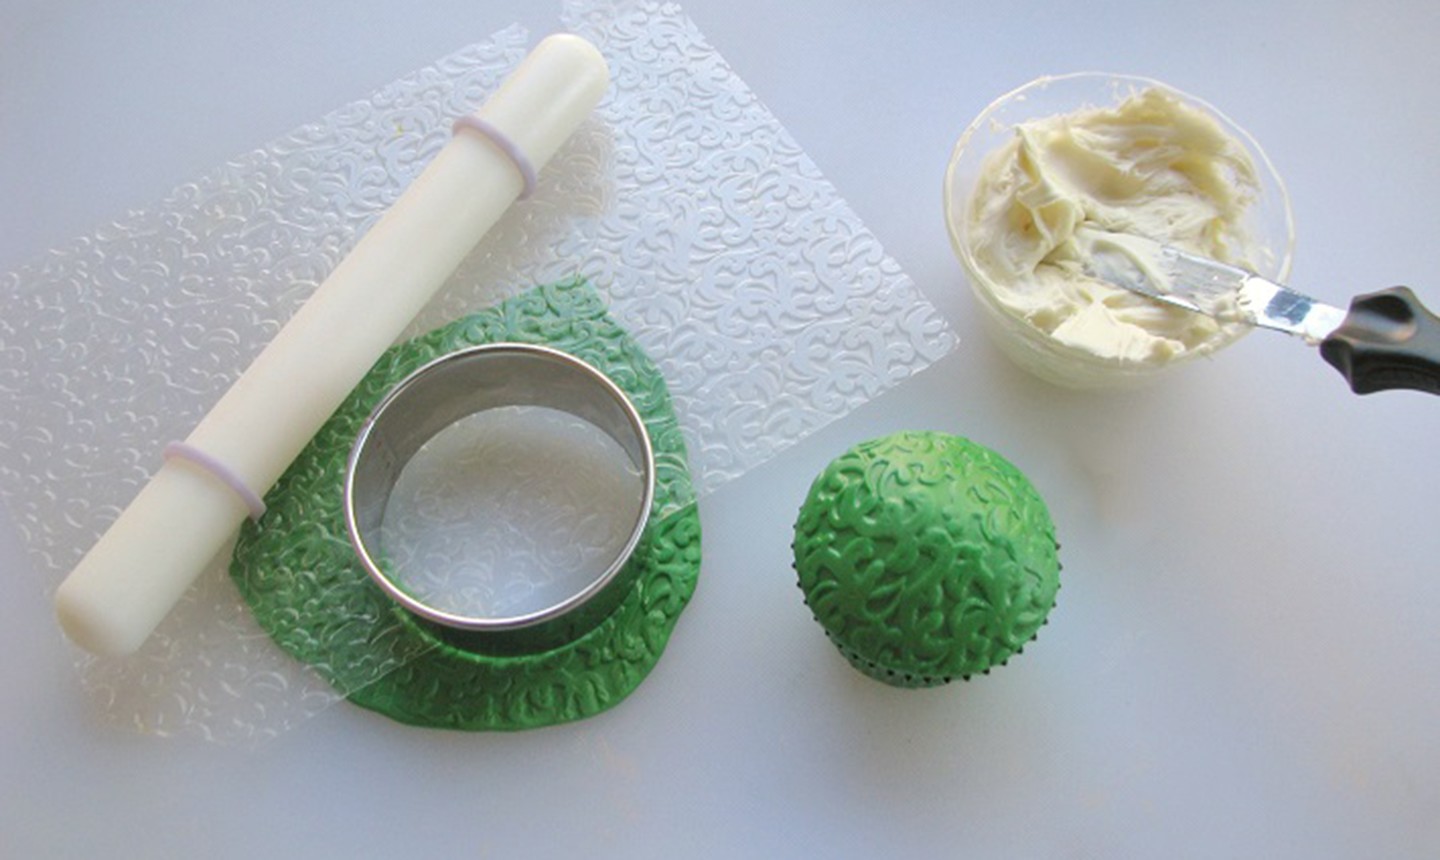
You can also add texture to your ornaments by using an embossing mat. Simply roll your fondant so it's a bit thicker than the usual ⅛" and brush on a thin layer of vegetable shortening. Place your embossing mat over it and roll with your rolling pin. Then, just like before, cut out a piece with your round cutter and place it on an iced cupcake.
4. Decorate
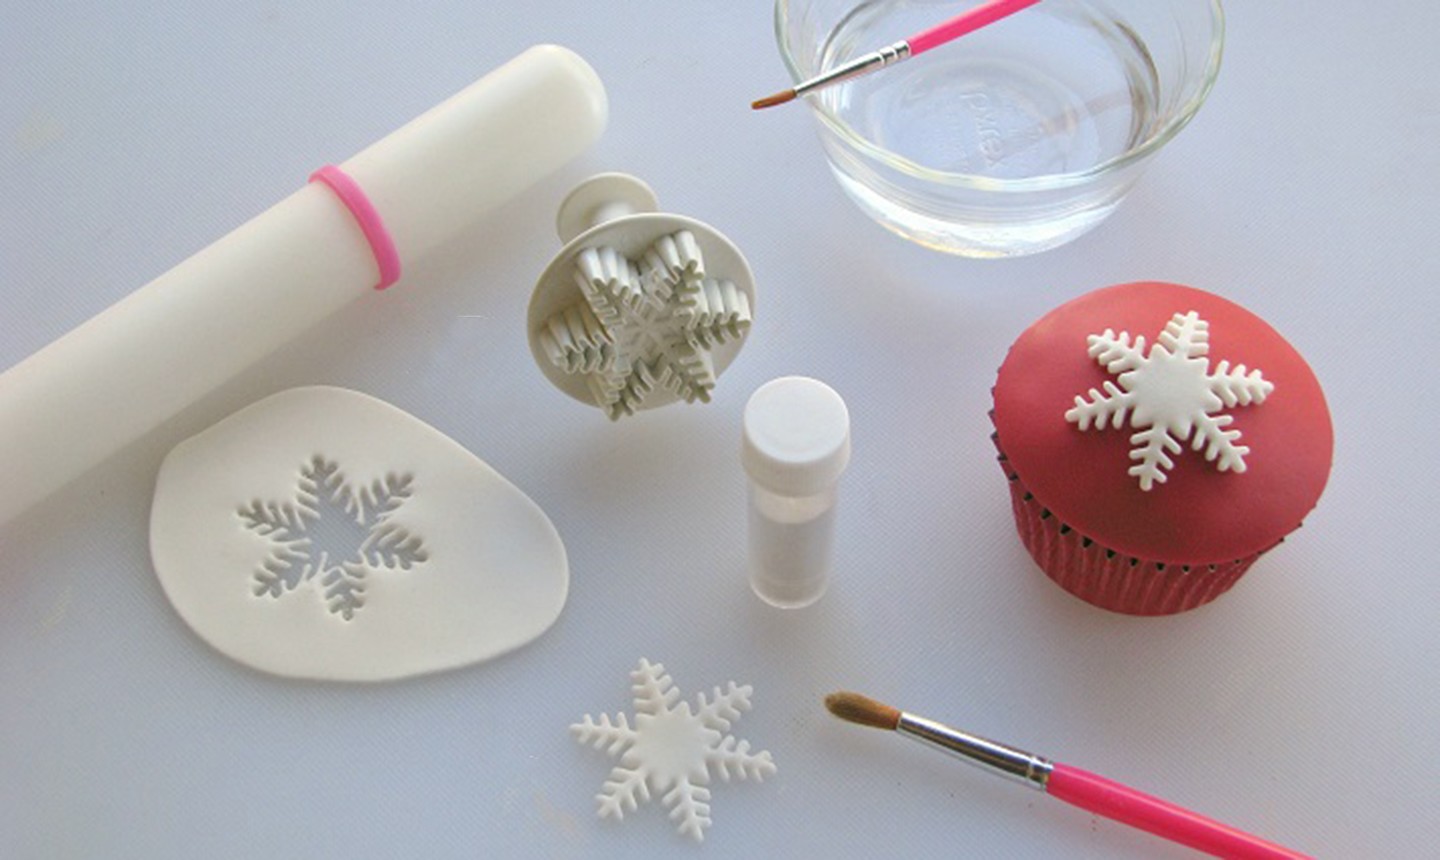
Roll out white fondant until it's 1/16" thick. Use a cutter to make a snowflake and brush with luster dust. Add edible glue to the back and press onto your cupcake so it's a little off-center. (This will leave room for the ornament cap.)
Roll out another piece of white fondant until it's about 1/16" thick. Using the rolling pastry cutter, trim a long piece approximately ¾" wide and the length of the top of the cupcake. (Use the circle cutter to cut if you need.) Place the strip on top of the cupcake, again placing it off-center to leave room for the ornament cap.
Roll out more green and red fondant and cut out five diamond shapes with your cutter. (If you don't have a diamond cutter, use your X-ACTO knife.) Use edible glue to secure them across the white strip.
5. Add the Cap

Finish your ornaments by adding the looped cap. If you want them to be shiny, mix equal parts clear alcohol (like vodka) and corn syrup and lightly paint over your fondant.

These are adorable! I may have to make some this year. Thanks for the idea.