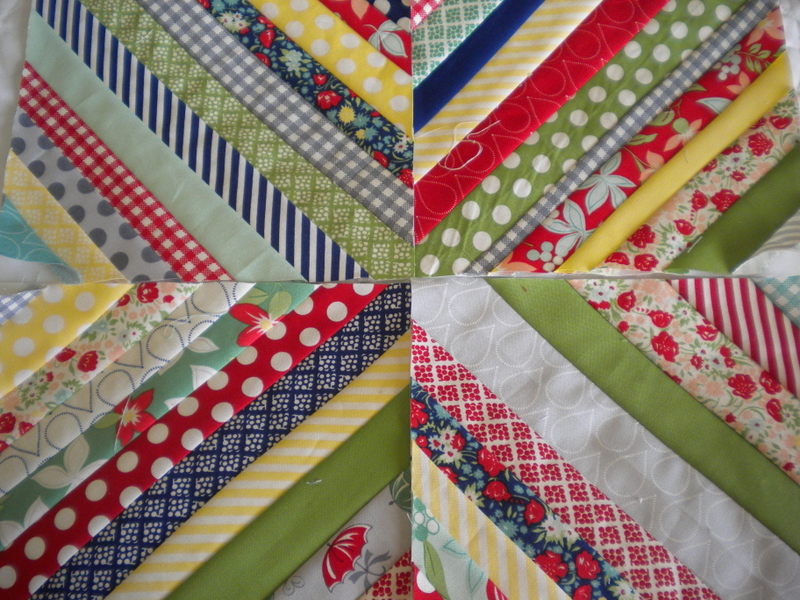
Rule number one: don't throw out those fabric scraps, even the thinnest of strips. After all, you can use 'em to make a totally new project — like a string quilt! These block are simple to quilt and make use of every bit of your fabric stash. What's not to love?
String Quilt Block
Level: Easy
What You Need
Good to Know: Your fabric can vary in width, but keep in mind: strips smaller than 1¼" won't show up well in your final block, and strips larger than 2½" tend to take up too much space.
Instructions
1. Cut Your Squares
Cut the squares needed for your block's base. The squares can be any size you want — just add ½" to whatever you want your finished blocks to be. For example, if you want 8" finished blocks you should cut a 8½" fabric square.
Pro Tip: To keep the square from being too bulky, use a very thin piece of batting, or even a piece of flannel or corduroy instead.
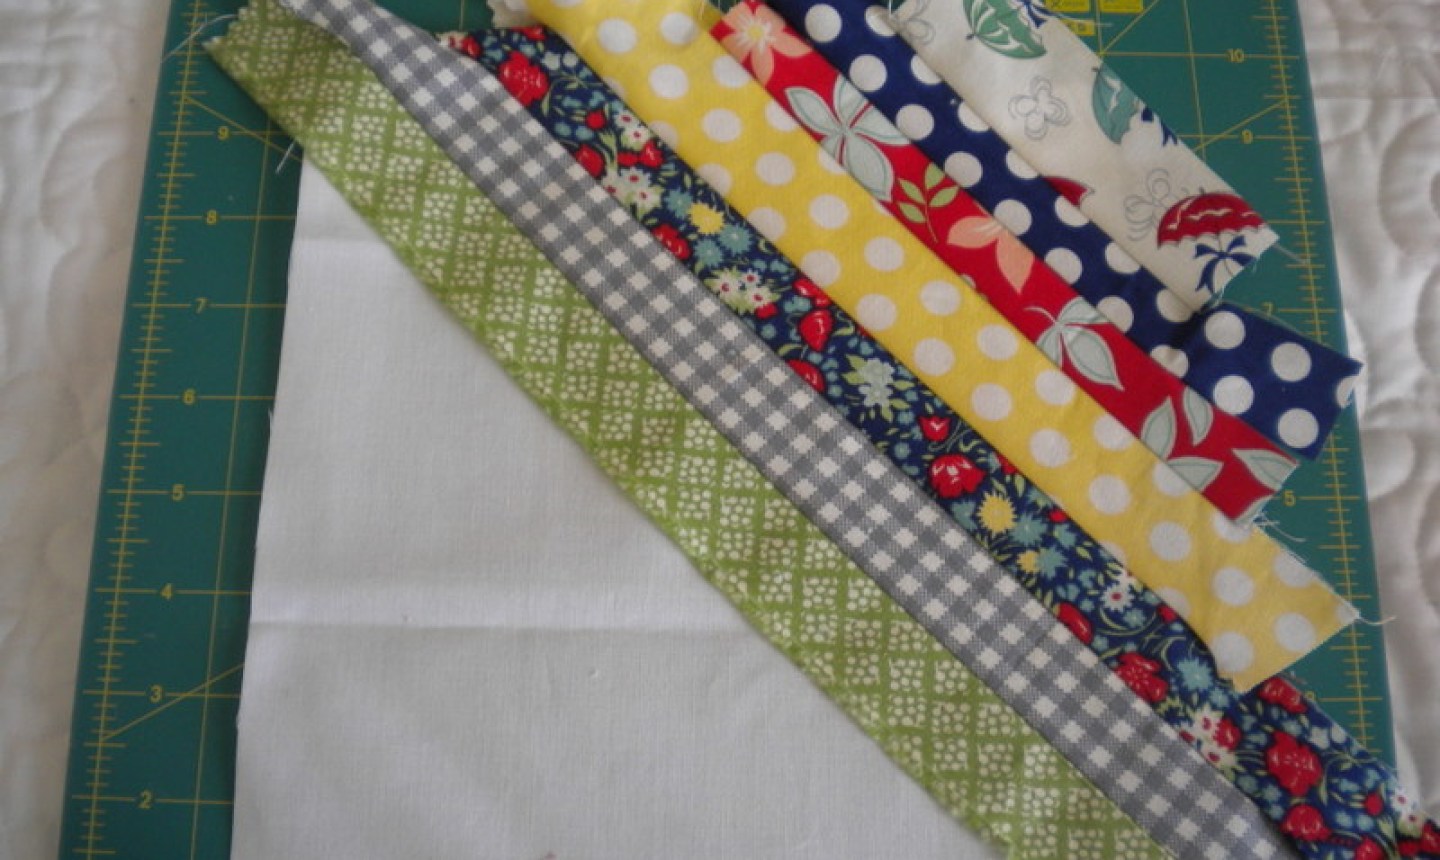
2. Place the First Strip
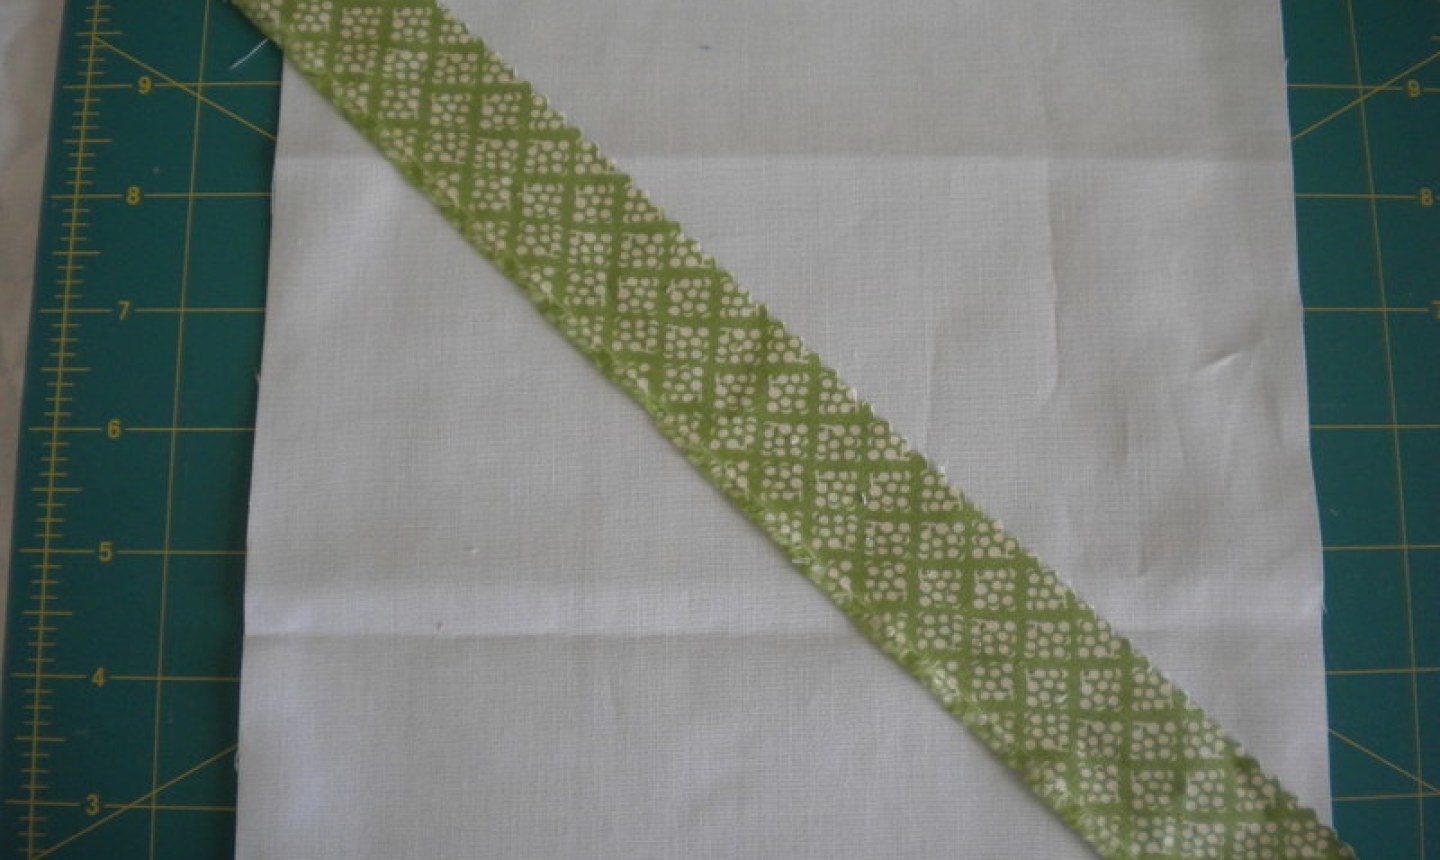
Begin by placing one strip of fabric diagonally across the foundation piece, right side up. Secure the strip with a few pins or dots of appliqué glue to keep it from sliding.
3. Sew the Strips
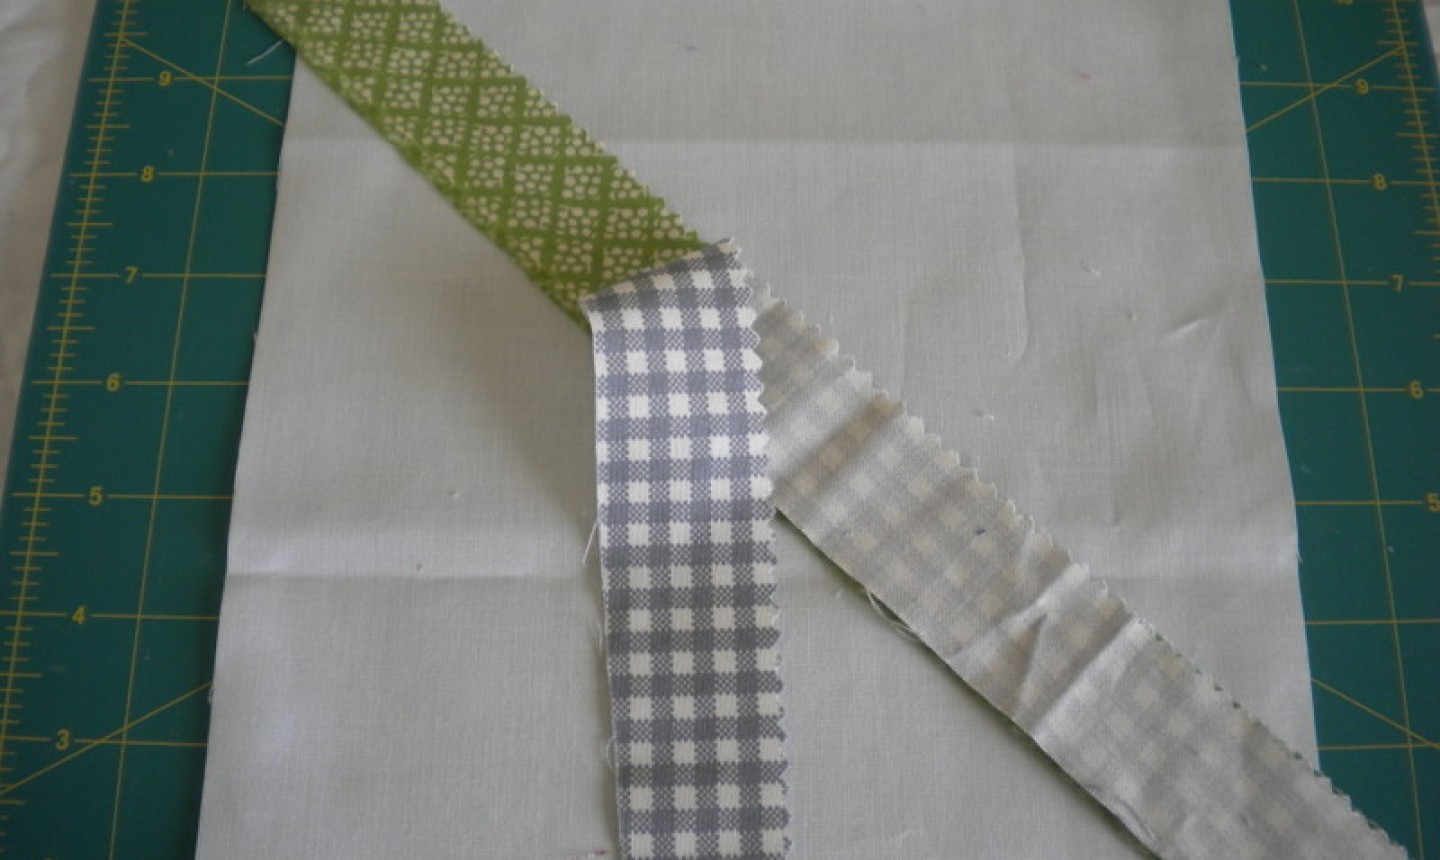
Place another fabric strip on top of the center strip, right sides together. Sew through all layers using a ¼" seam allowance. Press to set the seam, then press the seam open.
4. Continue Sewing
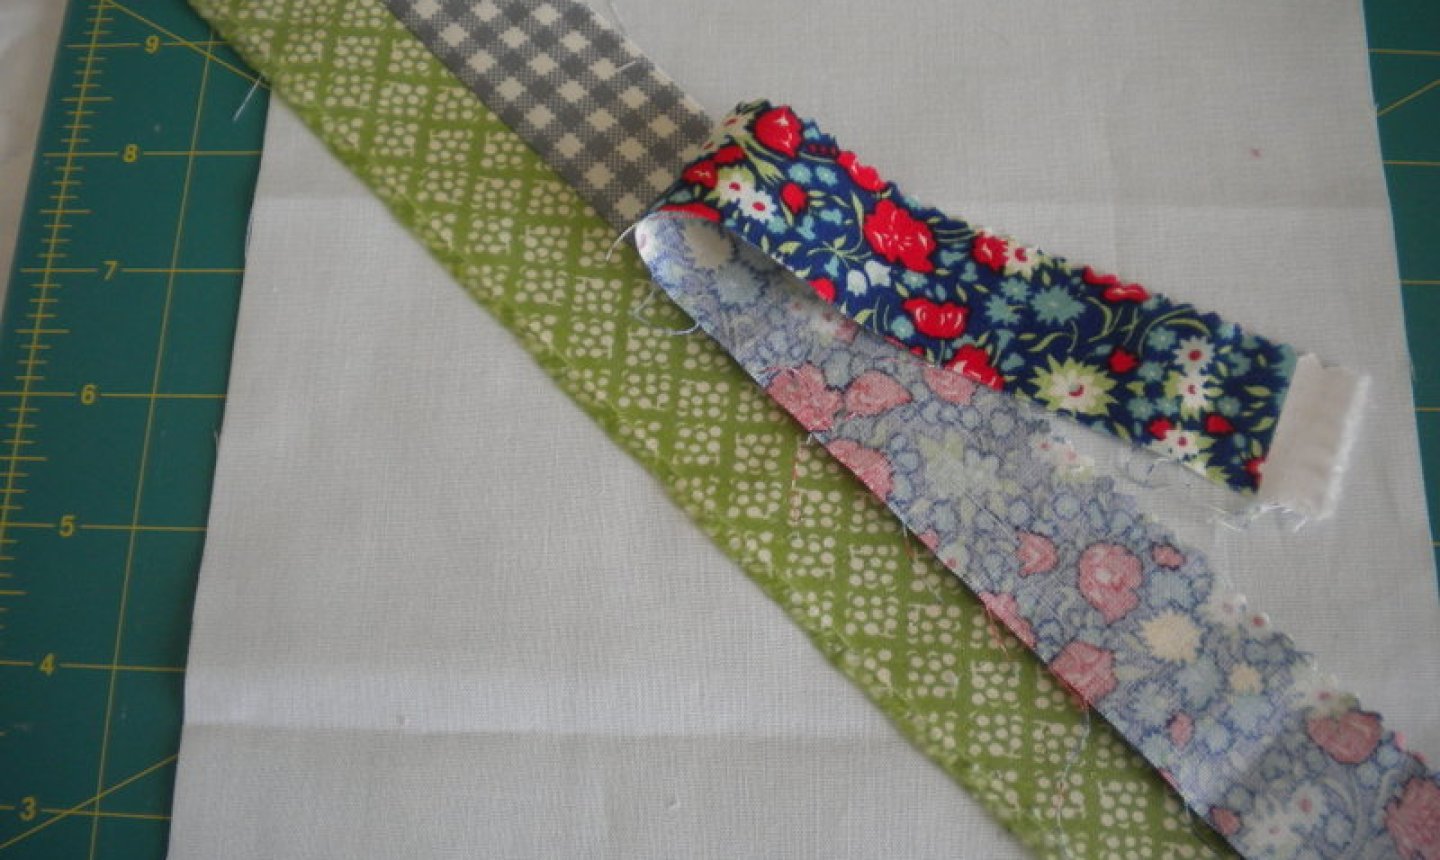
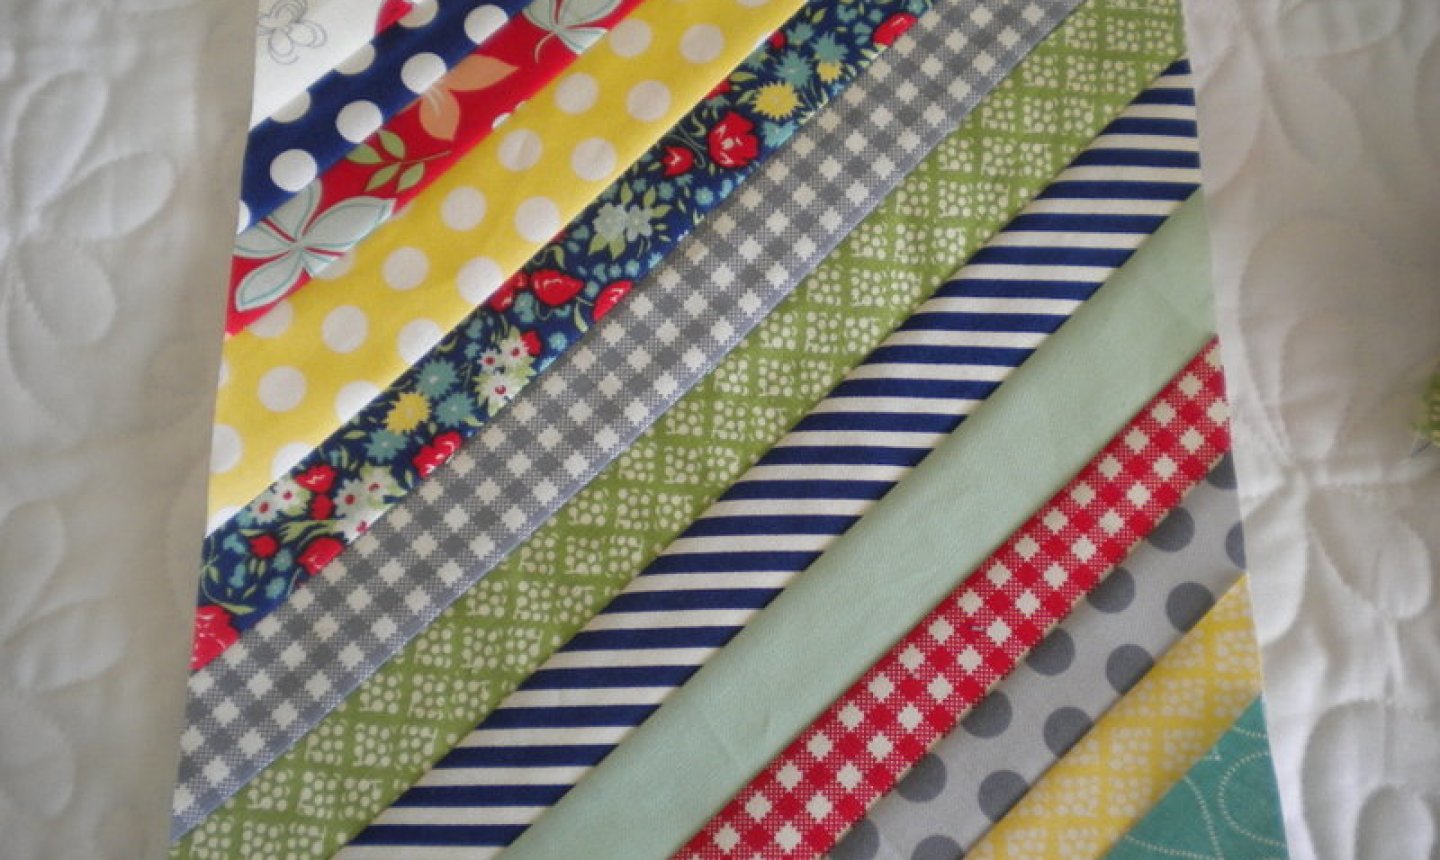
Add more strips using this method until one side of your foundation fabric is completely covered.
Then fill in the second half of the square in the same manner.
5. Trim
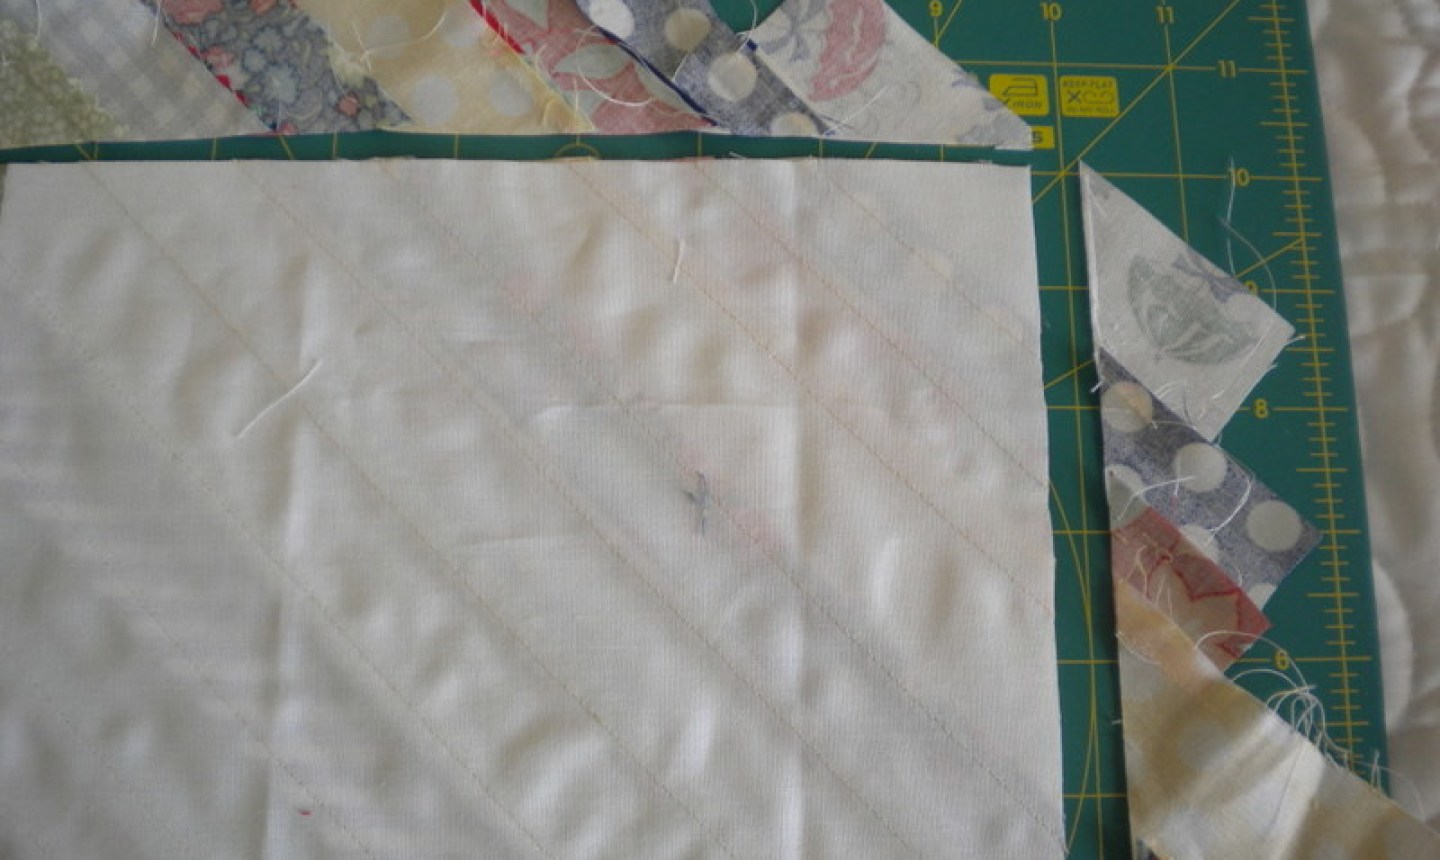
When your square is completely covered with strips, flip it over. Use a ruler and rotary cutter to trim the strip pieces so they're even with the edges of the square.
You have your first string block! Keep making more to make a gorgeous scrappy design.

I am interesting for crafting
How do you sew the blocks together to make a throw or blanket
How can I get a copy of this pattern: “String Quilt Block for a Fun, Scrappy Project”? Thank you.
Very good.
Need your Help....
I am a new quilter and wondered what to do with my pieces of left over fabric. Can't wait to get started.thank you
Can’t wait to try
Good afternoon, I just finished a scrappy string quilt as you described with the piano key border. It is SO pretty! Wasn't sure how it would turn out. Now, my question is--what do you recommend as the quilting (hand quilting) design? I was thinking "stitch in the ditch" on the blocks and keys with an X-variant (to mimic the blocks) in the sashing. A seasoned machine quilter friend recommended a swirly design on the sashing and borders and an overall design for the blocks. I'd appreciate your input. Many thanks, Lu Eisler
I like this idea
Would love this pattern thanks....looks amazing!