Nothing is more luxurious than clothing made of silk fabric. For any garment sewer, it is the ultimate fabric to work with and almost guarantees compliments. But, sewing with silk often comes with its fair share of challenges. Knowing what they are up front and learning how to deal with them will help make sure the end result is worth both the investment and effort. Keep reading for 10 tips to help sewing with silk.
For the most part, sewing with silk is not any different than sewing with any other woven fabric. The luxurious nature of the fabric itself is what makes working with silk a bit more of a struggle. Issues typically involve the fabric care, pressing, sewing seams, finishing and using the correct tools to prevent damage to the fabric.
Here are the top 10 tips for sewing with silk fabric:
1. Avoid water marks by prewashing.
Always test your silk before you begin for the likelihood of showing water marks. This can be a real challenge as pressing, especially with steam, is an essential part of sewing any garment, silk or otherwise.
Lots of silk fabrics these days are washable. The best way to combat marks from water is to wash the silk before you begin. Once washed, water spots don’t linger and simply evaporate away. But, with some silks, the finish is ever-so-slightly changed when washed. Still, I prefer that to having to worry about splashes staining my garment or the expense of dry cleaning.
2. Use weights and a rotary cutter.
Many types of silk are lightweight, which means they tend to slip and slide all over the cutting board. Use pattern weights to hold the fabric to the board and use a rotary cutter with a fresh blade for the best and most accurate cuts. Both the weights and cutter prevent the fabric from shifting about so patterns are cut accurately.
If you don’t have a rotary cutter, your next best option is to use micro-serrated shears. Unlike regular dressmaker shears, the serrated blades grip and hold the fabric so the fabric won’t slip away.
3. Test fabric pens.
Be especially careful with fabric pens as some may bleed or will not totally disappear as expected on some silks. Test before you mark. This is especially true for tailor’s chalk. Pressing will melt away the color but leaves a stain on the fabric. Consider the sharp point of a regular pencil for marks that will be concealed within seam allowances or use tailors tacks.
4. Avoid permanent marks from pins and needles.
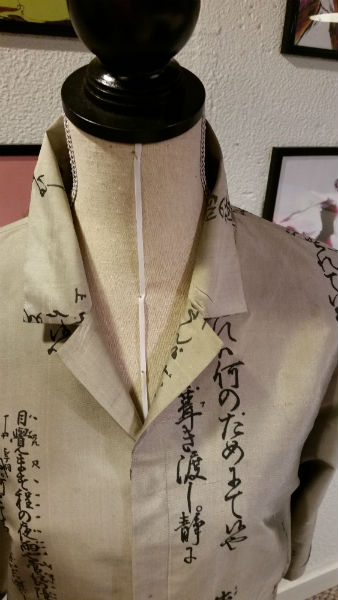
Pin and needle holes in some silks, like shantung, are permanent so there are no do-overs. This means prep and fit twice, sew once! Do all your fitting before you cut out the first pattern piece as ripping out a seam will leave marks! Or, hand baste seams in place using silk thread to check the fit before any final and permanent stitching is done.
5. Use the right pins and needles.
Use the right needles and pins when sewing with silk. Extra-fine or ultra-fine glass head pins and silk pins are your best options when working with silk as they are less likely to show pinhole marks and they will glide through the fabric preventing any unwanted snags.
6. Test your machine.
Test your machine stitching on a scrap of the silk fabric before sewing to check the tension, needle quality, and stitch length. If stitches are skipped or the needle snags the fabric, a new needle is in order. Or, do what I do, start with a fresh new #60 or #70 needle from the get-go.
7. Press carefully.
Ironing silk fabrics requires great care. Again, depending on the silk, some can handle steam, some cannot. With many fine silks, like dupioni and shantung, any pressed creases can be difficult to press out, making any pressing mistakes permanent. Always use a pressing cloth, like a piece of silk organza to protect the fabric. The see-through nature of the organza can prevent any unwanted pressing mistakes.
8. Stray from the fray.
Silk fabric has a tendency to fray a lot! This means any and all measures should be employed to reduce or eliminate excessive fraying as soon as pattern pieces are cut. If you have a serger, keep your sanity by overcasting all the raw edges of each pattern piece before assembling begins.
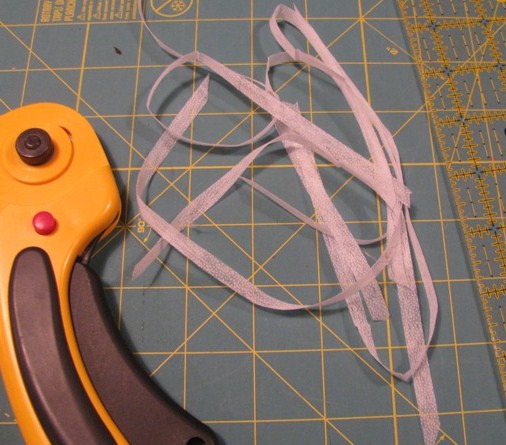
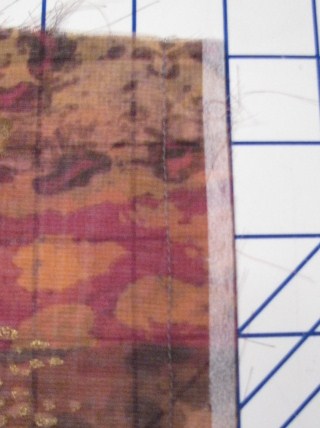
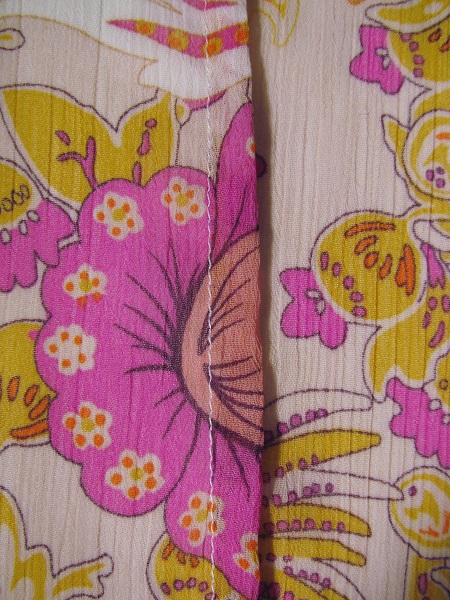
No serger? Do what I do with most sheer or very lightweight fabrics — Fuse narrow strips of fusible interfacing (1/8” – 1/4” wide) along all the edges of each pattern piece. Yes, this is time-consuming, but trust me, well worth the effort as fraying can become so excessive it can significantly reduce your seam allowances along important seams and hems.
9. Sew seams carefully.
Because of the lightweight nature of many silks and the excessive fraying issue, care must be taken when sewing seams. Seam allowances for any unlined silk garment must be finished. And, the type of seams must be carefully chosen. For an unlined shirt or top using lightweight silk, choose either French or Hong Kong seams, flat or faux fell seams or finish the seams with a good overcast stitch.
10. Be patient and plan ahead.
While this shouldn’t need to be said, the better prepared you are up front the less likely you are to make mistakes. That means, get the fit right before you begin, gather the right tools and employ sewing techniques that will produce a finished product that looks as good on the inside as the outside.
How best to store silk I’ve purchased on travels prior to construction?
Wish I could purchase this so I will remember it! Especially the tip on stop fraying!</strong>
Is there a particular type of thread to use? I need to mend the stitching on the waist band of some silk "long johns". Then I will be cutting up my old ones to combine with 100% cotton, 500 thread count to make masks & not sure what kind of thread to use for that. Any help would be appreciated. Thanks