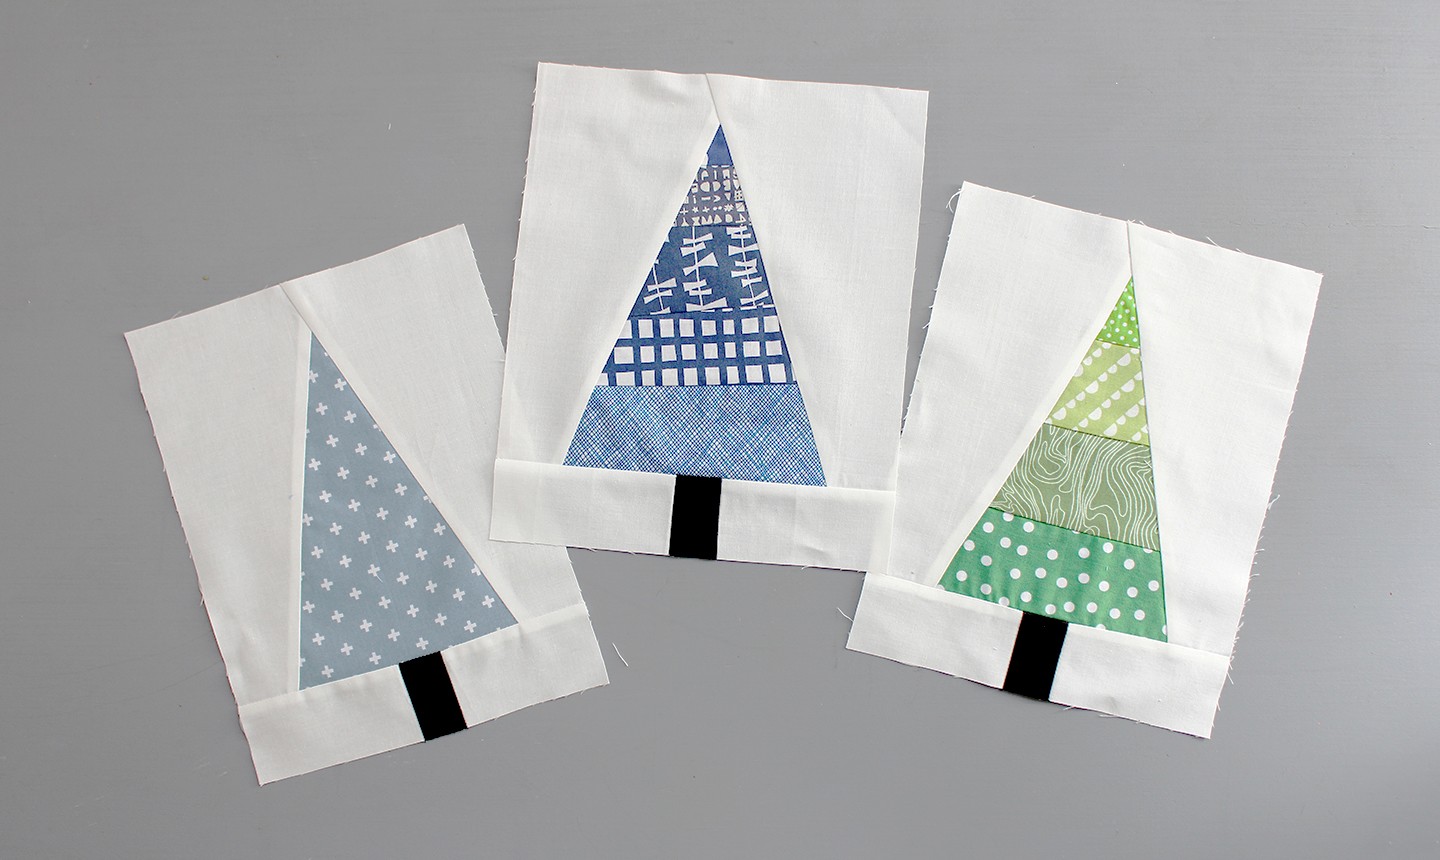
There’s nothing better than using scraps to make a fun quilt block. After all, you already have all the supplies you need! And these cute Christmas trees quilt blocks just so happen to be the perfect holiday project. Not only are they a cool foundation for a pillow or table runner, but you could even transform them into a big ole’ Christmas quilt. Regardless of which direction you choose, these cuties are guaranteed to put you in the festive mood.
Scrappy Christmas Tree Block
Level: Easy
What You Need
- Fabric scraps
- Rotary cutter
- Clear ruler
Instructions
1. Cut the Tree Fabric
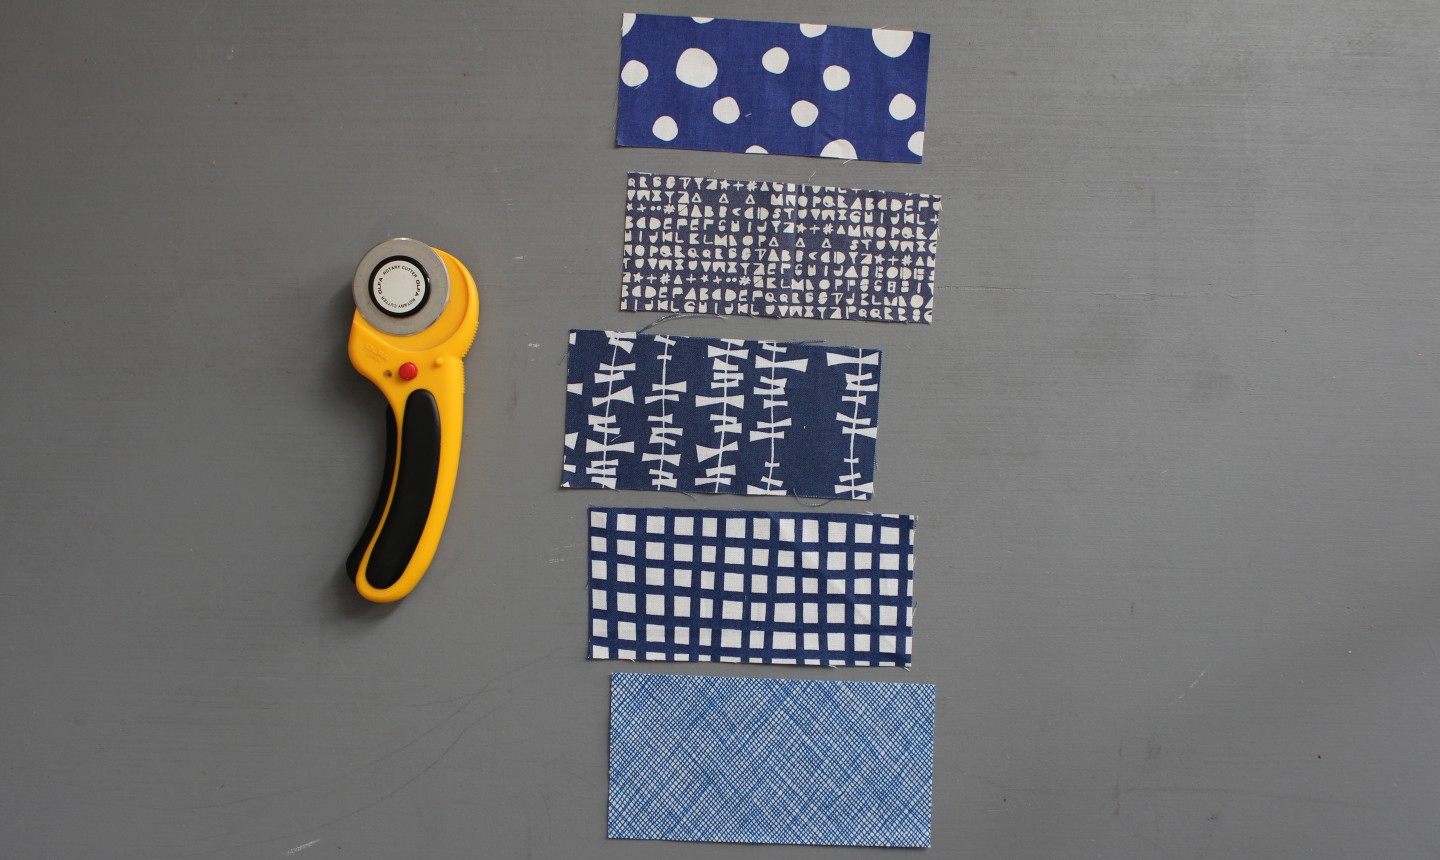
To make the scrappy strips, cut your assorted fabric scraps into pieces so each is between 2 -3″ tall and 4-6½” long.
Pro Tip: Don’t worry about making them all the same size — the variation makes the block look even more interesting.
2. Arrange, Sew, Press
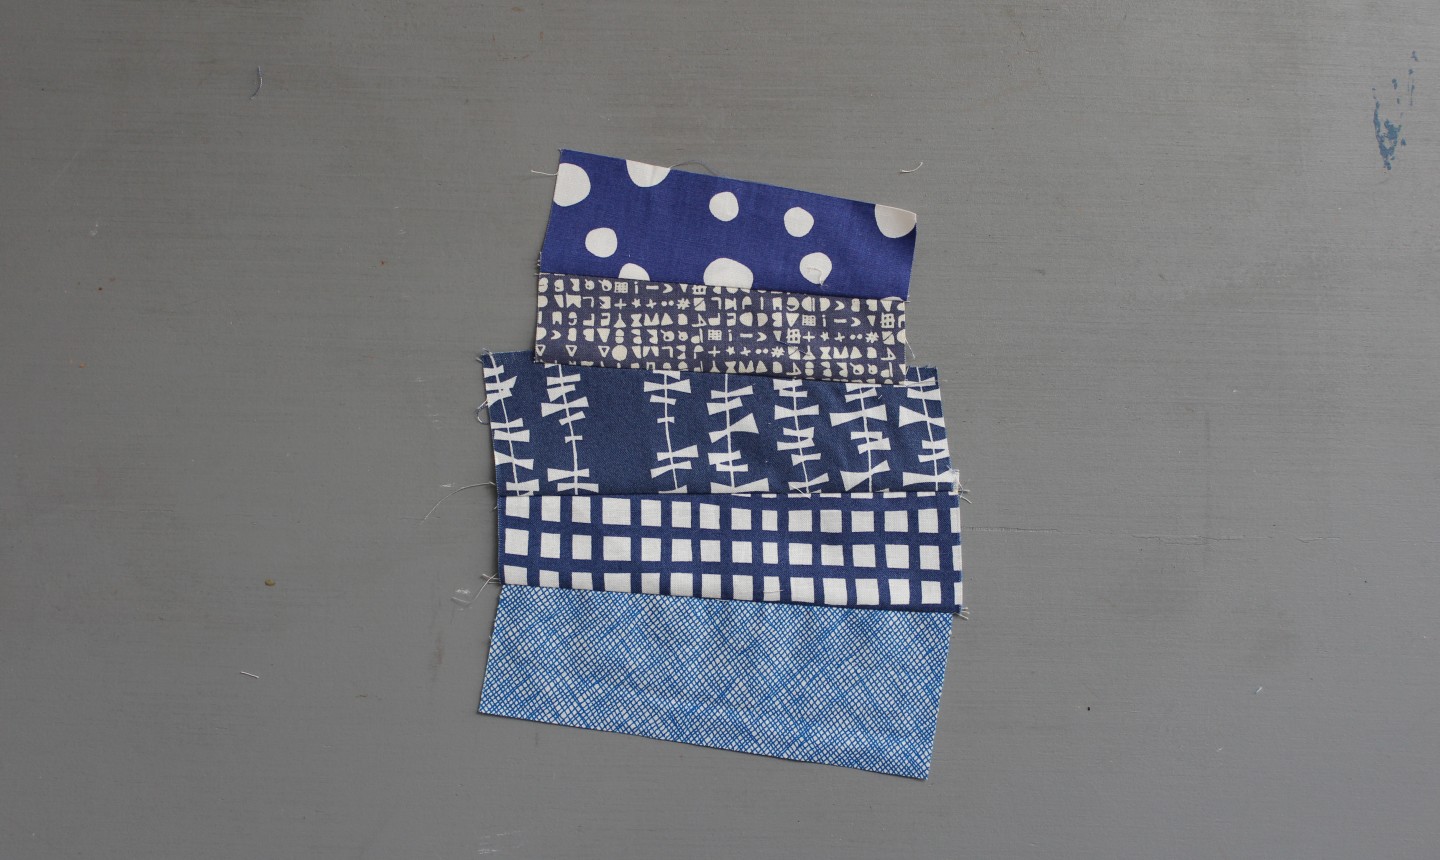
Arrange the strips so the widest one is at the bottom and the thinnest at the top. Sew the strips together using a ¼” seam allowance. Keep most of the strips relatively straight, but sew one or two at a slight angle. For these crooked ones, trim your seams to ¼”.
Press all the strips. Altogether, your piece should measure about 9″ x 6″.
3. Make the Big Cut
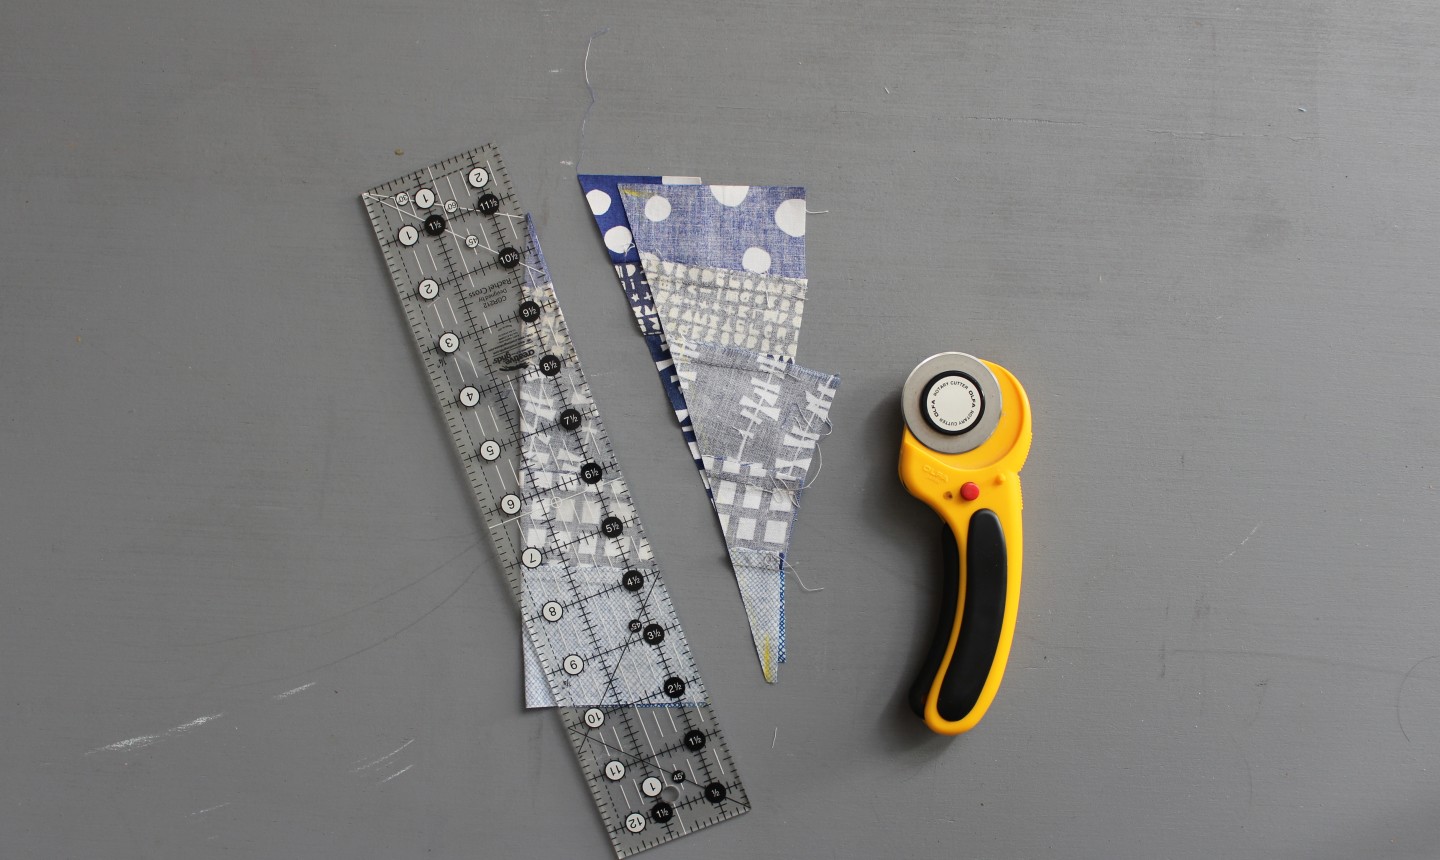
Fold the strip set in half width-wise and line up the folded edge with the 0″ mark on your cutting mat. Align your ruler on the 8½” tall and 3″ wide marks on the mat, then cut along the line with a rotary cutter. When you unfold the fabric, you’ll see your tree!
4. Stitch the Trunk
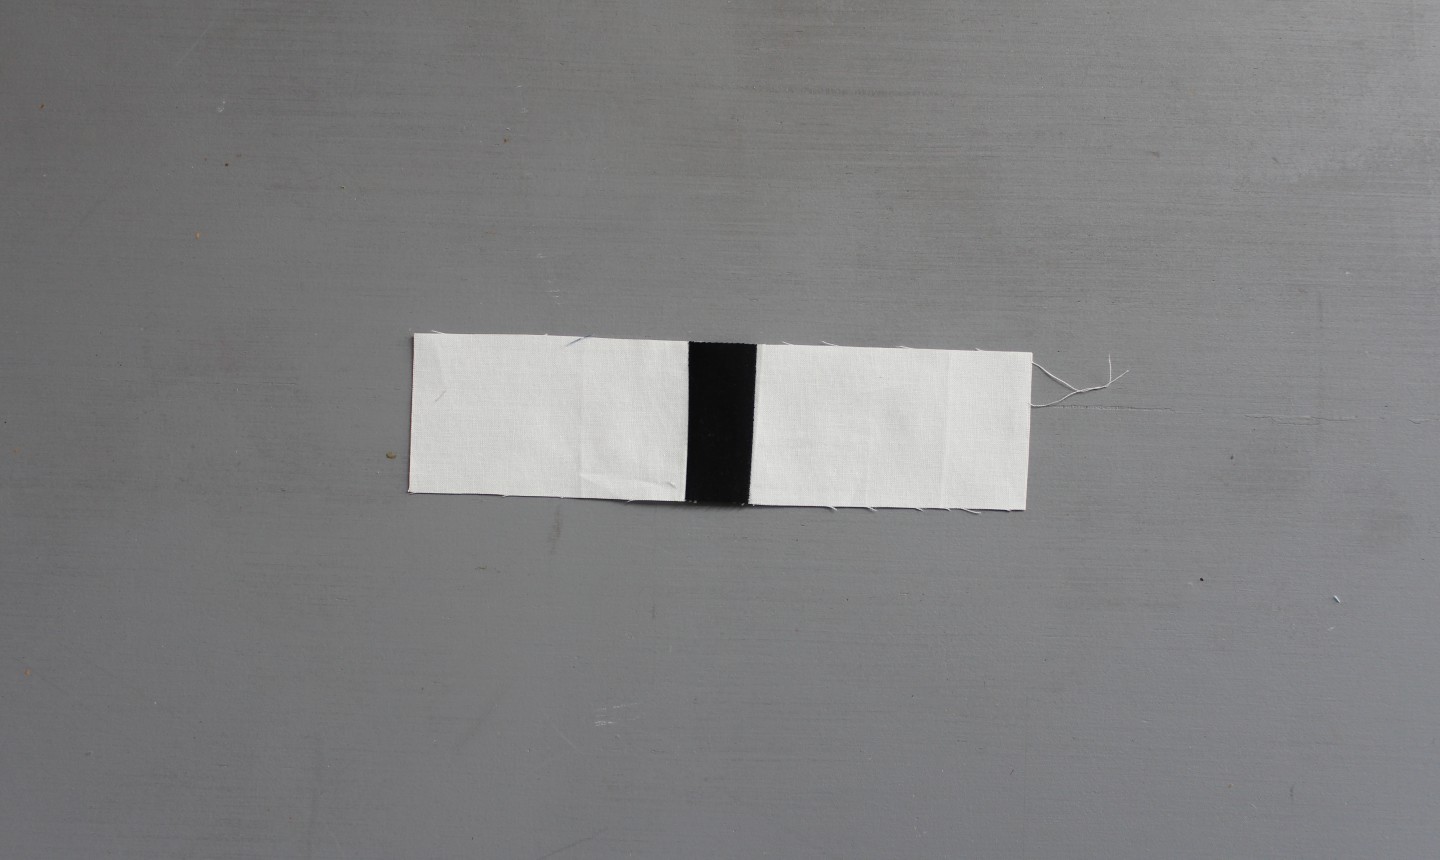
Cut a black rectangle 1½” wide x 2½” tall. Cut two white rectangles that are each 4½” wide x 2½” tall. Sew the white strips to both sides of the black, using a ¼” seam allowance. Press the seams toward the black fabric.
5. Piece It Together
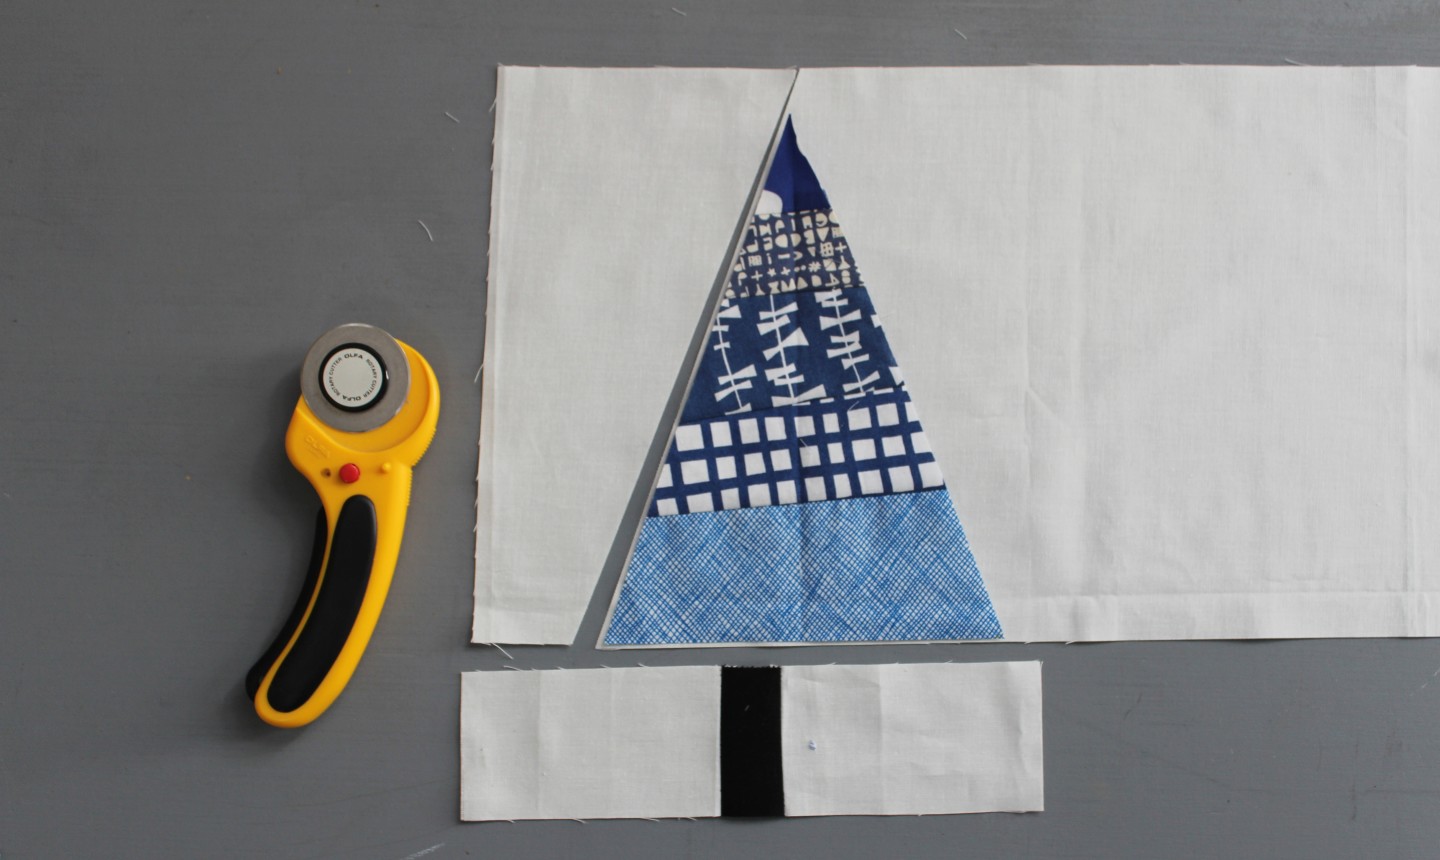
Choose a piece of background fabric that’s about 16″ long x 9½” tall. Arrange the tree trunk strip below the background fabric, so the left edges align.
Center the tree piece on top of the trunk, laying it on top of the white background fabric. Use a rotary cutter to cut the white background fabric along the left side of the tree from top to bottom.
6. Attach the Tree
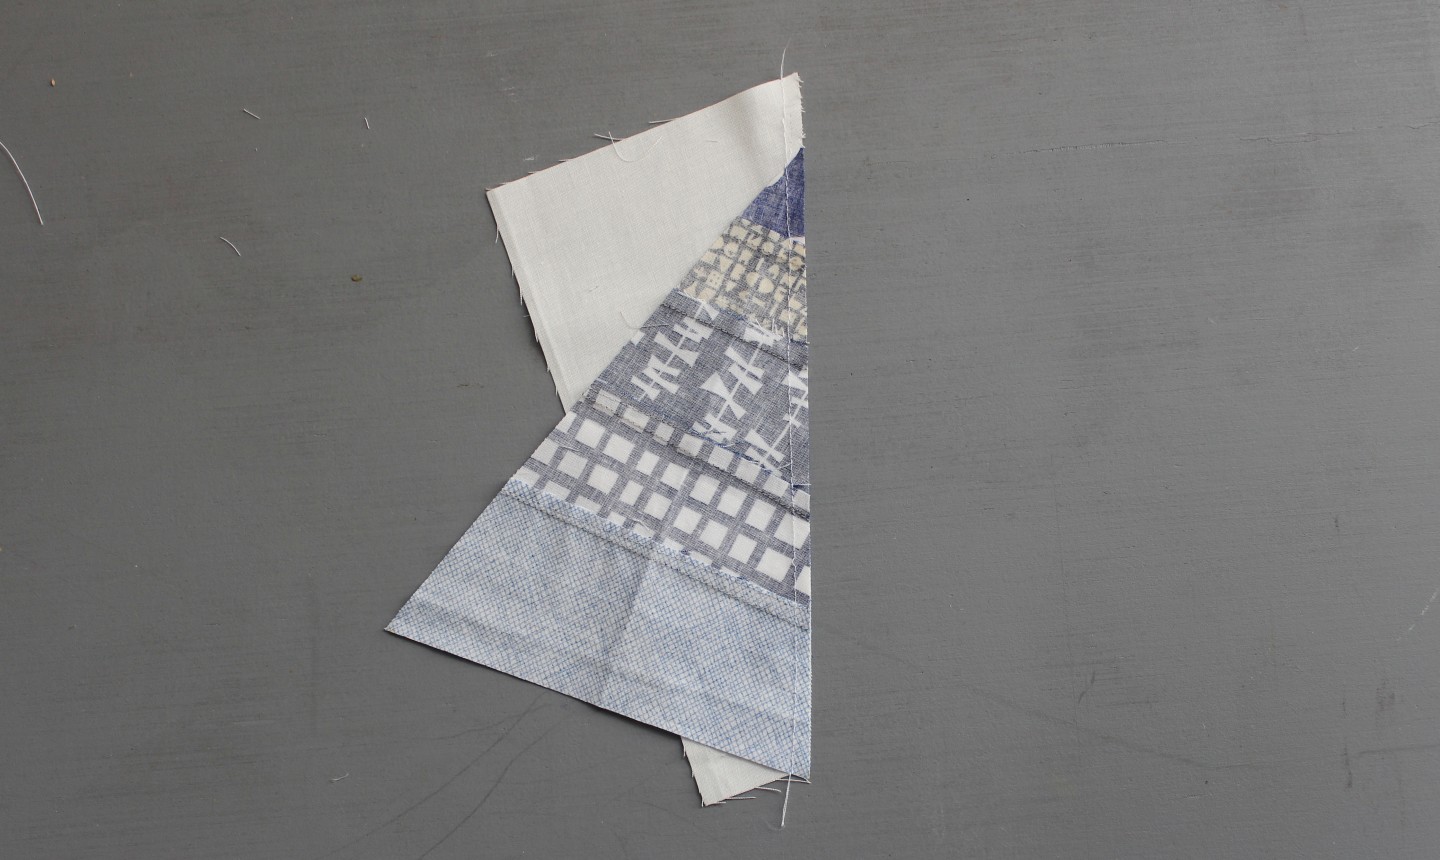
Lay the tree face-down over the line you just cut. Arrange it so the bottom point overlaps the white fabric by ¼ of an inch. Sew the tree to the left background piece using ¼” seam allowance. Press away from the pieced strips, toward the white.
7. Finish the Background
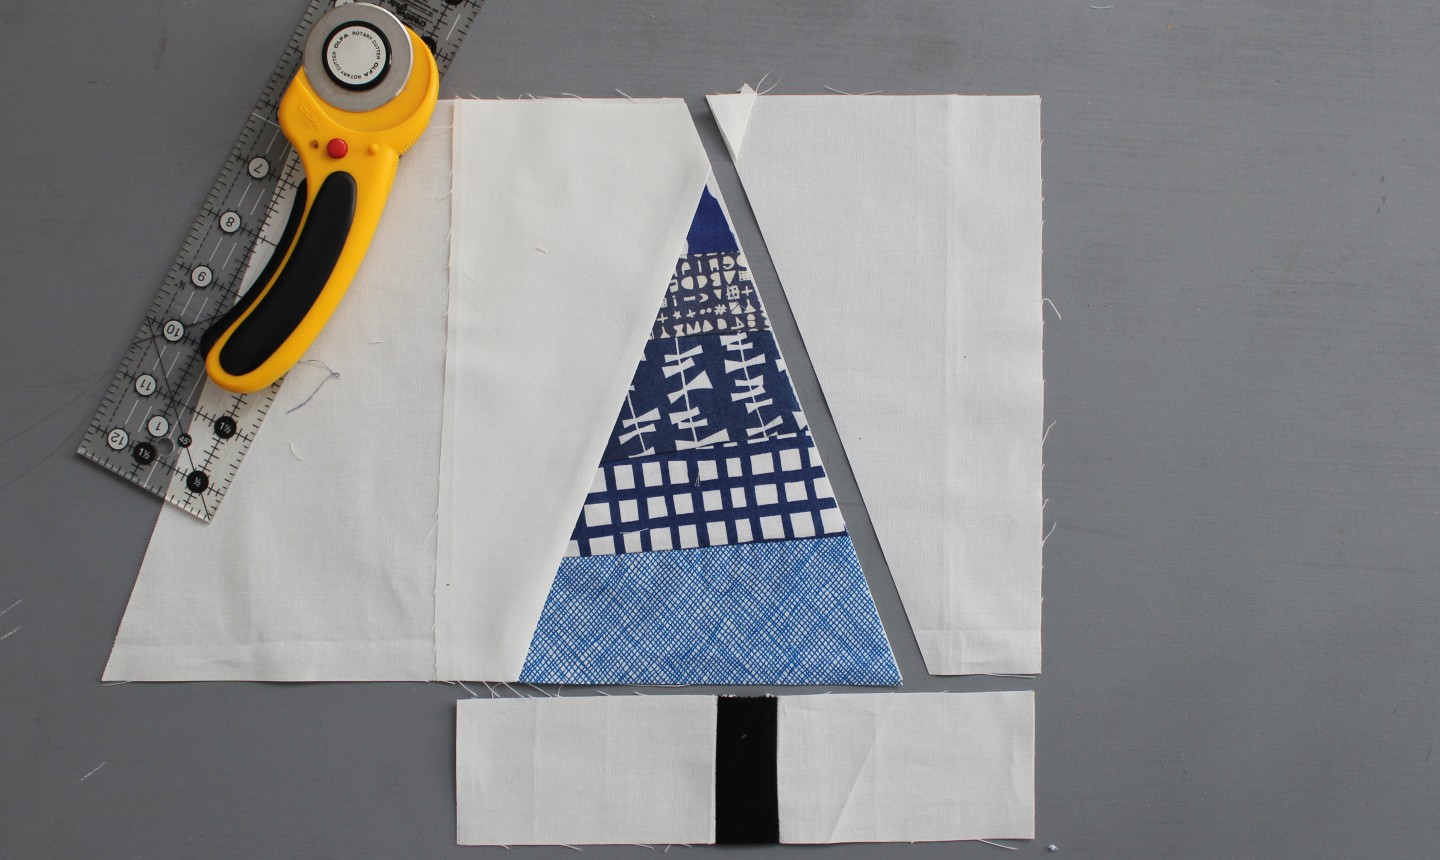
Pick up the straight edge of your remaining white background fabric. Place it above your tree stump, so the left edge extends 1″ to the left of the stump.
Place the tree piece on top and use it as a guide to trim the white background along the right side of the tree, cutting from top to bottom on the white fabric. (Don’t panic if you cut off the tip of the white background fabric in the upper left corner — you’re supposed to!)
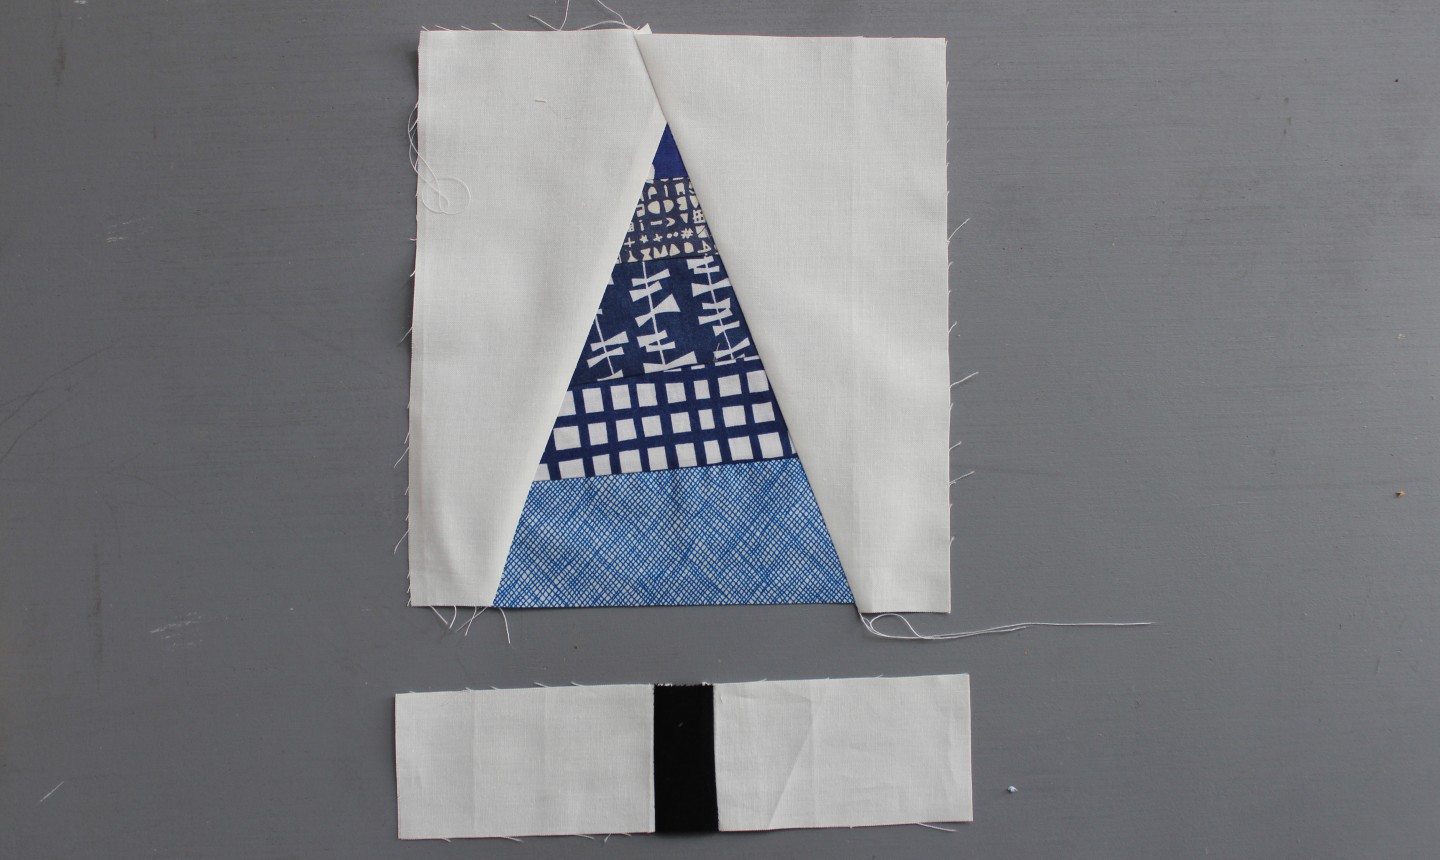
Repeat the steps you used on the left to sew the right side of the tree to the background fabric.
8. Make the Final Touches
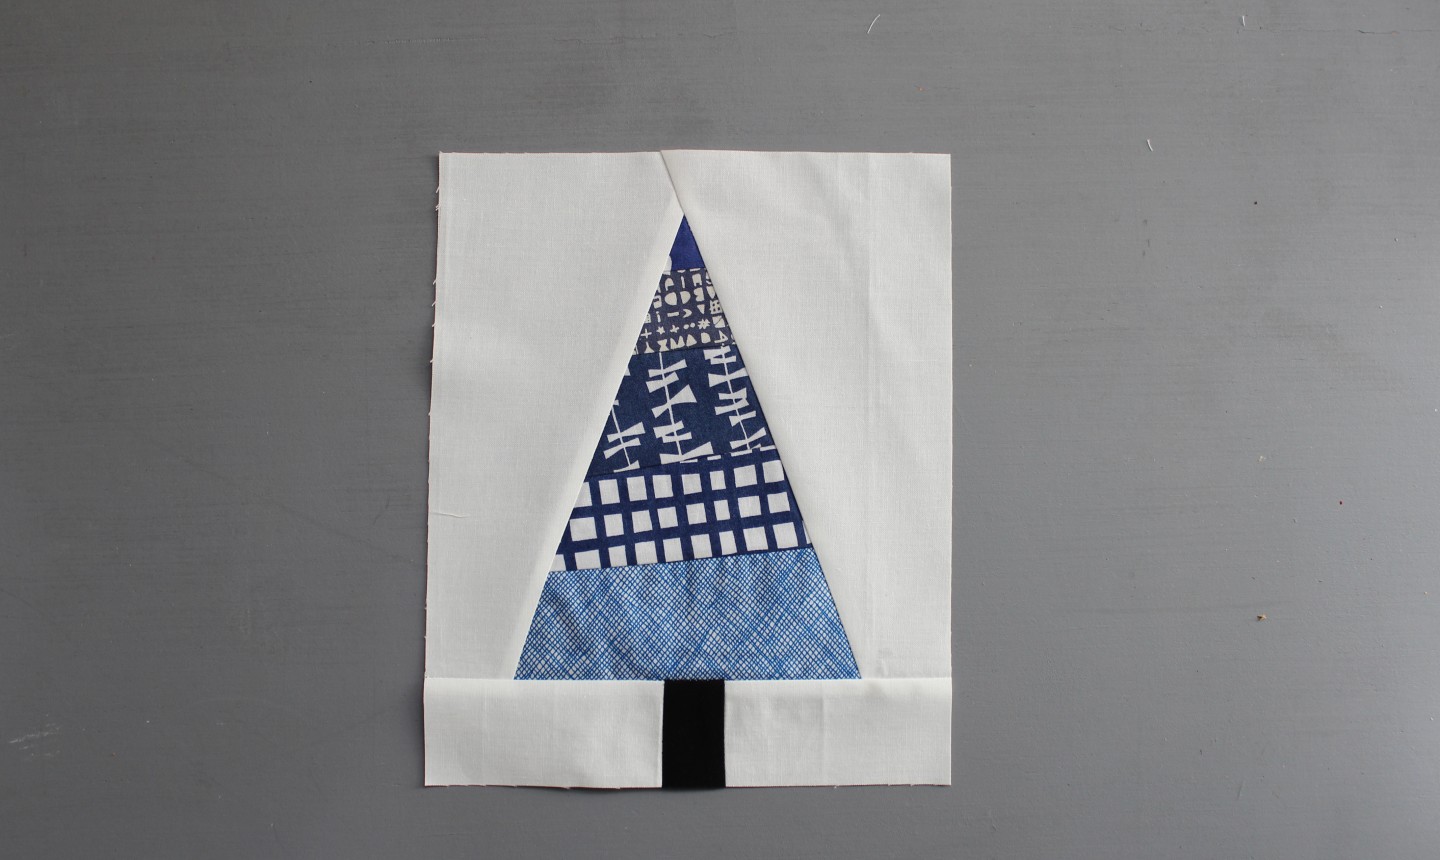
Center the tree stump under the tree. Place the fabrics right sides together and stitch using a ¼” seam allowance. Press the seam away from the tree.
Trim the block to 8″ wide x 10½” tall and press. You can use this finished block as a template to make others, or make it the centerpiece of a larger project.
Photos by Marni Weaver.
Just learning
just learning to quilt, thought I'd make a block a month
A great way to use my Christmas scraps I don’t want to toss. And others as well. Can’t wait to start. Thank you
Thank you. It took me 2 tries to make it right but the 2nd one turned out perfect!
Love this pattern
Great for Christmas cards
Cute idea. Might give a try next year.
cute
Terrific use of fabric scraps, I can see turning the block into trivetl
Thank you for a darling tree pattern