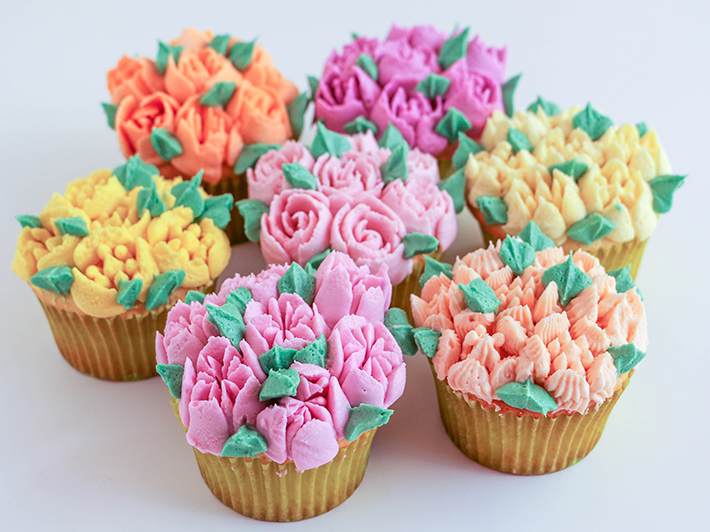
Next time you’re making cupcakes, we’ve got three words for you: Russian piping tips. These new all-in-one tips make it insanely easy to pipe gorgeous buttercream flowers onto cakes, cupcakes or anything you’re baking. Oh hi, birthday-party rock star.
Normally, you’d need lots of skill and years of practice to create beautiful buttercream flowers with detailed centers and delicate petals. Not anymore, at least not when you’re using Russian piping tips. These things will make your buttercream petals blooms even if you’re not exactly a frosting pro.
If you do happen to be a professional baker, these piping tips will let you fill up your bakery case with to-die-for cupcakes in, like, two seconds. Or if you’re a busy mom who wants to crush the next bake sale, look no further. Here are some pointers for getting the PERF results from your piping tips:
Before you pipe: Tips for success
1. Use a Stiff Buttercream Frosting
Swiss meringue and American buttercream both work well. If you use a meringue-based buttercream, you’ll just need to work a little quicker since it softens up faster. In this post, we’re using American-style buttercream.2. Pipe Flowers Right Away or Store Them Properly
You can pipe flowers directly onto a cake or cupcakes. But if you want to make your flowers in advance, pipe them onto small pieces of parchment paper. Then store them in the freezer until you’re ready to decorate.3. Keep Your Piping Tips Clean
Make sure to keep the tip of the nozzle on your Russian piping tips as clean as possible. Extra bits of buttercream will cause your flowers to lose their shape.4. Make Smooth Buttercream
Your buttercream should be perfectly smooth before you fill your bag. The little openings on these piping tips can be pretty unforgiving! Keep a toothpick or skewer nearby to clear away any butter clumps.5. Help the Flowers Stick
You can pipe your flowers onto an unfinished cake or on top of a crumb coat. If you’re using a crusting buttercream, give the cake a quick spritz with water before you pipe to help your flowers stick.How to Decorate with Russian Piping Tips
How to use Russian piping tips
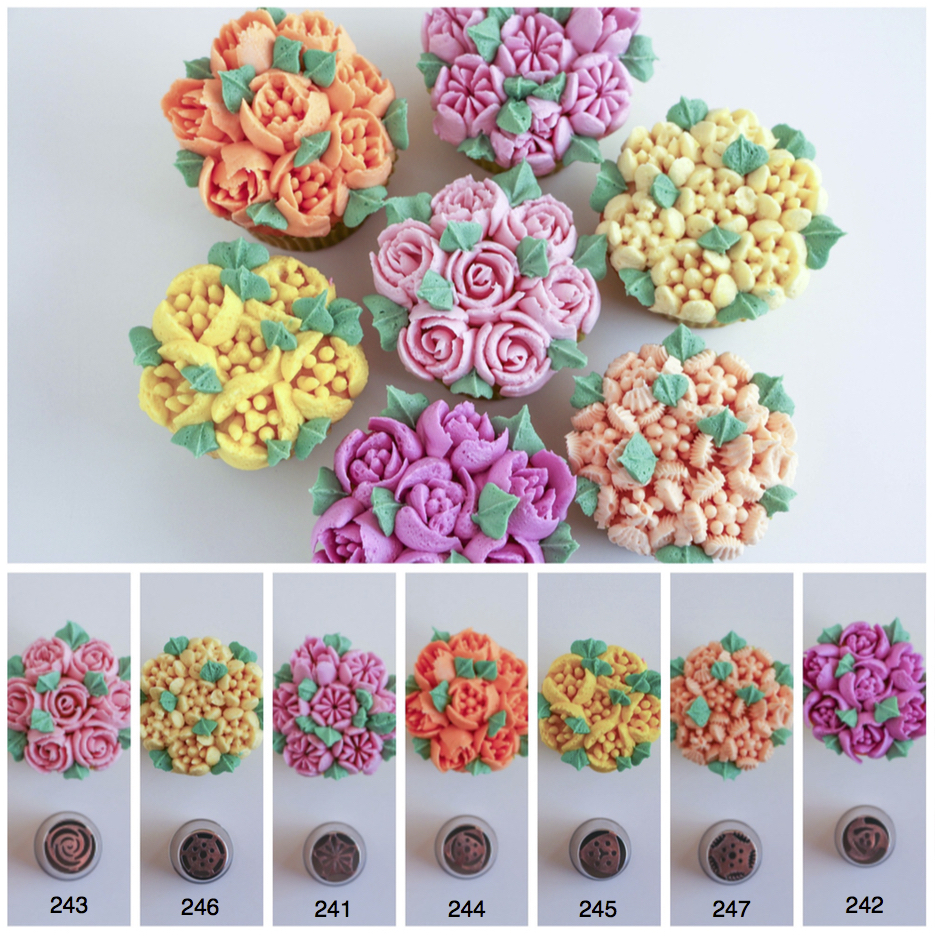
What You Need
- Ateco Russian Flower Piping Tip Set
- Piping bags
- Buttercream
- Gel colors
- Small icing spatula
- Toothpick or skewer (optional)
- Leaf tip (optional)
1. Fill Your Bag

Fit your piping bag with a Russian tip, and fill the bag with buttercream. Apply pressure to the bag until buttercream starts poking through all of the openings. Wipe the tip of the nozzle clean before starting your design.
2. Pipe a Flower
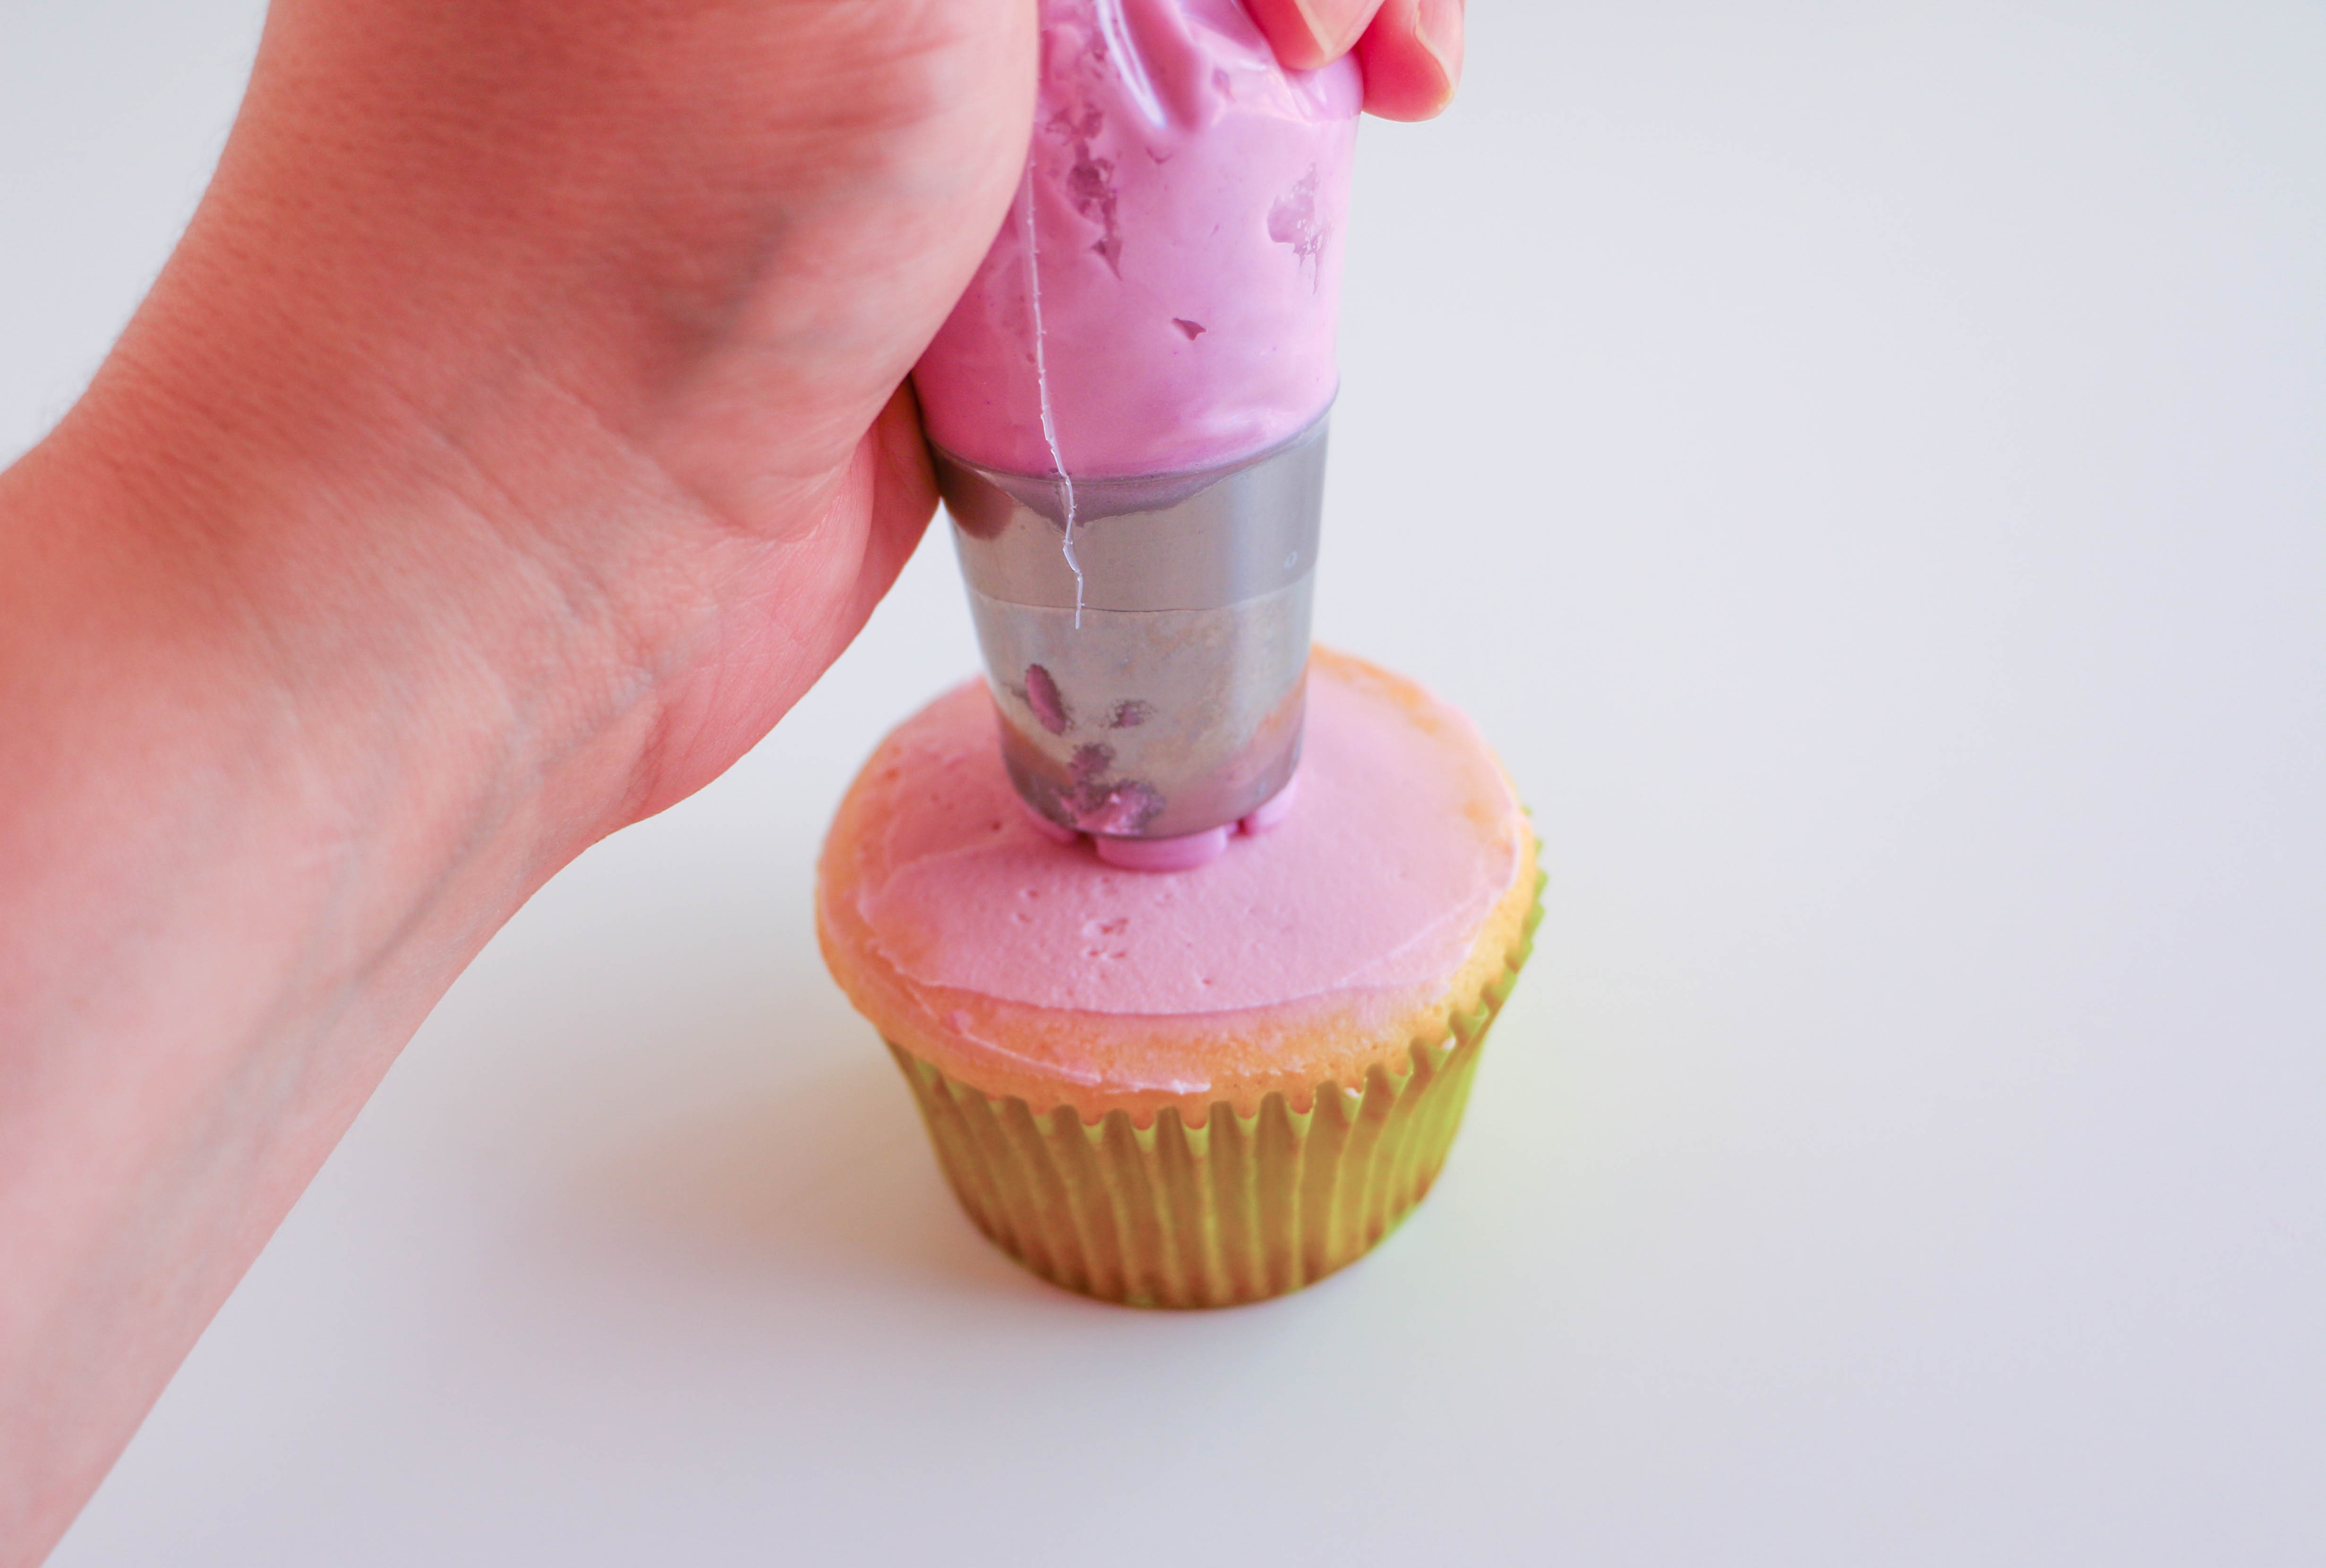
Hold the flat end of the tip just above the surface you want to pipe on. Apply steady pressure to the piping bag while pulling directly up, as straight as you can.
Release pressure when you’re three-quarters of the way done with your petal. Continue to pull the piping bag up until the buttercream separates from the tip.
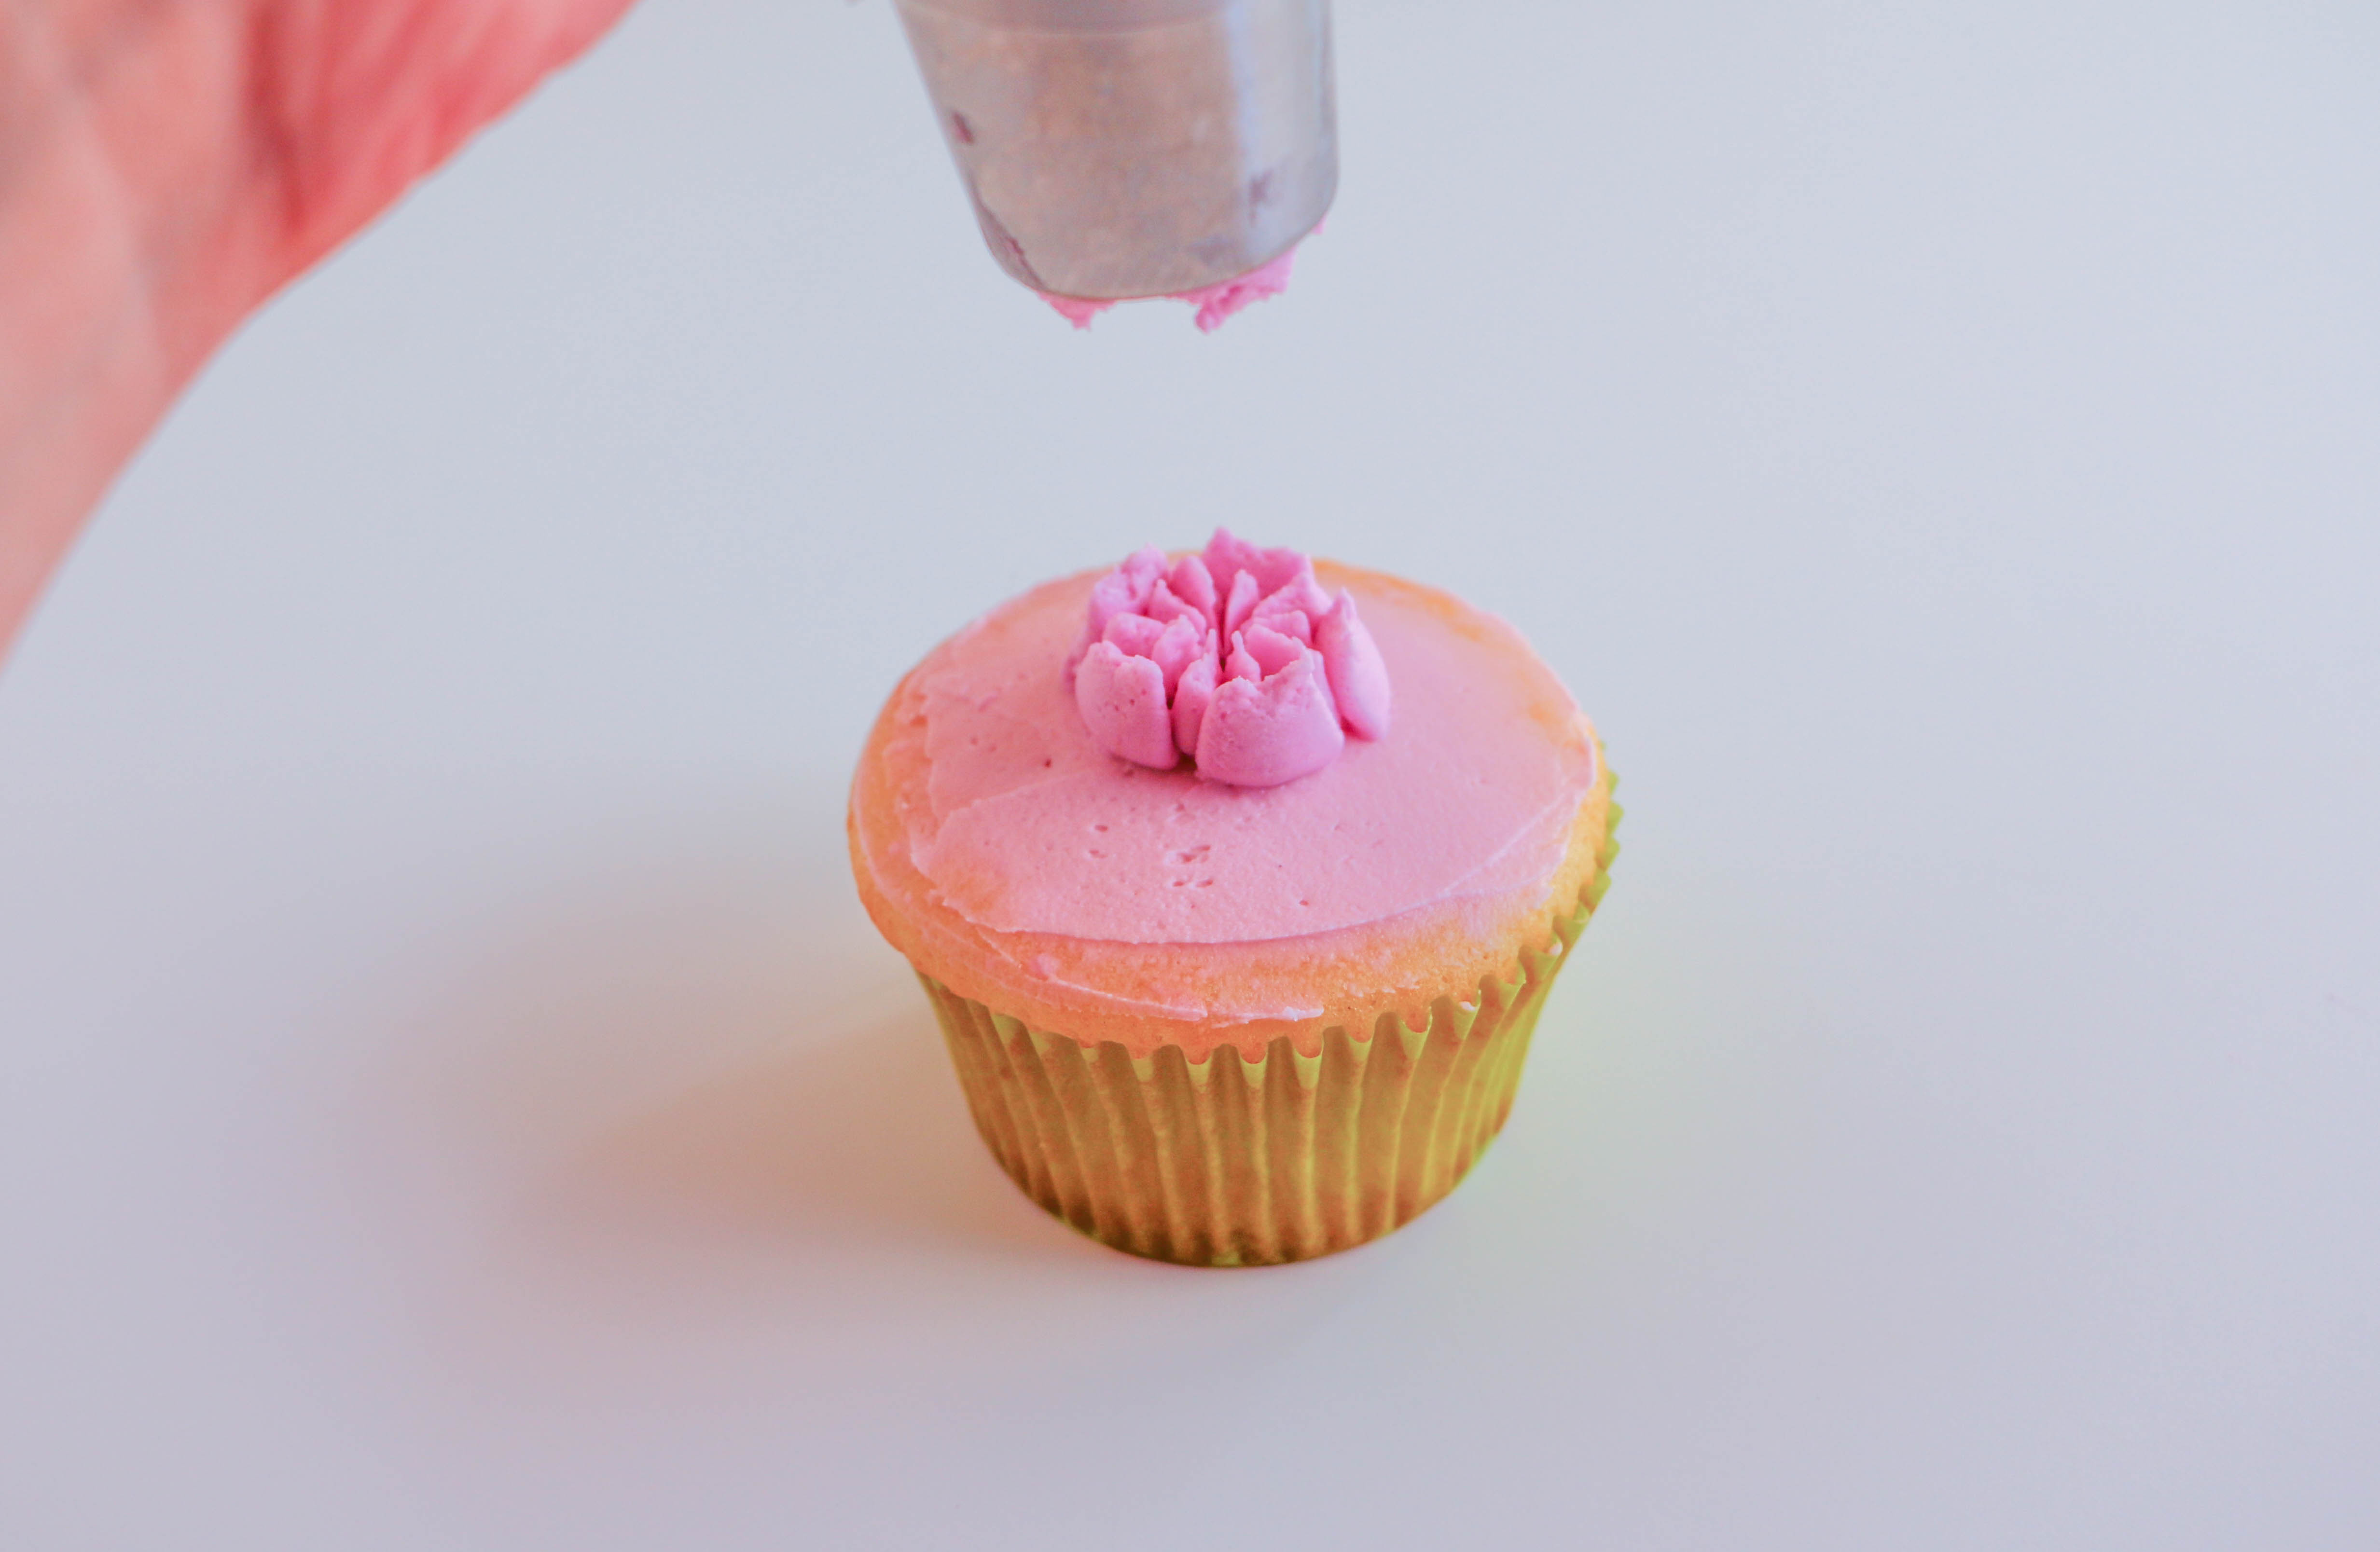
Keep all of your movements slow and steady, so the petals and centers don’t smush together.
If you play around with these tips and find that you prefer the look of shorter flowers, you’re in luck: Shorter flowers tend to be easier to pipe (at least for some).
For most of the flowers in this post, we applied pressure for a quick count of two and then released and pulled away. For others, we applied pressure to the bag for a count of three before releasing and pulling away.
3. Pipe More Flowers
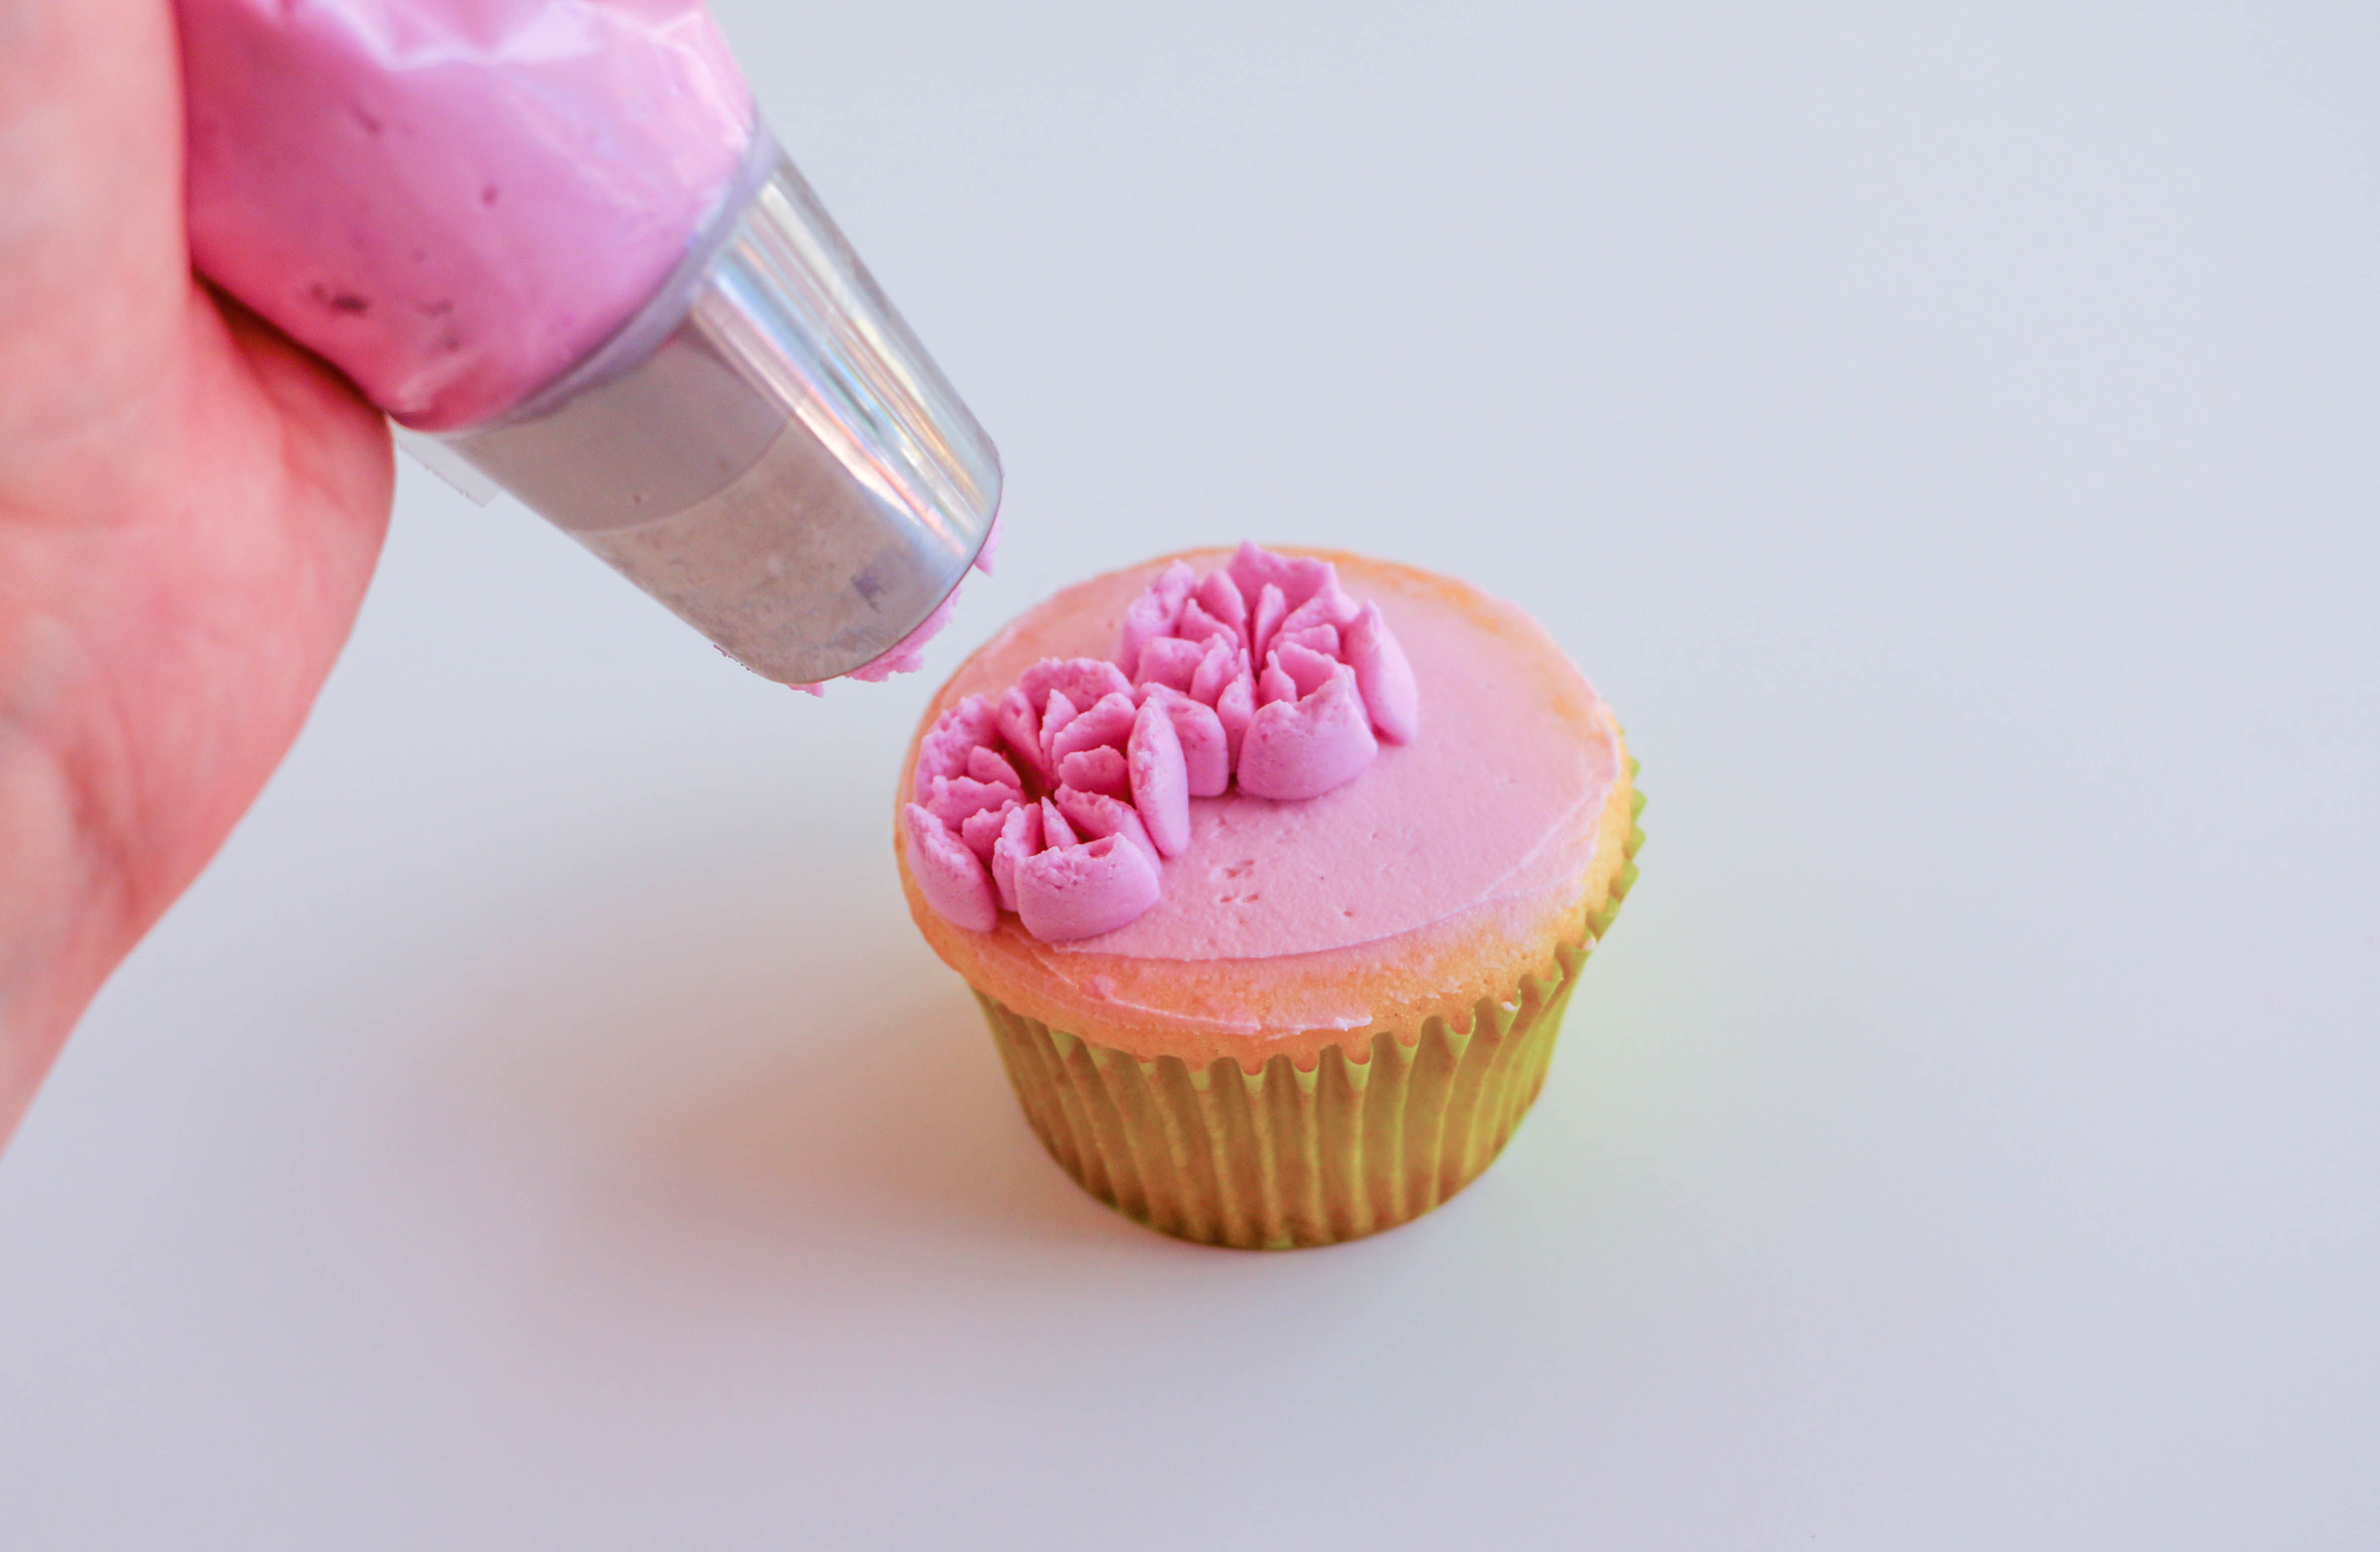
Continue piping flowers to fill in the rest of the area you’re decorating, repeating the piping process described in Step 2. Cluster flowers as closely together as possible, to avoid letting the cake or the crumb-coat below the frosting show through. Position the nozzle so that the side edge slightly touches the petals of the flower before it.
4. Add Leaves
Here we’ve used a size 366 leaf tip, but you can get the same look by cutting a V-shaped notch into the tip of a piping bag.
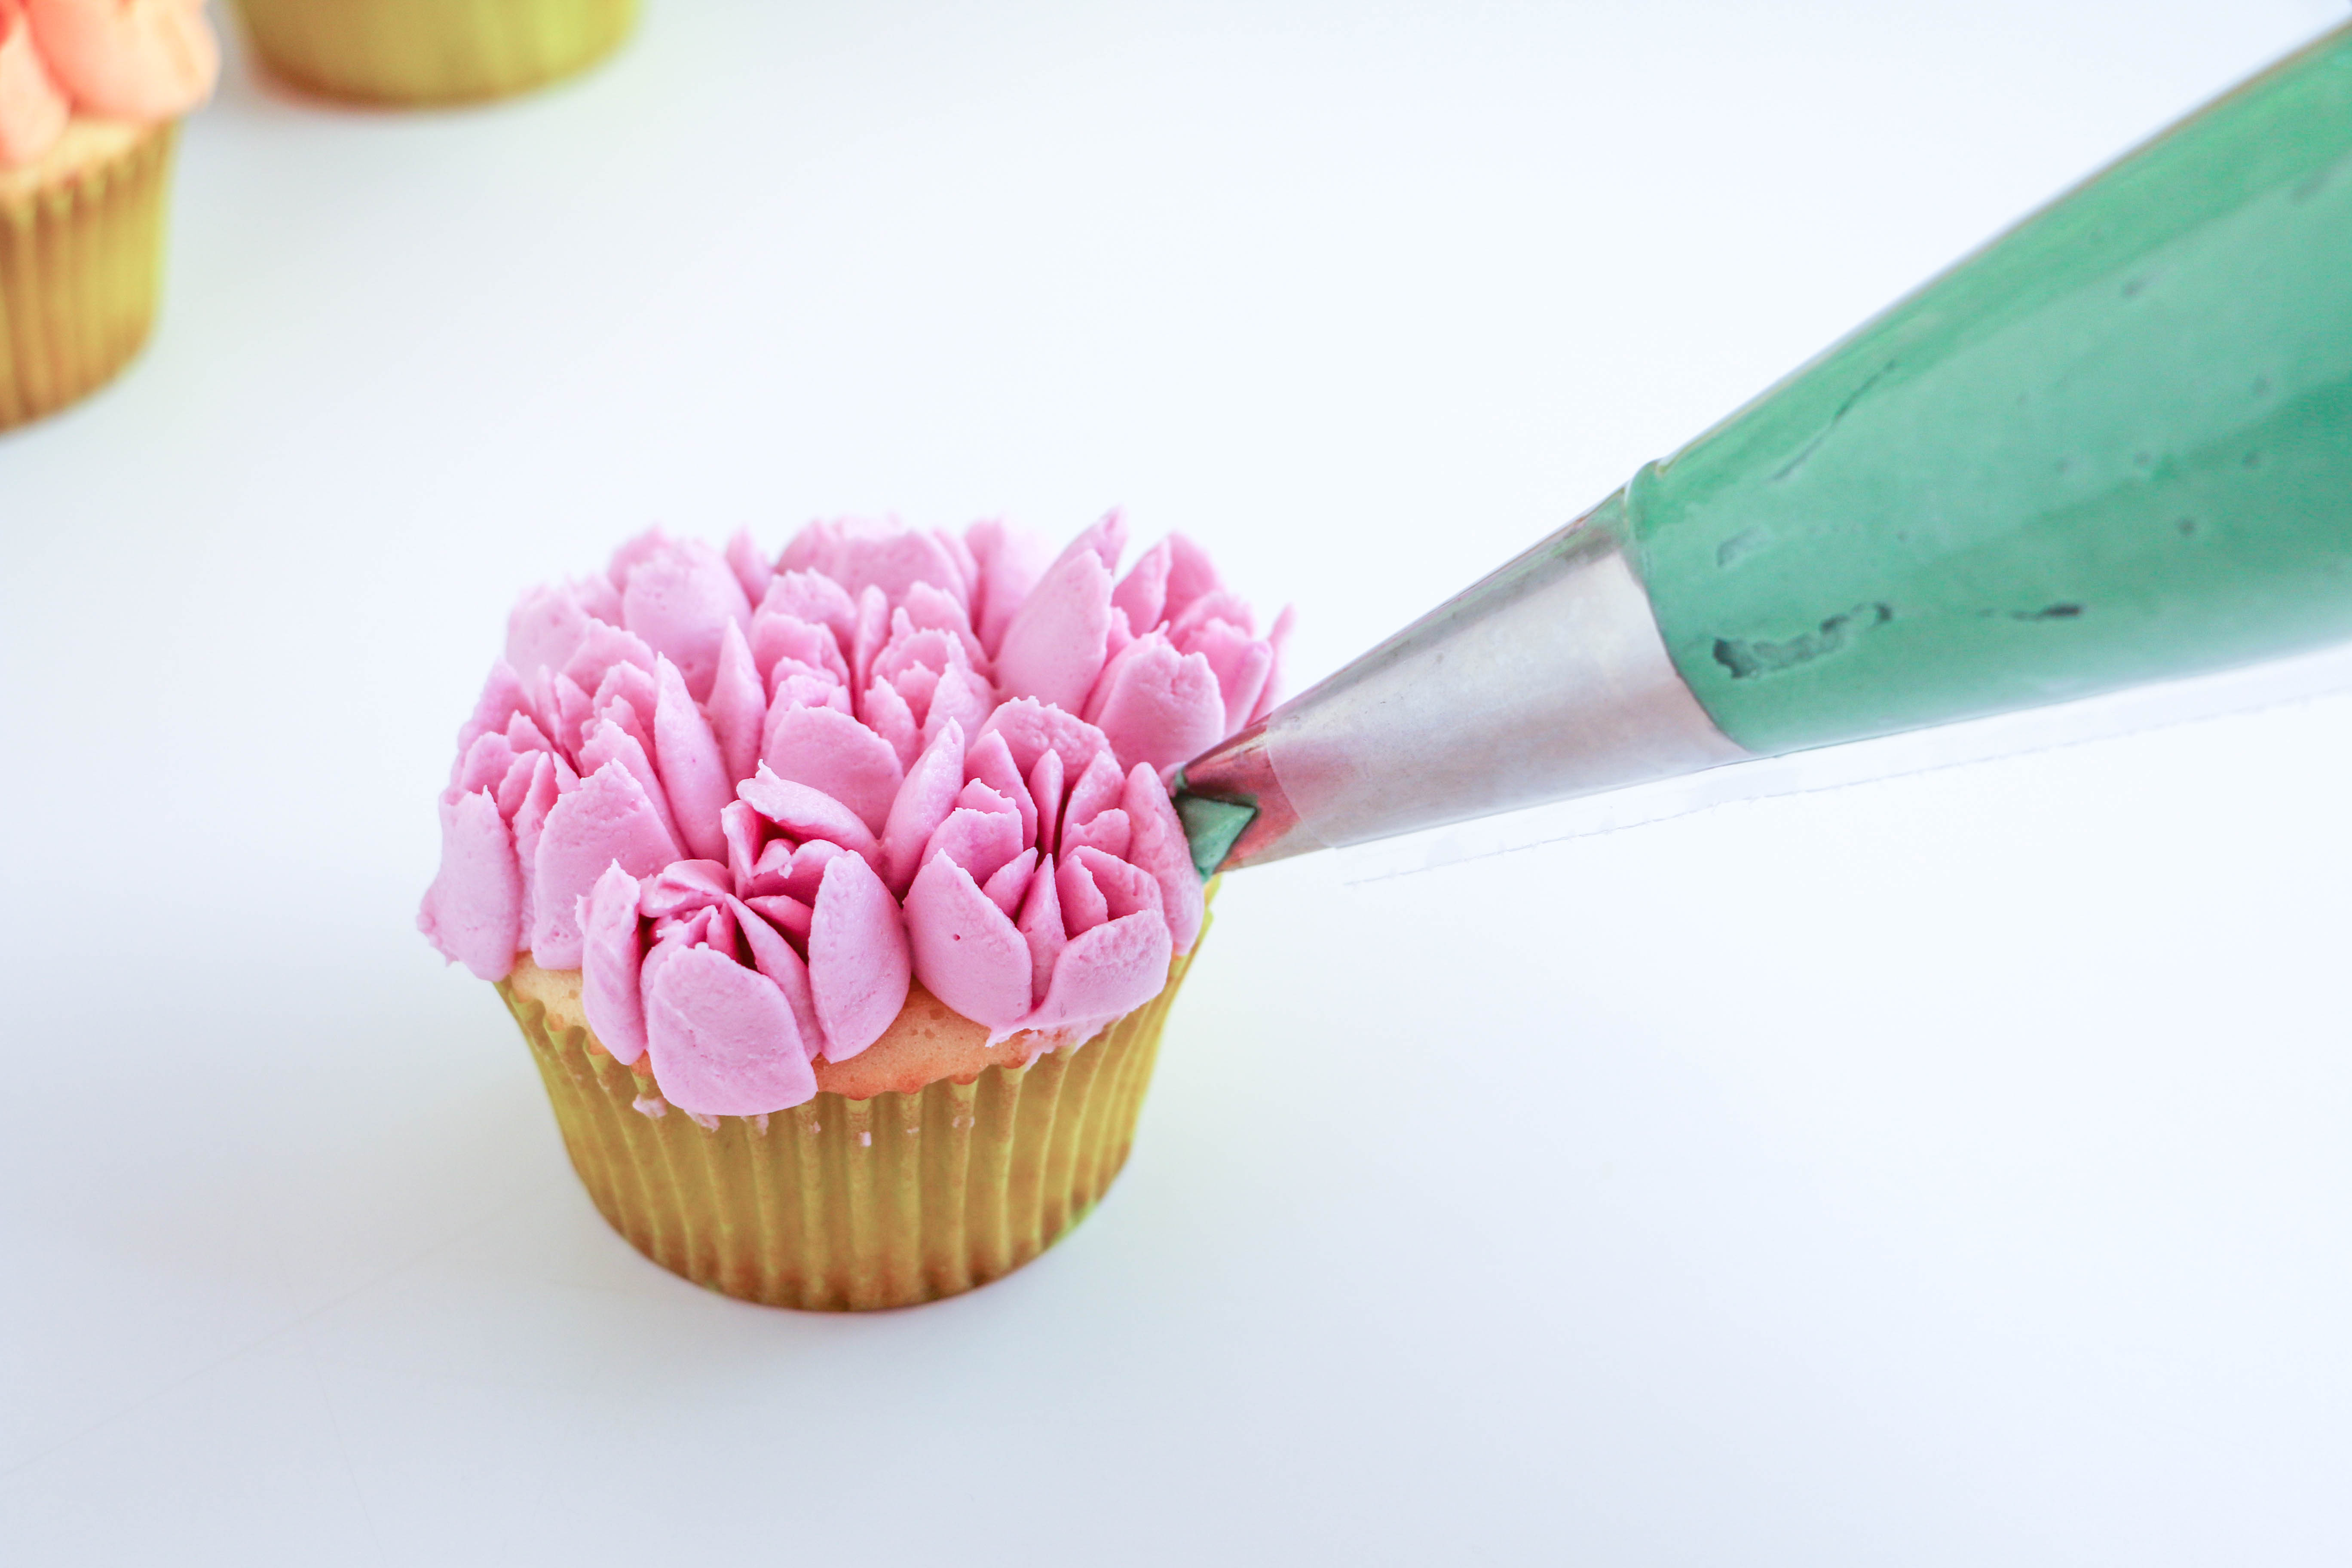
Fill a piping bag fitted with the leaf tip with green buttercream. Hold the bag less than 1/4 inch above where you want the leaf to be. Position the tip so that it looks like a little mouth about to gobble up one of your buttercream flowers.
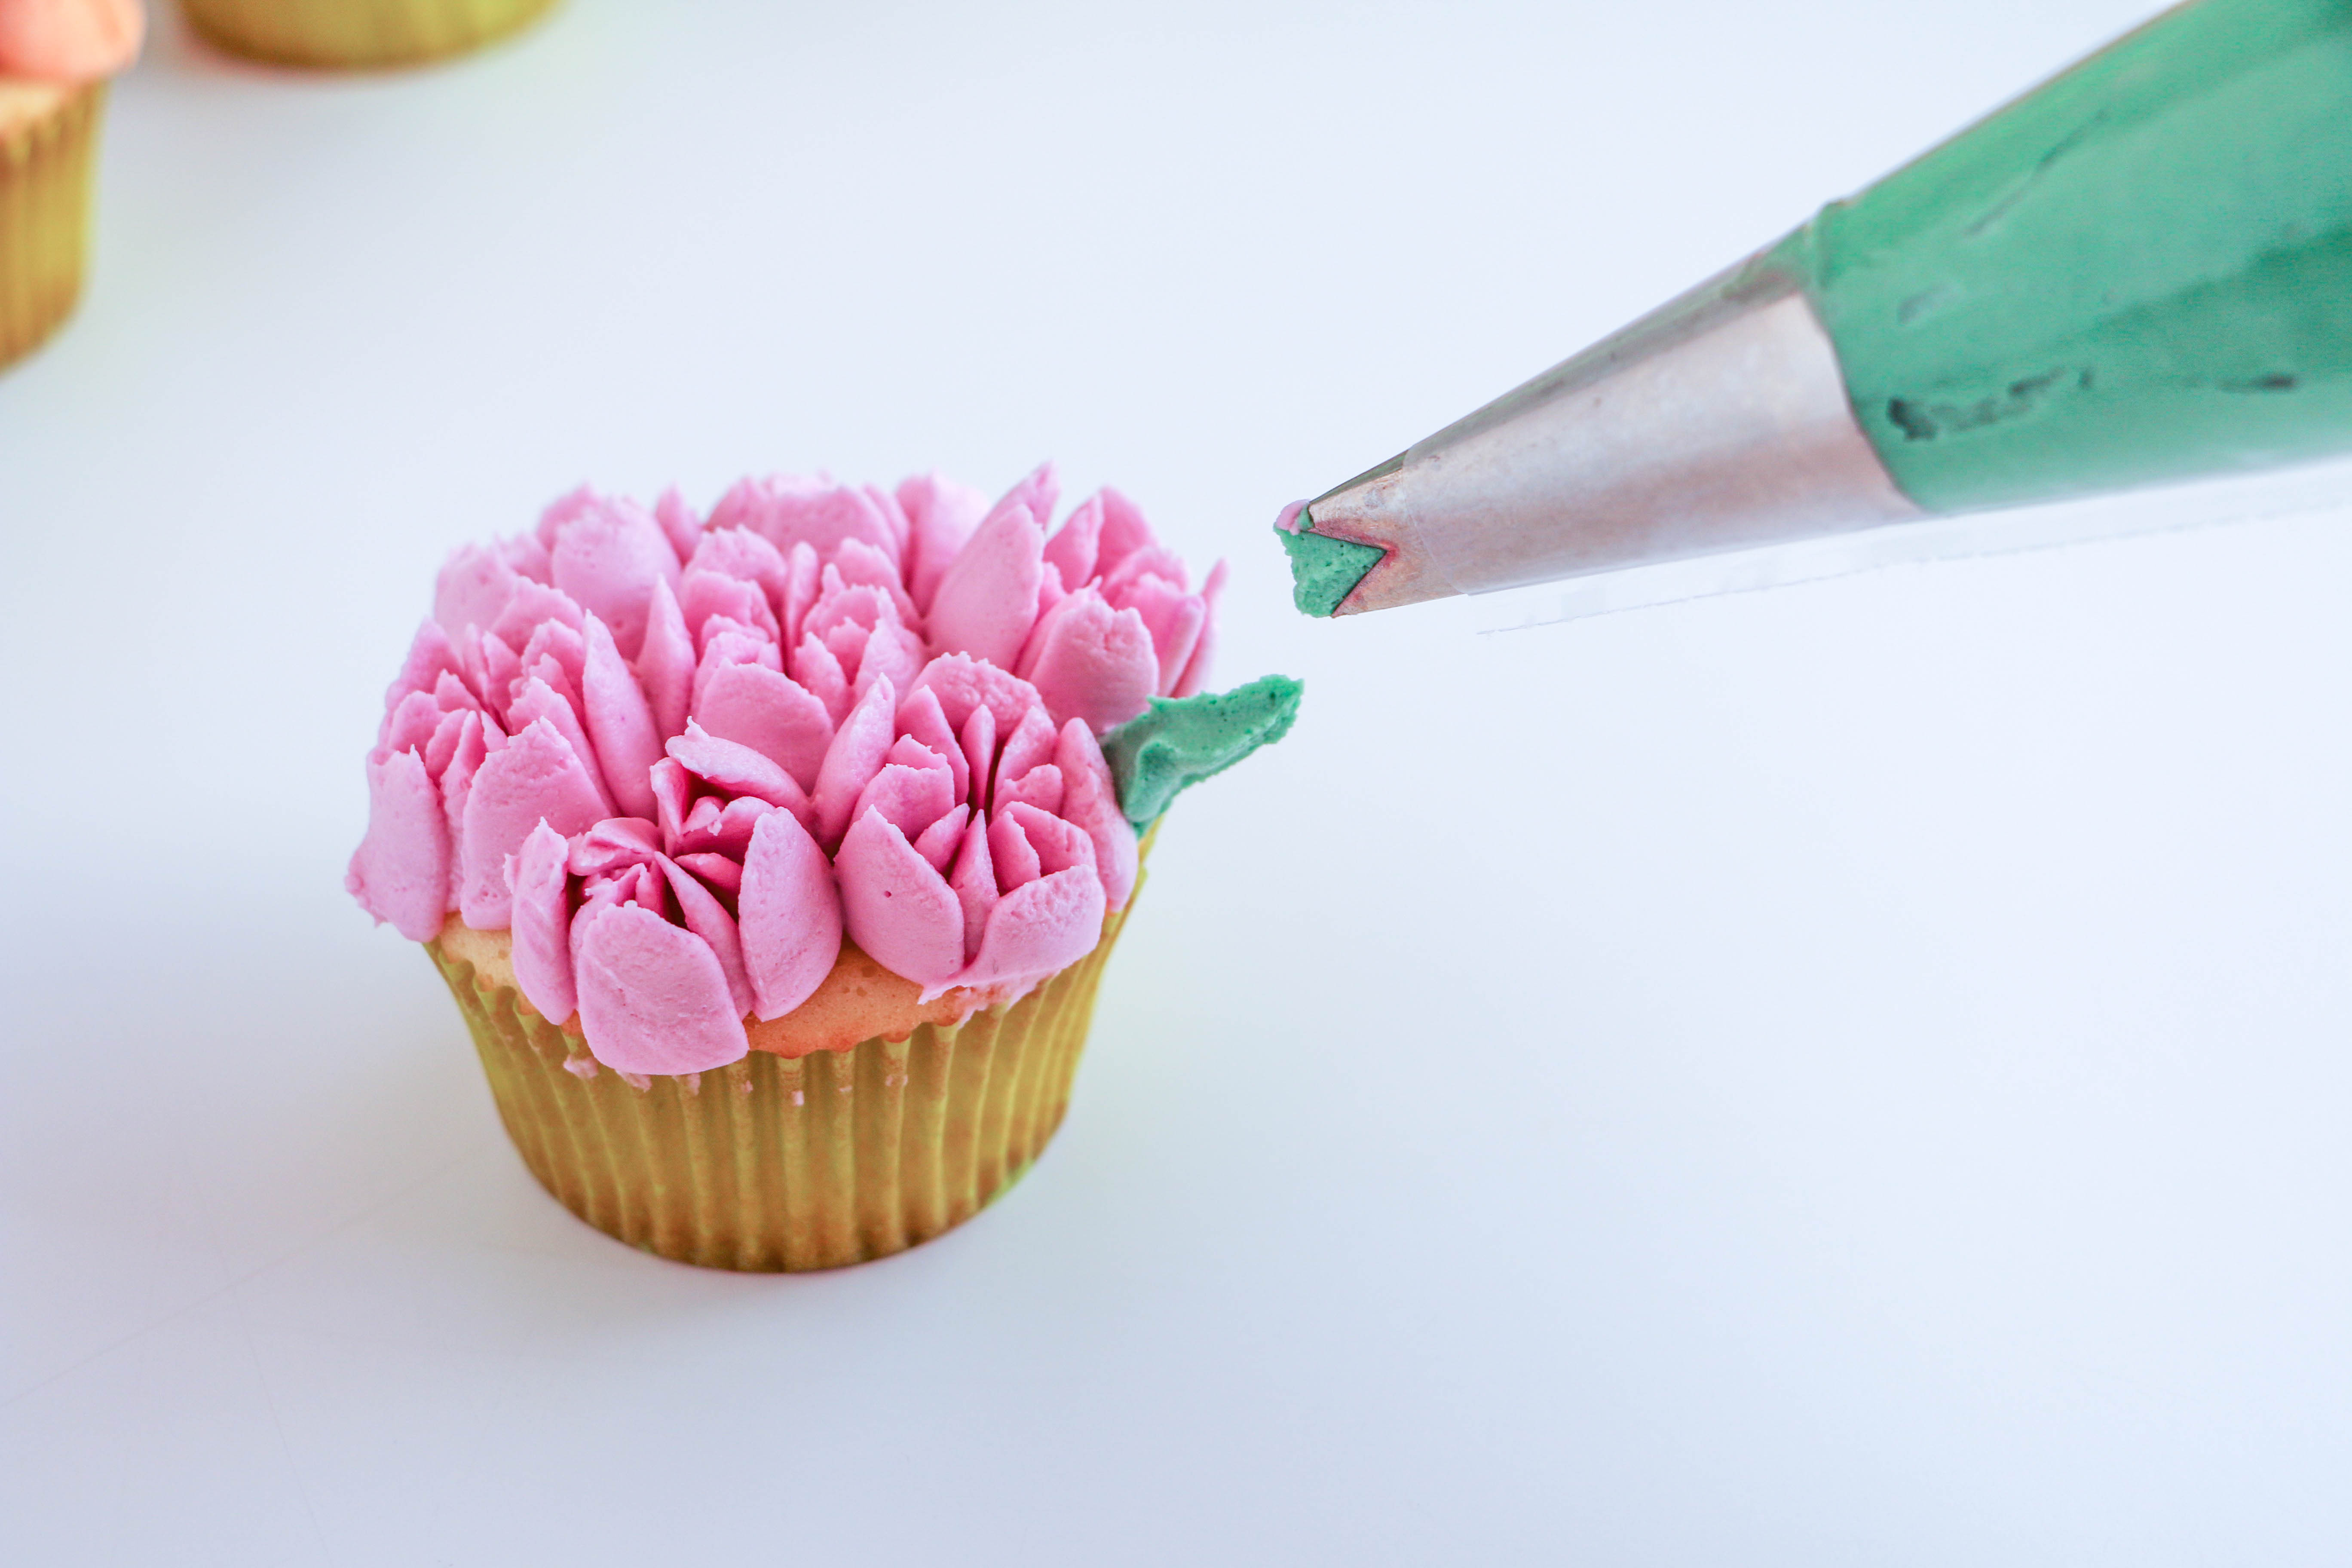
Apply pressure to the bag. Once the buttercream makes contact with the surface piping, release pressure and pull the bag away. Repeat to fill in any empty spaces.
How to Add Extra Color
To create a variegated and lifelike look to your flowers, layer different shades of colored buttercream in your piping bag.
1. Line the Piping Bag with Green Frosting
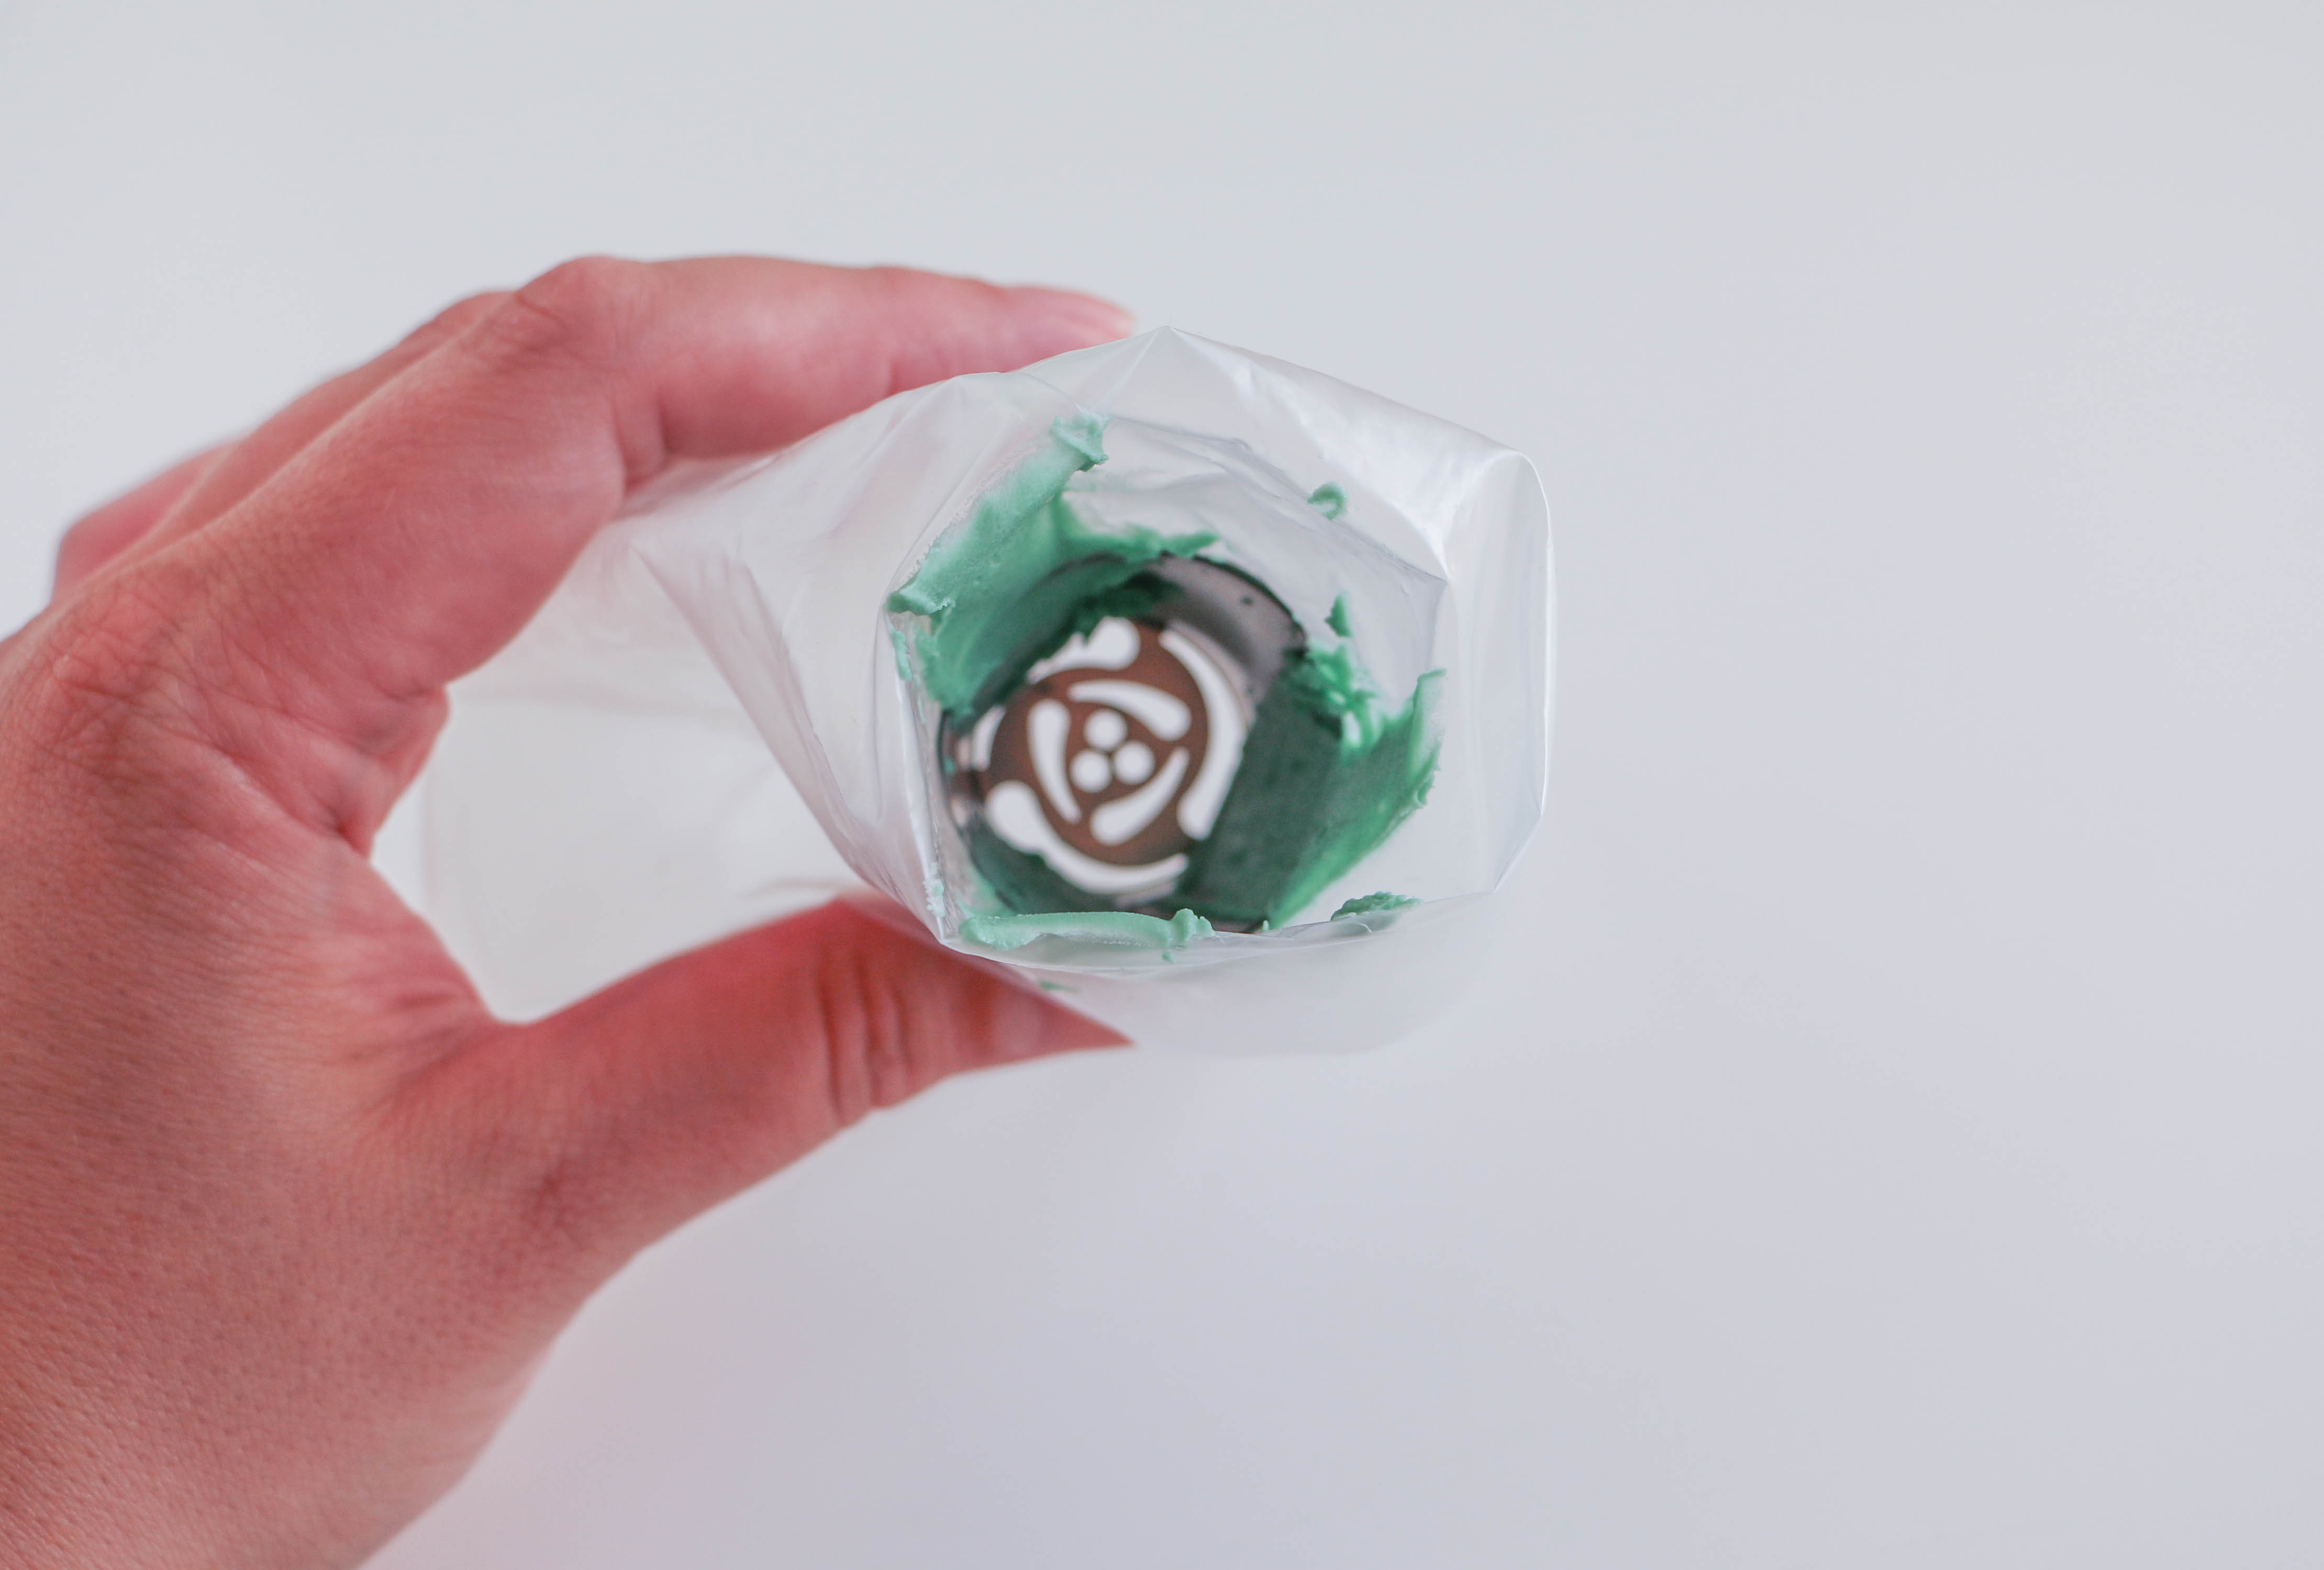
Use a small icing spatula to smear thin lines of green buttercream on the inside of your piping bag. Make sure to spread the color all the way to the base of the tip.
2. Add a Layer of the Petal Color
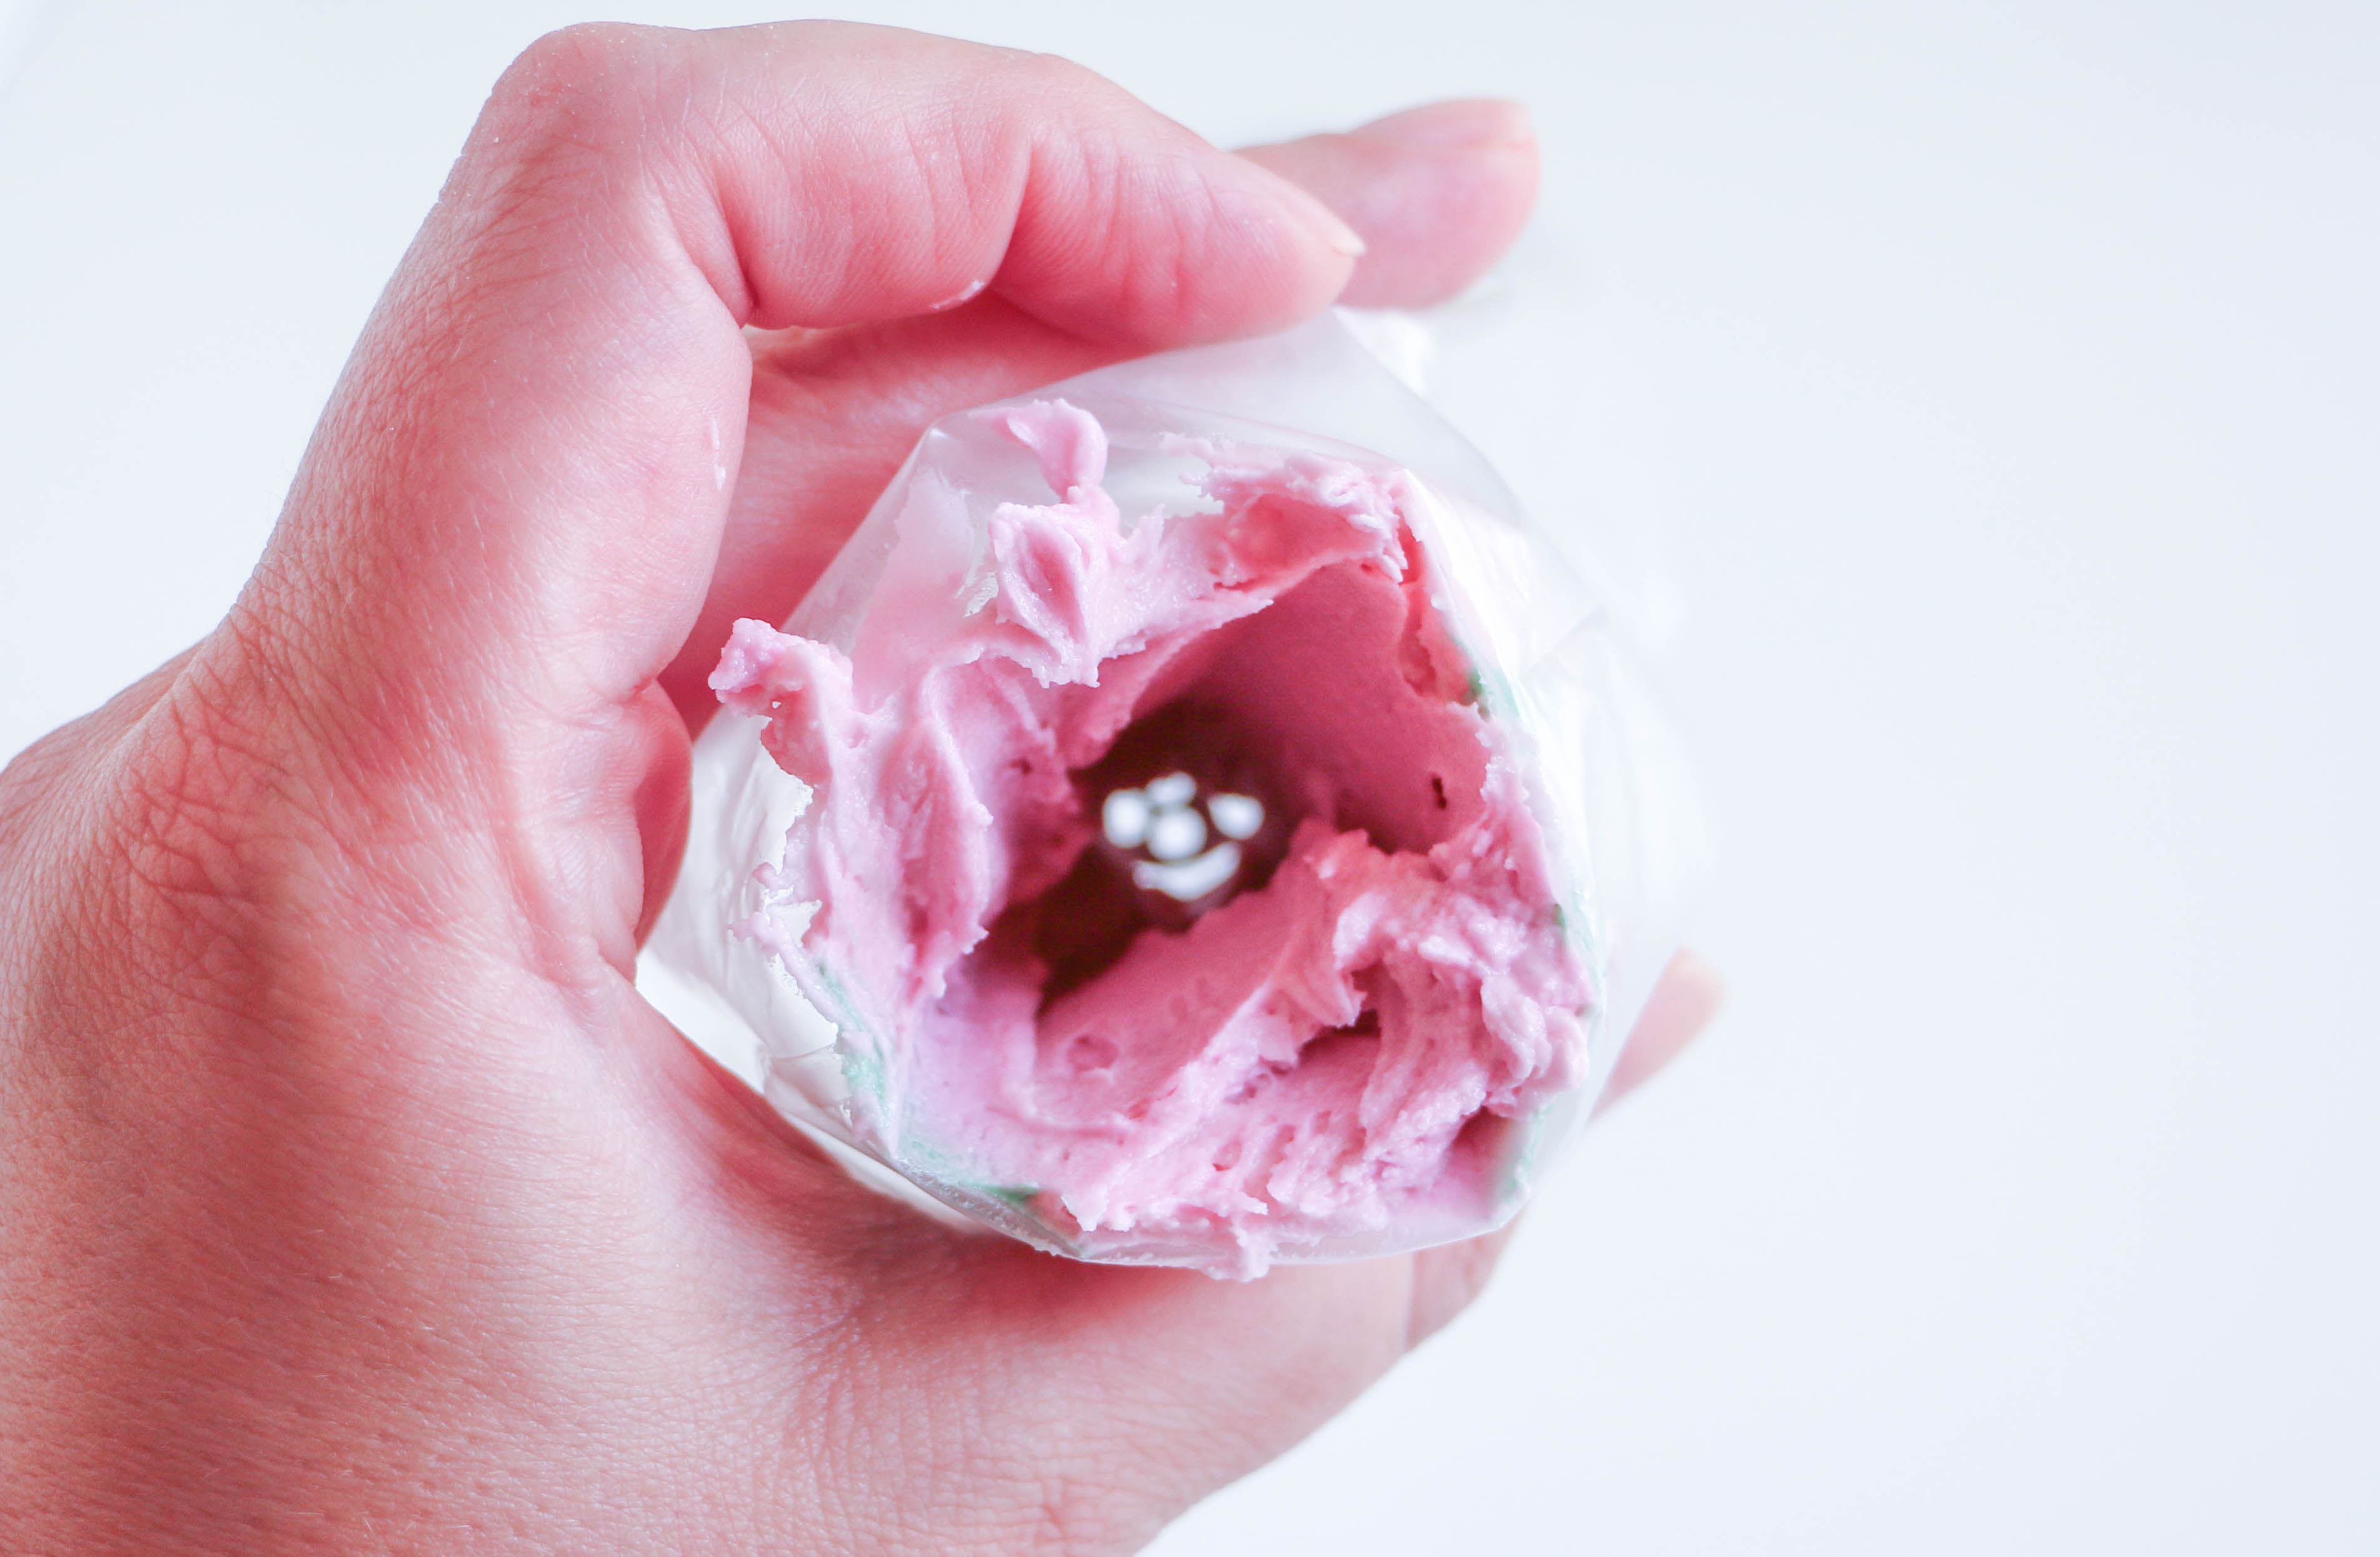
Cover the sides of the piping bag with a thicker layer of the petal color. Leave a dime-sized opening through the center all the way to the base of the tip.
3. Add Color for the Center Flower
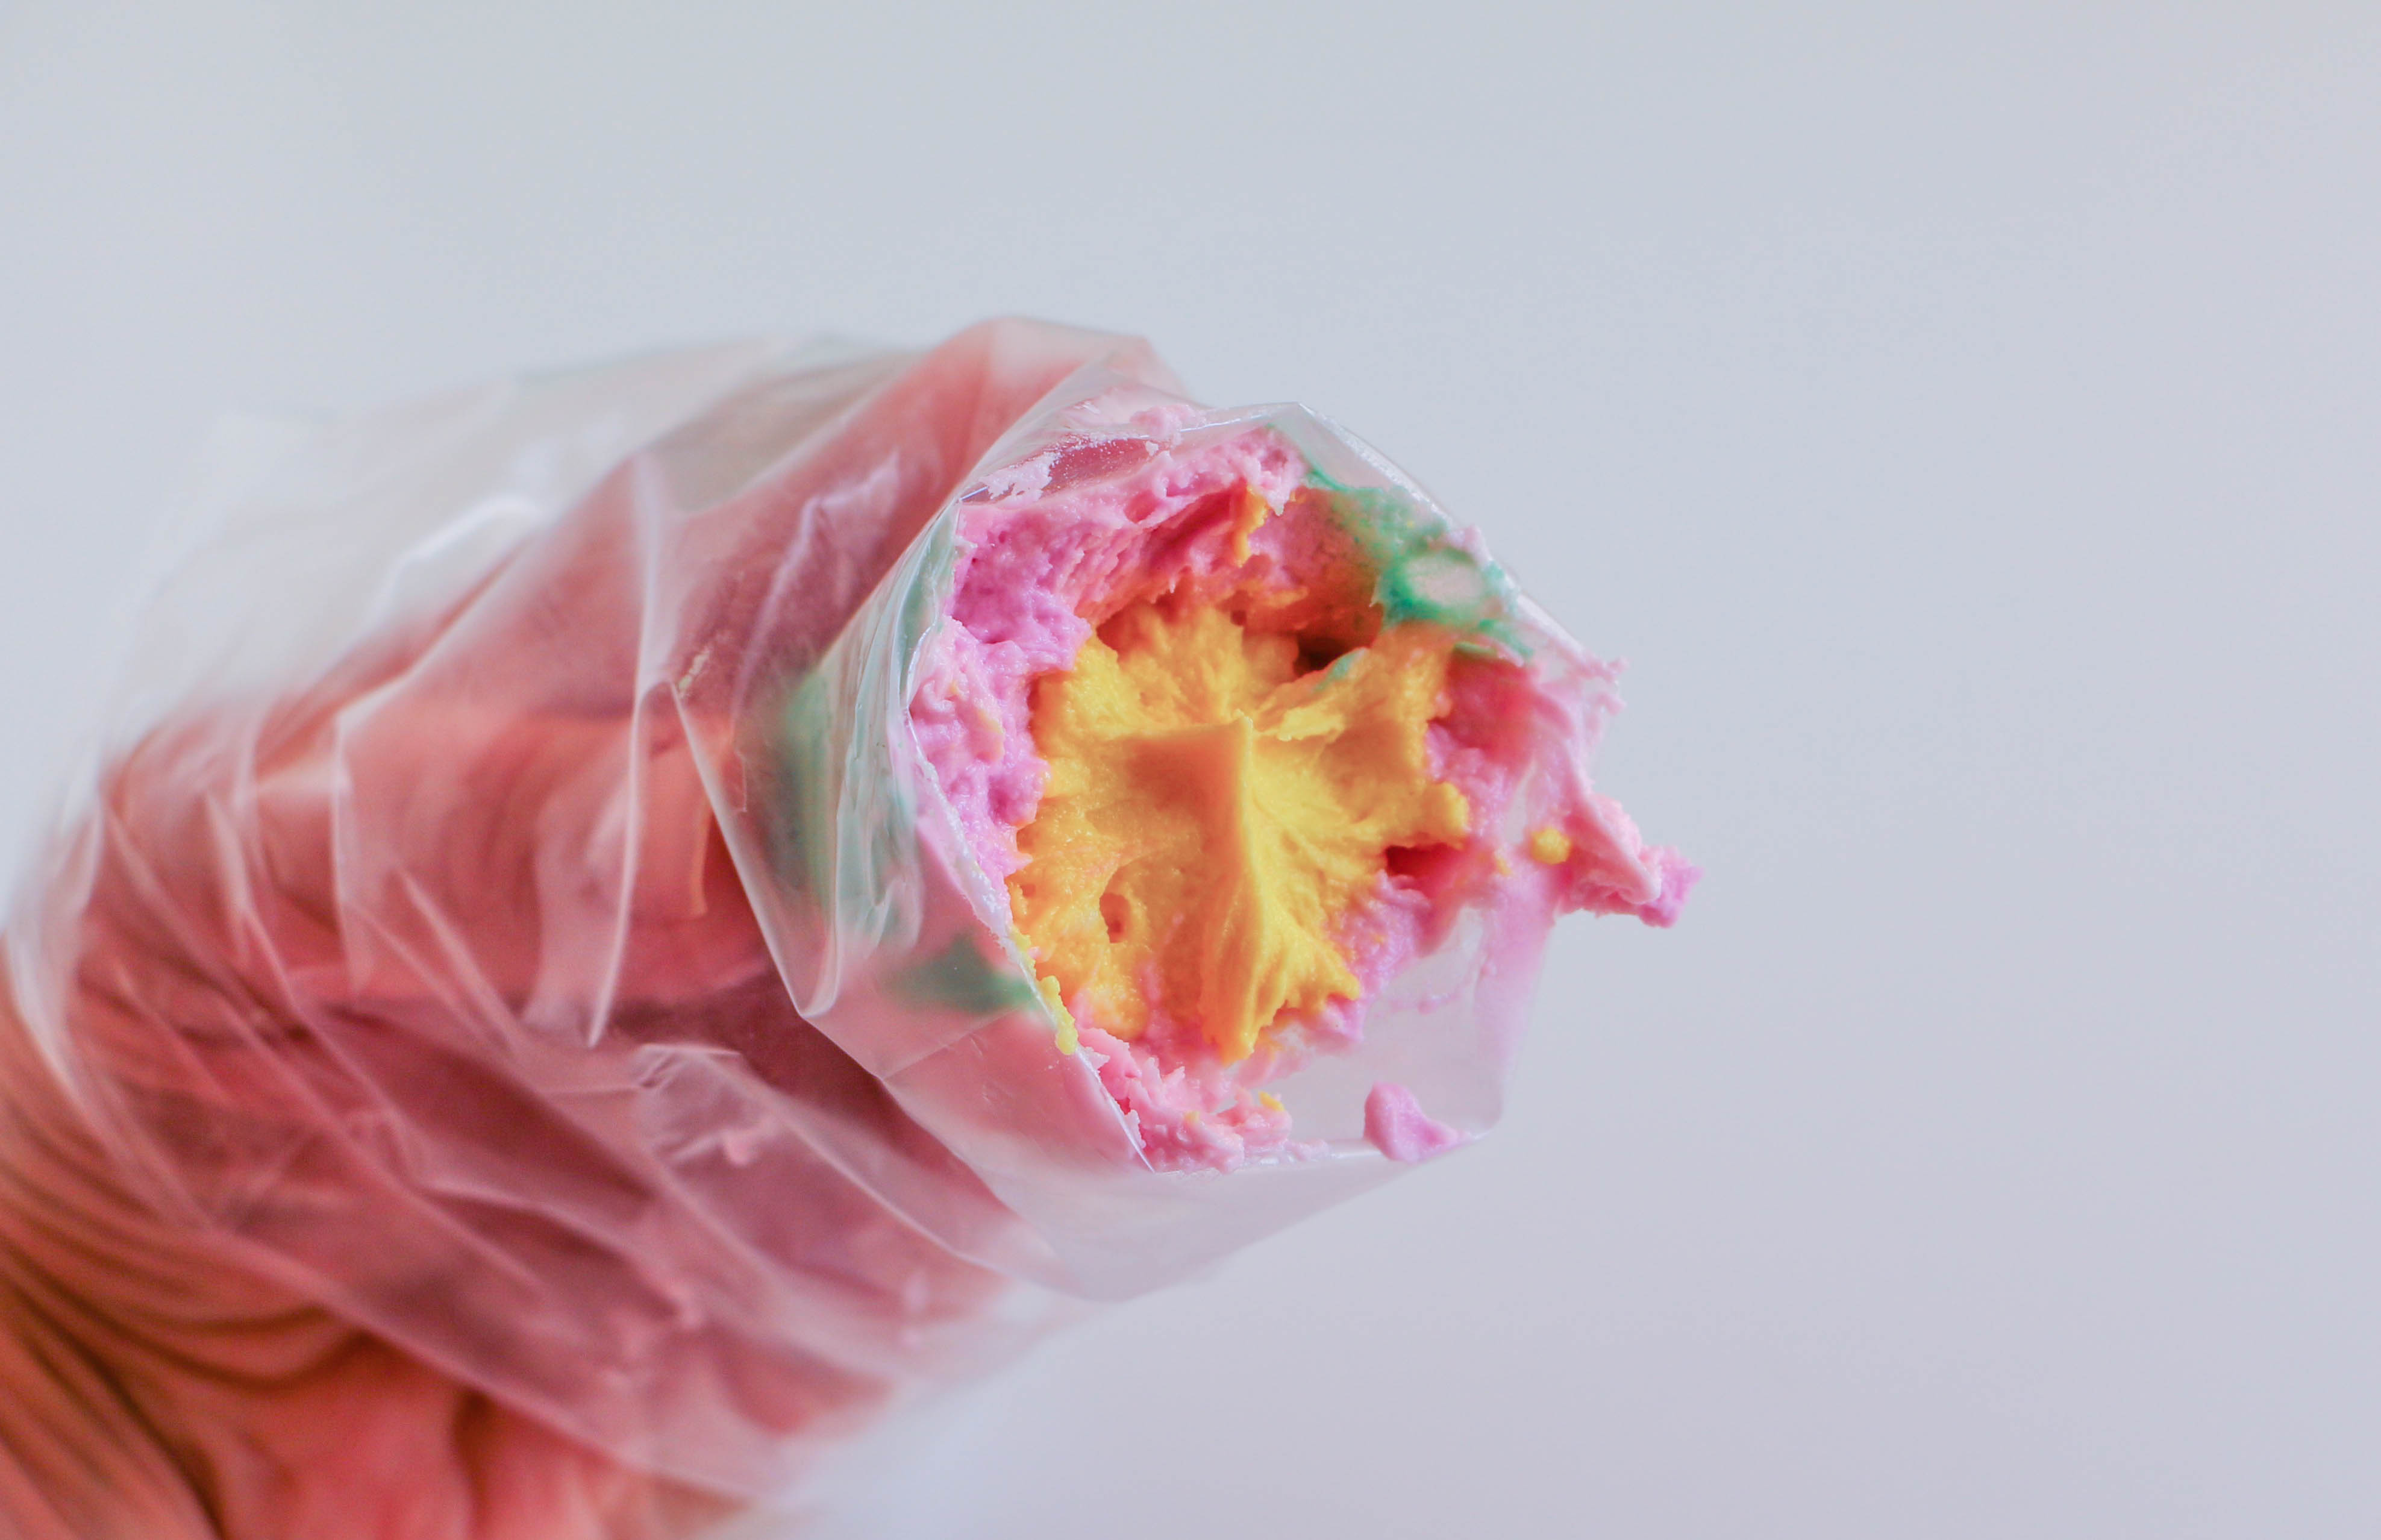
Fill in the center with yellow buttercream. Use a small icing spatula or a piping bag with a small opening — whichever is easier for you.
4. Pipe
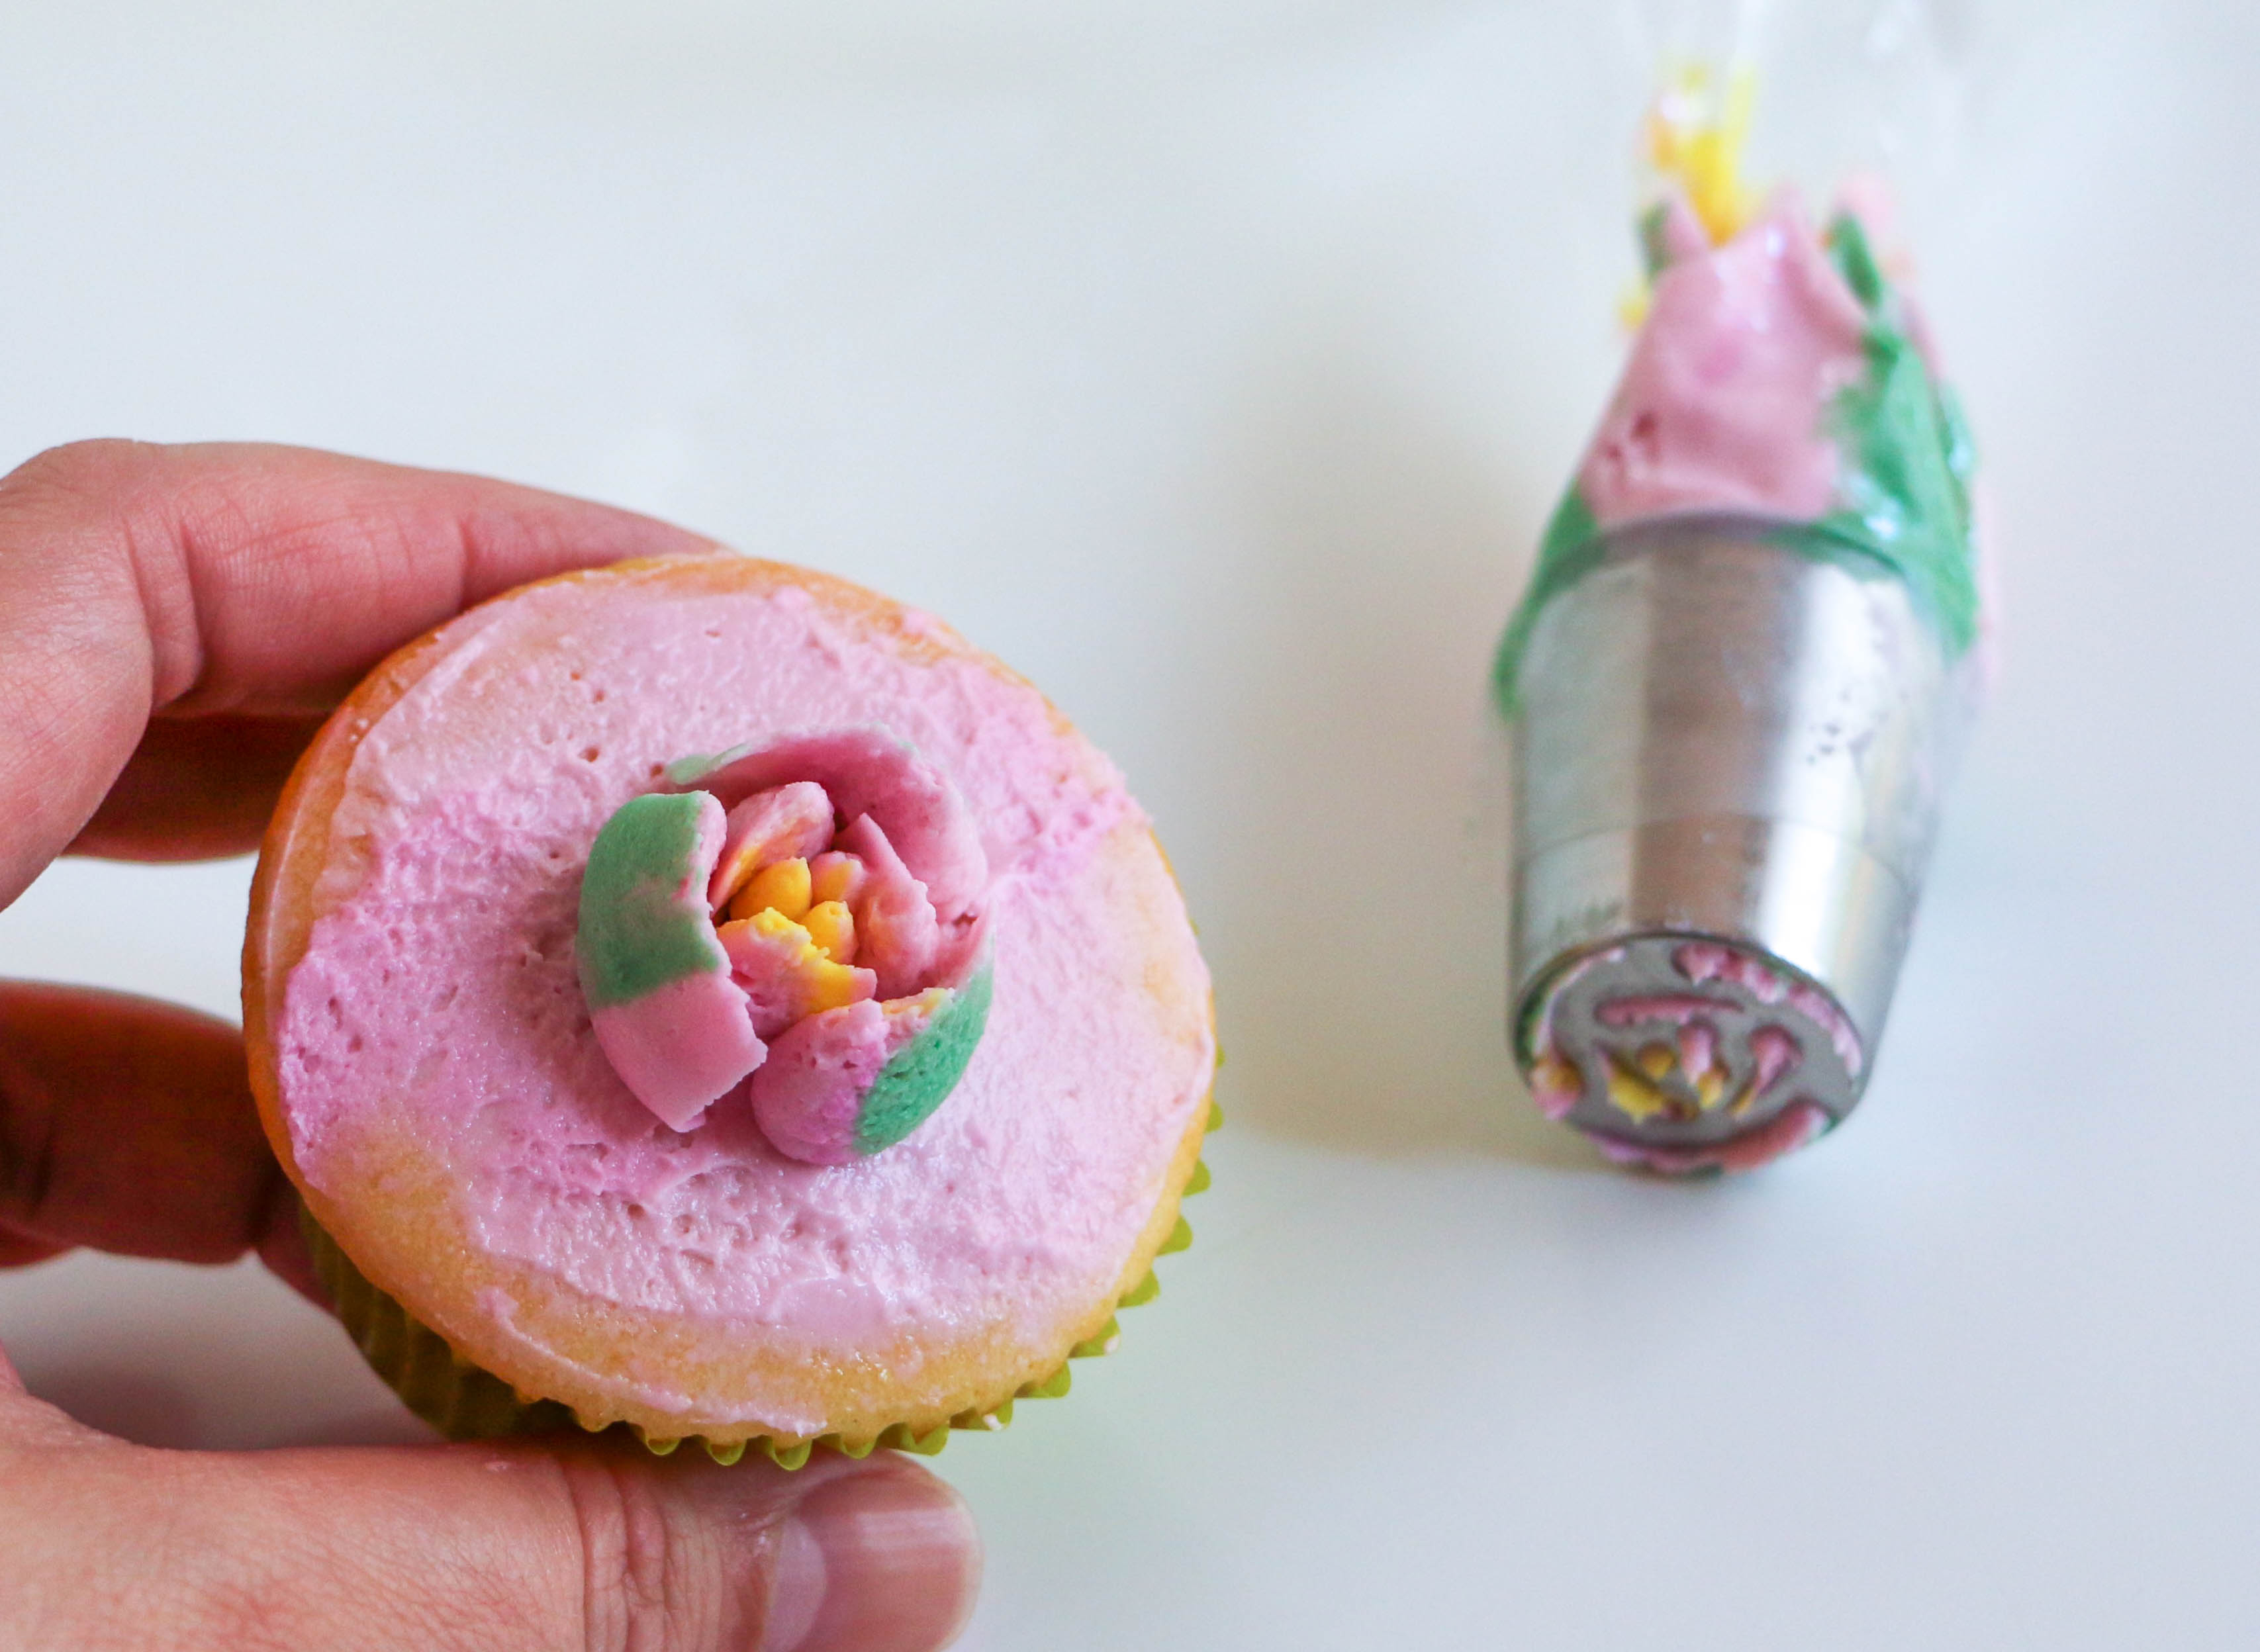
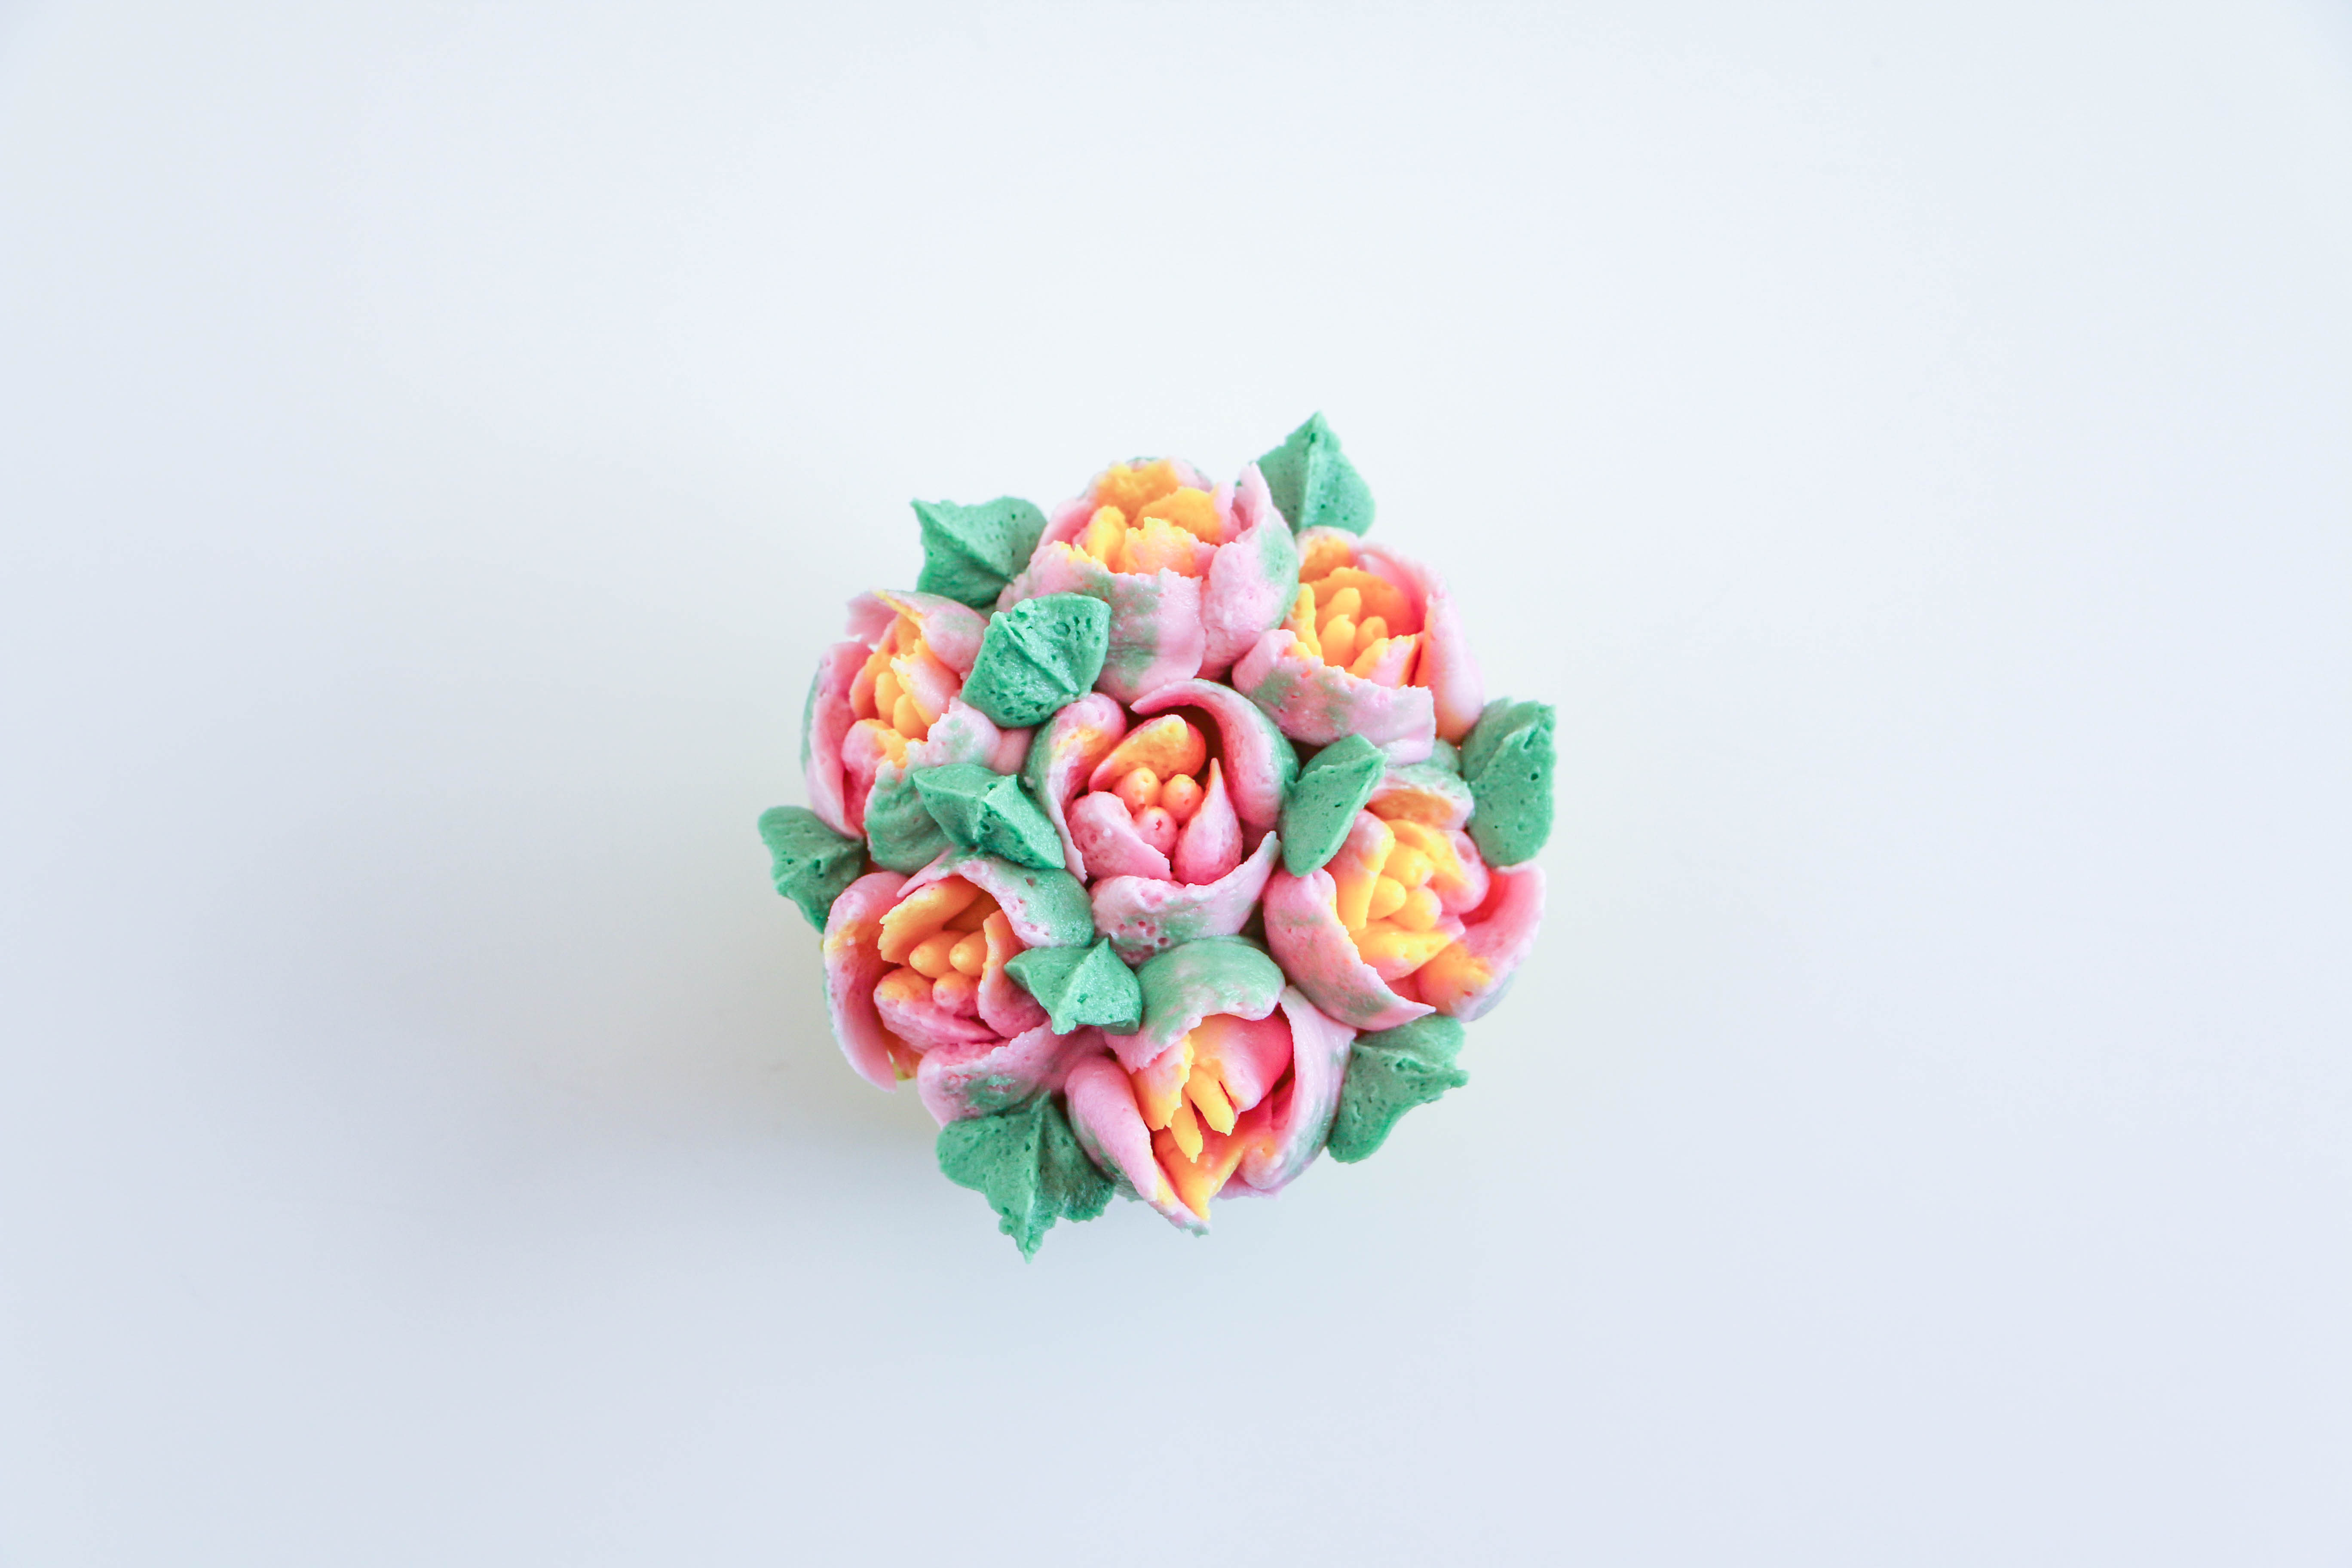
Pipe flowers using the same method as in Step 2 from the earlier tutorial. The colors will subtly change as you pipe, adding to the realistic look of your flowers. Add in any additional leaves or filler as desired.
All images via Erin Bakes.
I find everything about these on You Tube!
I purchased this also and had no instructions either. I packed it back up and put in a drawer never to use it.
I purchased the 36 Piping Tips, Premium Master Kit last year before Christmas hoping to use them for Christmas treats but it did not come with any instructions or recipes, absolutely nothing and I tried to contact the seller and the company as to how I can get said instructions to no avail! How can I possibly get what was supposed to be included in the box? Please help me
These instructions are not completed, in my opinion. Can you please send me the WHOLE instructions to my email
Would like decorating tips, please, thank you!
Would really enjoy these decorating tips