Decorating cookies is a labor of love — especially when it comes to using royal icing. Royal icing consistency is utterly important when decorating: So many decorative techniques rely on just the right consistency.
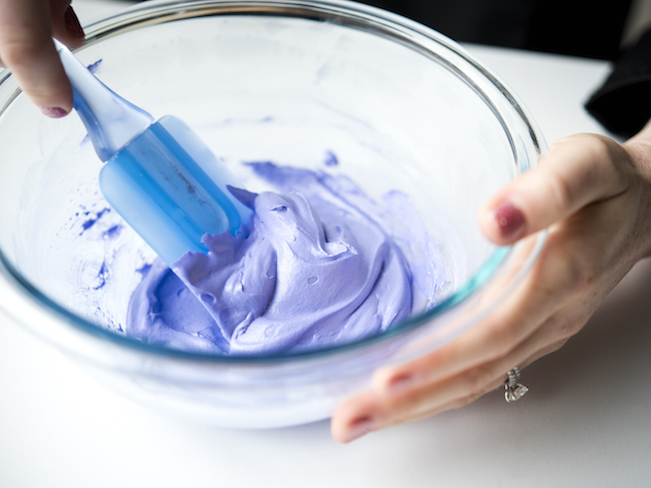
For example, stiffer royal icing is great for dots or pearl borders, but a runnier, more liquid consistency can create painterly effects. Read on to find out our top tips and advice for the right royal icing consistency!
Check out four common options for royal icing consistency.
While different bakers will use slightly different icing consistencies (and call them different names), here are the four we’ll cover:
- Stiff consistency royal icing (good for brush embroidery and borders)
- 15-second or 3-D consistency icing (good for 3-D details)
- Piping consistency royal icing (good for outlining and detailing)
- Flood consistency royal icing (good for filling spaces quickly).
We’ve organized this list starting with the stiffest consistency and ending with the least stiff.
Ready to get started? Use this royal icing recipe!
1. Stiff consistency royal icing
A stiffer consistency royal icing is a little hard to manage but still useable. It has to be somewhat stiff to hold its shape, which is why it works well with brush embroidery work, tiny roses or for piping pearl or shell borders.

How to create stiff royal icing
It’s easy to adjust your basic royal icing to become more stiff. Simply add in more sifted powdered sugar, bit by bit. Add in a teaspoon at a time, stir and test until you have a stiffness you like. Your icing should be able to hold its own if you quickly lift your spoon, palette knife or whisk out of the mixture.
Our top tip for working with stiff royal icing
Avoid working with teeny tiny piping tips if you’re using stiff royal icing. You’ll have to press and squeeze your piping bag harder to push out the icing, which will likely end up in one unfortunate mess (think: a ripped piping bag, icing all over your work and a frustrated cookie decorator!).
2. 15-second or 3-D consistency royal icing
This consistency is perfect for any 3-D elements you want to stand out from the rest of your piping (like the round detail in the center of the cookie shown below).
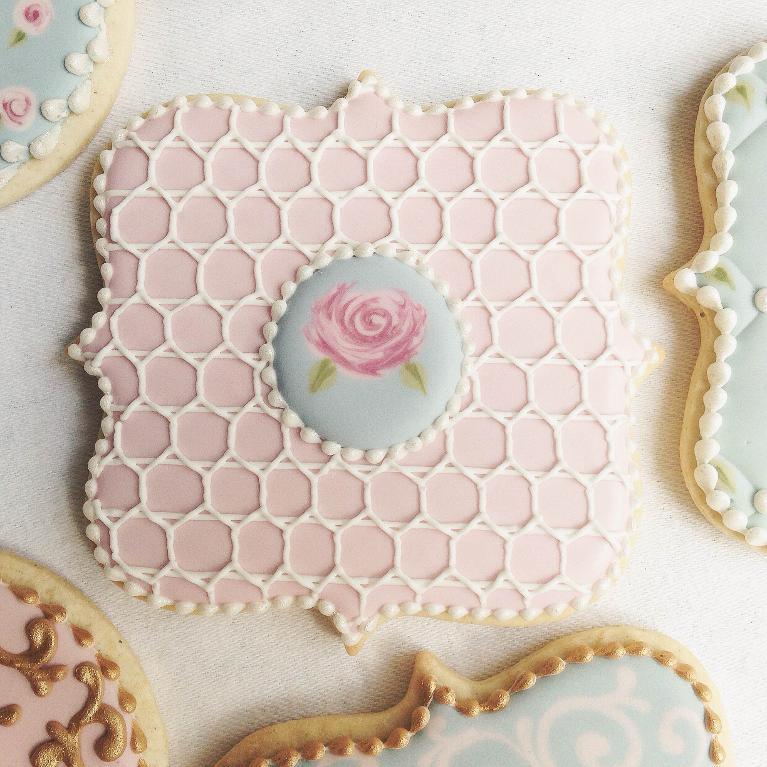
It’s called 15-second royal icing because if you run a butterknife through the royal icing in your mixing bowl, the icing should blend back together in 15 seconds.
This royal icing consistency holds its own, but softens or floods lightly so that any peaks made in the icing smooth out. Some cookie decorators even use it for outlining and flooding.
How to mix up 15-second or 3-D consistency royal icing
Adjusting your basic royal icing recipe into a 15-second consistency is easy. If your icing is runny and blends back together in under 15 seconds, add more sifted powdered sugar, mix and test. If it’s too thick and takes more than 15 seconds to blend back together, add a little water.
To test its consistency, drag a butterknife or palette knife through the royal icing. Use a watch or clock to time how many seconds it takes for the royal icing to blend back together. If you hit 15 seconds, your icing is ready to use!
Our top tip for working with 15-second royal icing
If you want to pipe a 3-D shape onto your cookie, test it first! On a flat plate, pipe out the shape and set it aside for a few minutes to make sure it keeps shape and settles down.
3. Piping consistency royal icing
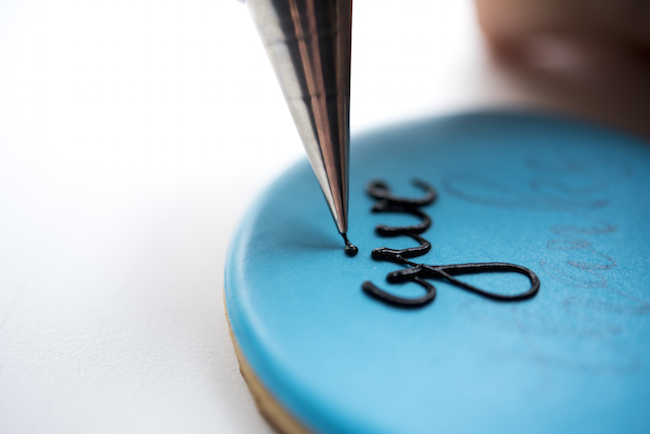
Getting a great consistency for piping is essential for cookie decorating. Piping-consistency royal icing needs to be thick enough to keep the runnier flooding royal icing at bay and create different sections in a cookie design, but it can also be used for adding piped details on top of pre-flooded set cookies.
The secret to piping consistency royal icing
What’s the secret to mixing royal icing? There’s no easy way to tell if it’s the right consistency while it’s in the bowl, so you need to test it! Piping consistency royal icing is pretty easy to get right once you’ve tested it out.
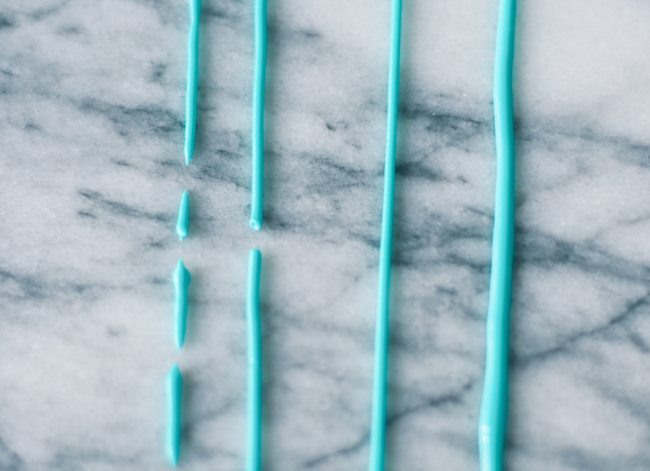
Photo via Juniper Cakery
Look at our image above — we bet you can tell which is the perfect consistency, right? (Hint: it’s the third one from the left). Too stiff and your piping will break up. Too wet and it will flood out! It takes a bit of trial and error, but just keep adjusting until you hit the right consistency.
Pipe a line of your royal icing and adjust from there — easy!
Our top tip for working with piping consistency royal icing
Learn the right techniques for piping for cookies. It sounds like an obvious thing to say, but piping outlines or details onto cookies is totally different than piping cupcakes.
You need to anchor your royal icing onto your cookie (touch the tip to the cookie and pipe a little out so it sticks) before lifting up and basically piping in mid-air so the line of royal icing simply falls gently onto the cookie. This really helps keep those lines sleek and free of any crookedness.
4. Flooding-consistency royal icing

Flood-consistency royal icing is a thinner, runnier icing that fills in (or “floods”) an area outlined in piping or 15-second consistency icing on the cookie. It’s the fastest way to completely cover a cookie in icing. Make it too runny and you’ll be left with a mess as it flows over your piping. Make it too stiff and it won’t spread or set smoothly.
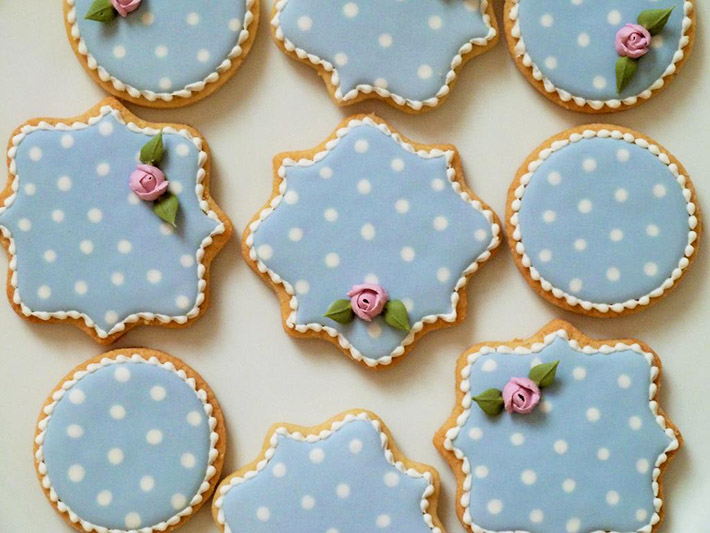
Photo via Clara3010
Another great thing about flooding icing is that you can use it to add painted effects, like the cute polka dot cookies above! Once you’ve flooded your cookies, take a contrasting color royal icing (also in flooding consistency) and pipe in a pattern. You’ll find that both royal icings will begin to settle and smooth over, creating a wonderful seamless look.
How to mix flooding consistency royal icing
Add a small amount of water to your basic recipe until you’re left with royal icing that’s a bit runnier than honey. If you scoop some up with a spoon and plop it back into the bowl, you should see the icing blend back together in a few seconds.
Our top tip for working with flooding icing
For better control, add your flooding icing to small squeeze bottles rather than a piping bag. Smaller ketchup-like bottles work well because of their tiny nibs.
Do I flood with the same consistency as what I outlined with?
Is there a home-made royal icing recipe, or does a person have to buy it?