
Who says ornaments have to be wintry? If you like a little extra whimsy along with your snowflakes, Santas and woodland creatures, look no further than a felt rainbow. Hang ’em on your own tree or stitch up a bunch for friends!
DIY Rainbow Felt Ornaments
Level: Easy
What You Need
Instructions
1. Cut Out the Arcs
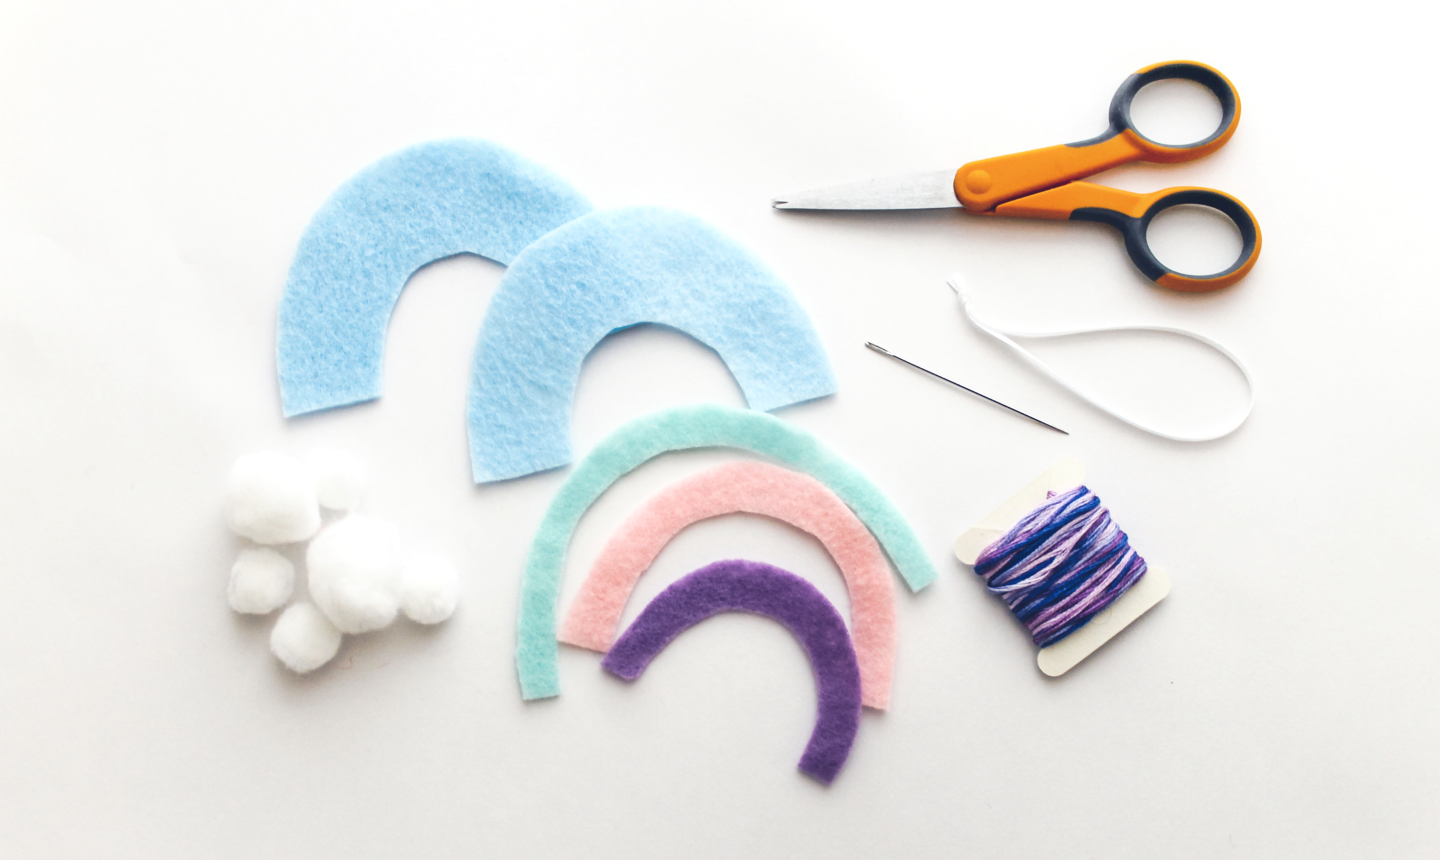
Print the templates onto paper or cardstock and cut them out. Pin the pieces directly to your felt and cut out two of the large background pieces. Then cut out your three rainbow stripes in different colors — I used aqua, pink, and purple felt for a pastel look.
2. Stitch the Middle Stripe
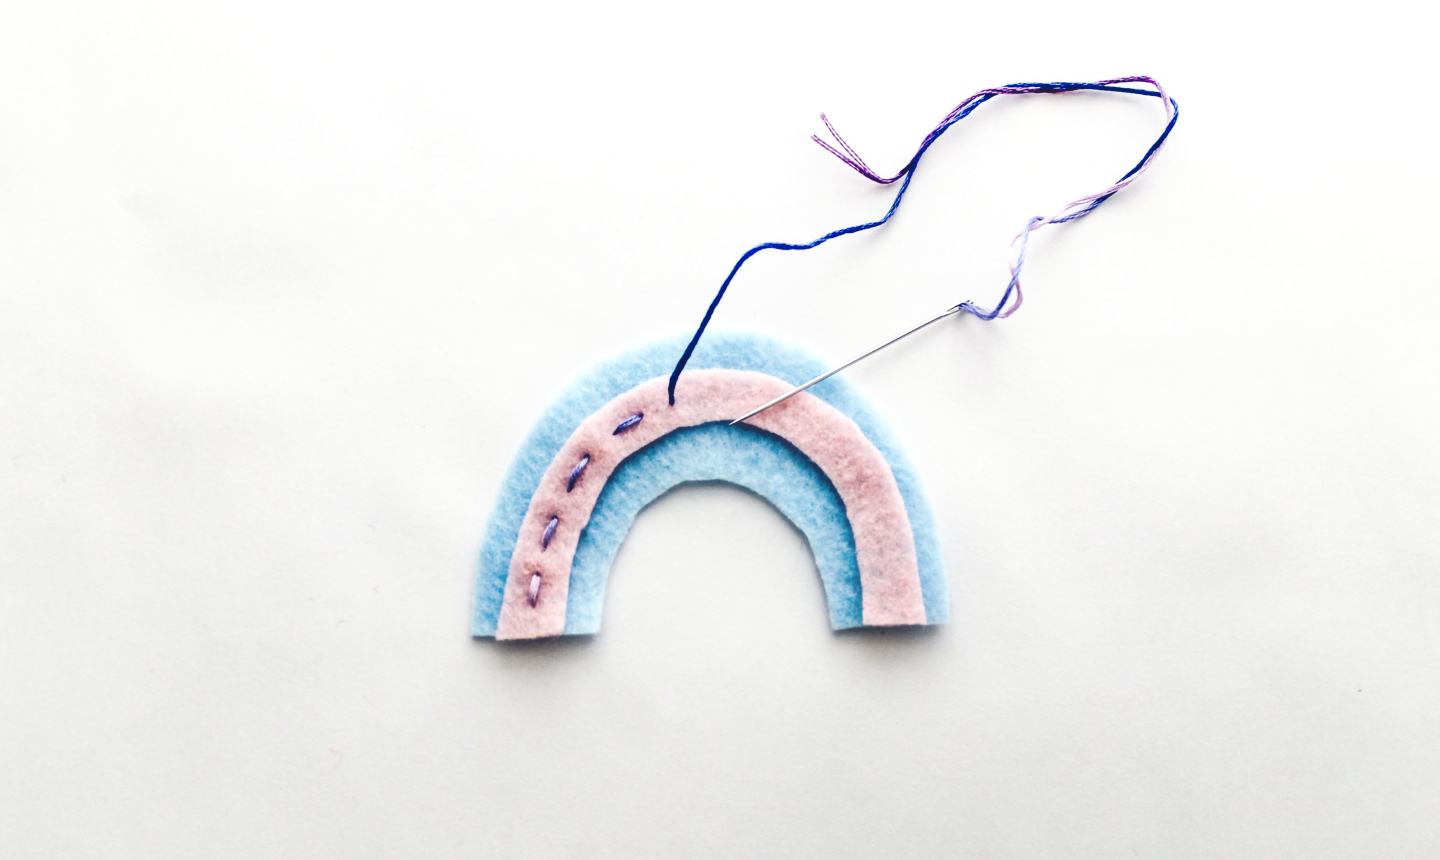
Center the middle stripe on one of the background pieces. Using a piece of your variegated floss, stitch it in place with a simple running stitch. Knot and tie on the reverse side when finished.
3. Place the Pom-poms
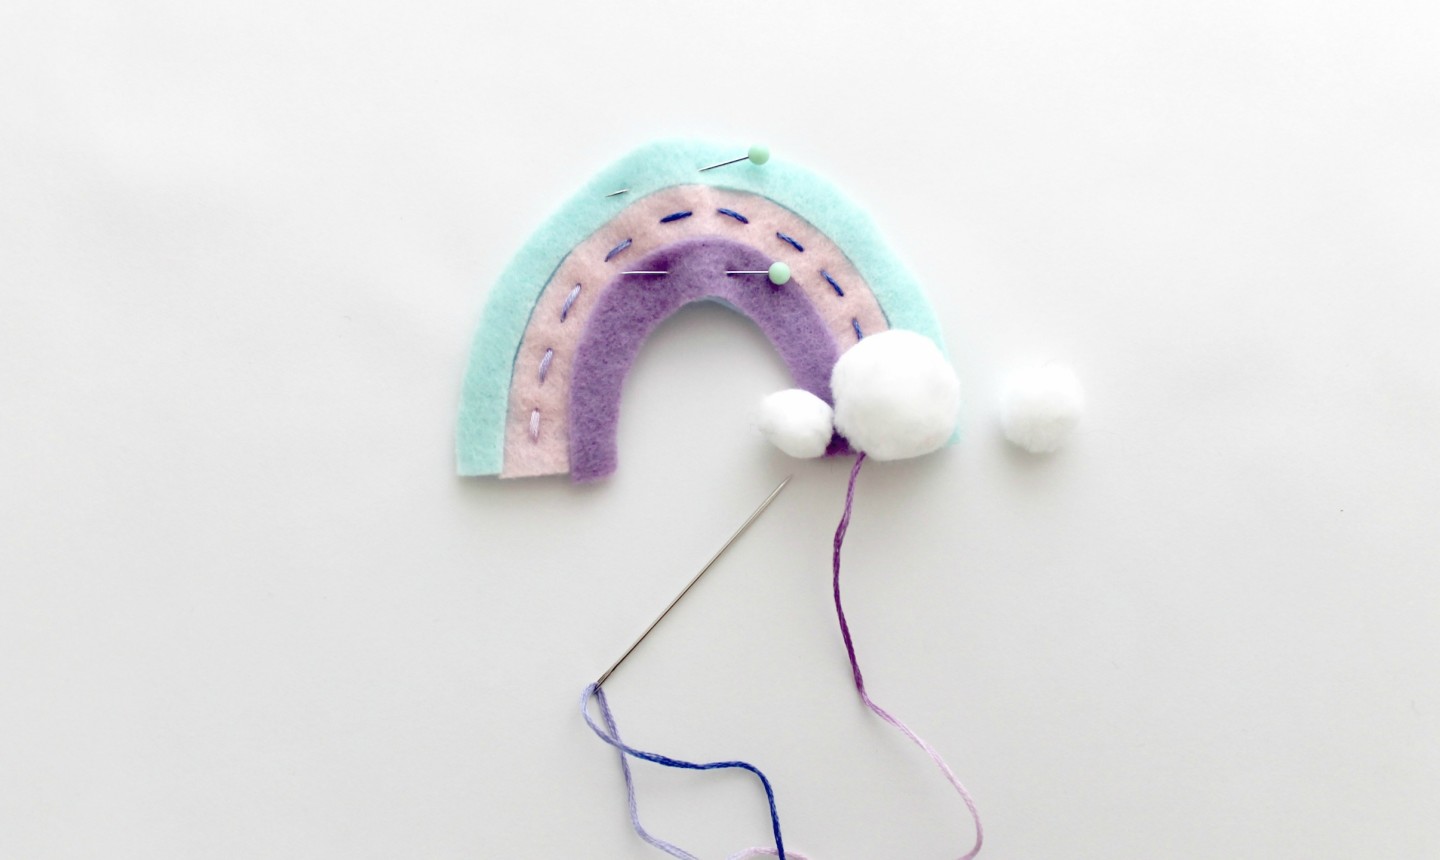
Place your larger arc and smaller arc above and below the one you just secured — but don’t start stitching yet! Before you sew ’em on, pin them to the piece and then turn your attention to the pom-poms.
Center the large pom-poms in the middle of one of the rainbow’s bases. Using a piece of floss, stitch through the background piece and up through your pom-pom to hold it in place. Add the two smaller pom-poms on either side of the large one and stitch them both into place. When all three are secure, tie them off in a knot on the backside of your rainbow and repeat for the other side.
4. Make the Final Stitches
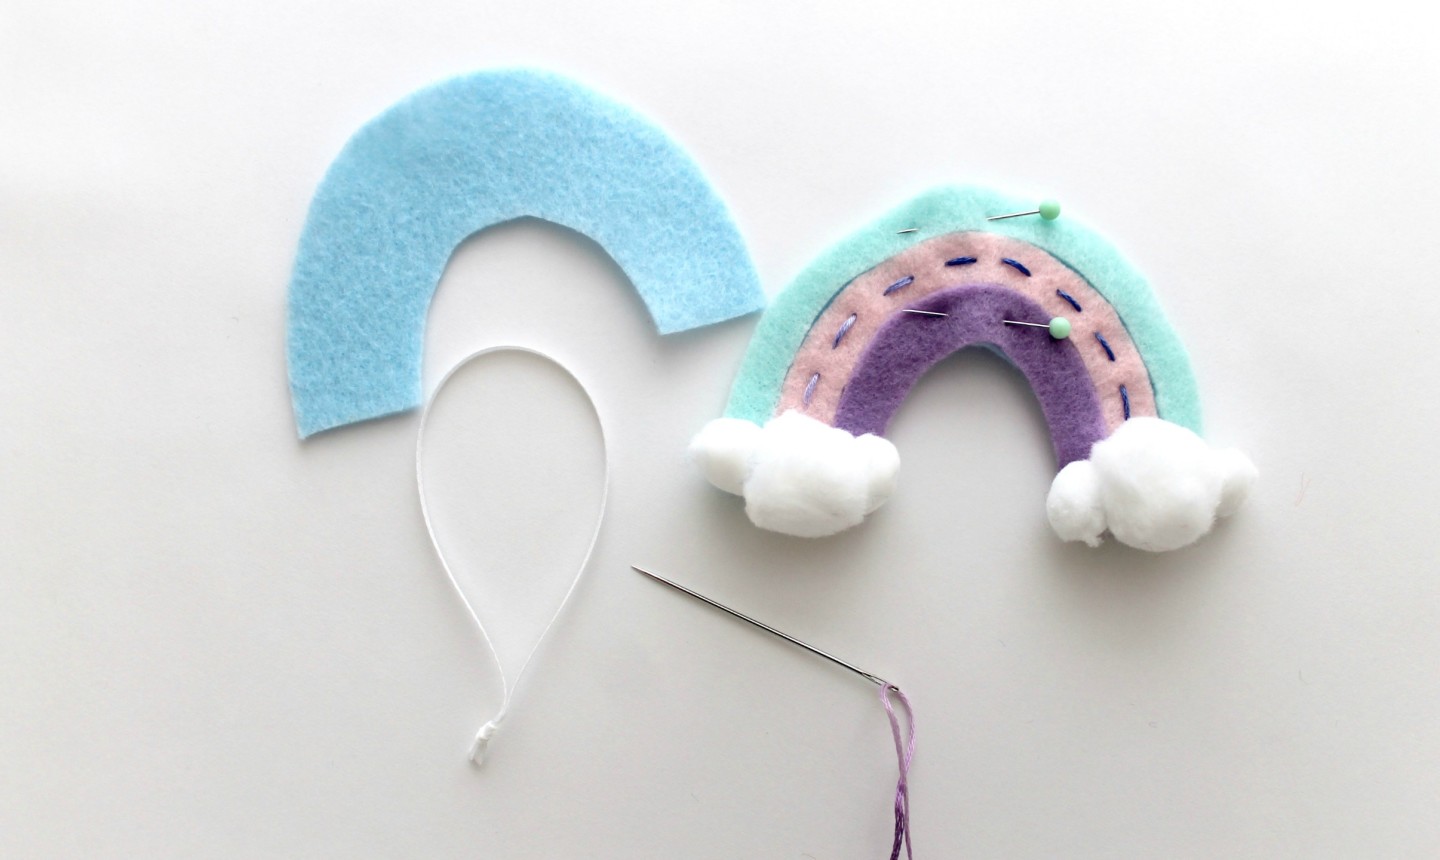
Place your remaining background piece on the back of your rainbow and pin it in place. Starting at the bottom edge of the rainbow (where you just added your cloud), stitch a running stitch up the side of your rainbow, sewing the top stripe in place as you go.
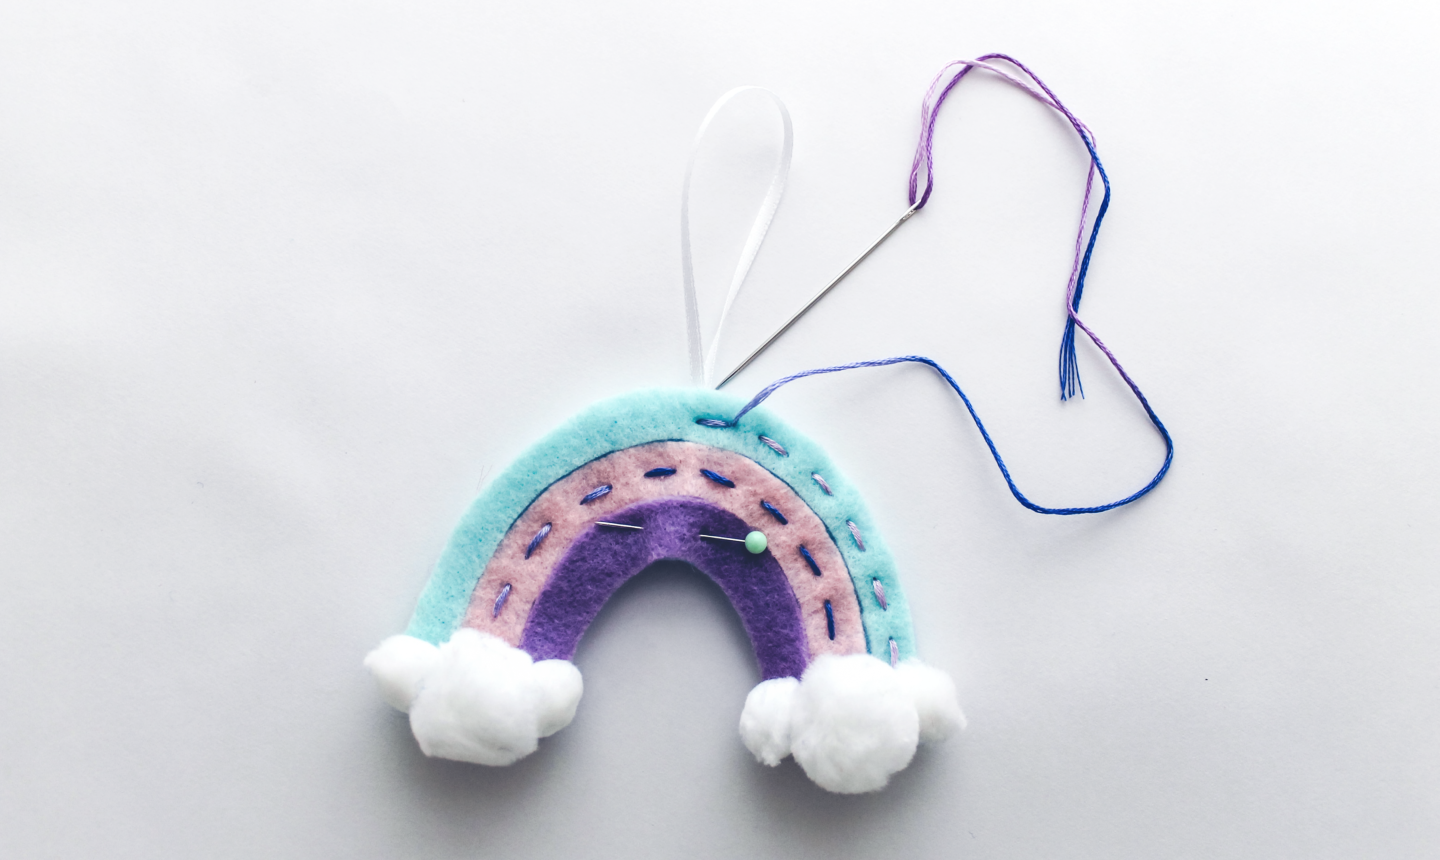
When you get to the top center of your rainbow, add a length of ribbon for hanging. Place it in between the background pieces and stitch over it, sewing it firmly in place.
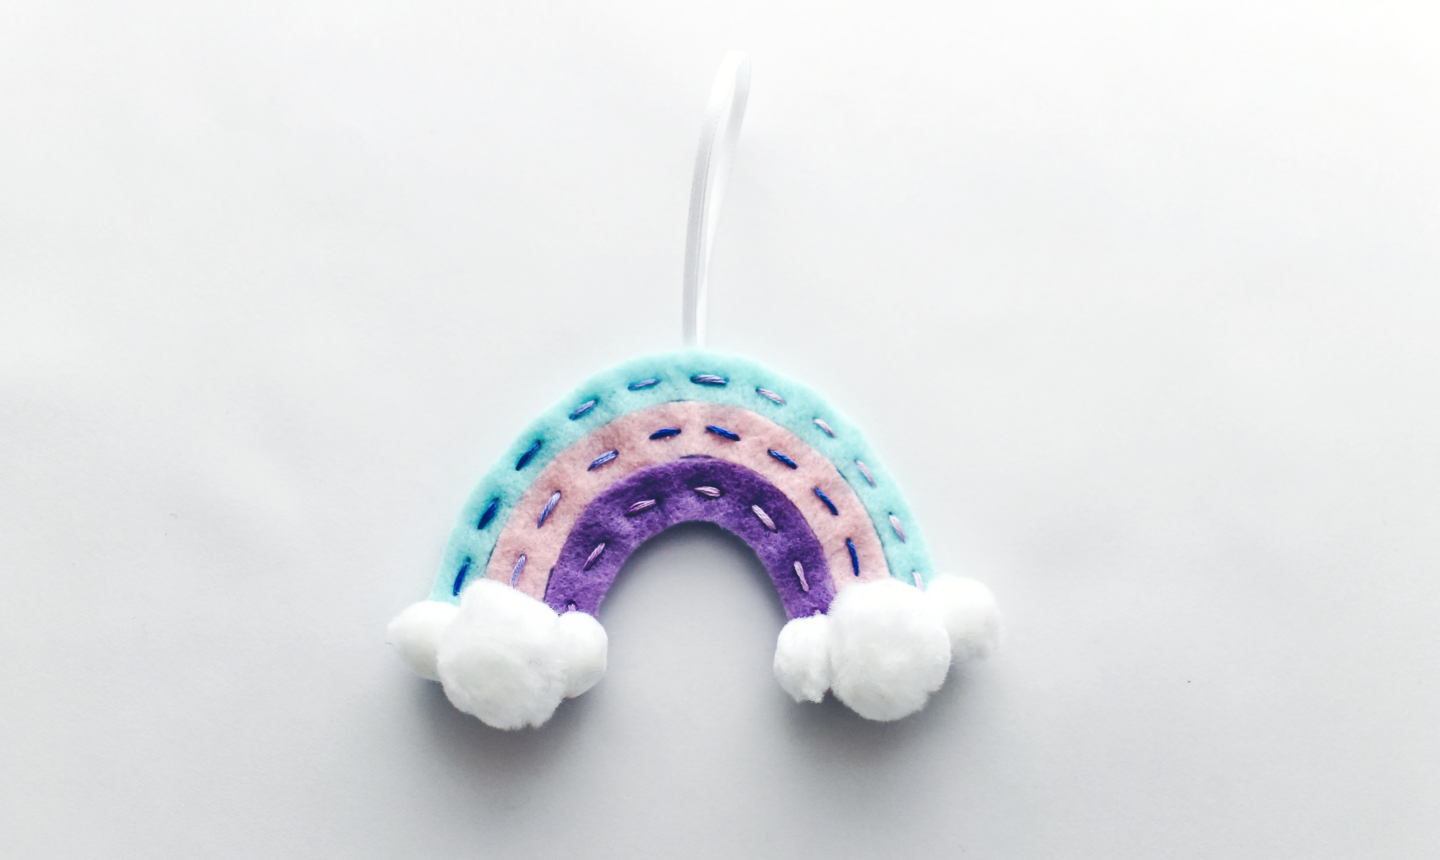
Keep stitching all the way around your rainbow to secure the top arc. When you reach the other base, stitch along the bottom arc as well. Then hang it on your tree!
Photos by Jodie Rackley.

Share tips, start a discussion or ask other students a question. If you have a question for an expert, please click here.
Already a member? Sign in
No Responses to “These DIY Felt Rainbow Ornaments Will Make Your Day”