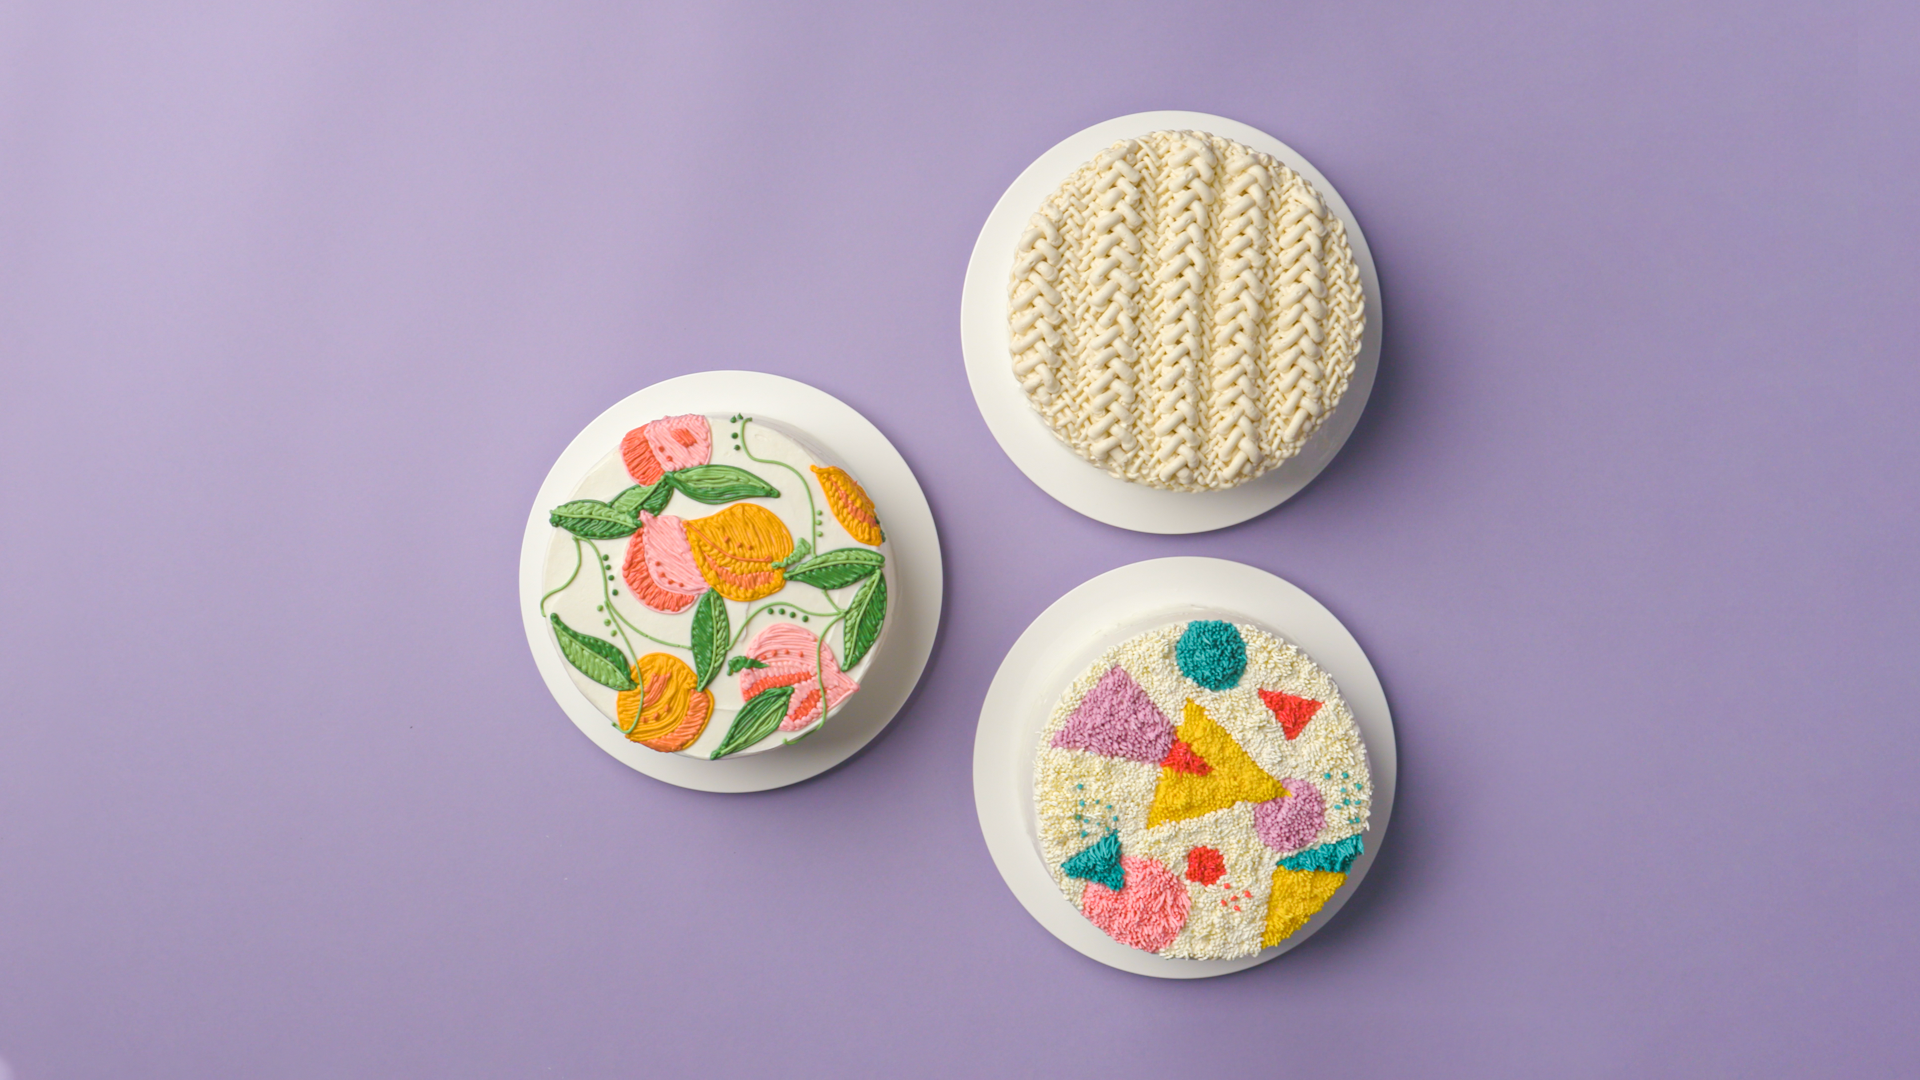
Don't let your cakes fall flat — bring the texture and wow party guests with your impressive piping skills. Best part: they'll never know each of these designs is totally beginner-friendly!
Embroidery Cake
Level: Easy

Inspired by gorgeous greenery hoops, you'll pipe colorful buttercream that looks super similar to popular embroidery stitches.
What You Need
Instructions
1. Prep the Cake
Bake your favorite cake according to the recipe's instructions and let it cool completely. We made two 6" round cakes, but you can make yours any size you want.
Whip up a batch of white buttercream and use an offset spatula to stack and frost the cakes. Smooth the buttercream with an icing smoother before decorating.
2. Make a Guide

Before you start piping, you need to plan out your design. Gently press a round cutter and leaf cutter into the buttercream on the cake to map out where the peaches and leaves will go. Plan to have the design extend beyond the cake top and go down the sides.
3. Color the Buttercream
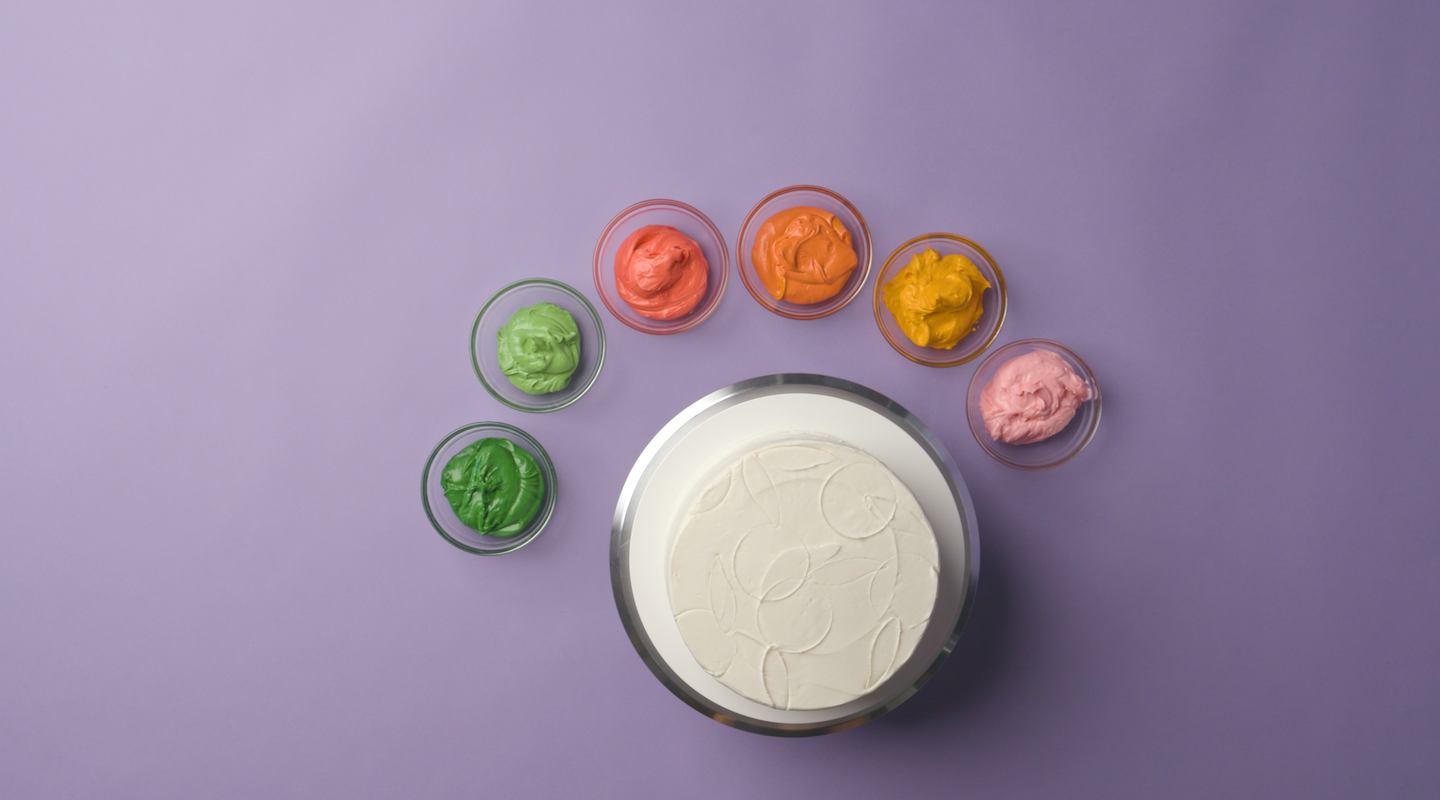
Divide your leftover white buttercream into six different bowls. (Make more buttercream if needed.) Using food gel color, color the buttercream so you have a bowl of dark green, light green, light pink, peach, orange and gold.
Pro Tip: Only add a few drops before mixing the buttercream to evenly distribute the color. Add more color if it's too light. If you accidentally make it too dark, add more white buttercream to the mixture.
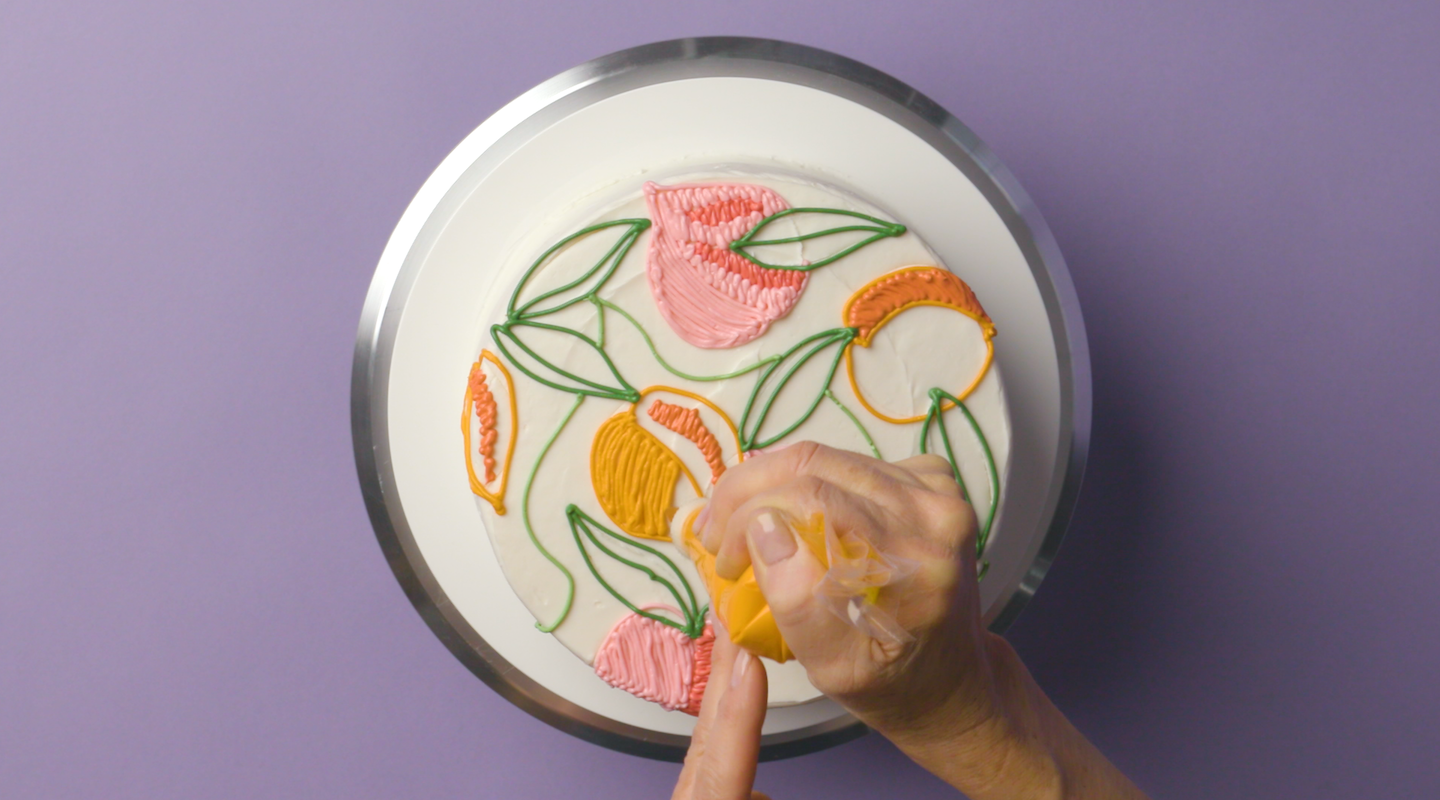
4. Pipe the Outlines
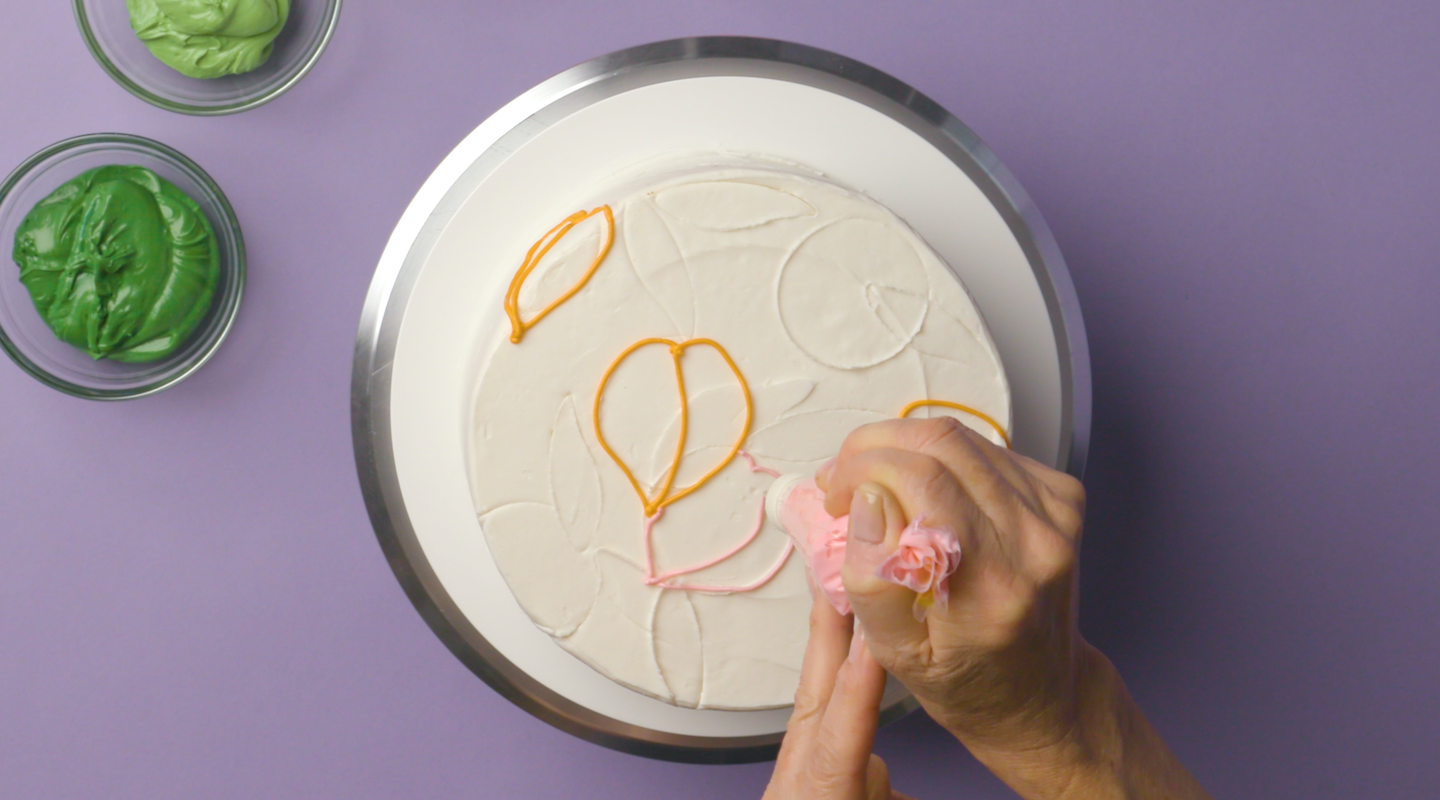
Fill piping bags fitted with a small round tip with each color of buttercream, and set them in a piping bag stand. Pipe the peach outlines, using gold for some and pink for the others. Use the circles in the buttercream as a guide, but don't follow them too exactly — you want these to be peach-shaped. Then pipe a center line from the indented top to the tip of each peach.
Pro Tip: When piping the center line, make sure it's not straight. Peaches are rounded, so the line needs to follow the curvature.
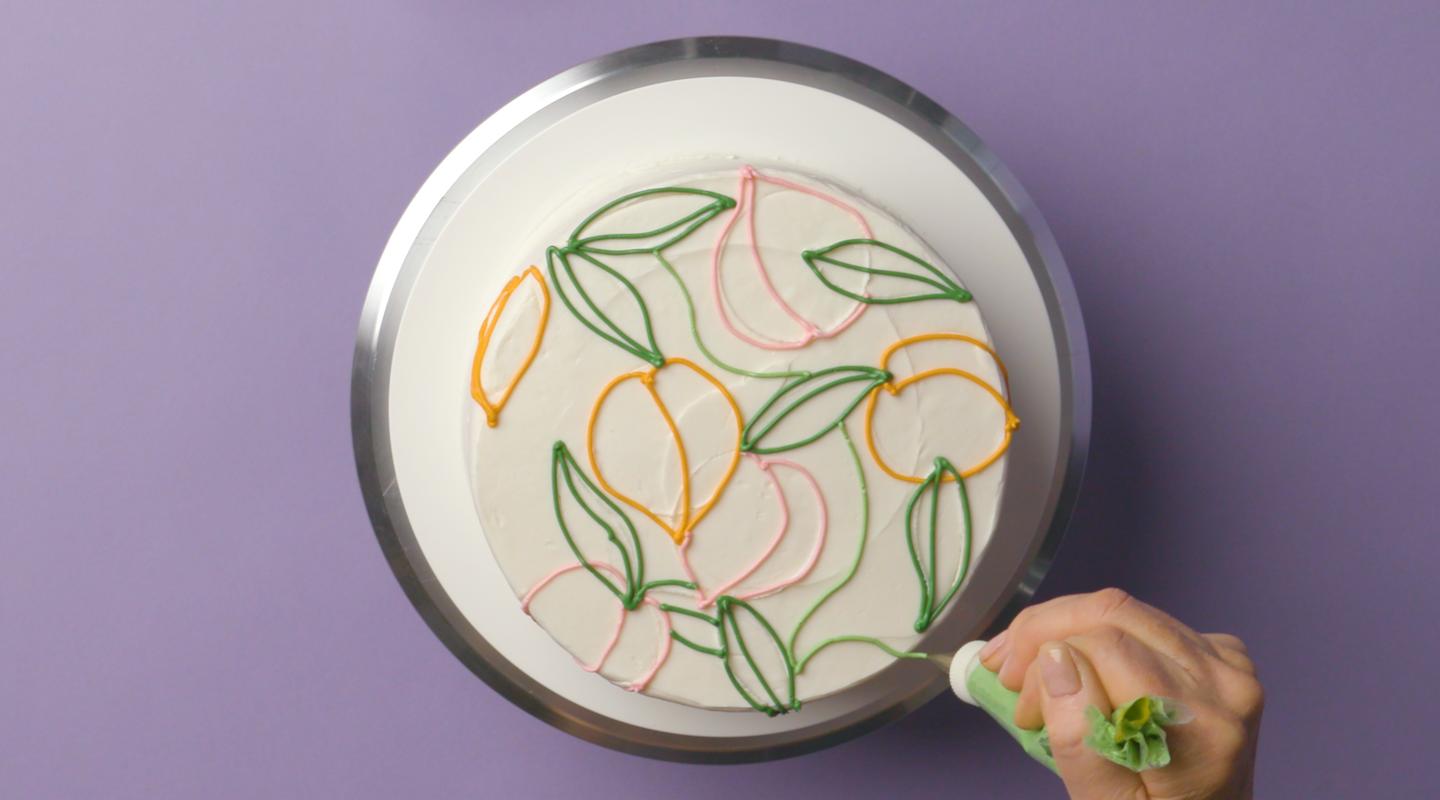
When the peaches are outlined, do the same for the leaves in dark green buttercream. Then pipe light green vines to fill in the white space.
5. Fill it In
Still using piping tip #2, begin filling in the design with a close zigzag pattern. To emphasize the dimension of the shapes, use a range of oranges and pinks in the peaches. Pipe one side of each leaf dark green and the other light green.
6. Add the Final Details

Finish the cake by piping decorative dots around any glaring white space for additional texture.
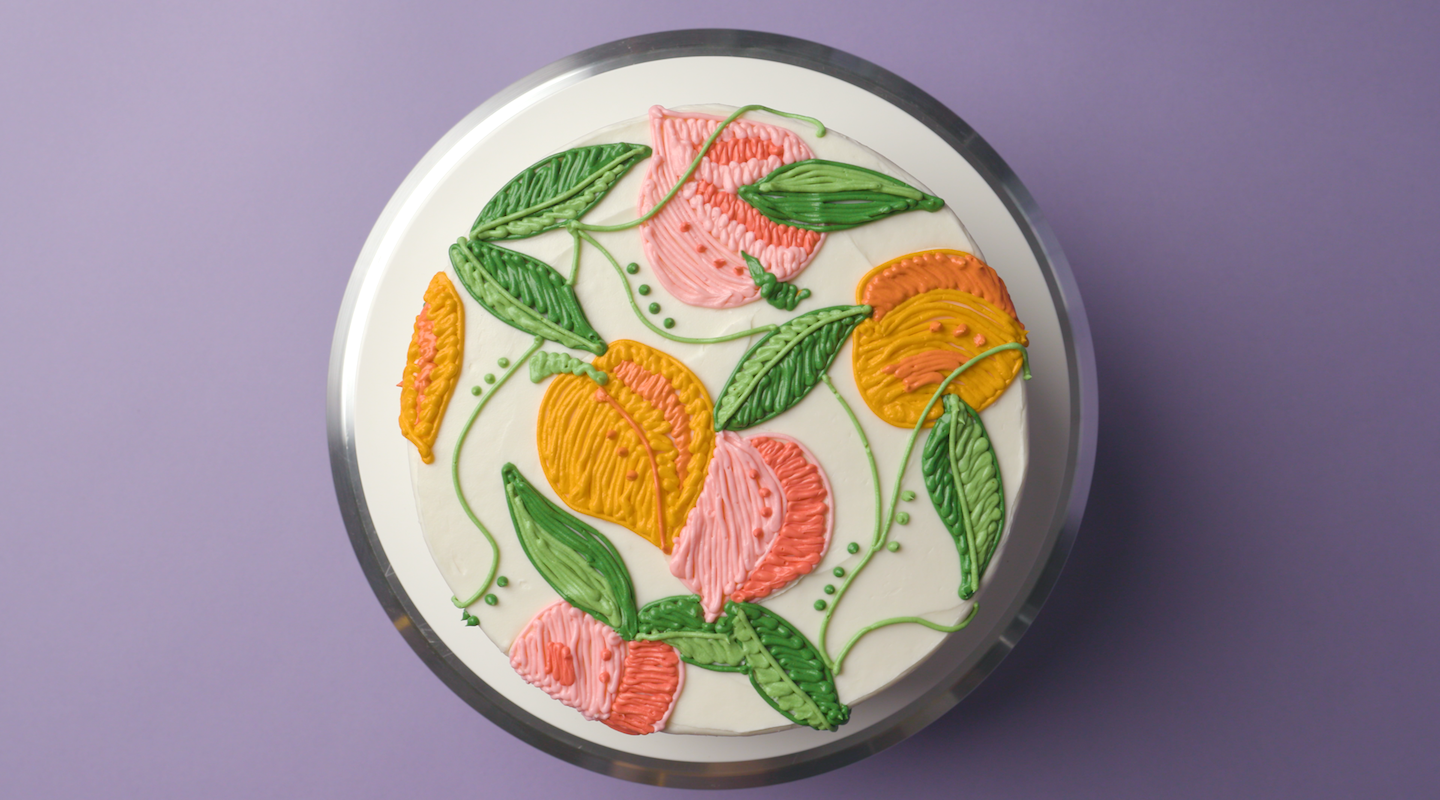
Satin stitch, fishbone stitch and French knots have never looked so yummy!
Knit Cake
Level: Easy
Cozy up in this delicious knit cake, inspired by herringbone stitch. Because it sticks to one color, this cake is truly all about that texture.
What You Need
Instructions
1. Prep the Cake
Bake your favorite cake according to the recipe's instructions and let it cool completely. While it cools, whip up a batch of white buttercream and use an offset spatula to stack and frost the cakes. Smooth the buttercream with an icing smoother before decorating.
2. Make a Guide
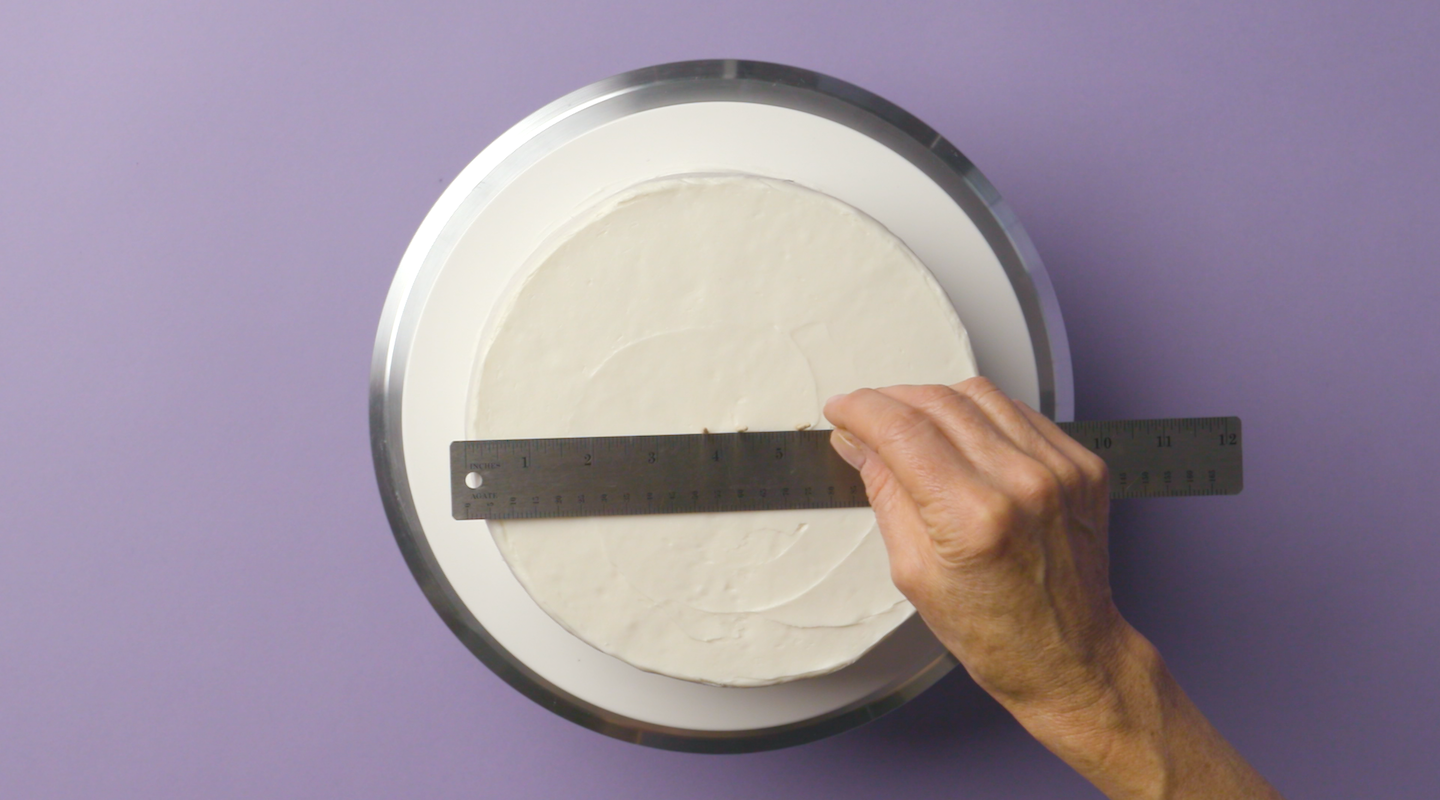
Place a ruler across the center of your cake, then insert toothpicks ¾" apart from edge to edge.
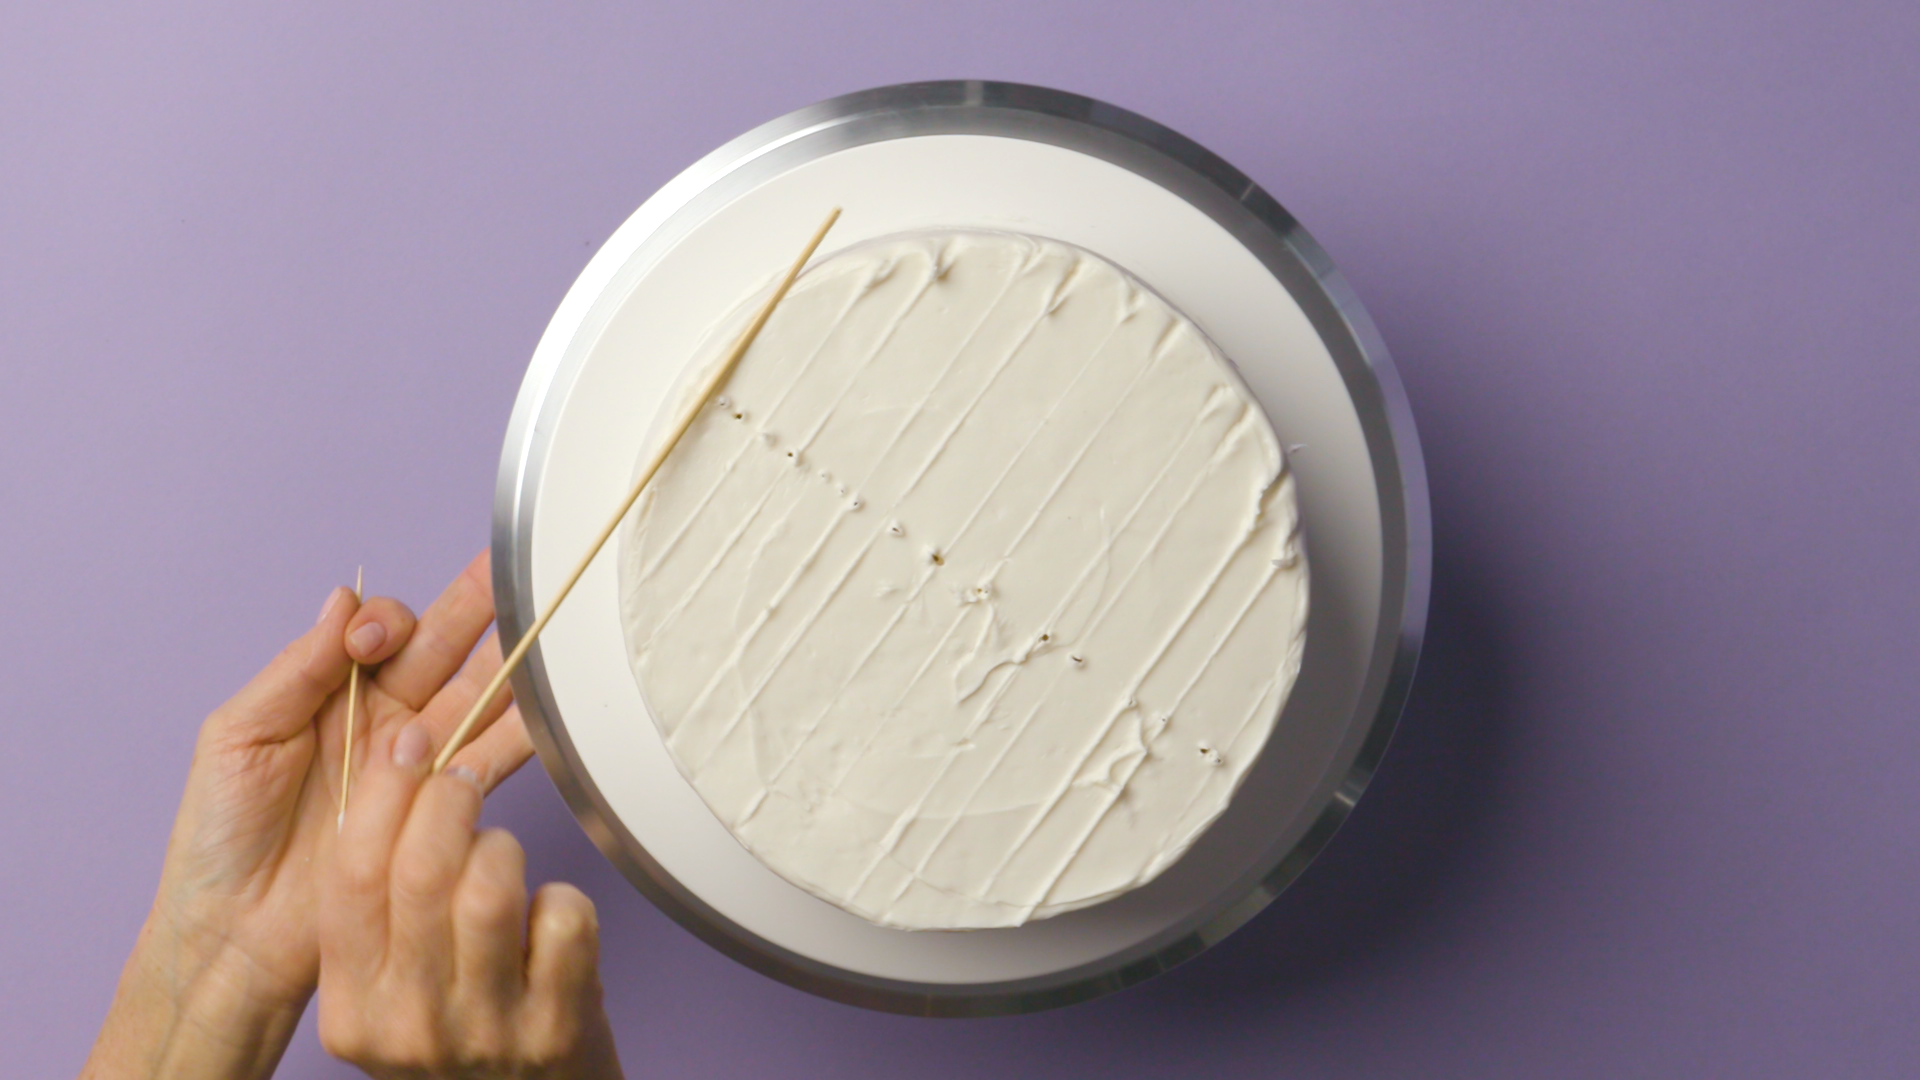
Gently press a wooden dowel into the buttercream. These lines should be placed where you put the toothpicks and perpendicular to where the ruler was. As you mark, remove the toothpicks. When you're done, your cake will have evenly spaced parallel indents.
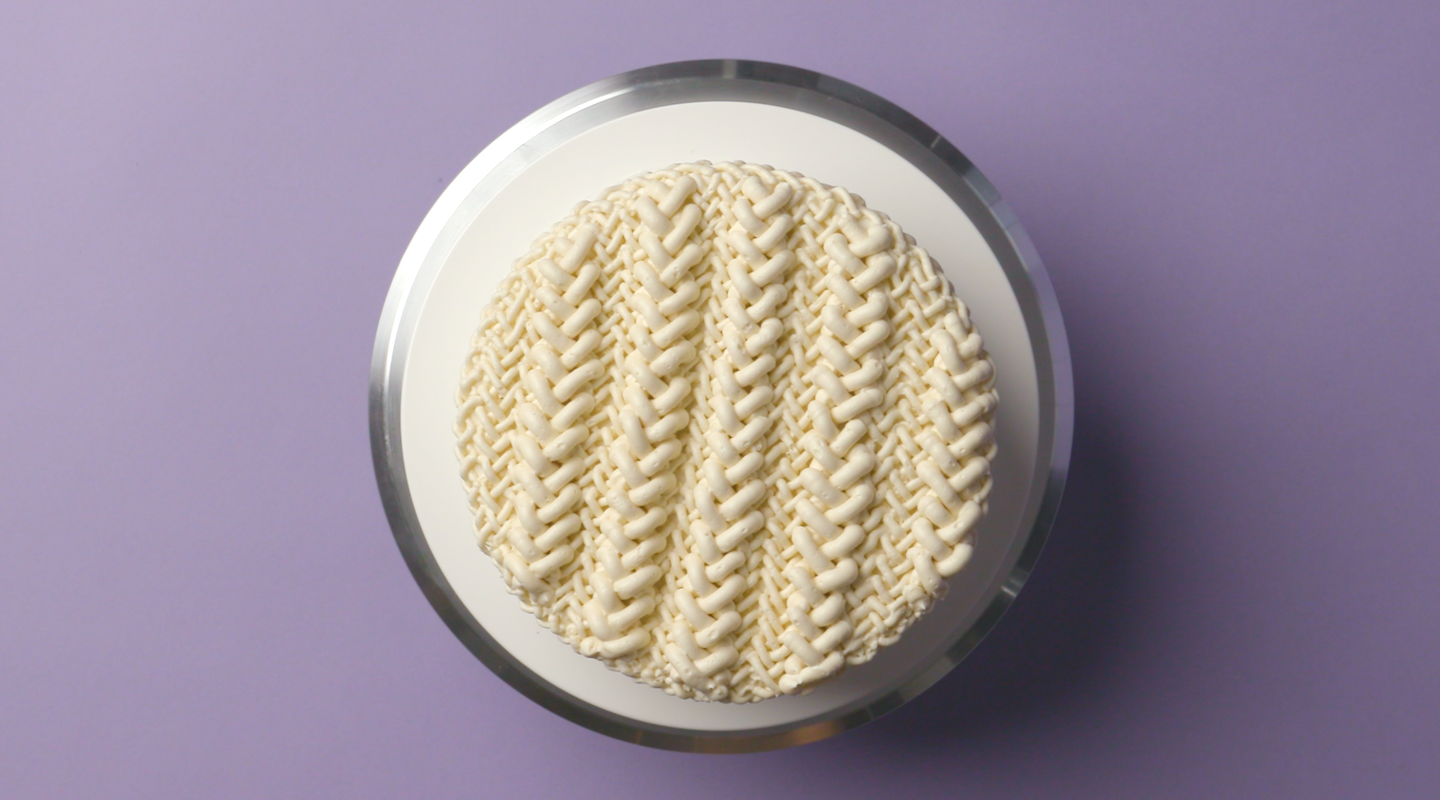
3. Pipe Your Stitches
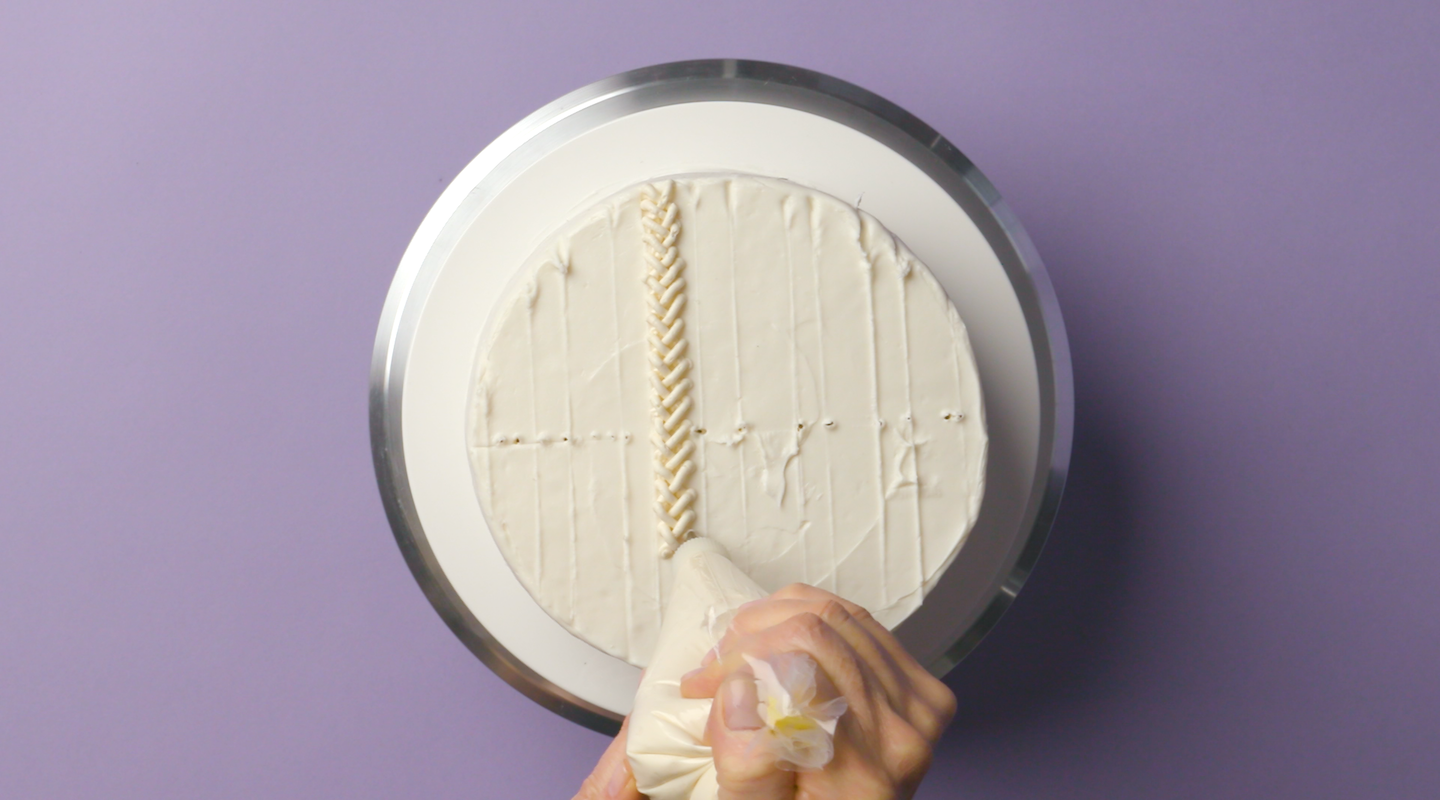
Fill a piping bag fitted with a #5 tip with ivory buttercream and turn the cake so the lines are vertical. Pick a segment and pipe a herringbone stitch from top to bottom.
Pro Tip: Piping a herringbone stitch looks complex, but it's actually super easy. Just pipe diagonal lines that crisscross over each other, like a braid.
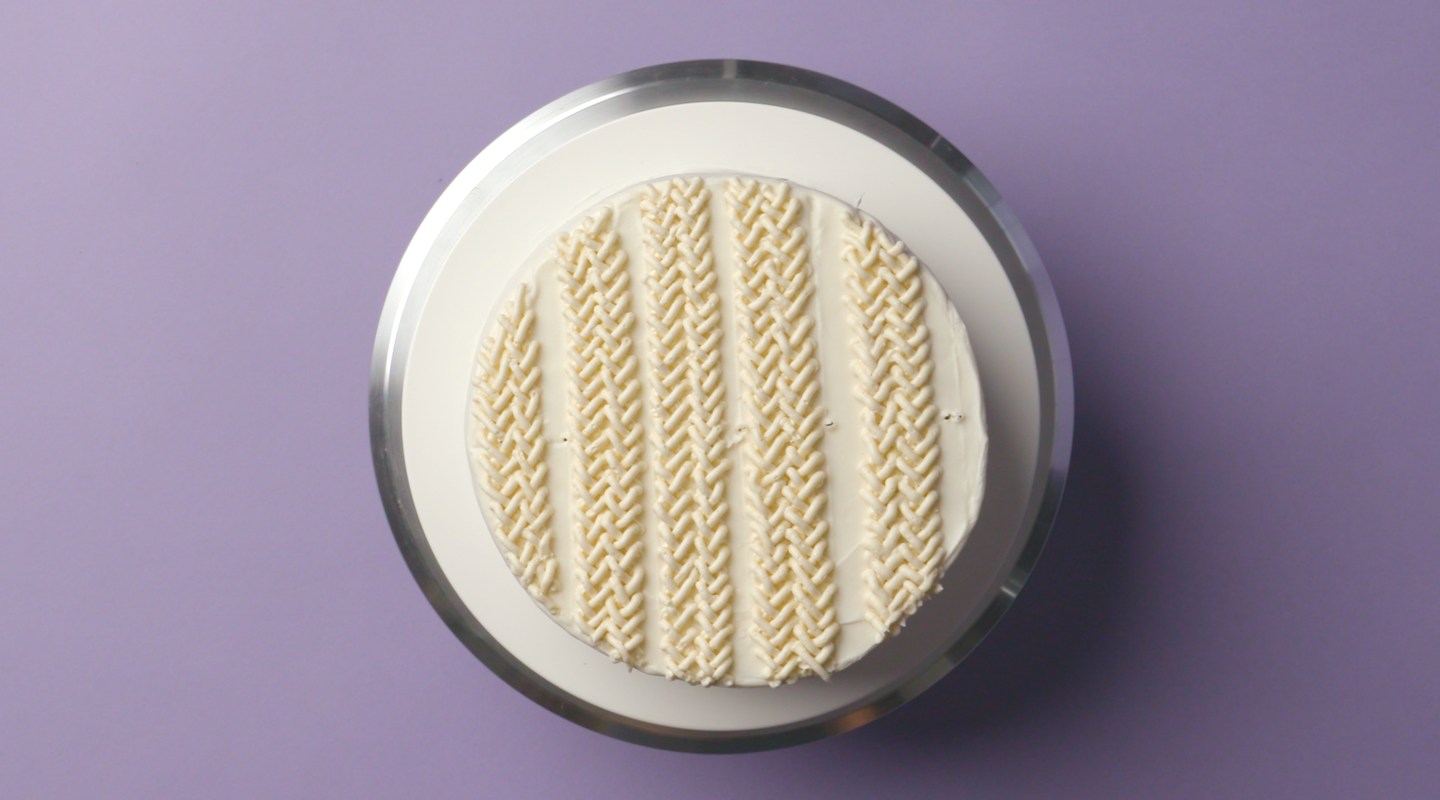
Keep piping the herringbone stitch, grouping them so all are two segments together.
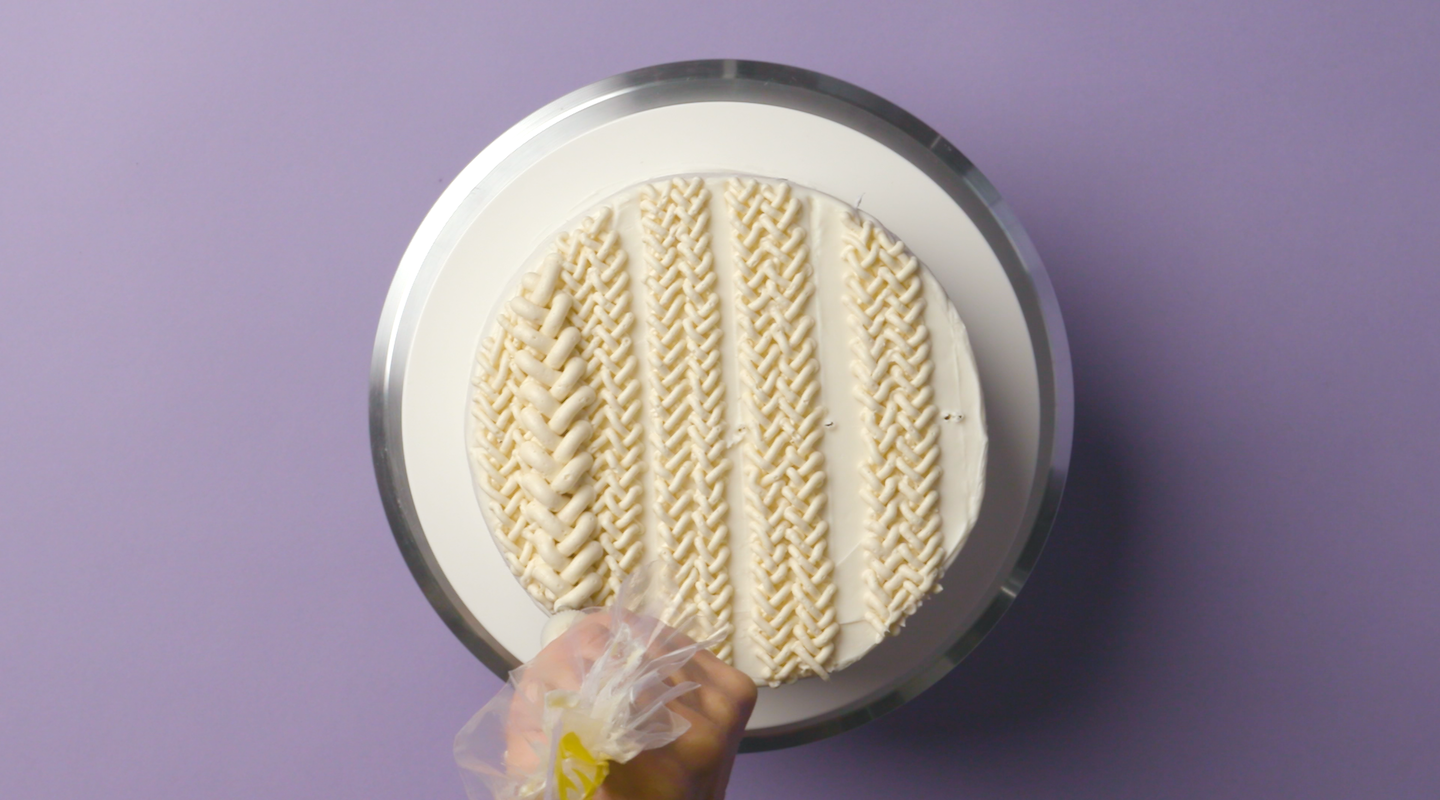
Replace the #5 tip with a #9 tip and fill in the gaps.
4. Finish the Edges
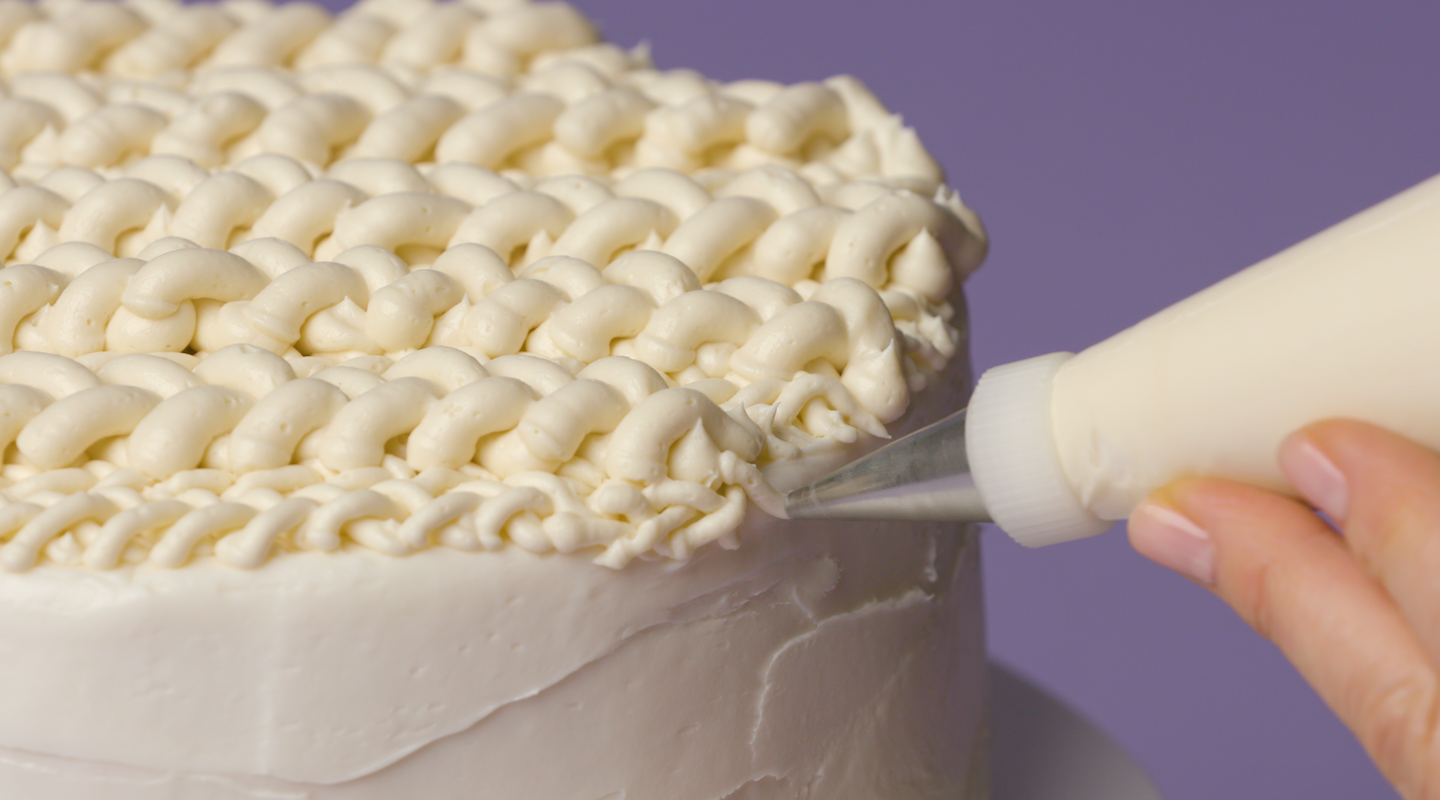
Polish off the edges by piping a herringbone stitch around the perimeter, using the #5 tip.
Now you have a new skill — knitting with buttercream!
Shag Cake
Level: Easy
 Go retro with this geometric cake inspired by the carpet of the '70s.
What You Need
Instructions
1. Prep the Cake
Bake your favorite cake according to the recipe's instructions and let it cool completely. While it cools, whip up a batch of white buttercream and use an offset spatula to frost the cake. Smooth the buttercream with an icing smoother before decorating.
2. Make a Guide
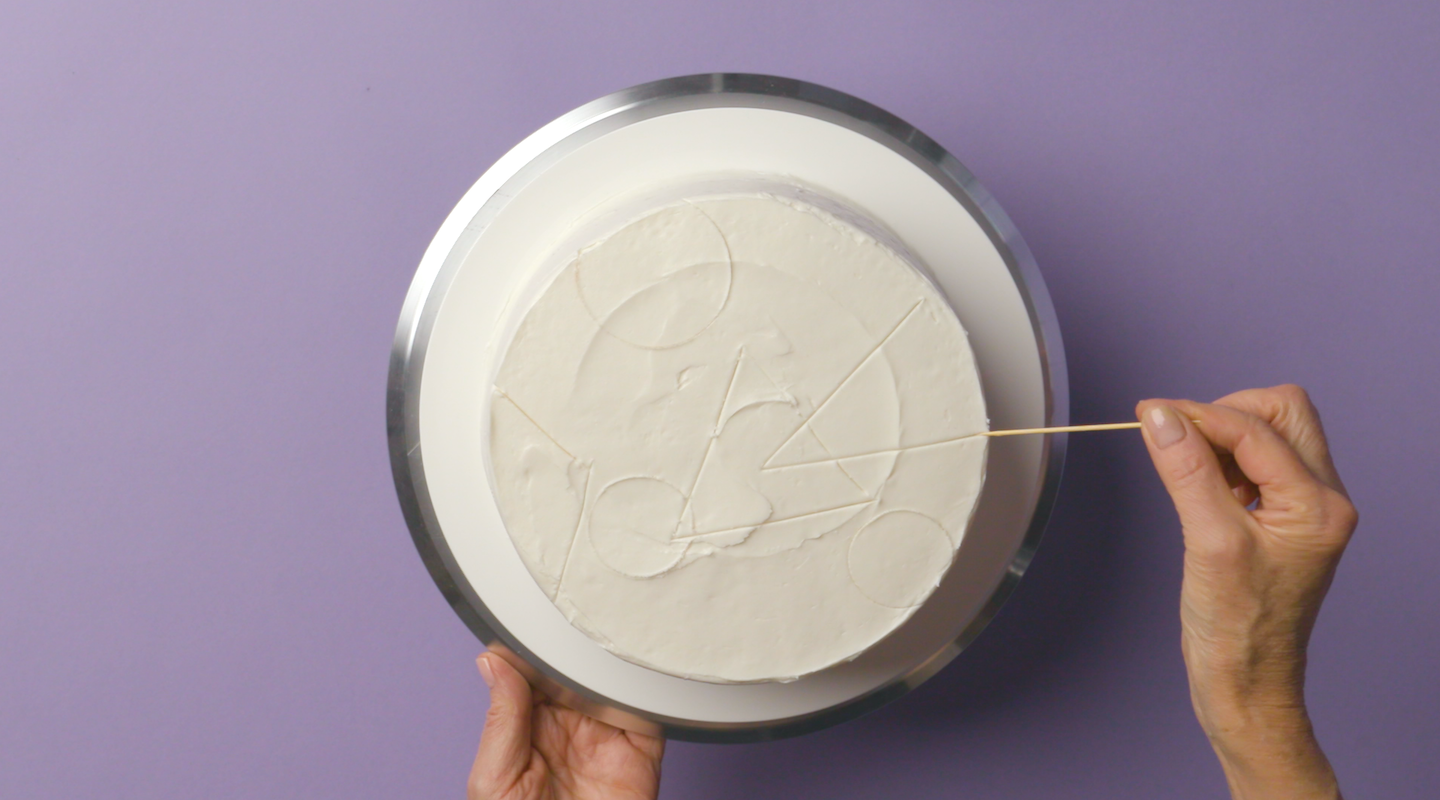
Gently press different sizes of round cutters into the buttercream to create circles. Then draw more geometric shapes with a toothpick.
3. Color the Buttercream
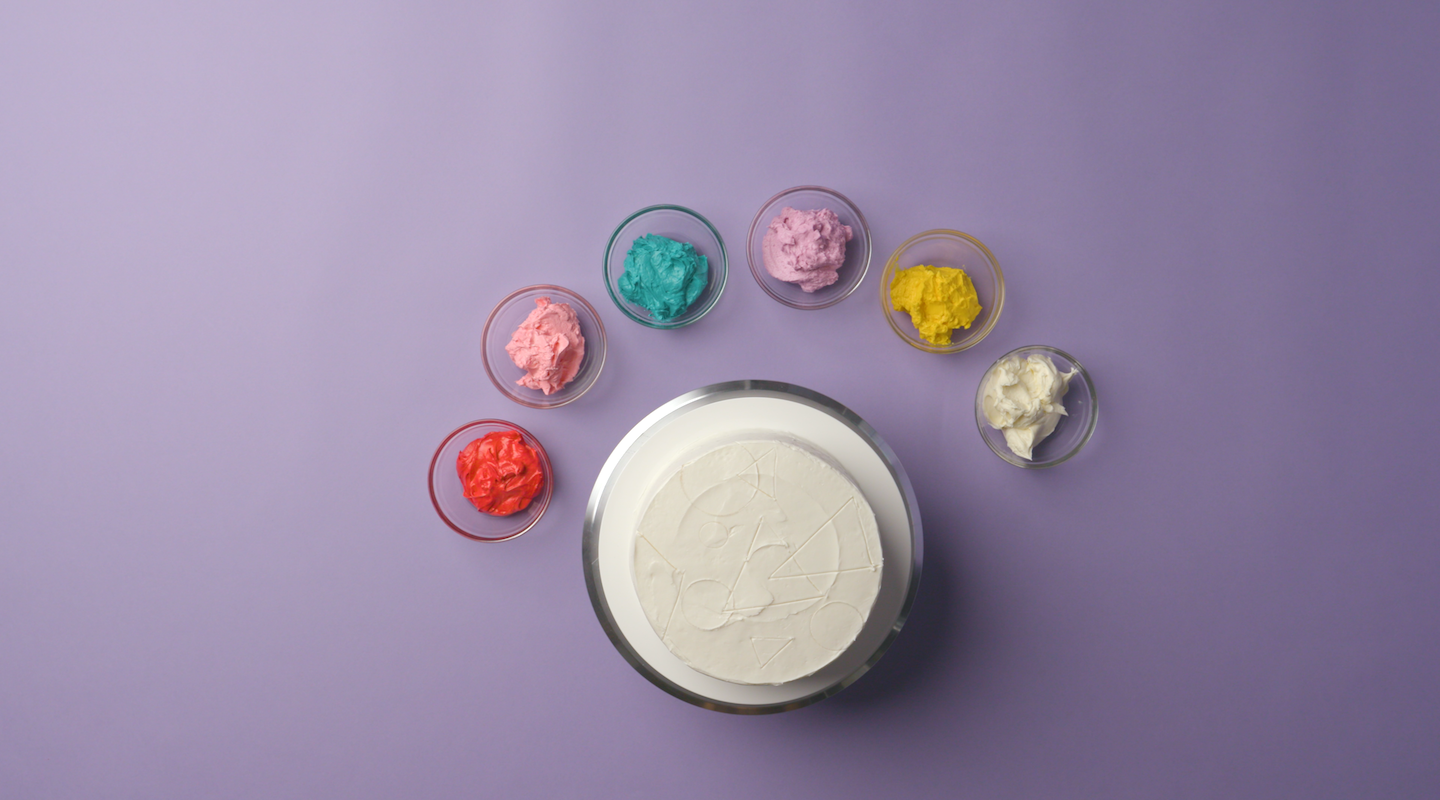
Divide your leftover white buttercream into six different bowls. Make more buttercream if needed. Using food gel color, color five bowls of buttercream and leave one white. We made red, pink, blue, yellow and purple buttercream, but you can mix whatever colors you want.
Pro Tip: Only add a few drops before mixing the buttercream to evenly distribute the color. Add more color if it's too light. If you accidentally make it too dark, add more white buttercream to the mixture.
4. Pipe the Outlines
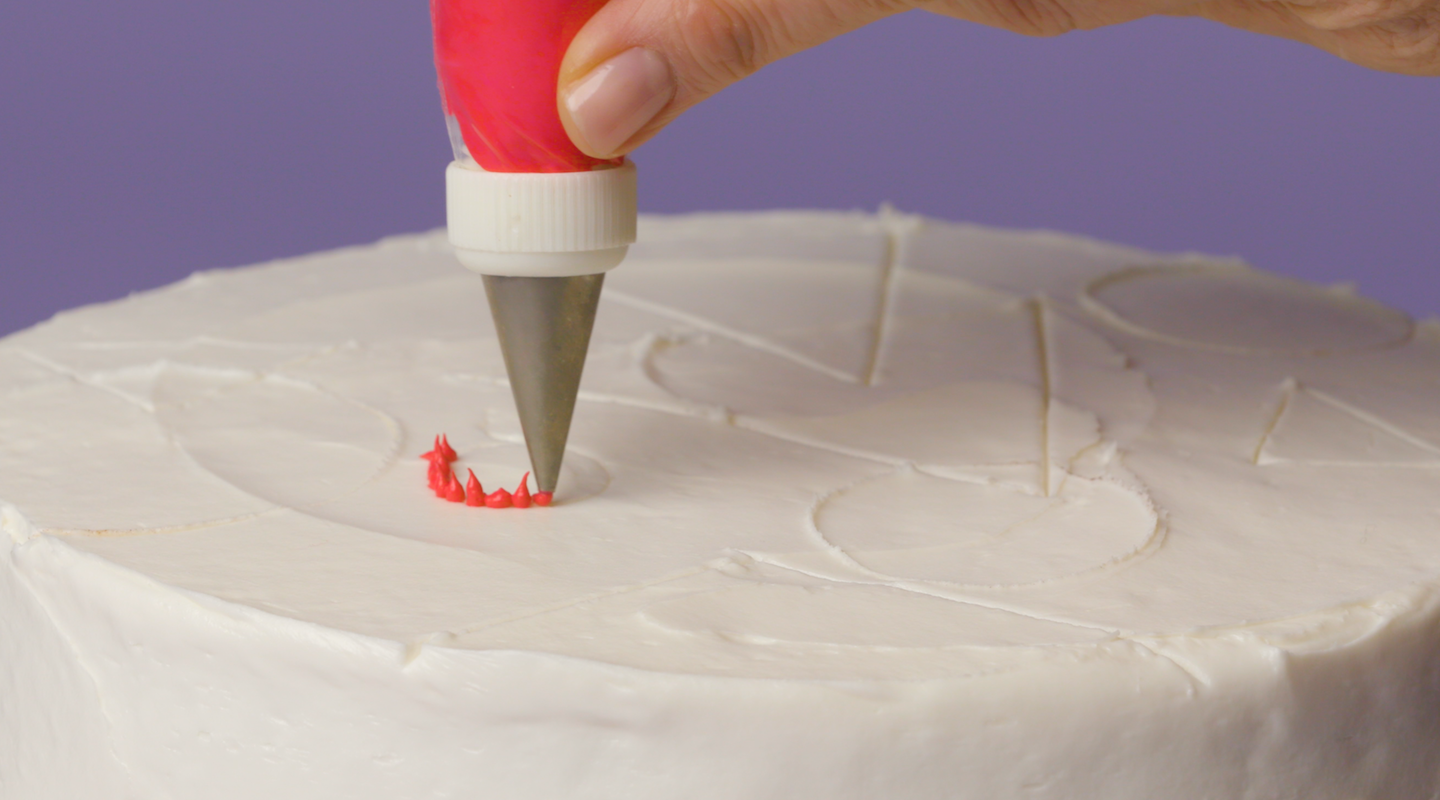
Fill piping bags fitted with a small round tip with each color of buttercream. Following your guide, pipe kisses along the outline of each shape.
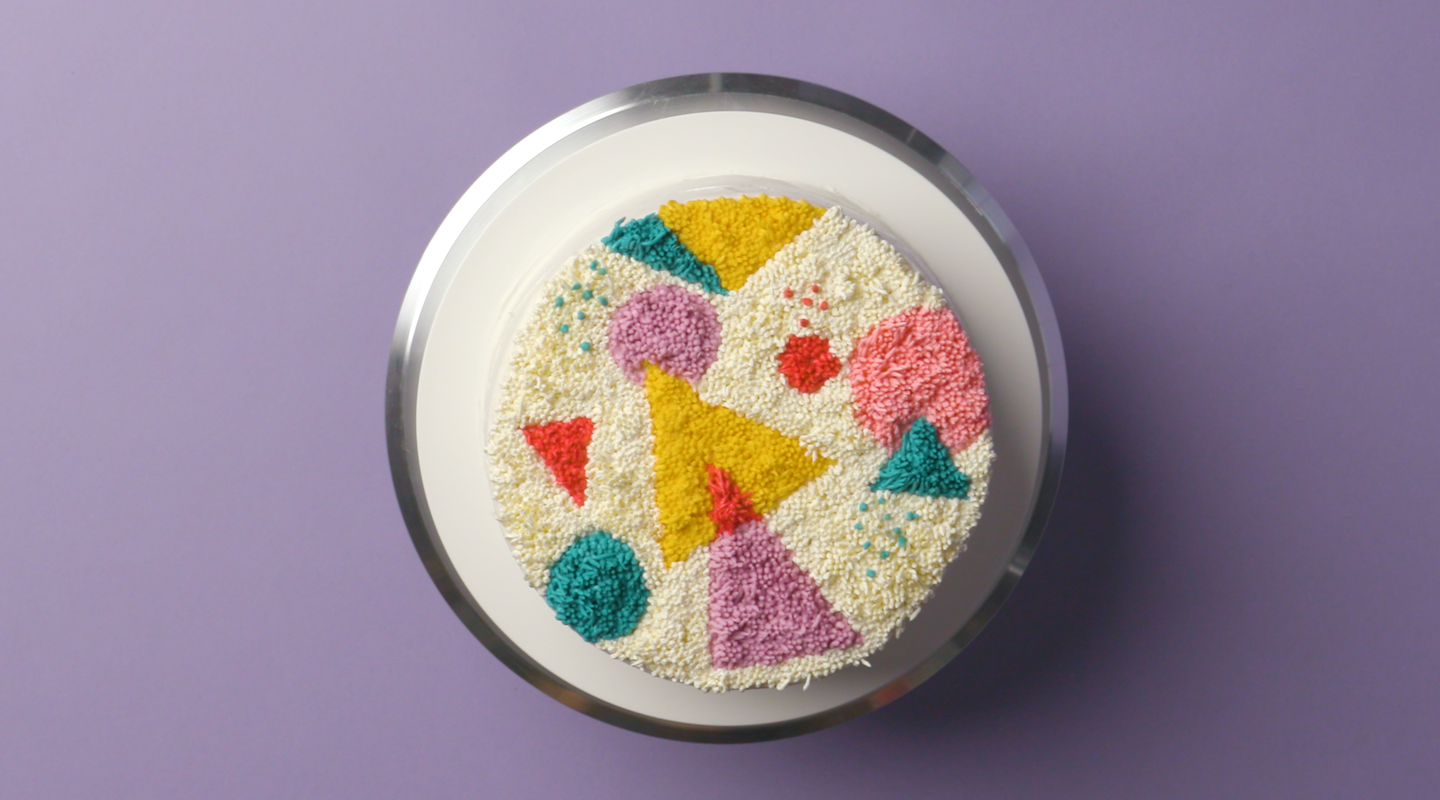
5. Fill the Shapes
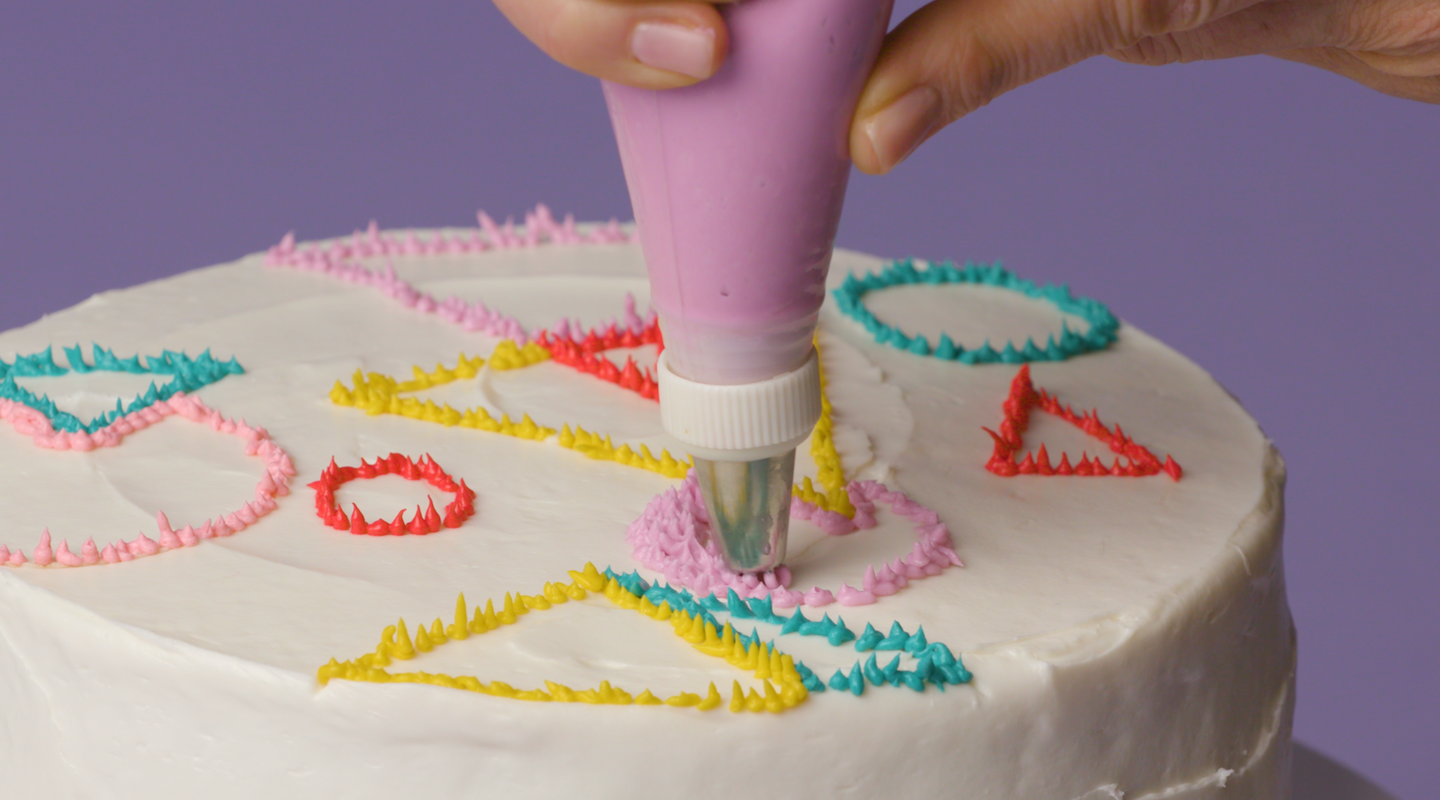
Swap the small round tips with a grass tip and begin filling in the shapes. Just like when piping kisses, hold the piping bag vertically and lift for optimal texture.
6. Pipe the Background
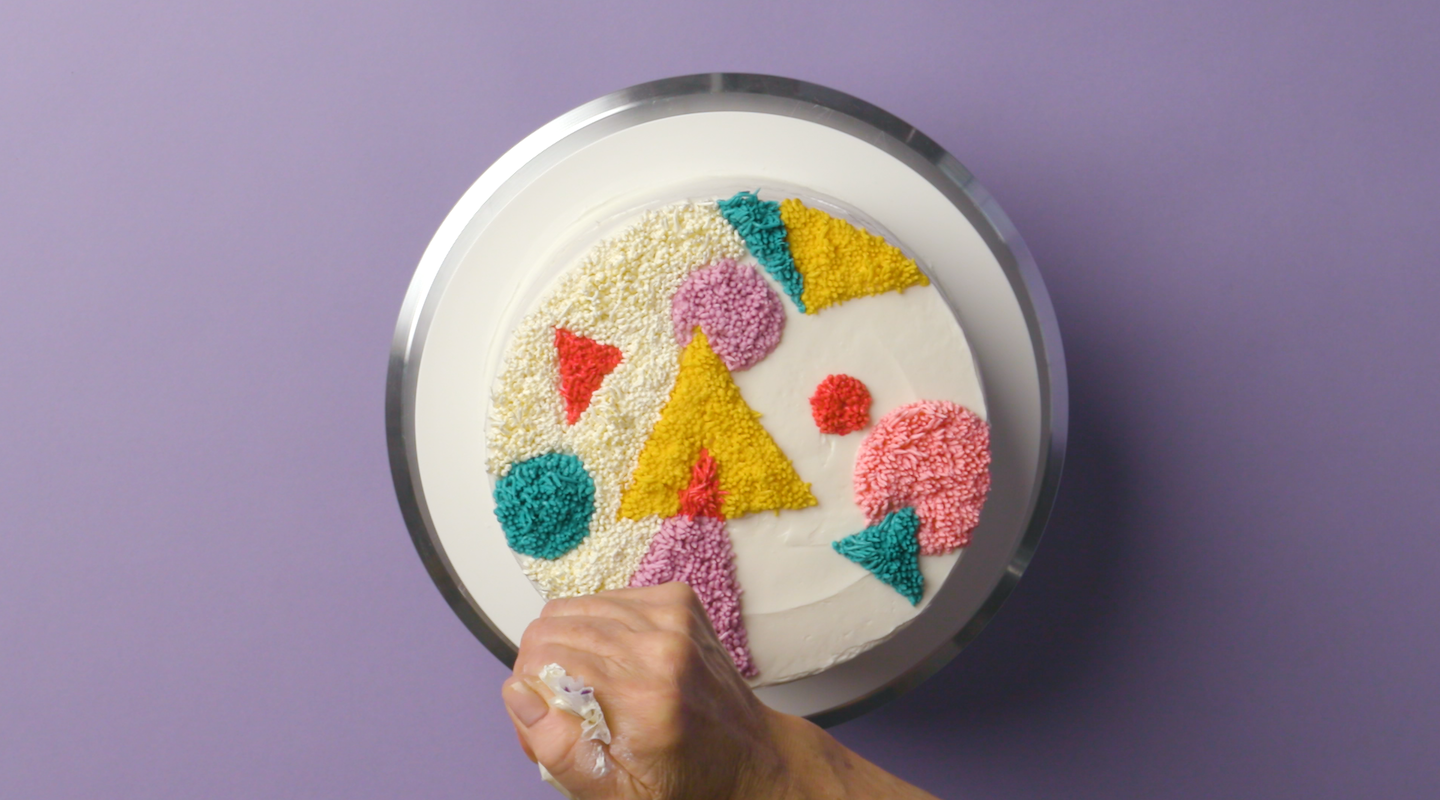
Once the shapes are filled and shaggy, pipe white buttercream with the grass tip to cover the entire cake.
Groovy!

Share tips, start a discussion or ask other students a question. If you have a question for an expert, please click here.
Already a member?
No Responses to “Even Beginners Can Pipe These Gorgeous Textured Cakes”