Marbled fondant is a huge cake-decorating trend — and now, it’s coming to your cake pops. The techniques in these pops are super fun to try and an easy way to make colorful cake pops that are marbled inside and out.
Marbling the dough is actually the simplest part. You can use two different kinds of cake (like chocolate and vanilla). Or start with a single light-colored batter, divide it, and tint one (or both) parts a different color before baking.
The dipping part gets a bit more technical. You’ll need candy coating in two or more colors: a darker hue (I refer to it as the base color) and a lighter one (I call it the accent color).
Let’s get this cake-pop party started!
Marbled Cake Pops
Level: Easy
What You Need
Instructions
1. Shape the Cake Pops
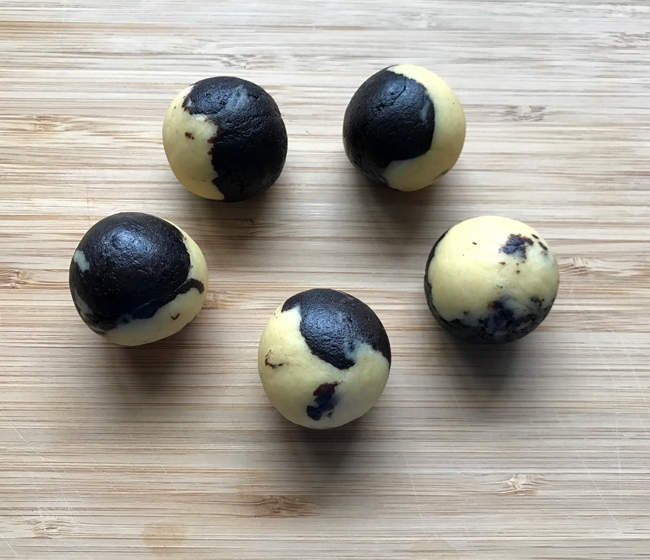
Perfectly pliable cake-pop dough is key to shaping cake pops. Use the cookie scoop to form uniform portions of dough. Scoop the chocolate dough, filling half the scoop, then scoop the vanilla dough, filling the rest. Use the palm of your hand to level the scoop and push off excess dough.
Another method to try: scoop a full scoop of each dough, cut the scoop in half and combine the halves. If you must have equal portions of each dough, this method is for you!
Roll each portion of dough into a ball. Place on a waxed paper–lined cookie sheet and refrigerate for 15 minutes or longer.
2. Melt the Candy Coatings
Melt the candy coatings while the cake balls are in the fridge. Place each color in a microwave-safe plastic bowl or cup (plastic and silicone are preferred). Microwave for 1 minute at 50 percent power. Stir, though it will still be solid. Continue to heat in 30-second bursts at 50 percent power, stirring between each interval, until the coatings are melted and smooth.
Add paramount crystals, EZ-Thin or virgin coconut oil (solid) to thin the candy coatings. Different colors melt to different consistencies, so be sure to thin each coating to a similar consistency — like wet paint.
Let the melted candy coatings sit at room temperature for a few minutes. They can always be reheated for 15 to 20 seconds at 50-percent power if they harden.
3. Stick It
Remove cake balls from the fridge and let them sit at room temperature for a few minutes to take the chill off. Dip about ⅓” of a lollipop stick into one of the candy coatings, then insert into a cake ball about halfway. Do this for all the pieces.
4. Combine the Dip Colors
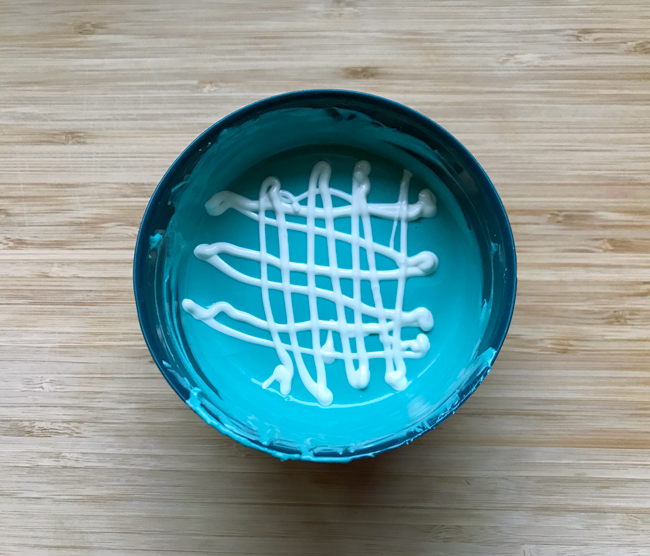
Place the lighter (accent color) coating into a zip-top bag. Snip the tip and pipe some lines vertically and horizontally over the bowl of base color. Make sure the lines aren’t too close to one another; you want the darker color peeking through.
5. Dip
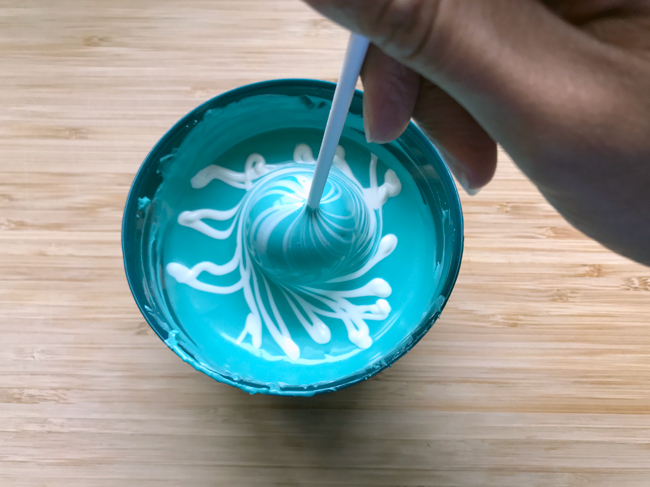
For a swirl pattern, dip the cake pop into the coating, then twist with your fingers as you lift it out. Carefully shake off excess coating while the pop is still upside down, then turn right side up. Use a toothpick to pierce any air bubbles.
For a more random pattern, dip the cake pop, then shake off excess while turning the pop this way and that. Place on a cake-pop stand and let dry completely.

You can dip two or three cake pops before you’ll need to pipe more lines.
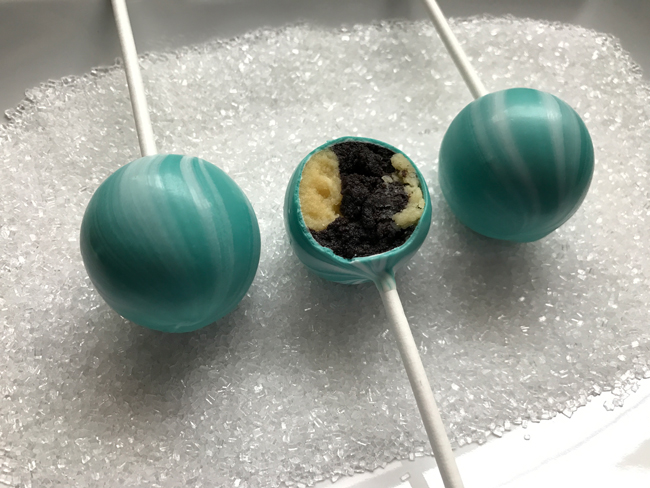
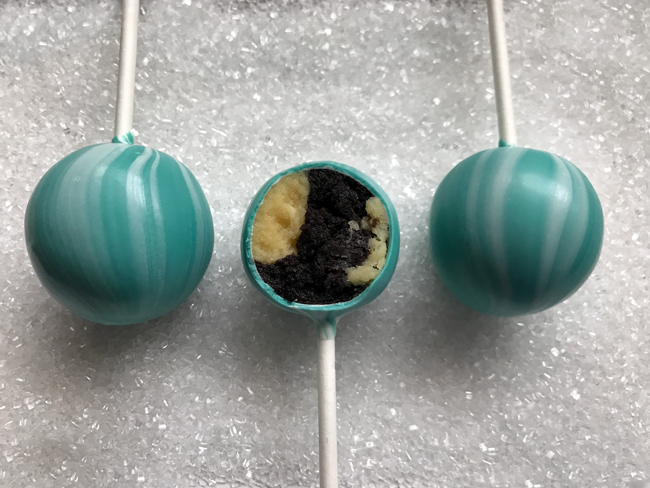
Look: marbling inside and out!

Share tips, start a discussion or ask other students a question. If you have a question for an expert, please click here.
Already a member? Sign in
No Responses to “How to Make Marble Cake Pops (Inside AND Out!)”