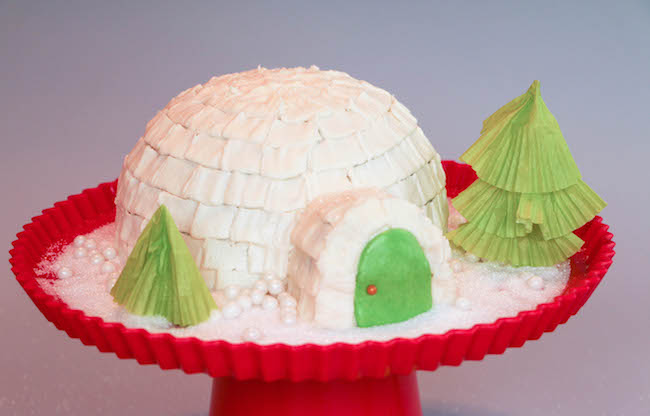
Building an igloo cake is the best excuse to stay warm and cozy on a snowy day. It’s fun, festive and (best part!) there’s absolutely no cake carving required — a heatproof stainless steel bowl and a single cupcake do all the shaping work for you. It couldn’t be easier!
Igloo Cake
Level: Easy
What You Need
Instructions
1. Bake

Place a cupcake liner in the center of a muffin pan and fill until it’s ¾ full. Grease the metal bowl and pour the rest of the batter into the bowl.
Place the bowl on a cookie sheet. Wrap a cold, wet towel around the base of the bowl. Bake the cake and cupcake according to the recipe’s directions, and allow it to cool completely before moving on.
Good to Know: The wet towel will help the cake bake more evenly, prevents the top from doming and keeps the sides of the cake from forming a hard crust.
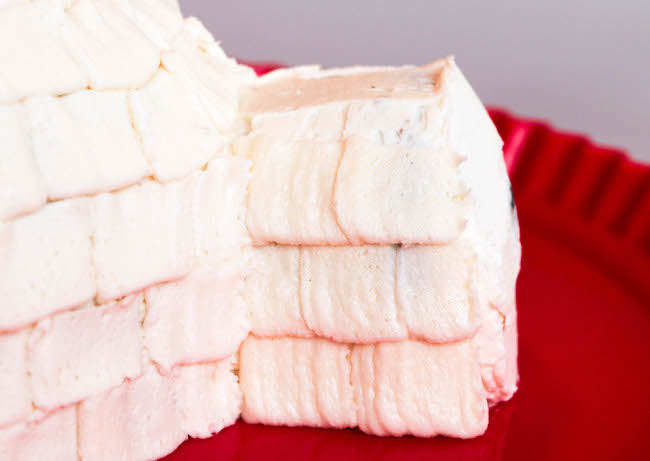
2. Shape
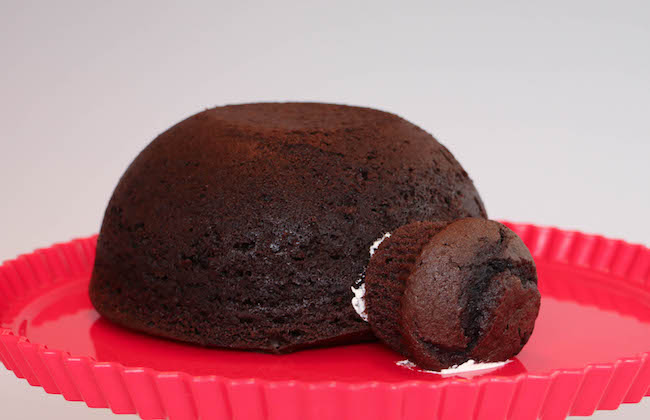
Remove the cake from the bowl and trim off the top so it sits flat when flipped upside down. Place the cake flat onto a cake board or serving platter. Remove the cupcake from the liner and use buttercream to secure it, top facing outward, as shown above.
3. Crumb Coat
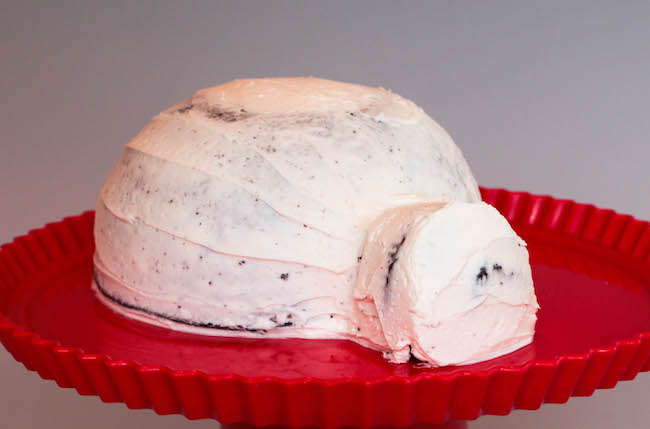
Once you have your igloo shape, crumb coat the entire dome and cupcake. Place it in the fridge for at least 10 minutes to set the crumb coat before moving on.
4. Pipe the Ice Bricks
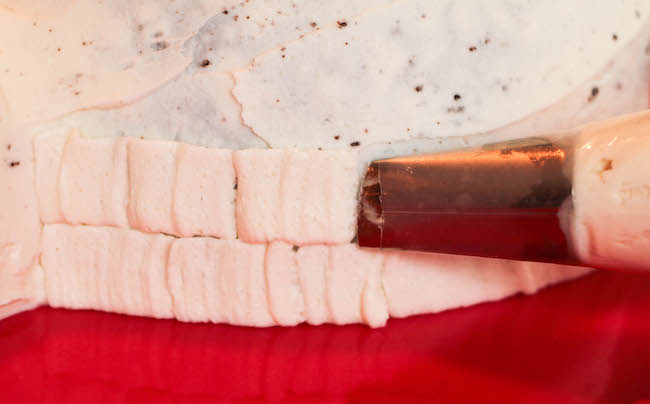
Fill a piping bag fitted with a Wilton #406 piping tip with white buttercream — either Swiss Meringue or American buttercream work well. Beginning at the bottom of the cake where the cupcake meets the dome, hold the tip flat against the surface of the cake. Pipe a strip of buttercream that’s ½” to 1″ long.
Repeat around the bottom of the cake. When finished, pipe the next row so the first strip stops half way through the strip below, like you’re stacking bricks. Continue all the way around and up the sides of the cake, staggering the strips as you go. Finish at the top with a single strip.
5. Pipe the Cupcake
Pipe staggered strips along the sides of the cupcake.

When the sides are done, pipe one arch of strips around the front.
6. DIY a Door
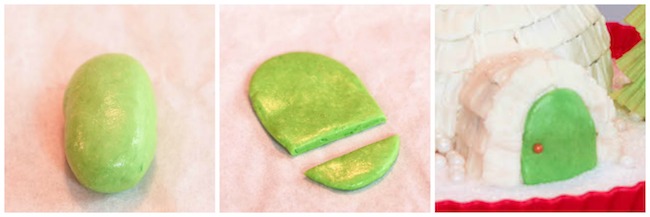
Roll a piece of green chewy candy into a log. Squish until it’s flat, then trim off the bottom to create the igloo’s door.
Attach the door to the front of the cupcake with buttercream. Press a gold sugar pearl into the candy to make the doorknob.
7. Finish the Snowy Scene
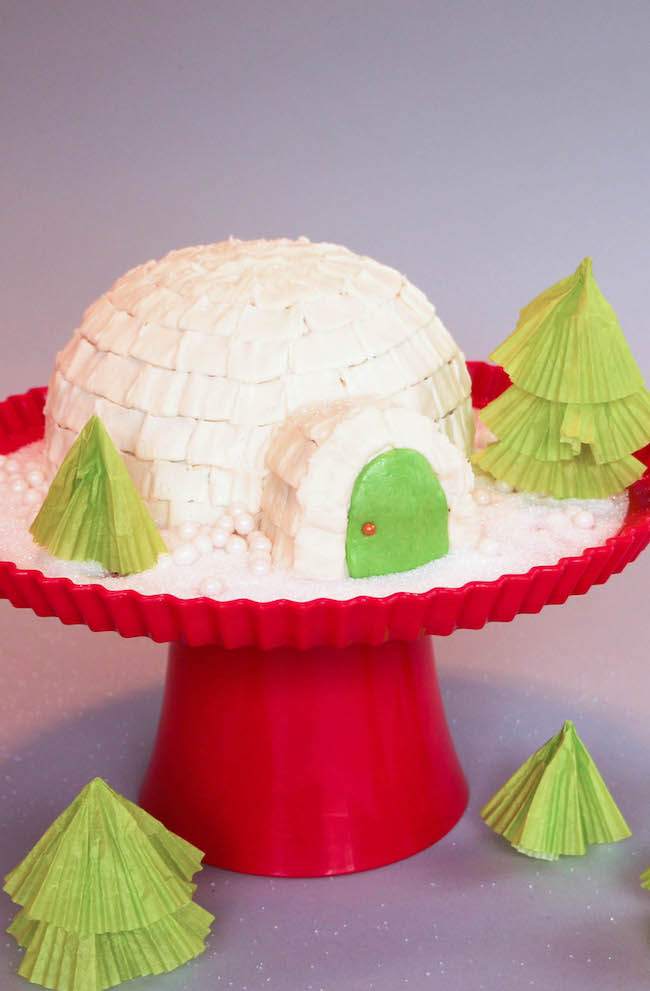
Pour sparkly sanding sugar snow around the cake and sprinkle a little on top of your igloo. Pile white sugar pearls around the cake in random spots.
To create little trees, flatten a green cupcake wrapper. Place a finger in the center (green side out) and squish the wrapper around your finger. Pull your finger out and press the center of the wrapper to a point. Fan out the bottom edge of the wrapper, then place it beside your igloo.
Now it’s time to dig into your sweet creation!

Share tips, start a discussion or ask other students a question. If you have a question for an expert, please click here.
Already a member? Sign in
No Responses to “Make a Cool 3D Igloo Cake, No Carving Required”