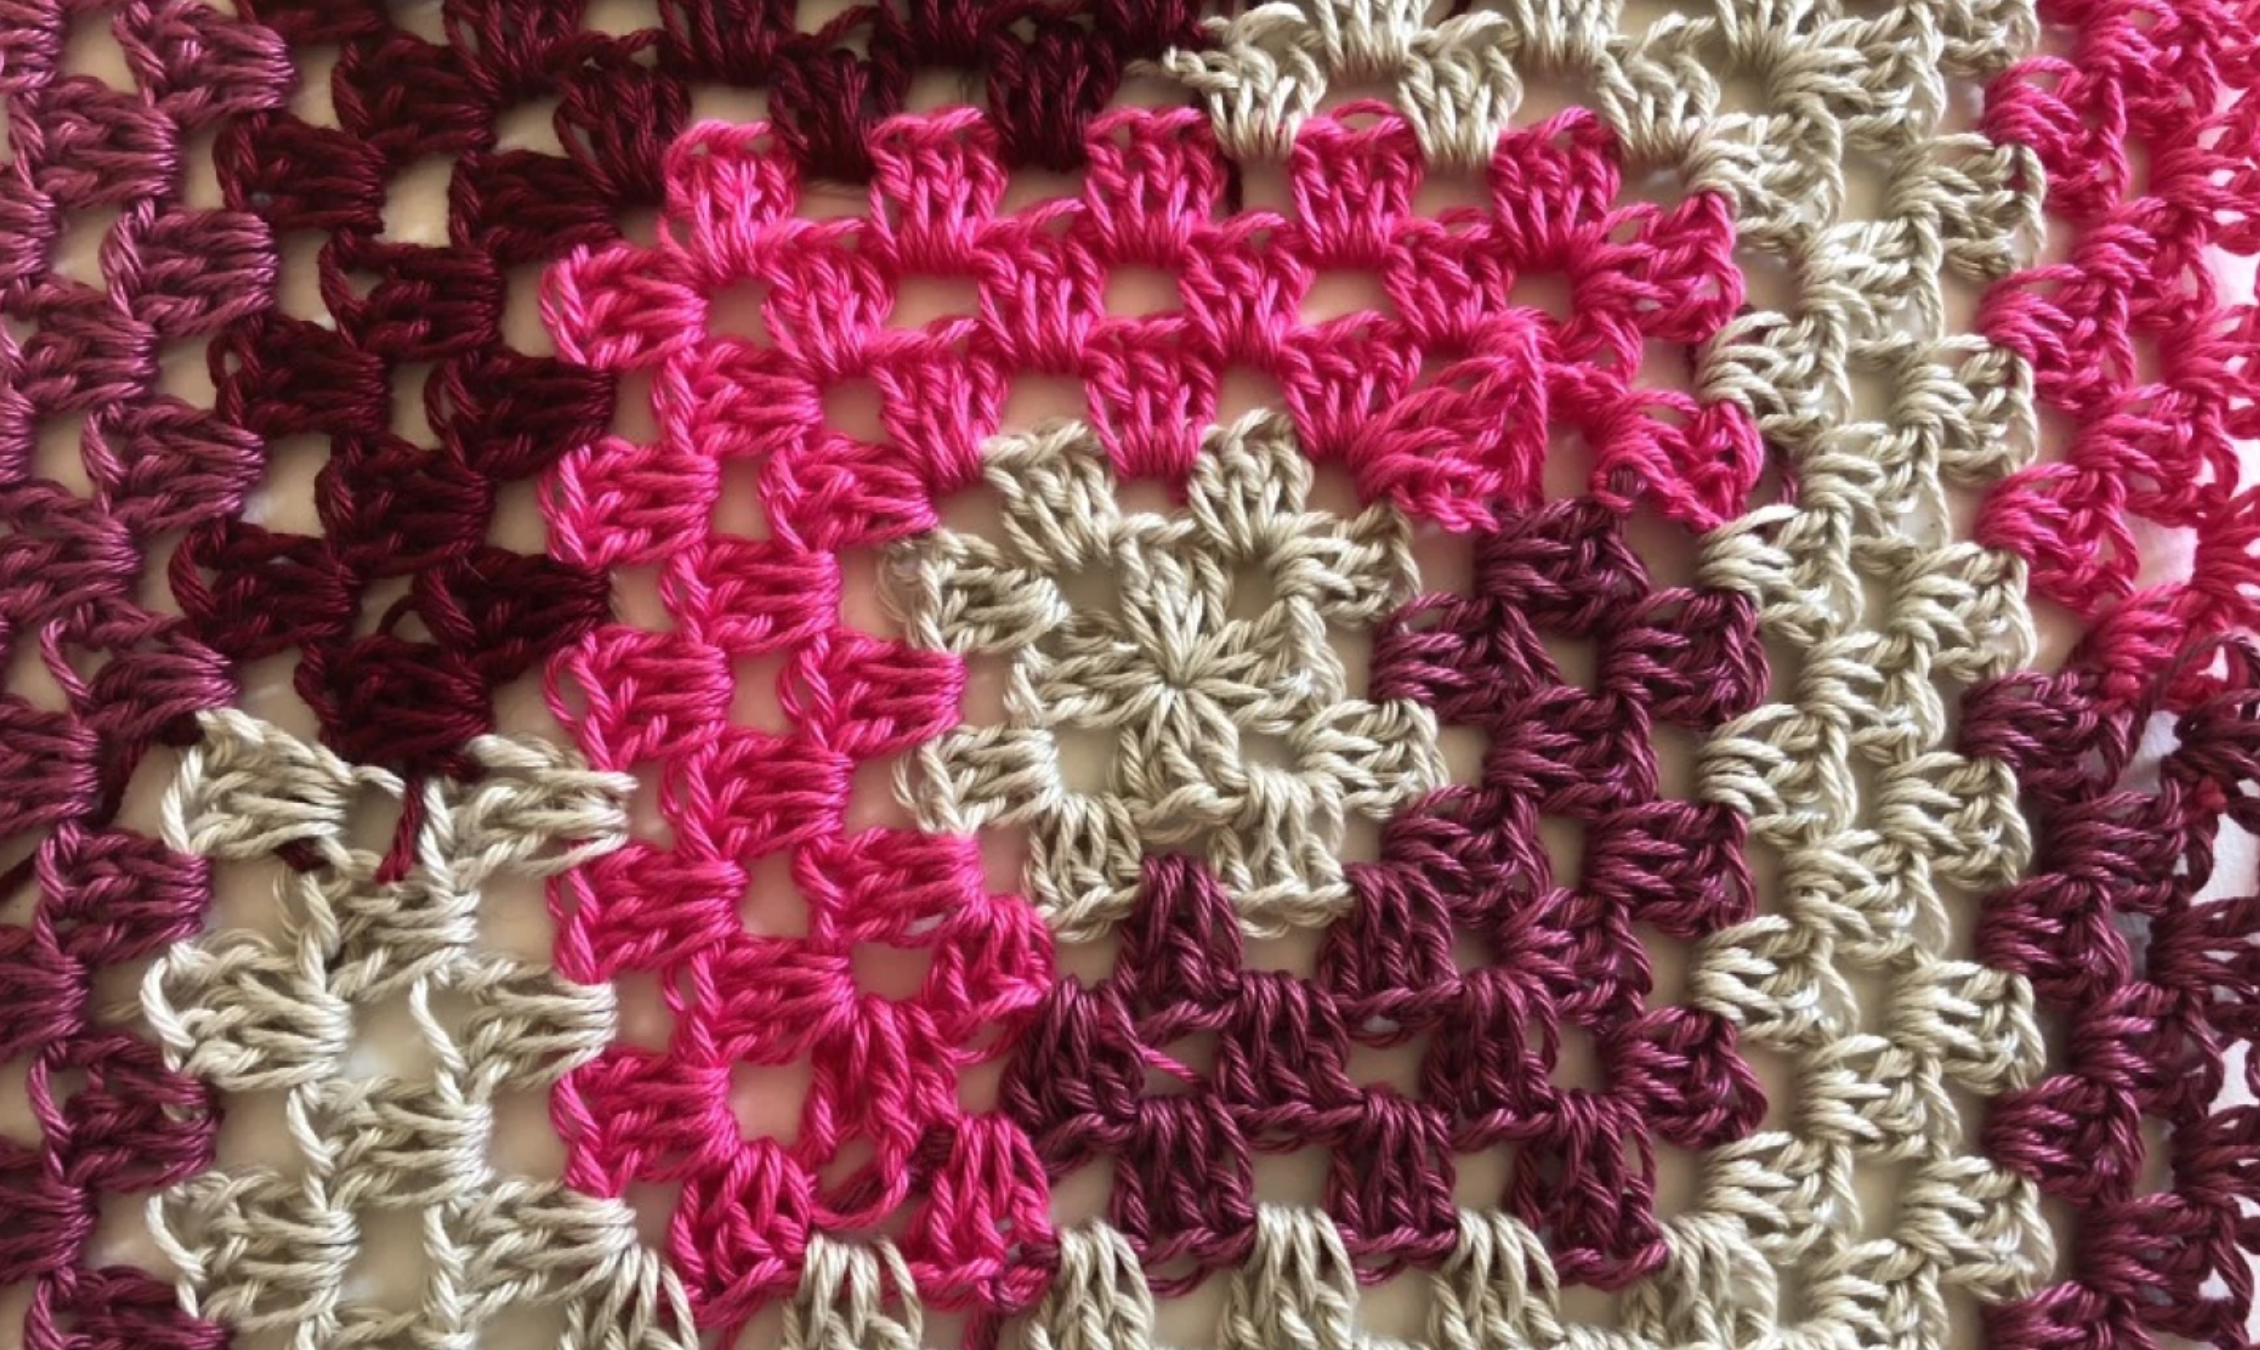
Can combining two classics give you something modern and fresh? When those classics are the crochet granny square and the log cabin quilt block, the answer is a resounding yes. It looks all fancy, but really, if you know how to crochet a granny square (or are willing to learn) and are comfortable with mid-row color changes, you can consider this crochet blanket your next project.
Log Cabin Granny Square
Level: Easy
What You Need
Abbreviations
Instructions
1. Begin With a Granny Square
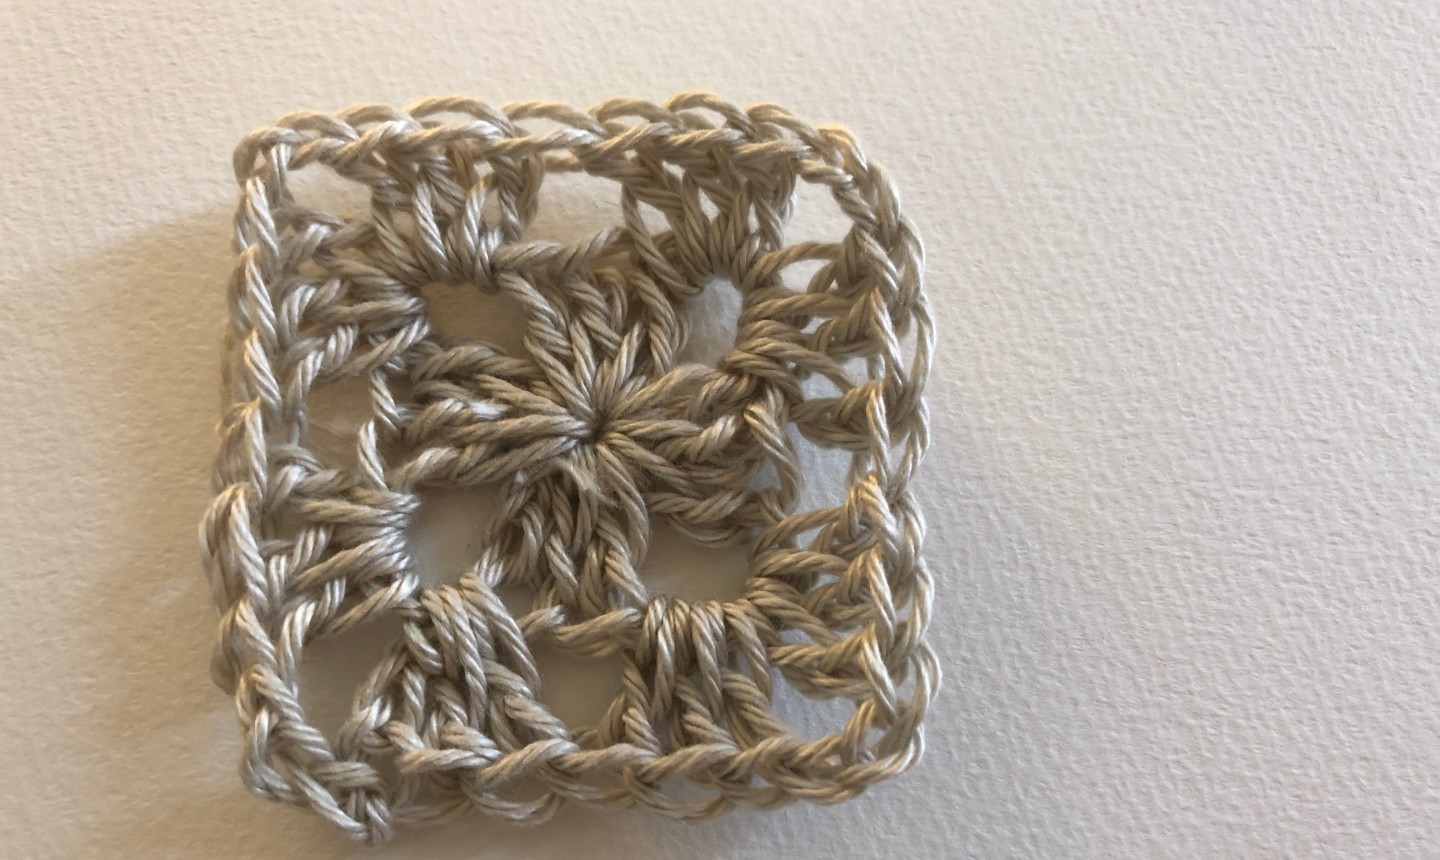
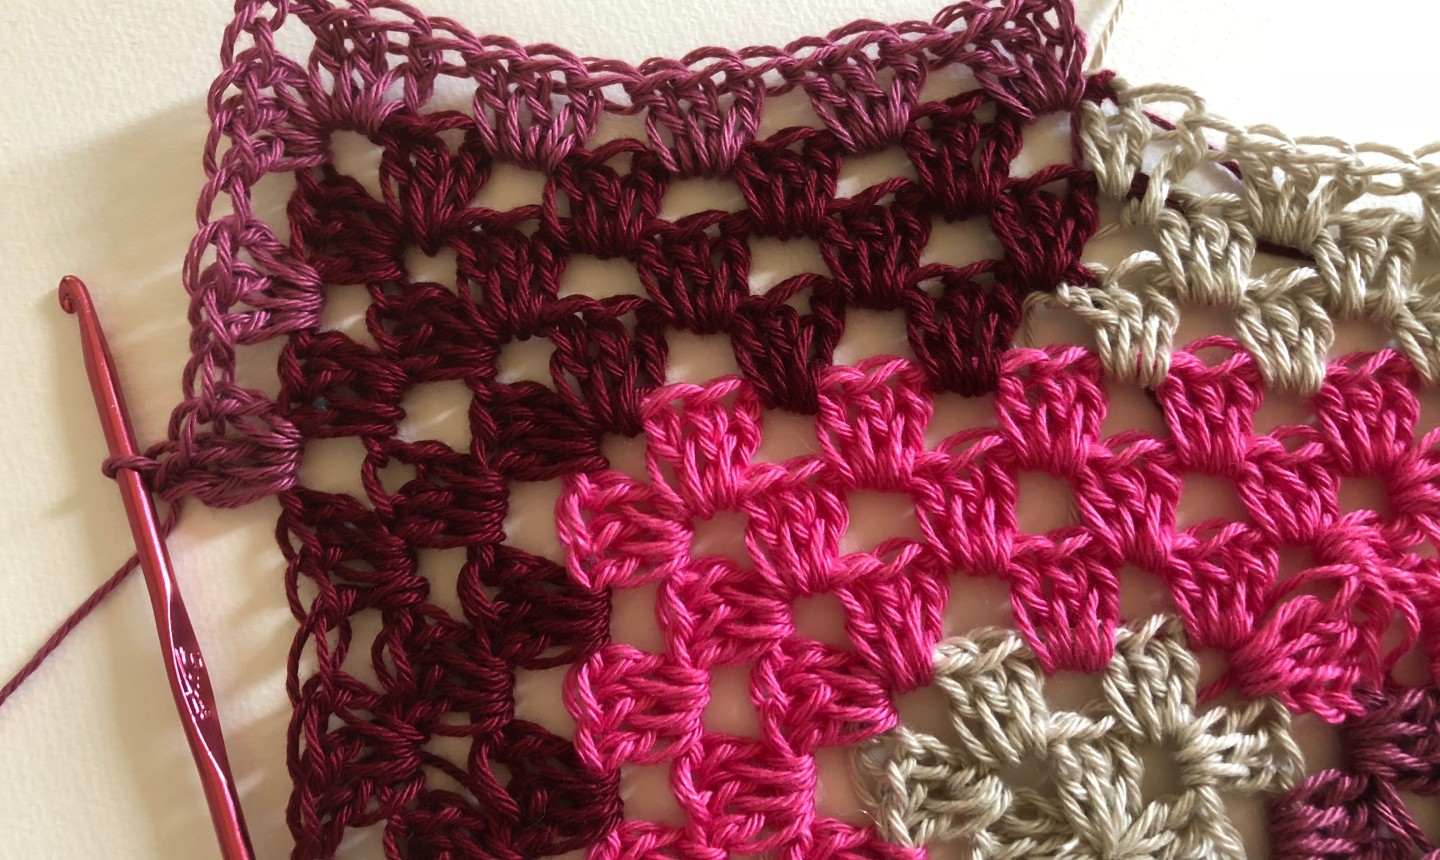
The project begins with a two round granny square worked in Color A. To recap for beginners:
Round 1: Ch 4, 2 dc into first chain, ch 2, (3 dc into same st, ch 2), repeat ( ) twice, sl st to top of ch 4 to close round.
Round 2: Ch 3, 2 dc in same spot, (3 dc, ch 2, 3 dc) in next corner, repeat ( ) in next two corners, then in final corner 3 dc, ch 2, sl st to top of ch 3 to close round.
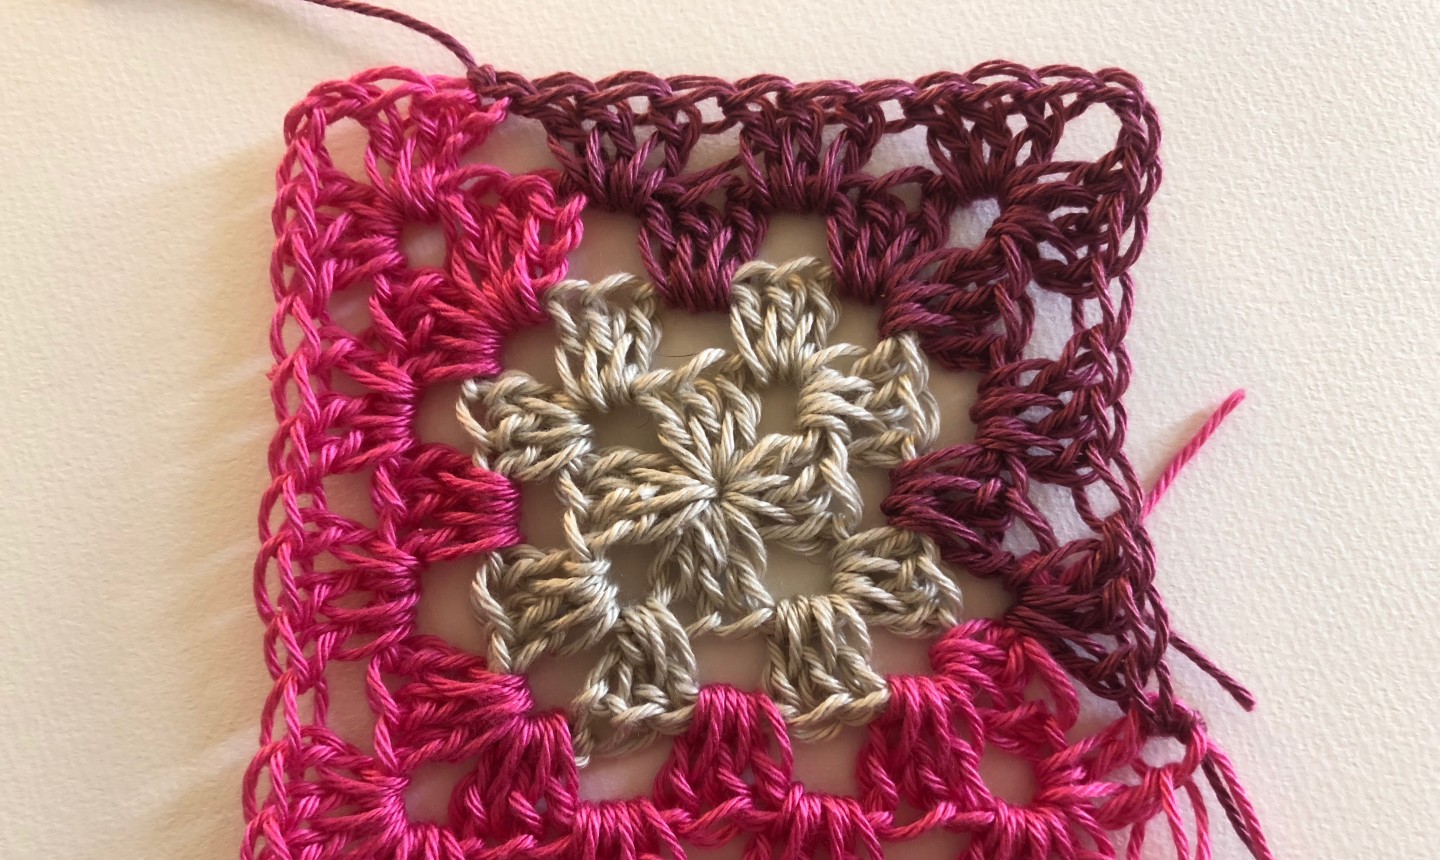
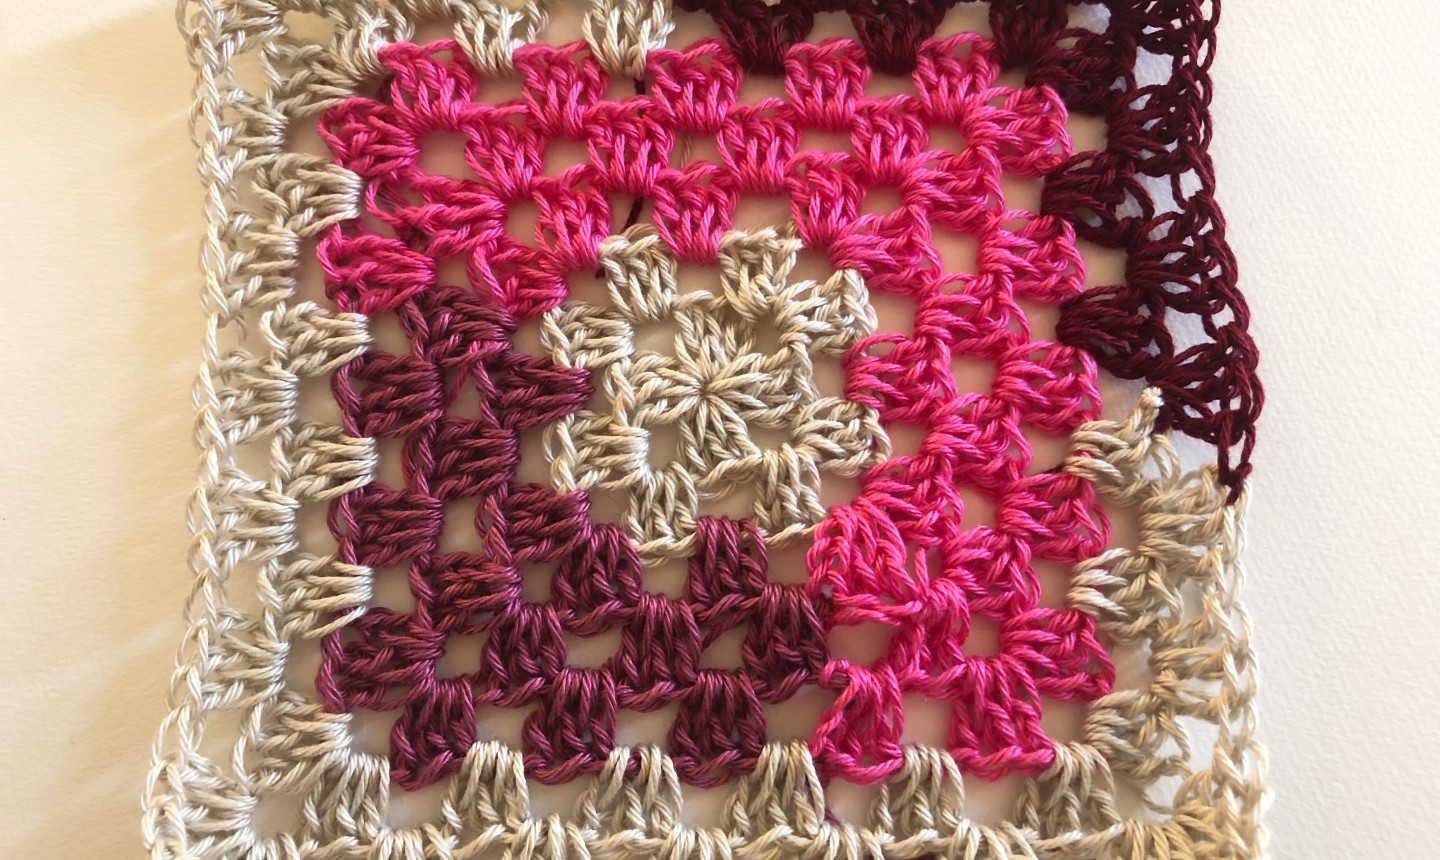
Round 3: You'll use the same traditional granny square stitch for the rest of the square. However, you'll use two colors in each round, changing them in specific places.
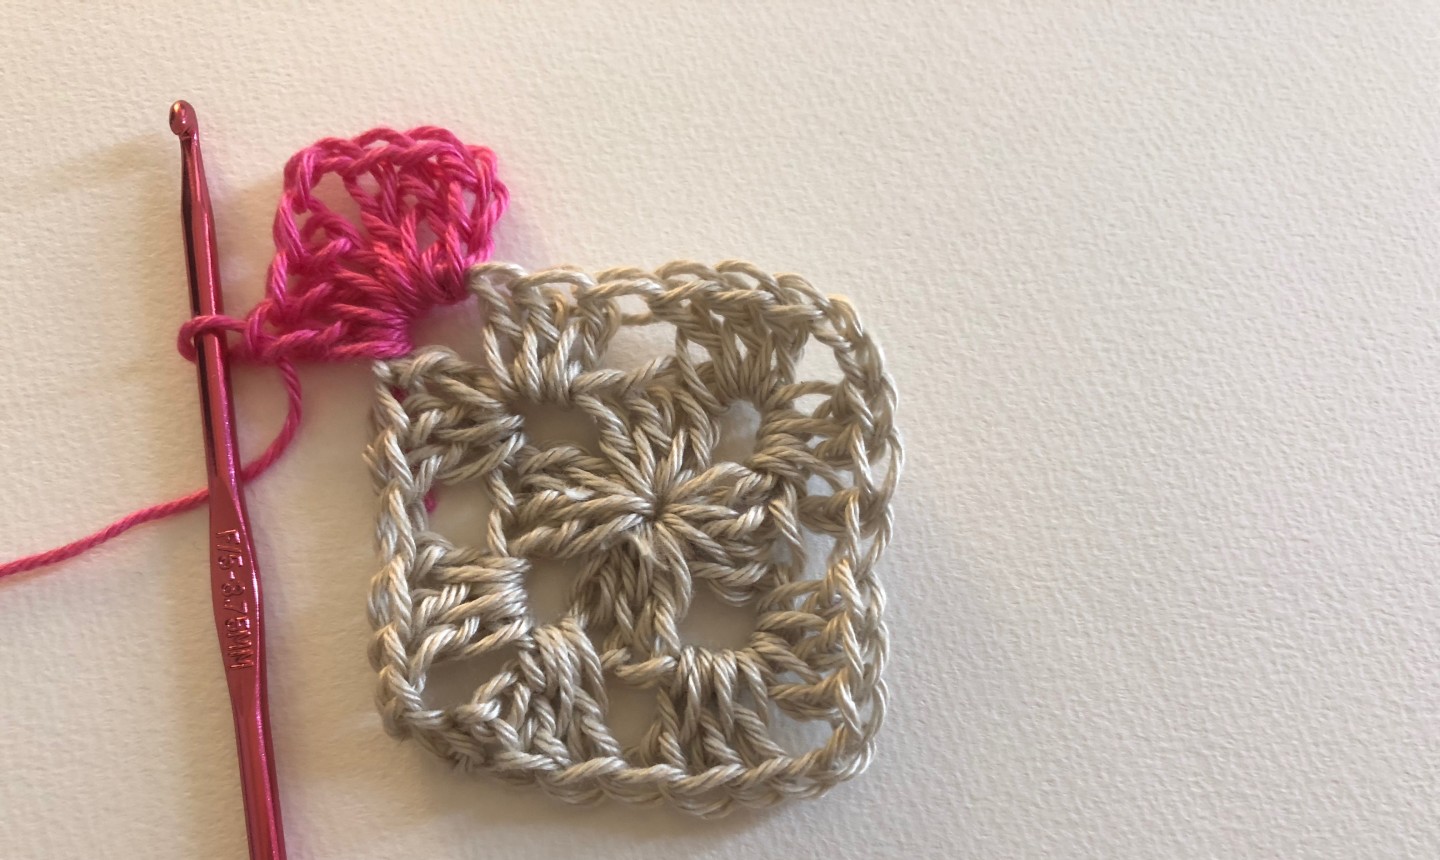
Join Color B in any corner. Work the corner as normal: (3 dc, ch 2, 3 dc).
Continue working as normal with Color B until you have completed two additional corners (for a total of three corners in this color.)
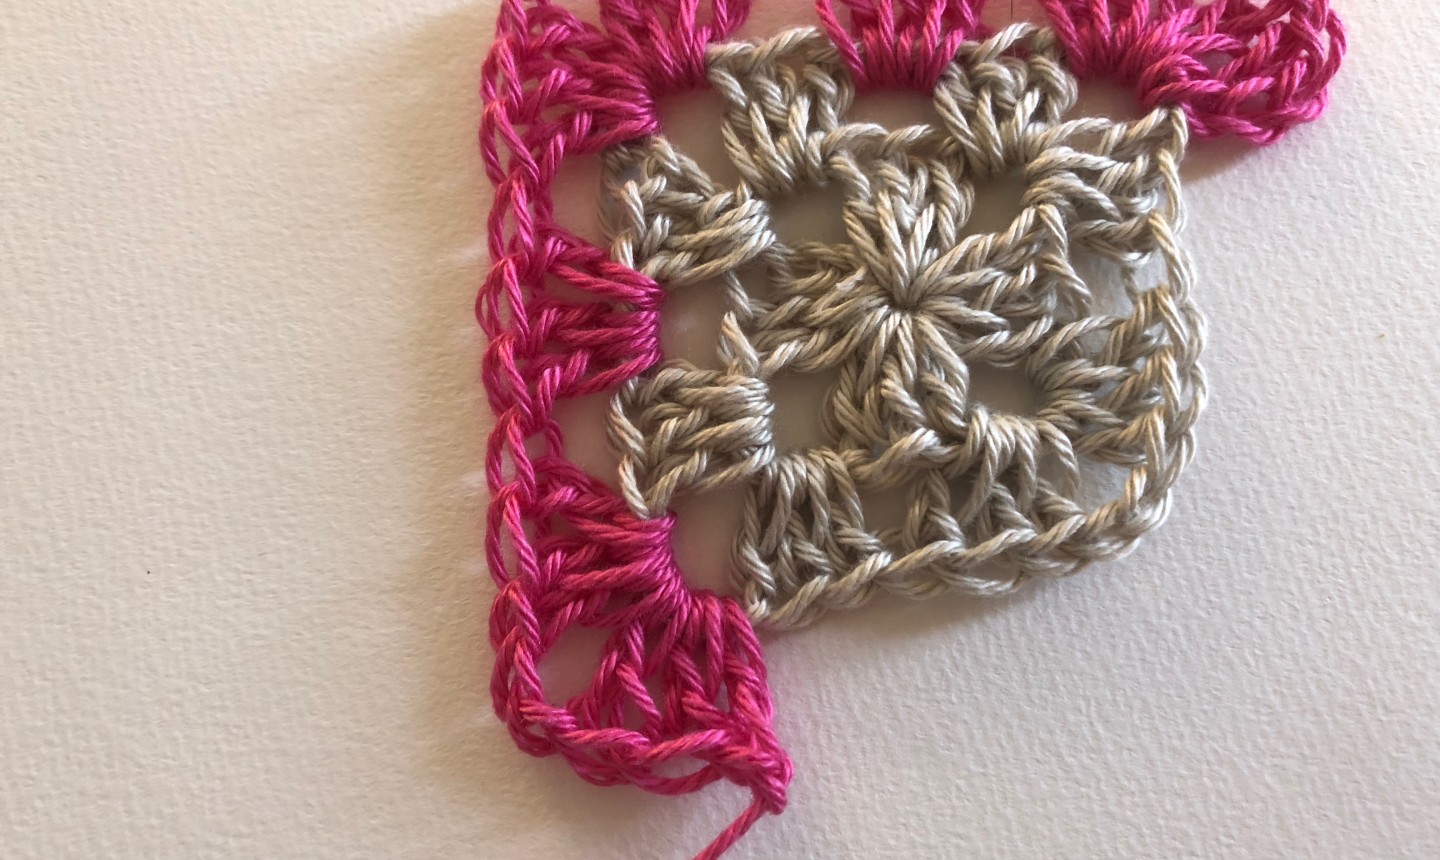
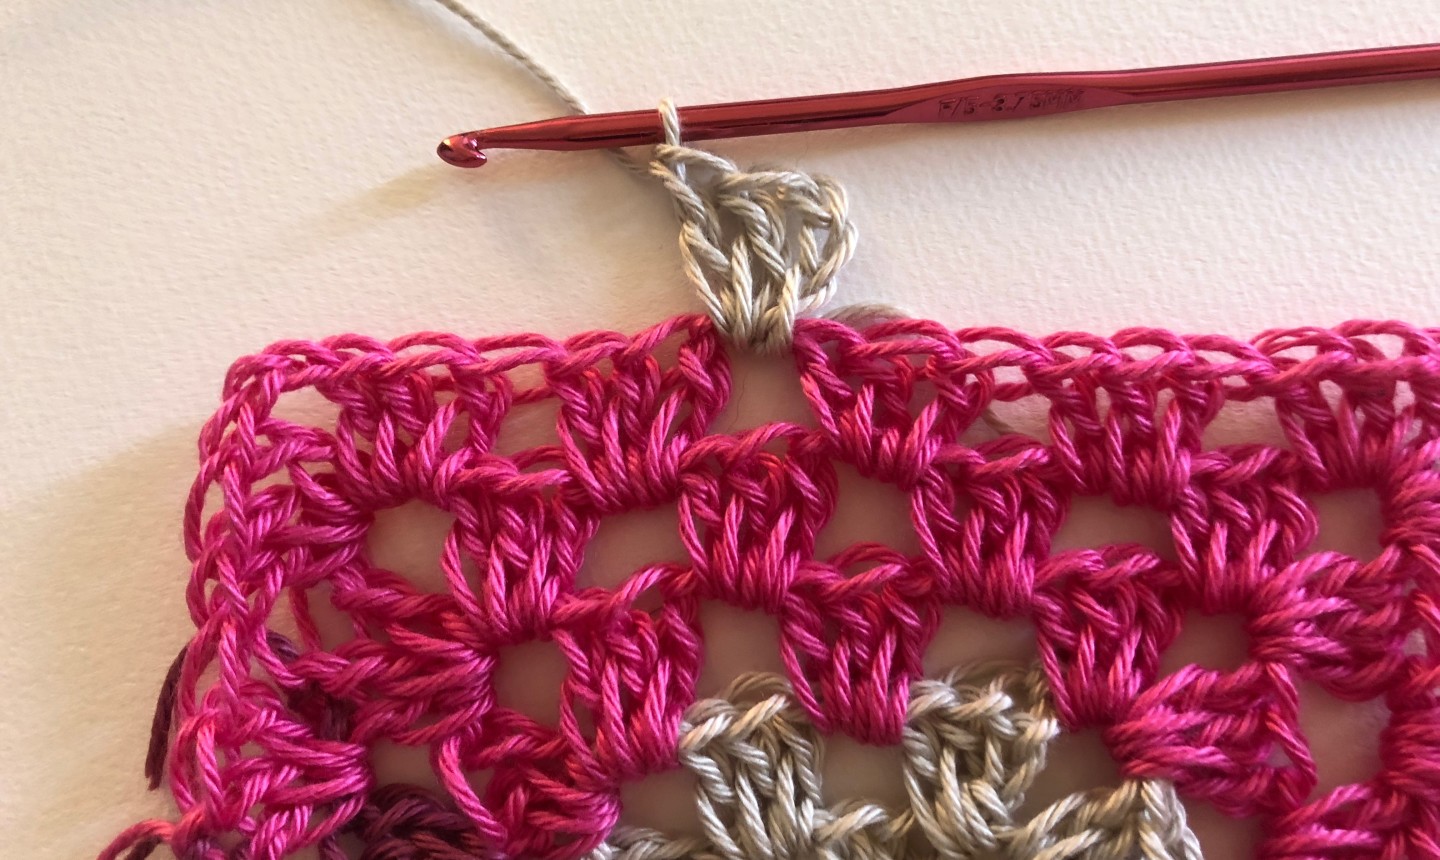
Fasten off Color B and join Color C in this last stitch using your preferred method of changing yarn colors.
Continue the rest of the granny square using Color C.
When you get to the end of the round, slip stitch to the top of the first chain 3 of the round and finish off.
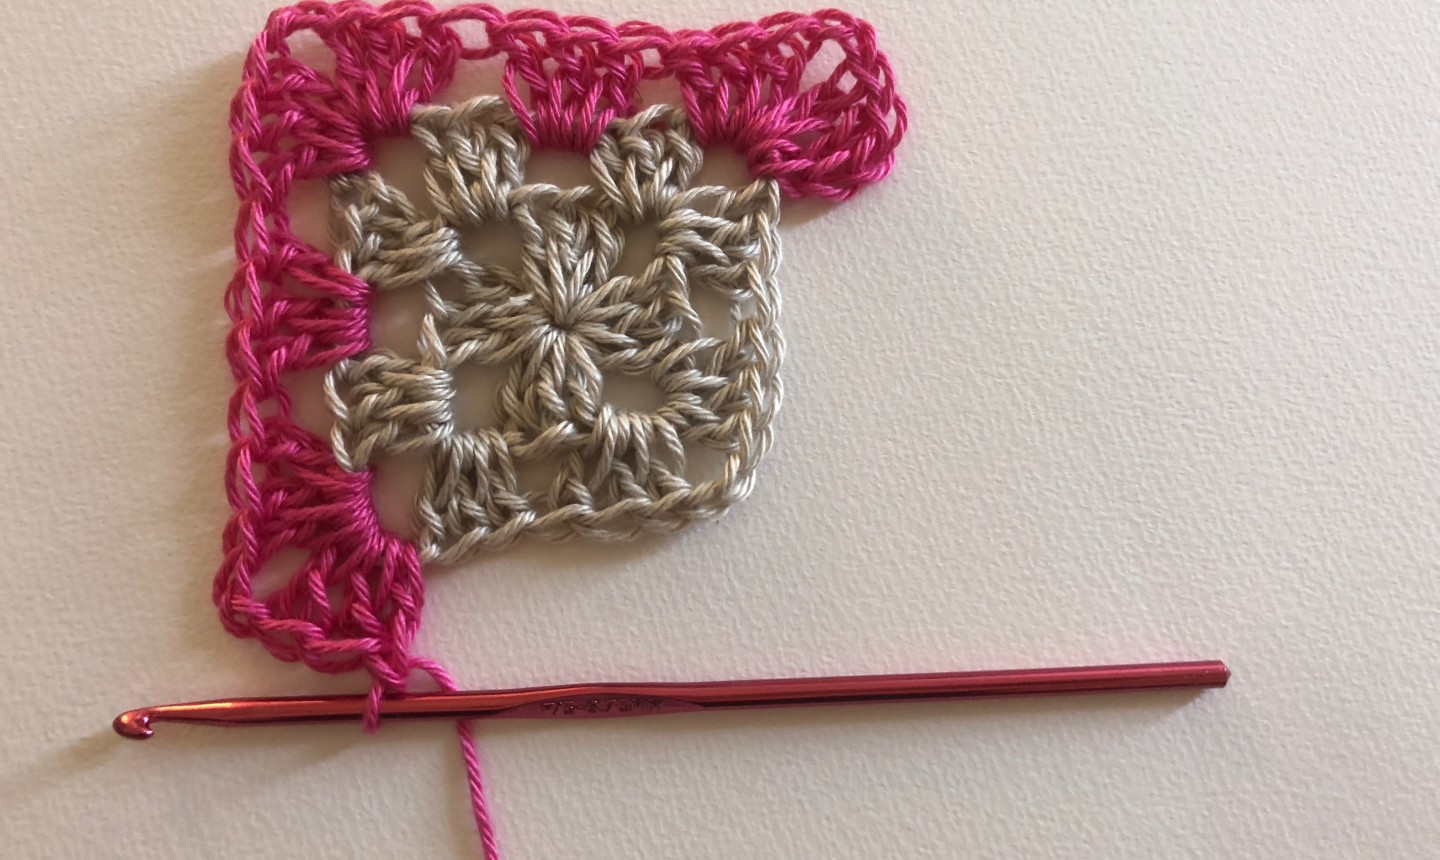
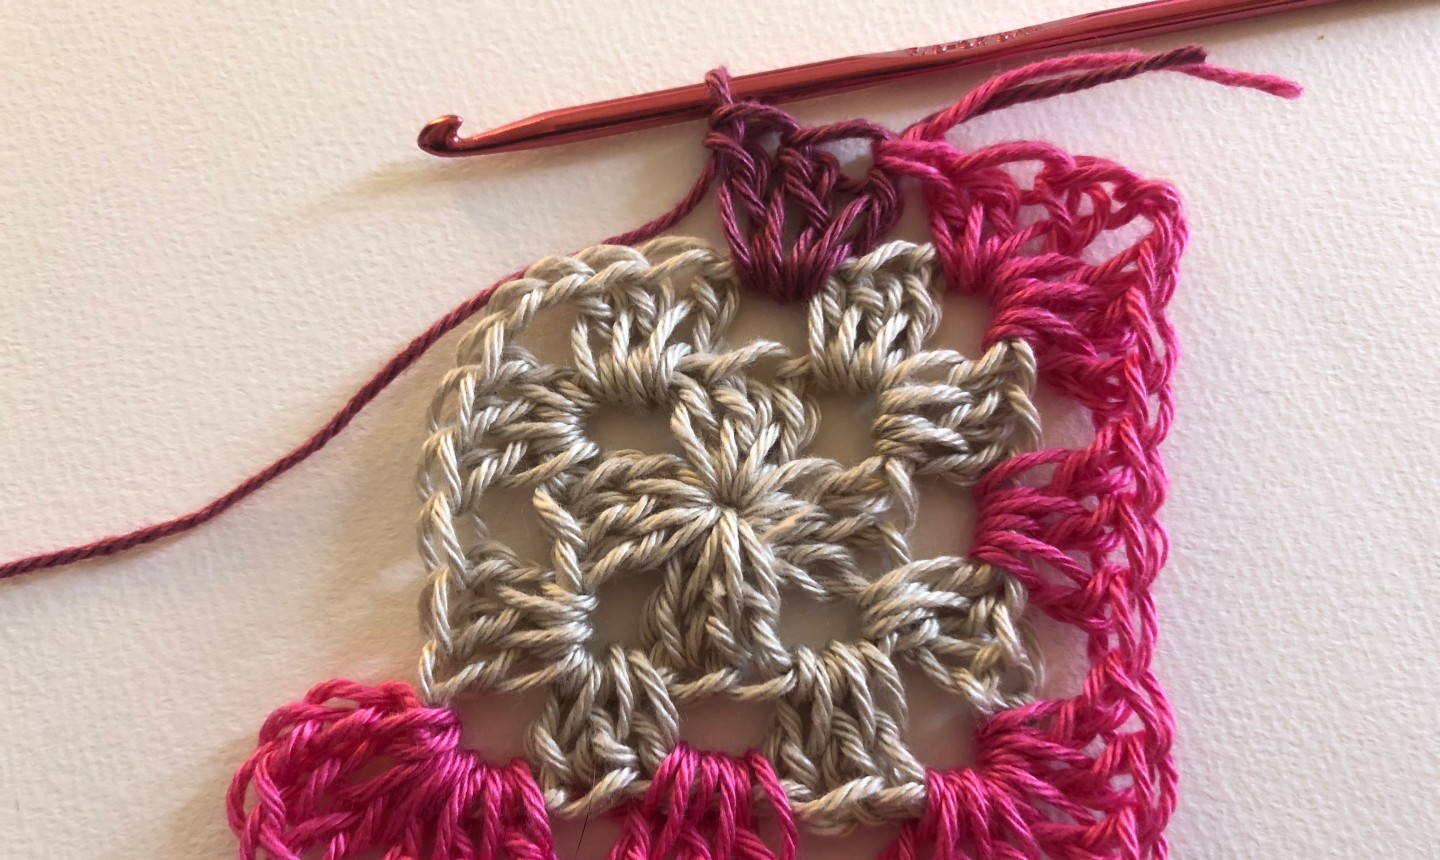
Round 4
Join Color B in the corner, complete the first corner and work all the way through the third corner using Color B.
Join Color C after the third corner and use it until you get to the end of the round. Slip stitch to the top of the first chain 3 and finish off.
Round 5
Round 5 is almost exactly the same as Rounds 3 and 4 except that you'll start the round one space earlier and end it one space later.
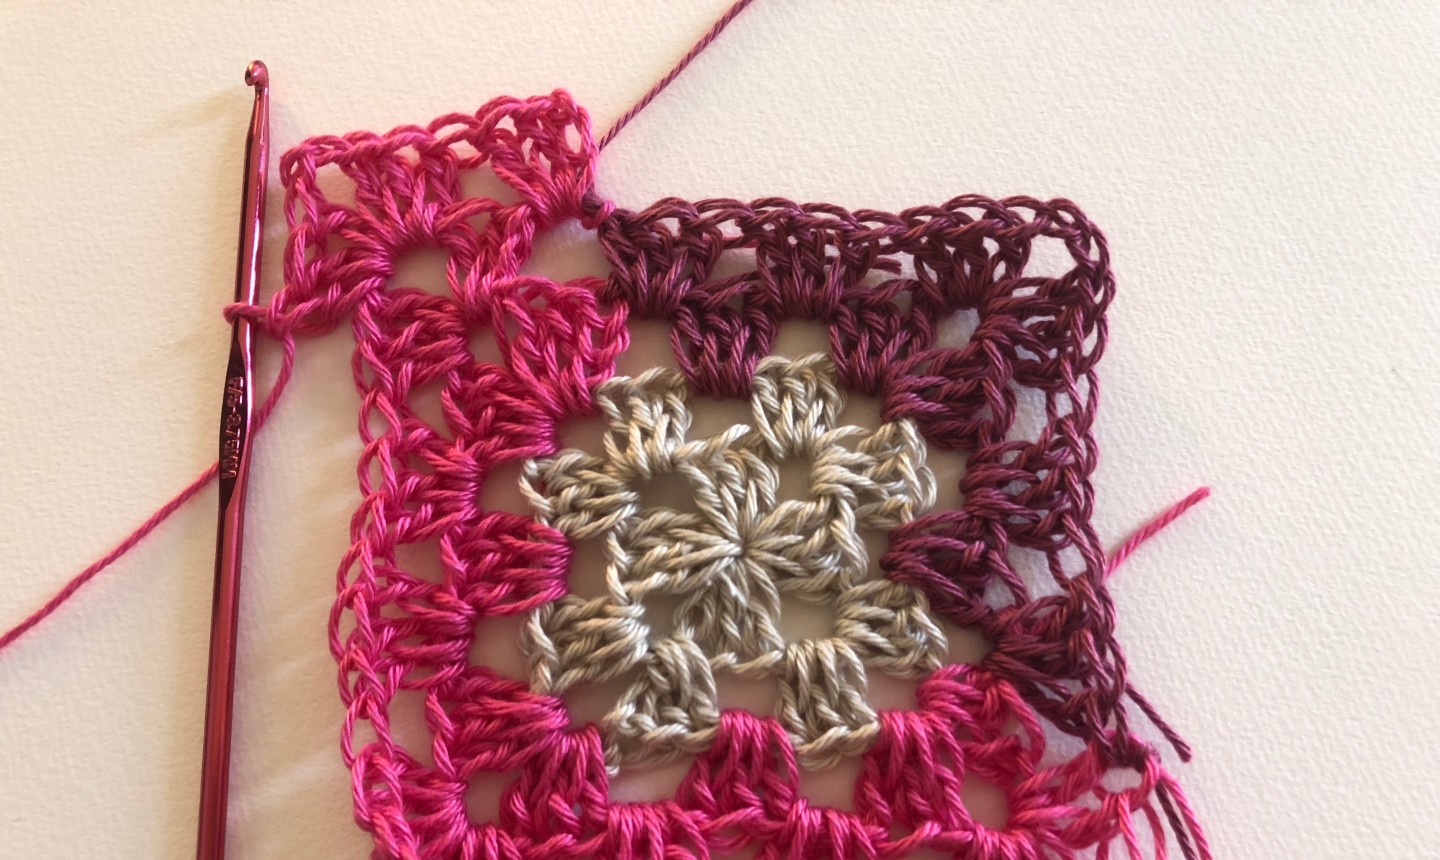
Join Color B in the space to the right of the corner. Ch 3 and work 2 dc in this space. Work your corner as normal and continue working all the way around past the third corner.
Work 3 dc into the space after the third corner.

Join Color C and complete the round.
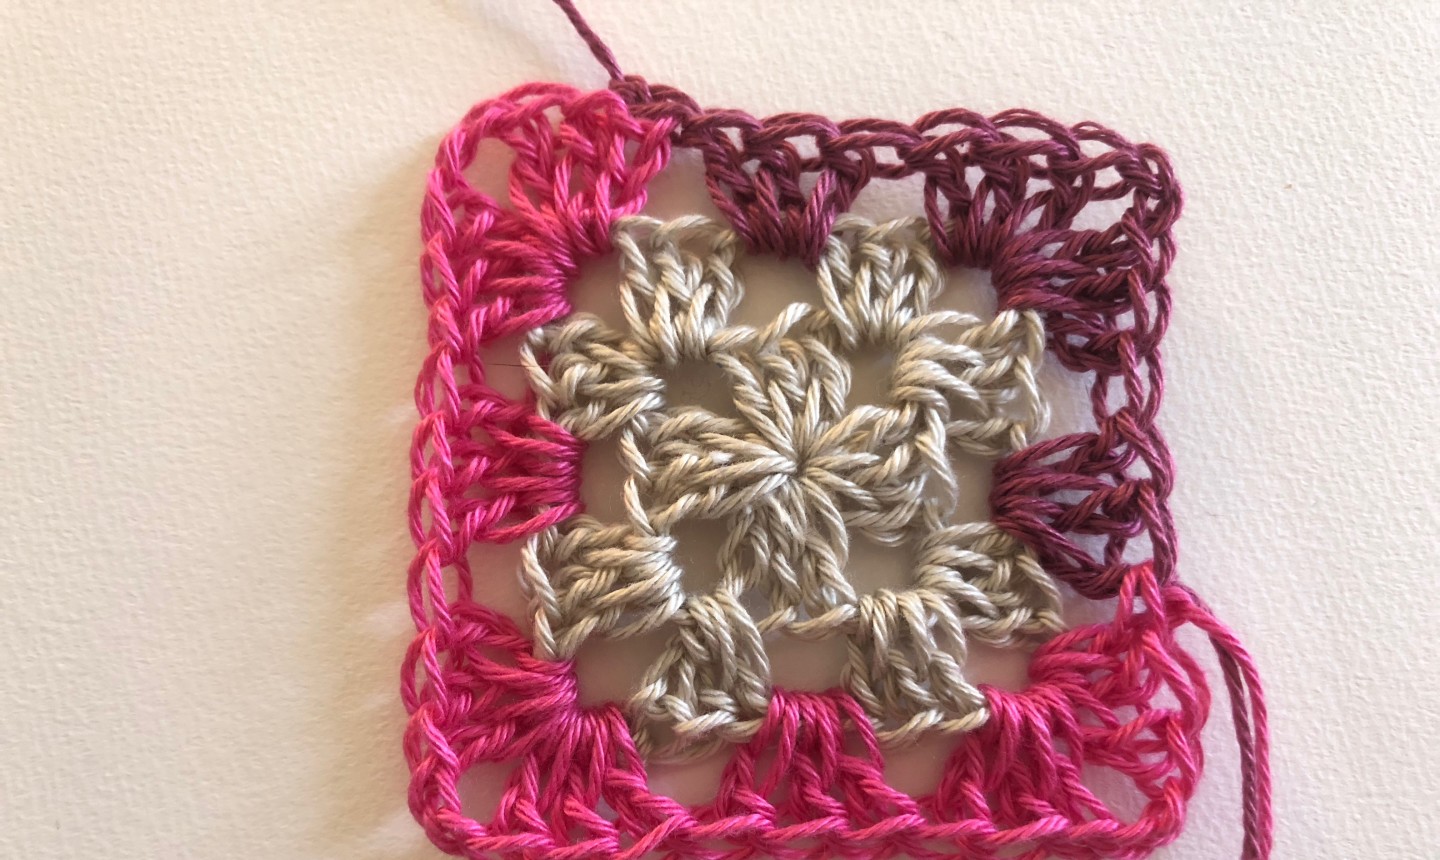
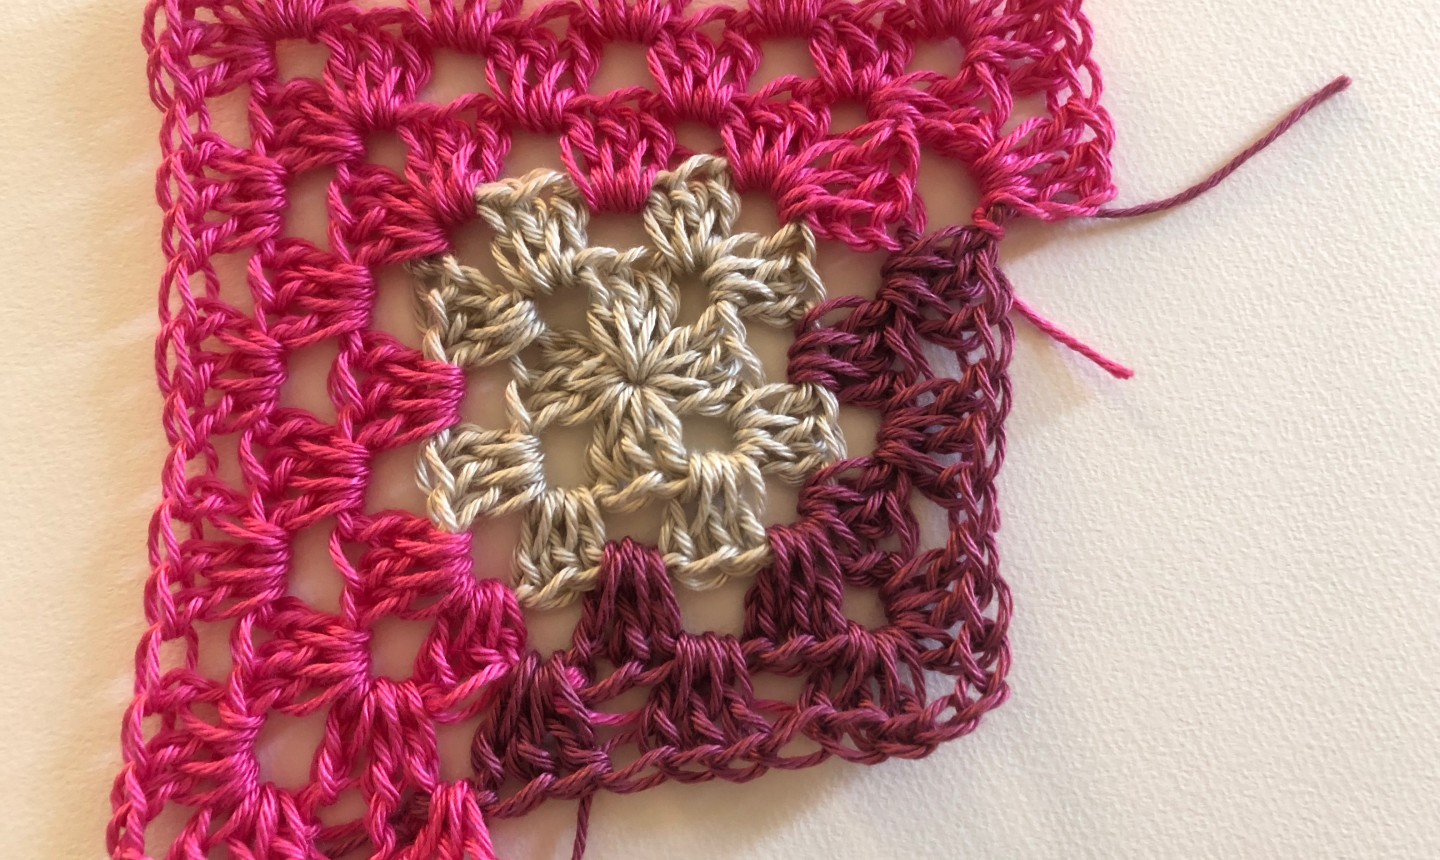
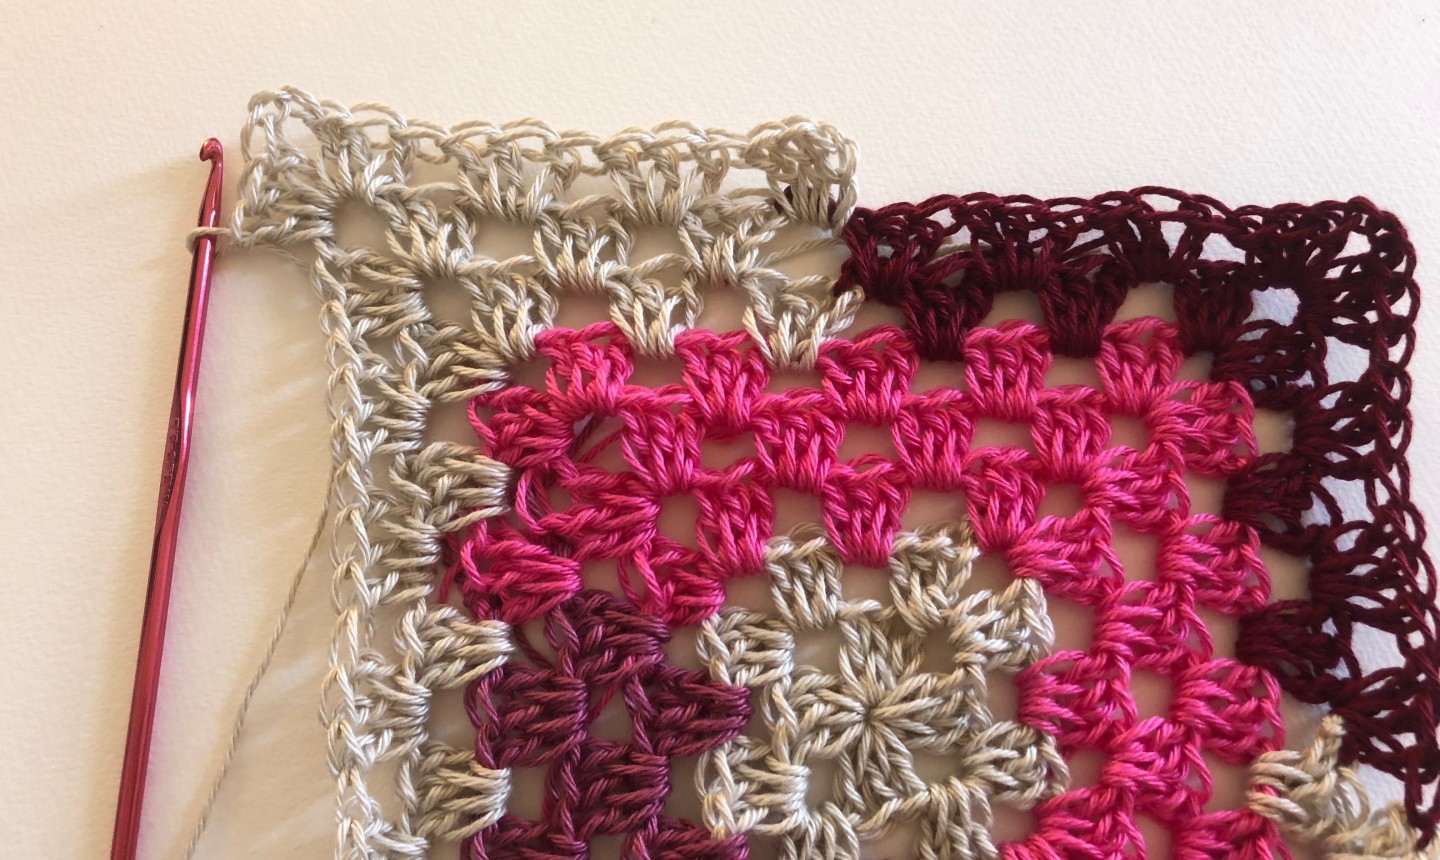
Round 6
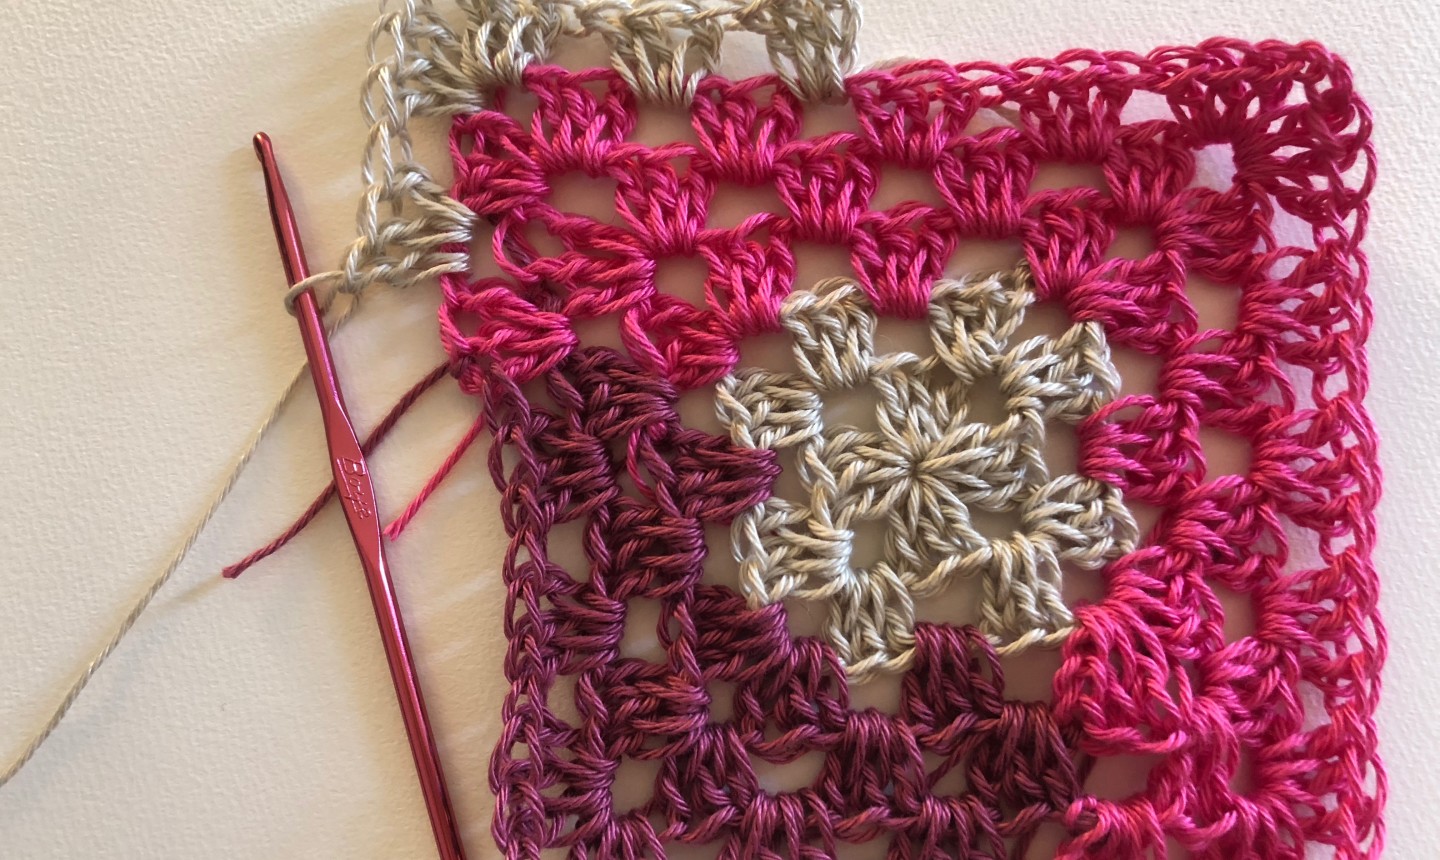
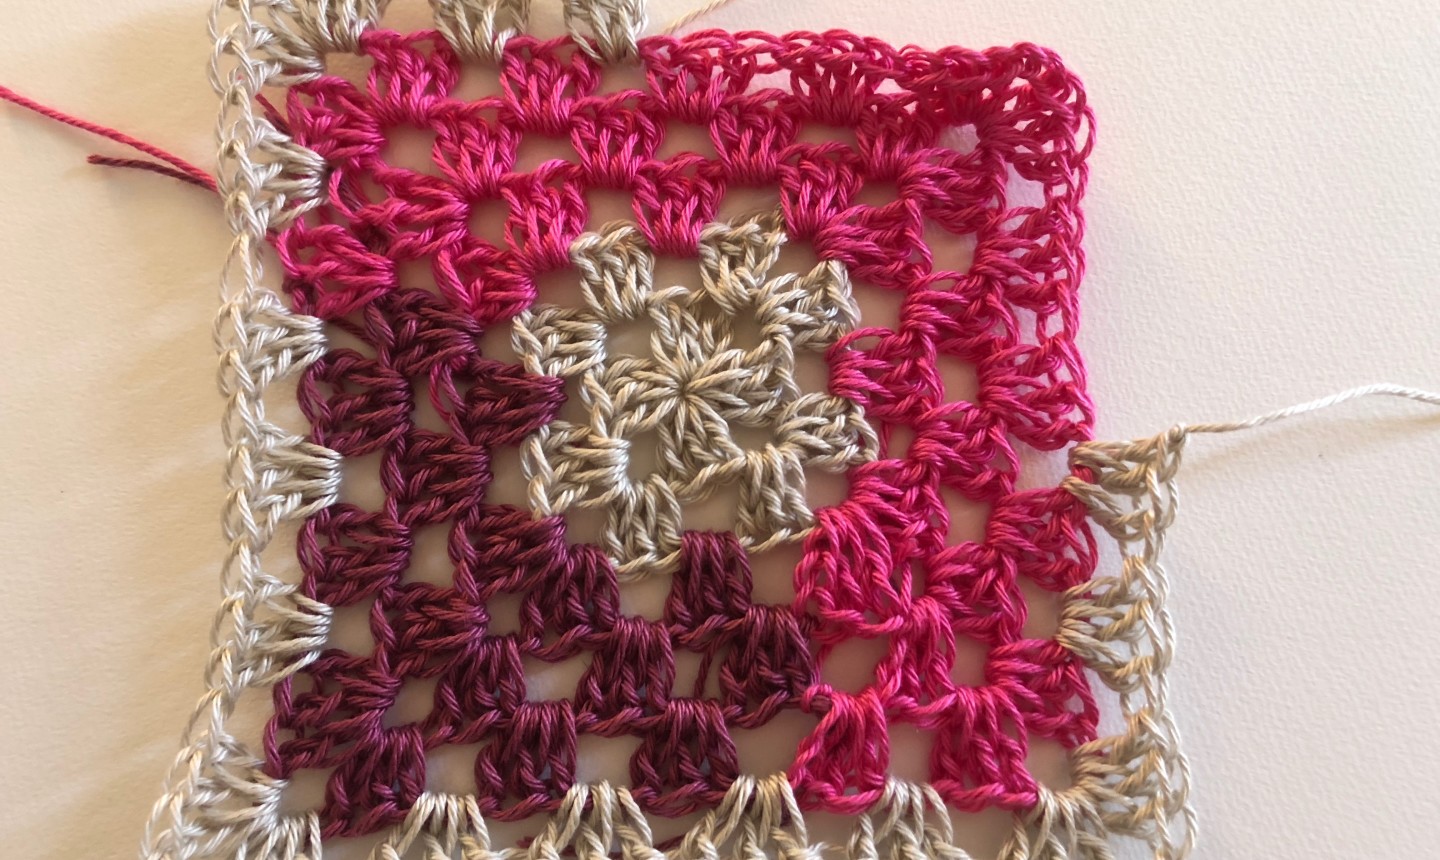
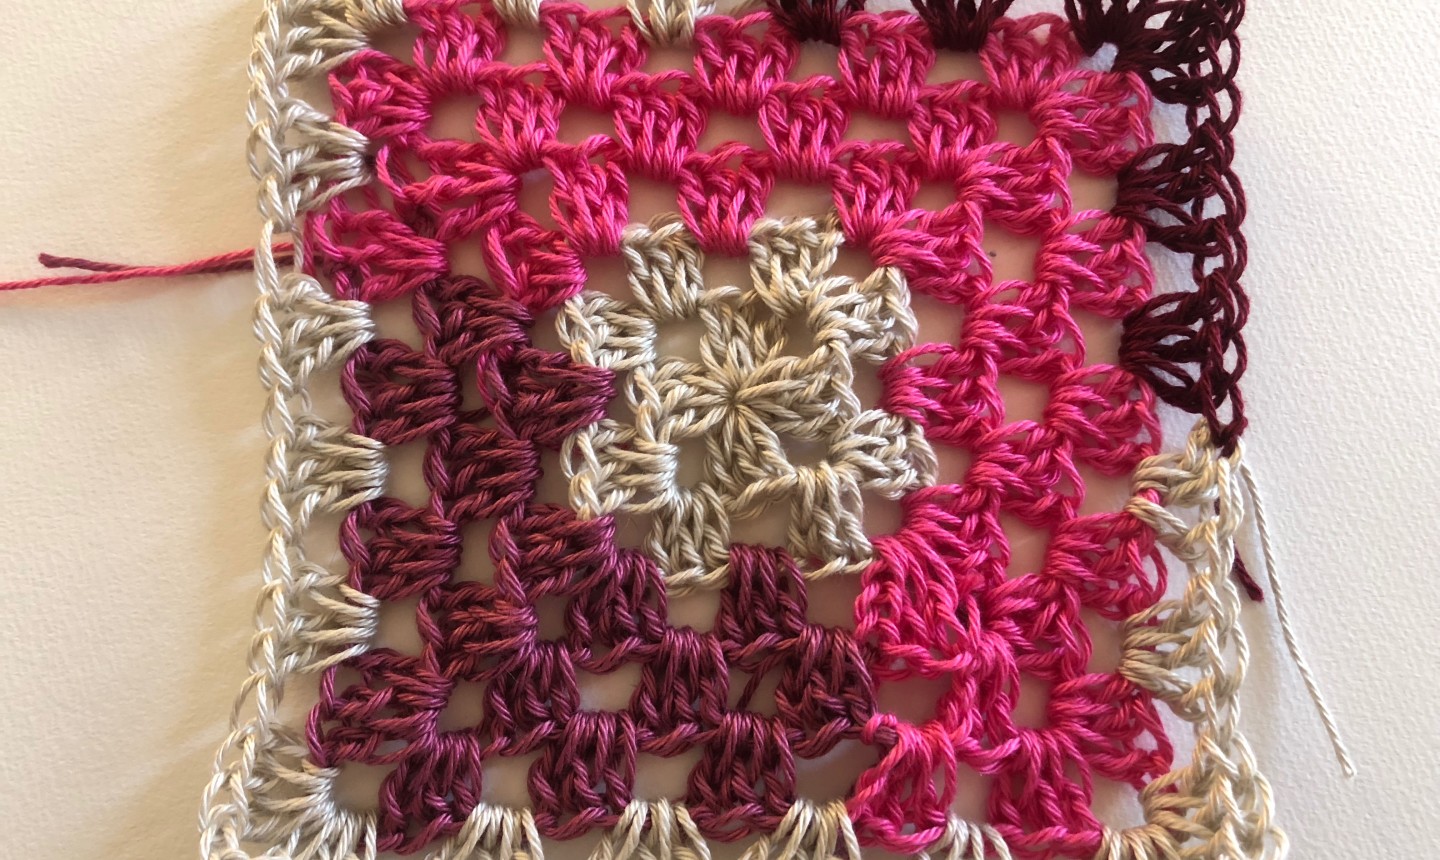
You've completed the first set of "logs" using Color B (which makes up the large left and bottom sides) and Color C (which makes up the smaller logs in the right corner).
Rotate the square 180 degrees so that what was the bottom right corner becomes the top left corner.
Join Color A in the space that is two spaces to the right of the top left corner. Ch 3 and 2 dc in that space.
Proceed with your usual granny square pattern.
Continue all the way around the third corner and work an extra two spaces after the corner.
Switch to Color D to complete the round.
Round 7
Repeat Round 6.
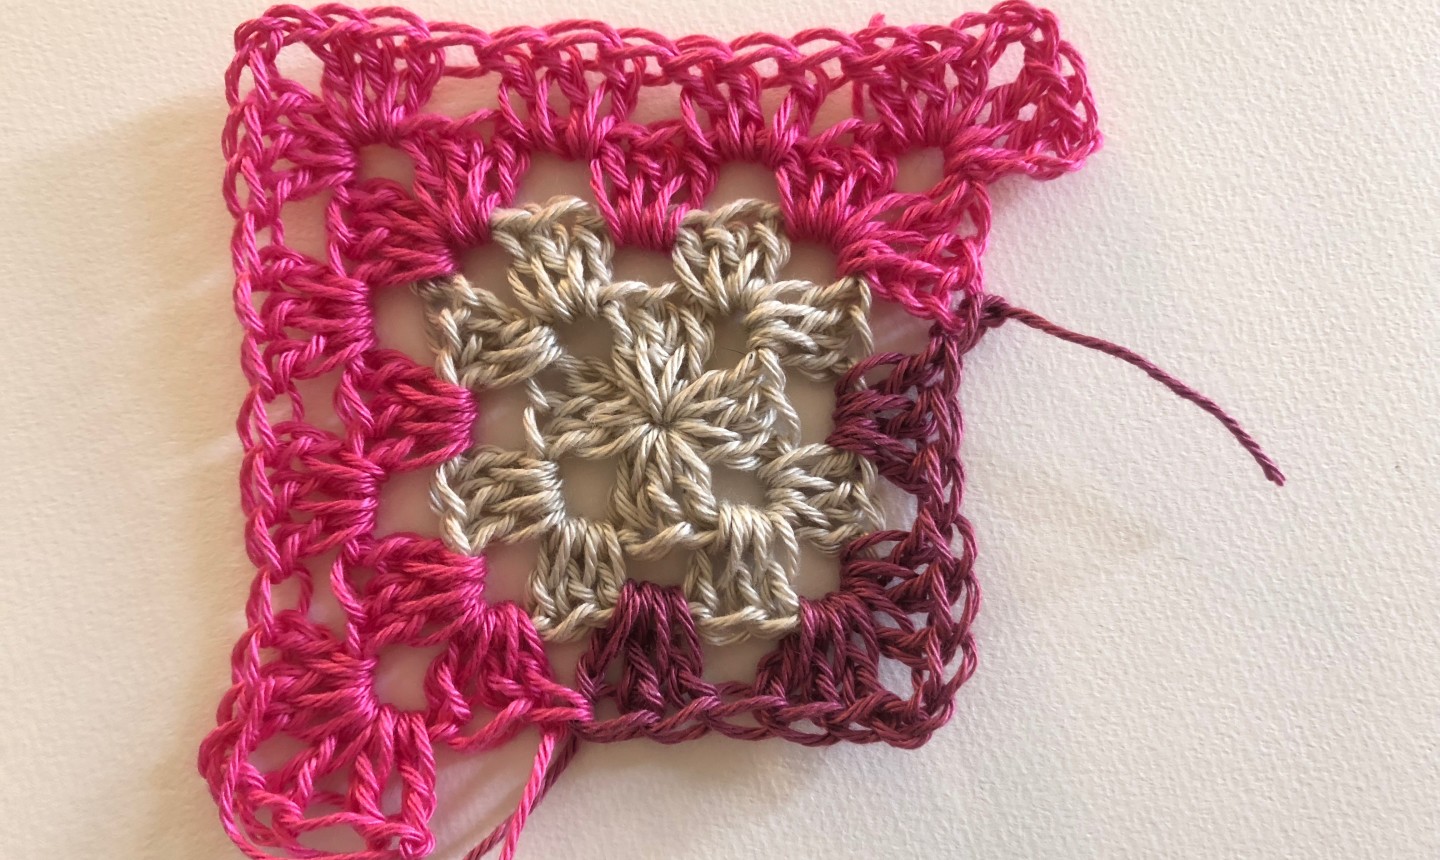
Round 8
This round is similar to Rounds 6 and 7, except that you work into an additional space before and after where you worked before.
Begin in the space that is three spaces to the right of the top left corner. Chain 3 and double crochet twice then continue around the square as normal.
End off Color C three spaces after the third corner. Complete the round with Color D.
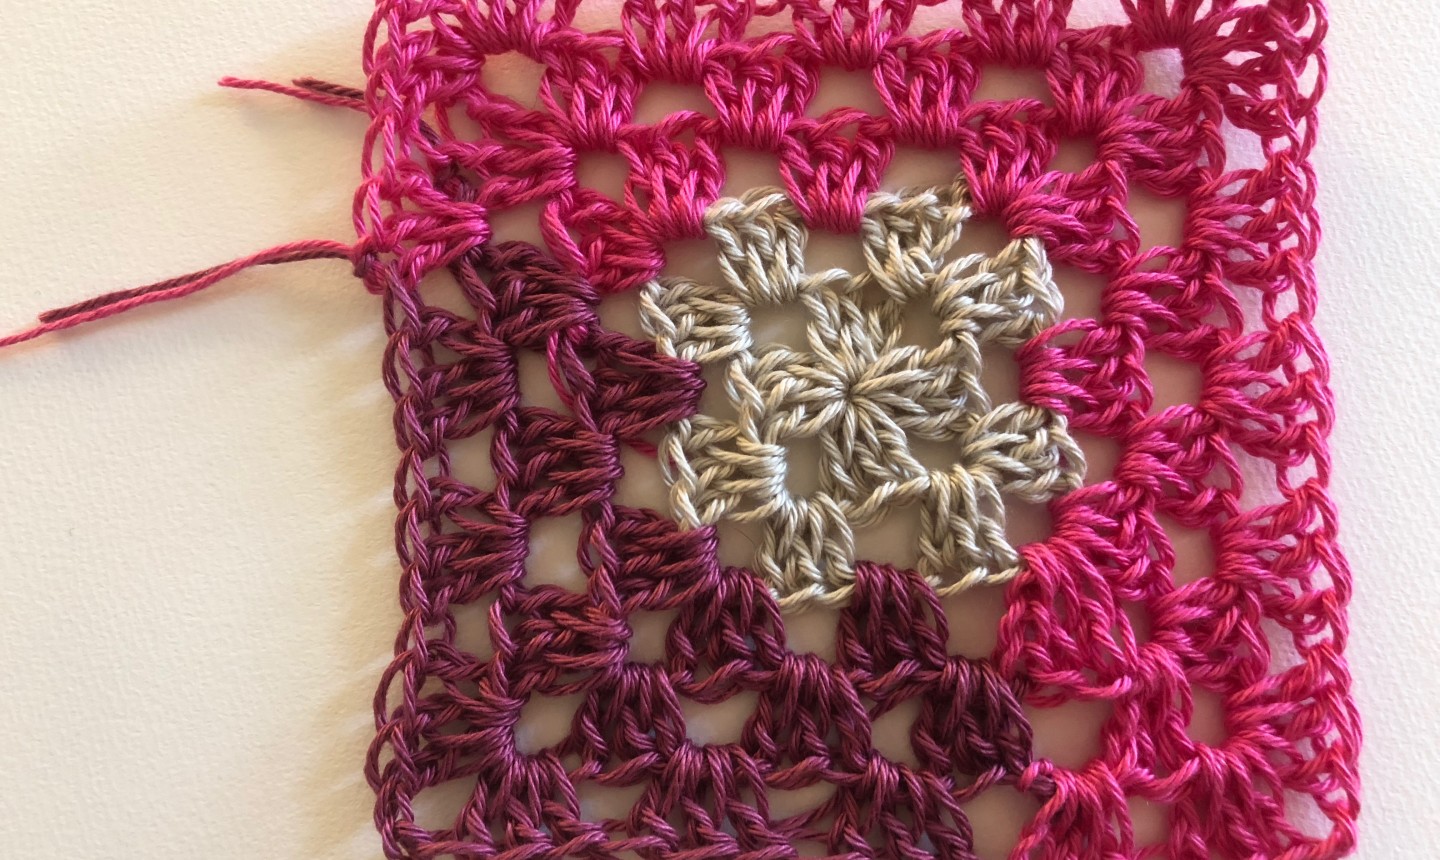
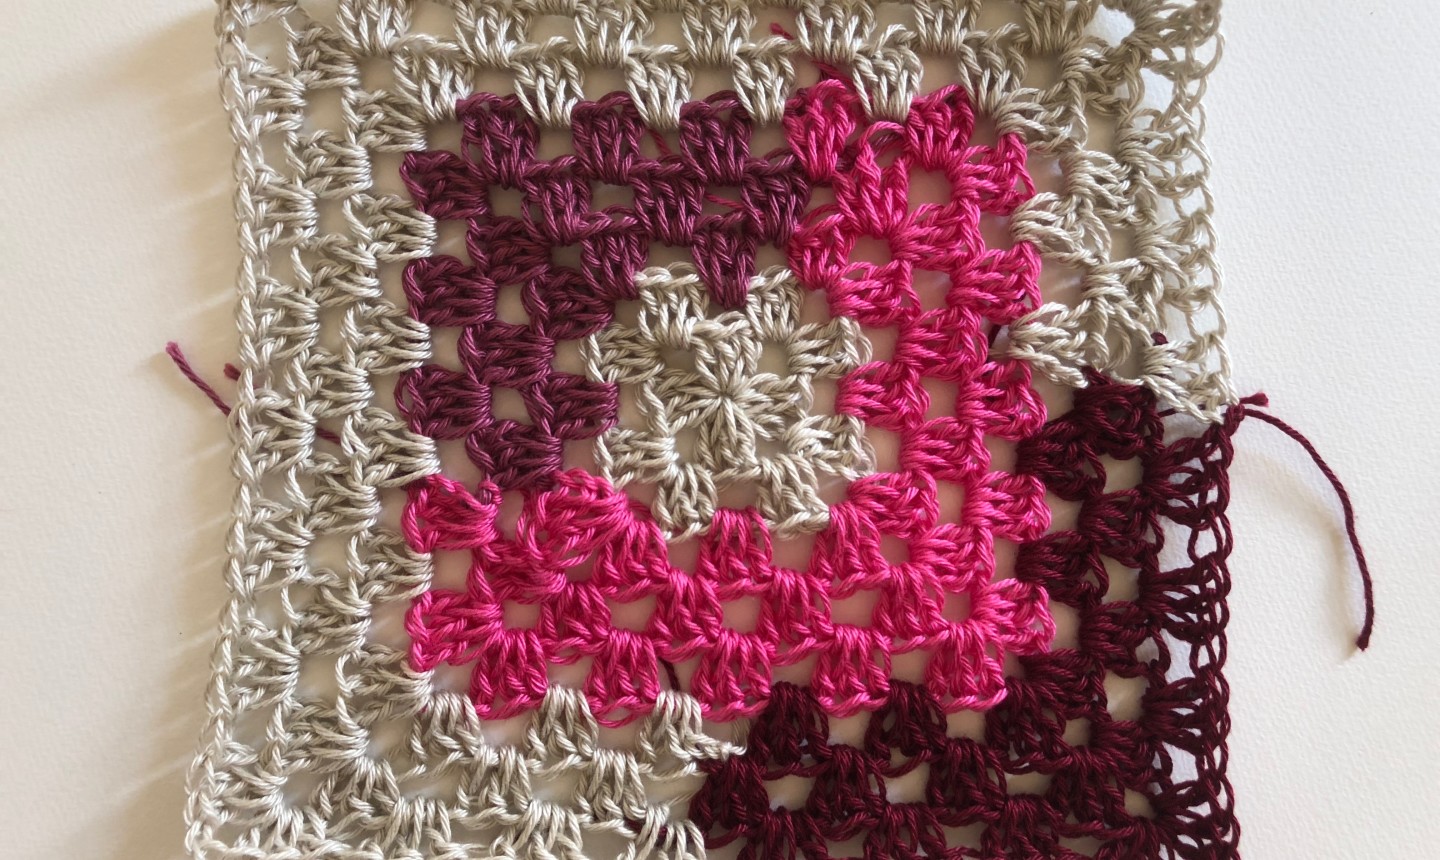
Round 9
Once again, after completing three rounds in the two same colors, you've finished the next set of "logs." Turn the work 180 degrees again, bringing the bottom right corner up to the top left.
Pro Tip: You can vary the design by only rotating the work 90 degrees instead; play with different combinations of turns to build different styles of "logs."
Join Color C in the space that is four spaces to the right of the top left corner. Work all the way around to four spaces past the third corner. Switch to Color B.
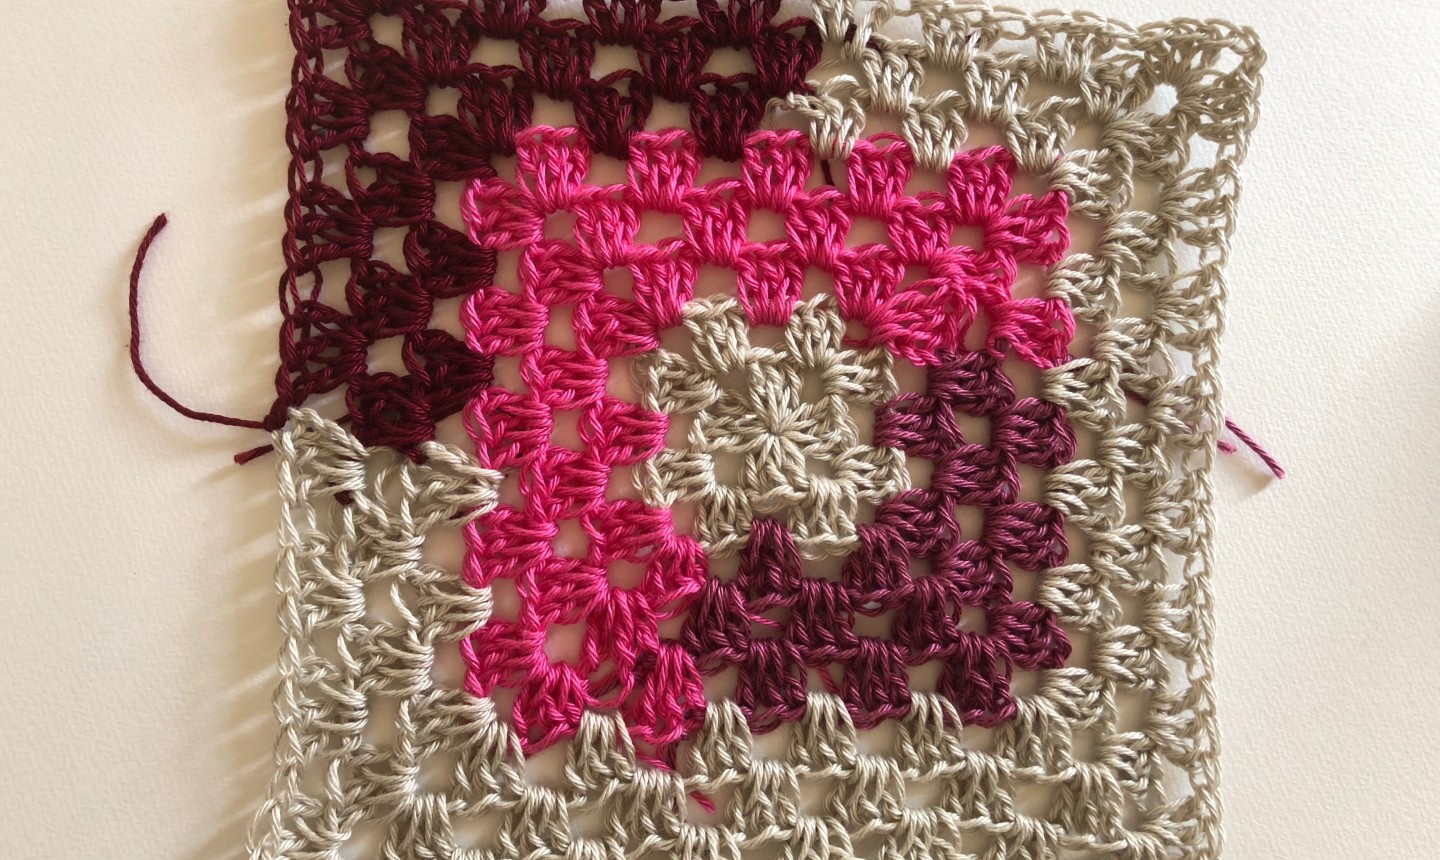
Rounds 10 and 11
Now that you understand the pattern, you'll just keep working it.
Round 10 is the same as Round 9; Round 1 is the same except that you'll begin one space before and one space after where you did before.
Mess around with variations in color changes however you want. And if you have more than 4 favorite colors, that works too: this pattern knows no limits when it comes to color.

Share tips, start a discussion or ask other students a question. If you have a question for an expert, please click here.
Already a member?
No Responses to “This Crochet Log Cabin Granny Square Is a Graphic Crochet-Quilt Mashup”