Don’t have a serger in your sewing studio? This Singer Lock Cutter is a far less expensive alternative to serging. This simple device when attached to a regular sewing machine can sew and trim simultaneously much like a serger machine will do. It can be used to sew stitches much akin to serger stitches and finish seams in one step. Or, it can be used to trim and finish an already stitched seam.

For any sewer without a serger, this is a handy tool that fits a wide variety of sewing machine brands and models with a low shank presser foot arm. Like a serger, it can sew either an overcast or zigzag stitch while at the same time trimming away excess seam allowances. It creates a cleanly finished and evenly trimmed seam edge.
How to use the lock cutter sewing machine attachment
Step 1:
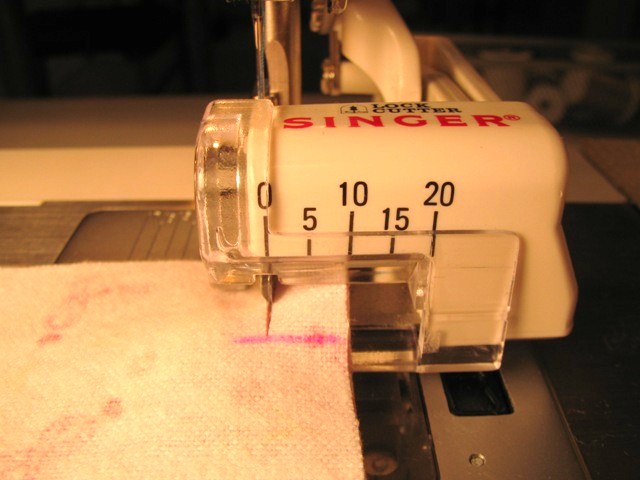
The device looks somewhat similar to a walking foot and attaches to the presser foot shank in the same way. Once the device is attached to the machine, set the stitch selector to either a simple overcast stitch for woven materials, or a zigzag stitch if sewing with knits. Set the stitch width to 5 mm or any desired width as long as it doesn’t hit the sides of the presser foot or the small finger in the center of the presser foot. The stitch length can be what you want it to be, but anything within 2.5 - 3 mm works best.
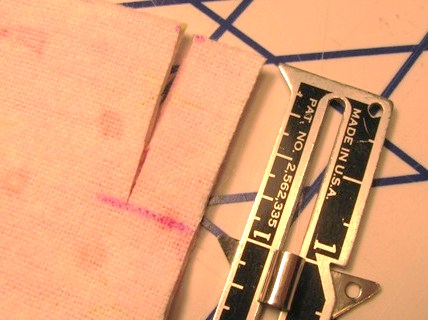
The markings on the front of the cutter gauge the width of the fabric to be trimmed away and are in millimeters. They help guide the fabric into the cutter so a straight cut and sew seam is achieved.
Step 2:
Prepare the fabric for inserting into the device. Make a 1 inch cut from the top edge into the fabric. The cut should be anywhere from 5 to 2 mm from the side edge of the fabric, or approximately ¼ - 1 inch. This represents the width of the fabric that will be trimmed away.
I prefer to use this device to trim and finish already stitched seams. So, if I have sewn a seam with a ⅝ inch seam allowance, I use the device to trim the allowance down to ⅜ inch, which means the width of my cut is ¼ inch from the edge.
Step 3:
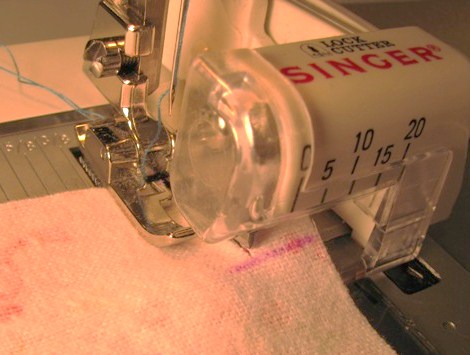
Once the cut is made, the fabric is ready to be inserted into the device. With the presser foot and sewing machine needle in the raised position, slide the left cut of the fabric over the clear plastic bar into and then under the presser foot. The right cut of the fabric will also slide over the clear plastic bar, but to the right of the cutting blade. This will effectively separate the cut portions and clear the path for the cut and sew process to work.
Step 4:
With the fabric in place, lower the presser foot. Slowly -- and I mean slowly -- begin to sew, making sure the needle doesn’t hit either side of the presser foot or the center finger. Also, give those thread tails a bit of a pull to ensure the fabric doesn’t sink into the throat plate and the fabric progresses forward smoothly. Continue sewing at a slow, even pace.
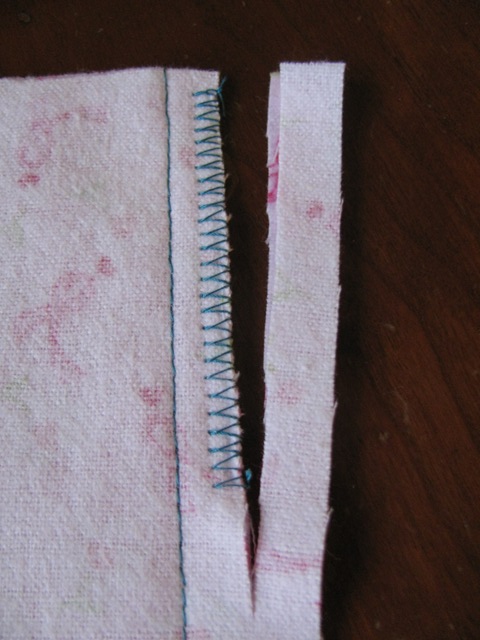
Ok, so its not exactly a serger. But, it does a very good job of finishing seams so that the inside of your projects can look as good as the outside.
If you'd like to try your hand at using a serger, sign up for Beginner Serging: Machine Basics & Techniques with Amy Alan. You'll gain confidence with using serger setup stitches while making three posh projects: an exposed zipper bag, an ombré ruffled apron and a striped knit scarf.

Cute Singer Machine is very nice. I used the first seeing machine of Singer which is working with electric adopter. It was very nice and useful. I like to buy this. How ca I order
I’m researching this for my 15-91, low shank sewing machine. Will this Work ???
Il est valable pour la toile cirée ?.Merçi pour un e réponse.
Does this foot fit Husqvarna machines?
Will this fit a Singer 776 Stylist?
Will this fit any low shank Singer sewing machine, and what is the cost ?
looked up information on serging and showed Singer Lock Cutter foot