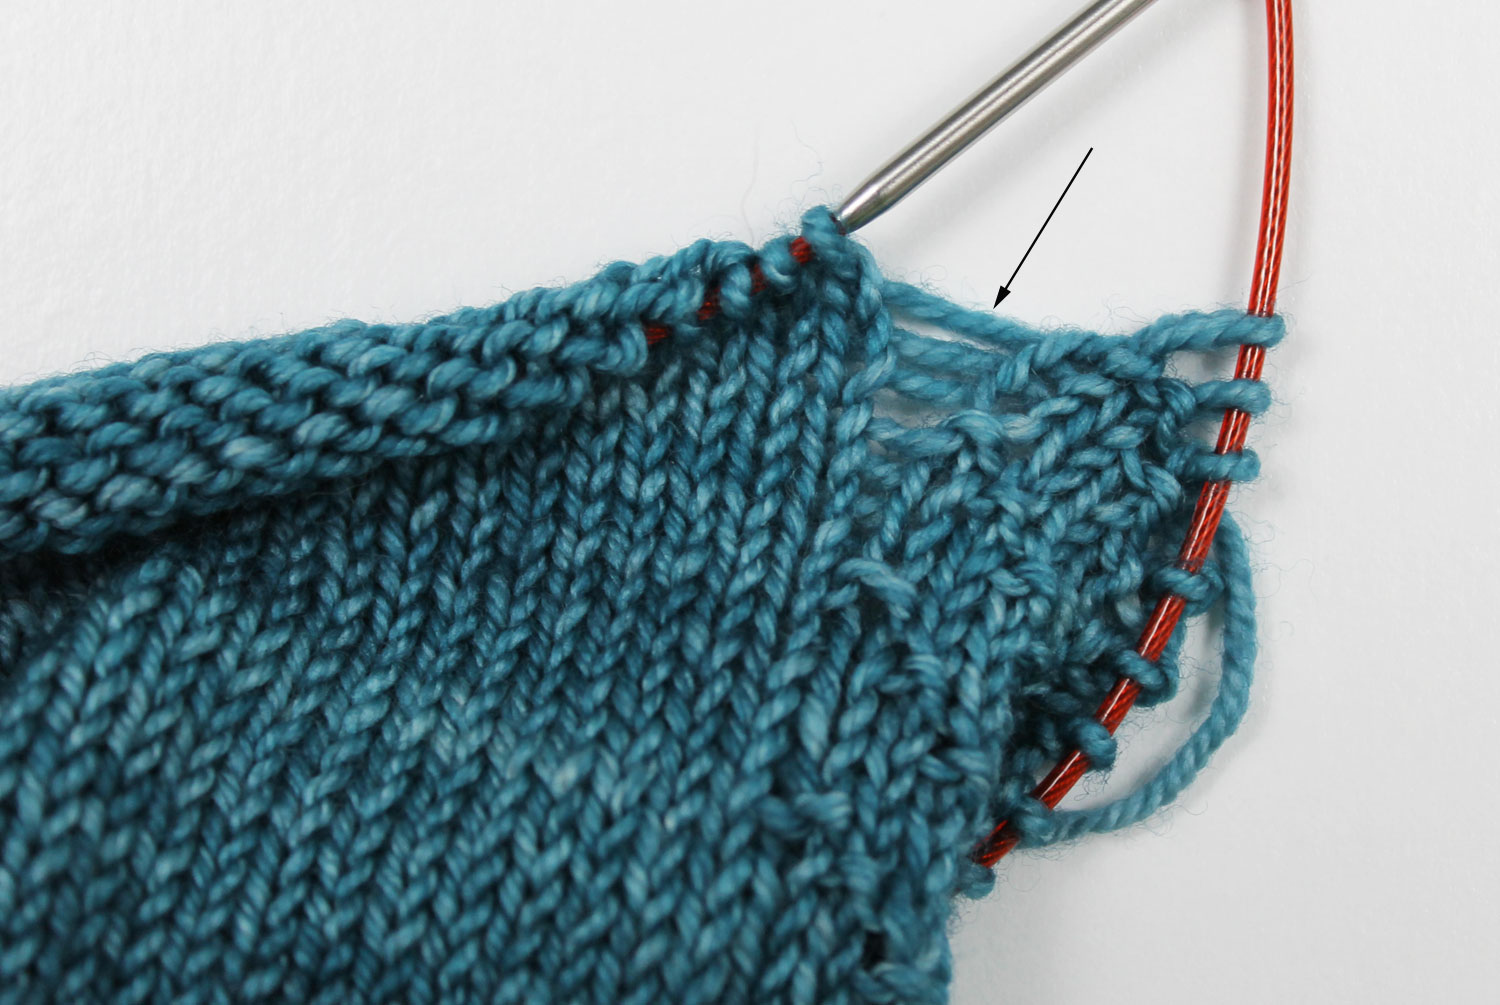
News flash: knitting and ladders don't mix. No, not that kind of ladder... we're talking about those pesky ladders that happen when you're knitting in the round. Ladders are stretched stitches that form when your stitches separate too much between needles. Sometimes ladders might even look like a dropped stitch, but don't be fooled.
See the horizontal bars showing up between the stitches in the photo above? That's a ladder. Ladders are a common problem for knitters learning the magic loop, but they pop up in double-pointed needle knitting, too, where they're actually more of a high-risk situation because of all the needle changes.
Luckily, you only need to make a couple of small adjustments to avoid those ladders. We're using magic loop to demonstrate here, but some of the same techniques can be applied to knitting with double-pointed needles unless noted otherwise. Let's take a look at a few of your options.
1. Pull Taut on the Second Stitch
Many knitters pull tightly on the first stitch of the new needle, and that can solve the problem. But pulling the second stitch tightly can also help even out the tension and avoid laddering.
Something many knitters don't realize about ladders is that they can be caused by both loose tension or tight tension. Sometimes when you pull tightly on that first stitch before moving on, things can get a little too tight at the join between the needles. That first stitch is tight, and it throws off the tension of the join, which then causes a ladder.
If you're pulling tightly on the working yarn and still getting a ladder, focus more on making the tension even.
2. Don't Pull Too Tightly Before Moving to a New Needle

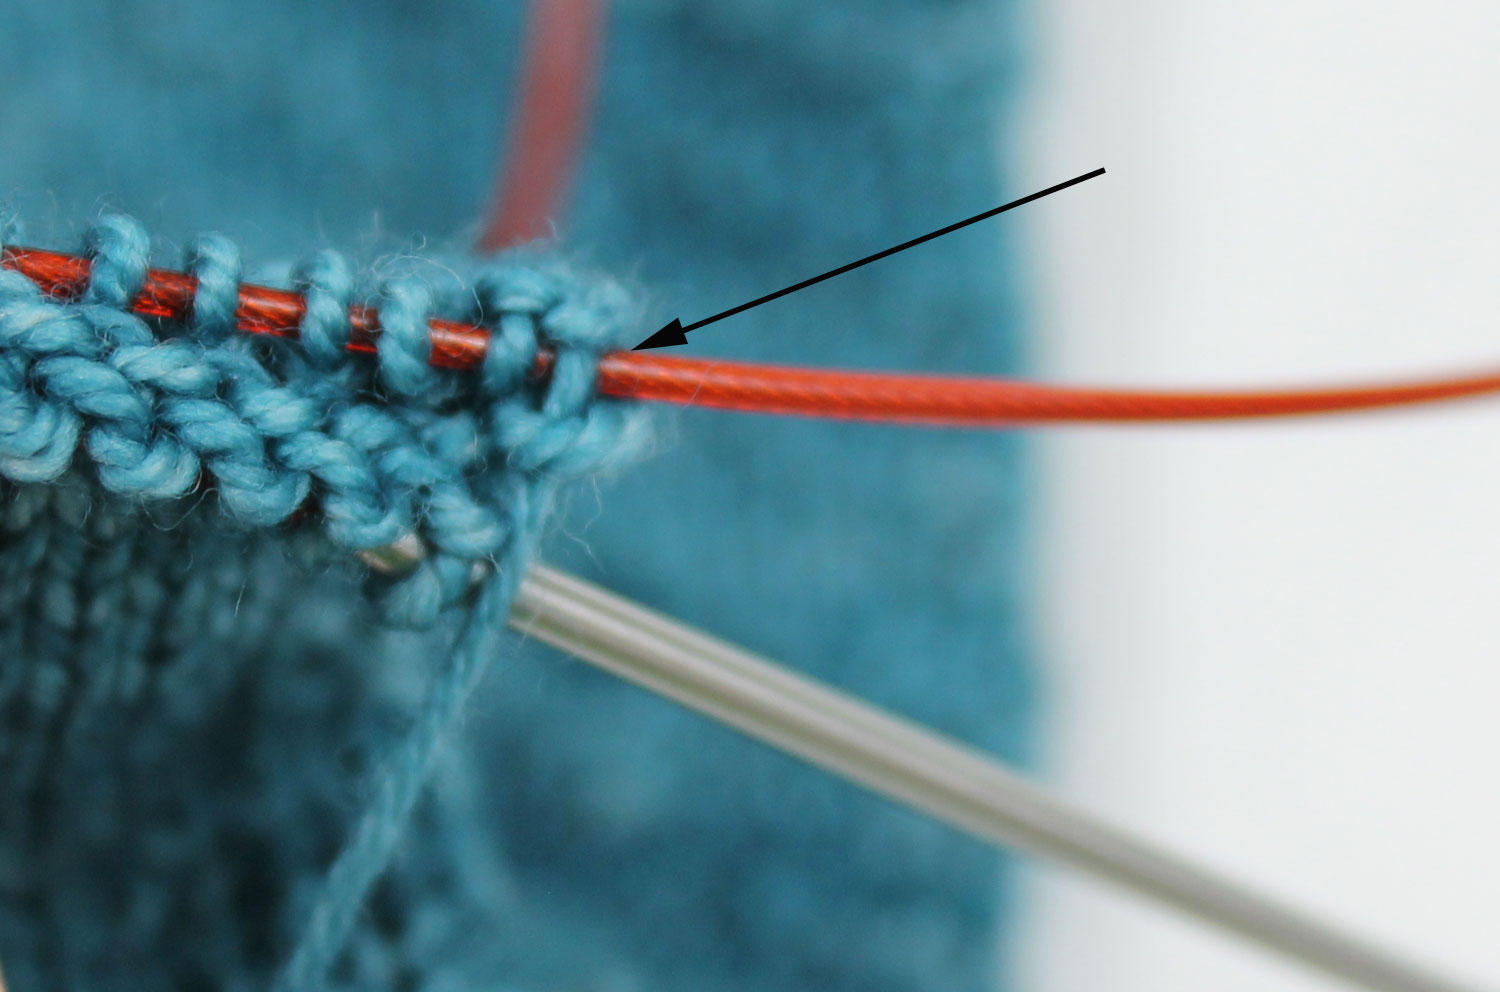
This is a problem that's unique to magic loop. Circular needles have cables that are much thinner than the needle tip. So when we tighten the working yarn before we start working on the needle closest to us, we're tightening that stitch to fit around the cable, rather than around the needle tip.
Just like with Option 1, pulling too tightly can throw off the tension of the entire round, which also causes ladders. Instead of pulling tightly, focus more on making sure all the stitches have an equal sizing and tension.
3. Keep the Stitches Close Together

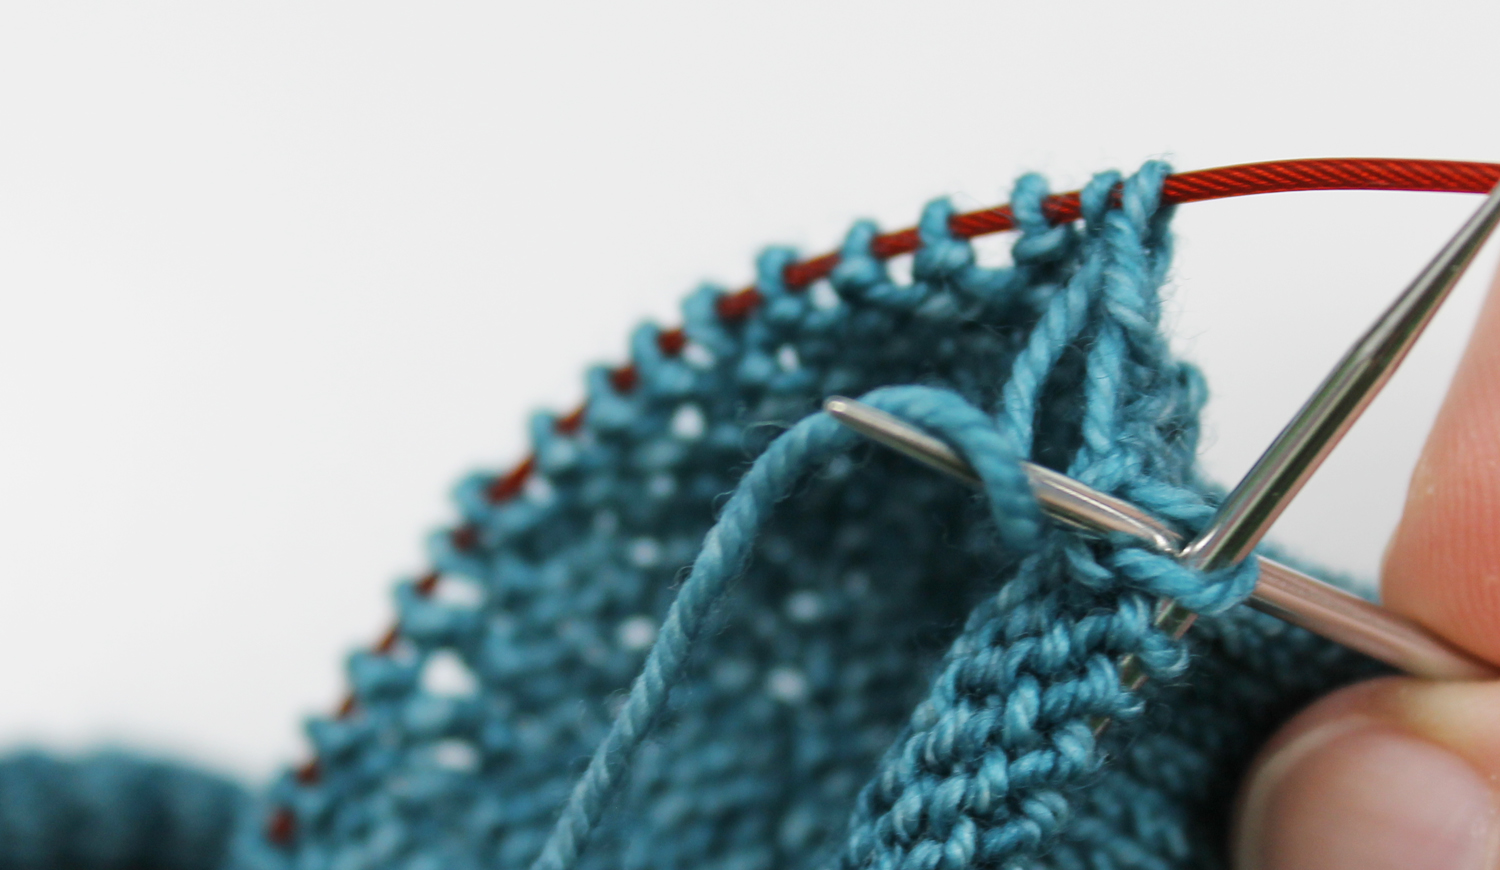
In the photo above, you can see there's a pretty big gap between the back needle and the front needle where the next stitch is being knit. Pinch that back cable to meet the new needle when you start knitting on a new needle, and that will close up the gap and help you avoid ladders.
This can work with double-pointed needles, too. When you're changing to a new double-pointed needle, make sure the old needle and new needle are close together. For double-pointed needles, that usually just means making sure your needles are at an angle.
4. Use a Different Fiber
Some fibers, like cotton, don't have a lot of stretch. So once that ladder forms, it's unlikely it will spring back in place. Fibers like wool, though, are famous for being springy, which also means they're more forgiving. (If you used a springy yarn like wool and still have ladders, keep reading!)
5. Block It
If your ladder only happens occasionally in the project and it isn't too wide, you might be able to fix it with blocking. As you probably know, blocking shapes the stitches and helps them settle. When you block your ladders, wiggle the stitches around so they shift and hide the ladder. Just try to adjust them so they are the same size as the other stitches.

Some time ago I learned a method for preventing ladders in circular knitting by slipping the first stitch on a round (which leaves a float) then picking up the float on the next round. Unfortunately I've forgotten the correct method of working in the float on the next round. Does anyone know this method?