Hand embroidery is a terrific hobby for a number of reasons, not least of which is the fact that there aren't a whole lot of rules involved in it. Embroidery is one of those pursuits that allow the crafter a lot of freedom for creative expression, without the hindrance of a lot of rules. In this post you'll learn how to start embroidery threads without a knot.
There are guidelines, with embroidery — little hints and tips that will help you create embroidered masterpieces that look good and that withstand the test of time.
One guideline that you'll most likely come across early in your stitching adventures is the no-knot one, which tells us that we shouldn't start our threads with knots that are left on the back of the embroidery.
There are several reasons for this guideline:
- Have you ever stretched and framed a piece of embroidery flat, only to find little lifted bumps on the front of the work, thanks to knots? I have!
- Have you started a thread with a knot on the back and tried to stitch a chain stitch or a French knot in the same spot, only to find your thread in a mess because it ran through a knot on the back of the embroidery and pulled the whole thread out of whack? I have!
- Have you ever embroidered something meant to be laundered, started your threads with knots, and after laundering the item, found that the knots loosened and released over time? I have!
- Have you ever tried to finish the edge of an ornament or needlebook or other item, and found it impossible to put your stitches right where you wanted to, thanks to the presence of a knot? I have!
So there are many reasons why needlework instructors often encourage stitchers not to use knots.
But isn't it complicated, to start an embroidery thread without a knot? Not at all!
Here's how to start thread securely without leaving knots on the back.
No knots with two strands
It's pretty common for stitchers to use two strands of floss in the needle at one time when they stitch, and this method of avoiding a knot is not only super-fast, but it's super easy!
Keep in mind, though, that it only works when you're embroidering with two strands of floss in the needle.
1. Instead of cutting two separate strands of floss, cut one very long strand and fold it in half.
2. Thread the cut ends into the eye of the needle so that the folded end is the end of the thread.
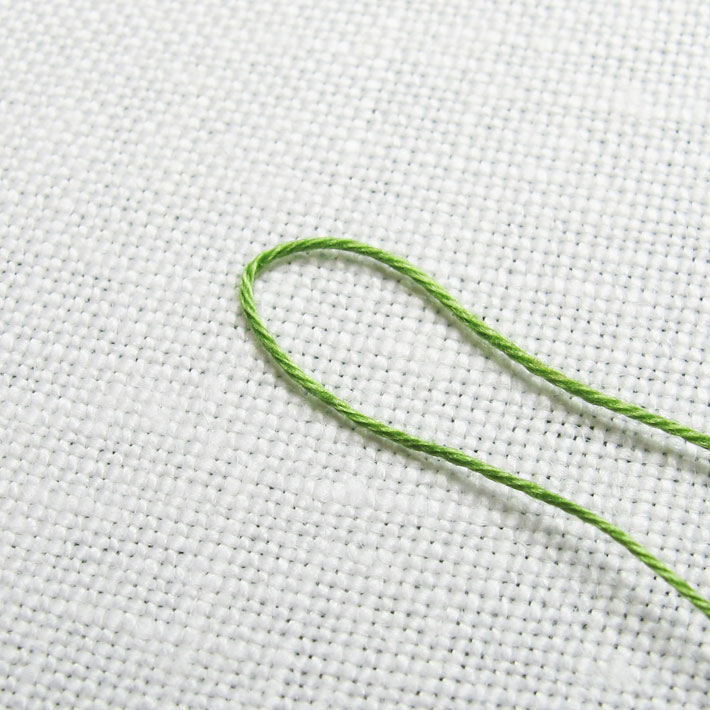
3. Take your needle and thread from the back to the front of the fabric, like you normally would, only don't pull all the way through. Leave a small loop on the back of the fabric.
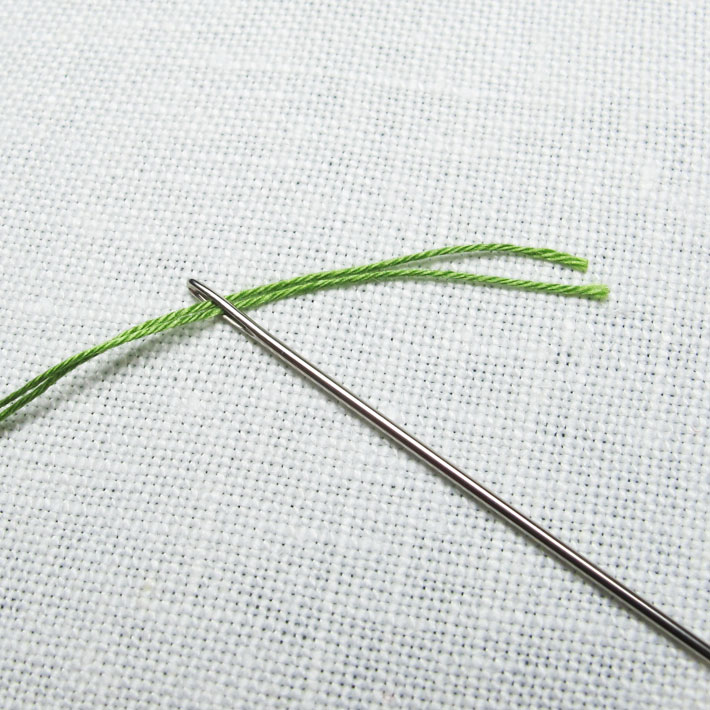
4. On the front of the fabric, take your first stitch forward, but before you insert the needle and pull through, turn the work over again...

...and make sure that the needle is passing through the loop on the back of the fabric.
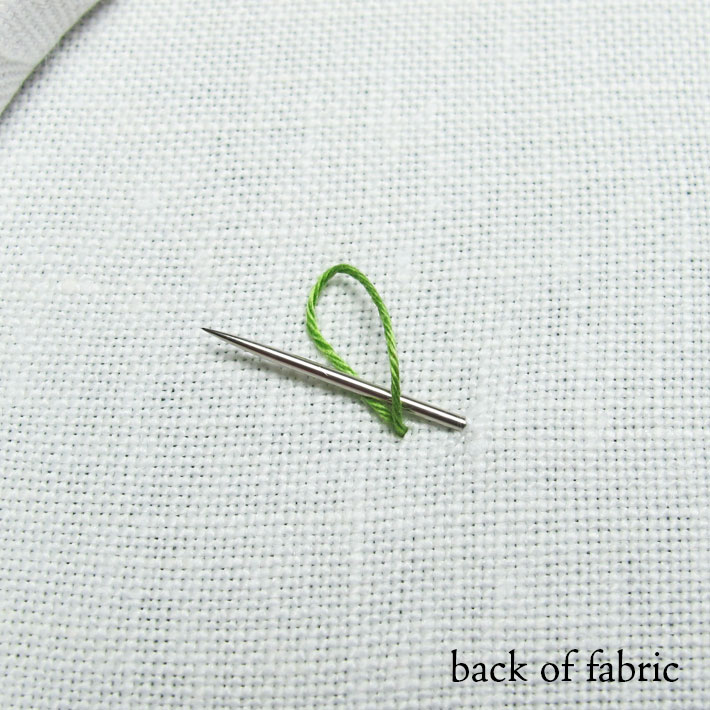
5. Pull the needle and thread through the loop and tighten the loop up. This will create a chain stitch of sorts around the working thread.
6. Turn the work over and stitch away, confident that your thread is secure on the back of the fabric — without a knot!
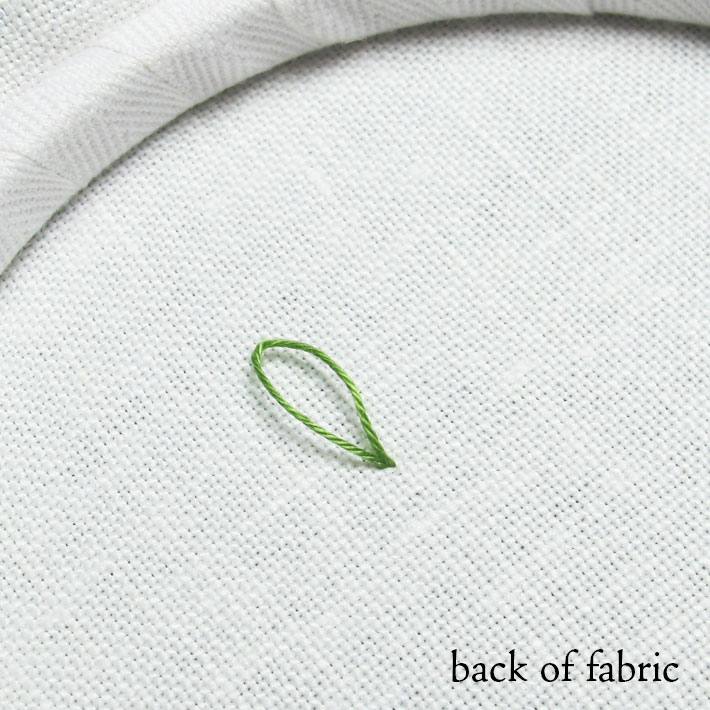
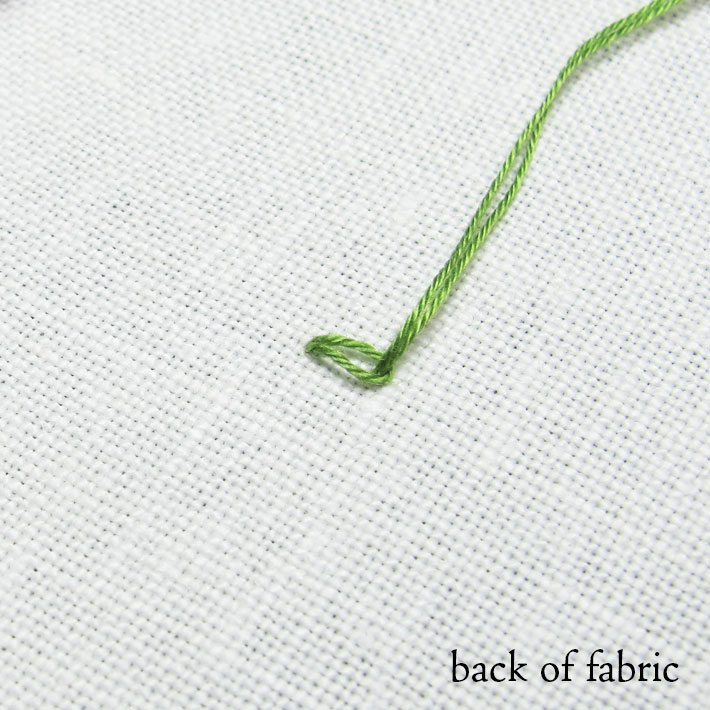
A finished line of stem stitch will look like this on the back of the fabric, using this method of starting a thread.
No knots with any thread
The first method above is quick and easy, but it's somewhat limiting. It only works when you're stitching with two strands of floss, after all.
The method below works with any kind of thread, with any number of strands.
Yes, you're right! That's a knot in the photo! In this case, the knot is called a waste knot, because we're eventually going to cut it off.
1. With this method of starting a thread without leaving a knot on the back of the fabric, thread your needle as you normally would and tie a little knot at the end of your thread.
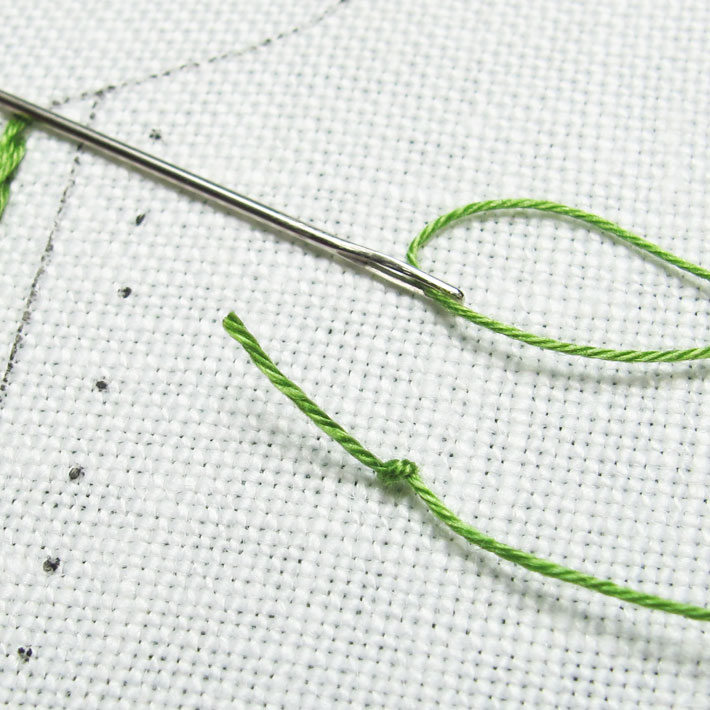
2. An inch or so away from where you want to start your embroidered line, take your needle and thread down into the fabric from the top, leaving the knot on the top of the fabric.

3. Moving down your design line towards your starting point, bring the needle and thread to the front of the fabric and take a tiny backstitch over one (or two, at most) threads in the fabric.
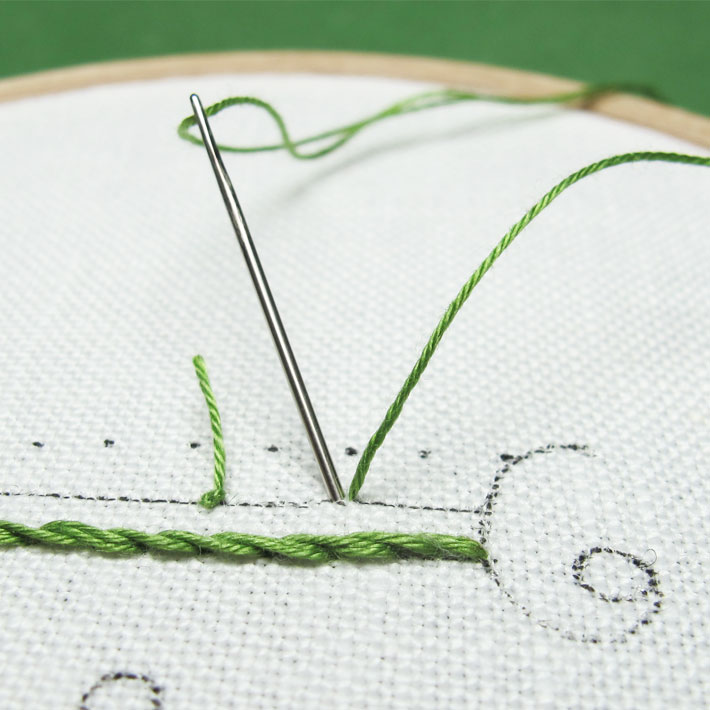
4. The goal here is to make two or three tiny backstitches on the design line, working toward the starting point of your embroidery.

5. Once you have two or three of these tiny backstitches worked on the line, bring your needle and thread to the front of the fabric at your starting point, and start stitching towards the knot.
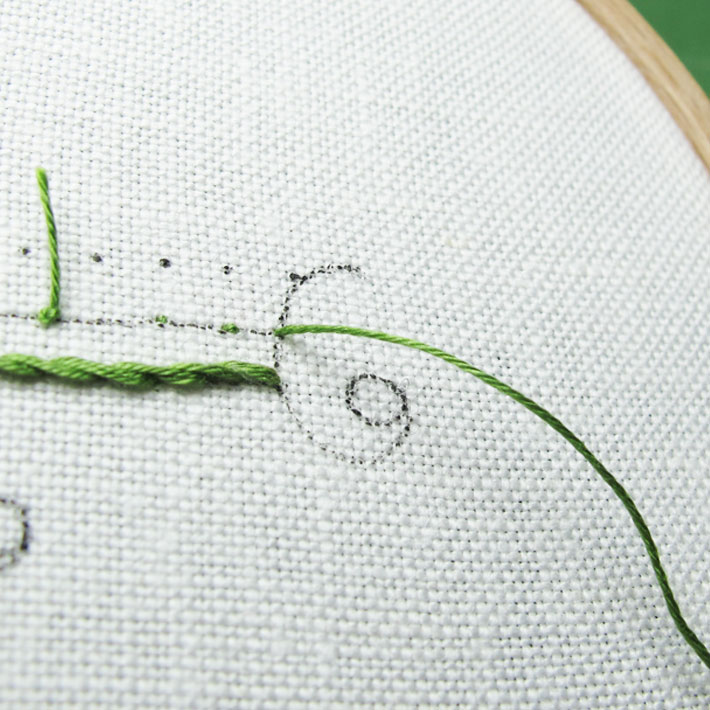
6. Stitch right over those little backstitches, as if they aren't even there. Your line of embroidery stitches will cover them up.
You don't need to pay too much attention to what's going on on the back of the fabric. You'll most likely be stitching through the threads on the back as you progress towards the knot — and that's OK! Just think of it as extra security.
7. When you arrive near the knot, pull up on the tail of the knot, to pull it away from the surface of the fabric. Then snip right next to the surface of the fabric to remove the knot.
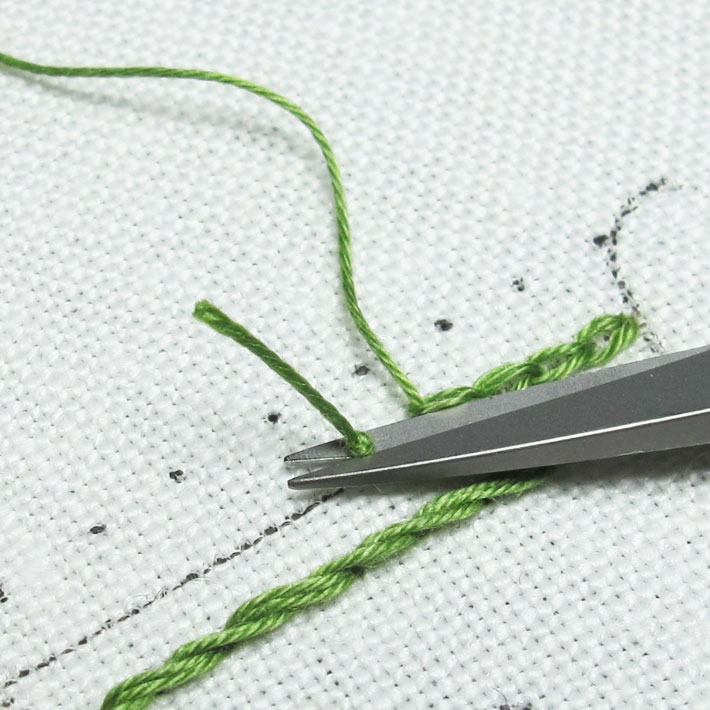
Once you snip the thread close, the rest of it will bounce to the back of the fabric.
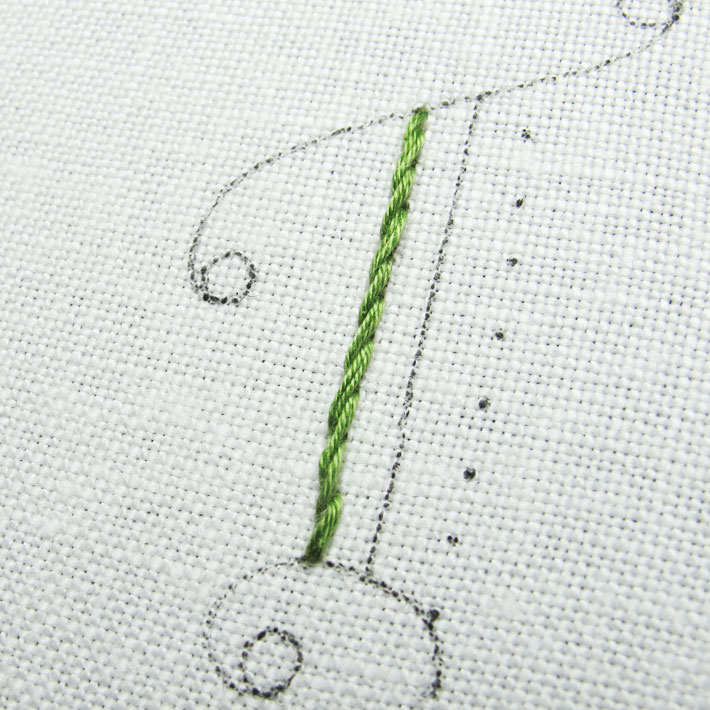
Up close, this is what the beginnings of both lines of stitching look like. The line on the left is the two-stranded method; the line on the right is the waste knot with tacking stitches.

Both threads are perfectly secure, and neither involves a little lump on the back of the fabric.

Waste knots and small tacking stitches like those described above work in pretty much any stitching situation, where you can cover the little stitches up with your embroidery.
So whether you're stitching on a line or filling in space, this is a secure way to start an embroidery thread.
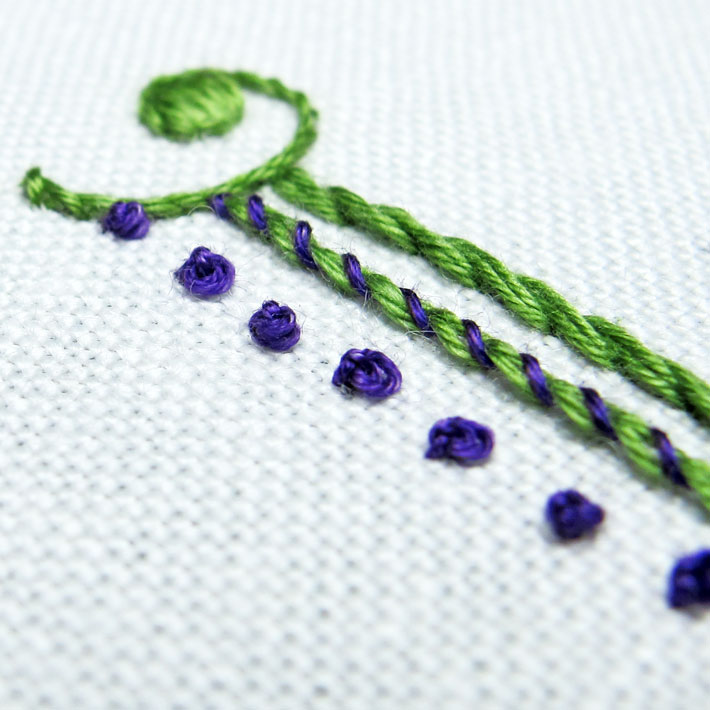
In the photo above, I'm going to fill that small dot with satin stitch and then outline part of it with stem stitch. To start my thread, I began with a waste knot on top of the fabric, inside the little dot, and I took three tiny stab stitches inside the dot, too.
Then I cut the knot off and worked the embroidery over the stab stitches.
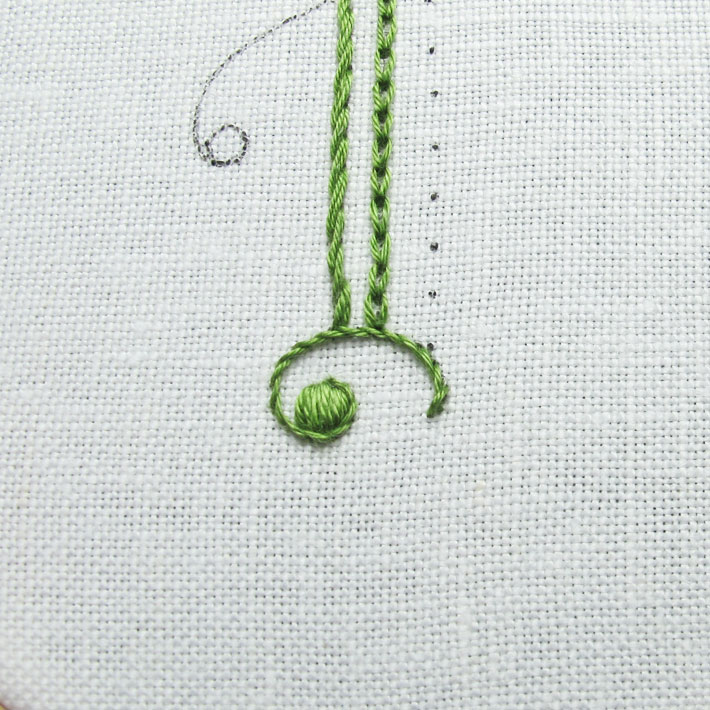
And there's the filling, with no stab stitches visible, and no knots on the back.
No knots with isolated stitches
It's a little trickier to avoid knots or even traveling threads on the back of the fabric when embroidering isolated stitches like single French knots.
But when you're working on a lighter colored fabric and embroidering with dark thread, traveling lines and tails from knots can be unsightly from the front of the embroidery.
So here's how to avoid using knots with isolated French knots, while avoiding traveling dark threads between the knots.
1. Begin with a waste knot on the top of the fabric once again and then bring the needle and thread to the front of the fabric right where you want your French knot to be.
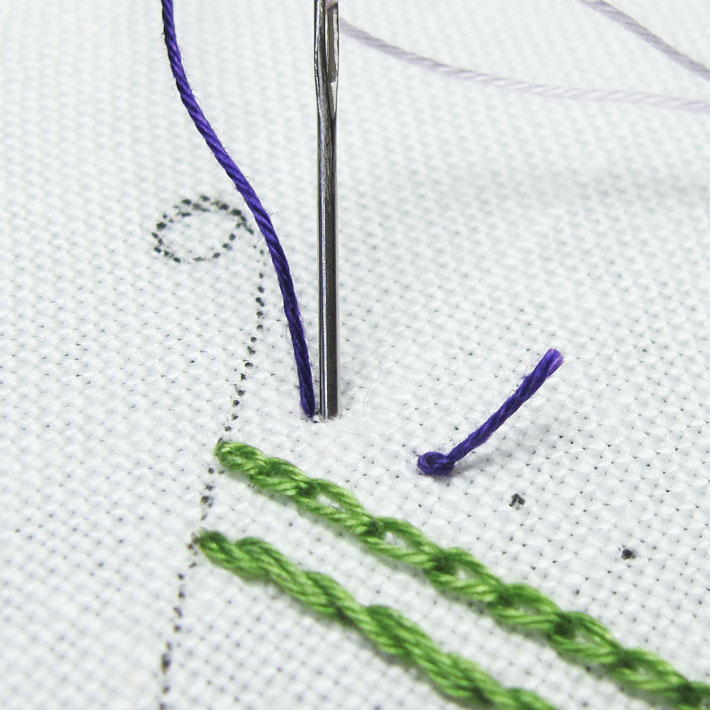
2. Make a tiny little stab stitch over one thread of the fabric (or two, if you're using a very fine fabric).
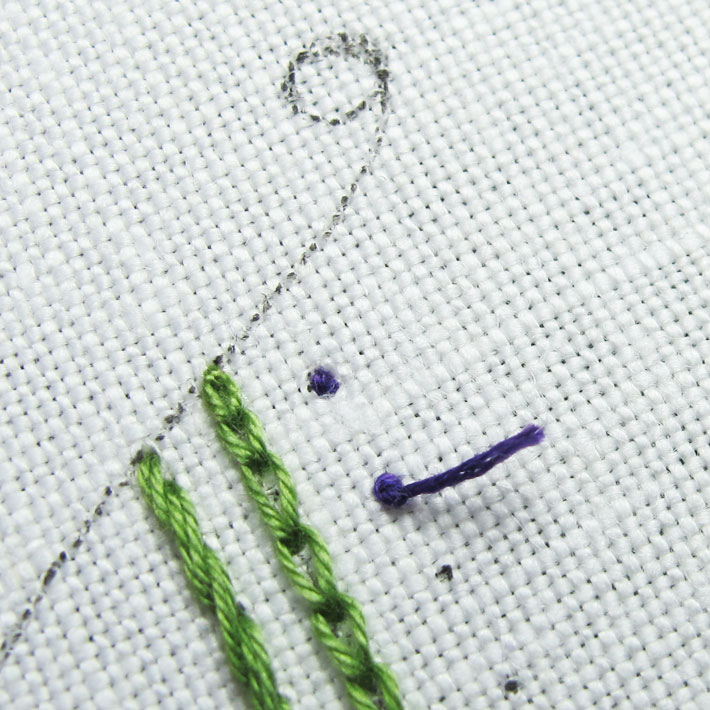
3. Crossing over the first stab stitch — as if you're making a tiny cross-stitch — work another tiny stab stitch.

4. Pull these stitches tightly enough that they sink flat to the fabric, but not so tightly that they distort the fabric or pull on the fabric threads.
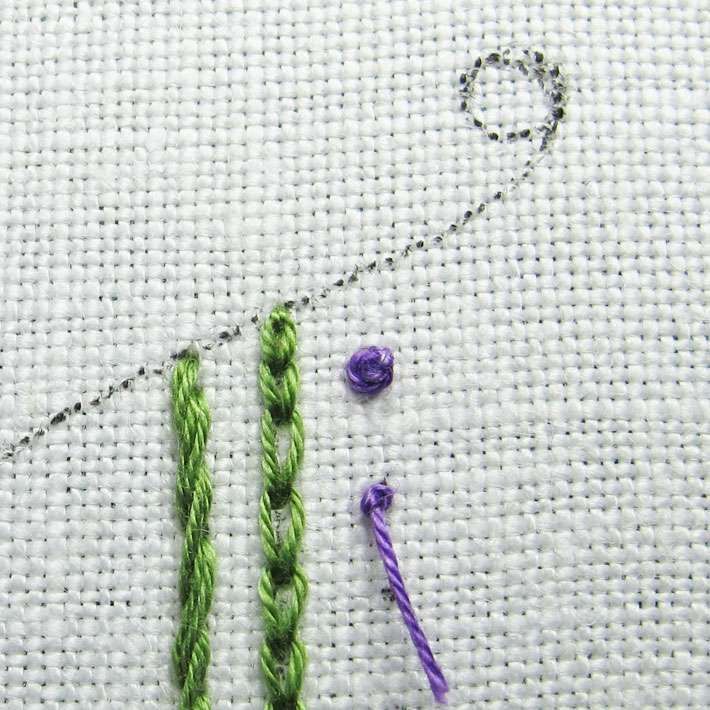
5. Now, work your French knot right over this tiny dot, bringing the needle and thread to the front of the fabric on one side of the dot, wrapping the thread around the needle for the French knot, and taking the needle and thread to the back of the fabric just on the other side of your stab stitch dot.
6. Pull the thread through, and you have a perfect French knot sitting right over the stab stitch dot.
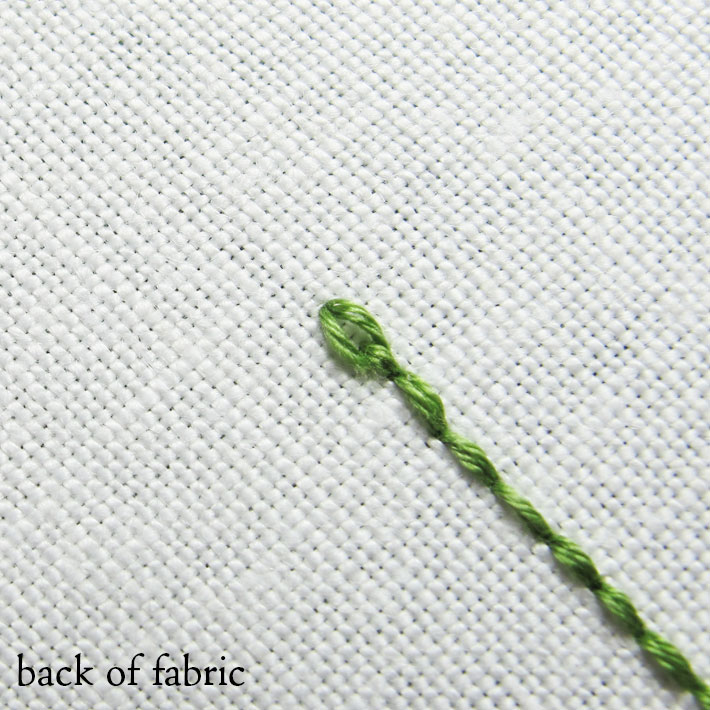
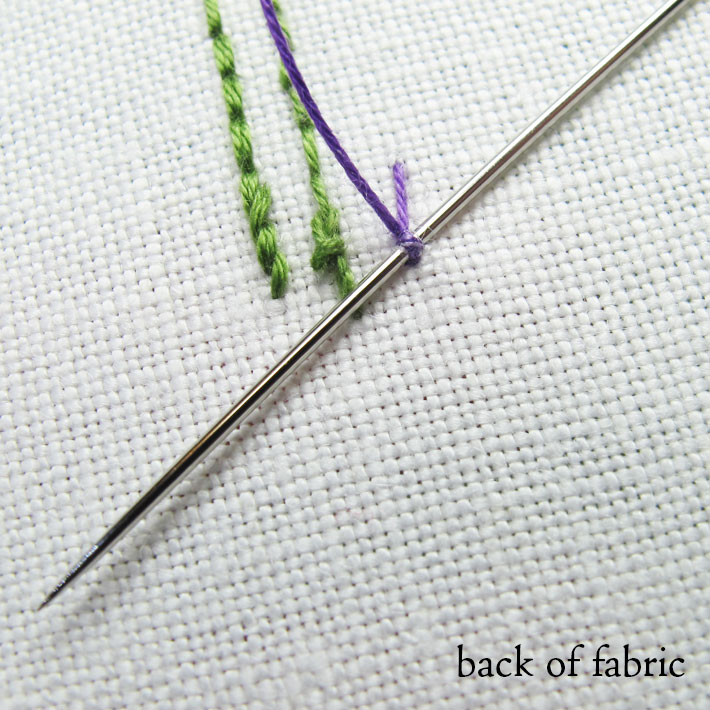
7. Turn your work over, run the needle underneath the stitch right behind the French knot...
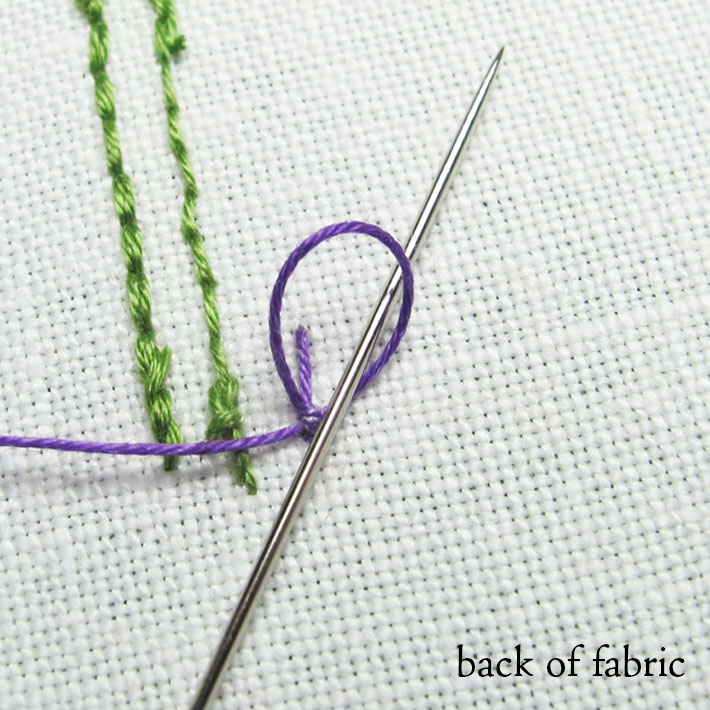
...and pull through until a small loop is left in the working thread. Pass the needle through the loop in the opposite direction that you passed under the stitch, and then cinch the loop around the working thread.
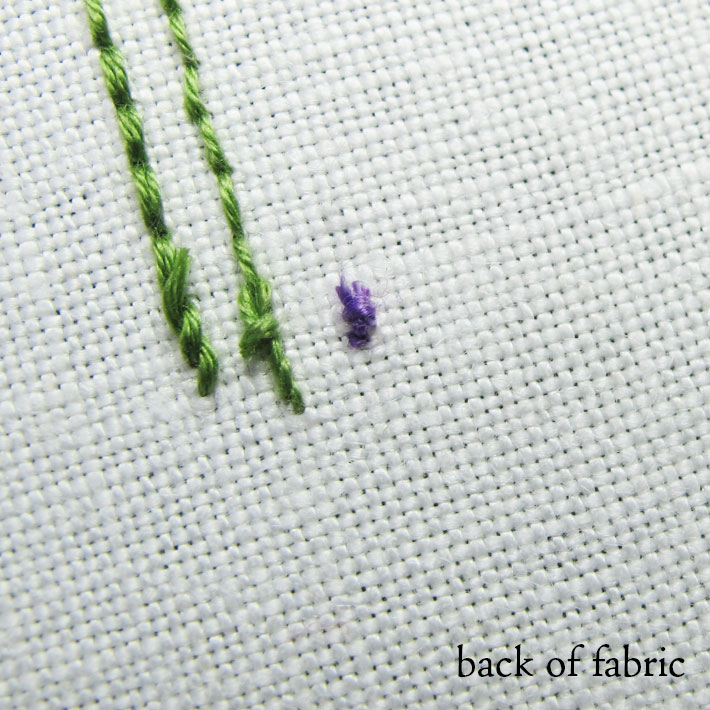
8. Snip both threads — the thread from the waste knot and the working thread — close to the back of the French knot.
While this method definitely slows down the stitching of French knots, it's a sure way to stitch an isolated French knot securely onto the fabric, without leaving heavy knots on the back of the fabric and without trailing dark threads behind the fabric, between the French knots.
And, while these methods may seem long and complicated at first, I promise that all the methods demonstrated above are secure and easy ways to start threads without using knots in practically any stitching situation. Once you get used to these methods, they become second nature and you'll delight in the fact that you can start your threads quickly and securely without having to worry about leaving knots on the back of your embroidery!
Don't let no-knots deter you!
All that being said, if you really prefer to begin your embroidery with knots and the whole idea of changing your methods would put you off embroidery forever, don't sweat it! Use a knot!

wonderful information thanks