Your basic elastic waistband is nobody’s idea of a good time. The elastic always twists and turns inside its casing, forming gathers that bunch up unevenly around the waist. Why? Because most waistbands have an elastic that’s just floating inside a tube of fabric. This post can help you sew and elastic waistband.
Thankfully, there’s a much better way to sew an elastic waistband — and stop this annoyance from happening ever again. All it takes is the right technique.
The Secret to a Twist-Proof Elastic Waistband
Simply put, you need to sew elastic directly to the fabric, forever joining the two parts together. It’s incredibly easy, and you can use a conventional machine, a serger or an overlock machine to do it.
This technique isn’t just for waistbands, either. You can use it for any elastic you’d put into a casing. But since this method only has you fold the fabric into the garment at an amount equal to the width of the elastic, you want to trim off any extra fabric that might otherwise get folded an extra time (according to the instructions on your pattern).
For example, the patterns for most elastic waist garments tell you to fold the fabric a small amount, usually about ¼”, then fold it again a scant bit wider than the elastic you’re inserting. This is to avoid having an exposed raw edge on the inside of the item. But since you’ll only be folding the fabric the width of the elastic — and finishing the raw edge of the fabric at the same time — any extra fabric that would’ve gotten folded needs to be cut off. Otherwise the pattern won’t work.
How to Sew an Elastic Waistband
Level: Easy
What You Need
- Elastic
- Scissors
- Sewing pins
Instructions
1. Cut Your Elastic to Fit

Following the instructions for your pattern, cut your elastic to fit the part of the body it’s going around. Here, we’re using a 1″ elastic for the waistband on a pair of pajama pants, so the elastic is cut to fit the wearer’s natural waist. Make sure to use the right elastic type and size for your project, as instructed by the pattern’s designer.
2. Pin the Ends Together
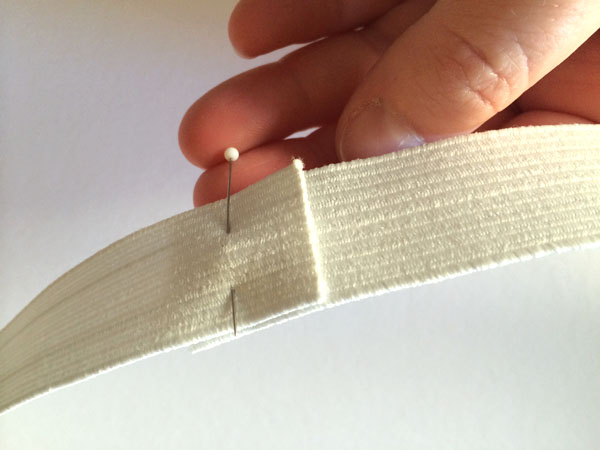
With this technique, we’re not forming a casing in the waistband and closing the elastic circle afterward — so we’ll need to sew the ends of the elastic together first. Overlap the ends following the pattern instructions, then pin in place. Here, we’re overlapping the elastic by 1″, which works well for a waistband.
3. Join the Ends
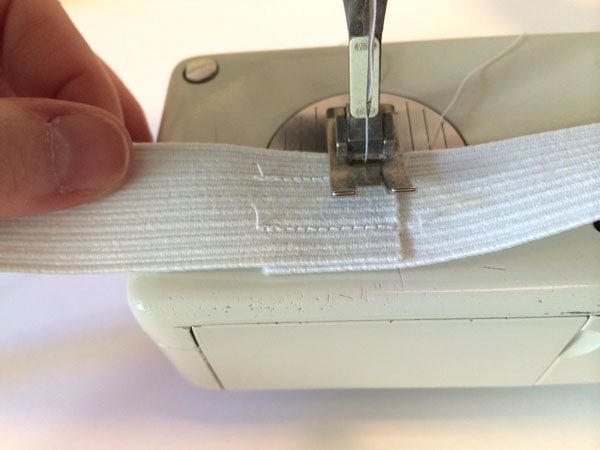
Use a regular straight stitch to sew the ends of the elastic together. You may want to sew at the top and bottom of the elastic when it’s more than ¼” wide, to secure it properly.
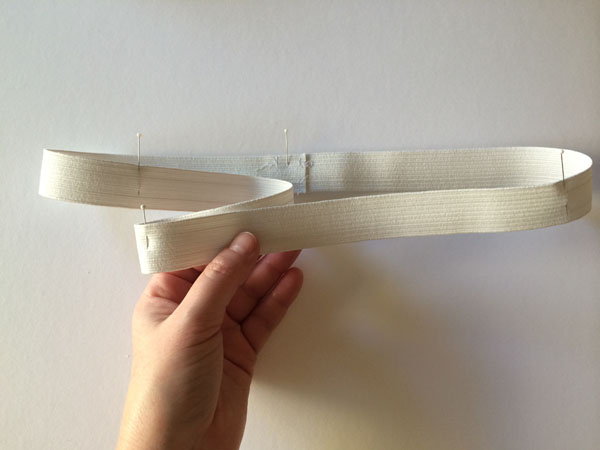
4. Form a Square of Stitches
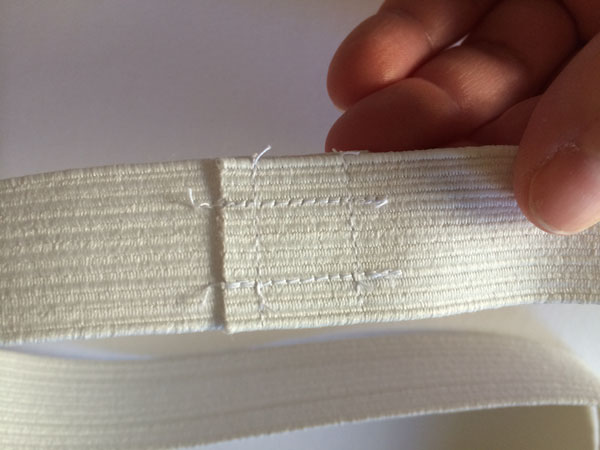
As you continue to sew the ends of the elastic together, form a square of stitches, as pictured above. Make sure you backstitch each row. After you’re done sewing the elastic, pull on the area to double check it’s secure.
5. Divide the Elastic
Starting at the overlap spot, fold the elastic in half to find the spot opposite the overlap spot. Now place those two spots together to find the halfway point between them on either side, dividing the elastic into four equal sections. Mark each spot with a pin vertically inserted into the elastic at the quarter mark spot.
6. Divide the Waistband Fabric
Repeat the process in Step 5, this time dividing up the waistband fabric into four equal parts. Don’t assume the seams on your project will be at any of these four anchor points. Start at the center back and divide the rest from that starting point, in the same way you did with the elastic in Step 5.
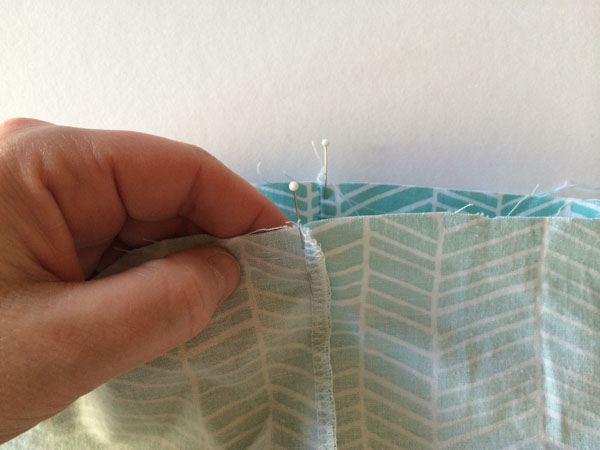
7. Apply the Band to the Fabric
Place the elastic on the wrong side of your fabric, with the top of the elastic flush with the raw edge of the fabric. Place the elastic overlap in a discreet place, like at the center back or near a side seam.

Continue around the waistband, pinning its four anchor points with the four anchor points of the elastic.
Good to Know: Don’t freak if your elastic is smaller than the waistband — this is correct! Keep pinning the two together and breathe easy.
8. Stitch
Put the top edge into your machine first, with the wrong side of the fabric facing up. Here, we’re using a serger, but you can also use a conventional machine with an overlock stitch, a zigzag stitch or a multi-step or 3-step zigzag stitch. The stitch needs to secure the elastic to the fabric and finish the raw edge at the same time, so a straight stitch won’t work here.
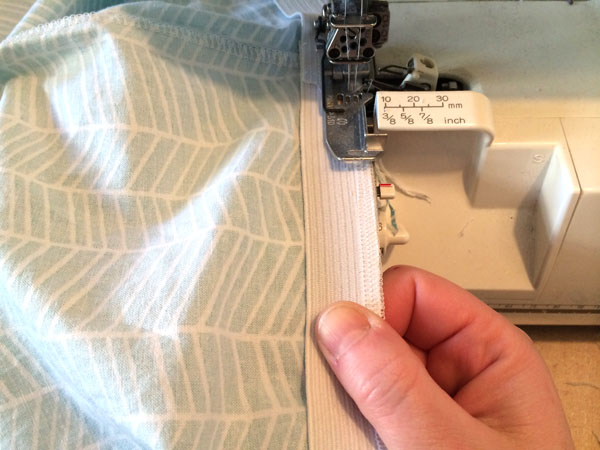
As you sew around the entire waist, pull and stretch the elastic to fit the fabric between the four anchor points. This stitch will connect the elastic to the fabric to keep it in place while wearing. If you’re using a serger or overlock machine, do not cut the elastic or fabric with the machine’s knife while you’re sewing.
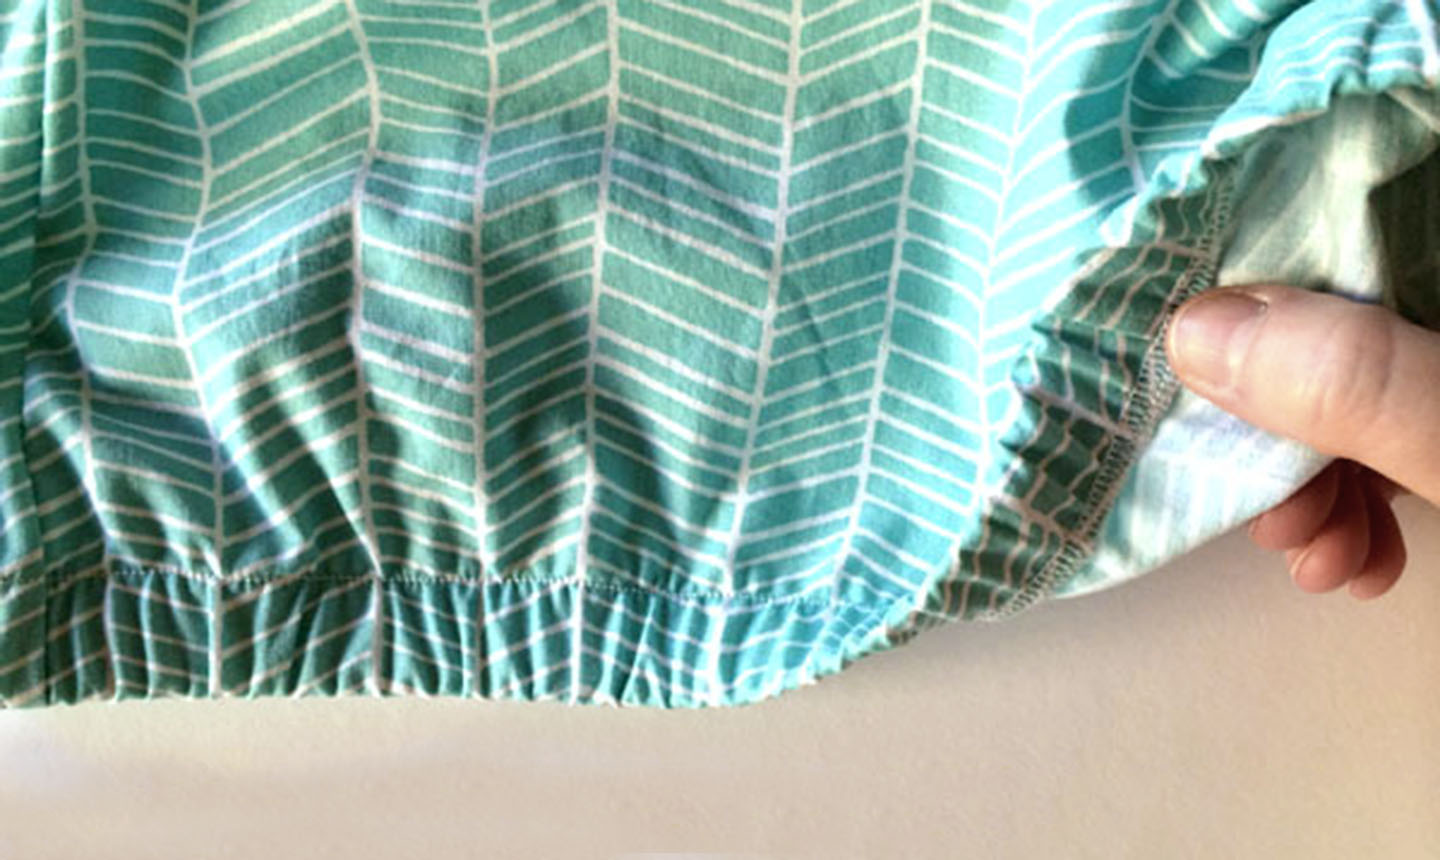
Once you’ve gone all the way around the opening, the fabric will be gathered up due to the elastic.
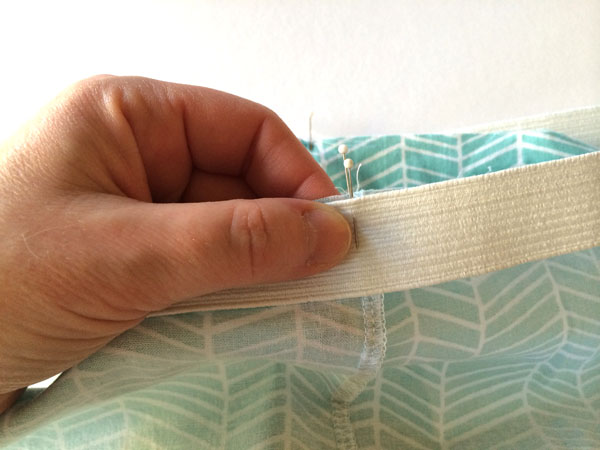
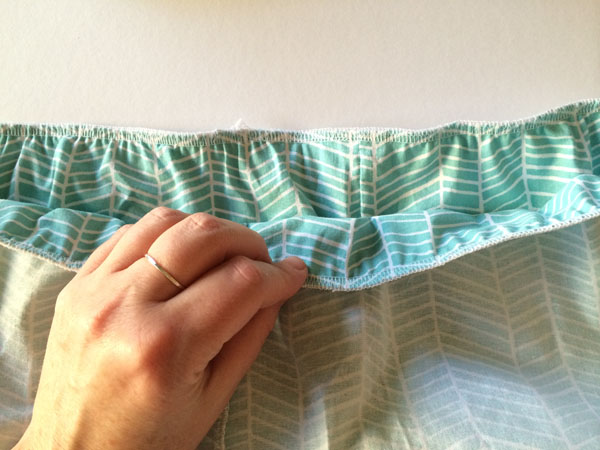
9. Fold and Pin
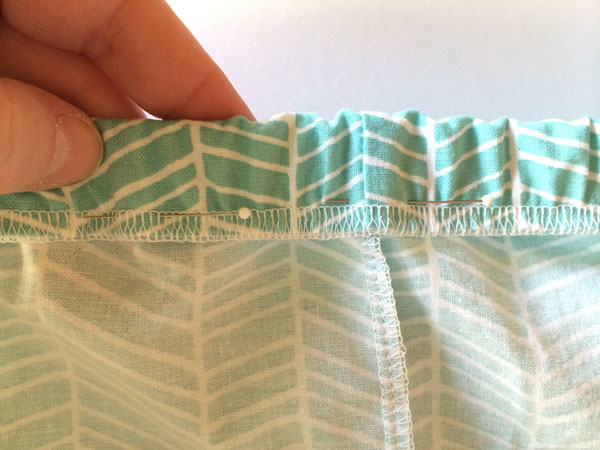
Fold the elastic and fabric down into the wrong side of the garment and pin in place. Only fold the width of the elastic itself, making sure the top edge of the elastic is at the very top of the fabric fold. You’ll need to stretch the elastic and waistband area as you pin, since the fabric is gathered to fit the elastic.
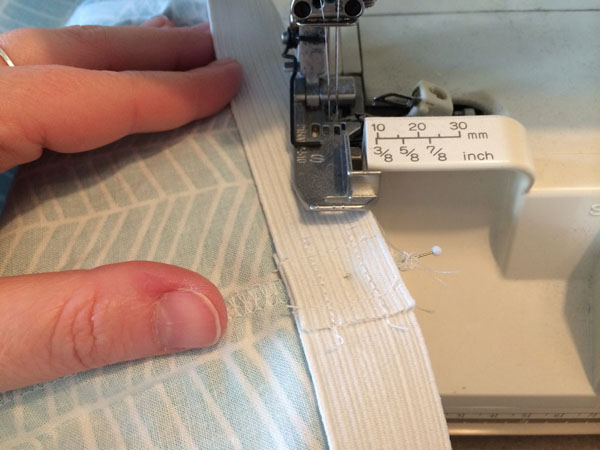
10. Sew Along the Bottom of the Fold

Sew with the wrong side of the fabric up and go through the fabric, stitching and elastic. Make sure to stretch the elastic and fabric as you sew to prevent sewing tucks and pinches along the way.
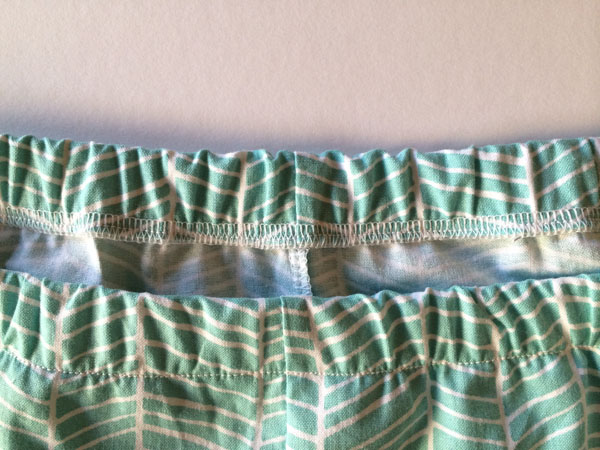
Once you go all the way around, the elastic waistband will look exactly the way it would if you’d sewn it into a casing. But the gathers will be evenly distributed, and the elastic will never flip or twist since you’ve sewn it directly to the fabric.
A life-changing makeover for the ol’ elastic waistband? You bet!
Was wondering when you fold over the elastic do you use a straight stitch ?
Very helpful. I think I am going to be a regular visitor to Craftsy.
What tensions were the needles and looper and stitch length and differential set to when attaching elastic to a waistband please?😊
How do you hand sew inelastically and for doll clothes?
Thanku thanku thanku! U saved me... forever grateful!!