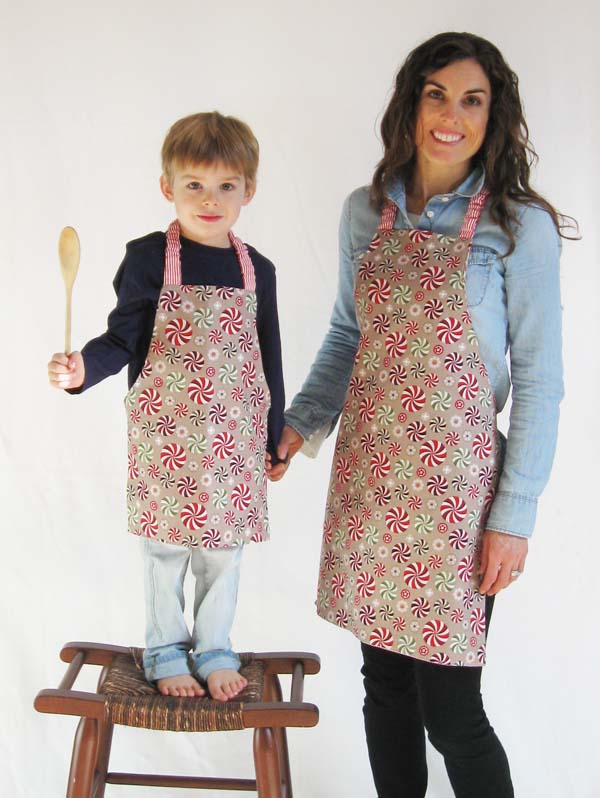
What could be sweeter than baking holiday treats with a little kitchen helper? Baking holiday treats with your little helper in matching aprons, of course!
Motivate the young chefs in your life by sewing this quick-to-make children's reversible apron.
Materials:
- ½ yard of two different fabrics
- A 15-inch piece of ¾" elastic, plus a 2-inch long piece of hook and loop sew-on fastener
This apron fits a child age 3-6 and you can add length or width as needed to your pattern for larger sizes.
Step 1: Make the paper pattern.
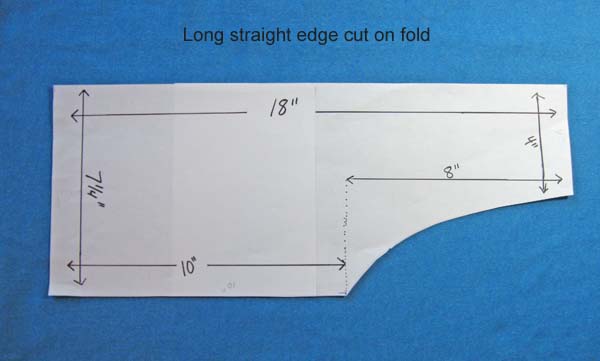
Tape two pieces of printer paper together so the long side is 18 inches, or tape and cut to that length. Mark the width at 7 ¼ inch across what will be the bottom edge. At the other edge which will be the top measure at 4 inches from the fold edge. To create the curve, mark 8 inches down from the narrow edge and connect creating a curve. If you don't have a curved ruler you can use a plate or saucer to trace a curve.
Step 2: Cut out apron pieces.
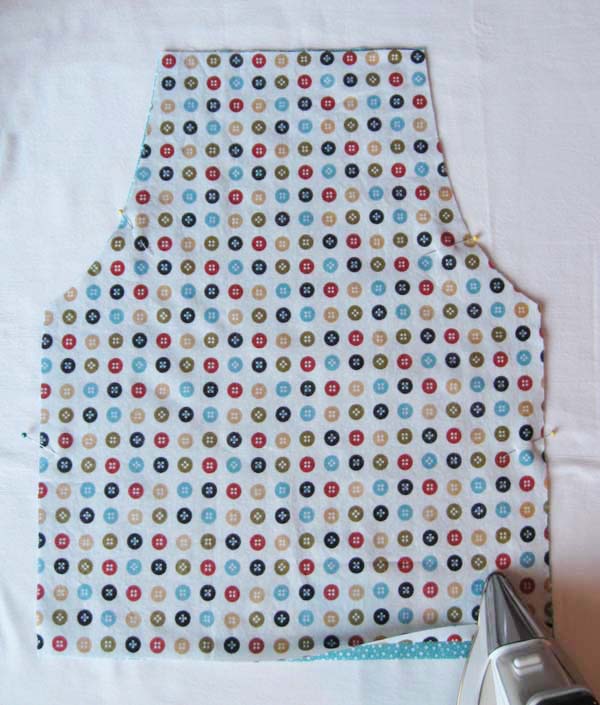
Cut the apron body on the fold on two different fabrics. Any cotton works well for this project. I like to cut the first fabric, then open up the folded piece and lay it, right side to right side on the 2nd fabric and use the first one as the pattern to cut the second. This saves time later and keeps the fabrics correctly facing each other.
It helps to put a couple of pins at the side seams so that your pieces stay matched together, although using cotton makes this really easy as the pieces stick together slightly. While keeping the pieces right sides together, fold and press ½ inch at the bottom edge. Flip over and do the same with the second fabric.
Step 3: Make the neck and waist straps.
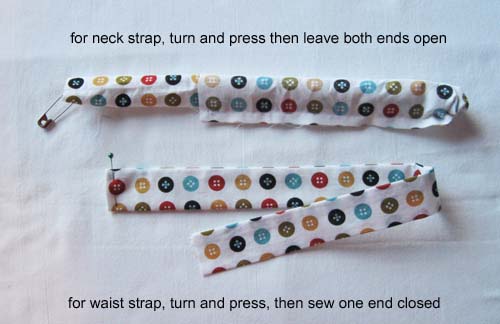
Cut one piece 18 inches by 3 inches which will be the waist strap. Cut another piece 24 inches by 3 inches for the neck strap. Cut a 15-inch length of ¾ inch wide elastic. To make the waist strap, fold the long edges together and sew together using a ½ inch seam allowance. Turn and press, then fold in about a quarter inch in on one end to make a clean edge and topstitch closed.
For the neck strap, sew the long edges together using a ½ inch seam allowance, turn and press, then thread the elastic through the tube, securing it at both ends by stitch across the end at ¼ inch.
Step 4: Attach the straps to the apron.
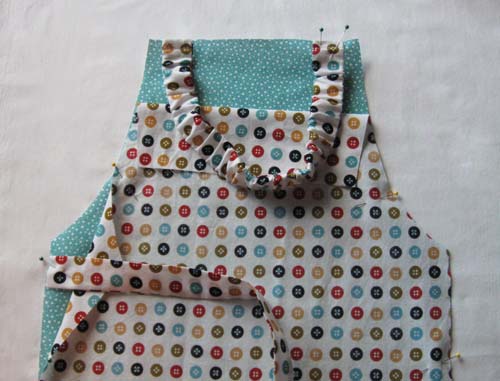
Attach the straps to the apron body. Lay the apron pieces you have pinned together and fold back the top slightly as pictured. Pin the neck strap with the elastic on the top edge, at ½ inch from the curved edge. Stitch across the top edge on one side to secure the neck strap. Pin the waist strap on one side as shown and stitch to secure.
Step 5: Sew the apron pieces together.
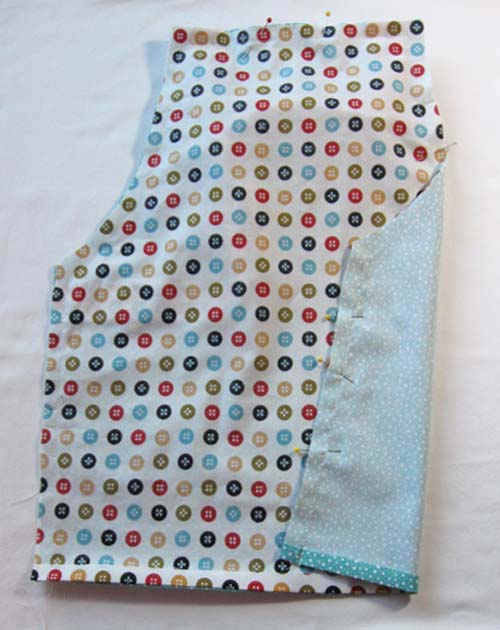
Pin the two apron pieces together, being sure that the strap pieces are tucked inside so you don’t stitch them into the seam. Sew all around the edge using a ½ inch seam allowance leaving the bottom folded edge open.
Step 6: Trim and clip.
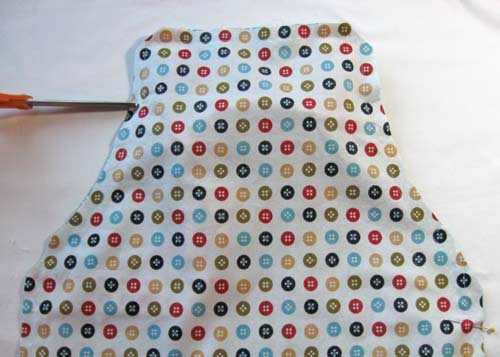
Trim the corners to reduce bulk when it is turned inside out, and clip the curves.
Step 7: Turn and press.
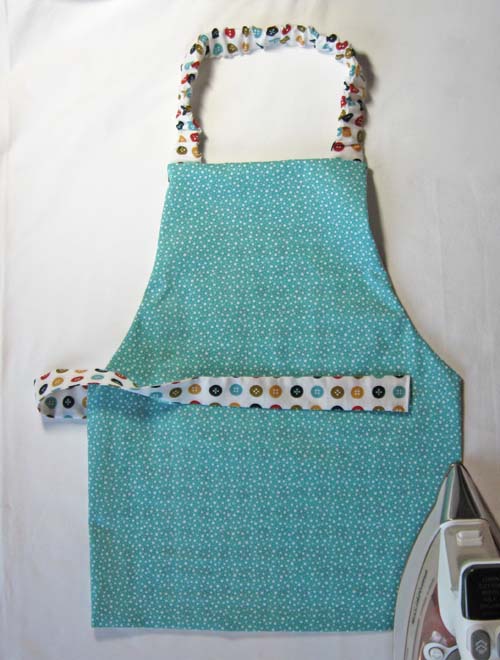
Turn the apron right side out and press all the seam edges to create a crisp edge. Topstitch all around close to the edge including the bottom to finish off the apron and enclose the bottom edge.
Step 8: Add the hook and loop closure.
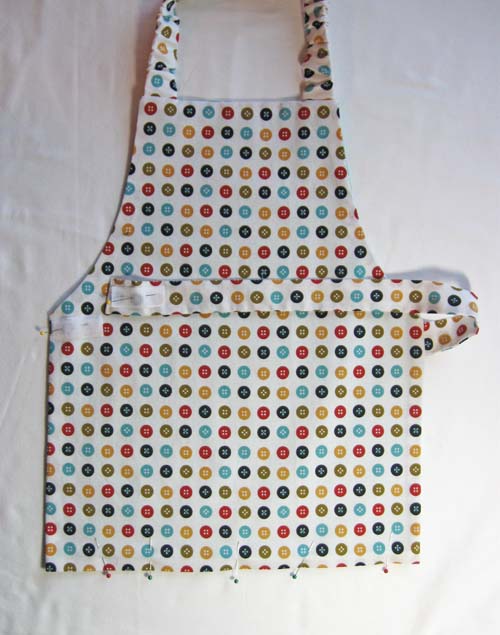
Almost done!
Sew the hook and loop pieces to the apron. I like to sew the fuzzy side to the apron body and the hook side to the strap. This way your little chef can put on the apron all by themselves.
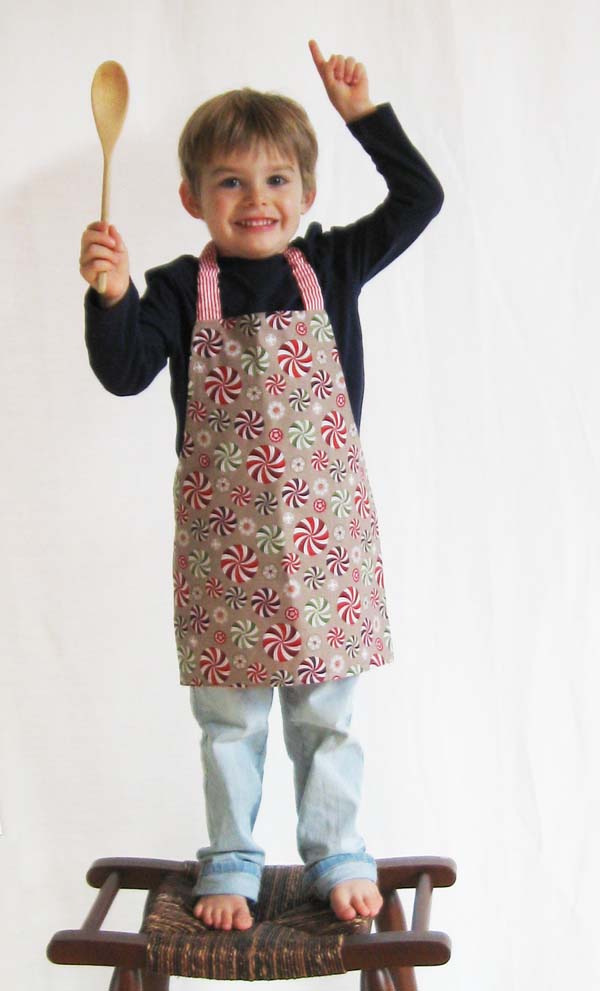
For an adult size apron, you can follow the same process to make a double-sided apron and add longer ties instead of the waist strap.

How about using velcro for hook. Is waist band too short?
And now I have made one. It is not reversible with the velcro. Make two ties, yes.
I can't see how this is a reversible apron! May be totally confused. The velcro is only on one side of the tie and so when you reverse the apron??? May just need to make this and see.
Love this little apron. So easy to make. I made a matching chef hat to go with it. Will add pockets to the next one! I plan to make several sets for our church fundraiser in the fall. Adorable.
Thanks
Just loved this pattern so simple and easy, I attached a pocket. Made a couple for a school fete added a rolling pin and a wooden spoon to the pocket. thank you for the pattern.
Have made this four four year olds, but need to update for an eight year old. Should length be added to both top and bottom? Is the best way to add width just to move the pattern over the appropriate amount from the fold? Thank you
I made this apron today to give as a gift. I like the idea of the hook and loop making it easier for the child to do it without help, or at least very little help. I did round off the corners at the top and I put on three rows of machine embroidery on the top and one along the hem. This is a quick, easy pattern that works well. Thank you!
I cut the pattern in half at waist, added 1/2 inch to each and used a different fabric for each and when I finished I top stitched across the middle. I also used a D ring attachment for an 18 inch tie for neck and made the waist ties 18 inches long to tie into a bow. This is for my 4 yr old granddaughter. I used leftover fabric from dresses I had made for her. Very cute. Thank you for the pattern.
Excellent pattern! I used the instructions to make an apron for my granddaughter and myself and they both turned out well. I cheated and bought wide ribbon for the waist and that turned out well.