
No doubt about it, cake pops are fun. But while these bite-sized cakes on a stick can be a blast to eat, making them can turn into a not-so-fun affair, especially when those super-sweet morsels fall off the stick, crack, leak or are just plain lumpy.
We’re here to tell you there’s a fix to all sorts of cake pop fails, and it starts with a nice, smooth finish. We’ll show you how.
Smooth, Shiny Cake Pops
Level: Easy
What You Need
Instructions
1. Form the Pops
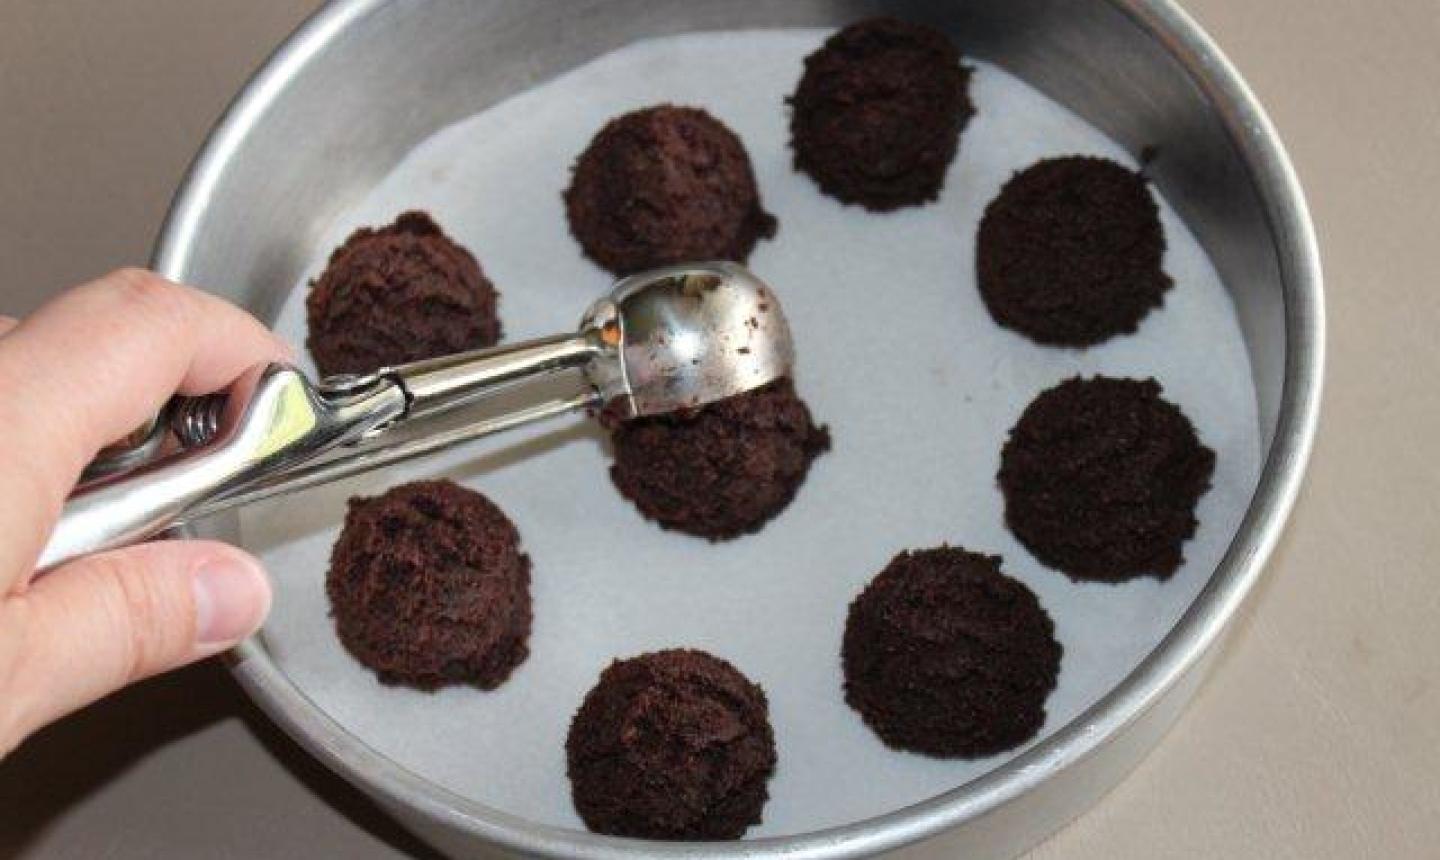
To guarantee the cake pops are all the same size, use an ice cream scoop to shape the cakes. After you’ve scooped them all out, roll each one between your hands to bind crumbs together until the surface is smooth. Place the balls in the refrigerator for at least an hour so they don’t fall apart during the dipping process. Or you can store them in the fridge overnight.
2. Smooth ‘Em
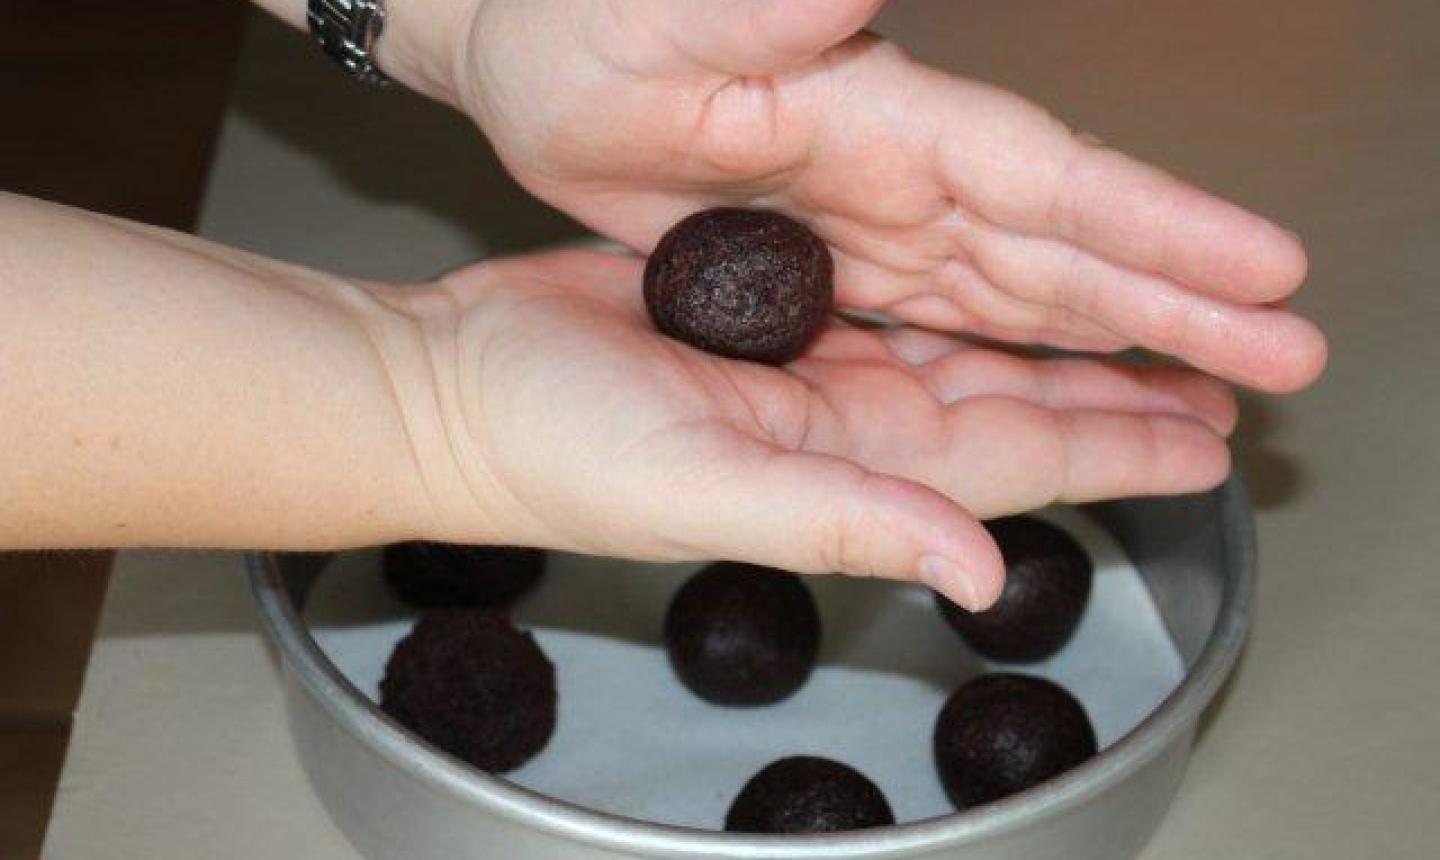
Once your cake pops are sufficiently chilled, take them out of the fridge and roll them between your hands again to form each one into a tighter ball. If you’re opting for hearts or other shapes, form them now — before you insert the sticks!
3. Stick ‘Em
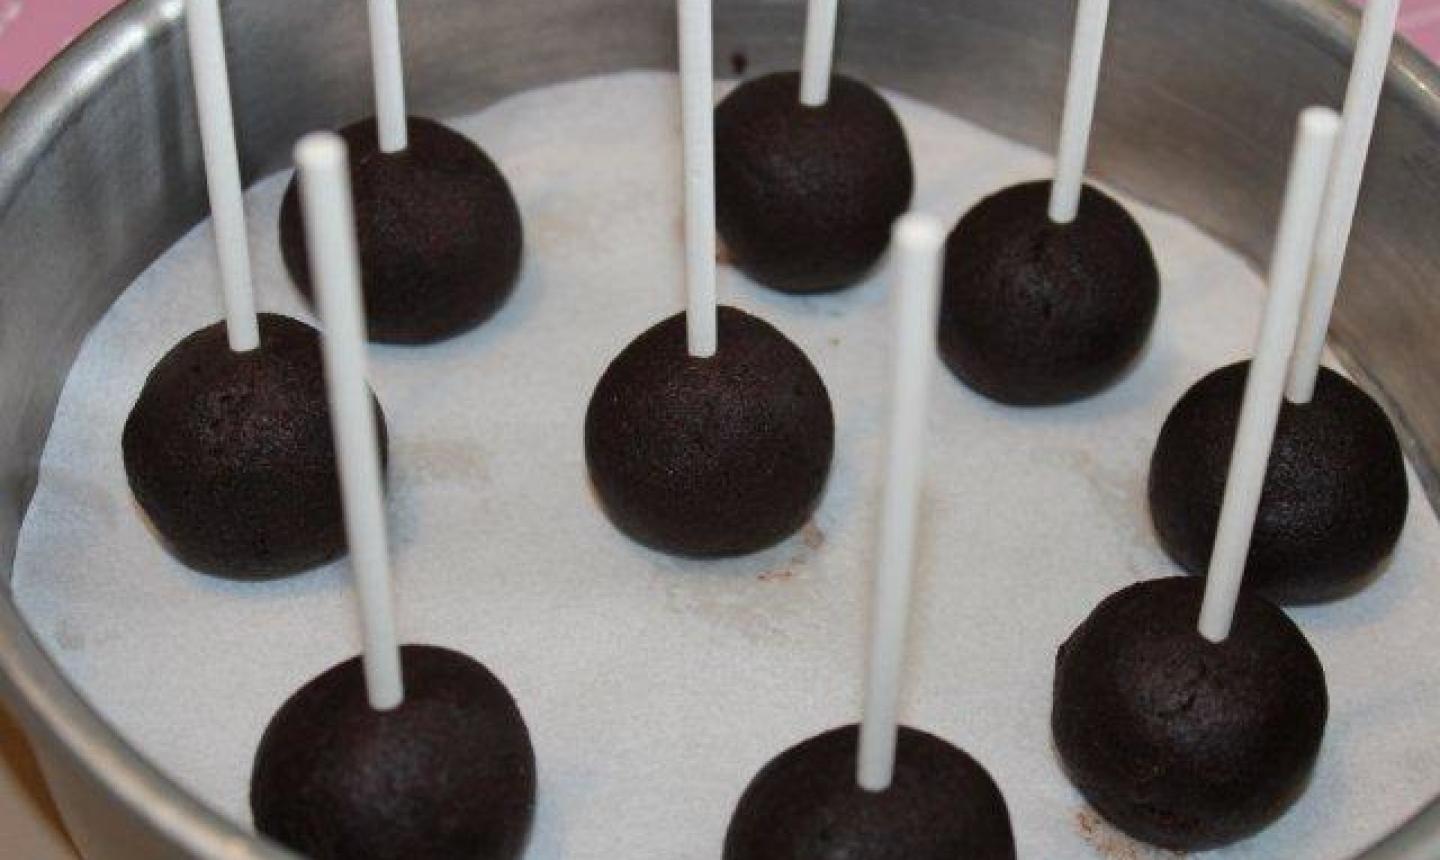
After you’ve shaped your pops, gently slide in the sticks and put the cake pops back in the fridge for a few more minutes while you make the coating. Take the pops out about 10 minutes before you dip them so they don’t crack or fall apart after the chocolate coating has dried.
4. Melt the Coating
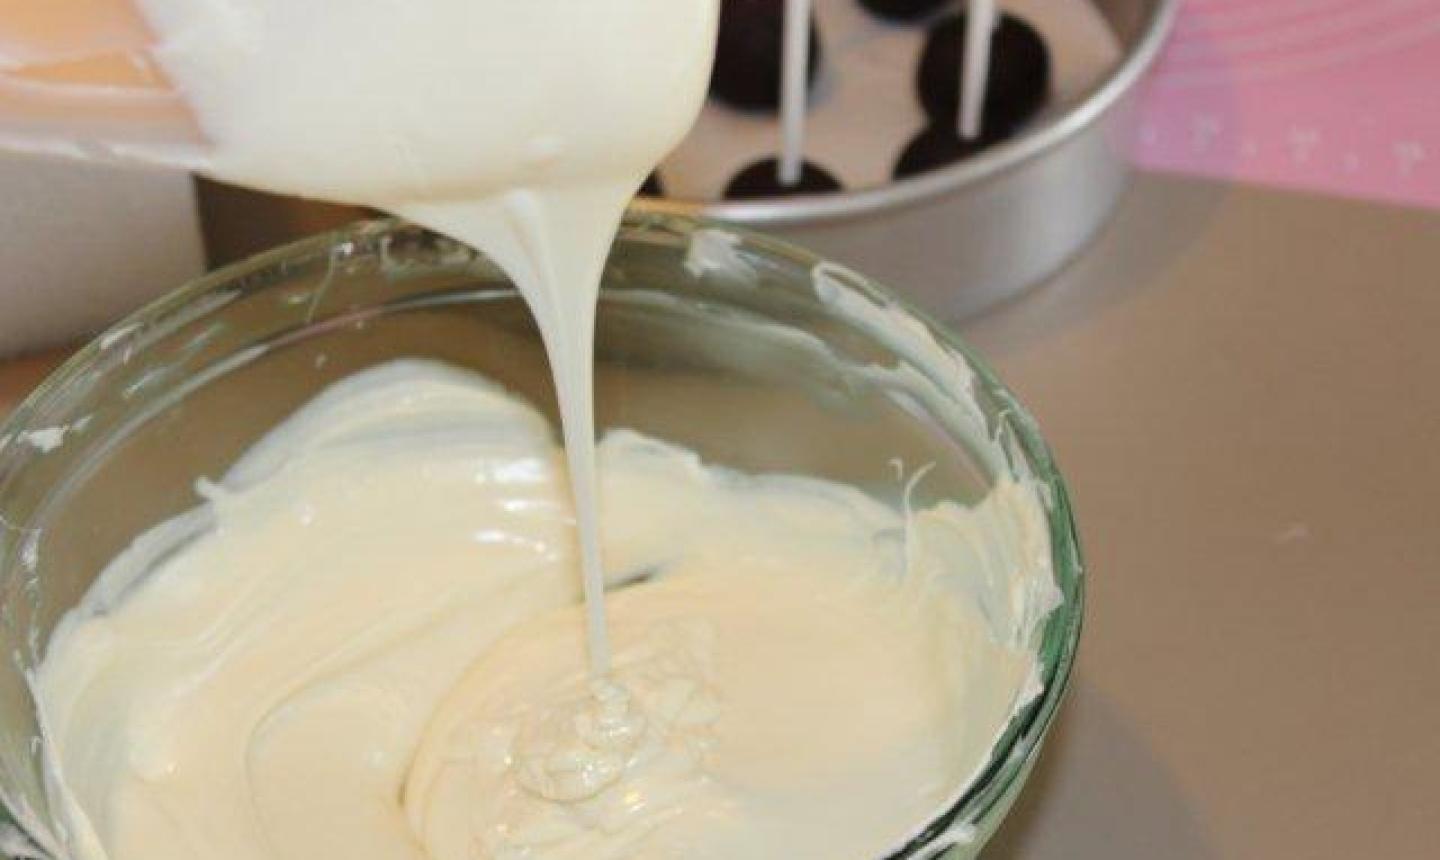
The most important part of getting a smooth finish to cake pops is the consistency of the coating, and one of the easiest ways to guarantee this is by melting candy melts correctly.
It’s suuuuuper easy to overheat candy melts. When they get too hot, they clump (so not good) and don’t fall off the spatula easily. Keep the following in mind as you melt the melts.
5. Dip, Dip, Dip
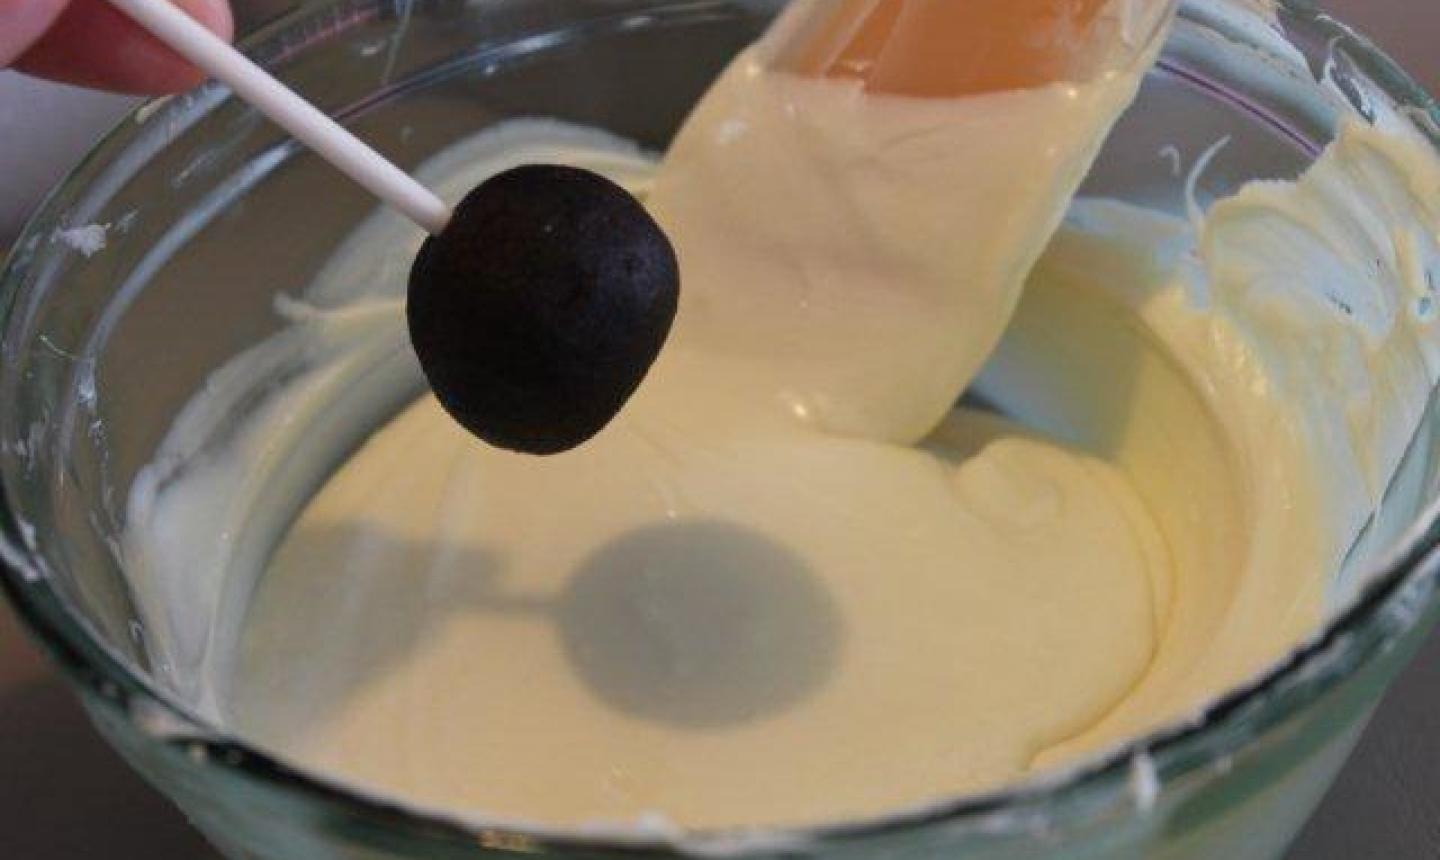
Once the melted chocolate flows off your spatula without clumping, you’re ready to start dipping your cake pops into the melts.
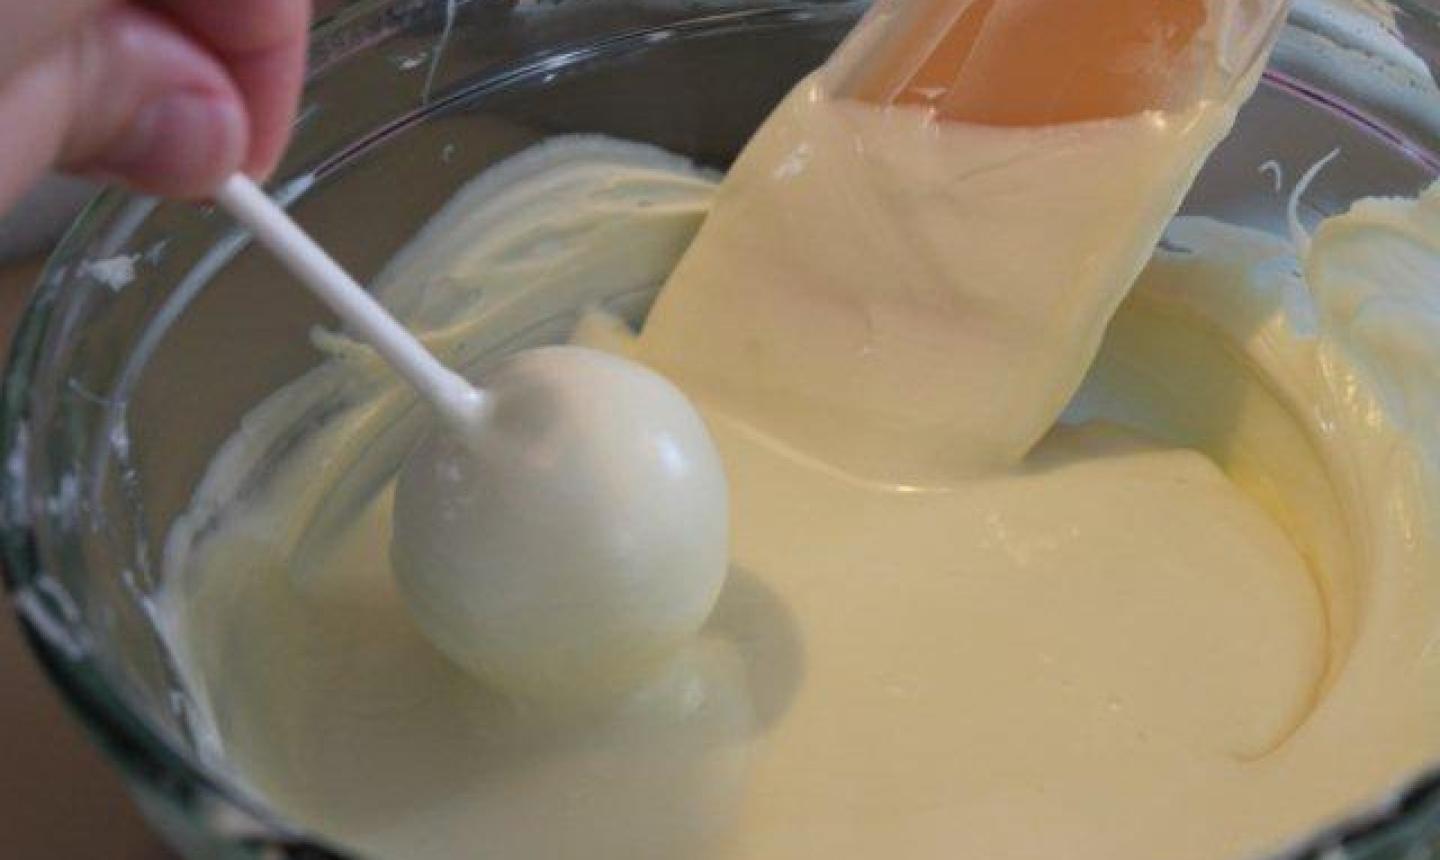
Dip each cake pop into the melted chocolate, lift up, turn and dip again until the entire surface is coated. Gently shake the excess coating from the top of the cake pop while it’s upside down.
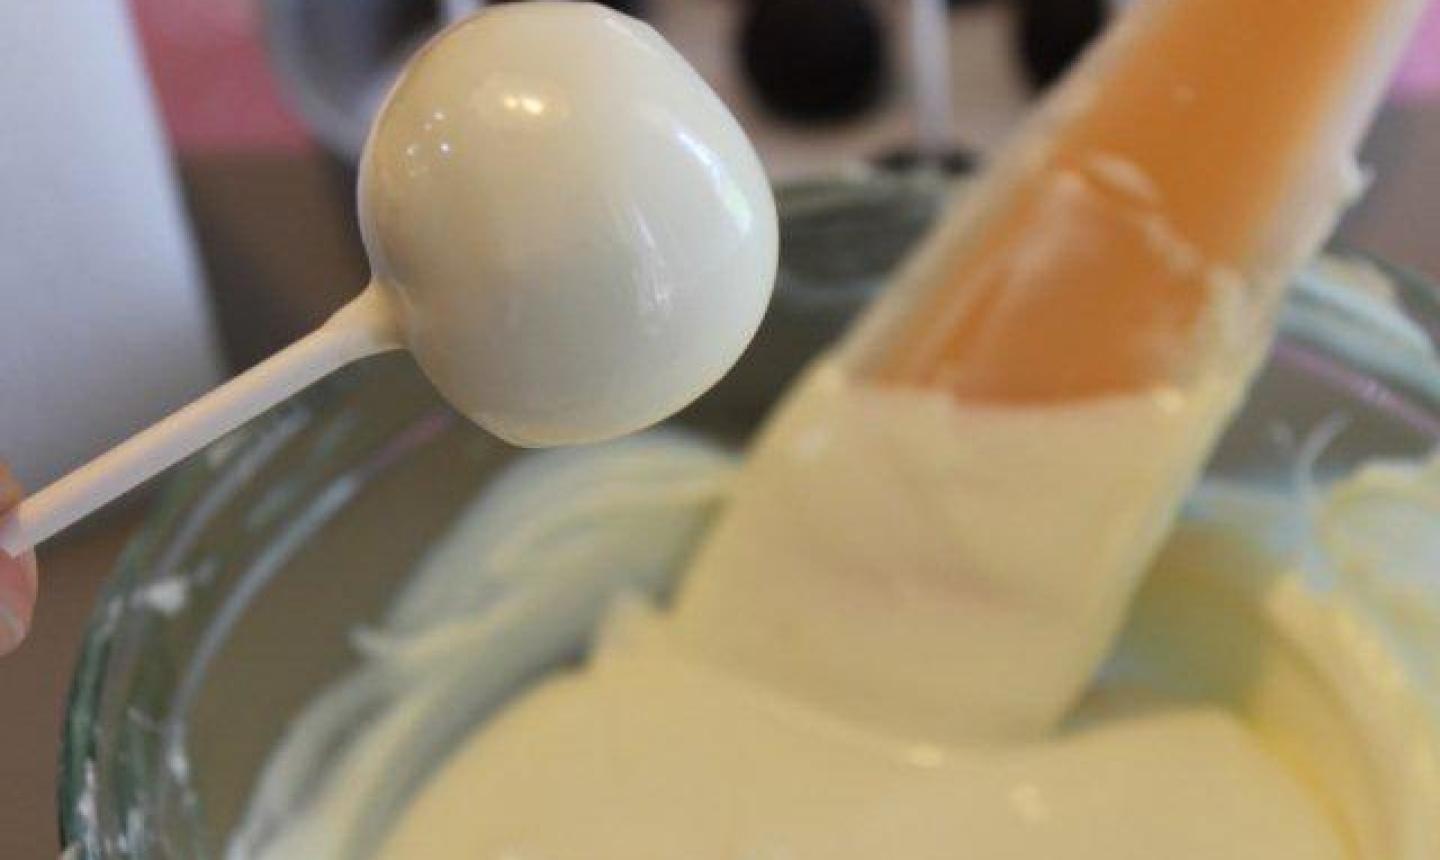
Once you’ve shaken out the last drop of excess chocolate, turn the cake pop right side up and gently shake it while twirling between your fingers. This helps even out the coating.
6. Let Them Dry
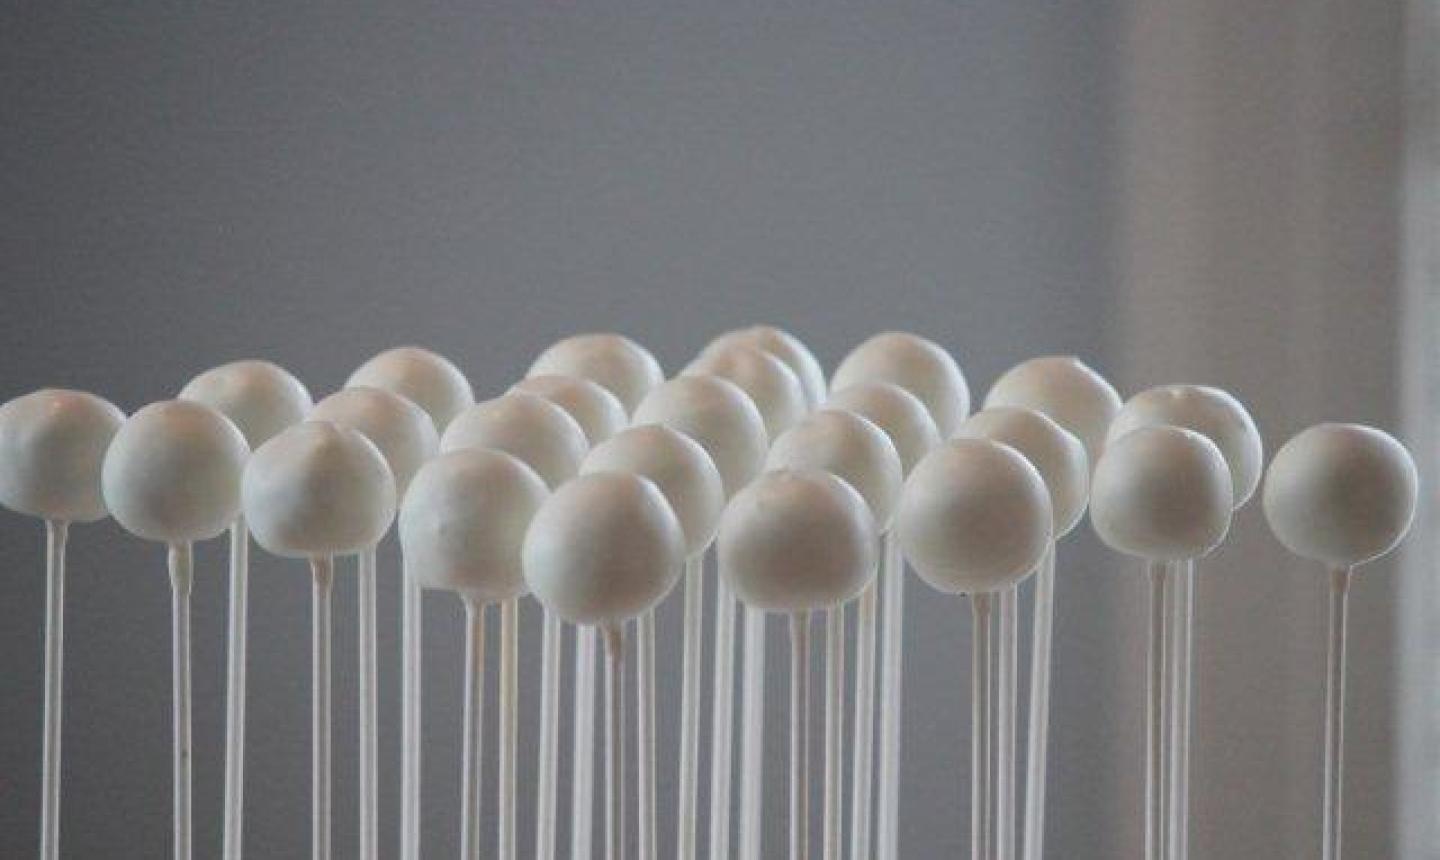
Once you’re done, stick the pop on a piece of Styrofoam to dry. For a more planet-friendly option, use an egg carton turned upside down.
Once they’re finished drying, you’re ready to decorate your cake pops, which will go much easier now because your cake pops are so smooth. Have fun!
If I want to use sprinkles how and when would I place them? Thanks!
Can you use regular cake frosting ( store bought) on top of cake pops instead of candy melts if so how do you prep it so it’s not too thick