Cake pops should definitely be pure enjoyment. But in reality, making the little guys can go from fun to frustrating FAST. So learn from our mistakes and spare yourself some pain.
How to Make Dough for Shaped Cake Pops
Here’s something nobody else will tell you: making cake pop dough is not a consistent one-size-fits-all situation. Your proportions will be different each and every time, and that’s just something to get used to.
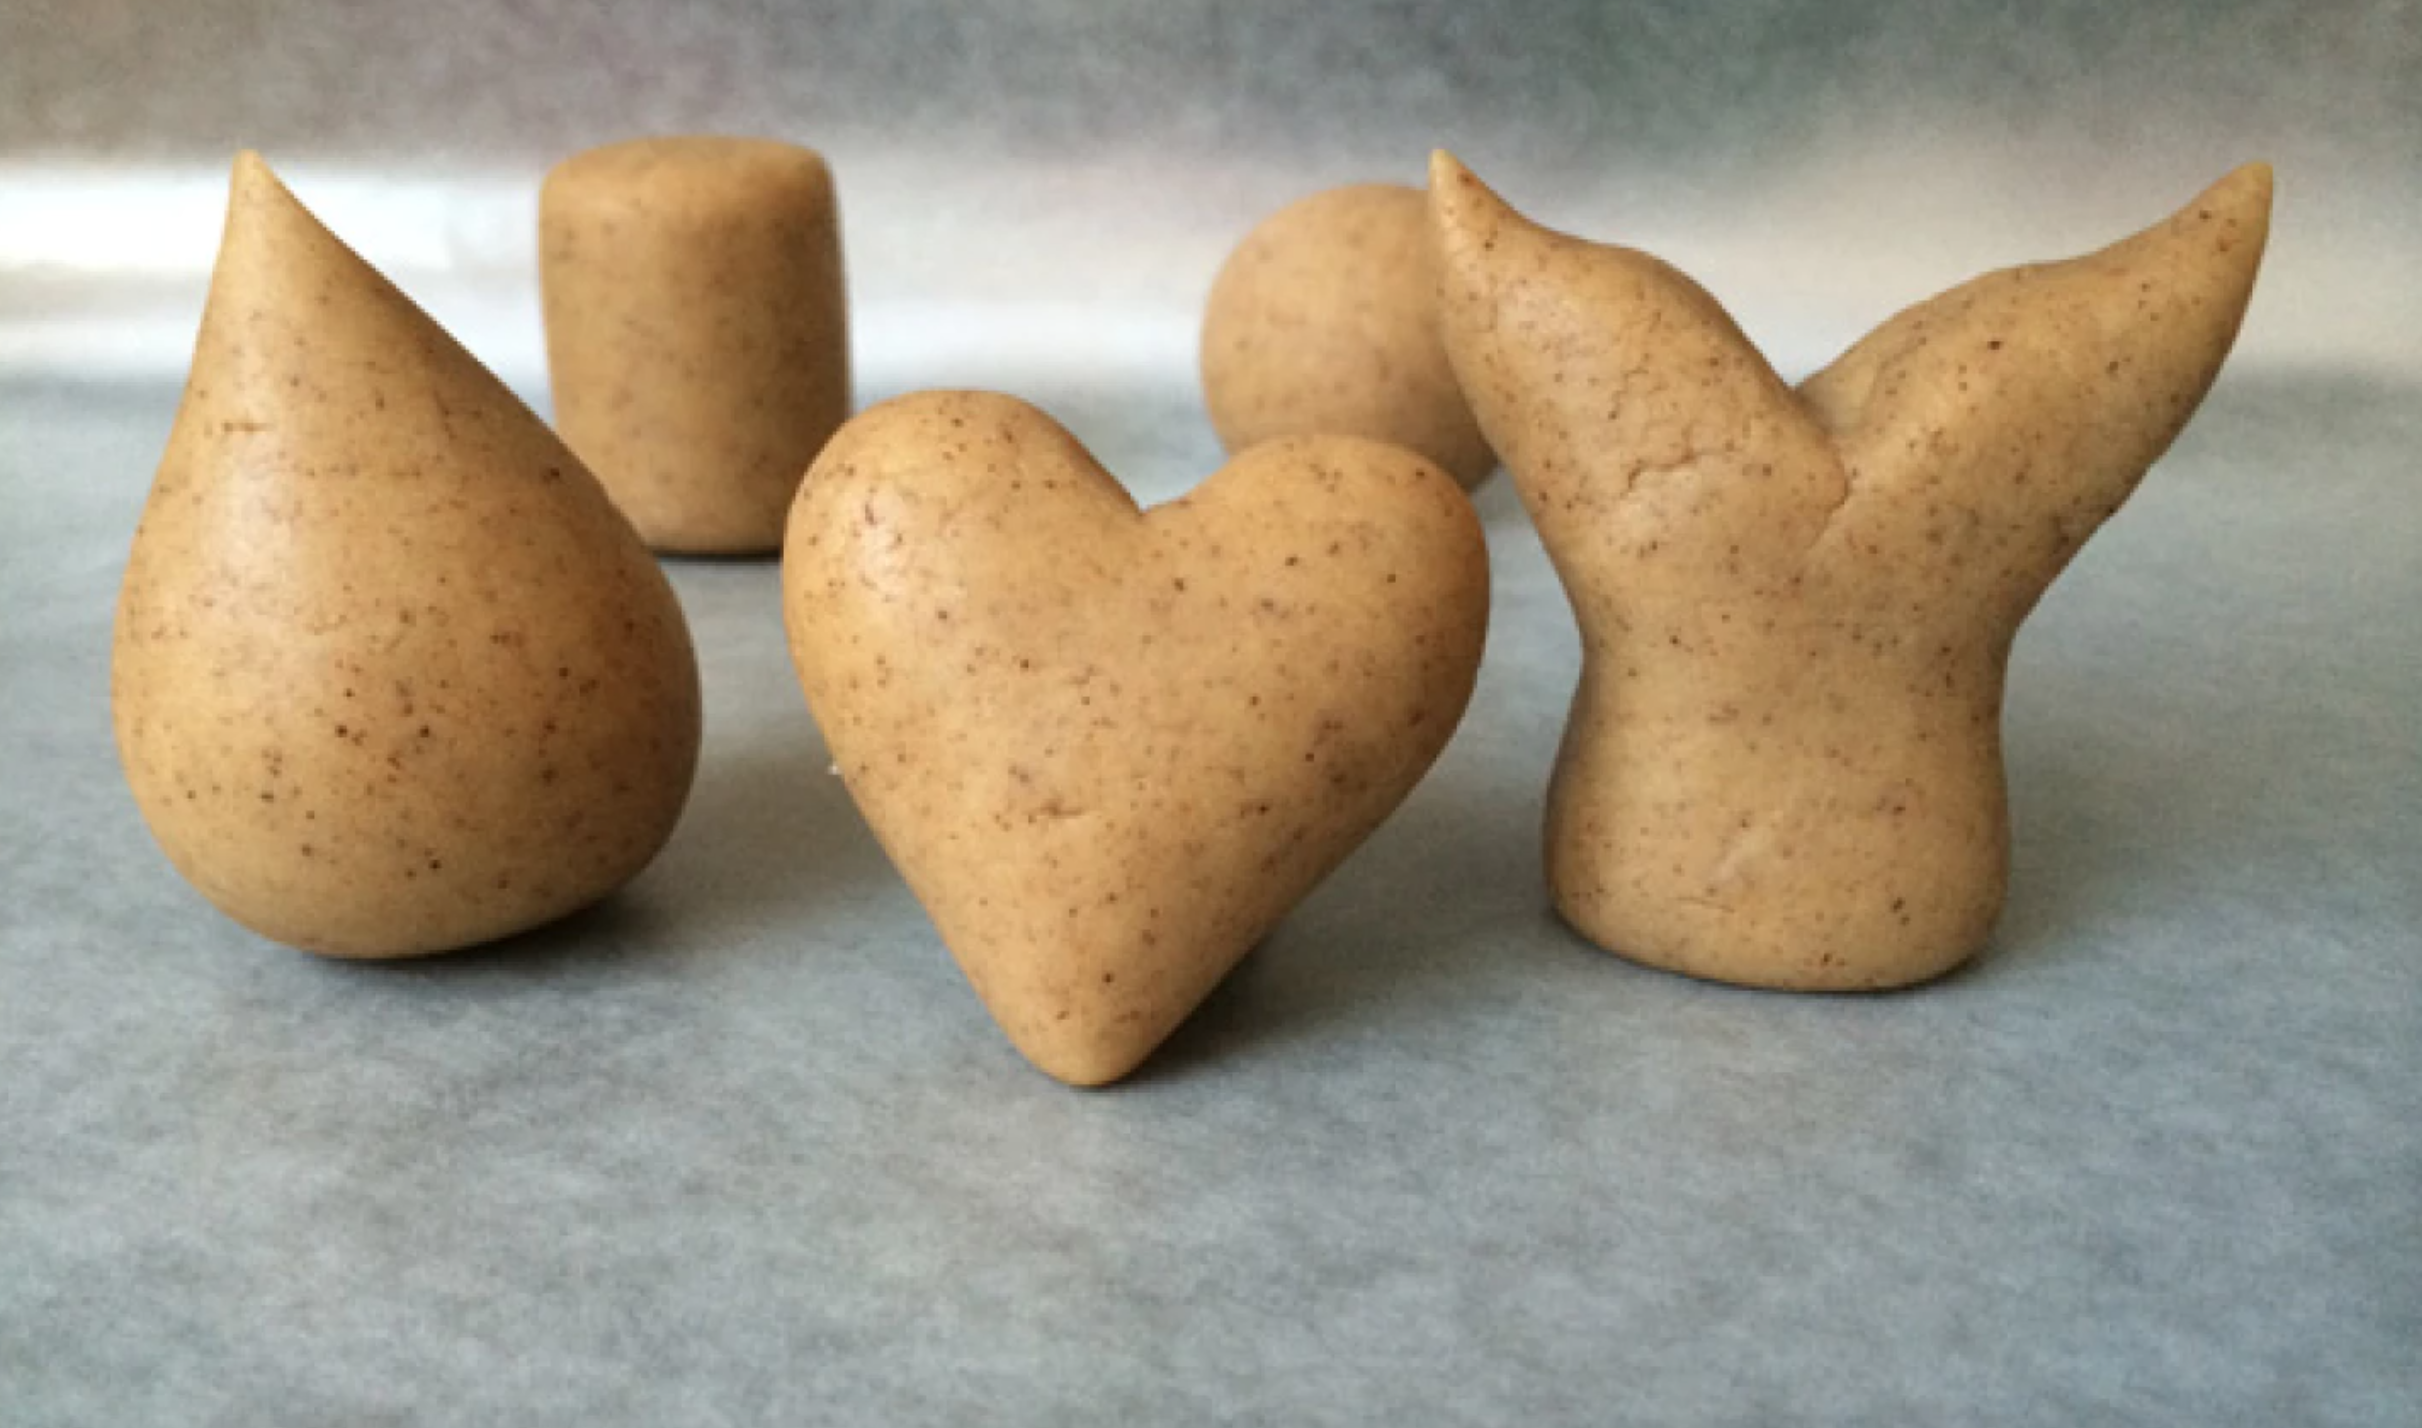
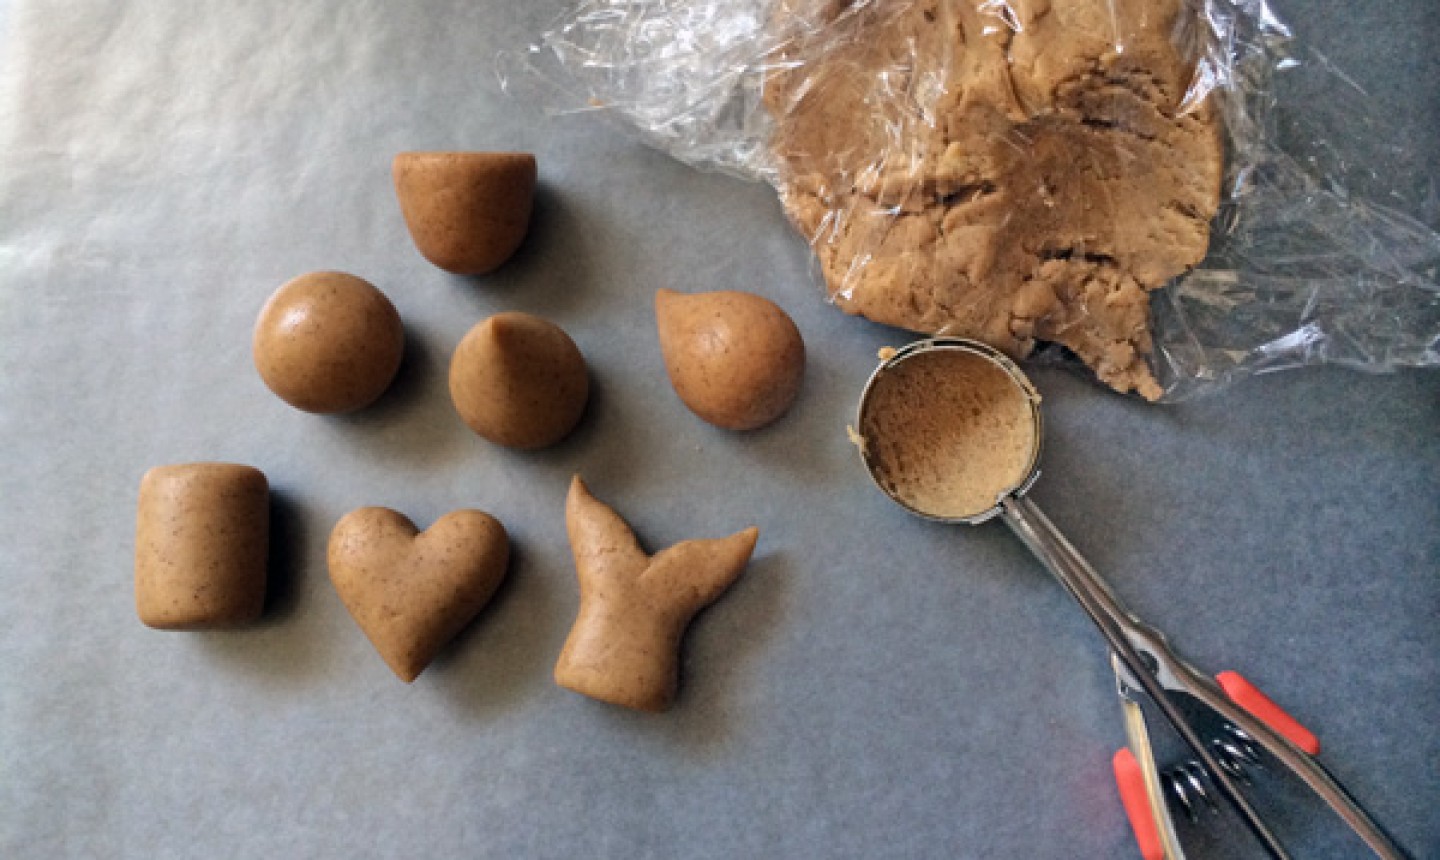
In this tutorial, we’ll teach you how to get a perfect cake pop dough texture using your personal judgment and very little actual measurement. The right texture will give the results you’re looking for when you’re shaping anything from a basic round ball to a whimsical mermaid tail.
1. Bake and Cool the Cake
Bake the cake, or grab some leftover you have lying around. For cake pops, we recommend cakes without any added textures (like nuts or chunks of fruit).
2. Crumble
Crumble the cake until the crumbs are fine and mostly even. You can do this in a stand mixer, or just crumble it up by hand. Scoop out about 1/5 of the crumbs and set them aside for later.
3. Bring On the Frosting!
Add a binder to your crumbled cake — this is what will hold the crumbs together to form a dough. Common binders for this are buttercreams, store-bought creamy-style icing or even just cream cheese by itself. My personal favorite is the thick texture of homemade cream cheese icing.
We find that slightly chilling the binder helps bind the cake crumbs faster, so if your binder’s room temperature, pop it in the fridge for 10 minutes. The flavor of the binder won’t really matter because you’ll be using such small amounts that won’t affect the taste much at all.
Put your crumbled cake in the bowl of a stand mixer (if it’s not in there already), and add the binder a tablespoon at a time. The total amount of binder you’ll use depends on the kind of cake and amount of cake you’re using. Cakes baked from scratch are denser and will use more binder than box mix cakes.
4. Mix It All Up
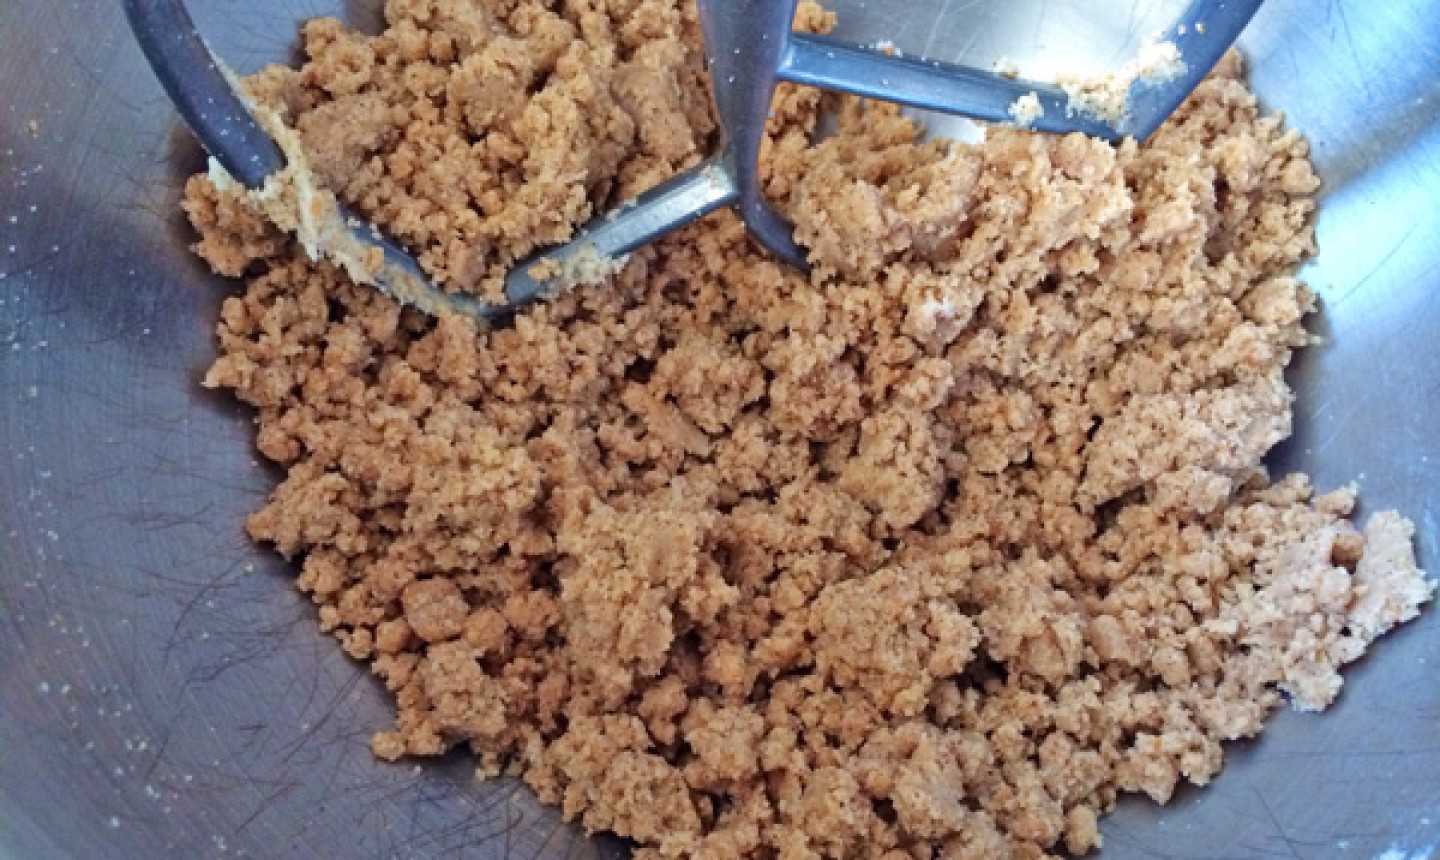
Mix on low speed for at least 3 minutes, then check the texture. If it looks like what you see above, you’re almost there. Add another tablespoon or two of binder and let it whirl for five minutes.
Continue this stop-and-check process until your dough has reached a play-dough or clay texture. The dough should feel sturdy — not tacky or crumbling when you handle it with your fingers. It shouldn’t fall apart when you place it in between your fingers and squeeze.
If you feel it’s too wet or tacky, don’t worry! Remember that bit of crumbs you set aside earlier? This is where that comes in handy. Mix in a little bit at a time until your dough is just right.
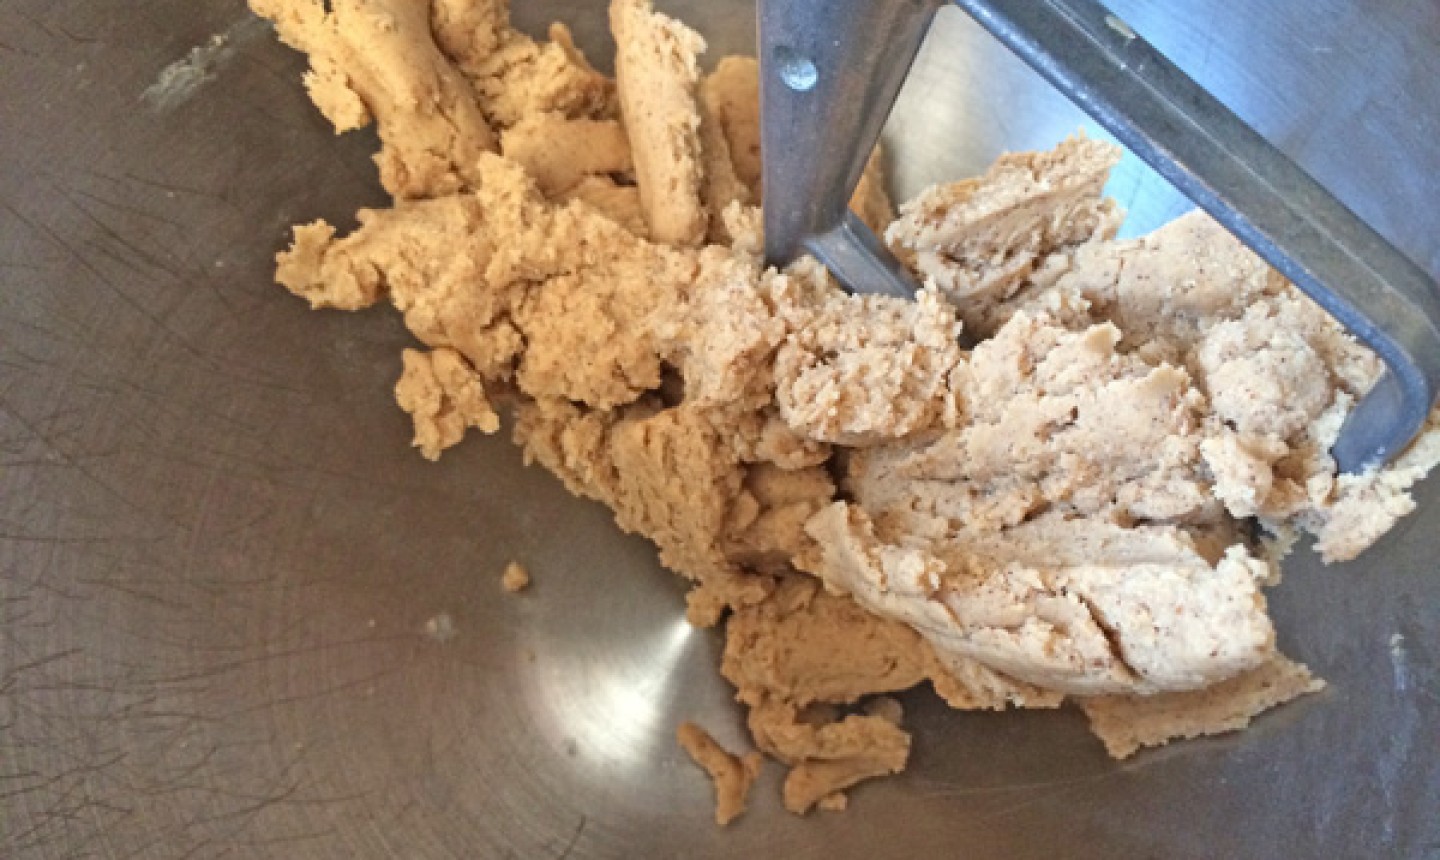
When your dough looks like this, you’re done. Ball it up and cover in wrap plastic wrap so it doesn’t dry out. It’s a good idea to keep it covered as you work, unwrapping only enough to scoop out the portions to make your pops one by one.
This process may take more time than you’re used to, but it’ll help keep that dough consistency right where you want it.
Share tips, start a discussion or ask other students a question. If you have a question for an expert, please click here.
Already a member? Sign in
No Responses to “Here's The Trick to Perfectly Shaped Cake Pops”