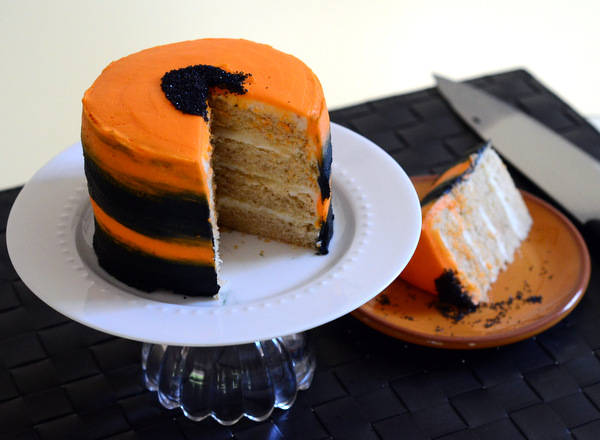
Halloween is the perfect excuse to make hauntingly-good cakes, but you don't have to pull off elaborate sculpting feats to do so. This striped stunner can be decorated in an hour, and even a buttercream beginner can nail it.
Striped Halloween Cake
Level: EasyWhat You Need
Instructions
1. Bake and Buttercream
Bake your cakes according to the recipe. While the cakes are cooling, mix your buttercream. We made four round cakes, but you can make more or less depending on how tall you want the cake.
2. Color the Buttercream
Divide your buttercream evenly into three bowls. Set one aside — this will remain white. Color the other two bowls, one black and one orange. Only add a few drops at a time before mixing. Continue until each color is nice and vibrant.
Pro Tip: We recommend using gel food coloring because it creates a more intense color than liquid coloring.
3. Crumb Coat
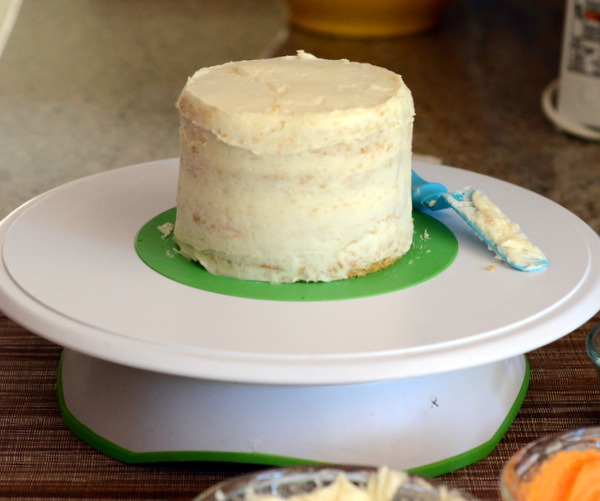
Stack your cakes with a layer of white buttercream between each. Once stacked, spread a thin layer of white icing over the entire cake to make a crumb coat. This will trap any loose crumbs, keeping the top layer of icing clean.
Good to Know: Don't worry about making this layer neat. As long as it covers the entire cake, you're good.
When finished, place the cake in the refrigerator for about 15 minutes to chill.
4. Spread the Stripes
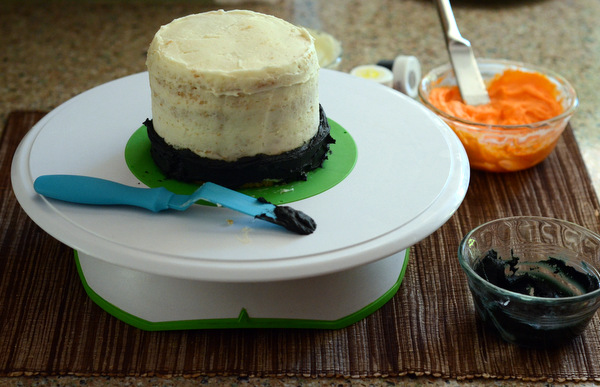
Spread a thick band of buttercream around the bottom of the cake — this can be in either black or orange, it's up to you!
Don't stress about making the stripe even and smooth. Right now it can look totally messy — you'll even out the edges at the end.
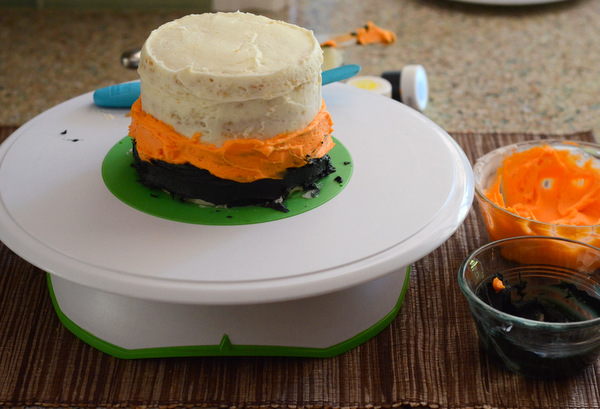
Spread a thick layer of the second color directly above the first stripe, making it about the same size as the first.
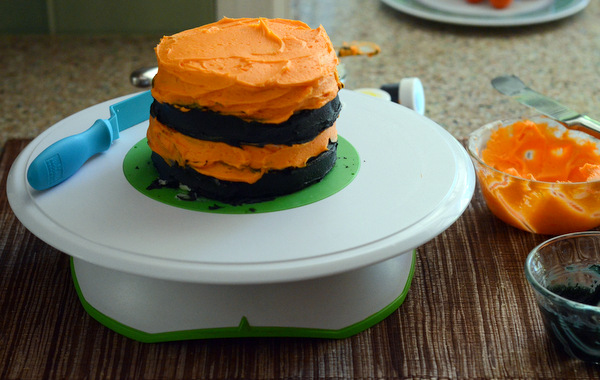
Keep building your stripes until the sides and top of the cake are well covered.
5. Smooth It Out
Grab an icing smoother (or turn your offset spatula so it's perpendicular to your countertop) and press the edge gently against the side of your cake. Spin the cake stand slowly while holding the smoother in place. The buttercream will smooth itself out as you turn.
Wipe off the edge of the smoother and repeat as needed, until the sides of the cake are even and smooth. When the sides are satisfactory, smooth out the top of the cake as well.
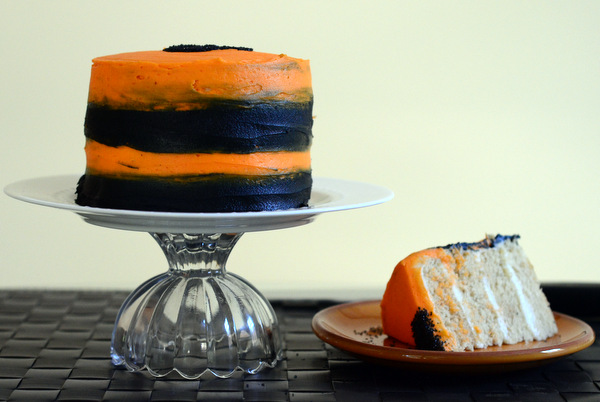
Top the cake off with some festive sprinkles and serve! The finished cake should have stripes that flow seamlessly into one another for a totally eye-catching look.
Photos by Nicole Weston

Share tips, start a discussion or ask other students a question. If you have a question for an expert, please click here.
Already a member?
No Responses to “This Striped Halloween Cake Is So Easy It'll Give You Goosebumps”