The Jewish holiday of Hanukkah (or Chanukah) begins this evening and will last for eight days, with the lighting of the menorah on each successive day. There are several fun Hanukkah cupcake ideas out there, but here is a fun fondant topper for cupcakes that are perfect for this year’s Festival of Lights!
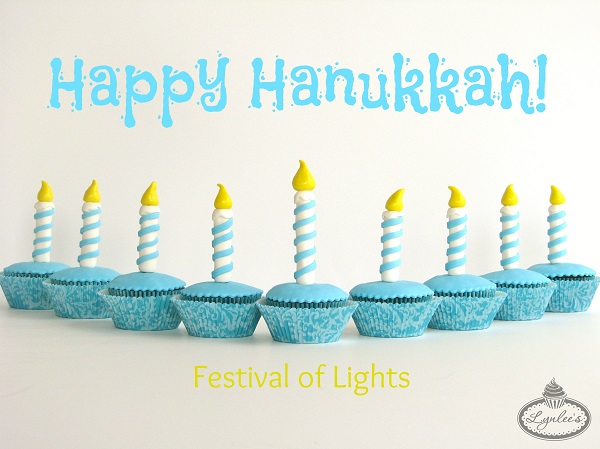
Follow this Hanukkah cupcake tutorial to create an edible menorah display for a sweet commemoration of the Jewish holiday.
Materials:
- White, light blue and yellow fondant
- Water/edible glue and brush
- Medium round circle cutter (approx. 1 1/2″)
- Round tip
- Fondant rolling pin with 1/8″ guide rings
- 1/4″ wooden dowels
- Rolling pastry cutter
- Knife tool
- Precision knife
- Vegetable shortening to soften your fondant
- Powdered sugar/dusting pouch for your work surface
- Small and large lollipop sticks
Directions:
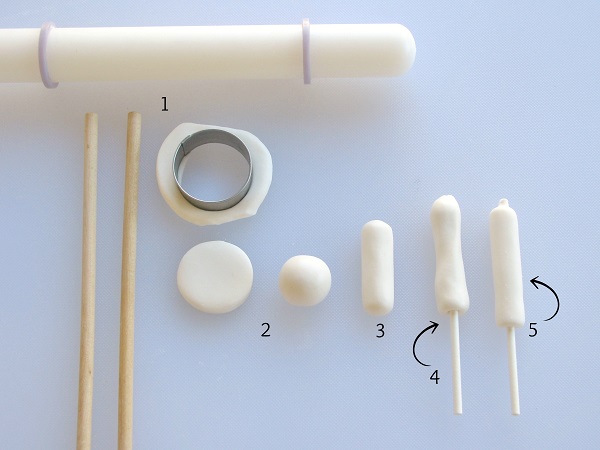
Step 1:
Roll out white fondant 1/4″ thick with the rolling pin and wooden dowels as guides on your work surface.
Step 2:
Cut out a circle from the fondant with the medium round cutter and roll it into a ball.
Step 3:
On your work surface, begin to roll the fondant into a sausage shape, but not all the way so you can easily add the lollipop stick.
Step 4:
Insert a small lollipop stick into the bottom center of the fondant and slowly twist upward until it protrudes a bit from the top.
Step 5:
Utilize your fingers to smooth out the fondant around the lollipop stick to properly form the candle base, making sure the bottom is flat and the shape is uniform.
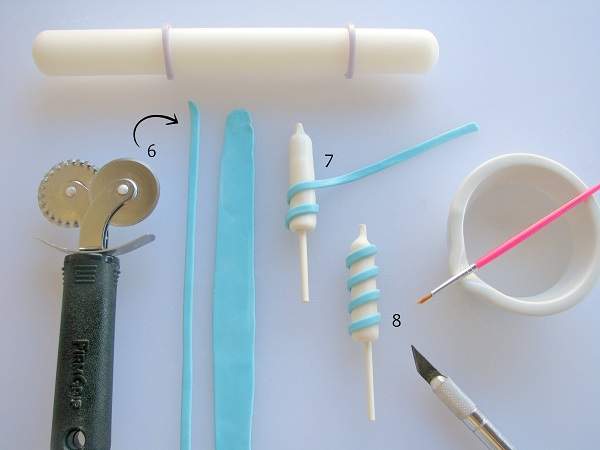
Step 6:
Roll out light blue fondant 1/8″ thick with the rolling pin and guide rings. With the rolling pastry cutter, cut a strip approximately 1/4″ wide and 7″ long.
Step 7:
Glue one end of the light blue fondant strip to the back of the candle at the very bottom. Begin to twist it around the candle all the way to the top, gluing as necessary along the way. Adjust the strip to ensure the diagonal lines are equidistant from each other.
Step 8:
Cut off any excess with the precision knife and glue the end securely to the back of the candle.
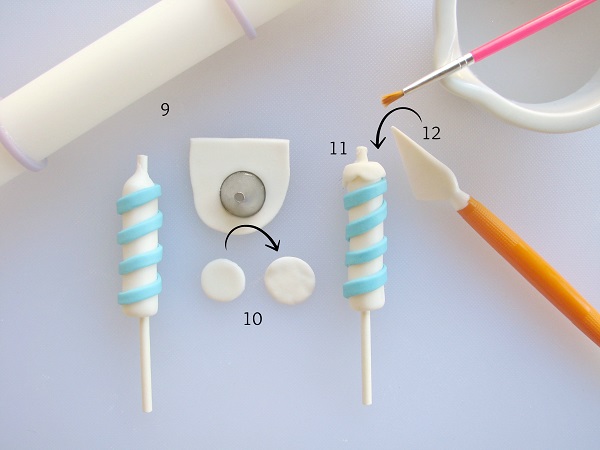
Step 9:
Roll out white fondant 1/8″ thick with the rolling pin and guide rings.
Step 10:
Cut out a circle with the bottom end of a round tip and use your fingers to flatten out the perimeter, pulling it gently in a few spots. Utilize vegetable shortening spread over the fondant to avoid tearing.
Step 11:
Insert the top of the lollipop stick and candle through the center of the small circle and begin to press it down along the top and sides to glue it in place.
Step 12:
Use the knife tool to flatten out the top of the candle and create small indentations to resemble melted wax dripping down.
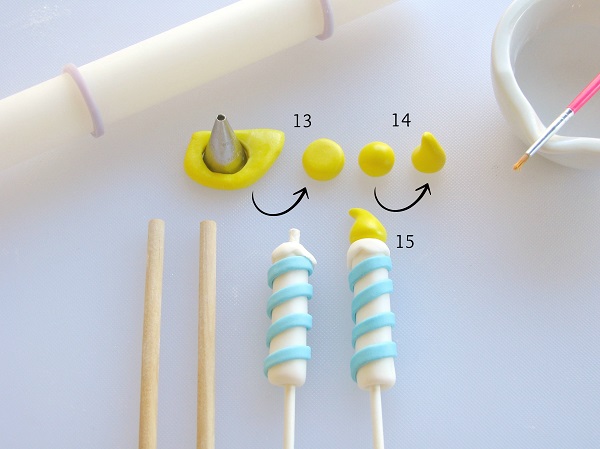
Step 13:
Roll out yellow fondant 1/4″ thick with the rolling pin and wooden dowels and cut out a circle with the bottom of the round tip. If you need help removing the fondant from the tip, utilize the precision knife to pull it out.
Step 14:
Roll the yellow fondant circle into a ball, then shape it into a teardrop shape for the candle flame. Form the very tip of the flame to lean toward the side to add a playful touch, changing it up a bit with every candle.
Step 15:
Insert the bottom of the flame over the protruding lollipop stick and glue it over the candle, securing it in place.
Step 16:
Repeat the steps above to produce seven additional candles. For the center candle of the menorah, use the larger lollipop stick and increase the size of the the shapes (candle, decorative strip and flame) accordingly. Allow the candles to dry thoroughly.
Step 17:
Once dry, insert the lollipop sticks in the center of iced cupcakes and create your presentation by displaying them in the shape of a menorah.
Optional steps:
- Add a glossy finish to the candle flames.
- Cut out fondant circles to cover the cupcakes, making sure to add a thin layer of icing in between for a smooth surface.

Share tips, start a discussion or ask other students a question. If you have a question for an expert, please click here.
Already a member? Sign in
No Responses to “Sweet Menorah: Hanukkah Cupcake Tutorial”