Embroidery is experiencing a major revival, and we couldn’t be happier! From trendy embellished jeans and personalized throw pillows to wall art and beyond, embroidery is popping up everywhere. Want to get in on the action and learn how to embroider? These 10 essential embroidery stitches for beginners are the perfect place to start. Mastering these fundamental stitches will give you a solid foundation and set you on the path to creating beautiful, hand-stitched projects.
We’ll walk you through each stitch, explaining how to execute them clearly and concisely. Think of this as your beginner’s guide to embroidery, equipping you with the skills you need to take your hoop to the next level and explore the endless possibilities of this amazing craft. So, grab your needle, thread, and fabric, and let’s explore the world of embroidery!
Good to Know: To see any of these stitches in action, check out our classes Startup Library: Hand Embroidery and Modern Hand Embroidery.
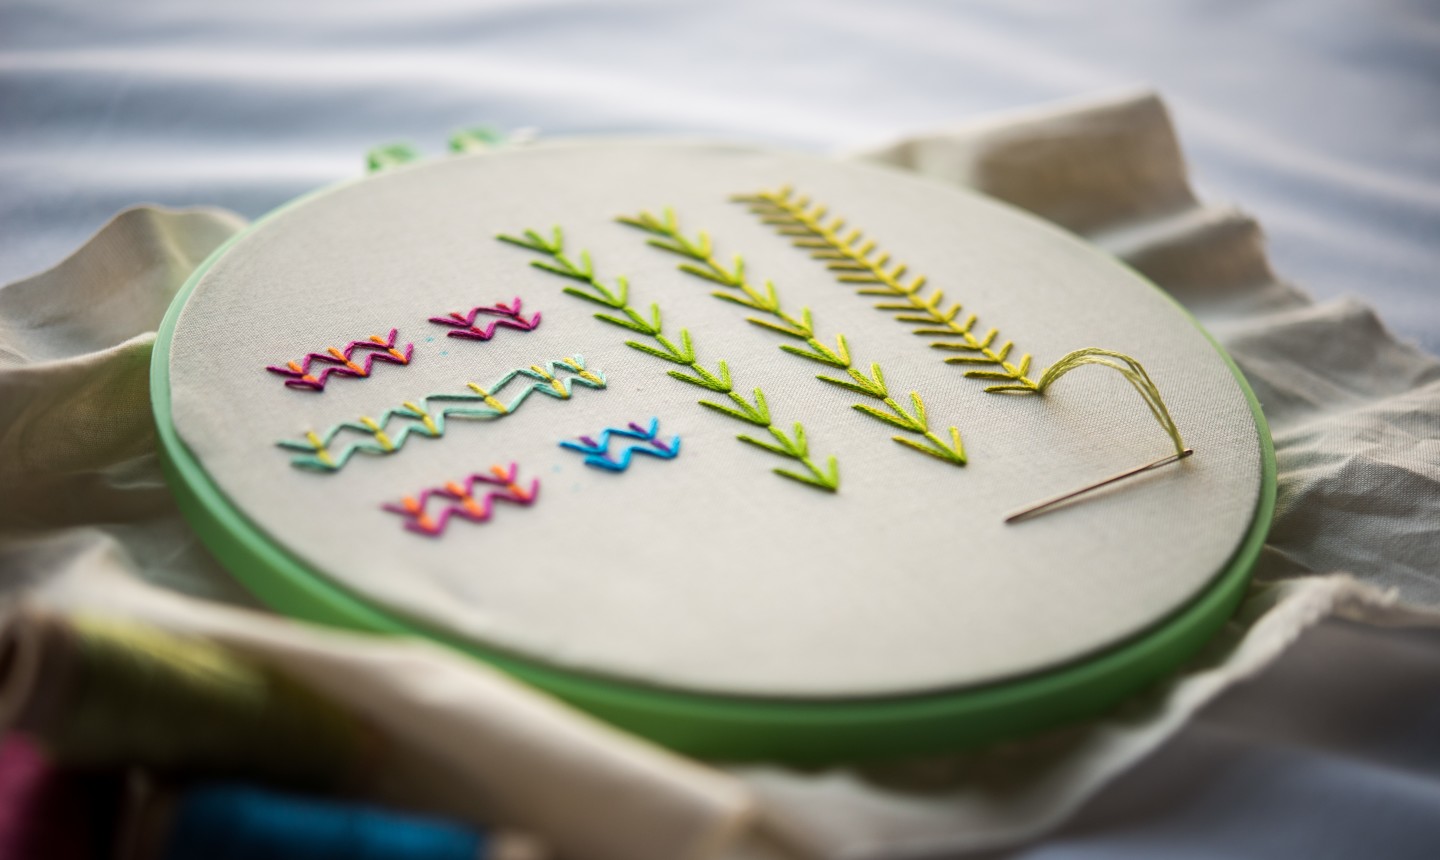
Different types of embroidery stitches
1. Running Stitch
Not to be confused with the running man, the running stitch offers a quick way to outline a design. There are two methods you can use.
The first is the sewing method: Simply weave the needle and floss through the fabric in one continuous motion to create several stitches at once, as if you were sewing a seam.
The second is the “punch and poke” or “stabbing” method: Push the needle through the fabric to the back, then poke it through to the front a short distance away, creating one stitch at a time.
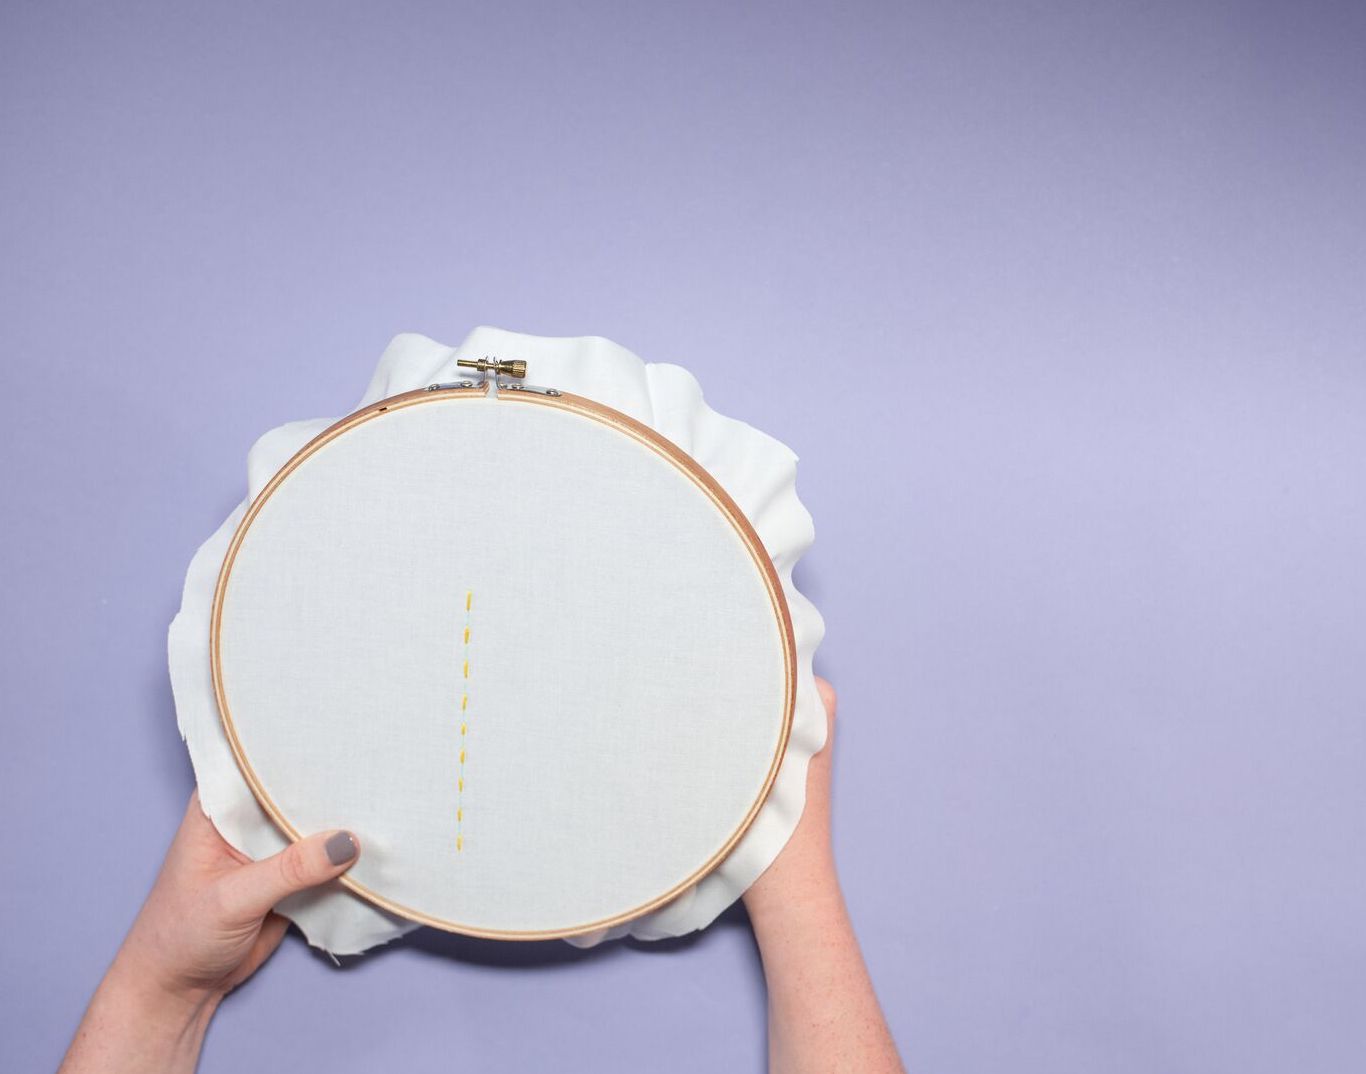
2. Backstitch
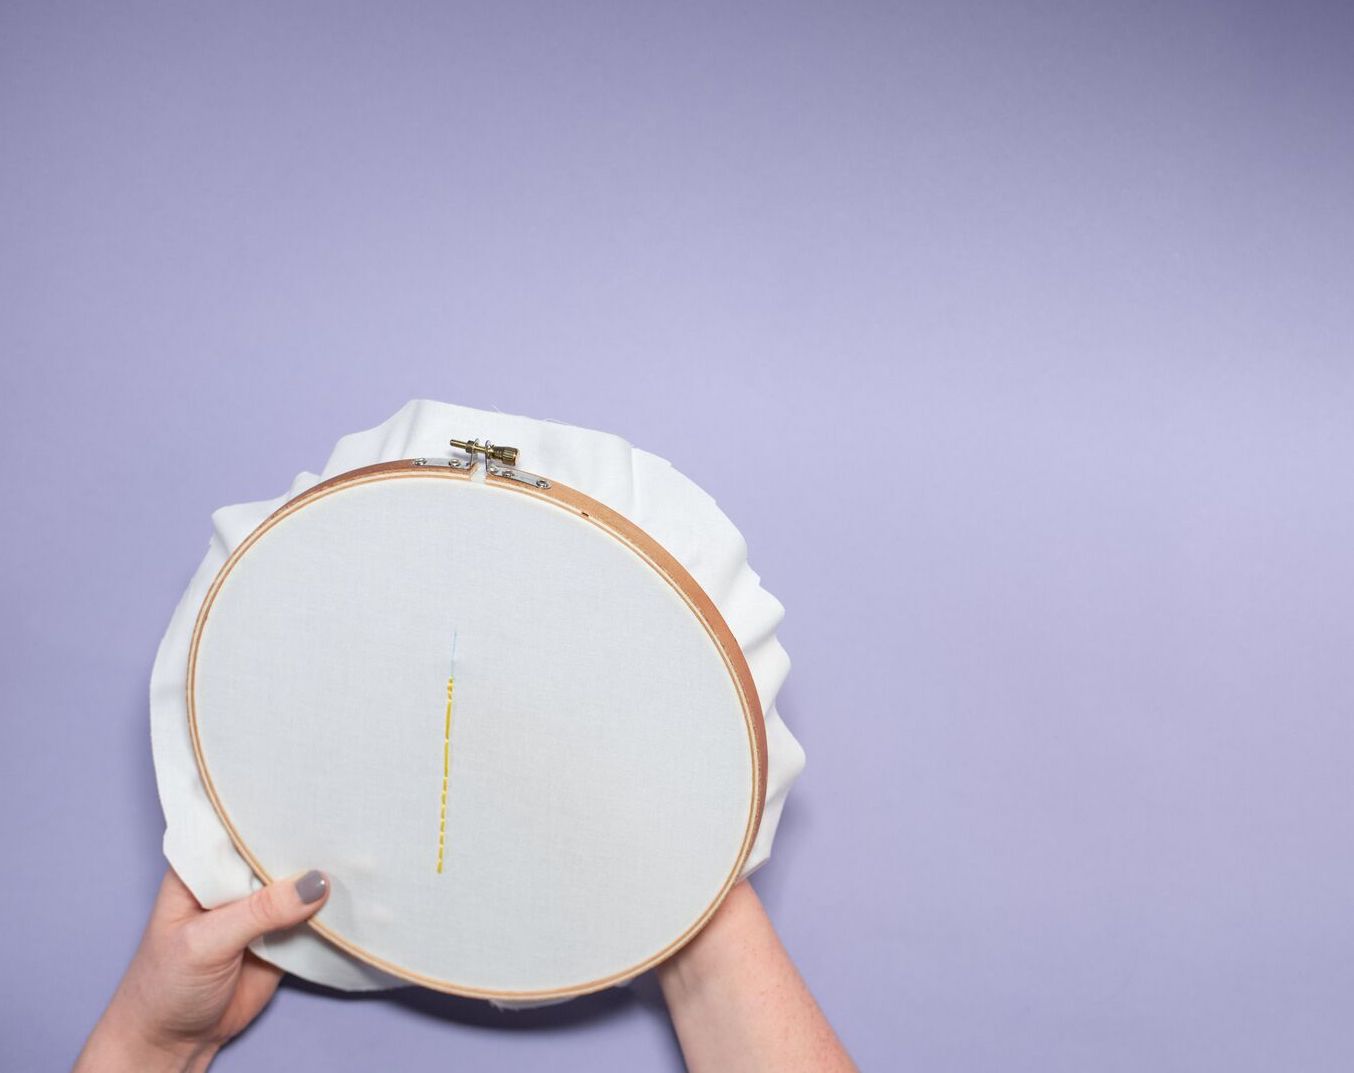
The backstitch is great when you need a solid line, like when you’re creating outlines or hand embroidered letters.
Begin by pulling the needle and floss up through the fabric and do one stitch forward. From underneath, space the needle out the length of your desired stitch, pull up through the fabric, and bring the needle and floss back down through the end of the previous stitch.
3. Split Stitch
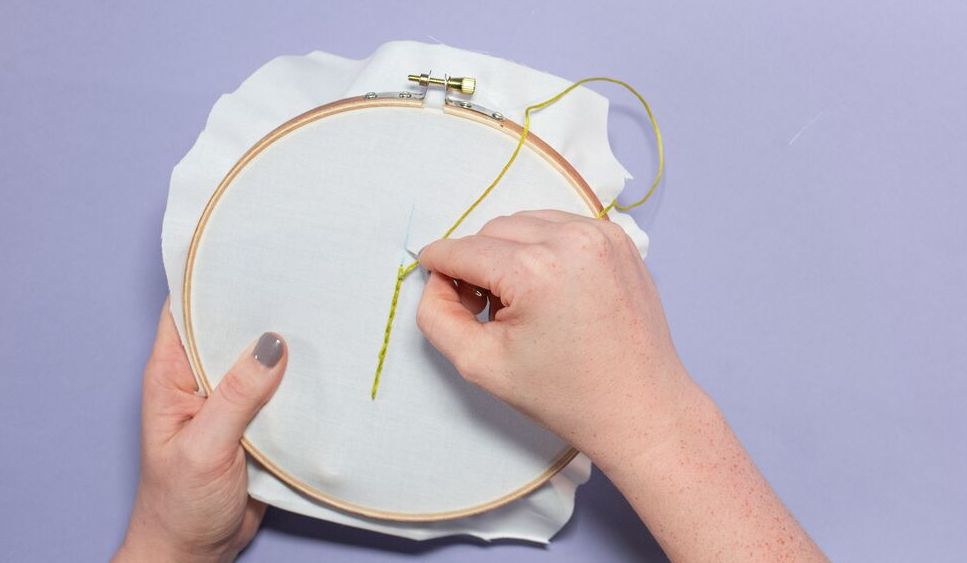
Similar to the backstitch, the split stitch creates a solid line, but its braided texture is all its own. This stitch is another good option for text and outlines, but also works well for filling in designs.
To begin, pull your needle and floss up through the fabric and create one straight stitch. With your needle and floss on the underside of your hoop, bring the needle up through the center of the stitch you just created. Stitch forward the same length as your initial stitch. Repeat by bringing the needle up through the center of each stitch.
4. Stem Stitch
This stitch got its name — you guessed it — from being used to create flower stems and vines. But really, it’s a nice option for anything that needs to curve.
Similar to the split stitch, start by creating one straight stitch forward. Then, bring the needle and floss up underneath the fabric, but instead of going through the center of your initial stitch, go just to the side of the stitch.
5. Satin Stitch
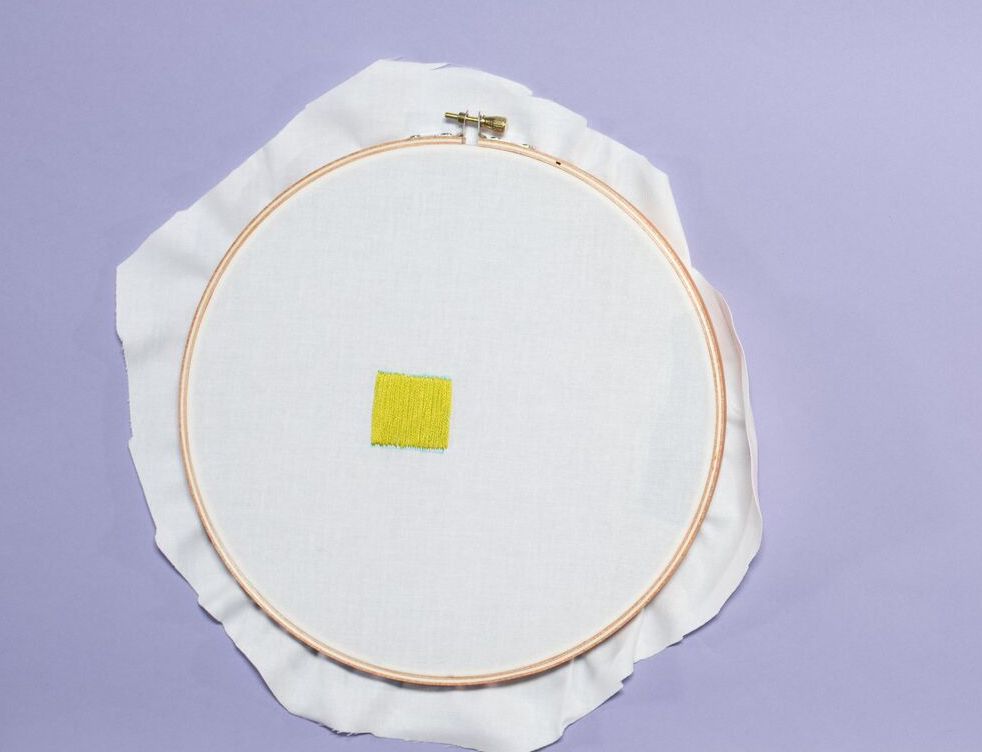
When you’re creating hearts or filling in leaves, it’s likely you want the design to have a smooth appearance. That’s where this stitch comes in. It adds a nice raised texture, and gets the job done super fast.
First, draw out the shape you want to fill to use as a guide. With your needle and floss, create one stitch that extends from one end of the shape to the other.
Bring the needle up again just next to the opposite side of the initial stitch. Keep the stitches close to one another, as required to fill the pattern or design you are working with.
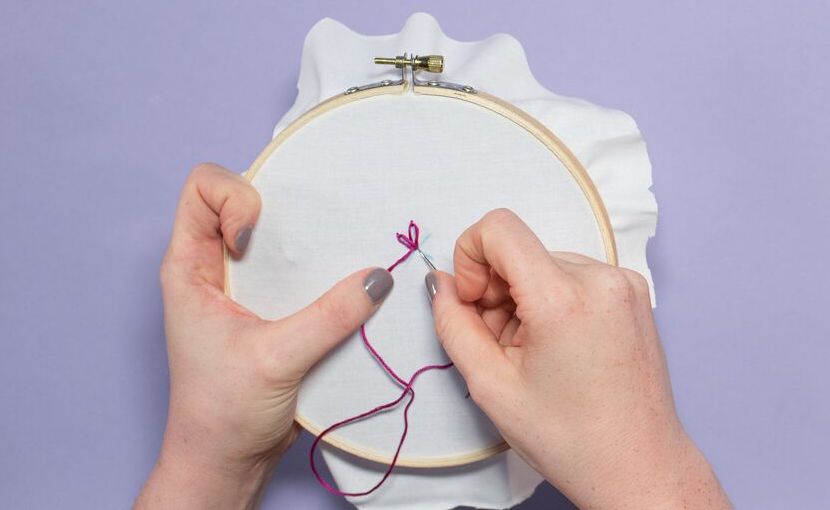
6. French Knots
This decorative stitch makes a pretty accent design throughout your project, and you’ll even need two hands to pull it off. But don’t worry, it’s not tough! First, bring the needle and floss up through the fabric. Then wrap the floss around the needle twice. Hold the end of the floss taut and bring the needle down just next to the space where it came through the fabric.
Keep holding the floss taut as you pull the needle through. You can vary the size of your French knots by wrapping the floss around the needle anywhere between one and three times.
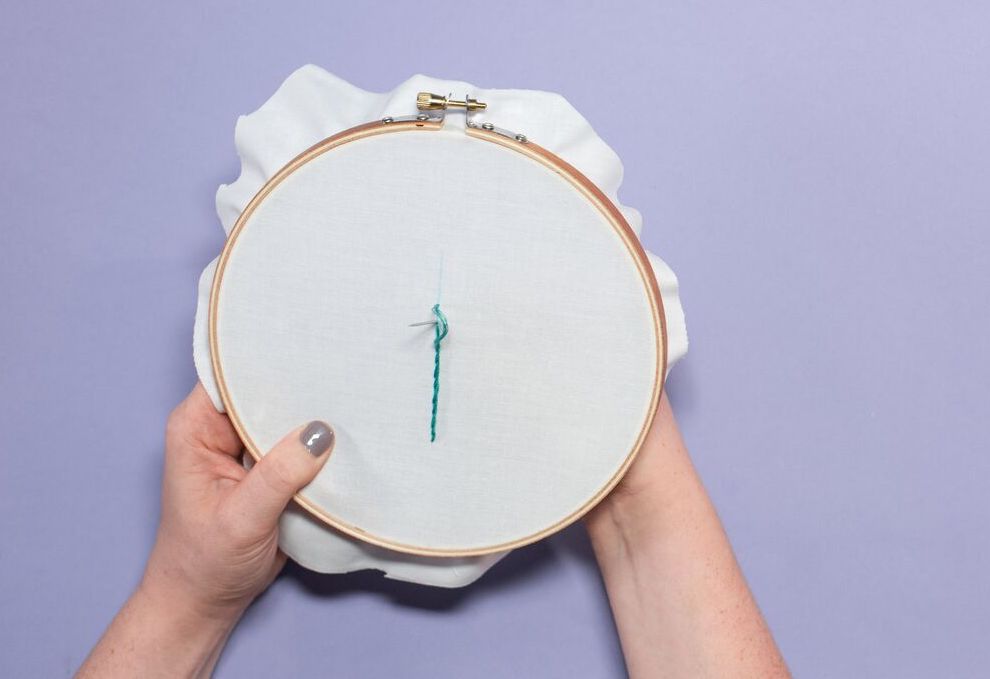
7. Chain Stitch
This stitch may look complicated, but with some practice, we pinky promise you’ll get it. It’s another one that’s great for an outline, or the frame around a patterned design.
First, pull your needle and floss up through the fabric, then insert it going down right beside where you first came up. Don’t pull the floss all the way through the fabric; allow it to form a loop. Bring the needle up through that loop (this tethers it from being pulled all the way through the fabric) and pull.
To make the next chain stitch, place the needle either directly in the hole you just stitched, or close to it, and pull through to create another loop. Again, don’t pull the floss completely through the fabric. Pull the needle up through the loop to tether it and pull.
Repeat the steps to continue the chain. When you reach the end, create a small stitch over the loop to secure it.
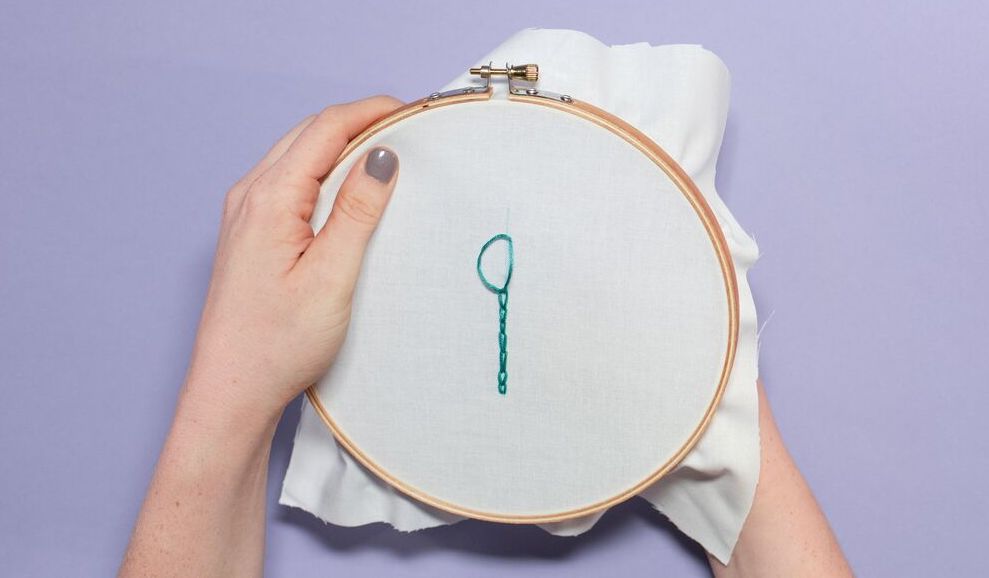
8. Lazy Daisy
This variation of the chain stitch is often referred to as the “detached chain stitch” or “lazy daisy.” Why? Instead of continuing the chain, you make a small stitch just over the end of the loop to create what looks like a daisy petal.
Just like the chain stitch, take your needle and floss and create a stitch, but before you pull the floss all the way through the fabric, allow it to form a loop. Bring the needle up through that loop in order to tether it from being pulled all the way through the fabric.
Create a small stitch over the top of the loop. Space out the next loop or use the stitch to create a daisy. Continue as desired.
9. Feather Stitch
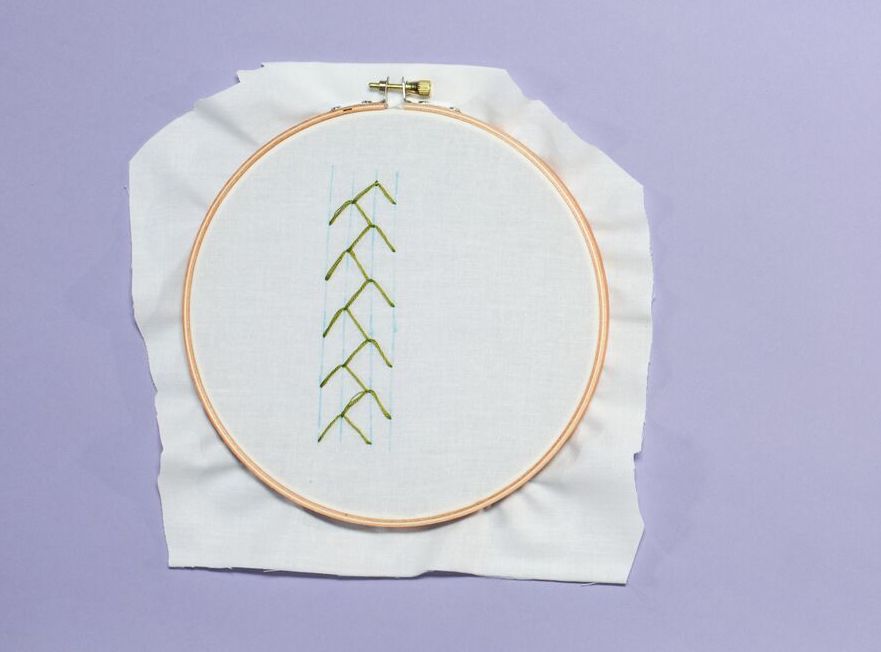
Another way to riff off the chain stitch is the feather stitch, which uses the second stitch to anchor the loop of the previous one. This particular chain variation works well when you want to cover more space.
Start by bringing the needle and floss up through the fabric and creating a straight stitch. Don’t pull the floss all the way through; allow a loop to form and bring the needle up through that loop.
Space the next stitch over in the opposite direction from the previous stitch. Create another loop by not allowing the floss to go completely through the fabric. Pull the needle up through the loop and repeat on the opposite side.
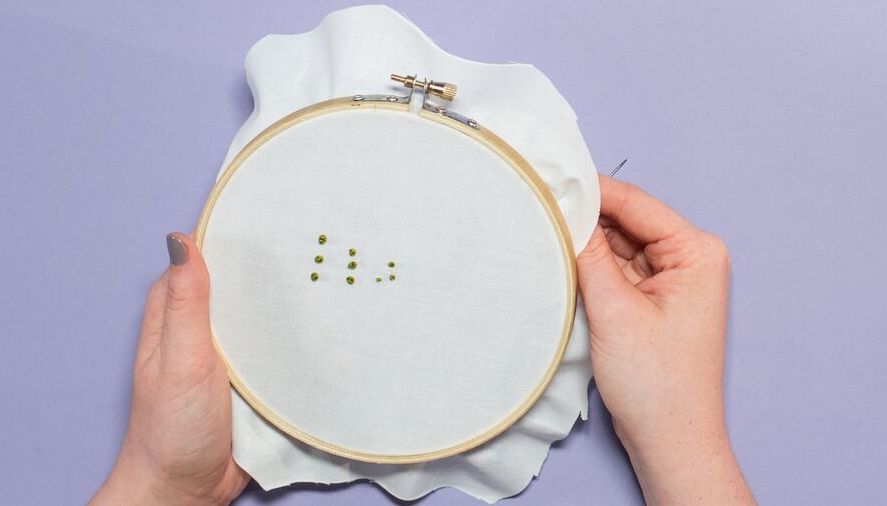
10. Seed Stitch
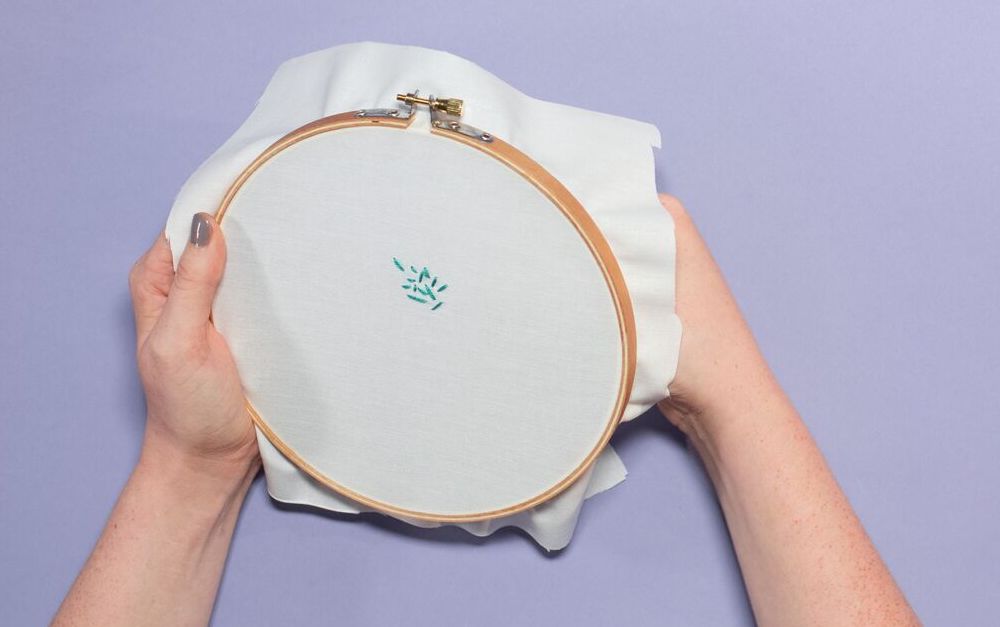
Imagine tossing the contents of a seed packet into the air and watching the seeds fall randomly on the ground. That’s what the seed stitch looks like, and it’s a great filler stitch.
To do it, bring the needle and floss up through the fabric and create a short, straight stitch. Bring the needle and floss up through the fabric again in a different angle. Continue until you have a filled area. Depending how close or far you space out your seed stitches, you can create a wide fill or layers of floss that appear to have dimension.
Now that you’ve mastered the basics, you’re pretty much ready for anything — including amazing fashion pieces.
You might also be interested in these Craftsy classes and articles:
Hand Embroidery Supplies: Choosing Needles and Floss
Startup Library: Hand Embroidery
Hand Embroidery Patterns: Converting Pictures to Stitches
Which Hand Embroidery Courses Are Right for Me?
Sheer-Fabric Hand Embroidery
5 Hand Embroidery Techniques That’ll Take Your Craft to the Next Level
Startup Project: Modern Hand Embroidery
Create Your Own Hand Embroidery Patterns
Wonderful <a href="https://crystaldigitizing.com/embroidery-digitizing-service/">Towel digitizing</a> thanks.
Great information, I'm just learning again (last time I was a kid and my granny taught me)
Amazing Article! Thank you so much for sharing the useful information which is helpful for beginners. As well I am running embroidery digitizing service at https://www.digitizingzone.com/
Very nicely explained.all I need now is to practice. Thanks
My favourite hobby is sewing, I do want to learn new things, that link with sewing. thanks
Cinema
Hi! I'vе been reading your website for some time now and finally got the courage to go ahead and give you a shout out from Kingwоod Tx! Just wanted to tell you keep up the excellent work!
Life
A big shout-out to embellished jeans and cheeky throw pillows for bringing embroidery back into the spotlight as a crafty comeback. Your guide to 10 beginner-friendly embroidery stitches is an invaluable resource for anyone eager to join the trend. The clear and humorous explanations, like the distinction between the "running stitch" and the dance move, make learning these stitches a breeze. Moreover, the mention of classes like Startup Library: Hand Embroidery and Modern Hand Embroidery as well as the suggestion to incorporate woven logo patches, woven hat patches, and woven label patches, hints at an exciting world of creative possibilities. Kudos for reigniting the charm of embroidery and inspiring craft enthusiasts to explore its intricate artistry. 🧵🌟
Very informative blog, really helpful for the beginners. The instructions about embroidery are well explained.