
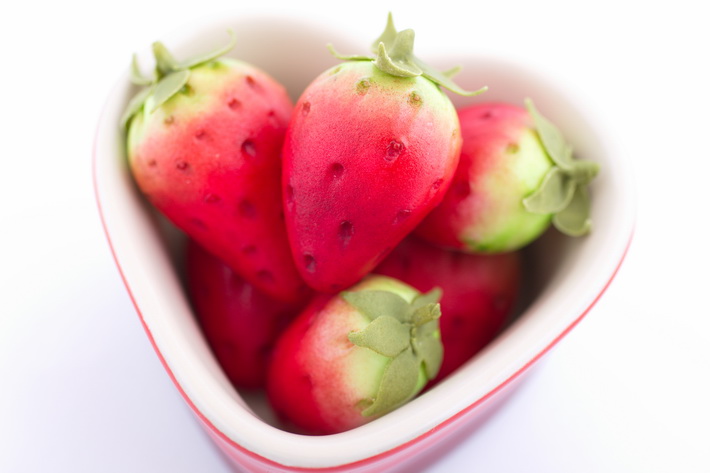
Make any cake can look more scrumptious and delicious by decorating it with juicy berries, and even more so when you make them from sugar. Now you don’t have to wait until strawberries are in season, you can have them the whole year round. Use these plump strawberries to decorate cakes, ice cream or desserts and for an authentic taste, add strawberry essence to your fondant or gum paste.
In this step-by-step tutorial, you will learn to make luscious fondant strawberries that are too good to be true, no-one will believe they are not real!
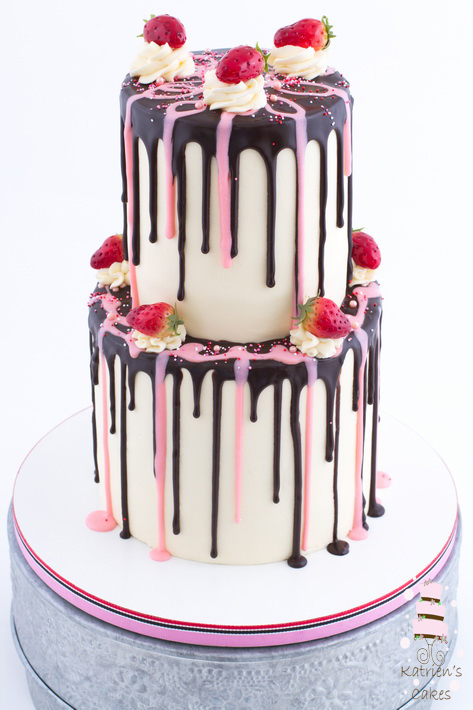
How to make fondant strawberries that look real!
Photos via Katrien’s Cakes
How to make fondant strawberries
Materials:
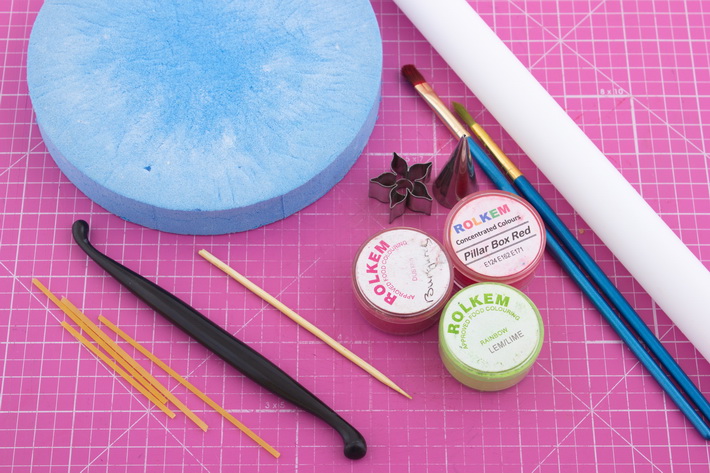
- Modeling paste made from fondant, sugar paste or gum paste
- Piping tip (nozzle) no.1
- Raw, dried spaghetti
- Small rose calyx cutter or any 5-petal cutter
- Petal pad
- Dog-bone tool, ball tool or skewer
- Small rolling pin
- Lime colored dusting powder
- Bright red dusting powder
- Burgundy dusting powder
- Small paintbrushes
- Confectioner’s glaze or light corn syrup (glucose syrup) and clear alcohol
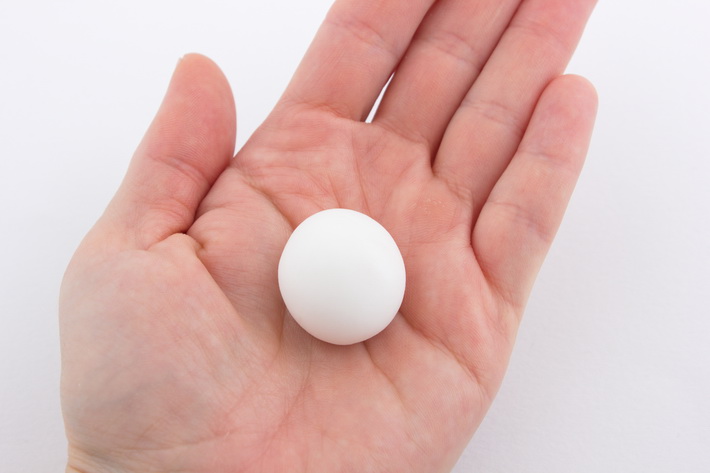 Step 1:
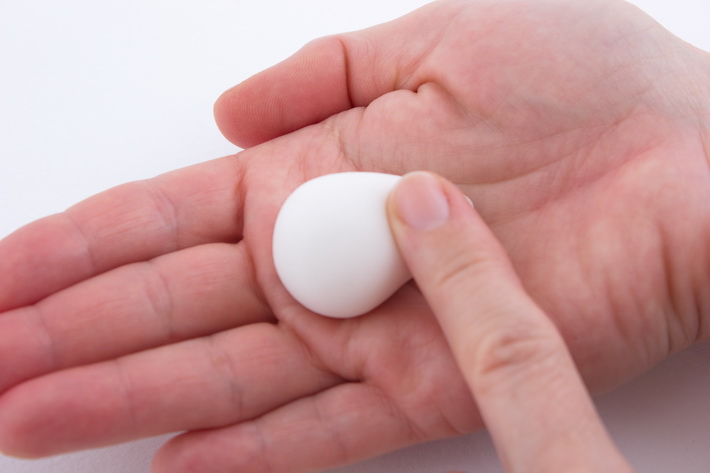
To make modeling paste, mix 9 ounces (250 g) of fondant or sugar paste with 1 tsp (5 ml) Tylose, gum tragacanth or CMC powder or use gum paste.
To make one strawberry, roll approximately 1/3 – 1/2 ounces (10-15 g) of paste into a ball.
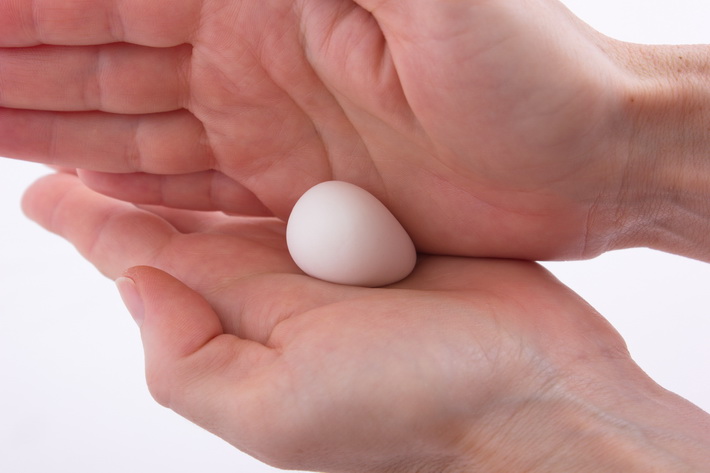 Step 2:
Roll the ball of paste on one side only by pressing your palms together while rolling to make a cone. The cone should be about 1 1/4 to 1 1/2 inches (3-4 cm) long.
 Step 3:
Curve the pointed end of the cone slightly to one side. Curve some of your strawberries to the left, others to the right and if you prefer to keep some straight.
 Step 4:
Indent the pointed end of the strawberry lightly with your finger.
 Step 5:
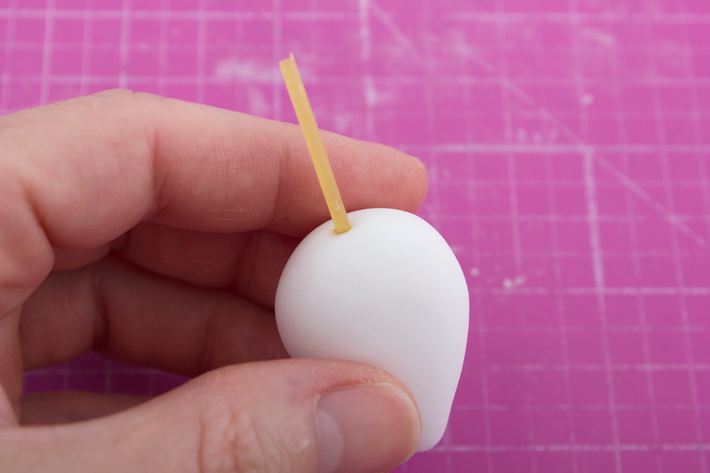
Push a piece of raw spaghetti into the rounded end of the strawberry.
 Step 6:
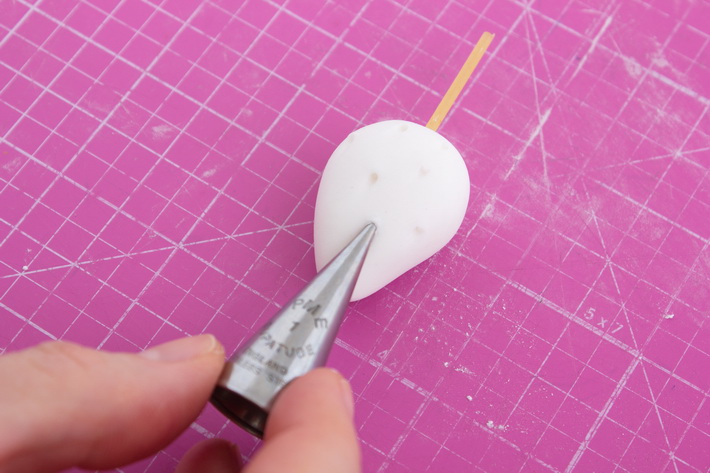
Hold a no.1 piping tip (nozzle) parallel to the strawberry and push the tip into the surface of the paste so that the tip creates a small drag mark and a small circle to look like a seed. Mark the strawberry with as many seeds as you like. If you are placing the strawberry flat on your cake you do not have to mark the bottom.
 Step 7:
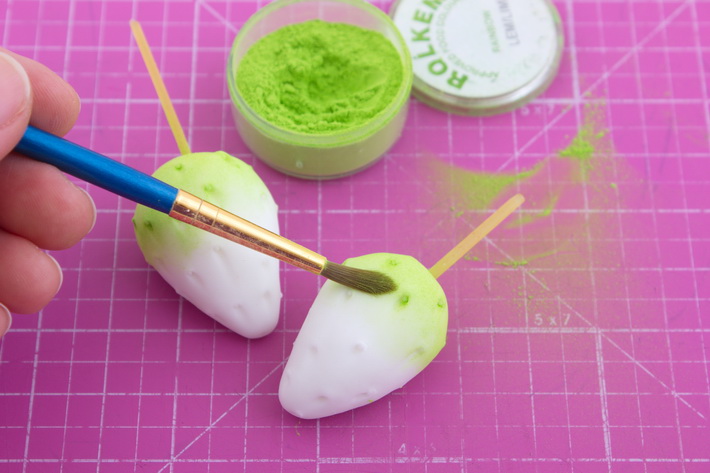
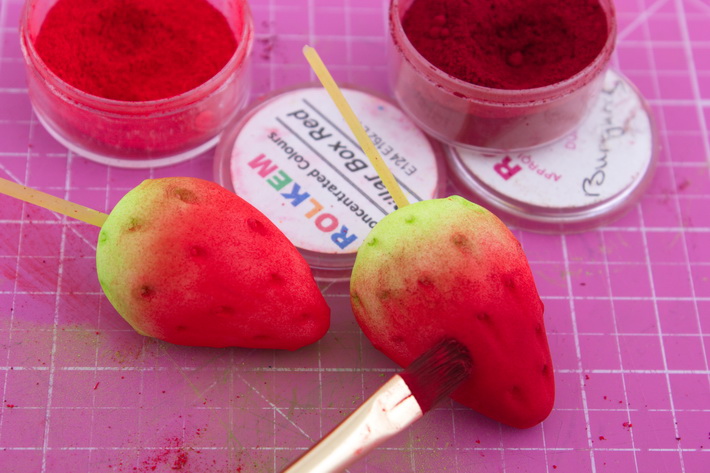
Dust the top 1/3 of the strawberry with lime dusting powder using a soft paintbrush. I used Rolkem Lem/Lime color but if you do not have lime you can mix together green and yellow dusting powder to make lime.
 Step 8:
Dust the bottom 2/3 of the strawberry with bright red dusting powder such as Rolkem pillar box red. Go slightly over the green so that the coloring looks more natural.
Then dust burgundy powder over the bottom 1/3 of the strawberry to make the tip look darker.
Dust only on the top and sides of the strawberry if it will be lying flat.
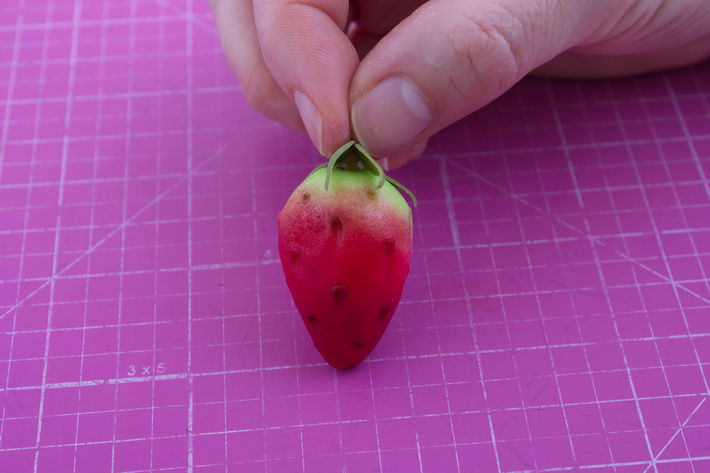
 Step 9:
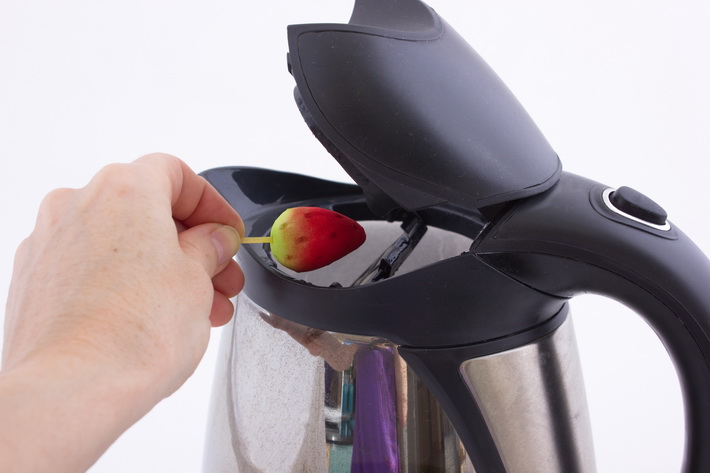
Holding on to the piece of spaghetti, steam the strawberry over a boiling kettle to set the dusting powder and place it on a piece of non-stick baking paper or a Silpat mat to dry. Let it dry for at least an hour before proceeding. Be careful not to burn your fingers with the steam.
 Step 10:
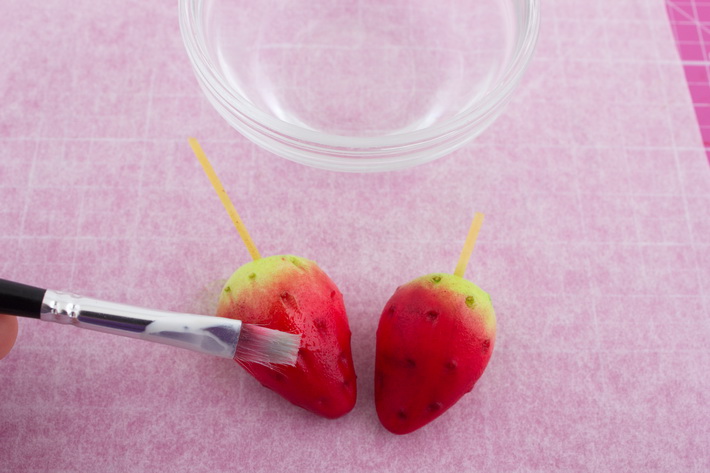
The strawberries will be slightly shiny from the steam but the shine will disappear after a while. I prefer my strawberries to be shinier, if you do too, paint the surface with confectioners’ glaze or a mixture of 1 part light corn syrup (glucose syrup) mixed with 2 parts clear alcohol such as vodka. Confectioners’ glaze will look much less shiny than the corn syrup mixture the next day.
Tip: See also our step-by-step tutorial for how to make fondant shiny to discover more techniques.
 Step 11:
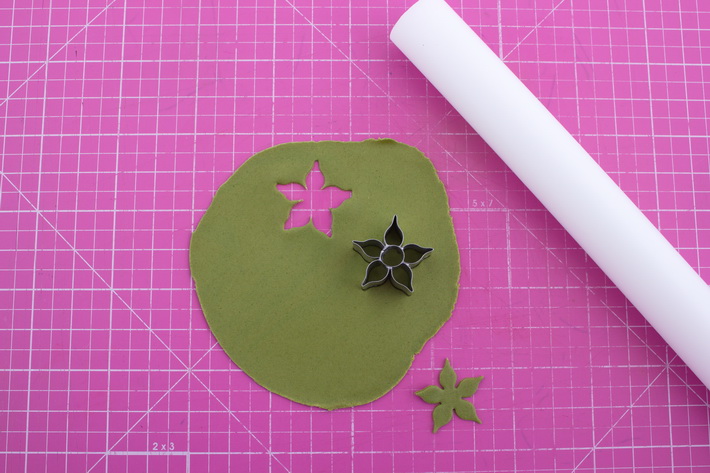
To make the calyx, mix your modeling paste or gum paste with leaf green food coloring and a drop of brown to create a natural shade of green.
Roll a small piece of paste until paper thin. Cut out a small calyx using a rose calyx cutter or any small 5-petal cutter.
 Step 12:
Thin the petals and lengthen them using a dog-bone tool or ball tool and a petal pad. If you do not have these items, dust your hand with cornflour and thin the petals by rolling a skewer from side to side on each petal in your hand.
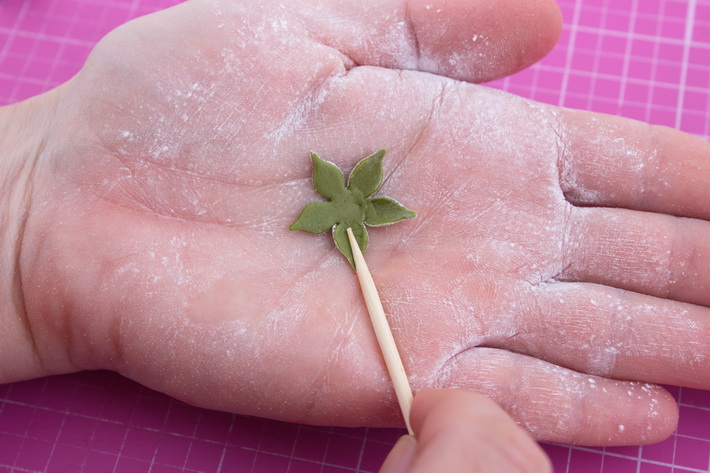
 Step 13:
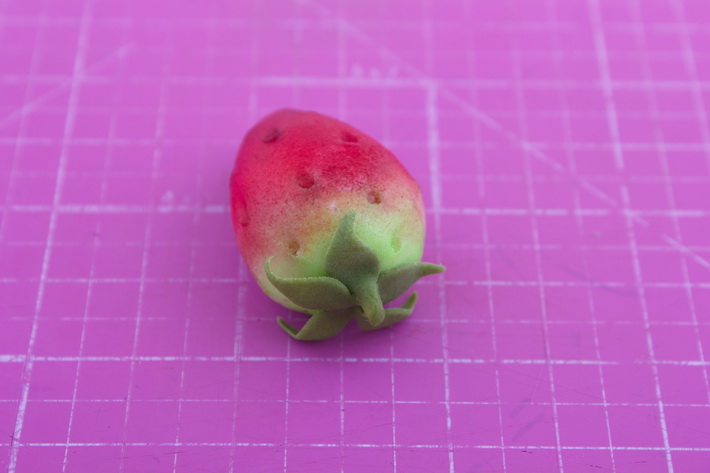
Cut the piece of spaghetti protruding from the strawberry with scissors so that only a small piece is visible. If you prefer not to have the spaghetti in the strawberry, pull it out.
Place a drop of edible glue, egg white or water on the calyx and place it over the spaghetti, or pinch it in the center to form a stem. Press the calyx onto the strawberry but keep the ends of the petals curled up and some of the petals lying in different directions or over each other to look more realistic.
Do not glaze the calyx, it should have a matte finish.
What makes online Bluprint classes great?

Learn for life! With lifetime access to your classes, you can watch lessons at your preferred pace and easily revisit your favorite concepts with just a click.

Kick up your feet! Enjoy classes anytime from the convenience of your home or even on-the-go with our mobile apps.

Get personalized guidance! Ask your instructor questions to receive all the answers and feedback you need to succeed.

Love it! There’s no risk in trying with our 100% money back guarantee.
Share tips, start a discussion or ask one of our experts or other students a question.
No Responses to “How To Make "I Can't Believe It's Not Real" Fondant Strawberries”