 While everyone loves a good embroidery design they can hang on the wall or turn into a pillow, there's something extra cool about being able to wear your finished masterpiece. With this easy tutorial, you'll have a new necklace — one you totally made yourself — added to your collection in no time.
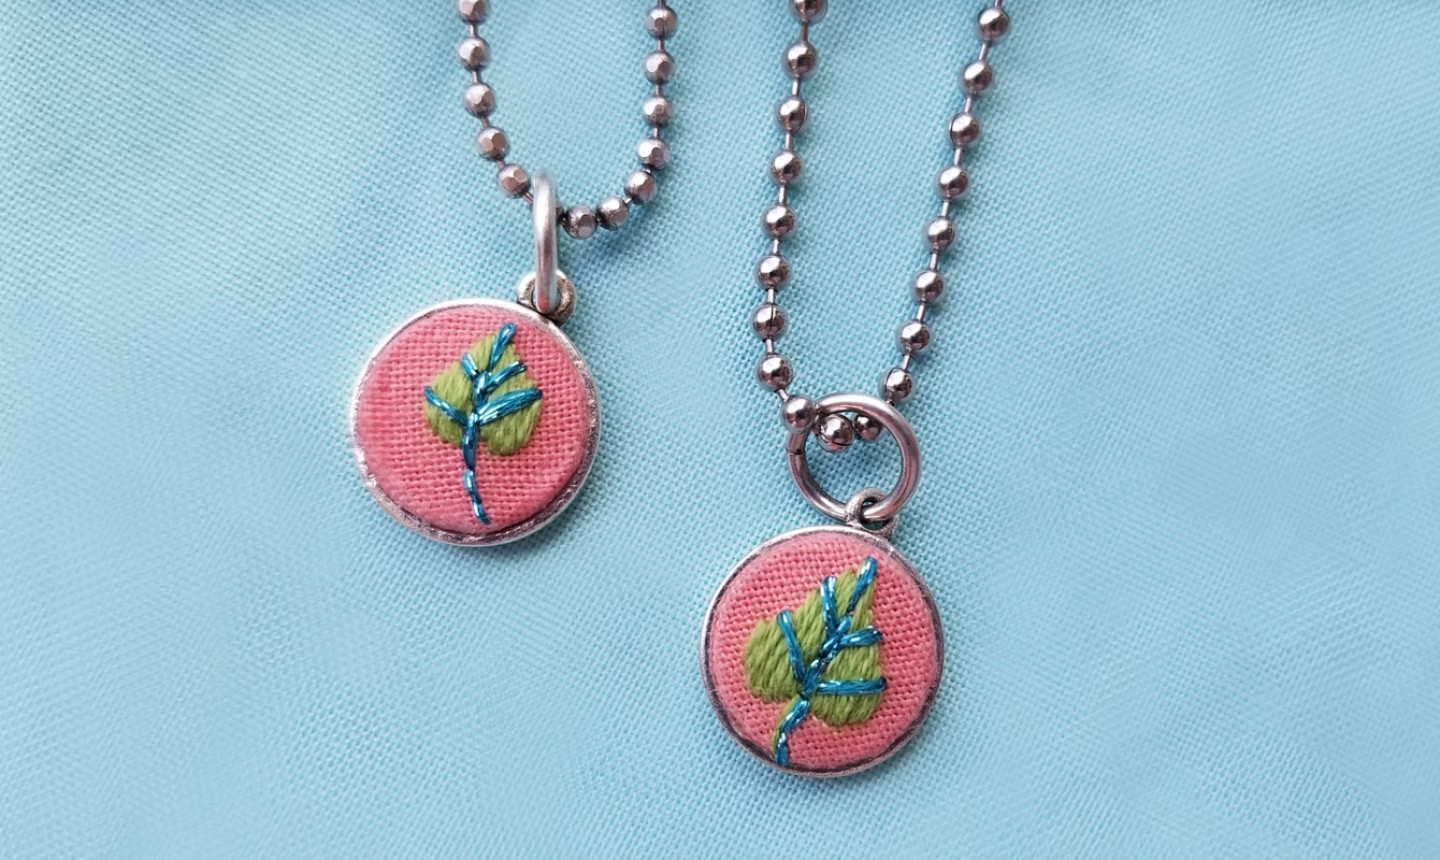
Embroidered Leaf Pendant
Level: EasyWhat You Need
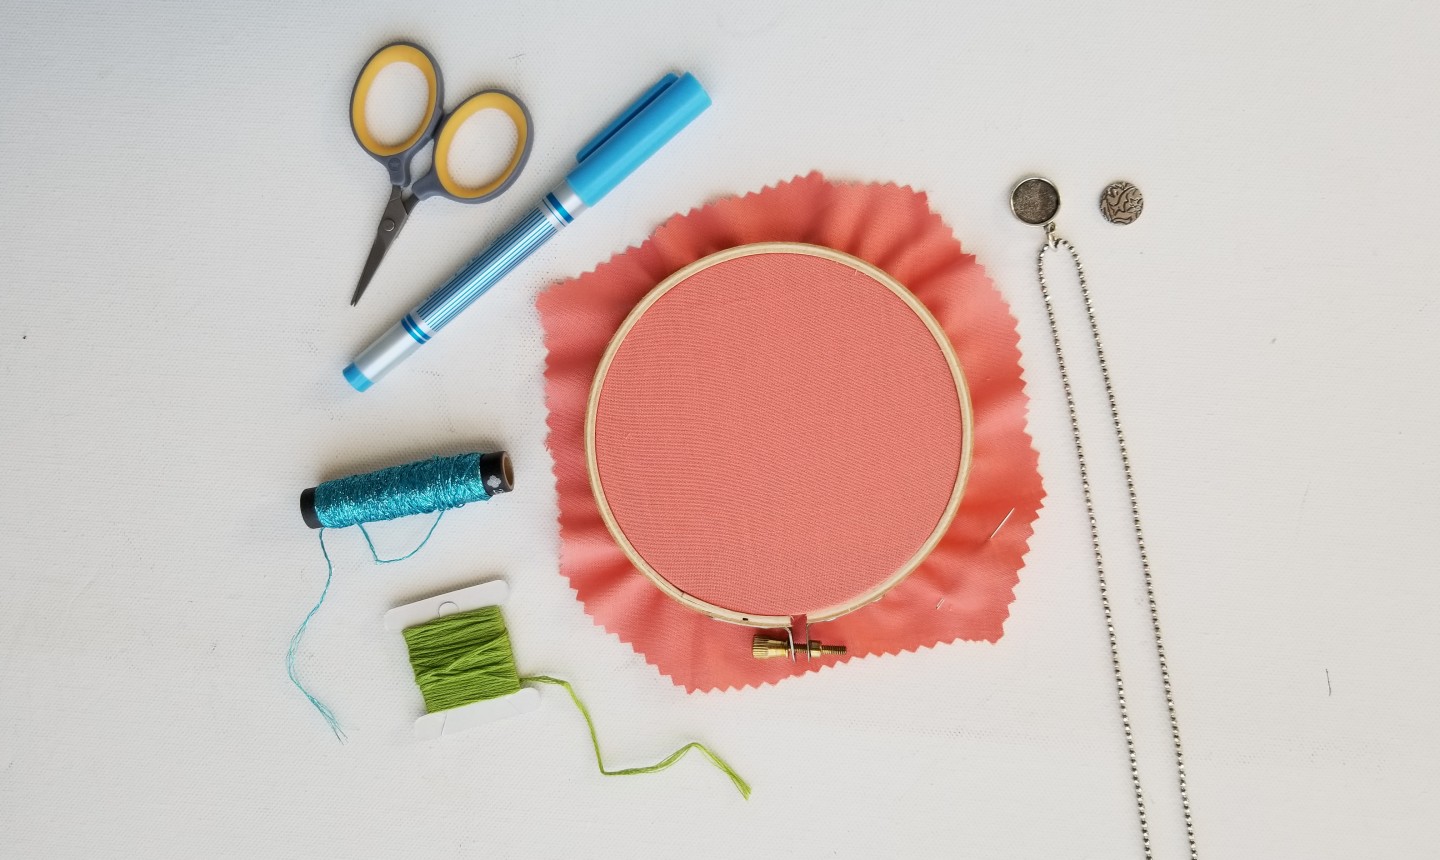
- Small amount of cotton fabric in a color of your choice
- 4" embroidery hoop
- Necklace Embroidery Kit (should include a flat tag, bezel and chain; we used one from Nunn Design)
- Water-soluble fabric marker
- Embroidery needle
- Green cotton embroidery floss
- Turquoise metallic embroidery floss
- Scissors
- Fray check or fabric glue
- Industrial-strength craft glue, such as E6000
- Small clamps
Instructions
1. Hoop Up and Outline
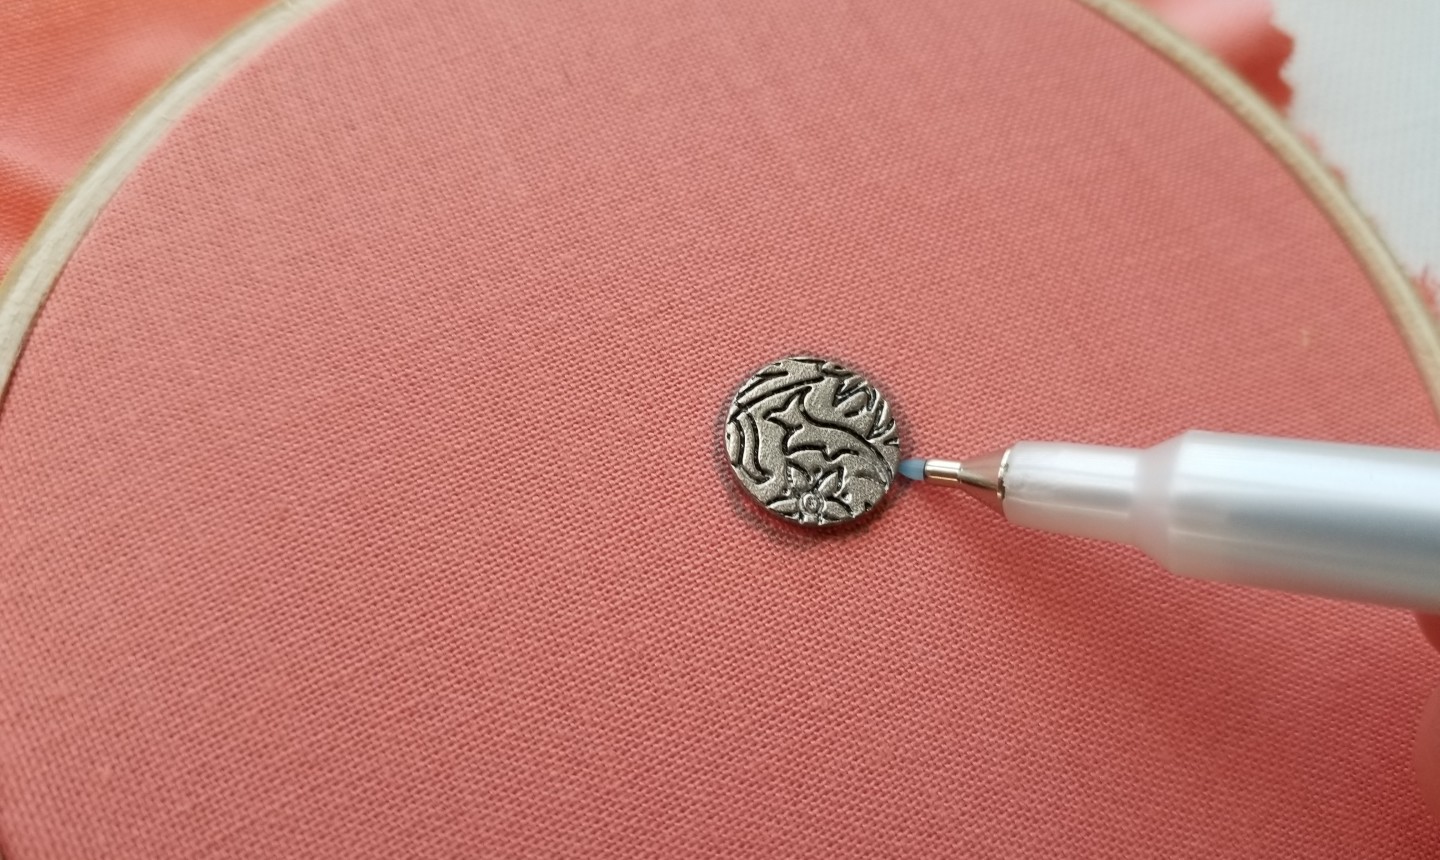 Hoop up your fabric, making sure to get the fabric nice and taut. Use your fabric marker to trace the flat tag from your necklace kit onto the fabric.
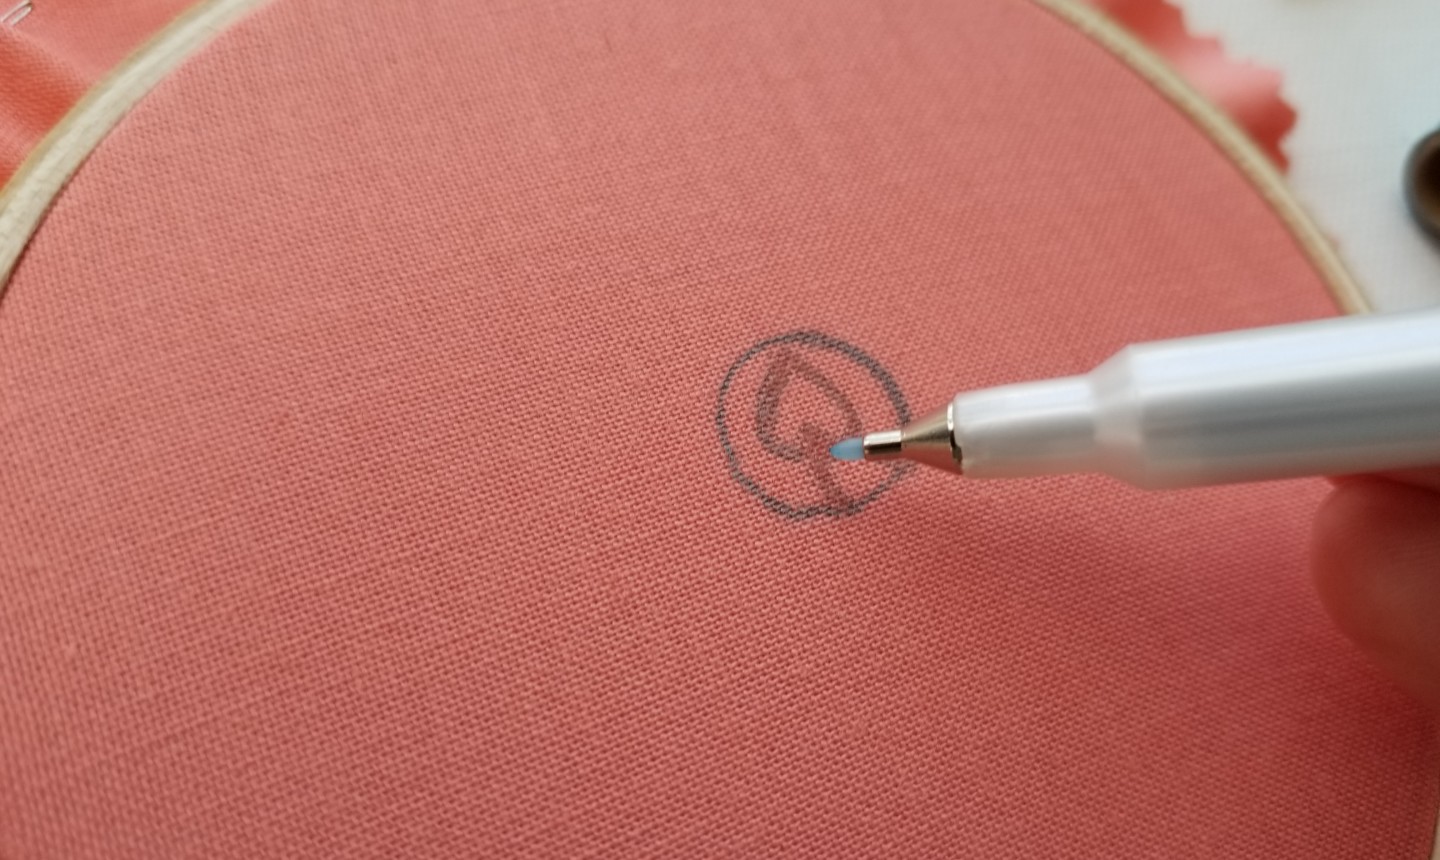 Draw a small leaf on your fabric, being sure to keep its edges inside the circle.
2. Fill In Your Leaf
 Pull out about an arm's length of green embroidery floss. Separate out two of the six strands of floss and thread them through your needle. Fill in the leaf with satin stitch, then finish off your thread on the back side and trim it.
Pro Tip: Because this project is so small, it might be hard to secure your floss on the back side. No sweat! We'll use glue to secure the embroidery to the bezel, so even if your ends aren't super secure now, they will be once that glue dries.
Pull out about an arm's length of green embroidery floss. Separate out two of the six strands of floss and thread them through your needle. Fill in the leaf with satin stitch, then finish off your thread on the back side and trim it.
Pro Tip: Because this project is so small, it might be hard to secure your floss on the back side. No sweat! We'll use glue to secure the embroidery to the bezel, so even if your ends aren't super secure now, they will be once that glue dries.
3. Add Detail
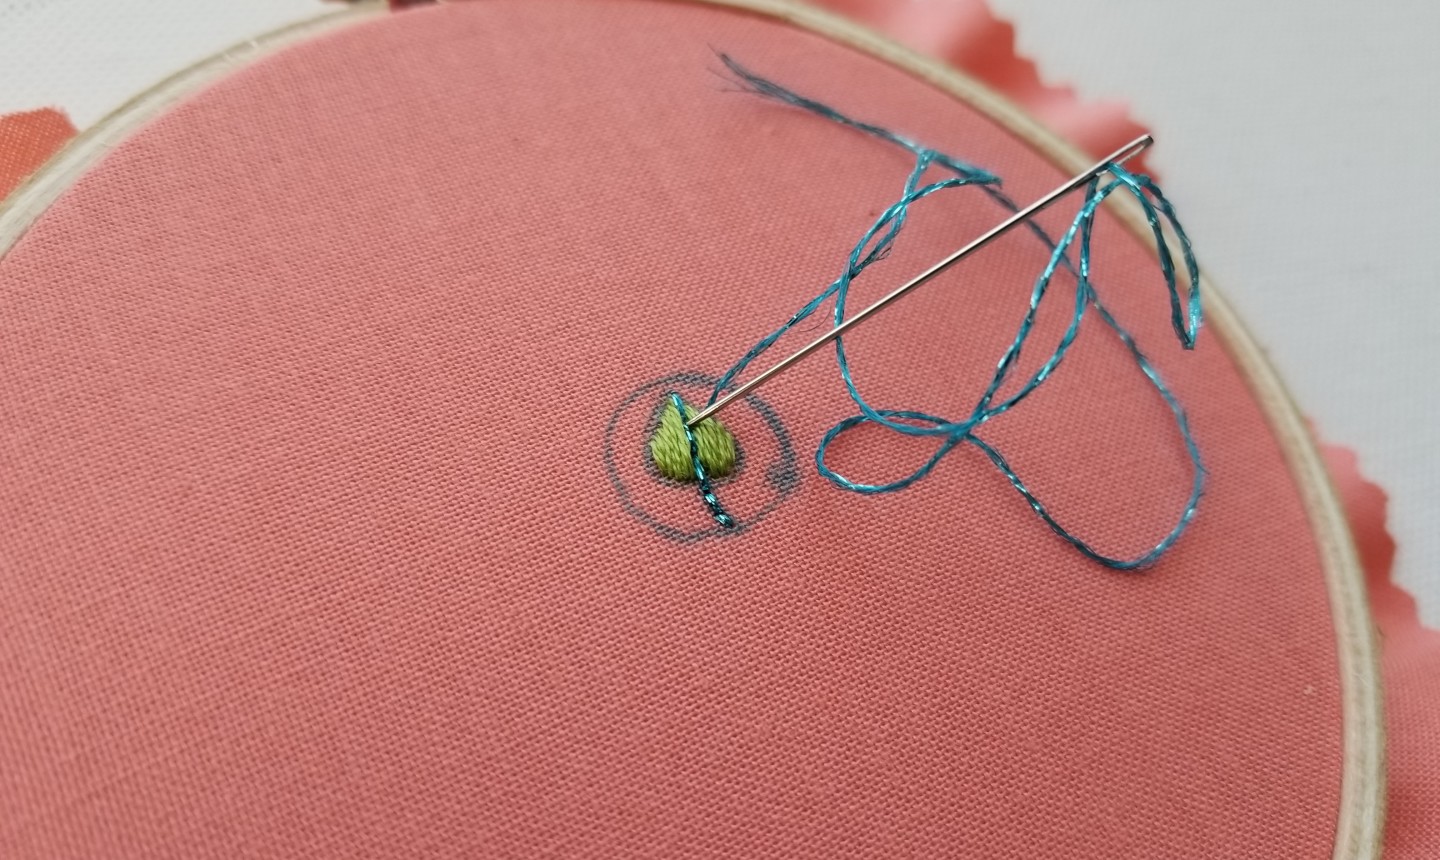 With the turquoise metallic floss, use a backstitch to make the vein and stem, and a straight stitch to add any accent details.
4. Clean It Up
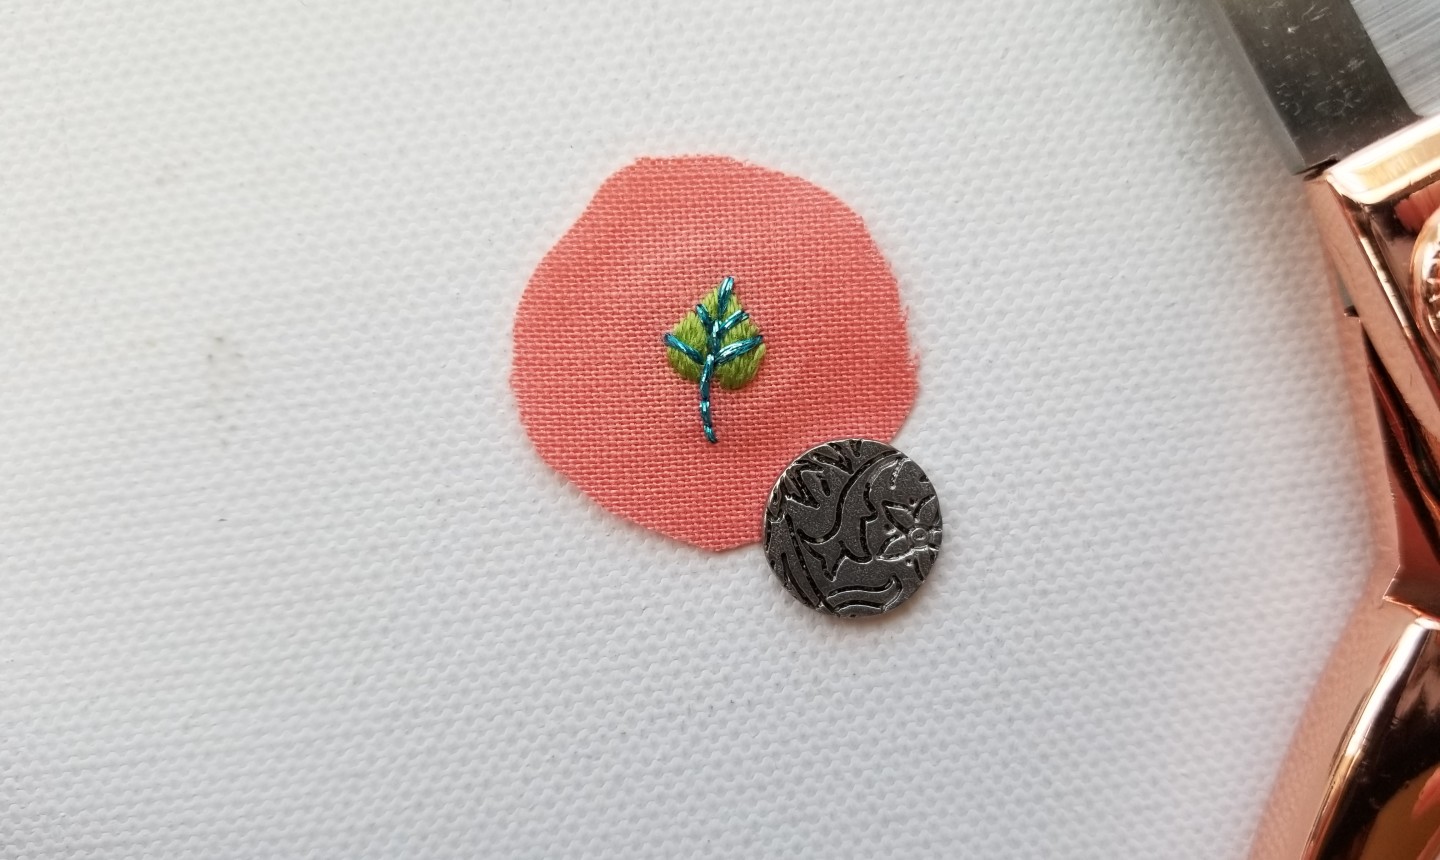 Take your fabric out of the hoop and trim away the excess fabric, leaving a 0.2" edge outside the circle you traced. Rinse your fabric, following the instructions on your fabric marker, to get rid of any visible markings. If there's any fraying along the edges of your fabric, apply a fabric glue or fray check.
5. Secure Your Work
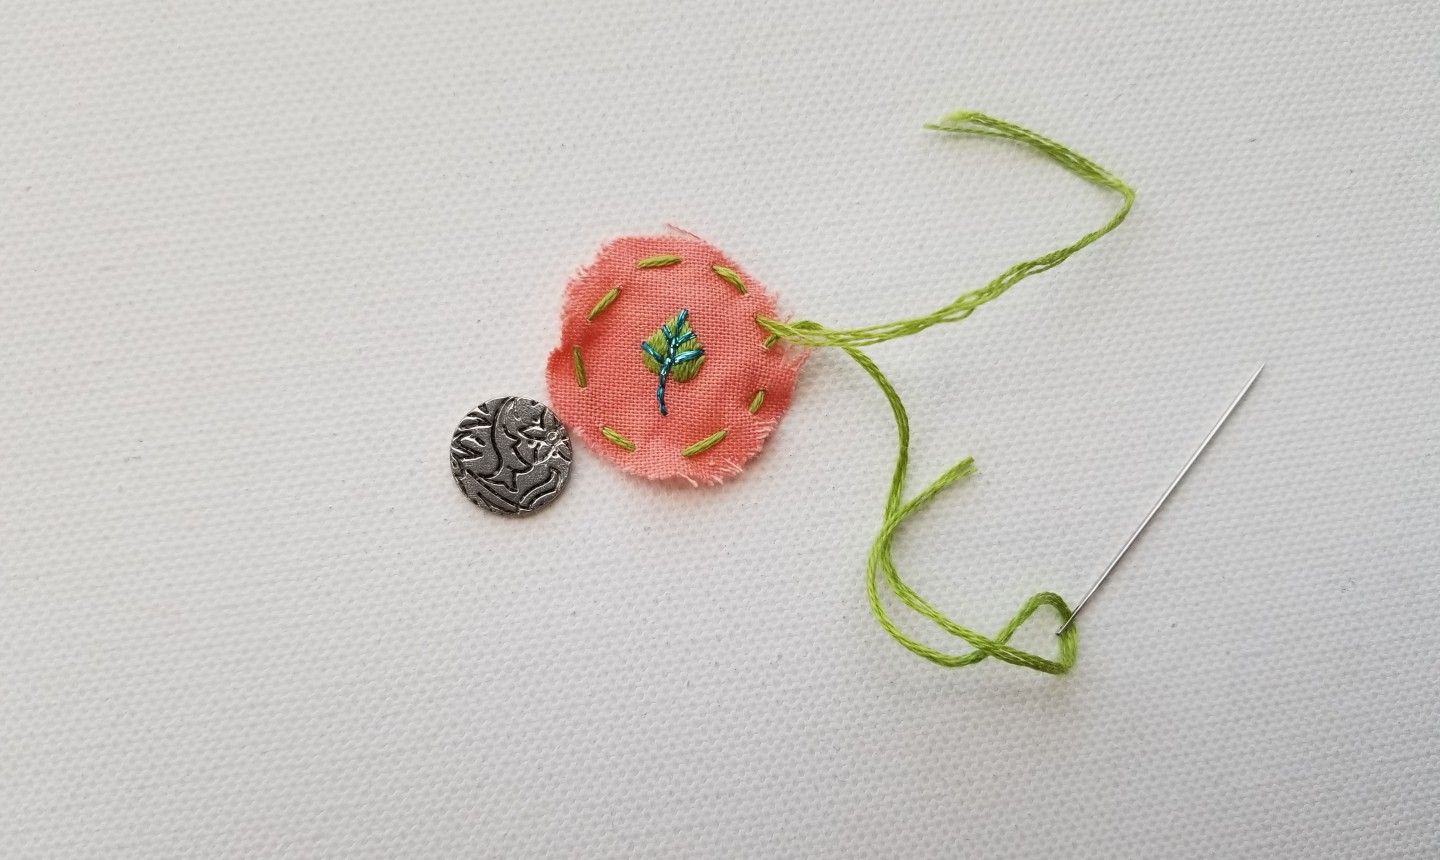 Work a running stitch along the edge of your fabric. Make sure the circle you make with your running stitch is wider than the flat tag you're covering.
 Cinch the fabric around the flat tag. Pull tight and make a double knot. Clip your excess thread.
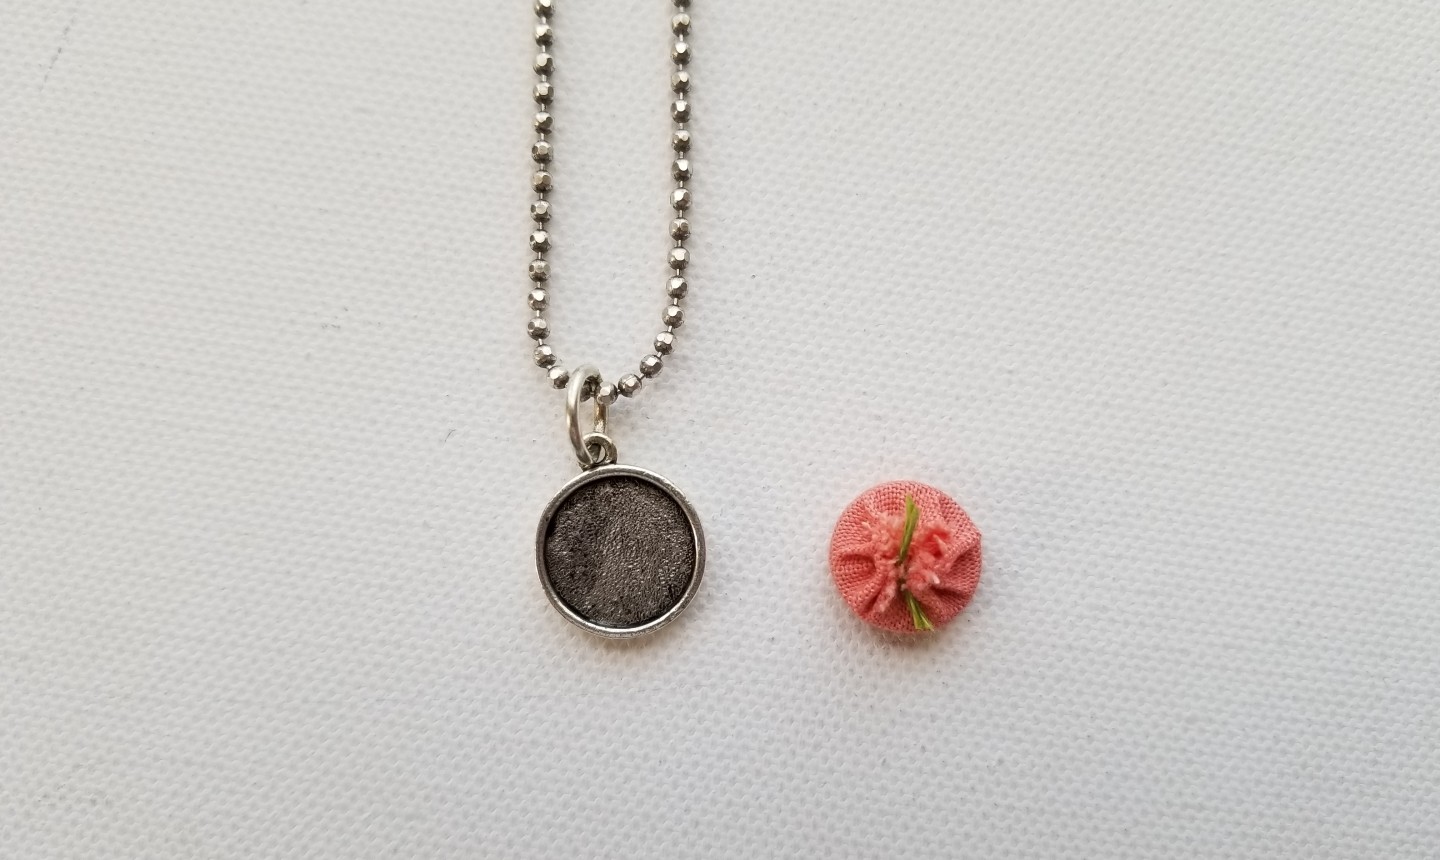
6. Make It a Necklace
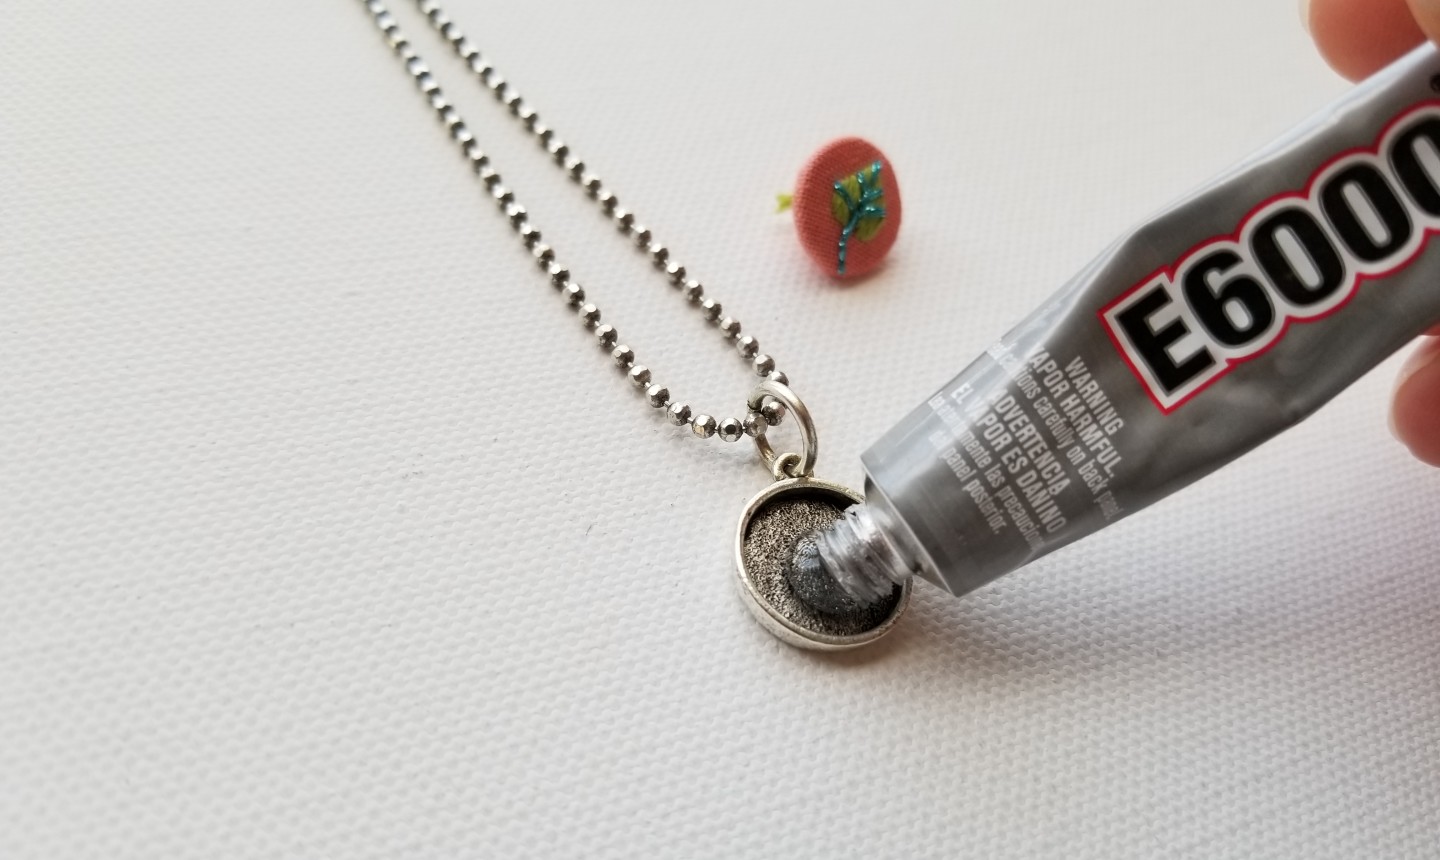 Apply craft glue to the bezel, following the manufacturer's directions for your specific glue.
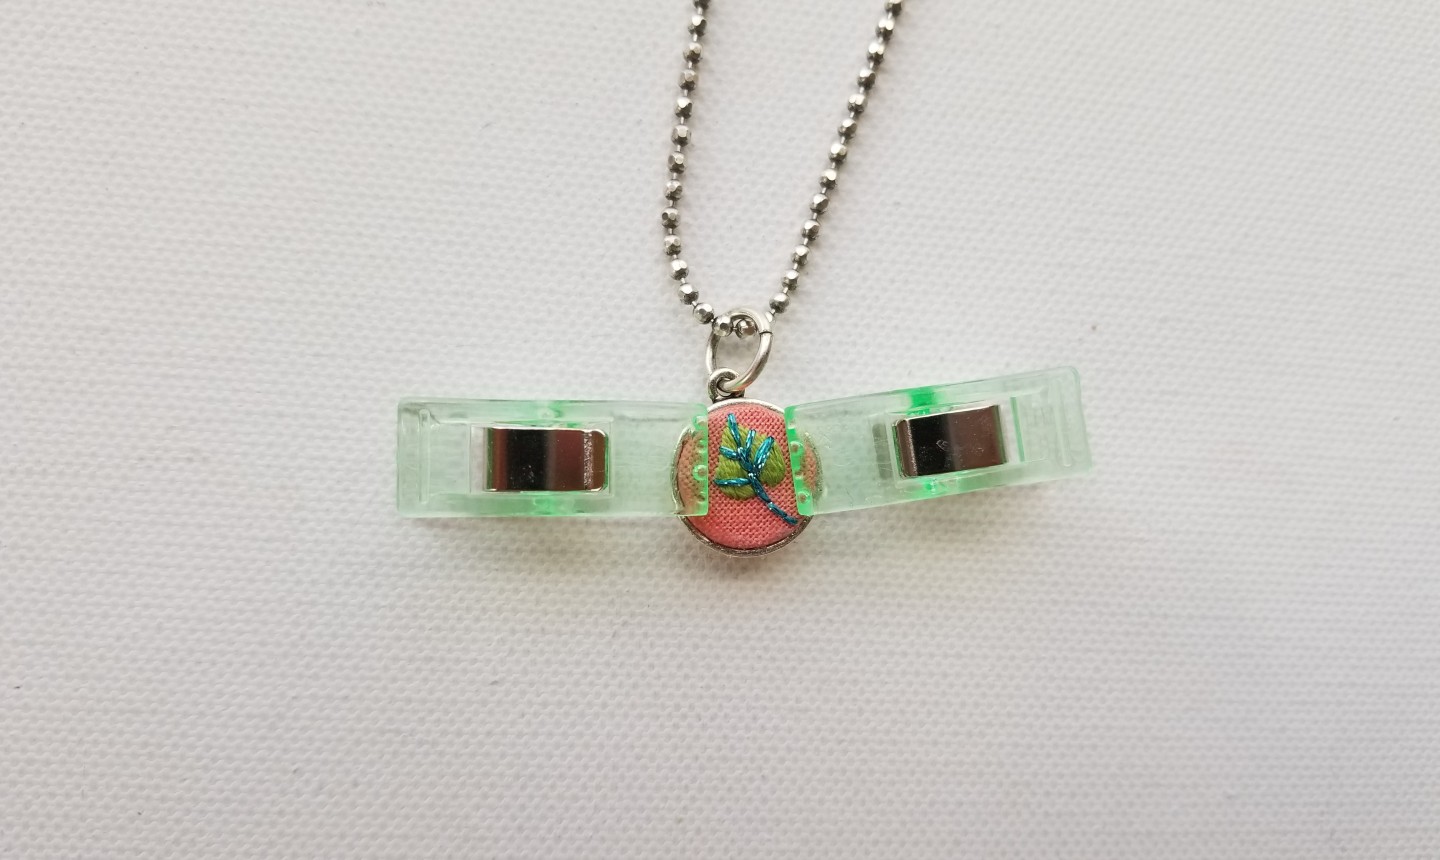 Insert the fabric-wrapped tag, and clamp it in place. Allow the glue to dry before removing the clamps.
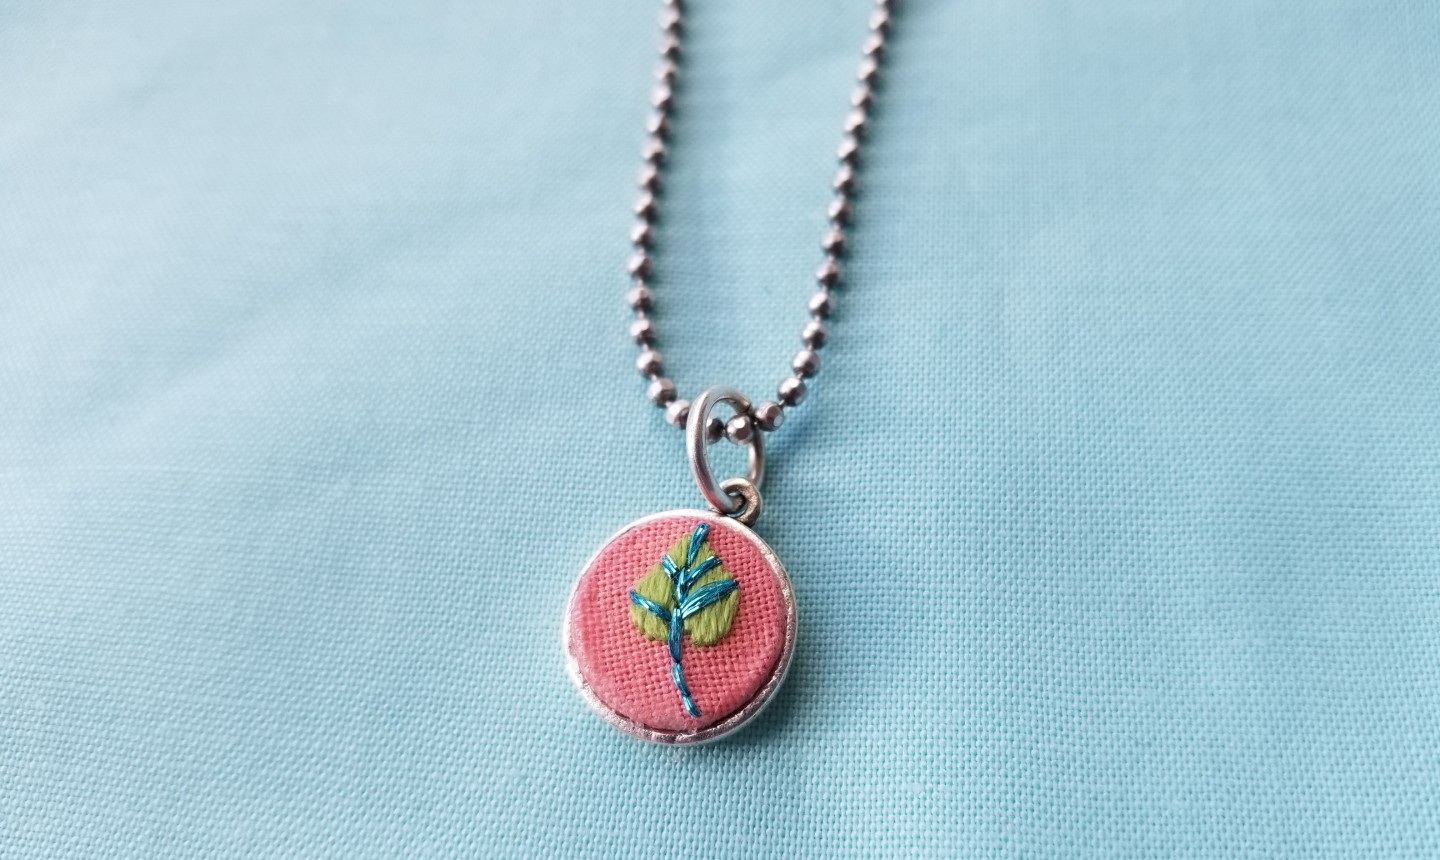 Slip that beauty around your neck and show off your chic style!
Photos by Jessica Long

Love this ! Making my Sis , and two daughters one for a present 🎁
What are those clamps called and where can I get them?