Want to make the most of the cookies cutters in your stash? This Halloween you can make three fun cookies with just the one cutter. Plus, you only need three colors of royal icing. Minimal effort for maximum fun! Read on for our tutorial to make your Halloween dessert table utterly terror-ific with these easy Halloween cookies.
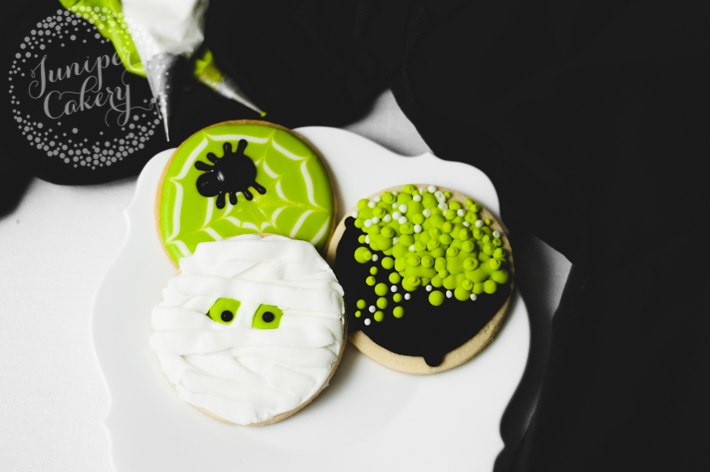
Spook-tacularly easy Halloween cookies
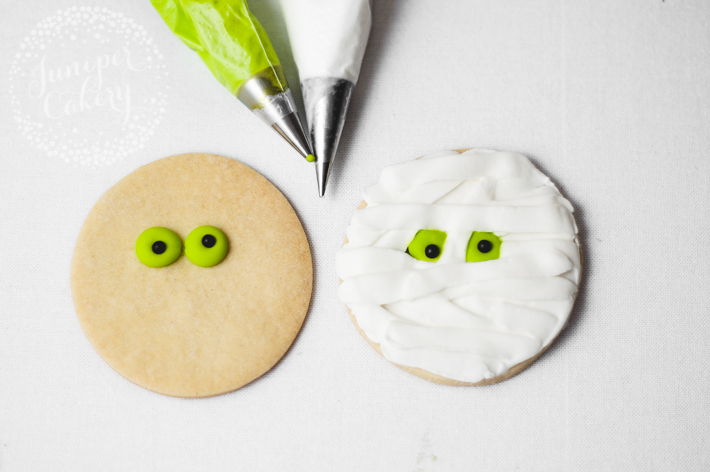
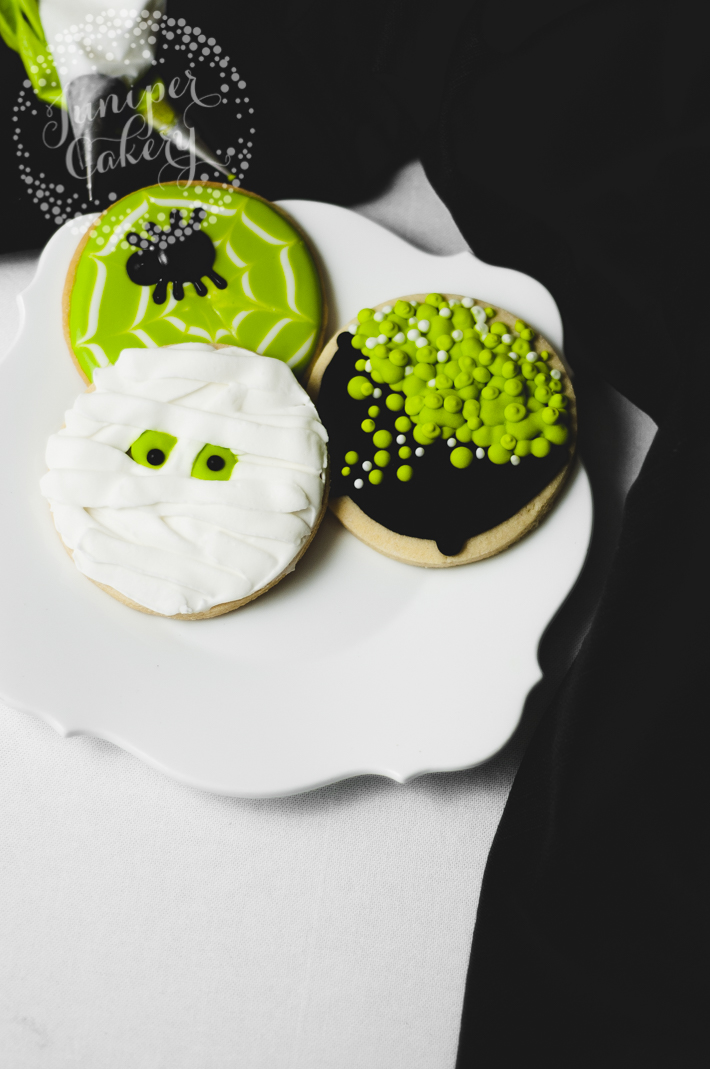
The (not so) menacing mummy
These easy Halloween cookies are definitely the easiest and quickest to decorate, plus it’ll still look great if your piping skills are less than professional.
Tools and materials needed
- Sugar cookies
- Circle cookie cutters
- 15-second-consistency royal icing in white, black and lime green
- Small petal piping tip
- Medium round piping tip
- Black edible sugar pearls
- Disposable piping bags
Step-by-step directions
h4>Step 1:Fill a disposable piping bag fitted with the medium round piping tip with some green royal icing. Pipe two small “blobs” in the middle of your circle cookie. Quickly place a black sugar pearl on top of each blob.
Step 2:
With a bag of white royal icing fitted with a small petal tip, pipe a series of long, flat strips of icing across the cookie. Leave to set for a few hours and they’re ready to scare the bandages off anyone!
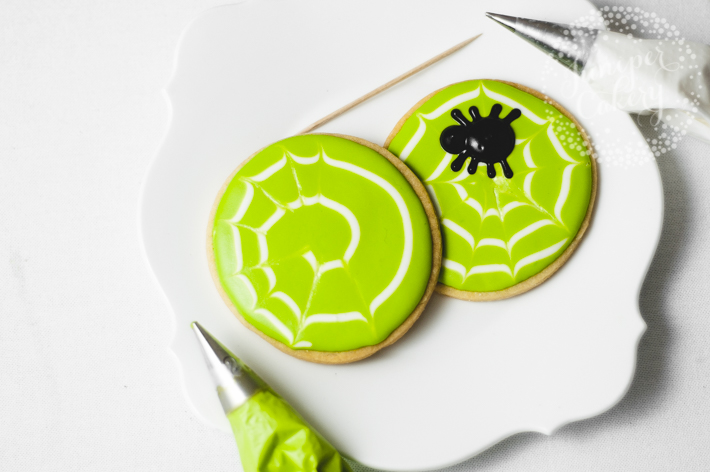
The scaredy spider
Tools and materials needed
- Circle-shaped cookie
- Cocktail stick / toothpick
- 15-second consistency green and white royal icing
- Piping-consistency black royal icing
- Small round piping tip
- Medium round piping tip
- Disposable piping bags/li>
- Black edible sugar pearls
Step-by-step directions
Step 1:
Outline and flood your circle cookie with the green royal icing.
(Not sure how to flood sugar cookies?
Step 2:
While the green icing is still wet, pipe concentric white circles of royal icing. Before the icings dry, drag the cocktail stick through the circles of icing in multiple places, moving from the outer edge of the cookie inward.
Leave the cookie to crust over for an hour before moving to the next step. If you try to pipe the spider while the icing is still wet, you’ll end up with a black puddle that seeps into the other colors. Instead, you want your spider to sit on top of the icing.
Step 3:
With a bag of piping-consistency black royal icing with a small round piping tip, pipe the spider’s eight legs. Consider where your spider’s body will sit before piping.
Then, pipe the body and head between the legs using a larger round piping tip.
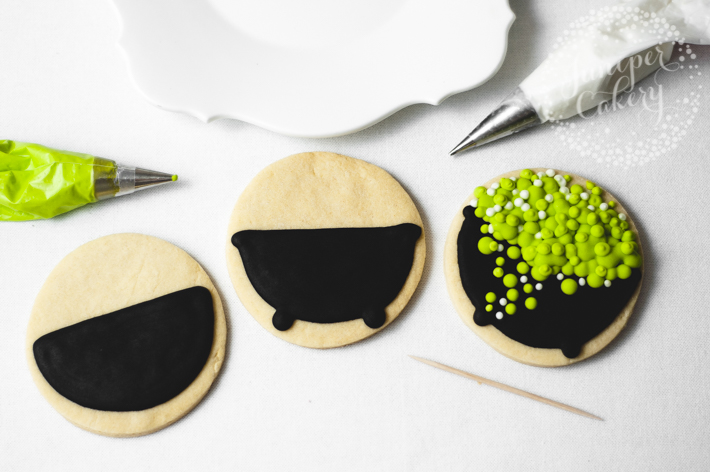
The creepy cauldron
Tools and materials needed:
- Circle cookie
- 15-second-consistency black royal icing
- Piping-consistency green and white royal icing
- Luster dust or metallic paint set
- Disposable piping bags
- Small plain round tip
Step-by-step directions
Step 1:
Outline and flood a half circle of black royal icing onto your cookie.
Step 2:
With the same black royal icing and piping tip, add in the cauldron details. You need two small circles for the legs and two teardrop shapes at the ends of the top! Leave to crust over for an hour.
Step 3:
With the piping-consistency green and white royal icing, pipe a series of different sized pearls or bubbles on the upper half of the cookie. Don’t forget to add a few bubbles foaming down the side of the cauldron.
For an extra detail, you can sprinkle some edible glitter on top! Or, once the cookie has fully dried, paint a little green or white edible luster dusts on random bubbles.
Share tips, start a discussion or ask other students a question. If you have a question for an expert, please click here.
Already a member? Sign in
No Responses to “One Cutter, Three Terror-ific Halloween Cookies”