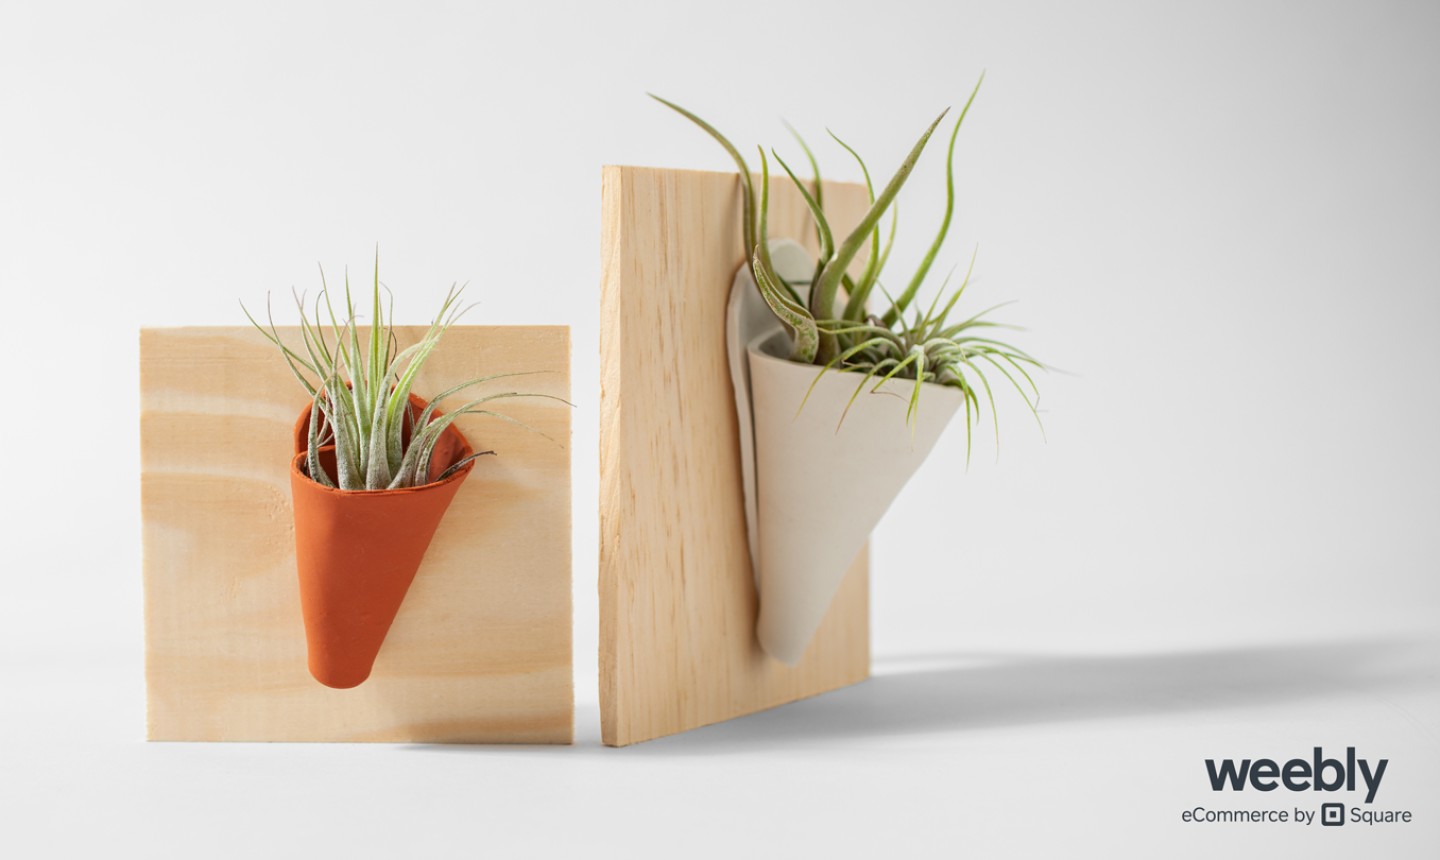
 Inspired by the signature pieces from Anna VonRosenstiel of Carter & Rose, these clay planters are an instant upgrade for all your favorite little air plants. Keep this project manageable by using oven-bake clay — no kilns required!
Clay Planter
Level: EasyWhat You Need
- Wooden backing board, cut down to your preferred dimensions
- Sawtooth picture hanging kit
- Oven-bake clay (such as Sculpey)
- Rolling pin
- Tin foil
- Large nail (optional)
- Hammer (if using nail)
- E6000 Glue
Instructions
1. Planter Prep
Preheat your oven following the directions on your clay. Prep your backing board: grab your picture hanging kit and attach the hanger to the back of your board. This is how you’ll hang your planter on the wall later, so make sure everything is oriented correctly! Pro Tip: If you want to make your board extra, bust out the paint, stain or any other decorations. Now’s the time to make your board beautiful, so go crazy. Or keep it simple. Your call.2. Shape the Cone
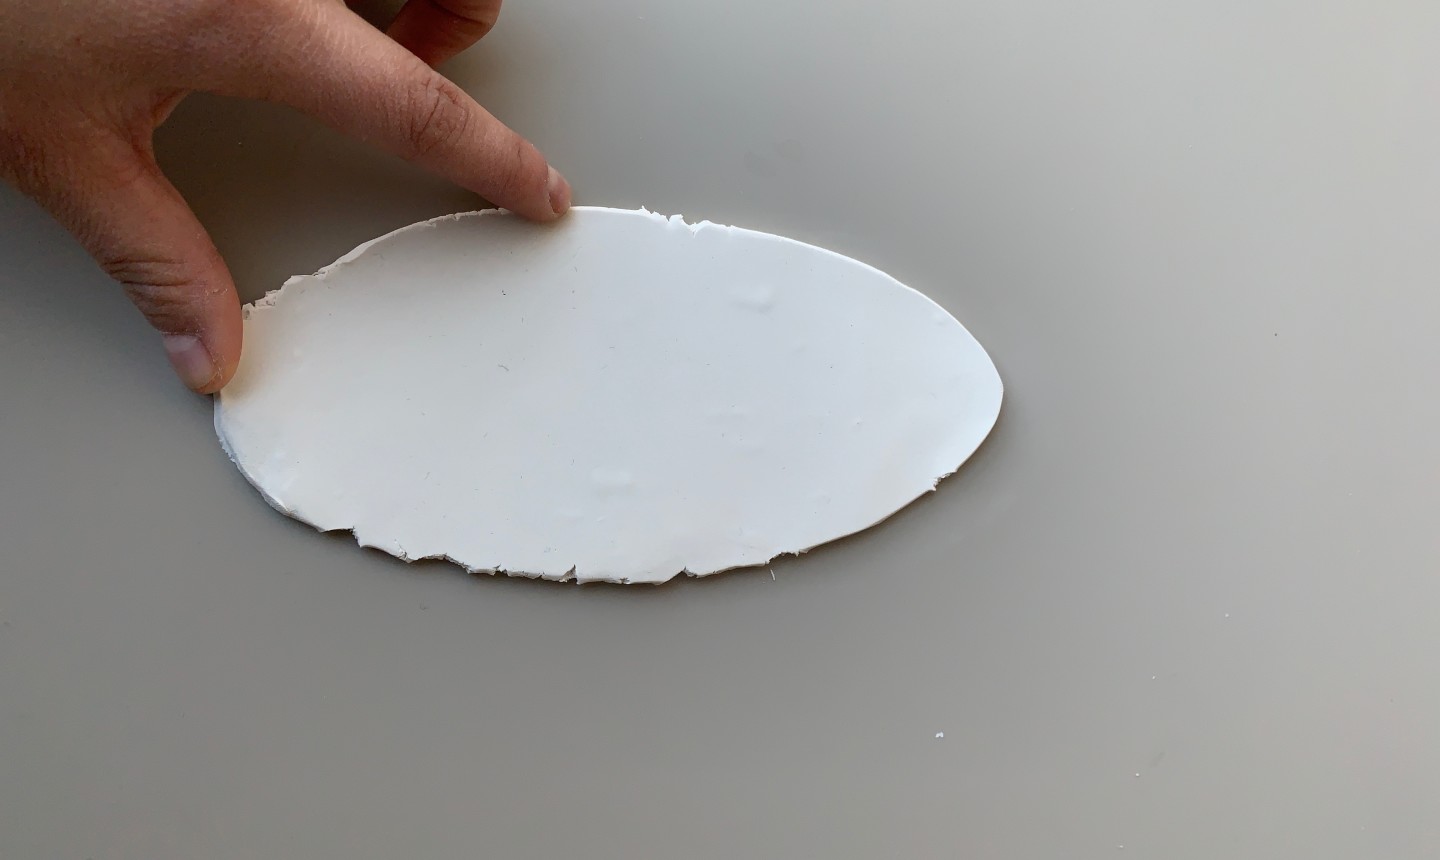
Break off a chunk of clay and roll it into a ball about the size of a golf ball (or larger if you want a larger cone). Use your rolling pin to evenly flatten your clay into an elongated oval. You want your clay to be about 1⁄8-inch thick, with no air bubbles.
 Use your finger to smooth the edges of your clay. If your shape is looking a little wonky at this point, use a butter knife and trim it back into shape.
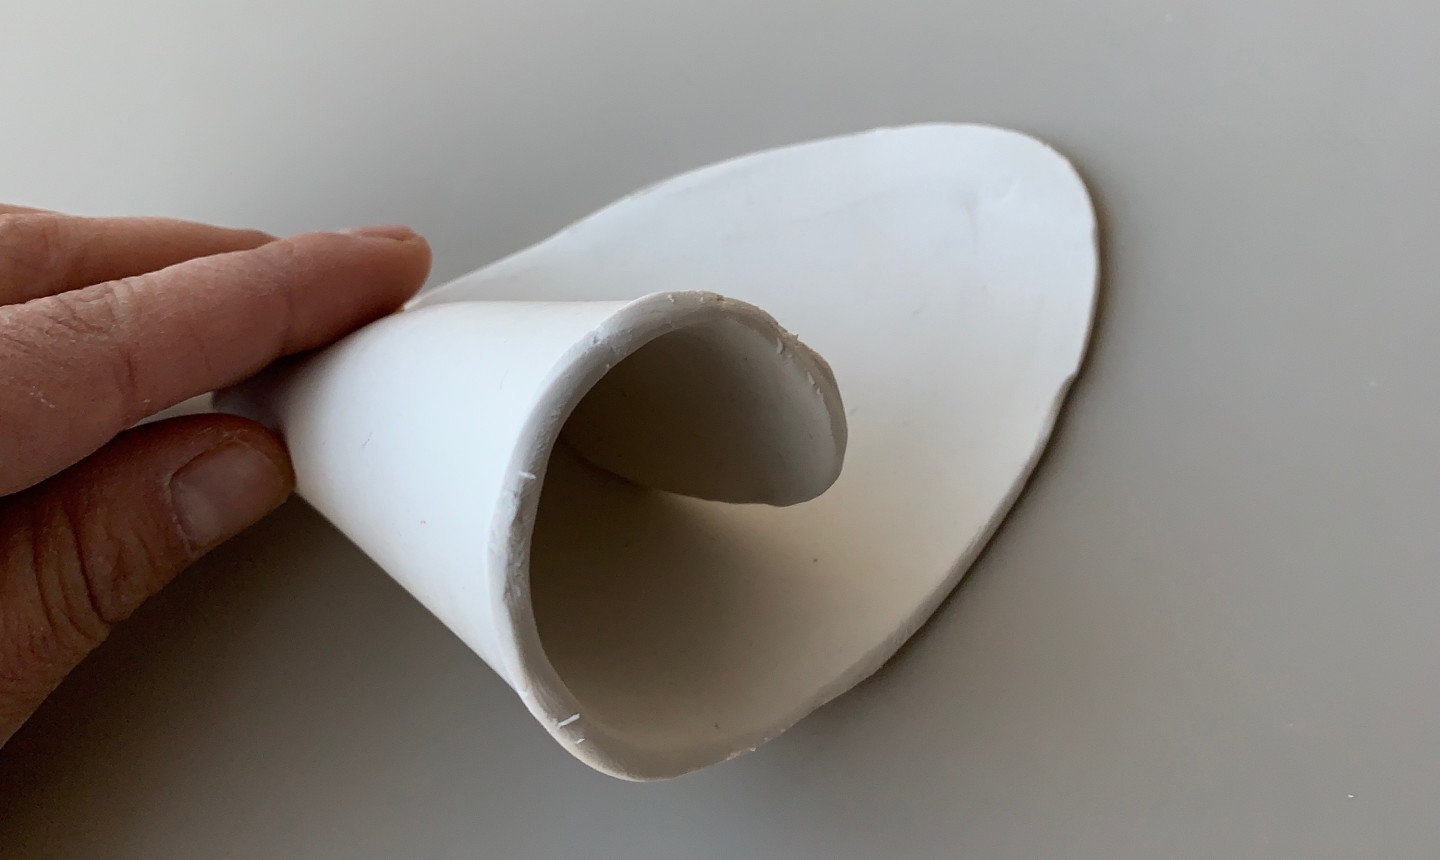 Gently roll your clay into a cone shape, overlapping the edges.
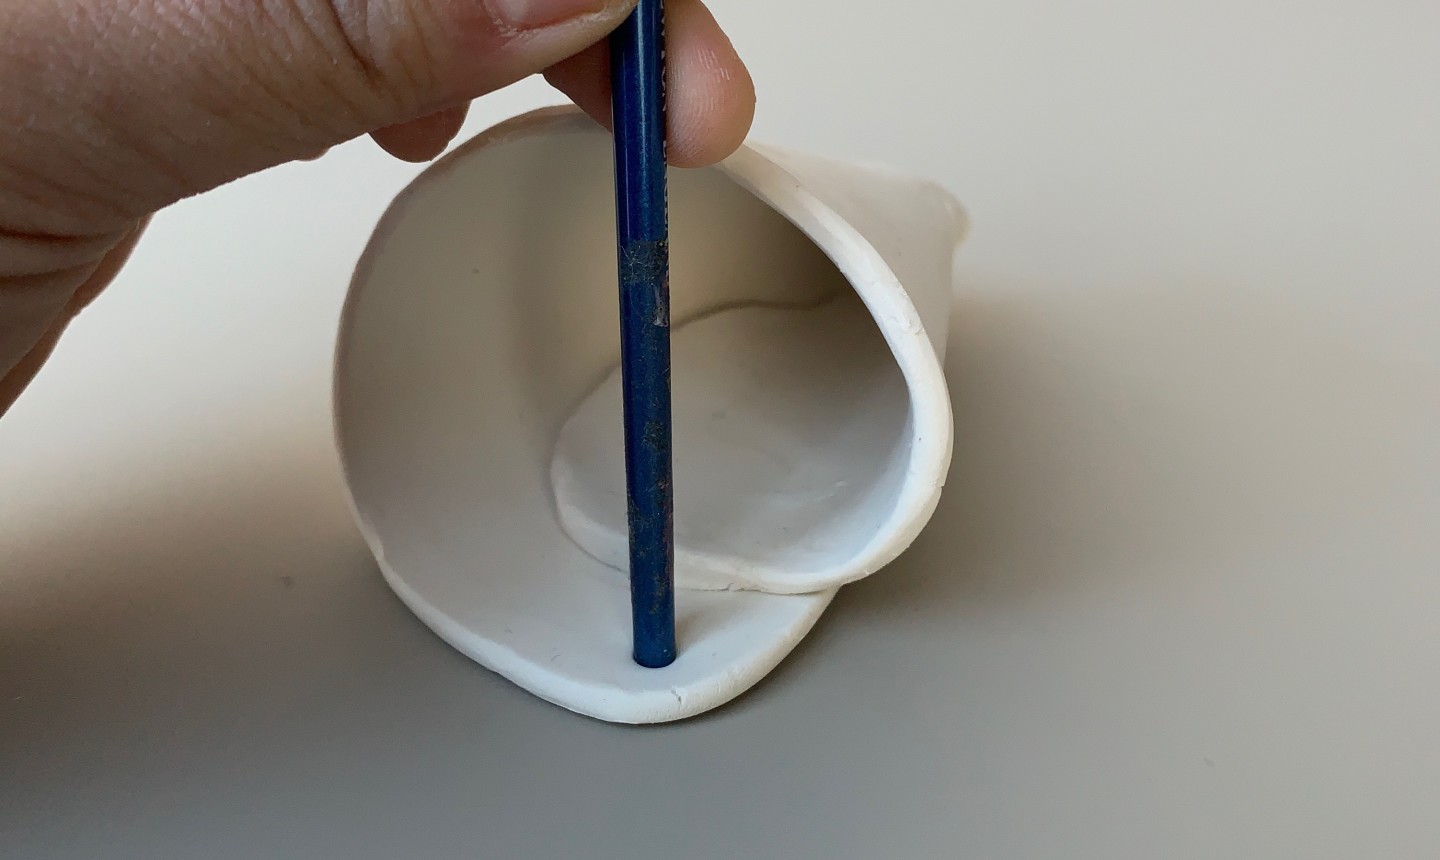 Pro Tip: Sure, your planter is technically going to be attached to the backing board with glue, BUT that doesn’t mean you can’t add in a nail for a more industrial look. If you’re pro nail, poke a hole in the top of your planter now, using the end of paint brush, an old knitting needle or whatever you have on hand.
3. Throw It in the Oven
Don’t actually throw your planter. Place it on a baking sheet and gently stuff your planter with crumpled-up tin foil (this will prevent the cone from collapsing on itself while it bakes). Follow the manufacturer’s directions for baking your clay.4. Attach the Cone
Once your cone is baked and cooled, it’s time to get it on that board. Glue your cone into place (remember to pay attention to which end has the hanging hook — an upside-down planter isn’t really a planter…) and let the glue cure.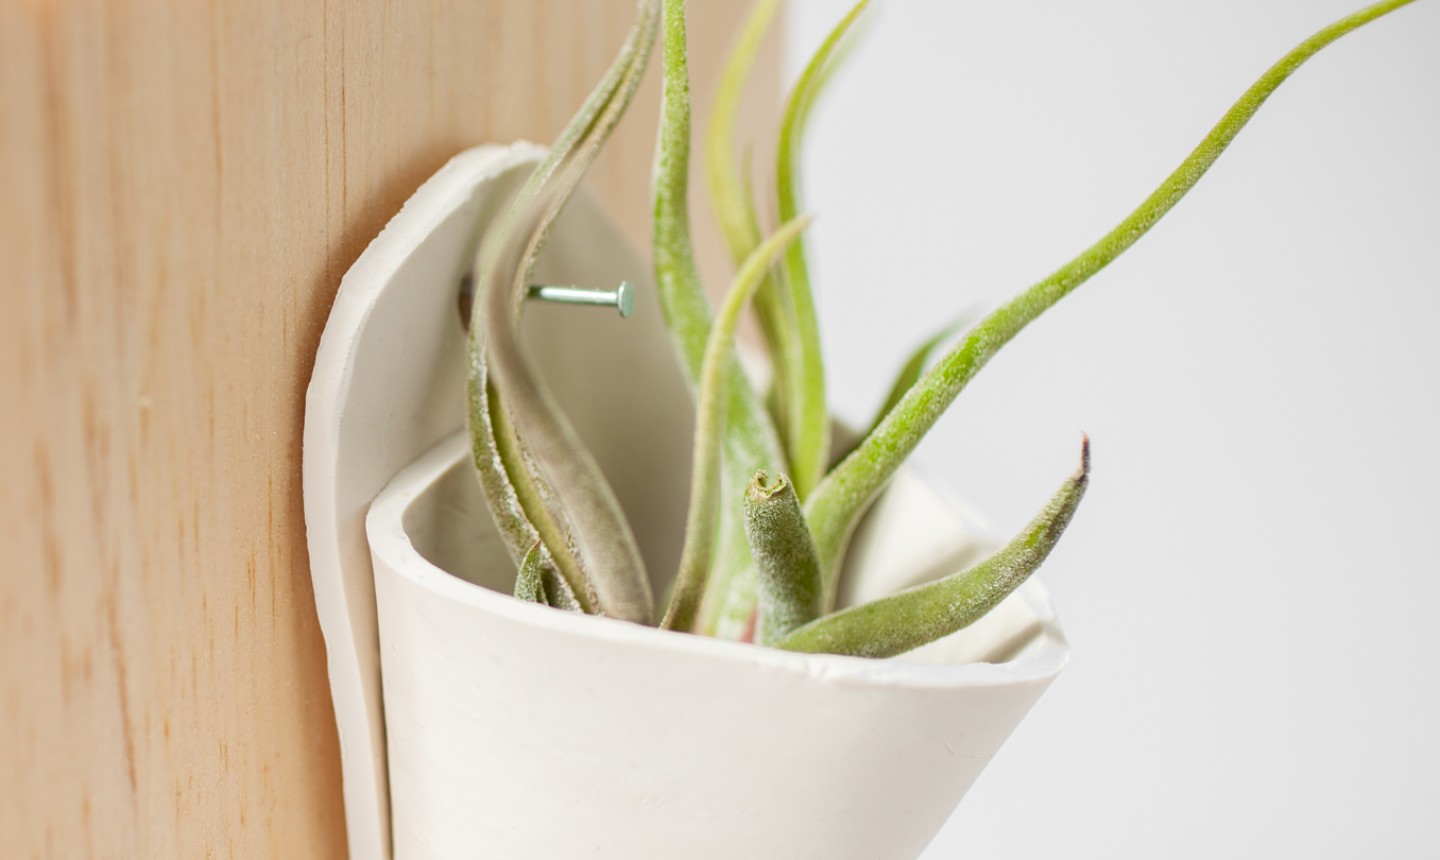 If you’re on Team Decorative Nail, carefully (carefully!) hammer your nail in place.
Hang it on the wall, pop in a plant and admire your handiwork.
If you’re on Team Decorative Nail, carefully (carefully!) hammer your nail in place.
Hang it on the wall, pop in a plant and admire your handiwork.
Customize It!
 Now that you know how easy this project is, it’s time to start leveling up. Experiment with texturizing your clay: soles of shoes, cheesecloth, and forks all make great patterns.
Clay doesn’t have to be white, either. Try out different colors or paint your baked planter. So. Many. Options.
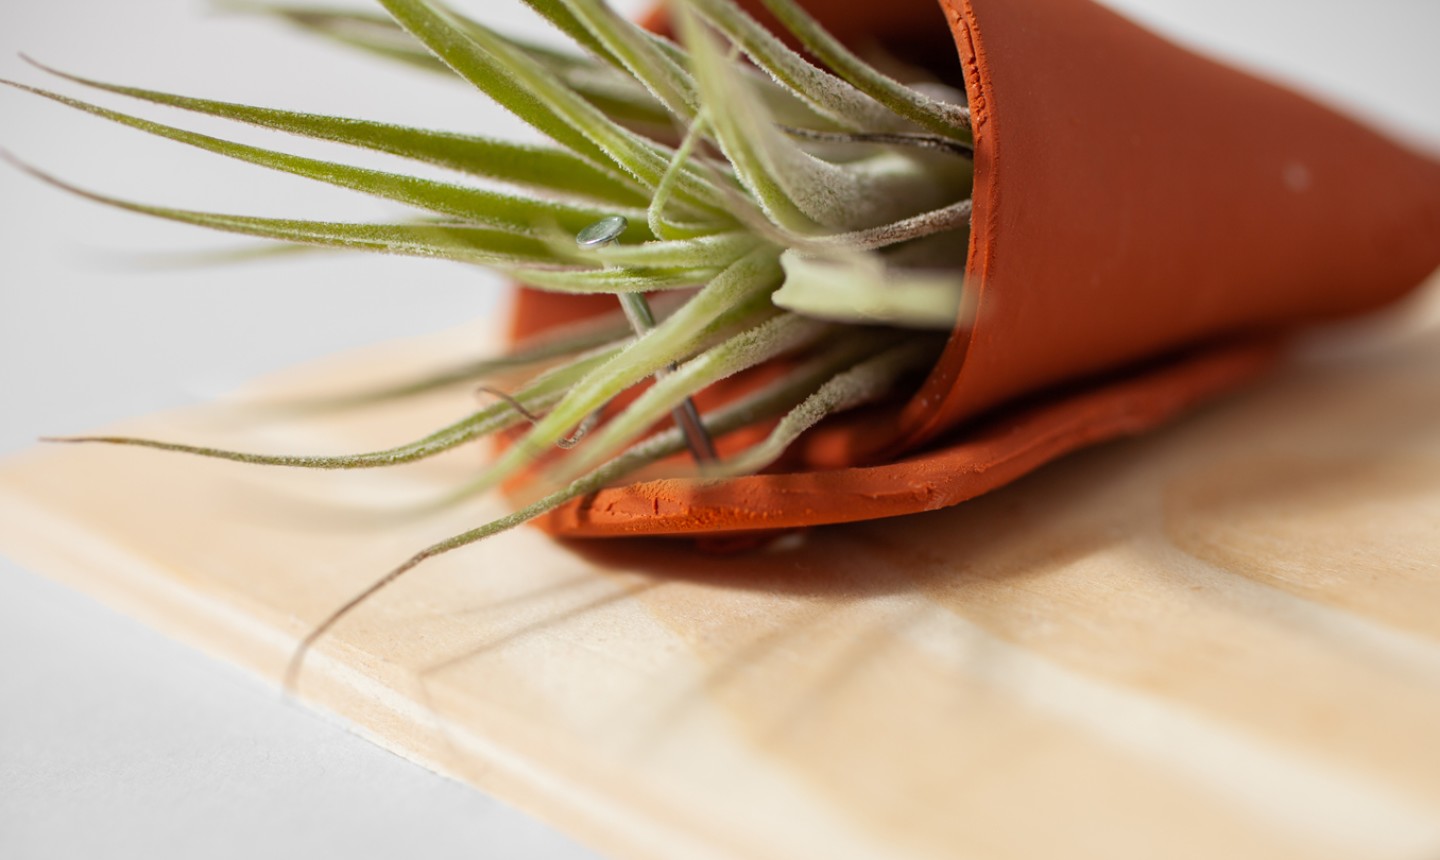
Ready to have your mind blown? You don’t even have to use clay. Metal or leather are equally hip substitutes.
Once you’ve caught the DIY planter bug, you won’t wanna quit. And the good news is, you don’t have to — we’ve got all the ideas right here!

With a few modifications, these instructions could make a container for succulents. What do you think?
This looks so cool!
Okay, this looks like a good one to do with my daughter. It seems simple enough to get us started on doing more projects together.
It looks easy</strong>
This will be great to work with grandchildren.
Thanks, great idea for a rainy day activity.