Gift cards are great, but (let’s face it) they can feel a little impersonal. So make them more meaningful this holiday with a DIY gift card holder!
Good to Know: If you’re yarn-savvy, try knitting a gift card holder.
Paper Gift Card Holder
Level: Easy
What You Need
Instructions
1. Cut the Pieces
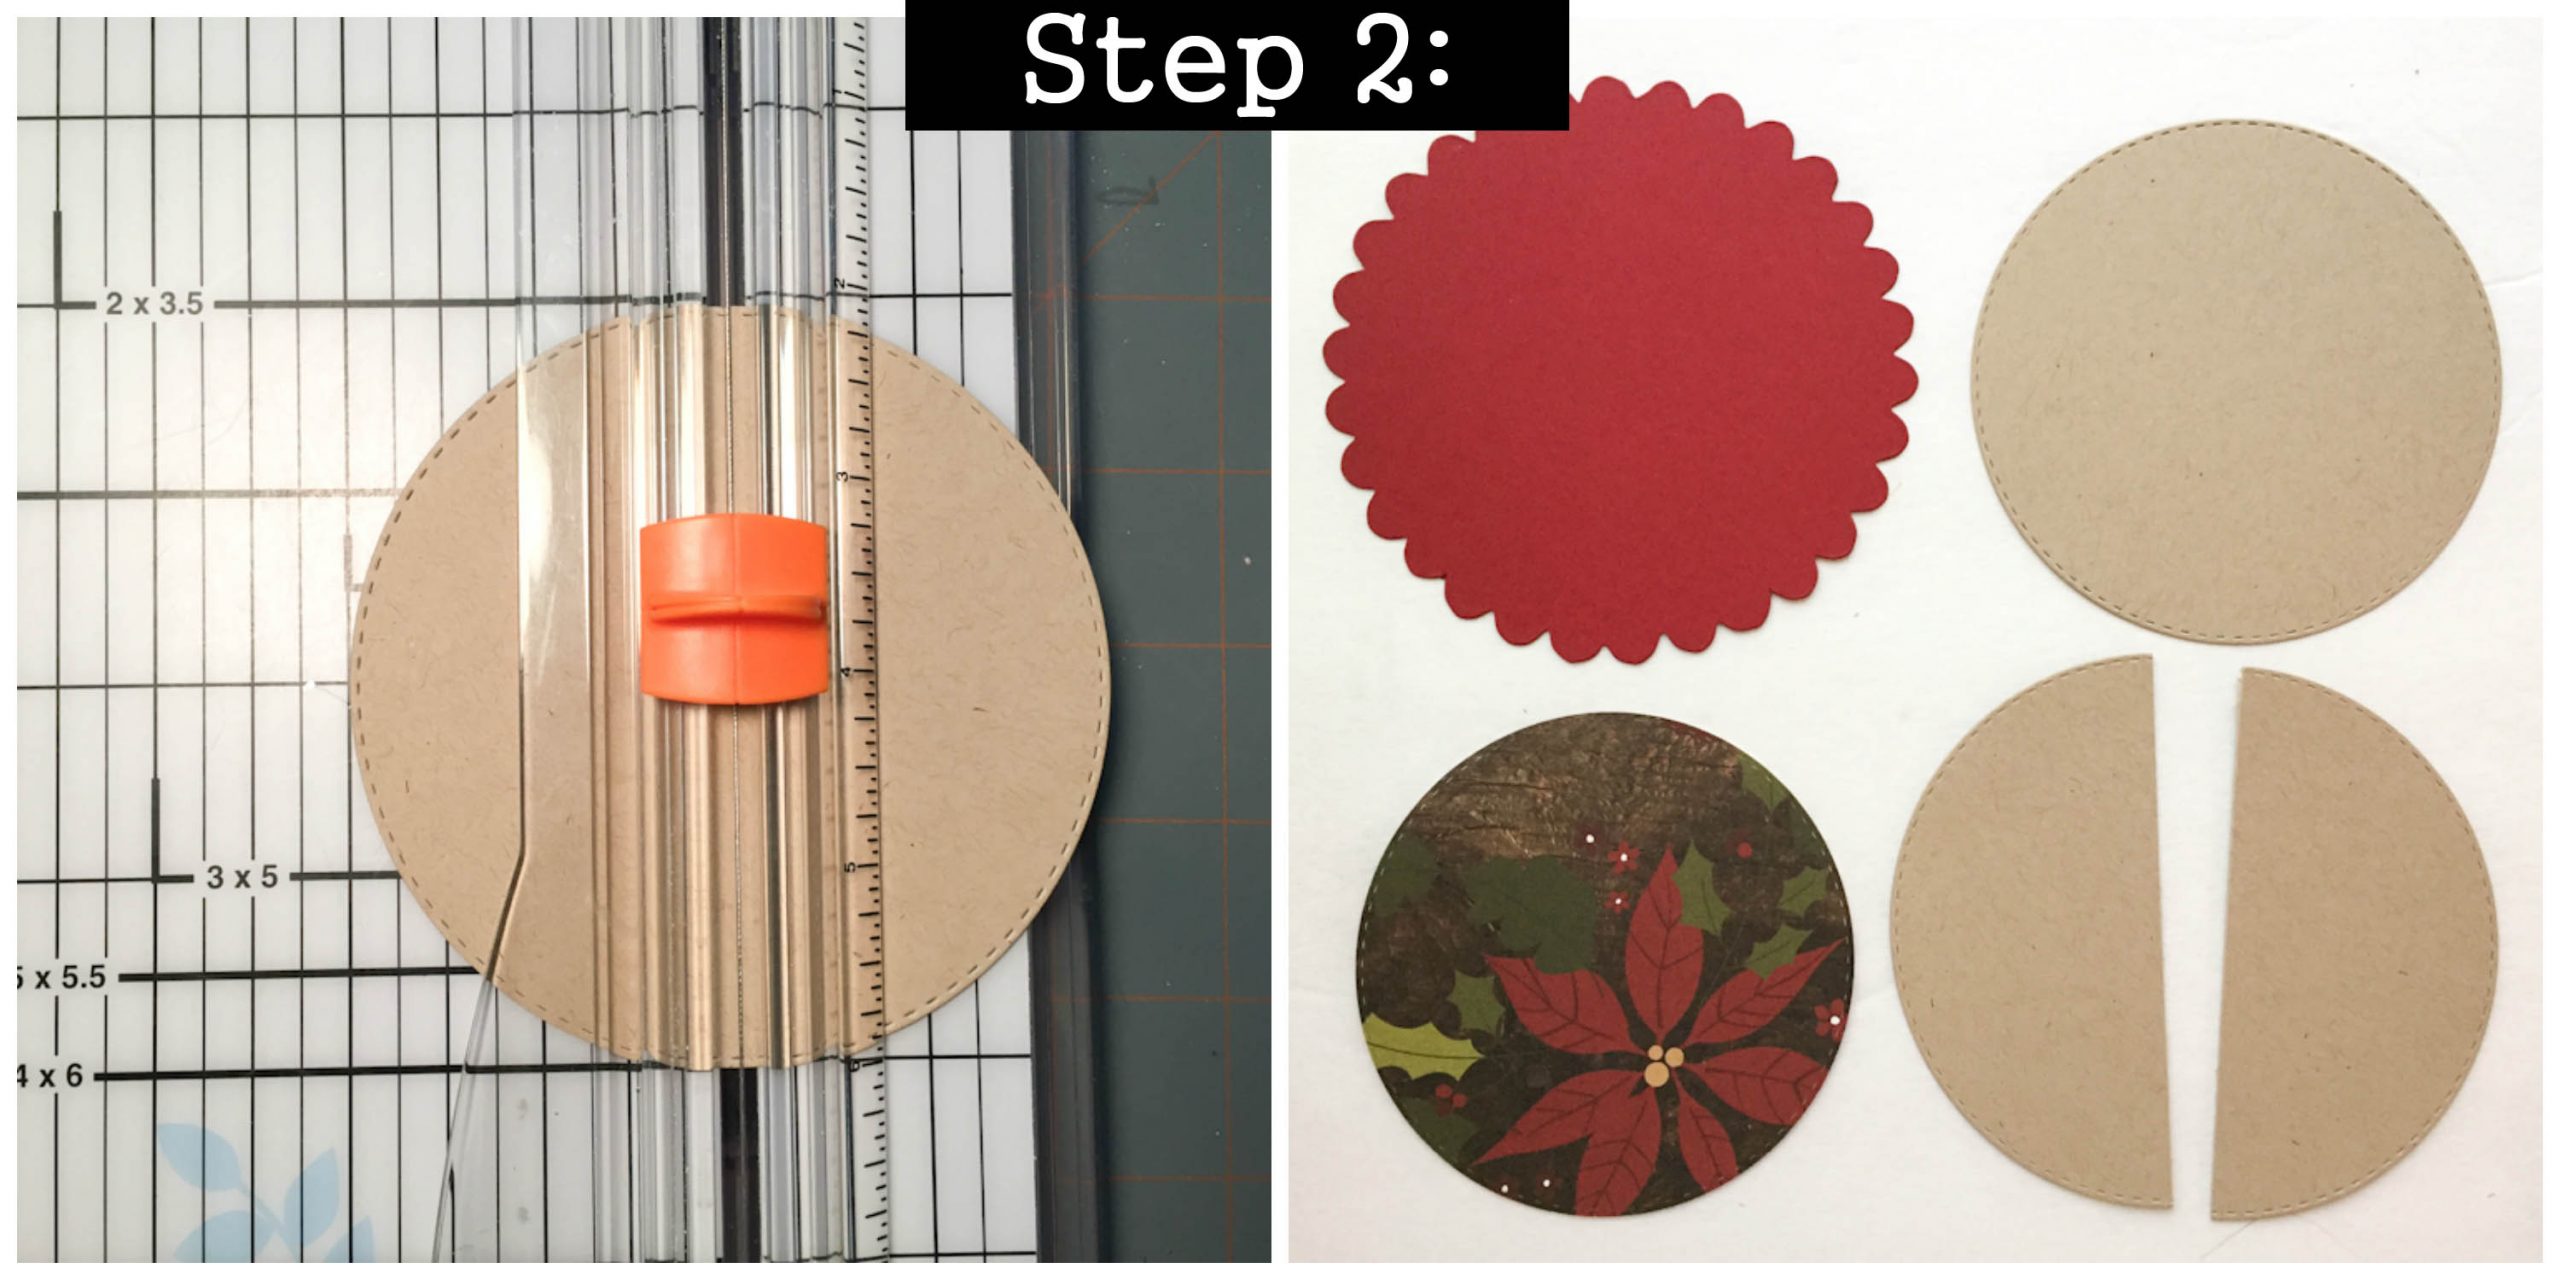
Use a manual die cut machine with circle die, or an electronic machine to cut the following pieces:
If you do not own a die cut machine, trace around household objects such as a cup or plate with a pencil. Use your scissors to trim out the circles by hand.
2. Cut in Half

Use your paper trimmer to cut the 4″ card stock circle in half.
3. Add the Ribbon
Trim a piece of ribbon approximately 12″ long. Loop the ribbon around and tape to scallop circle shape.
4. Put It Together

Use adhesive to attach your circles to the top of the scallop circle. Adhere the 4¼” card stock circle first, then the 4″ patterned paper circle. Embellish with glitter pen or other stickers and greetings as desired.
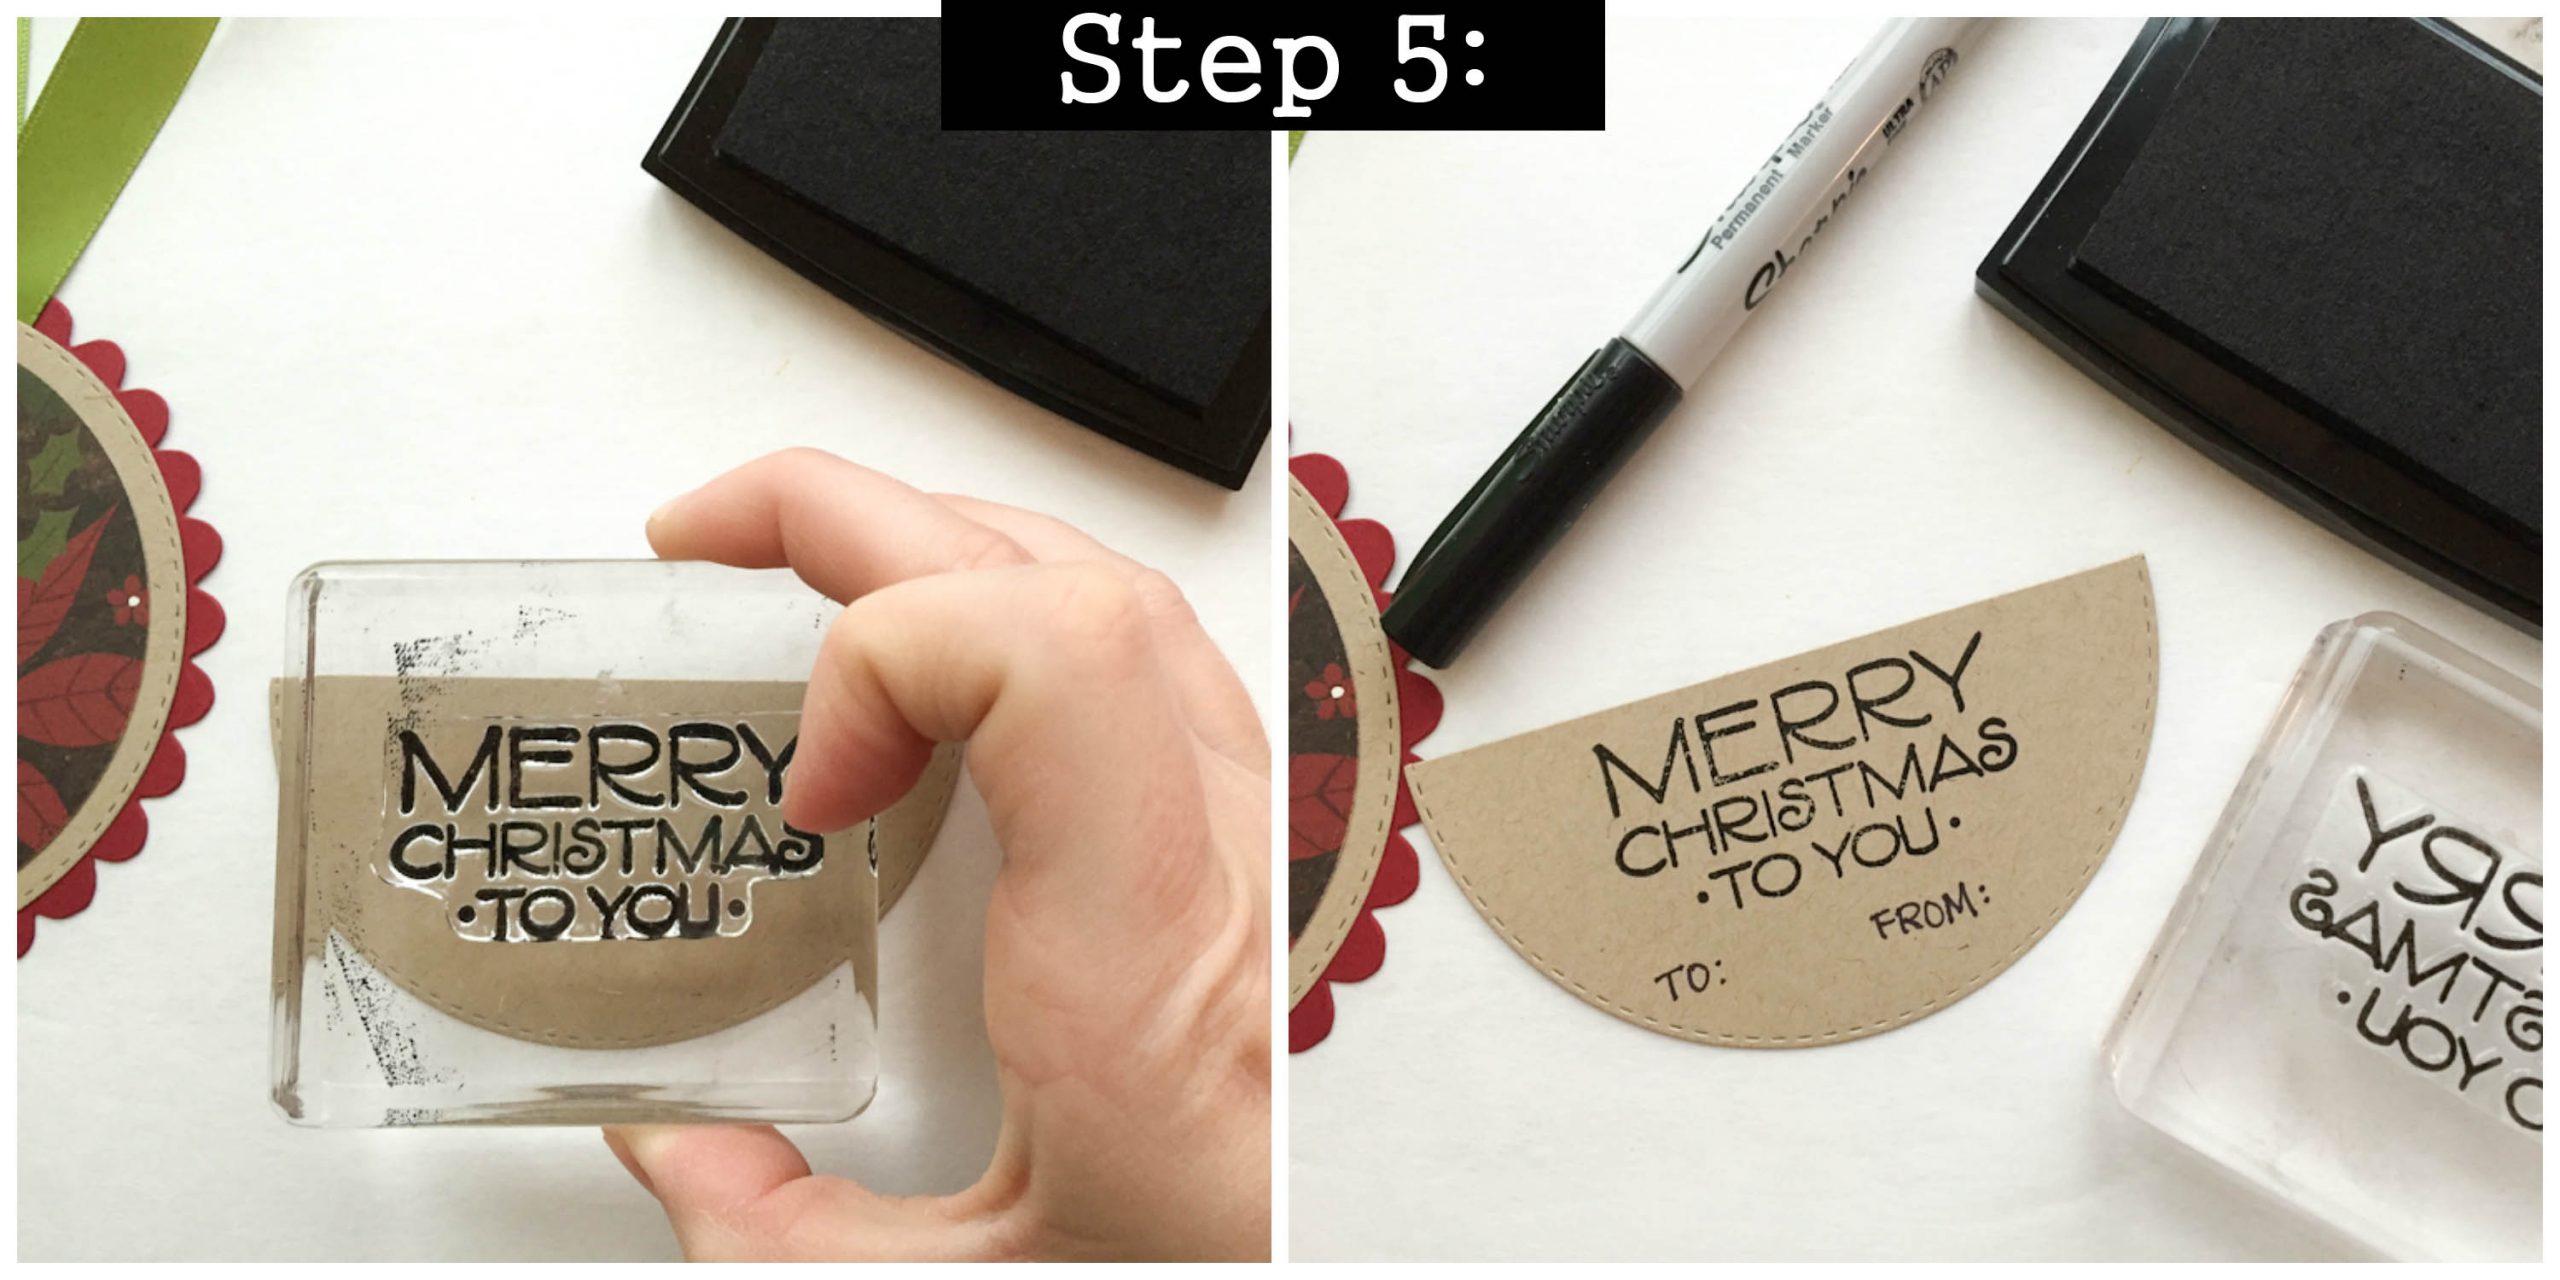
5. Decorate

Use stamps or markers to decorate the half circle of card stock that will become your gift card pocket. This is a great place to write a personal note or stamp your favorite greeting.
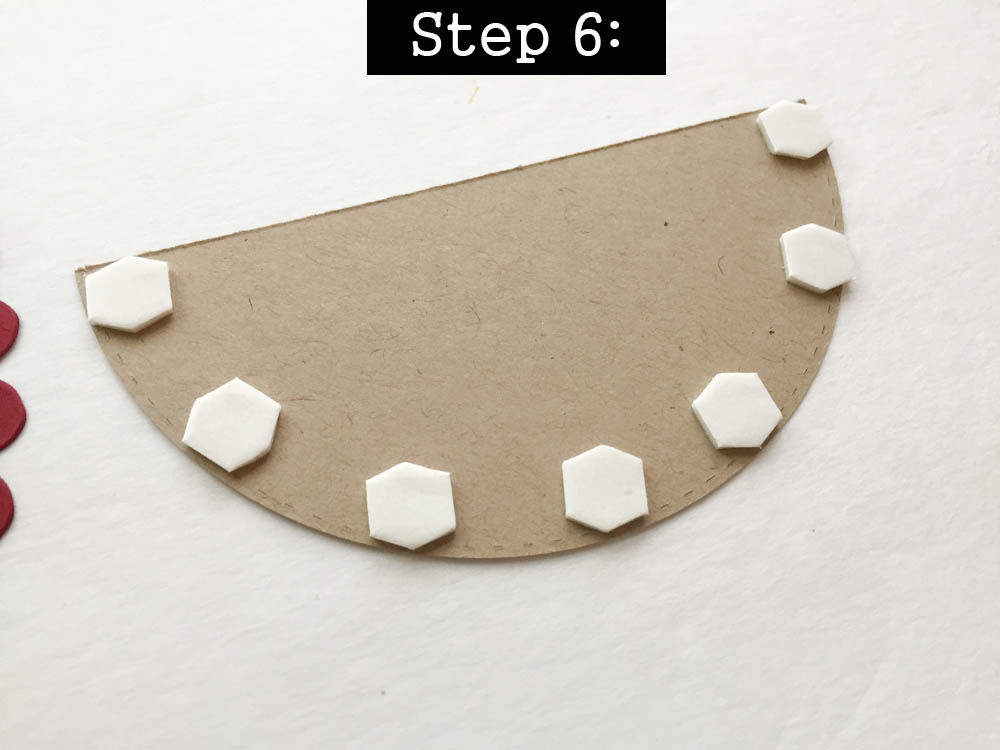
6. Make the Pocket

Line the outermost edge of the opposite side of the half circle with foam square adhesive. Be sure to keep the foam on the very edge, so there will be room to slide a gift card that won’t slide out.

Remove backing from foam adhesives and adhere to the back of your ornament. Slide the gift card into the pocket and hang on your Christmas tree for the special recipient!
Share tips, start a discussion or ask other students a question. If you have a question for an expert, please click here.
Already a member? Sign in
No Responses to “Make Your Present More Personal With a DIY Gift Card Holder”