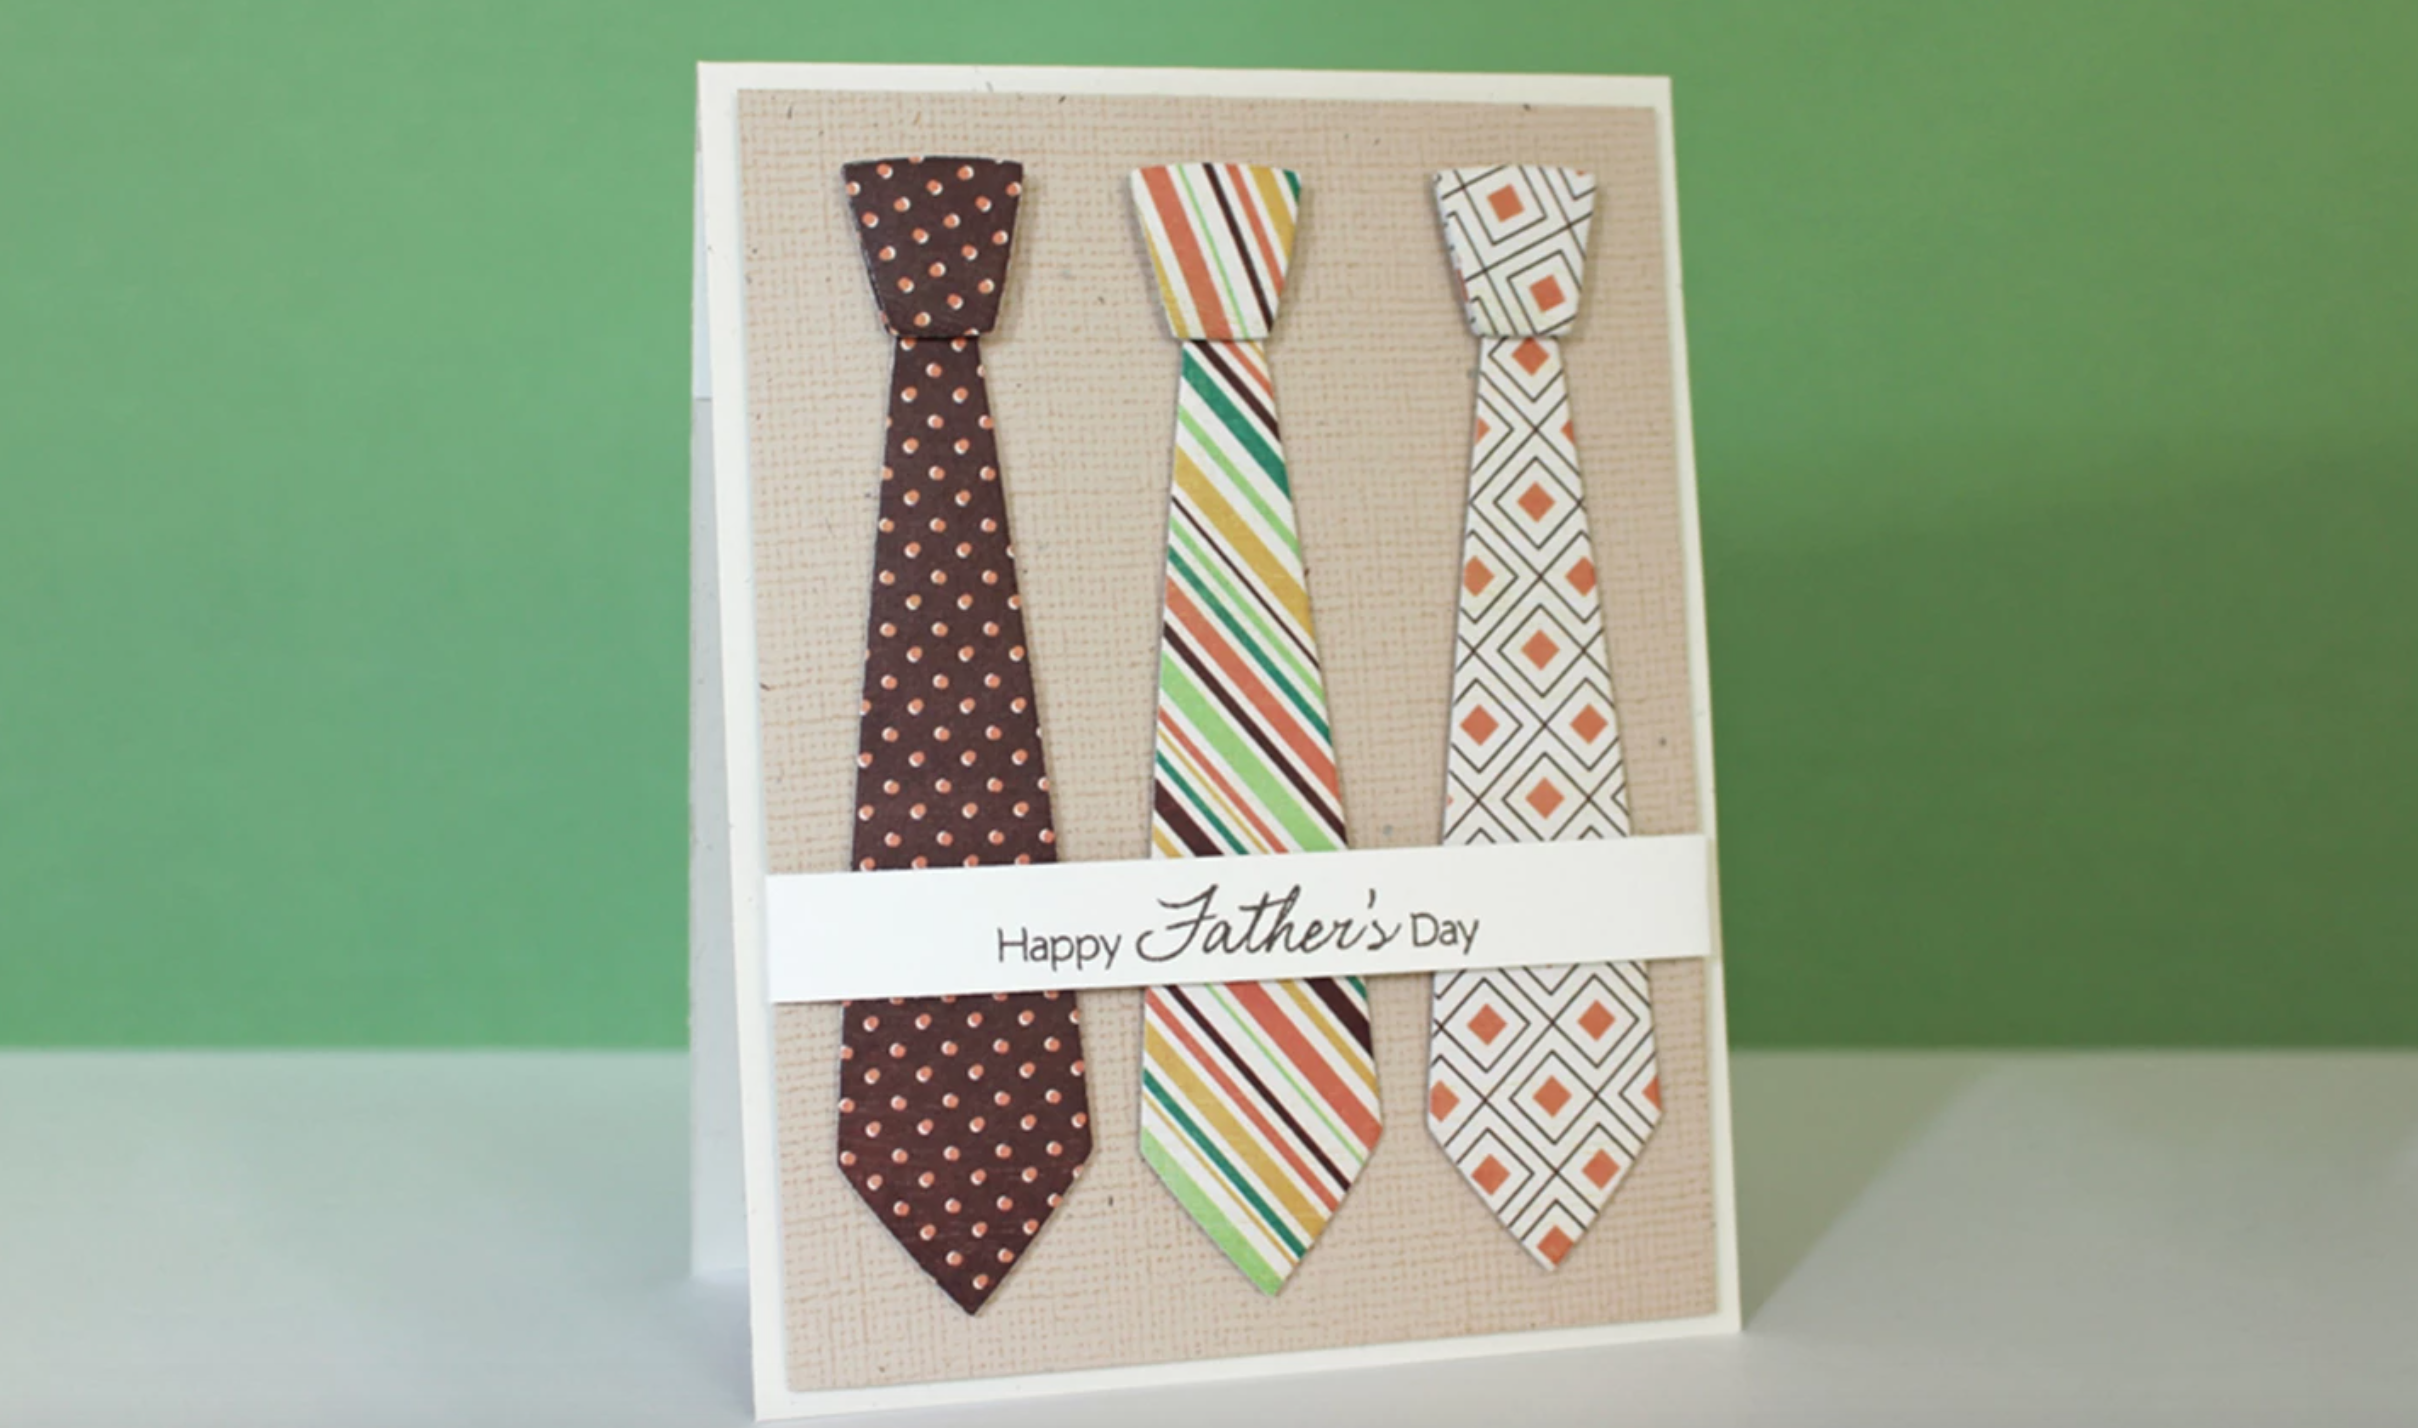
Skip the store-bought card this year and give Dad something he’ll really love — a card made by you. Gift this one alongside a homemade tie to really stay on theme!
Father’s Day Tie Card
Level: Easy
What You Need
Instructions
1. Cut the Ties

Cut out your tie pieces. We made four ties in different colors and patterns of paper, which will be placed on the card front. We also cut out three ties (for the inside of the card) and cut the bottoms off.
Good to Know: If you don’t have a die cut machine , you can always create the ties by hand; simply make and trace a template for each.
2. Add Ink
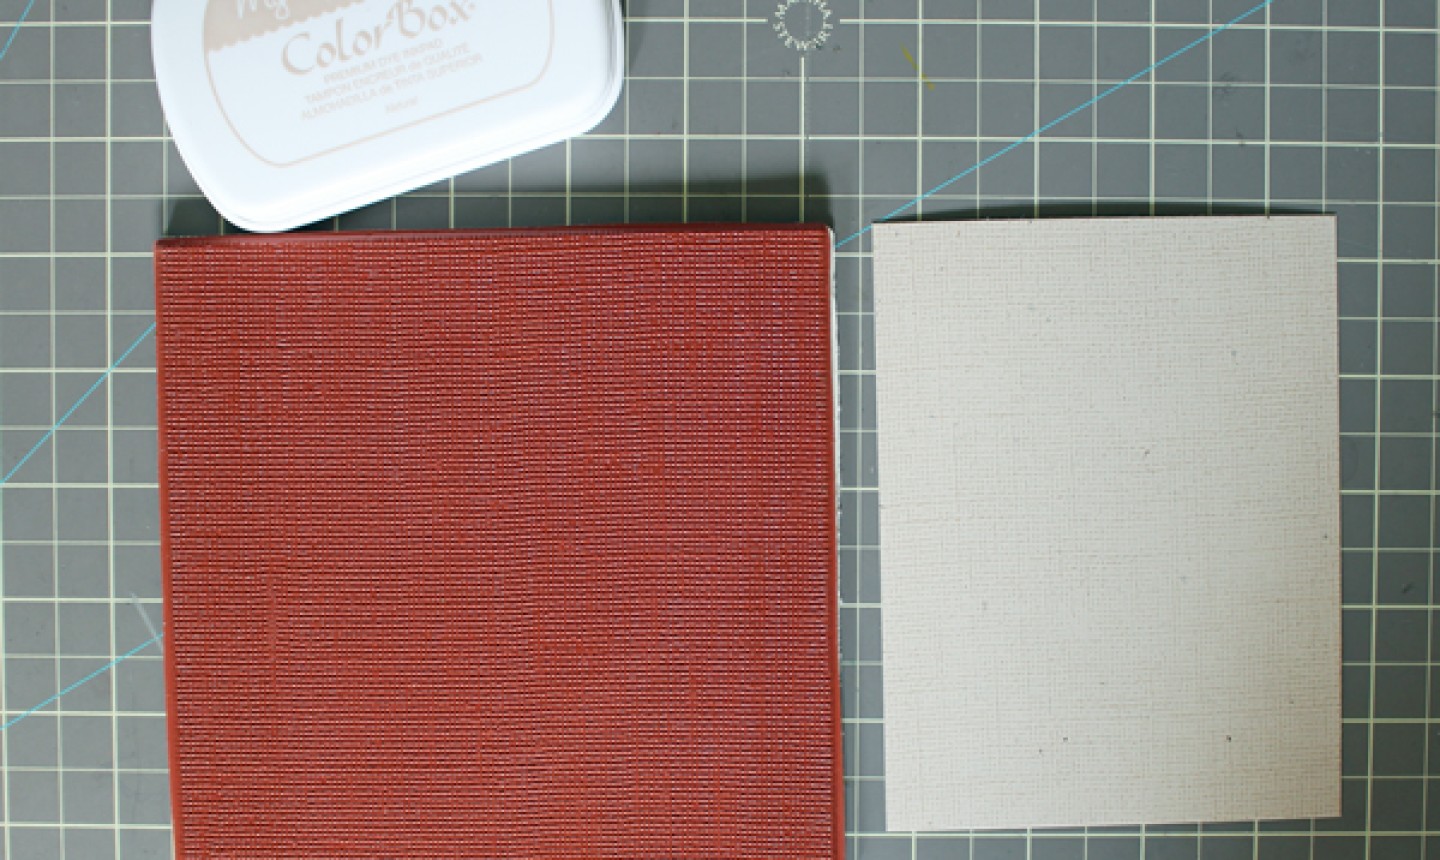
Trim your cardstock to be slightly smaller than your card. Lightly stamp it with the linen background stamp and natural dye ink to add color and texture.
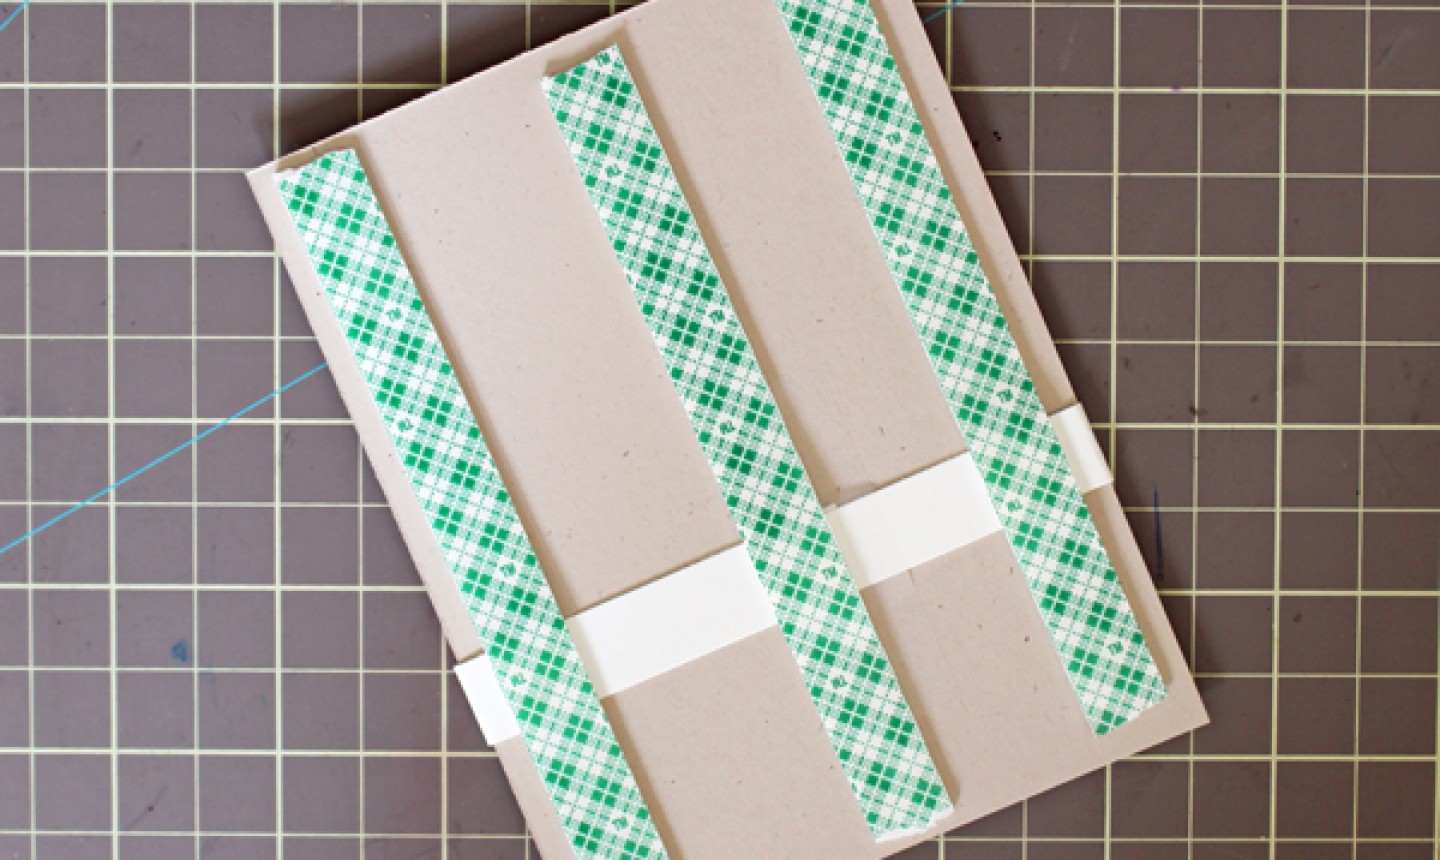
3. Tape the Ties
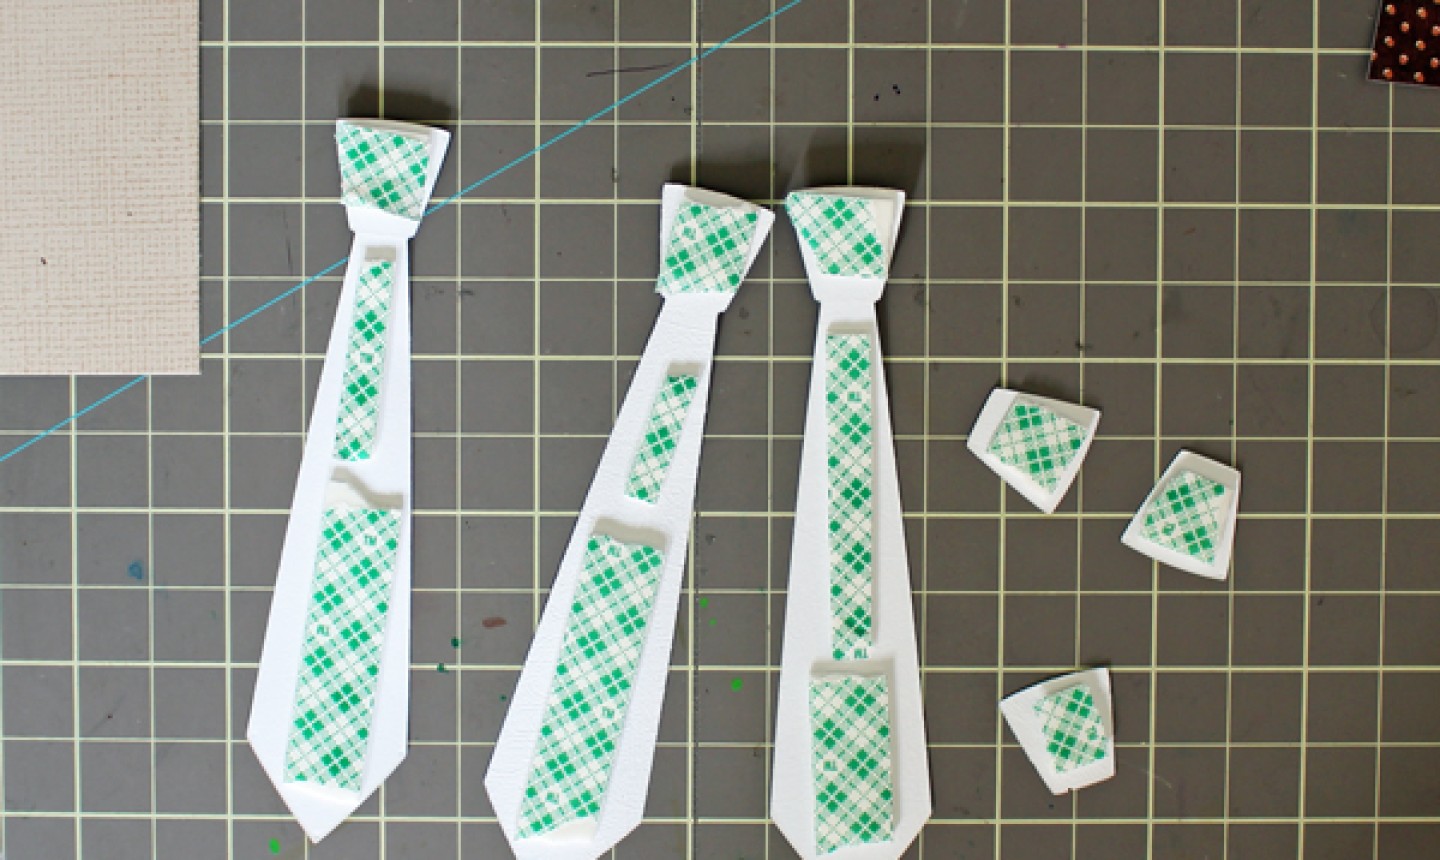
Add foam tape to the backs of your ties and knot pieces. Adhere them to the front of your cardstock piece.
Pro Tip: If you want to keep your card flat for mailing, use double-sided tape instead.
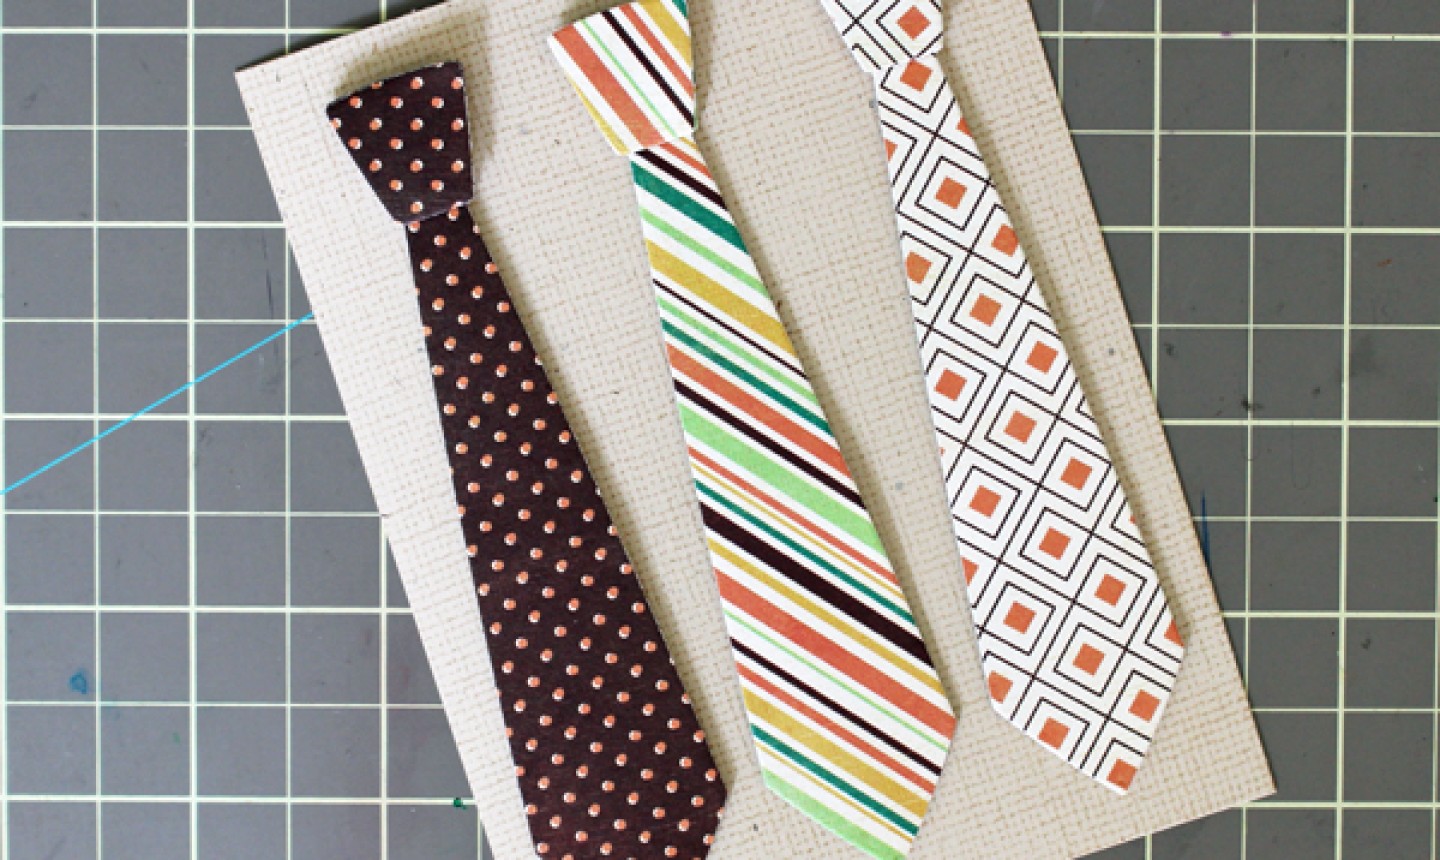
Place the tie pieces onto the cardstock, then secure the knots on top.
4. Stamp a Sentiment
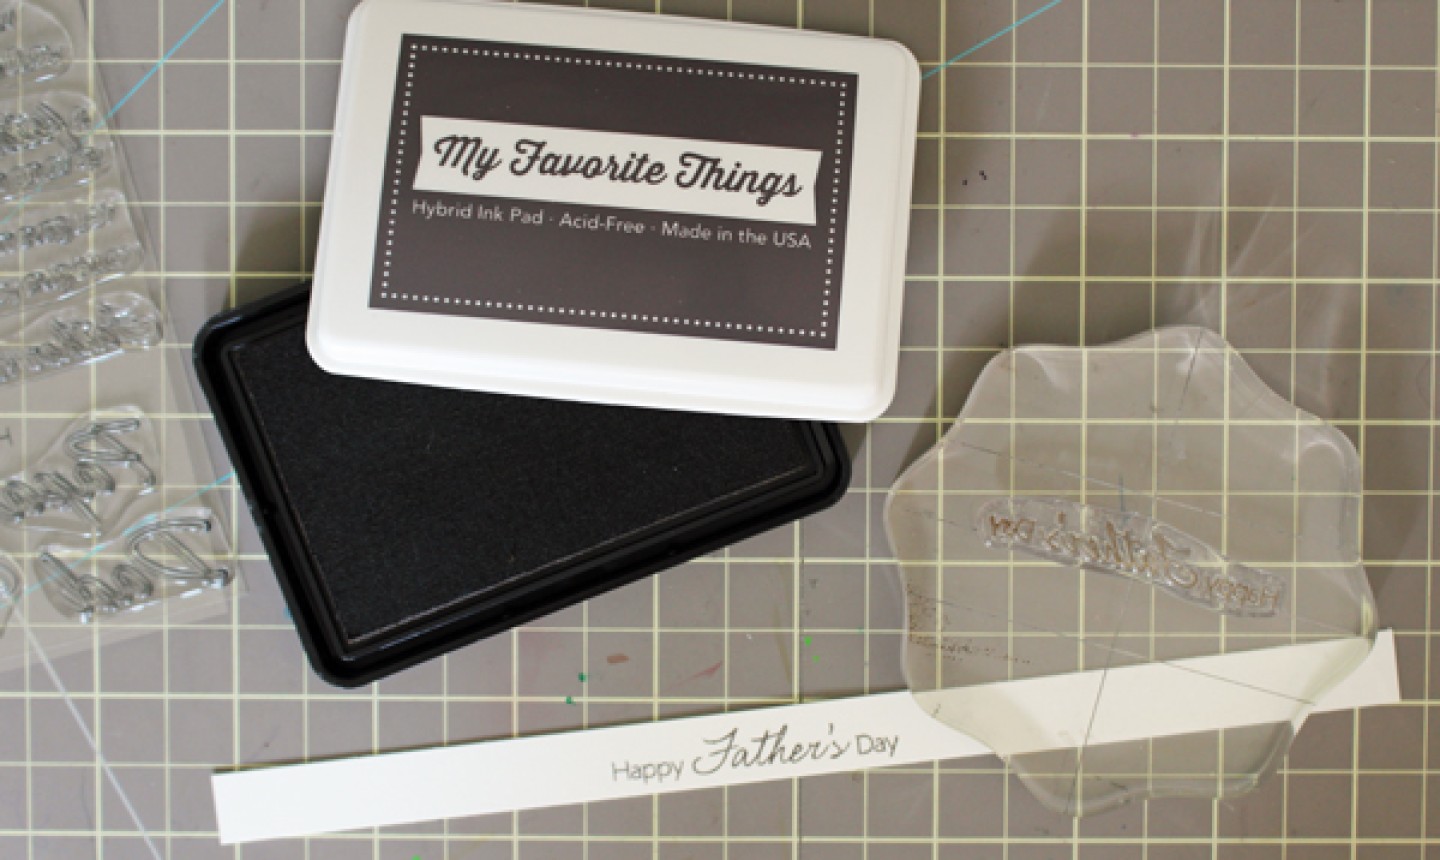
Cut a strip of white cardstock and stamp a Father’s Day sentiment in the center. We used brown ink, but you can use black or any color that complements your ties.
Wrap the strip around the cardstock piece with the ties and secure it in place with foam tape.
5. Tape the Panel
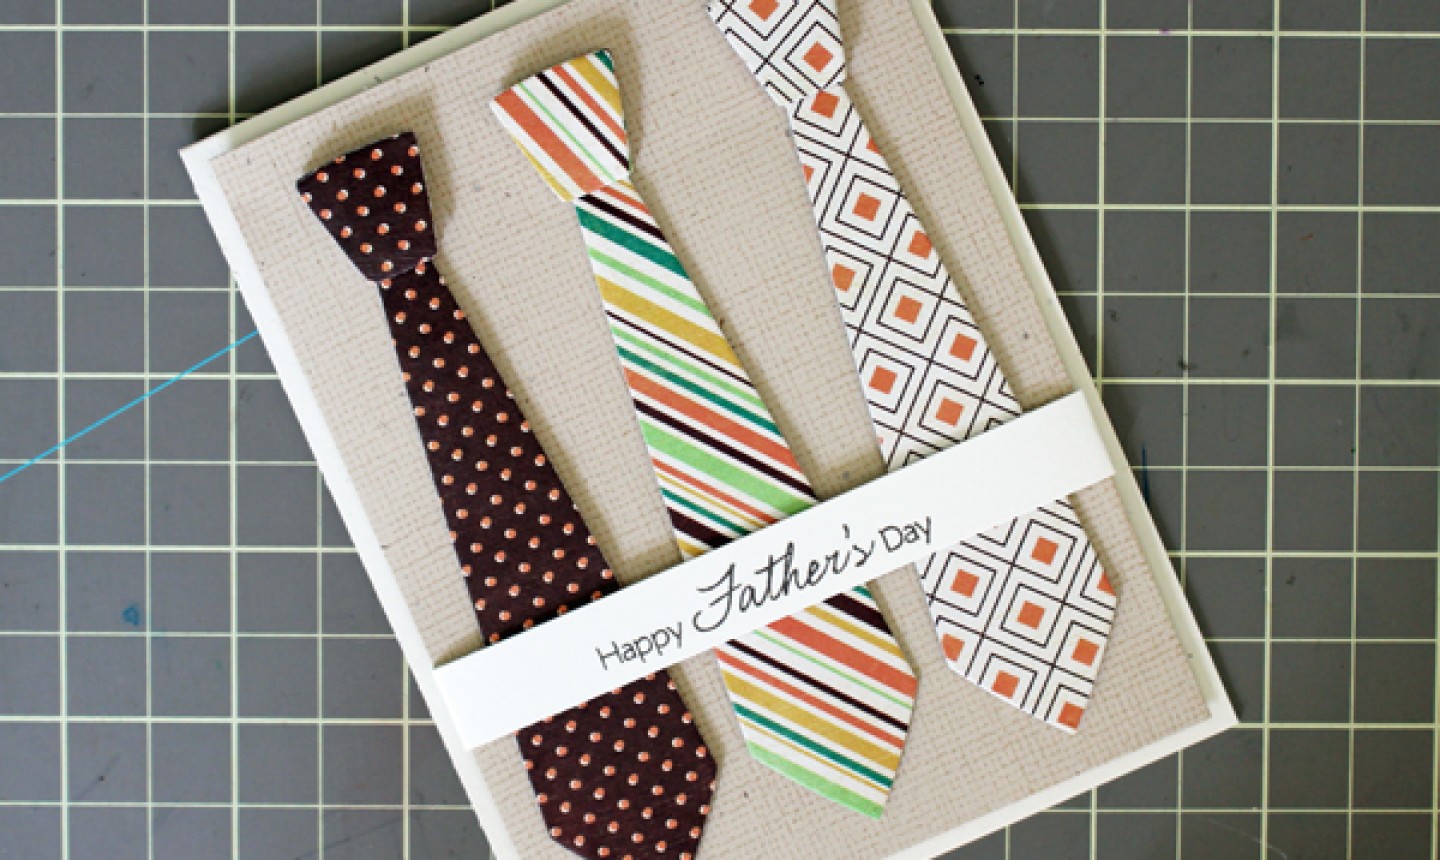
Tape the ties panel to the front of your card. Make sure it’s centered, so the a small white border is even on all sides.
6. Finish the Card
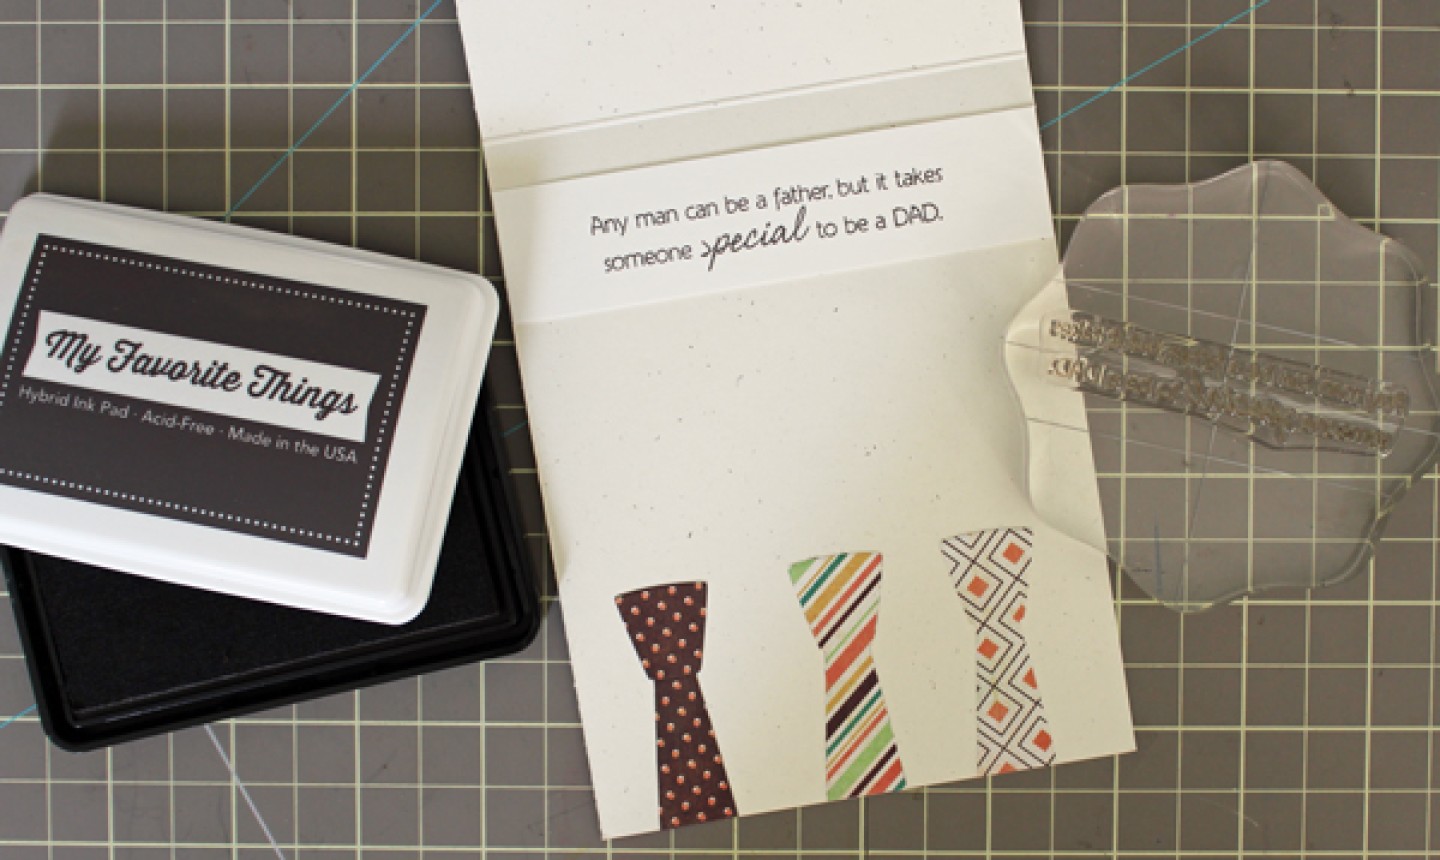
Use double-sided tape to adhere the three partial die cut ties to the inside of your card, as pictured above. Finish the card however you’d like — we stamped another sentiment, but you can handwrite a note or jazz it up with a touch of calligraphy.
Your Father’s Day card is ready to gift!

Share tips, start a discussion or ask other students a question. If you have a question for an expert, please click here.
Already a member? Sign in
No Responses to “This DIY Father's Day Card Is a Tie-riffic Weekend Project”