
Christmas is fast approaching, which means it's time to kick your holiday baking into full gear. And what's the holidays without Christmas cookies? These simple sugar cookies are cute and fun to decorate, so you can make a whole forest in a flash.
Decorated Tree Cookies
Level: Easy
What You Need
Instructions
1. Pipe the Outlines
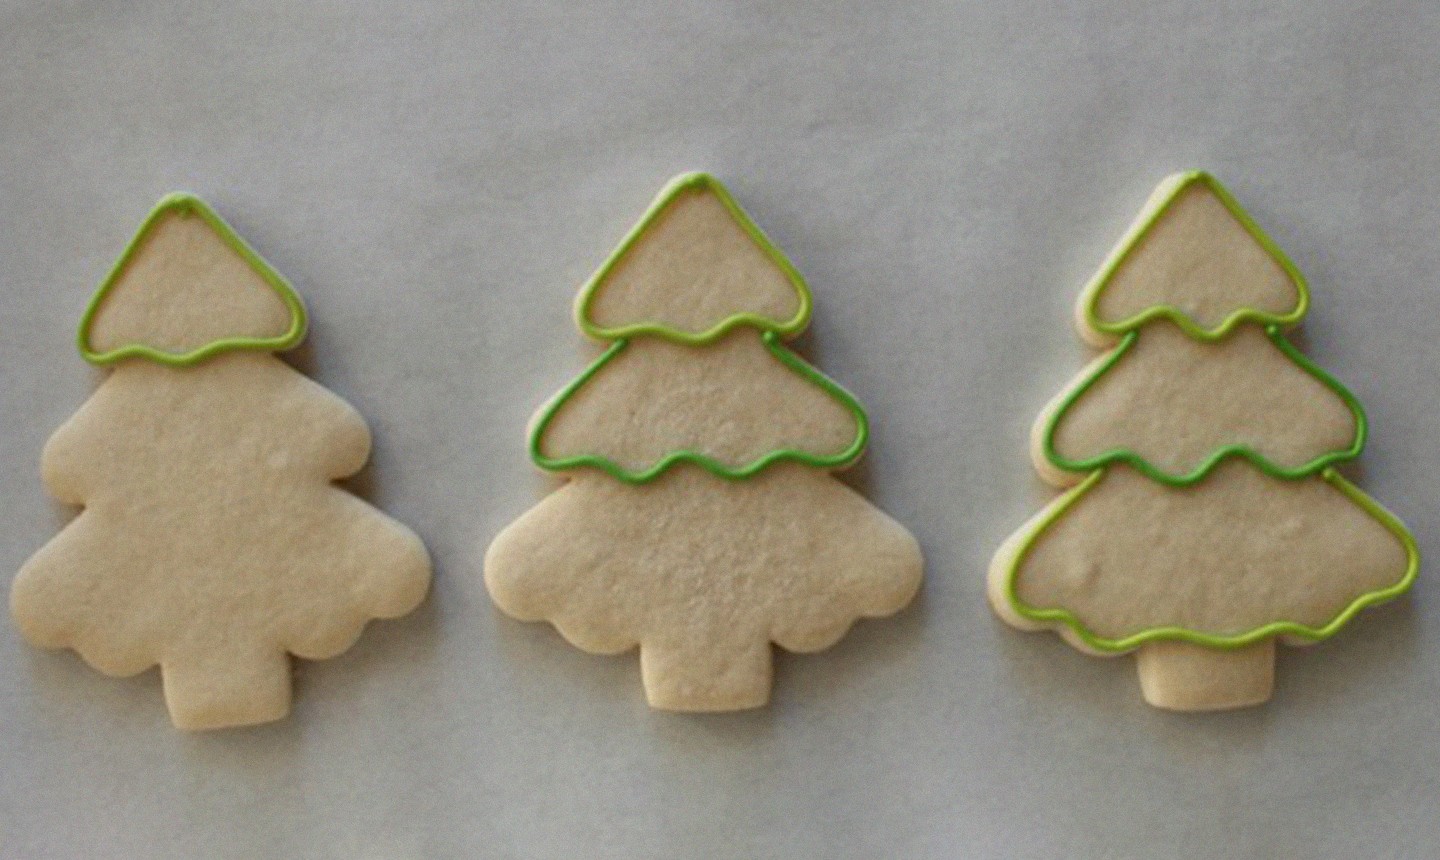
Fill your green royal icings into piping bags fitted with #2 piping tips. Pipe the outlines of each cookie, defining different sections of color.
2. Flood
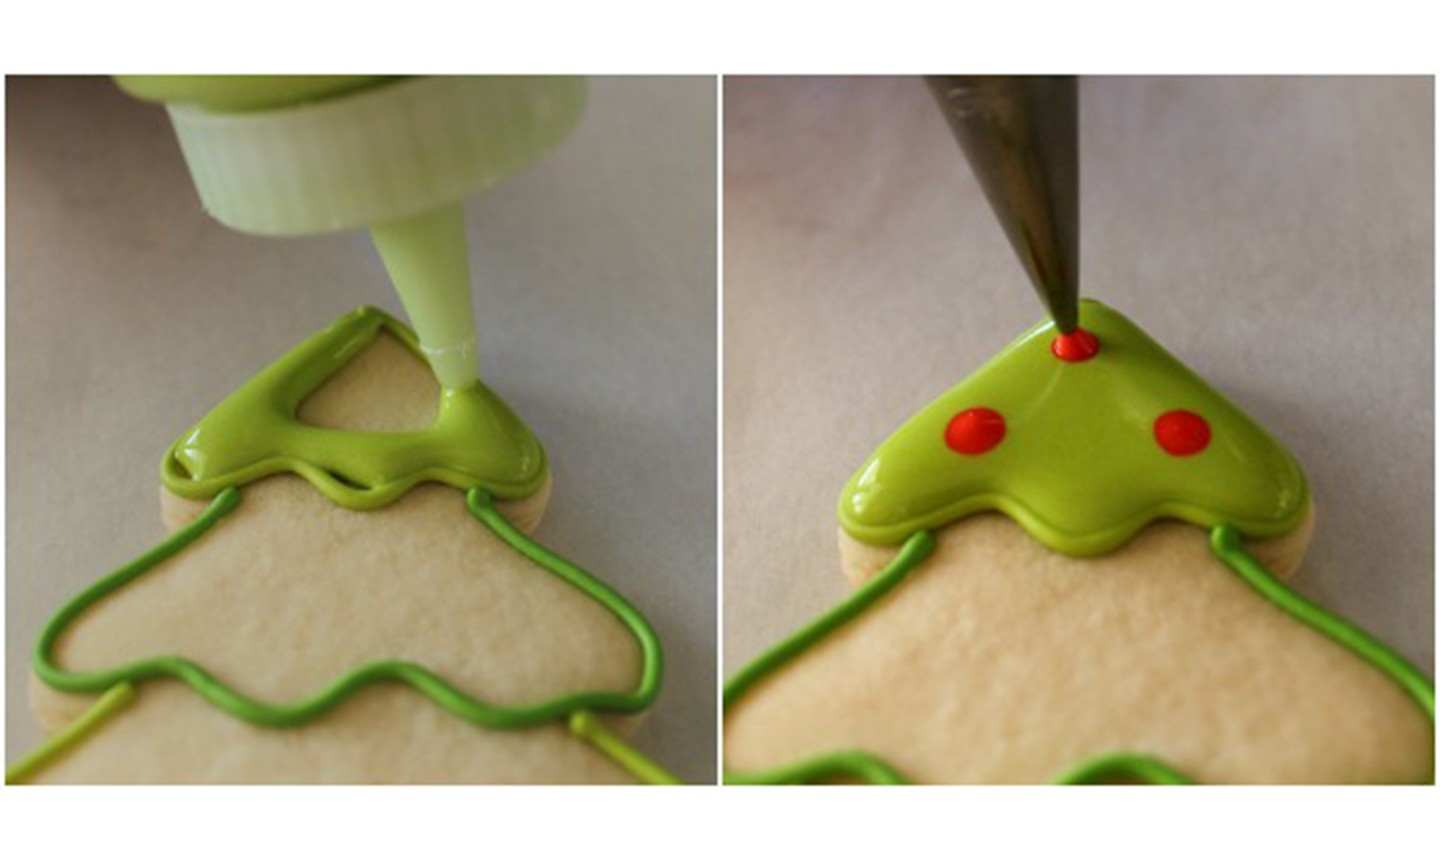
Fill icing bottles with flood consistency green icing. Fill another piping bag fitted with a #2 tip with flood consistency red icing.
Flood the top portion of the tree, then quickly drop in dots of red flood icing while the green is still wet. These will be your tree's ornaments.
Good to Know: It's important to add the dots soon after flooding so that they will be flush with the green layer.
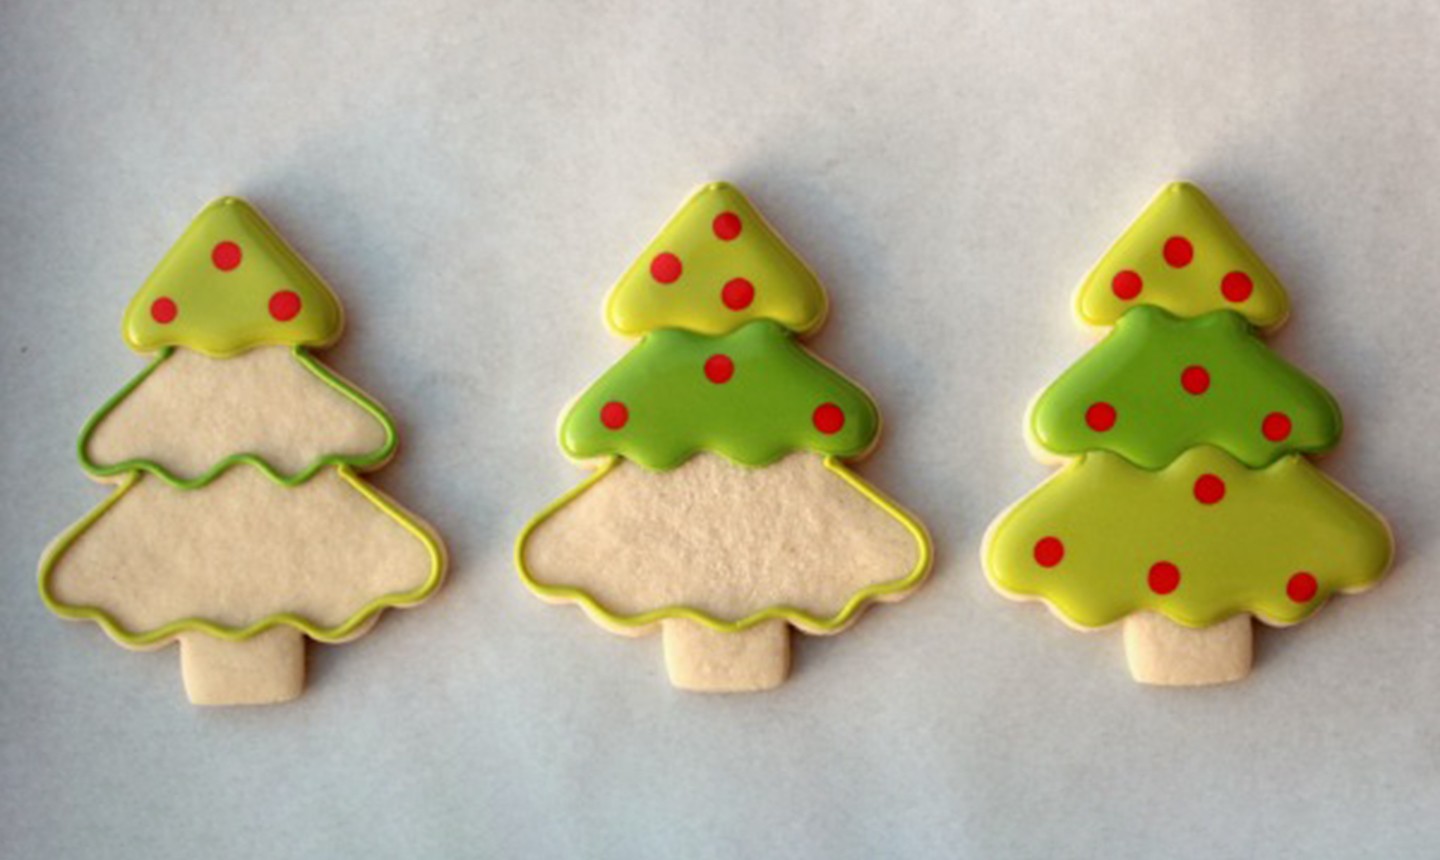
Repeat for the remaining sections of each cookie. Wait at least 10 minutes between flooding each section so the colors don't run together.
3. Flood the Trunk
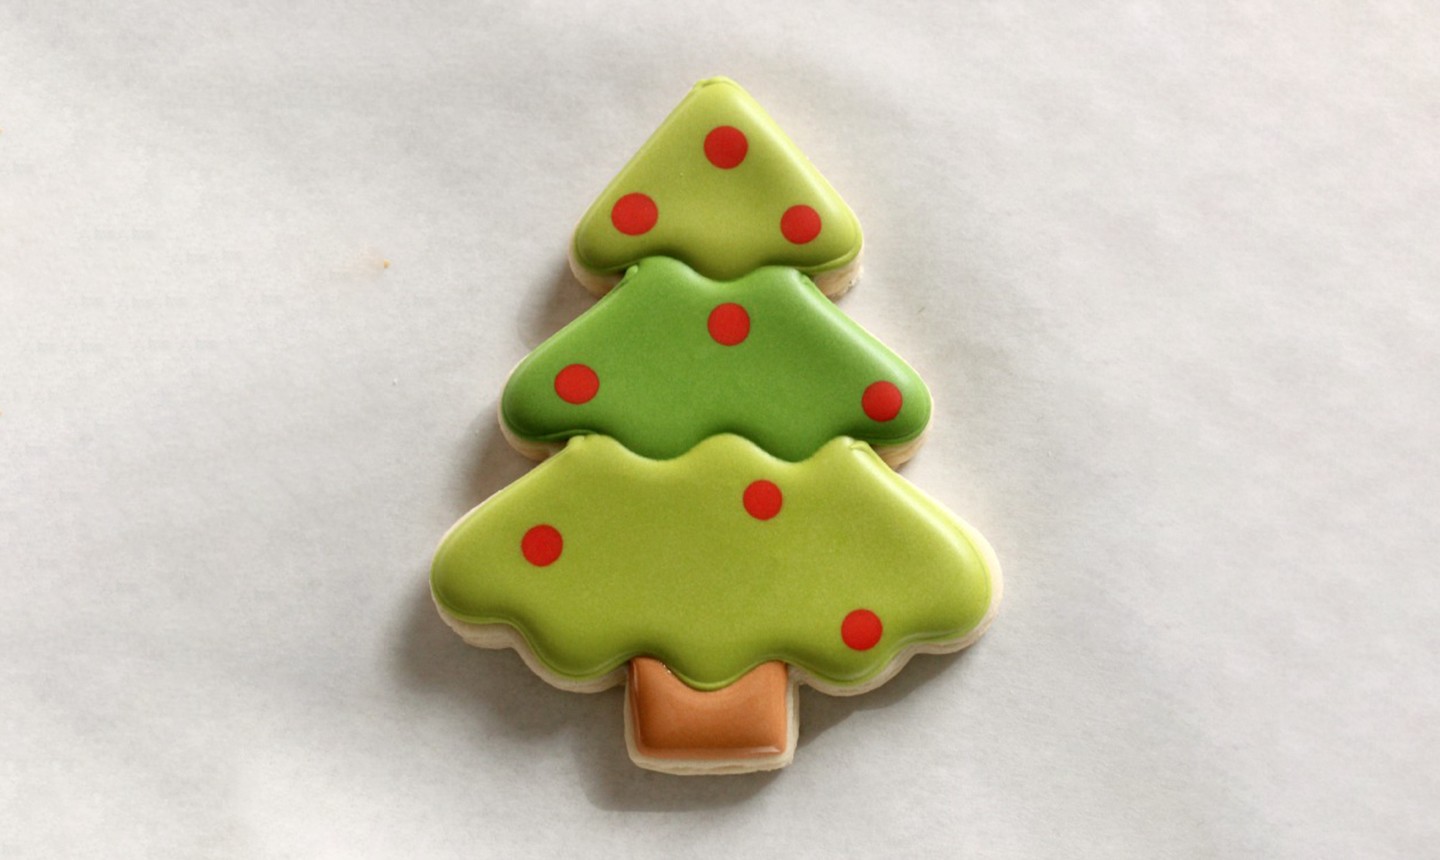
With brown flood consistency icing in a piping bag, fill in the trunk. Set the cookie aside to dry. This can take anywhere between four and 24 hours, depending on the humidity of your climate.
4. Add the Star
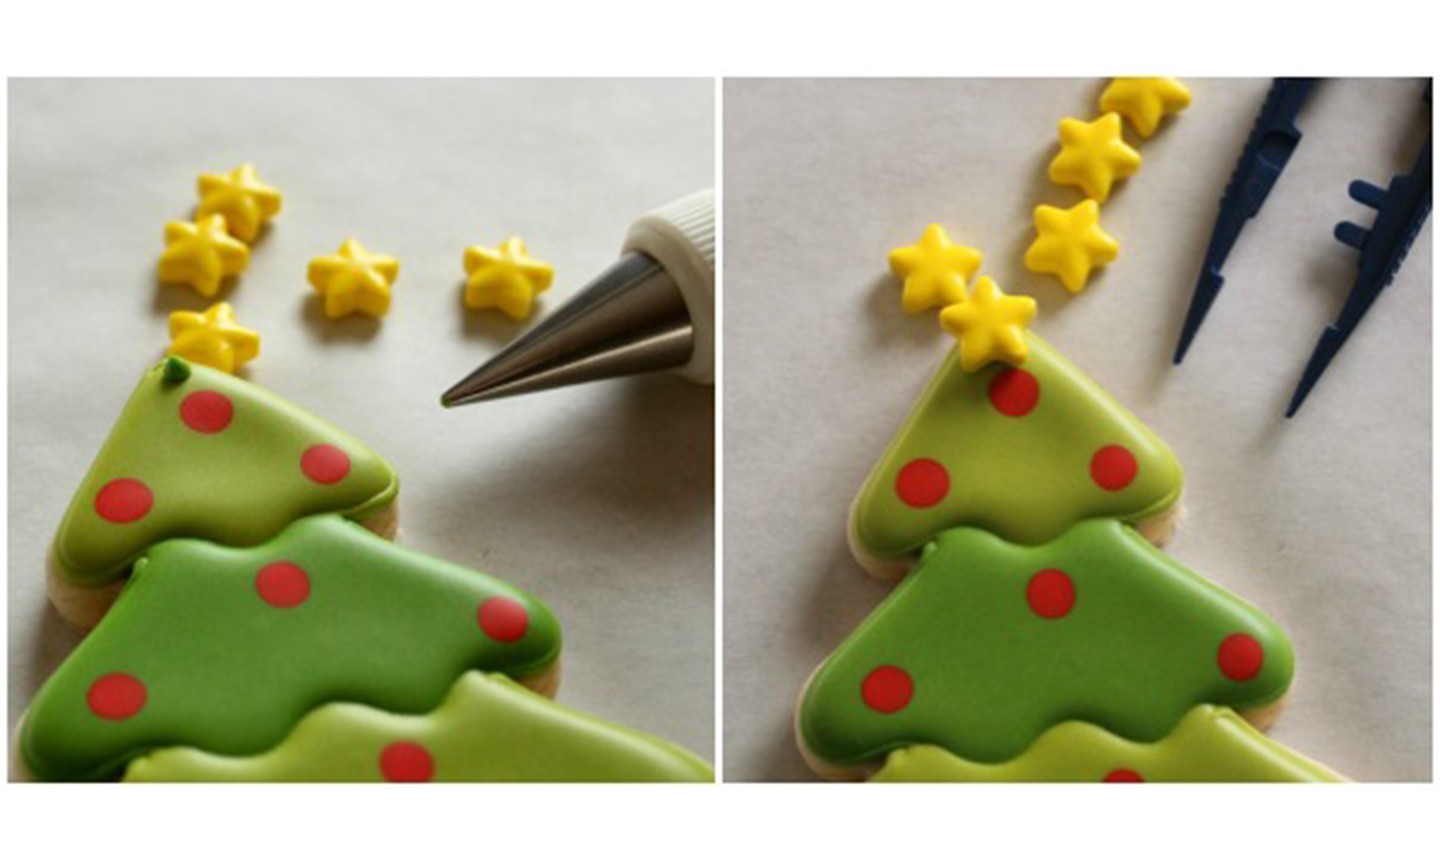
Once the cookie is dry, use a tiny dot of piping icing to attach a star sprinkle to the top of your tree. If you have trouble using your fingers, tweezers work well.
5. Pipe the Final Touch

Finish your cookies by piping white dots all over the tree. This is a great way to add visual interest and it serves as a handy cover for any sneaky air bubbles that pop up.
That's it! Package your cookies and gift them to friends, or display on a platter at your next holiday party.

I want a recipe for royal icing.
I want to make Australian Santa