Sewing your own bras can be intimidating, but there are so many reasons to do it. Not only does it call for such little fabric — making it a great way to use up fabric scraps or splurge on something fancy — but it's also a good way to save money. After all, store-bought bras are expensive!
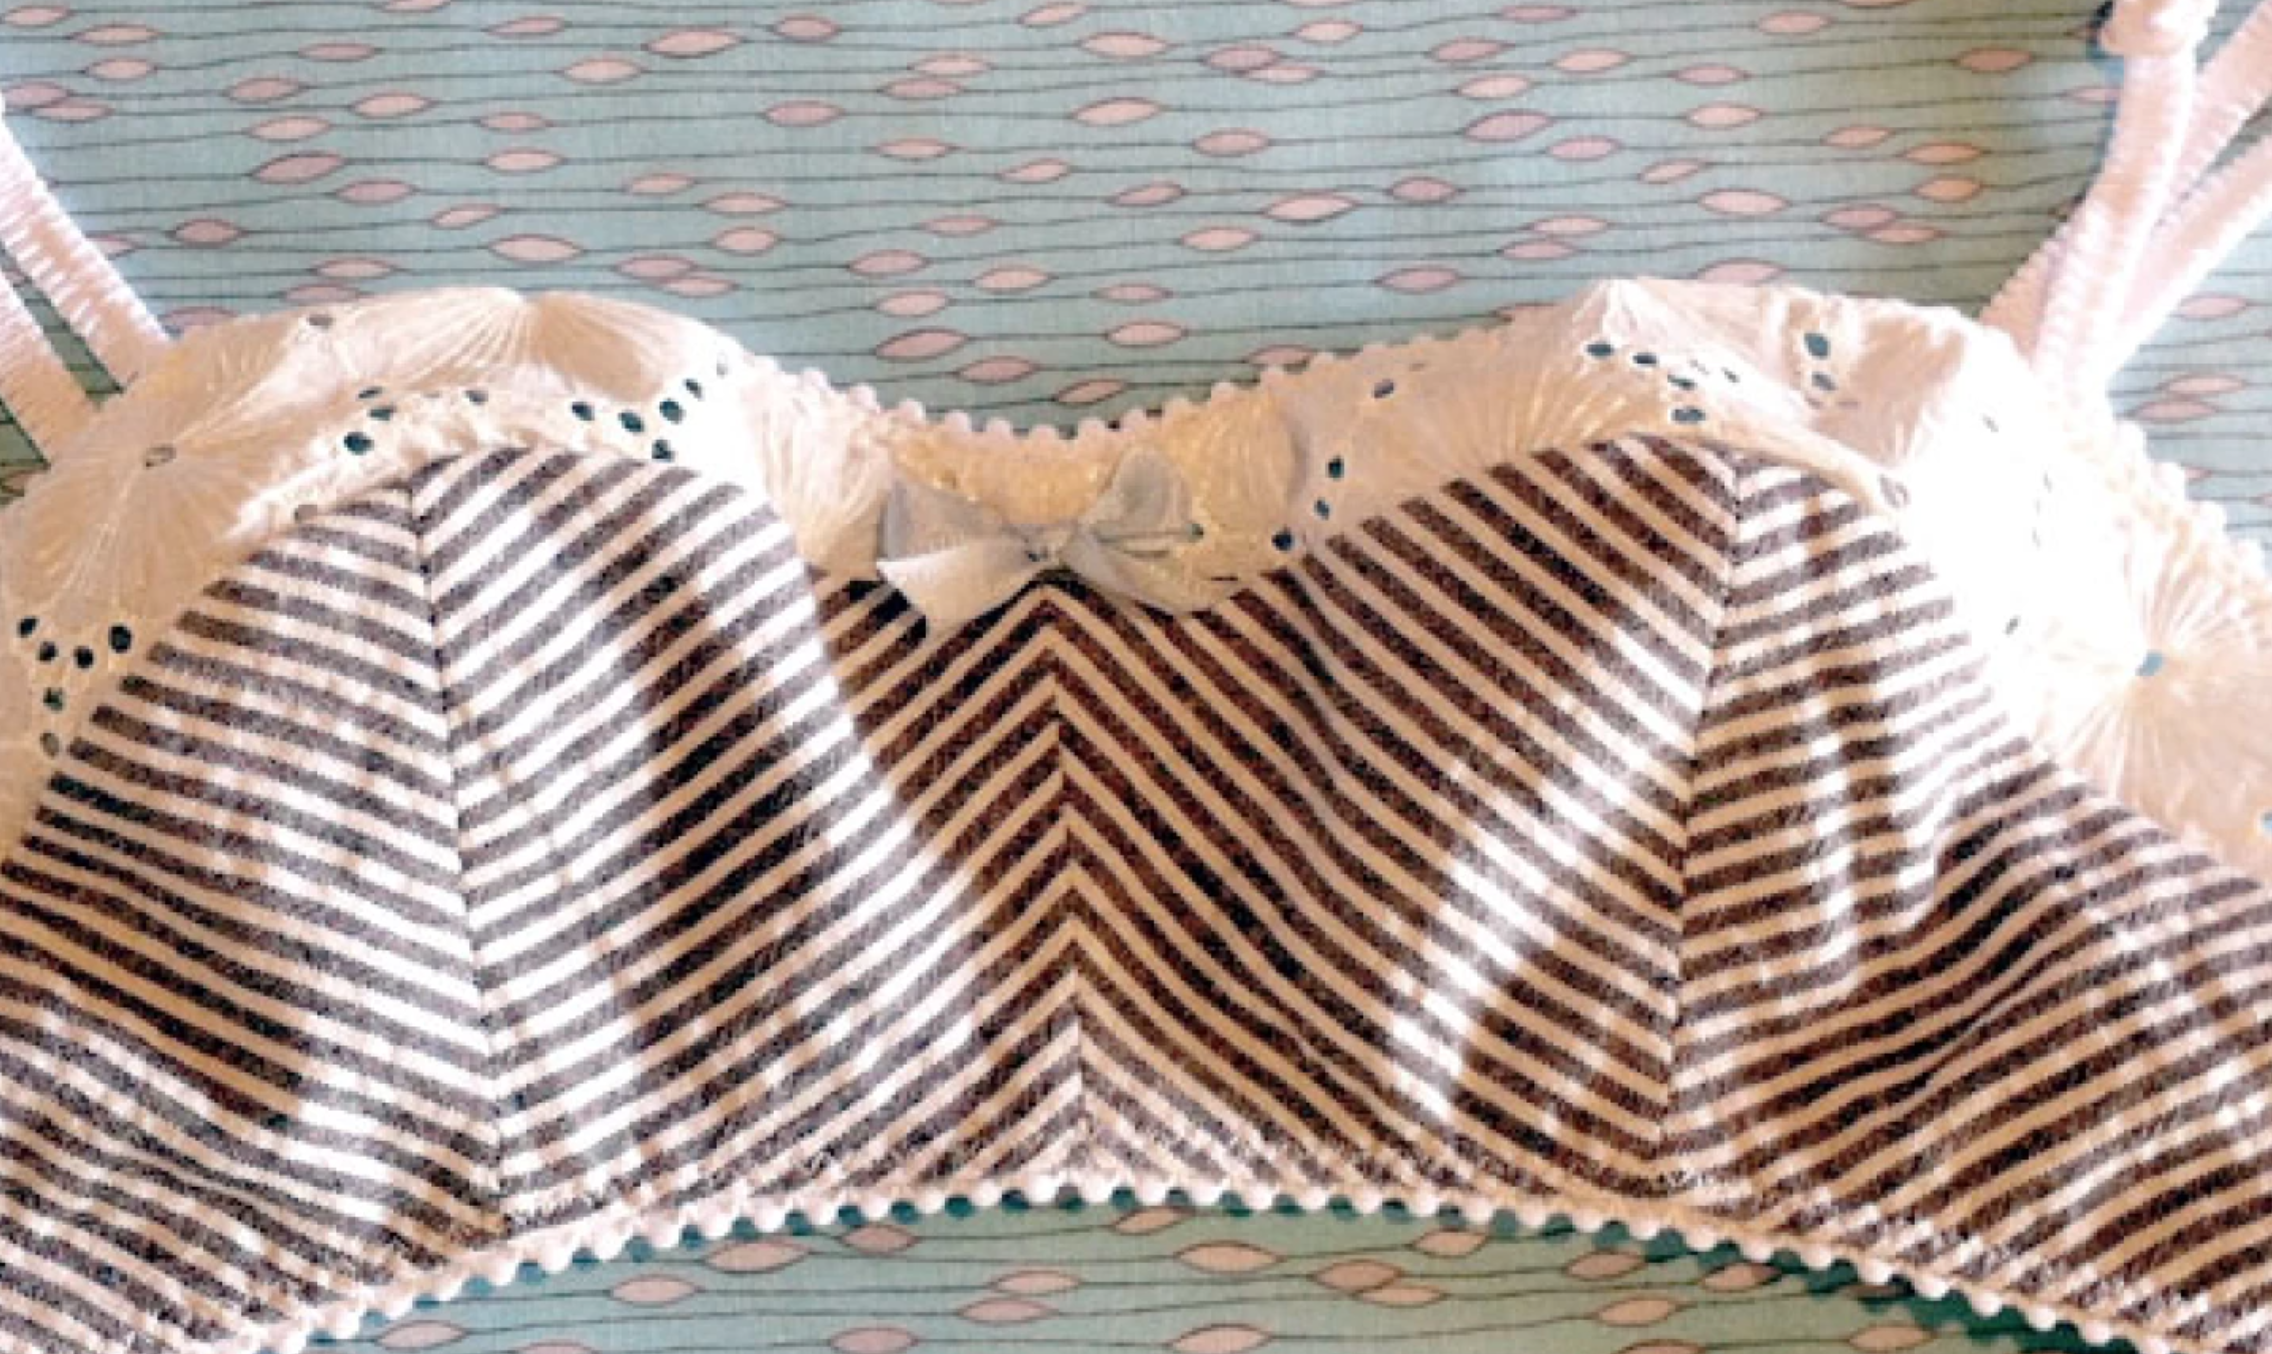
Plus, it can be hard to find a ready-made bra that fits the way you want it to. Which is where this pattern comes in. It's vintage-inspired, and a great sewing project for anyone who hasn't made lingerie before. Just keep in mind this isn't a typical bra — it's softer and less supportive, so more like a bralette. Making it custom-fit means your one step closer to having the comfy wardrobe of your dreams.
Vintage-Inspired Bralette
Level: Intermediate
What You Need
Good to Know: You need a few different fabrics for this pattern. The outside fabric can be either a knit or woven, while the cup lining should definitely be a knit. The decorative pieces on the upper cup should be cut from sheer fabric, such as lace or eyelet.
Instructions
1. Cut and Place the Pattern
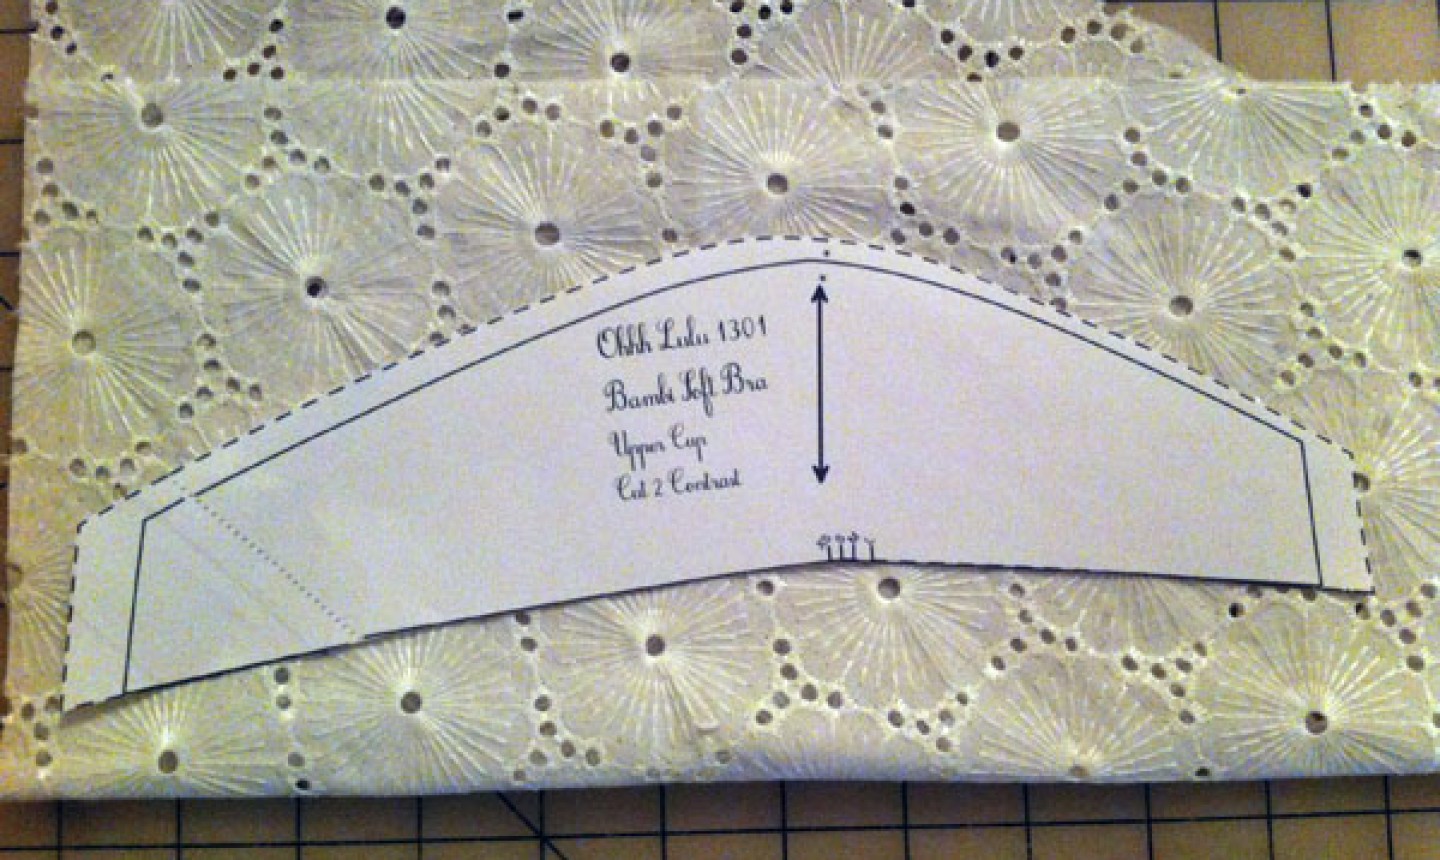
Download the PDF, print the pattern pieces and cut out your size. There are very few pieces in this pattern, so this will take very little time (and paper).
Place your pattern pieces on your chosen fabric. If you use a knit fabric for the outside, place them on the grain. If you use a woven fabric, place the pieces on the bias. Both grainlines are on the pattern pieces, so you can easily follow along.
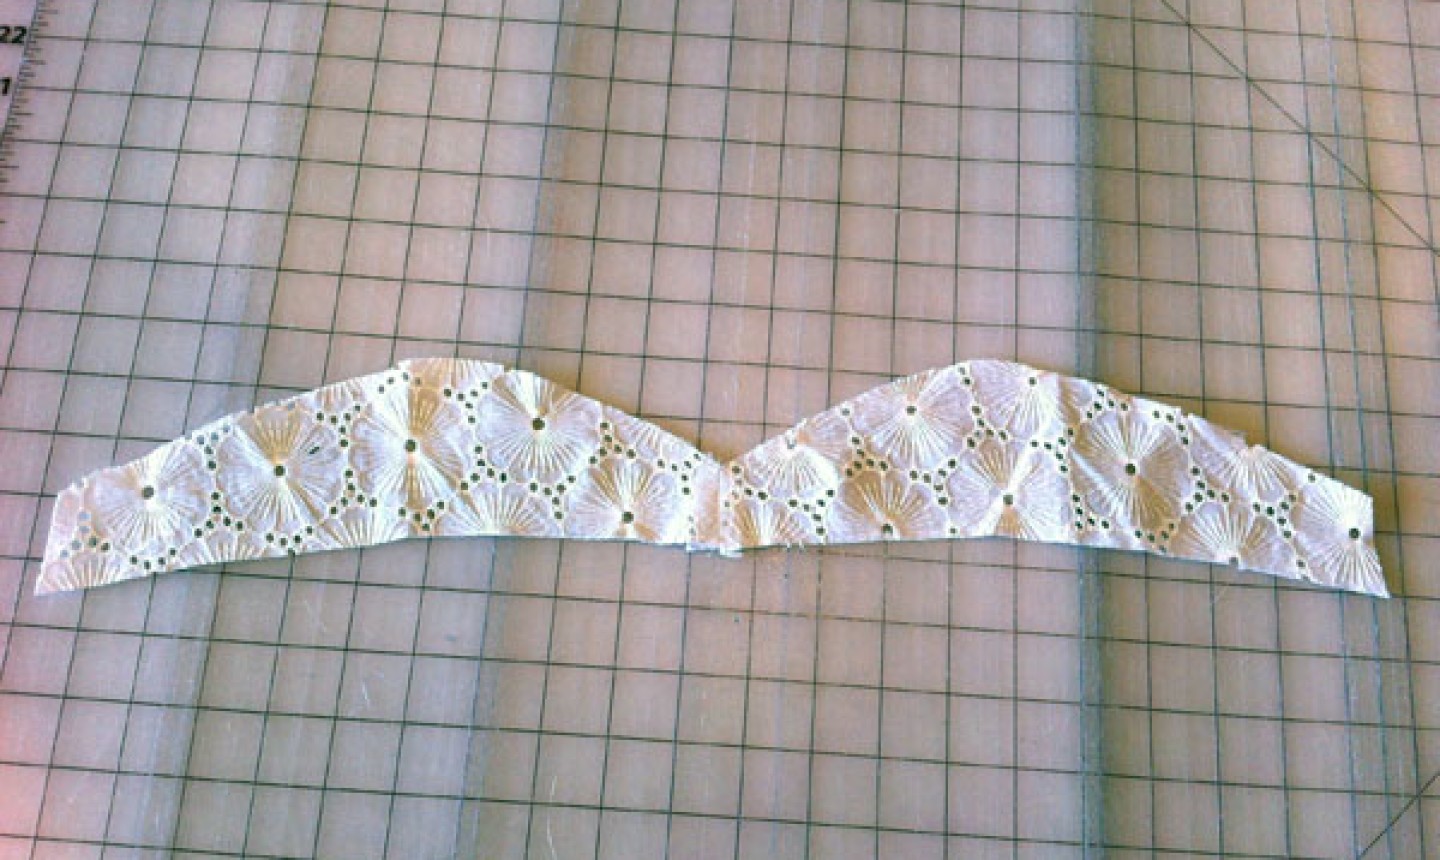
2. Sew the Front Cups
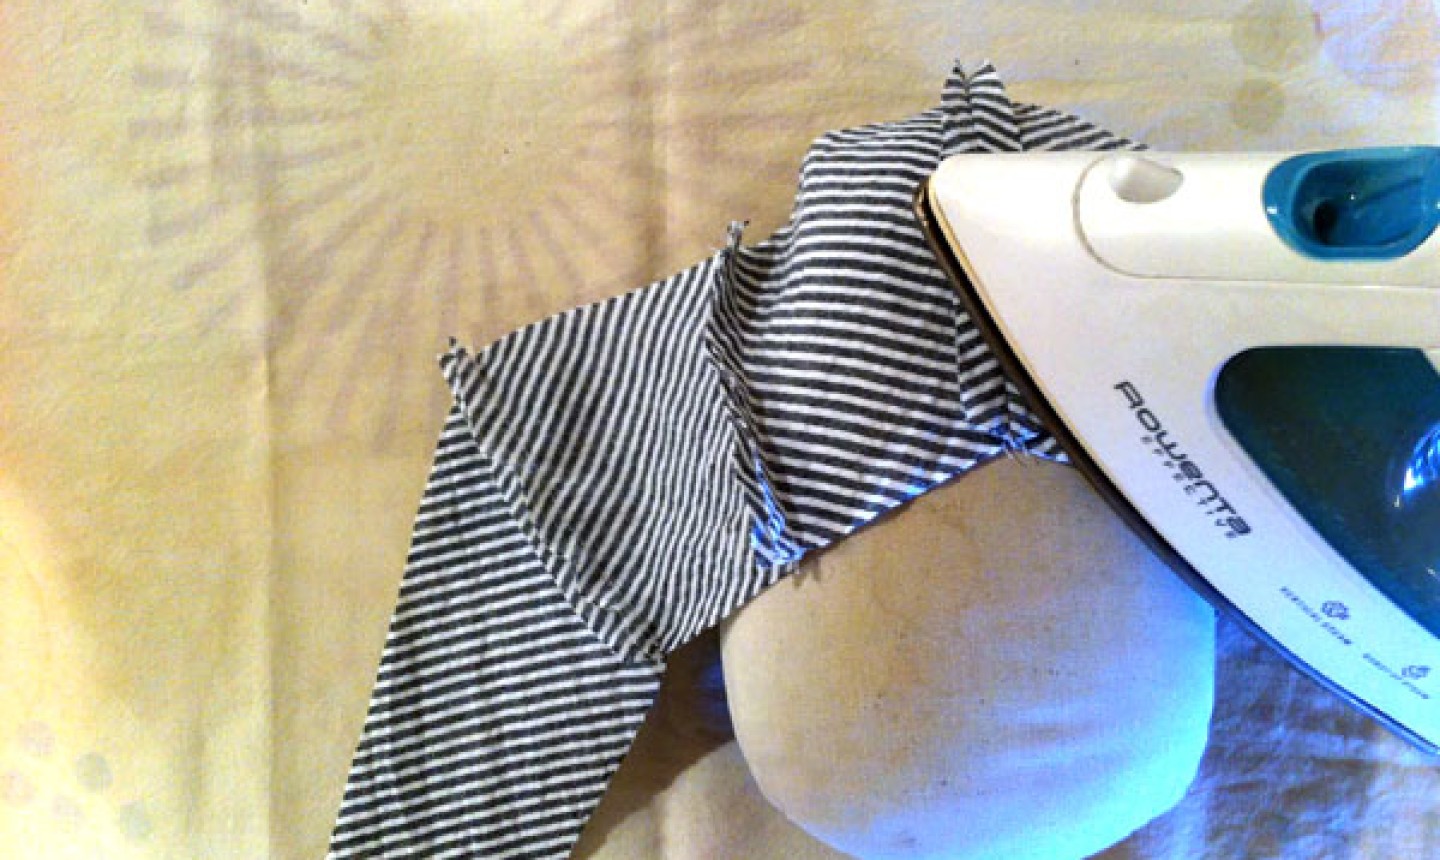
Sew the front cup pieces together as the pattern instructs, right sides facing. Press the seam allowances open. Don't worry about finishing the edges — these are going to be fully lined later. Press the curved seams over a pressing ham.
3. Sew the Knit Lining
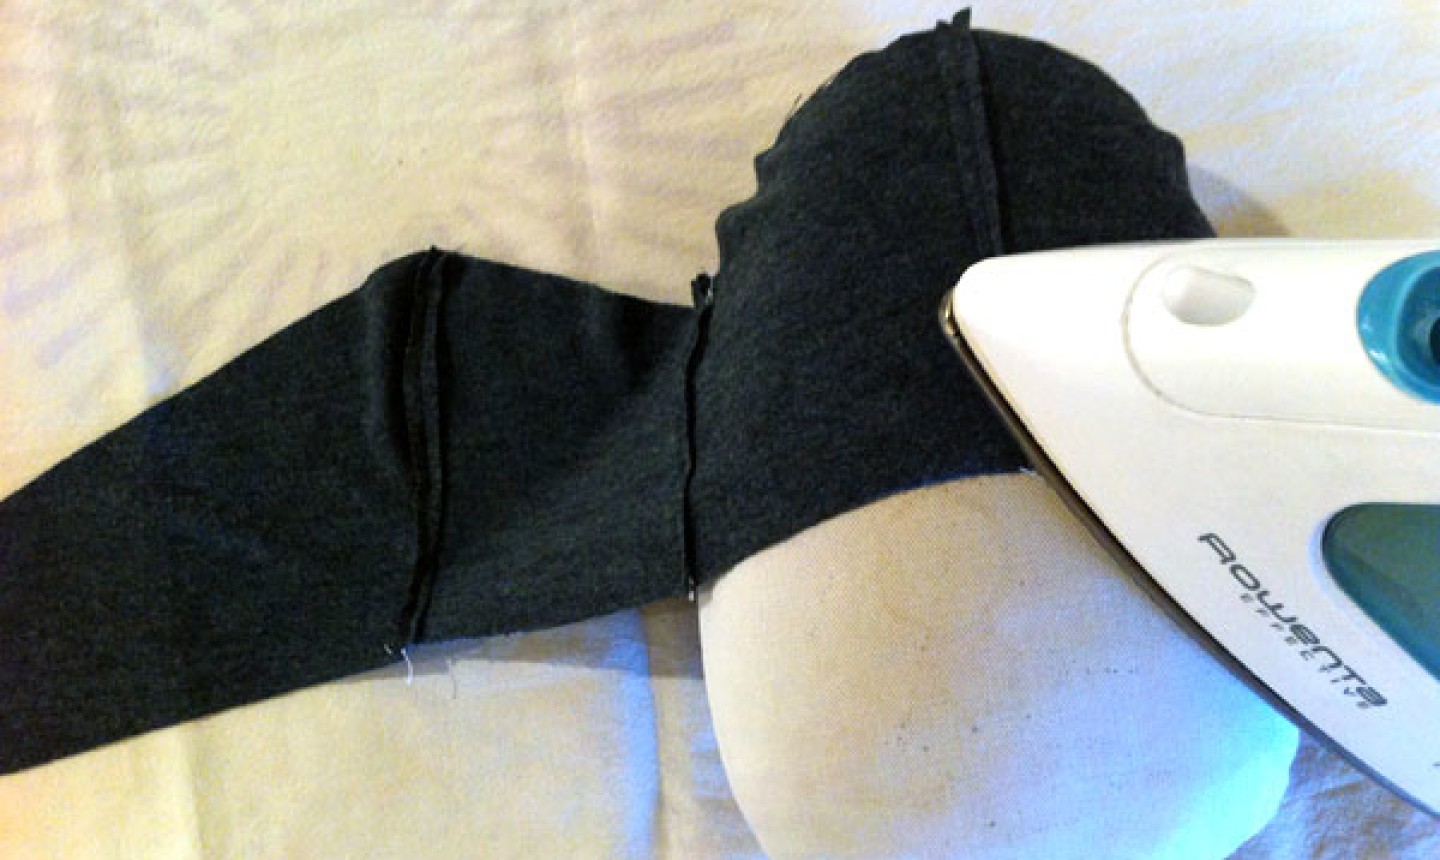
Sew the cup lining as the pattern instructs. Trim the seam allowances to ¼" to ease bulk. Press the seam open on your pressing ham.
4. Sew the Sheer Band
Sew the top band of the bra right sides together as the pattern instructs. This is an ideal place to use a French seam.
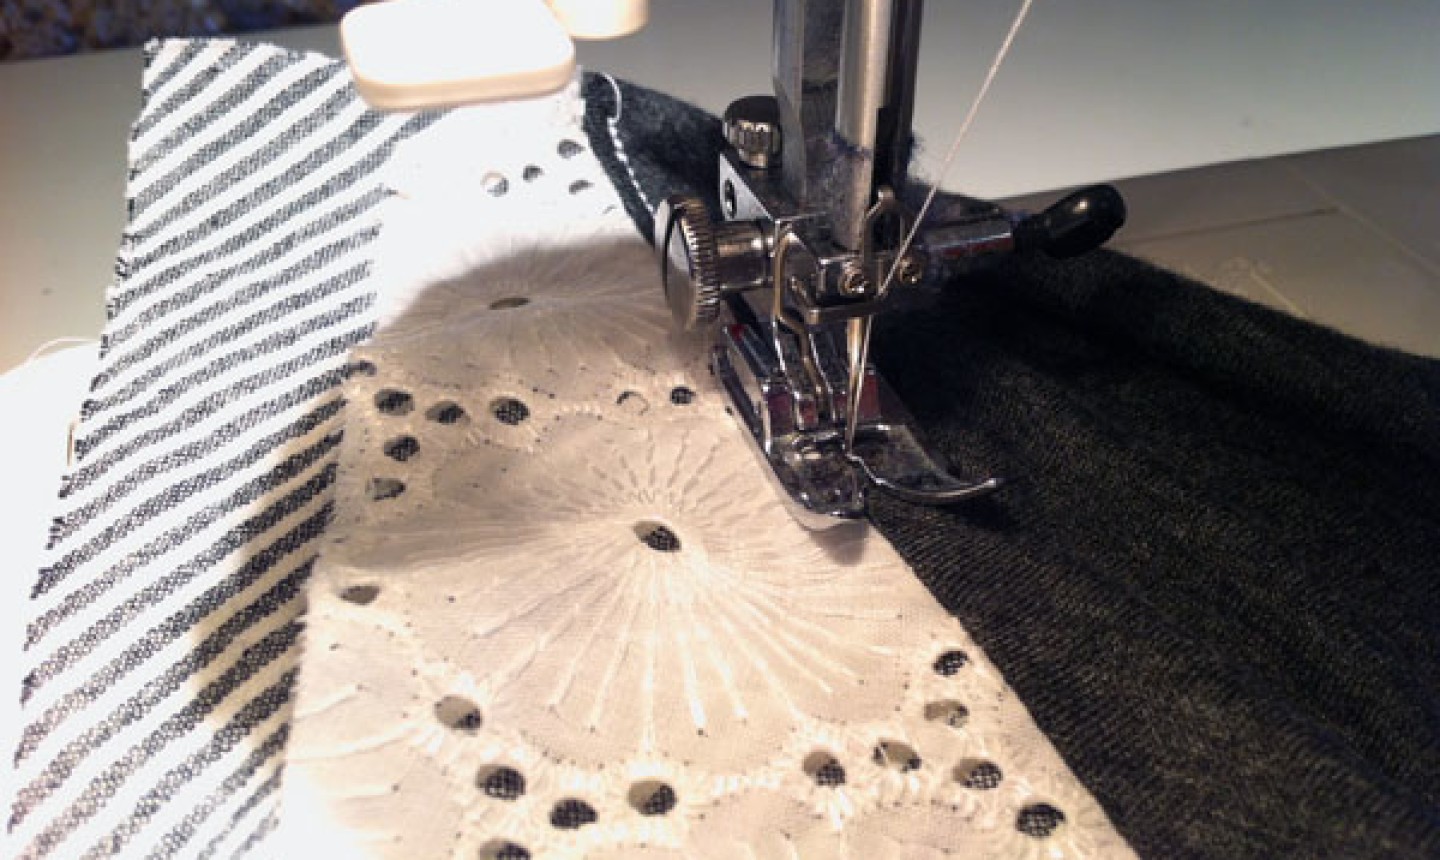
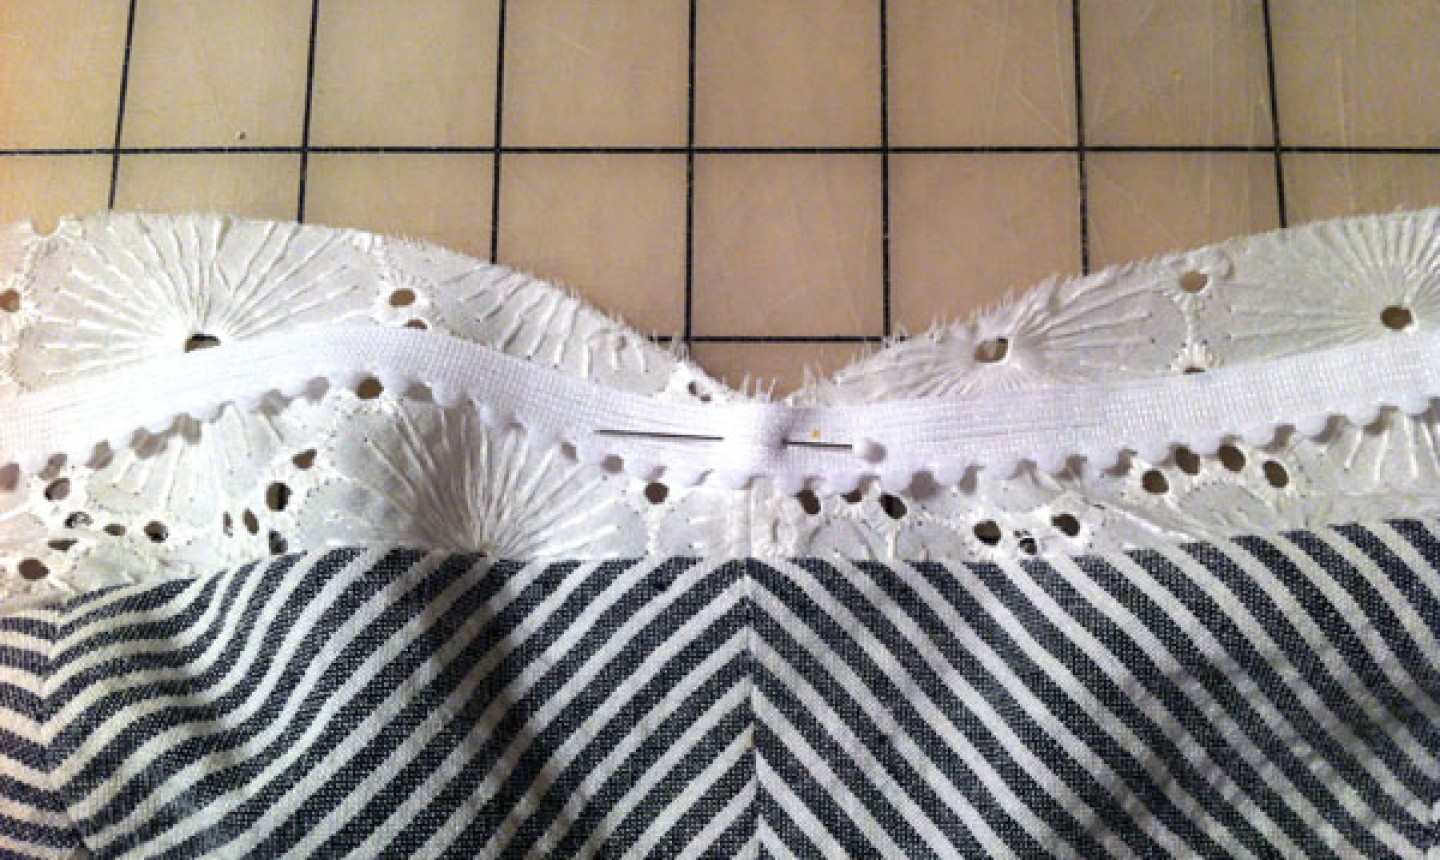
5. Pin the Front
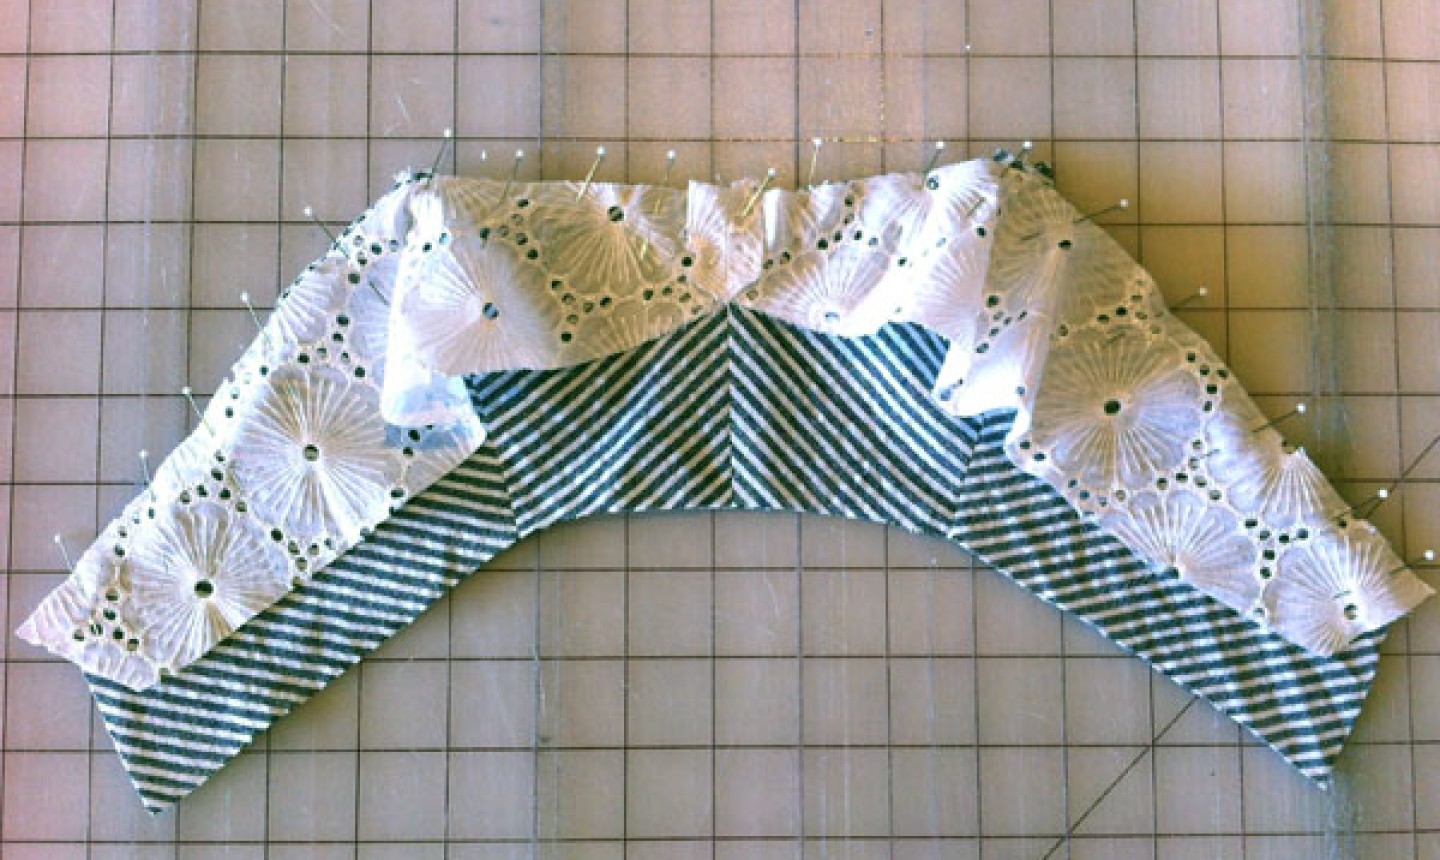
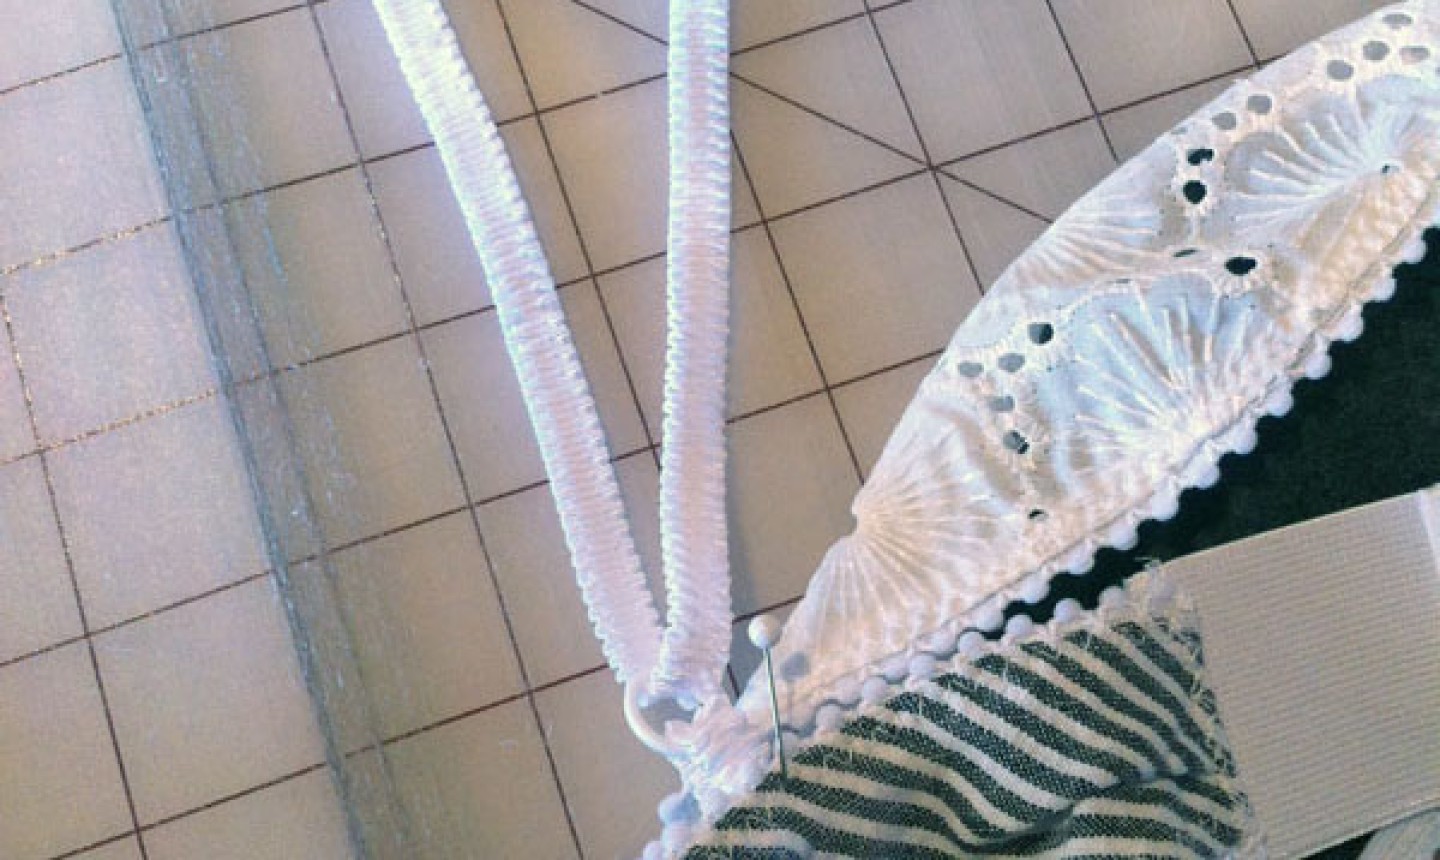
Pin the sheer upper band to the outer cup, right sides together. Line up the center seams and both ends, then pin in place. Baste the fabrics together, keeping your stitch line just inside the ½" seam allowance.
6. Pin and Stitch the Lining
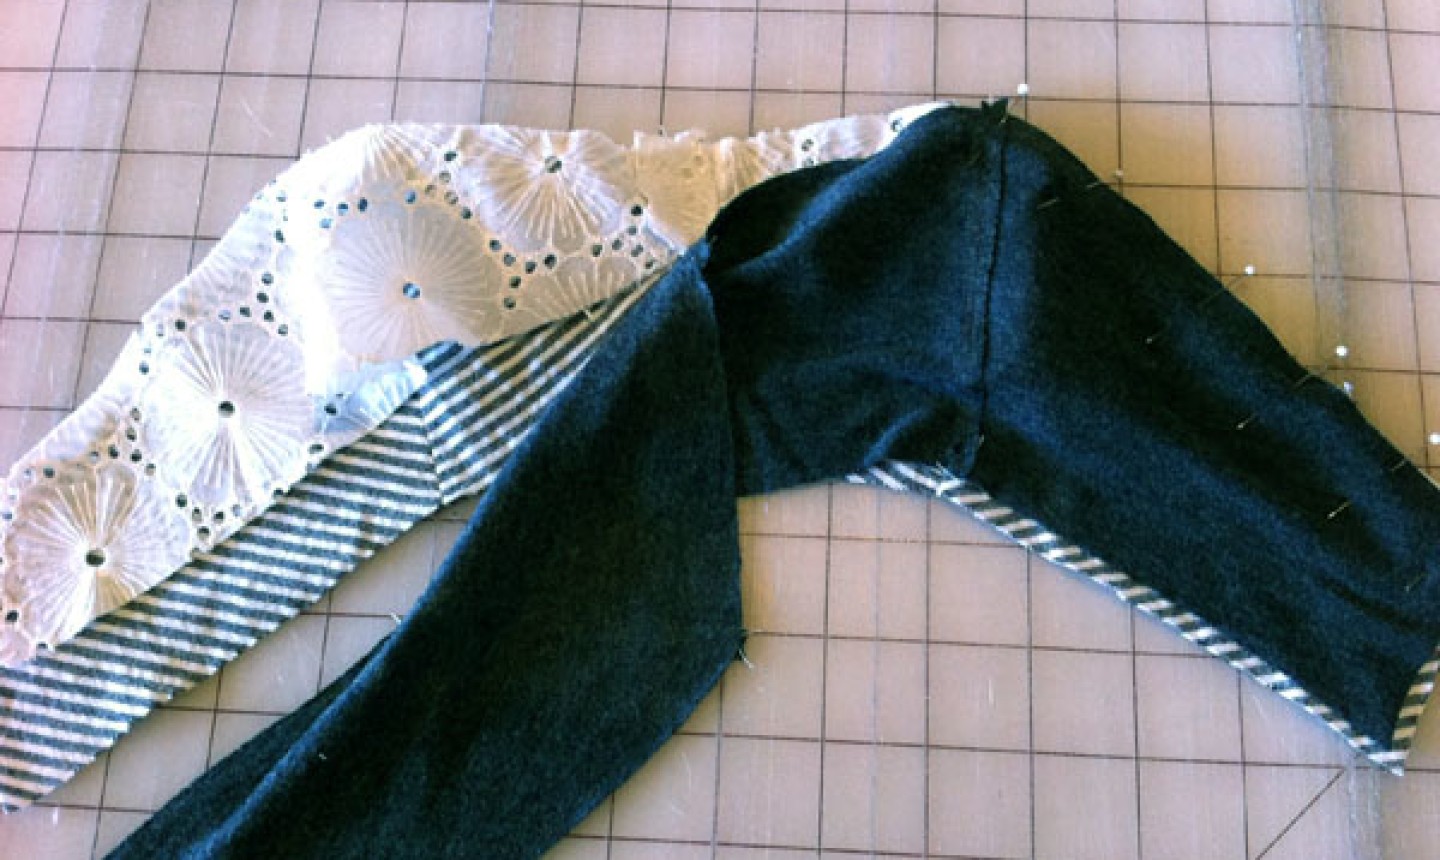
Place the right side of the knit lining on top of the outer cups, trapping the upper band in the middle. Line up the upper edge and pin in place. Stitch this seam, being careful not to pinch the upper band in the stitch line.
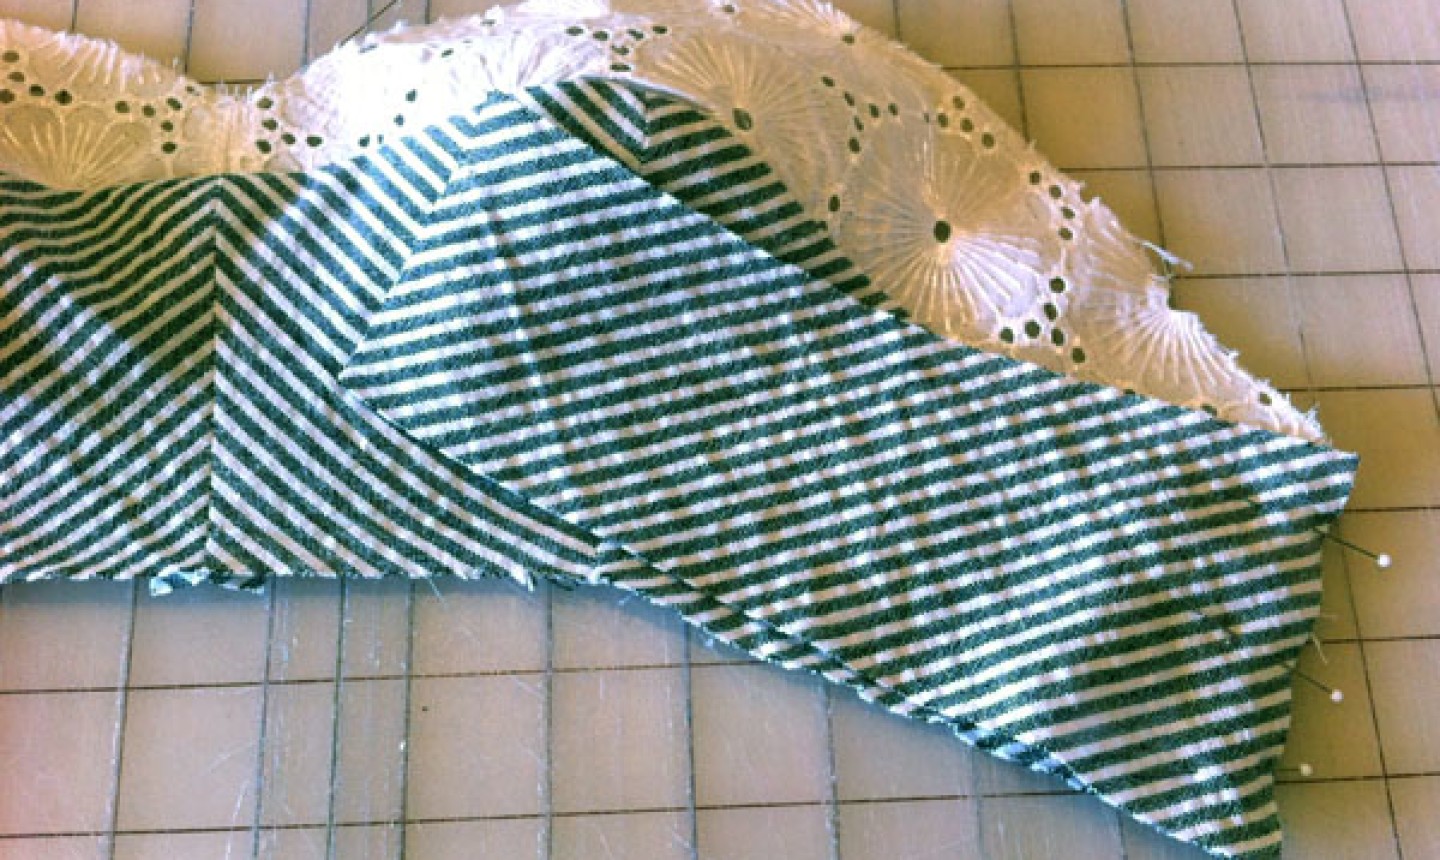
7. Reduce the Bulk
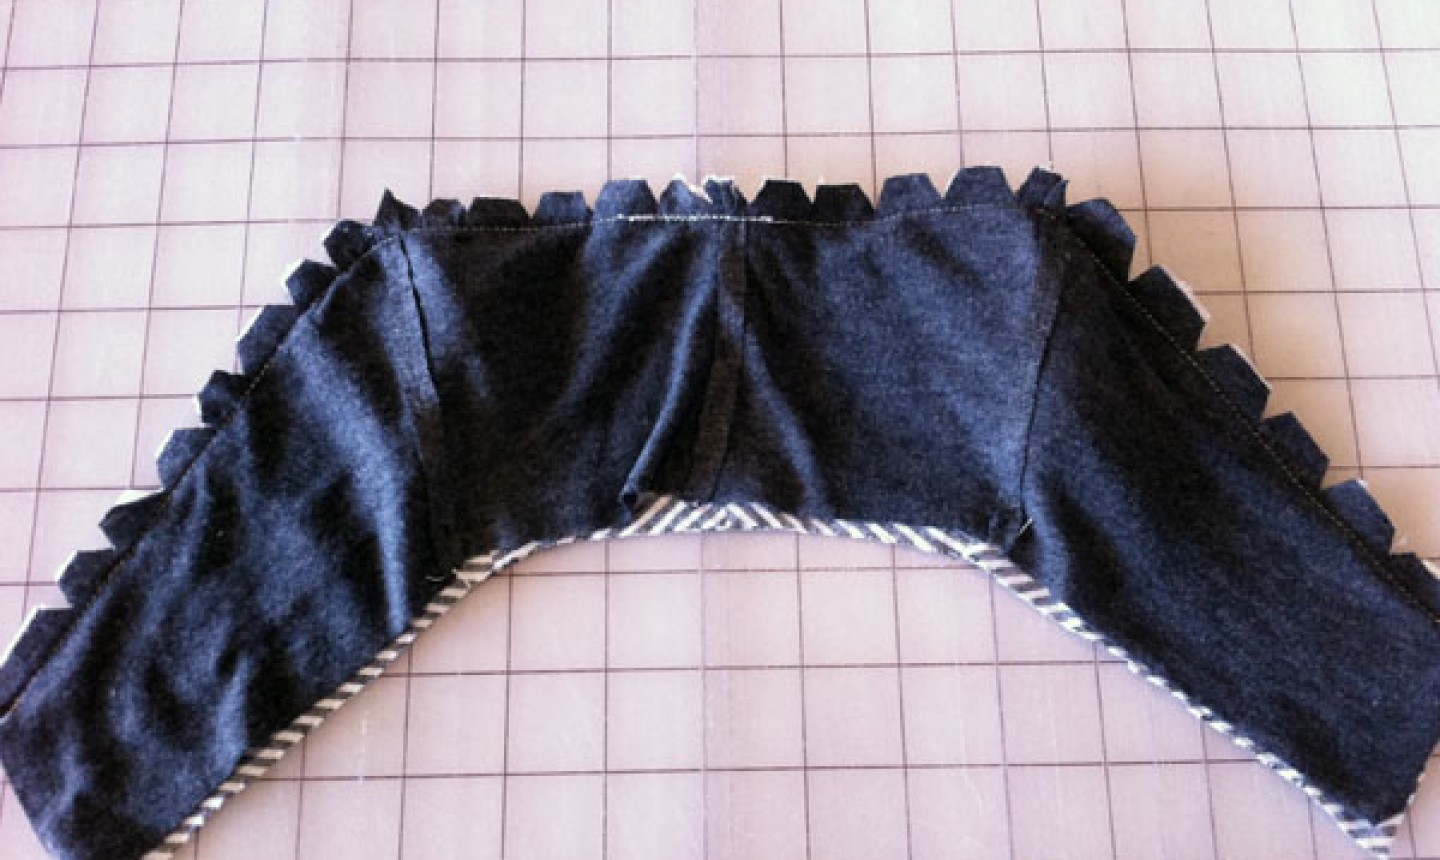
Cut notches from the seam allowance to reduce bulk and allow the curve of the seam to lay flat. Press the seam allowance toward the lining and pin in place.
8. Stitch
Understitch the seam you just sewed by stitching the seam allowance to the lining. Stitch just to the side of the seam, on the right side of the lining.
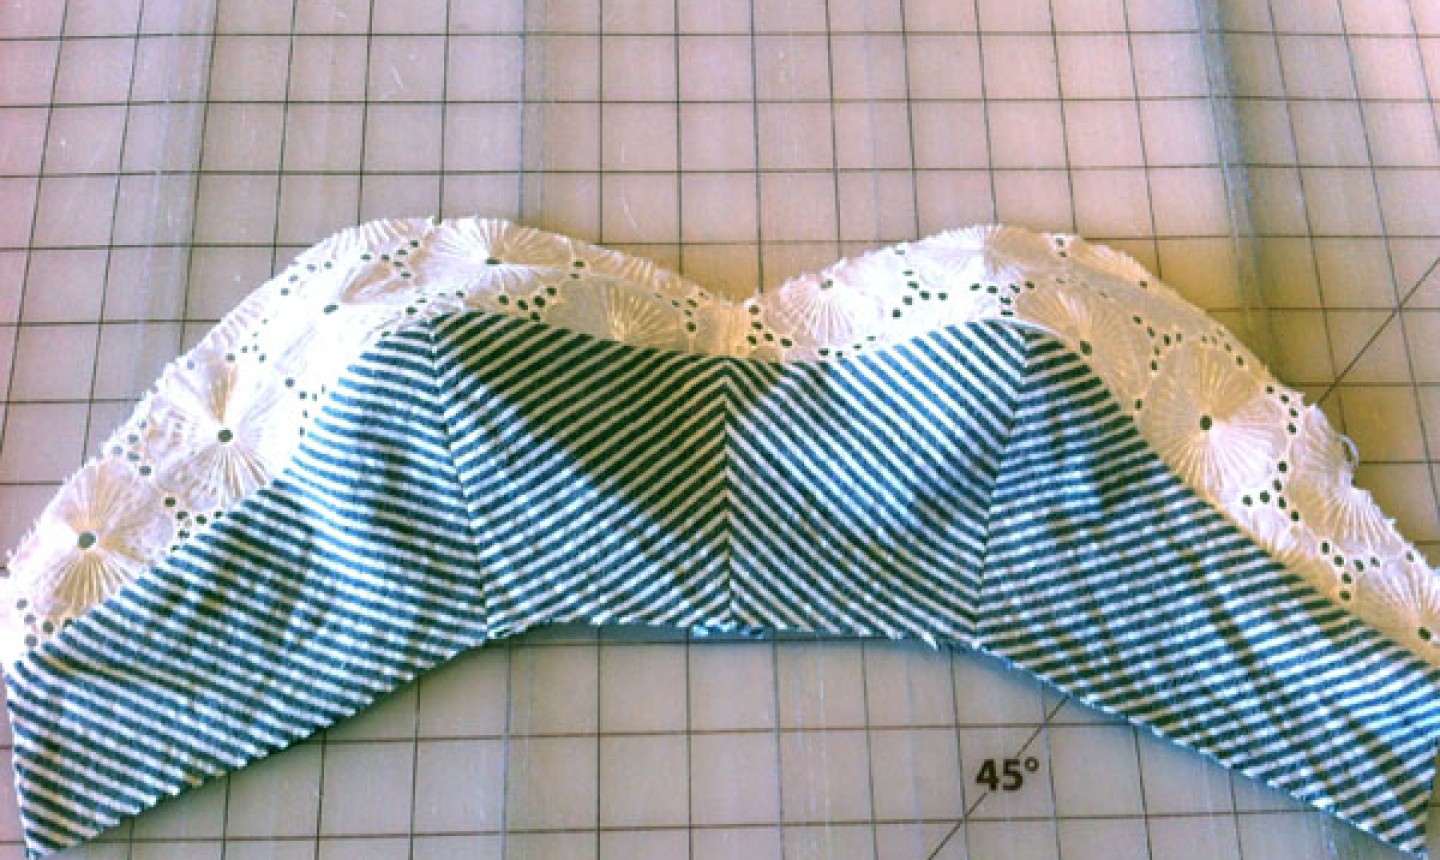
Press the seam on your pressing ham. Press the sheer band away from the lower cup to mold the curved seams over the curve of the ham. At this point, it starts to look like a bra!
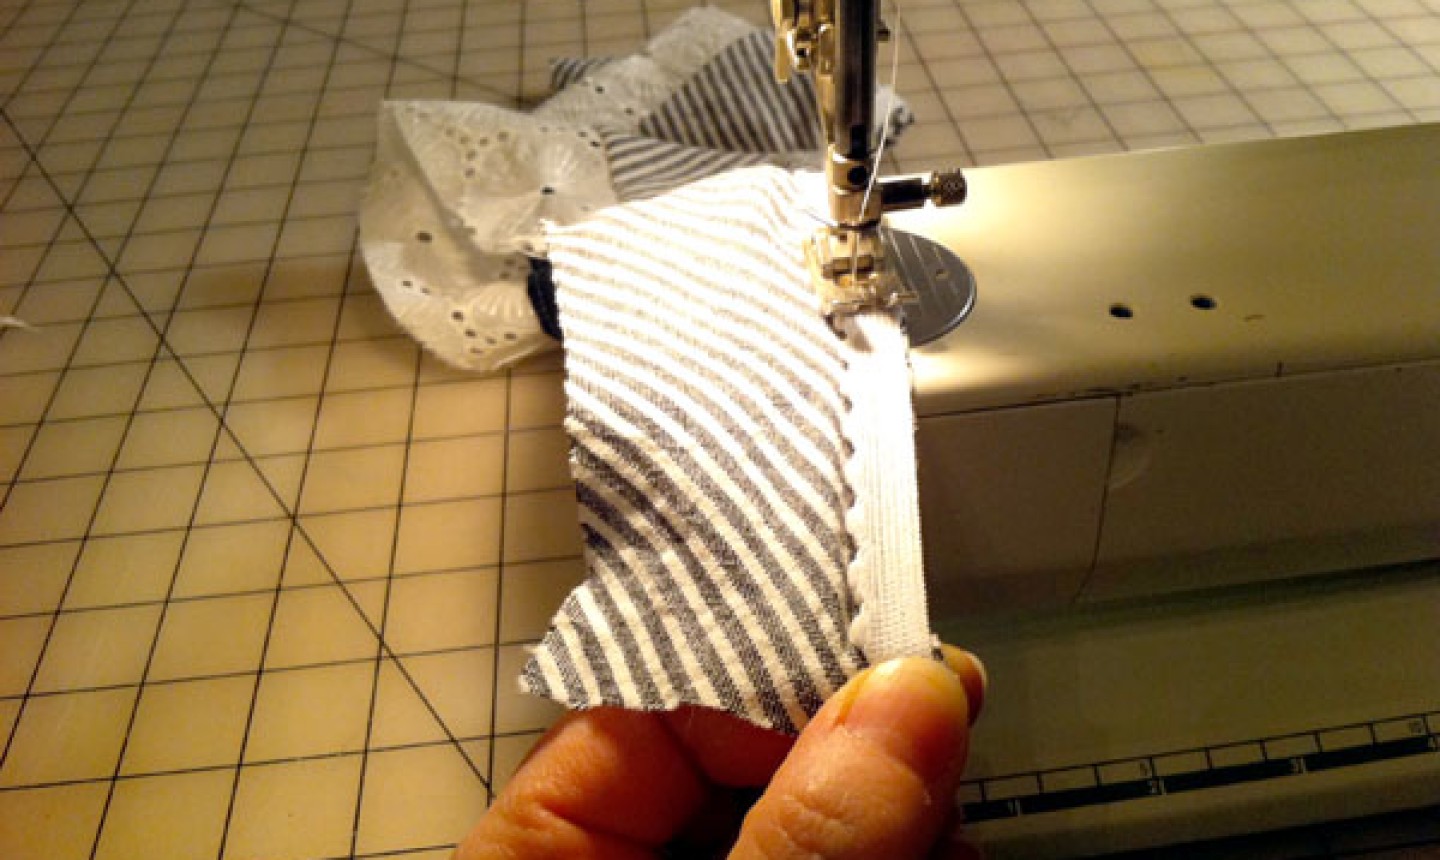
9. Sew the Side Bands
Place a band on one side of the front cup, right sides together, and stitch in place. Repeat on the opposite side. Finish these seams as you desire and press toward the side band.
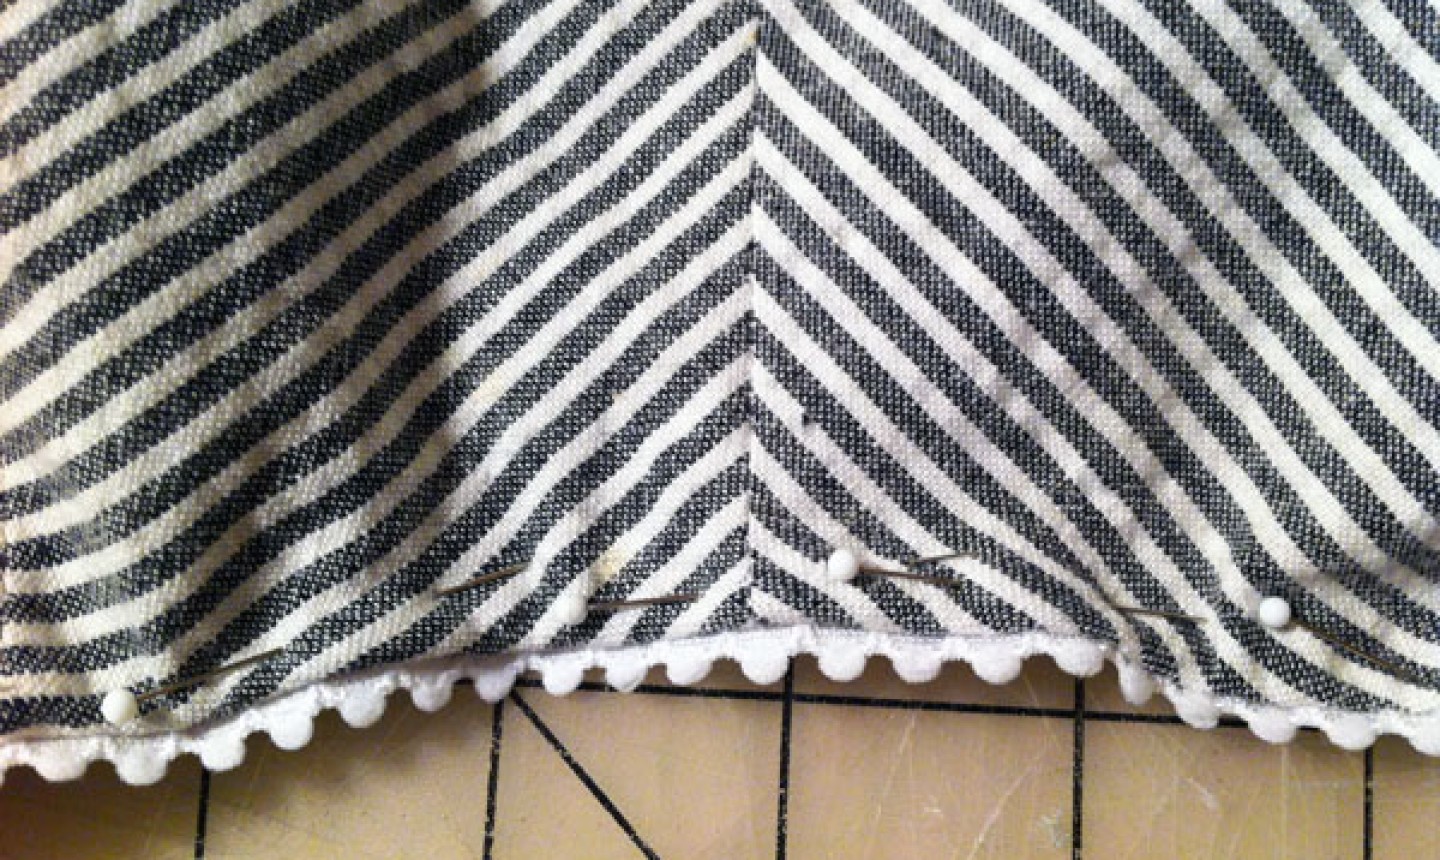
10. Pin the Elastic
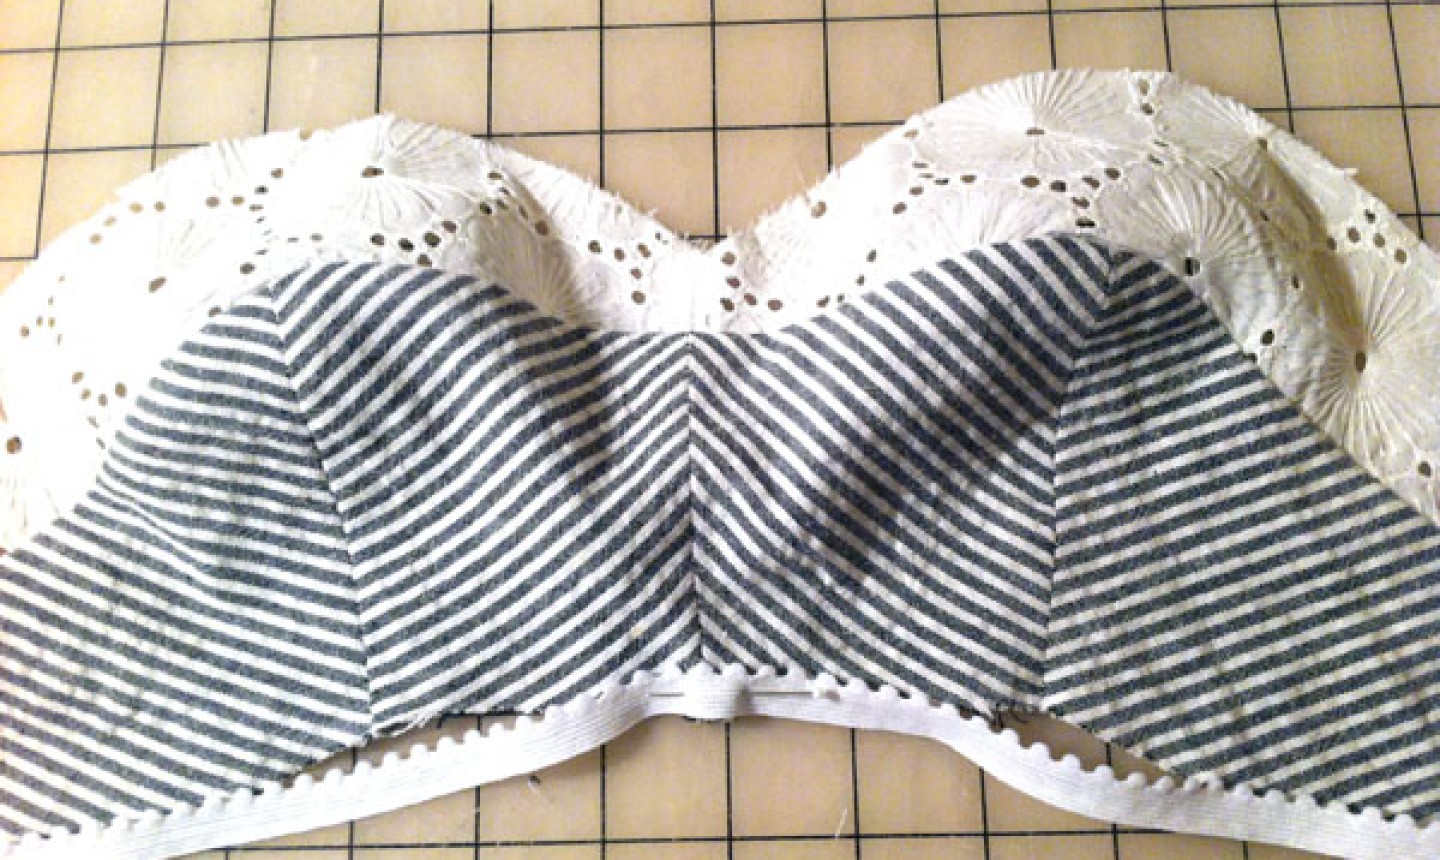
Cut the lower elastic about 1-2” shorter than the lower edge of the bra.
Pro Tip: The level of snugness is a personal choice, and the elastic can be cut shorter or longer than suggested. The shorter it is, the more the fabric will gather and the tighter it will fit against the body.
Fold the elastic in half and pin the center to the center of the cups (making sure to pin through the lining as well). The right side of the elastic should face the right side of the bra. Pin the ends together, but leave the rest unpinned.
11. Sew the Lower Elastic
Sew the elastic to the bottom edge, stretching it to fit as you go. Keep the lower edges aligned. The stitch should be a long and narrow zigzag stitch , placed near the top edge of the elastic. If your elastic has a trimmed edge, the stitching should be just underneath it.
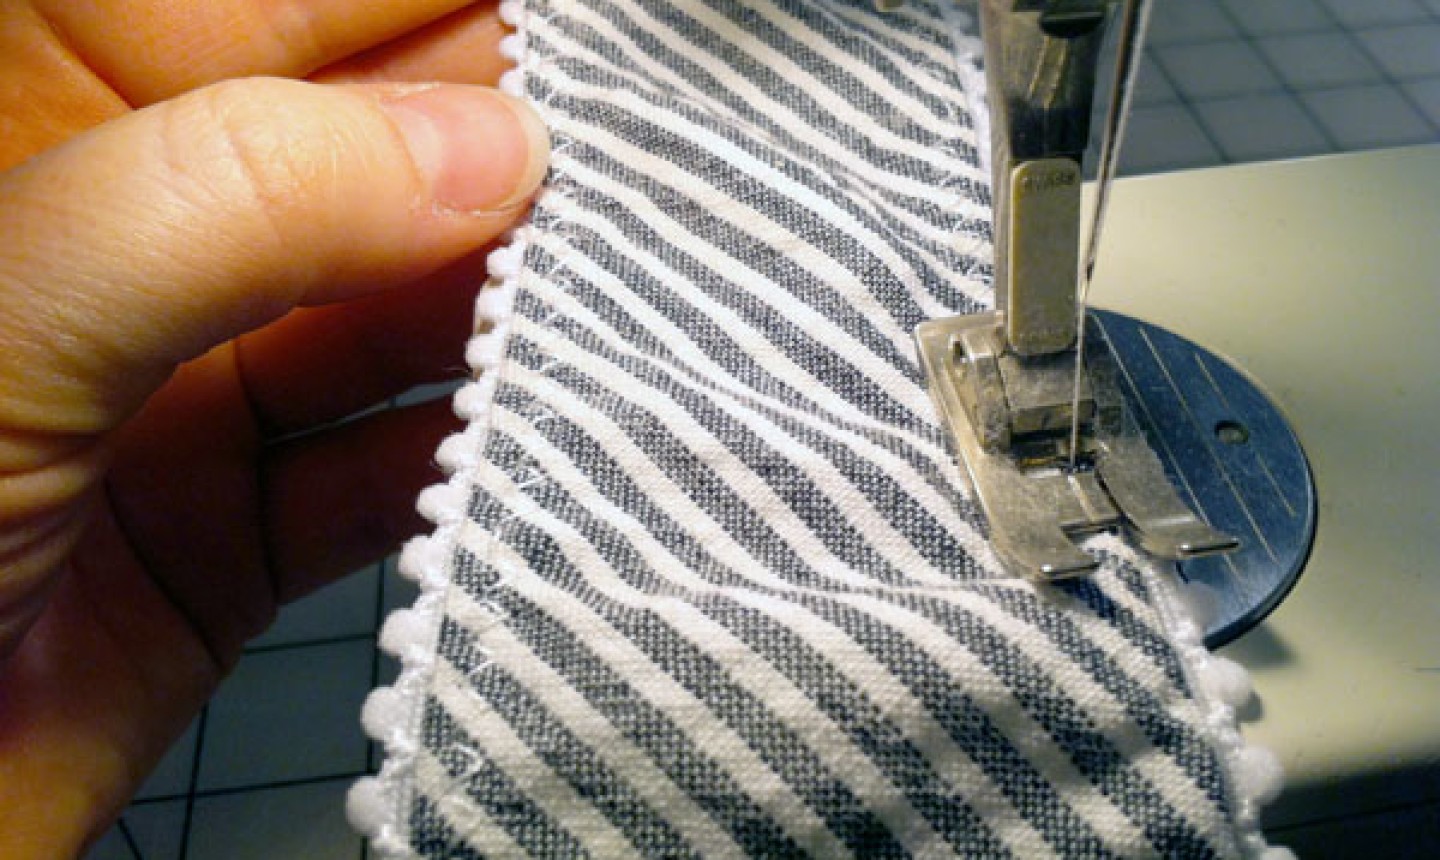
12. Finish the Edge

On the inside of the bra, trim the seam allowance along the elastic down to about ⅛”.
Fold the elastic to the inside of the bra, keeping the trim on the outside, and pin in place. With a slightly wider and shorter zigzag stitch, stitch the elastic to the bottom band on the right side of the bra.
13. Sew the Upper Elastic
Cut more elastic and pin to the top edge of your bra, in the same way as you did the lower edge. Stretch the elastic and sew it in place along the upper edge, keeping the raw edge of the fabric in line with the edge of the elastic.
Fold the elastic to the inside and pin in place. Stitch as you did before.
14. Add the Clasp
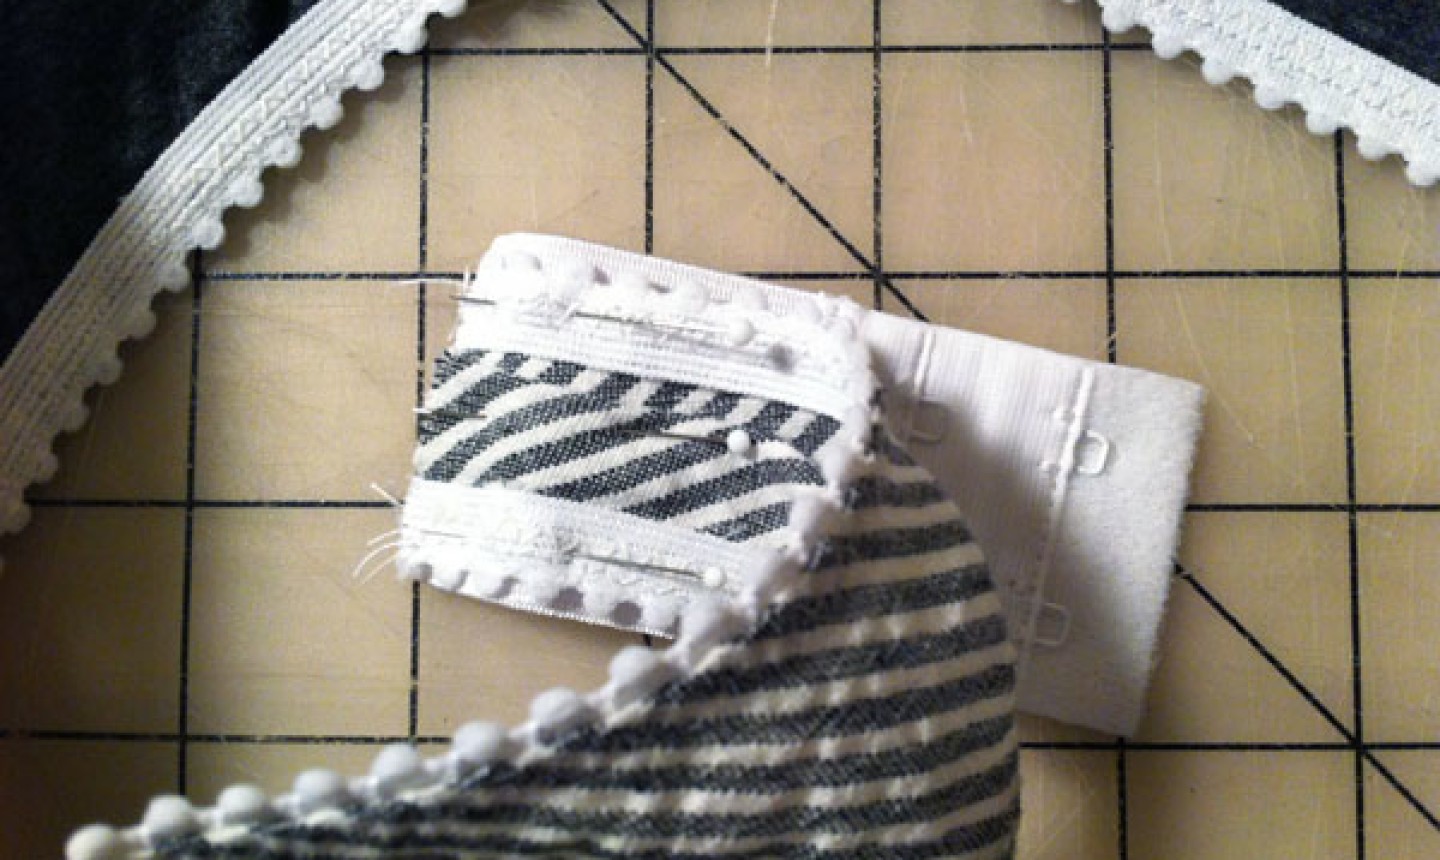
Pin one part of the packaged bra clasp to one end of the side strap and sew in place with a zigzag stitch. Repeat on the other end of the side strap. Press the seam allowance flat and finish the edge with a zigzag stitch.
15. Sew the Straps
Cut the elastic for your straps as instructed, two 2” pieces and two 20” pieces. This can be a different elastic or the same you used on the bra itself.
Pin the short end to the bra, on either the front or back, depending on where you want the ring to be. Wrap the short piece around the ring and sew it to the bra. Repeat with the other short piece. Feed the long piece through the same ring.
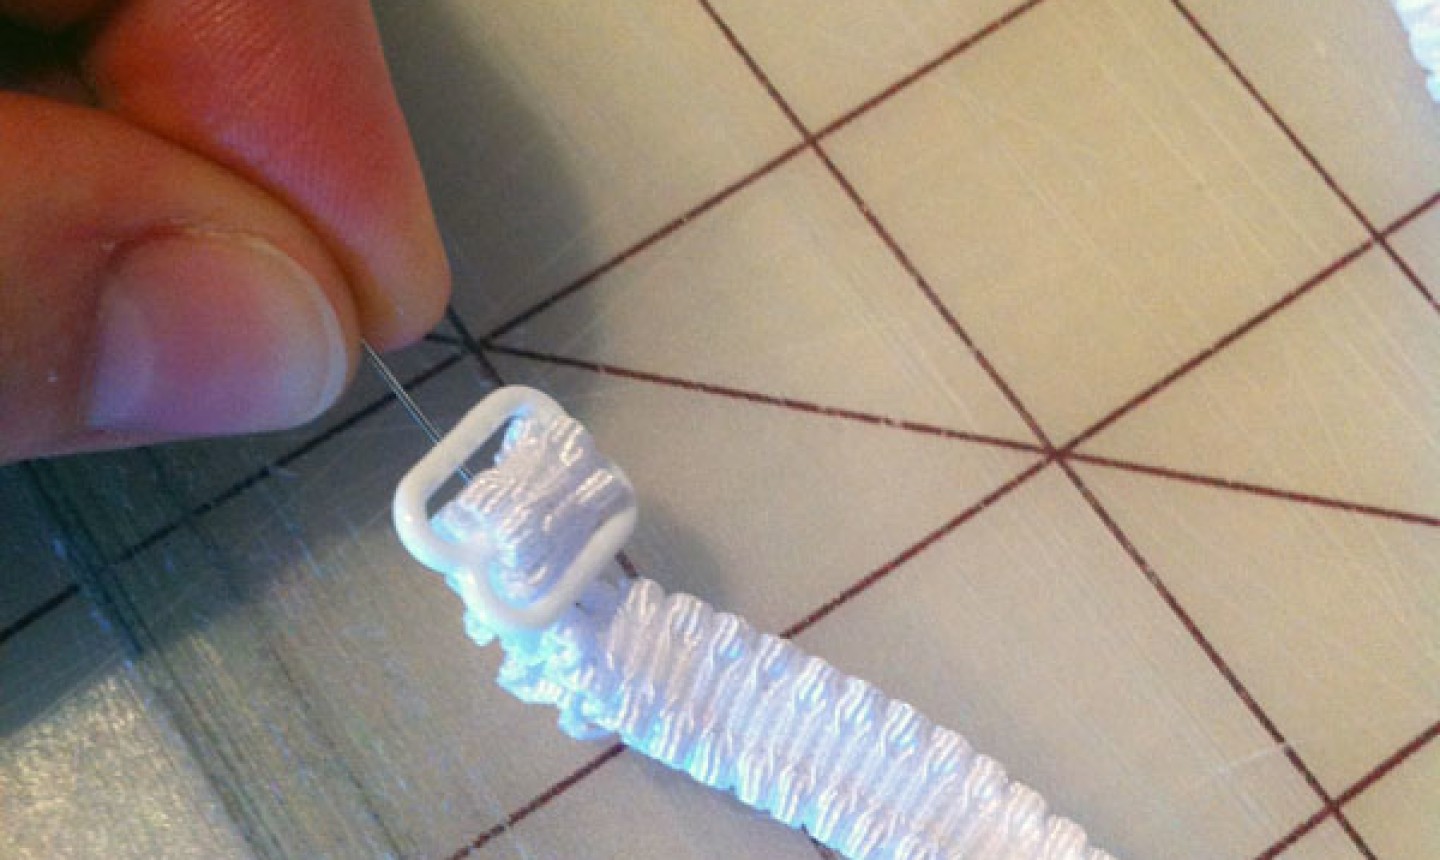
Take one end of the elastic and feed it into the adjustable end of the hardware. Pin in place about ½" after the hardware loop. Stitch in place with a zigzag stitch.
Take the other end of the elastic and feed it through the same adjustable hardware. Pin the end to the front of the bra and stitch in place with a zigzag stitch. Repeat the stitching on the other side.
Pro Tip: It’s a good idea to try the bra on before sewing the straps in place to ensure they're placed in a comfortable position on your body.
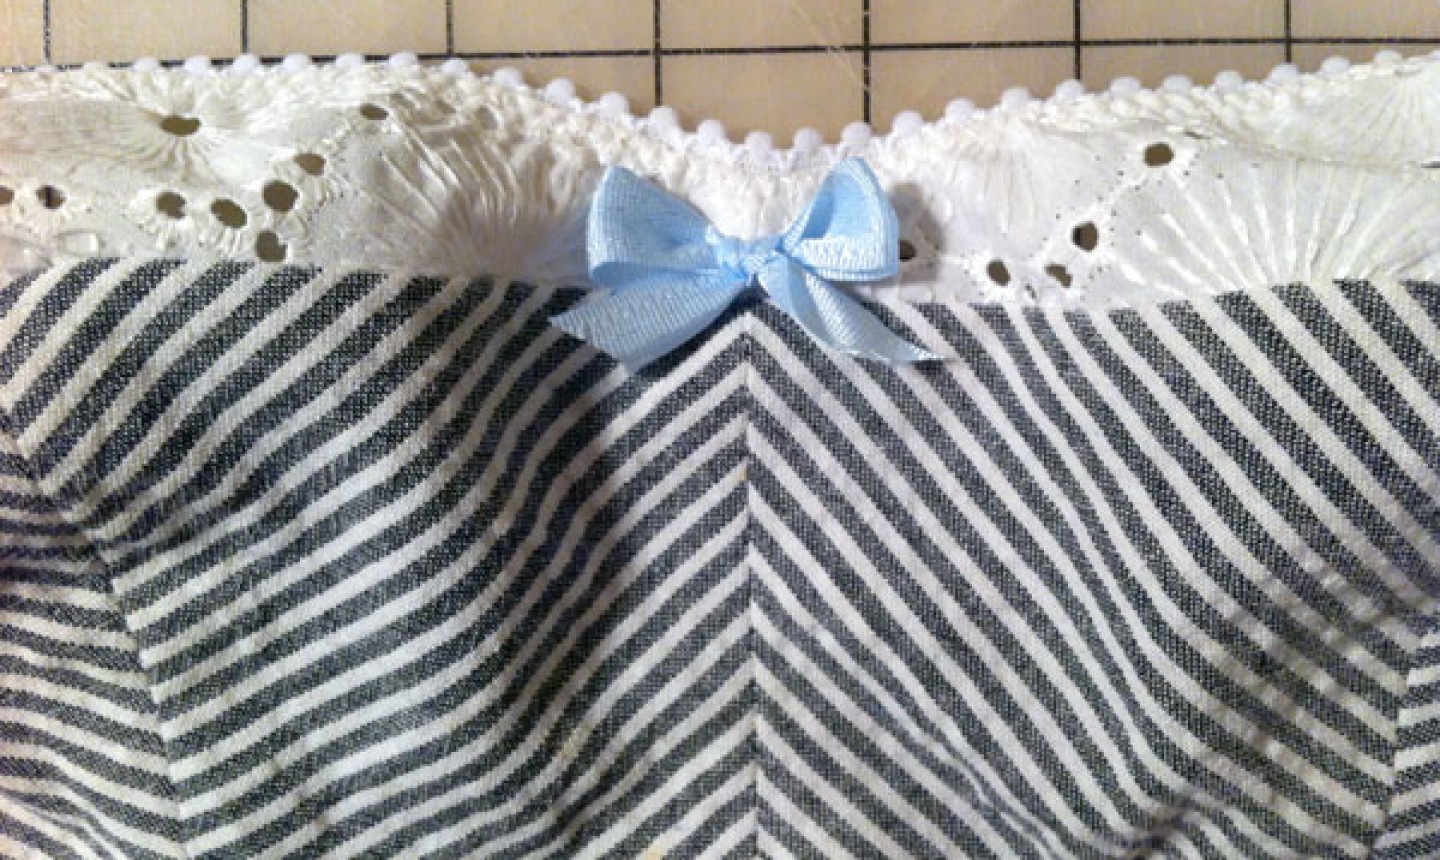
16. Add Final Details
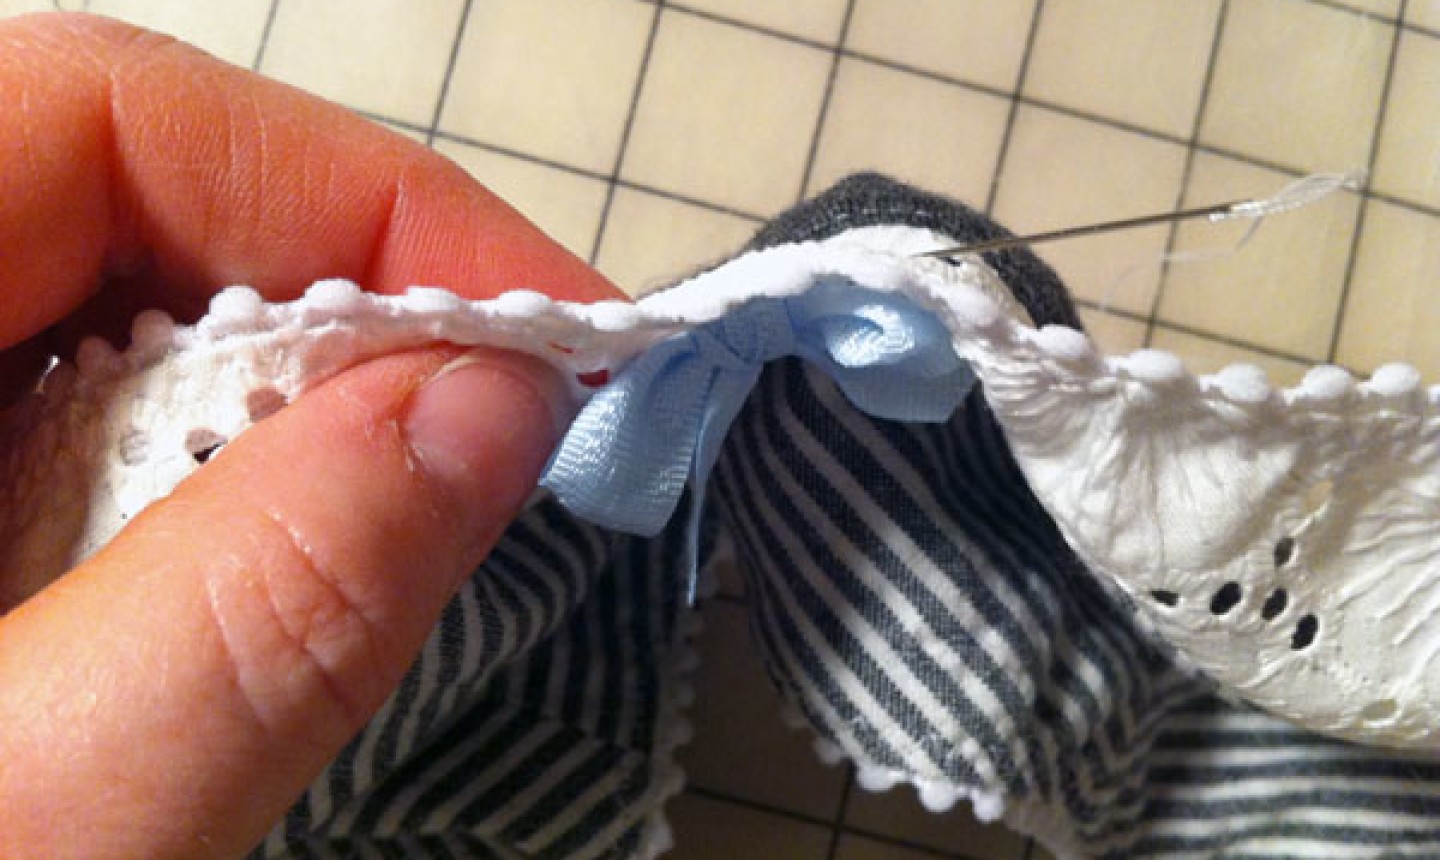
If you’d like a little flourish on the front of your bra, you can hand sew a rosette or bow to the center front.
And you're done!

where do i find the pdf of pattern?